I took my first photo/developing steps at the end of the 1950s.
In those days, the lenses one could afford were not especially
full of contrast. So naturally, nowadays, when I have access to
superb developing software, I aim at squeezing the utmost
of contrast|sharpness|oompf out of every shot.
I am quite pleased with my present state of development.
BUT: for some shots, a softer approach would be more suitable.
Like when shooting the tender bud of a Rhododendron, just opening up.
What is your approach to handling more delicate models?
Another trick people used in that old days was to cover the filter or front of the lens with a panty.
You can fix it with a rubber and get it more or less terse.
It tends to produce small stars and difracctive difussion in the intersection of panties threads.
You can very effectively mimic a soft focus filter in GIMP by overlaying at very low opacity a blurred version of the image. Try 5% or 10% opacity with a blur radius 2.5% of image height. For additional fun you can do it differently on different channels; you get a really vintage look by blurring the red channel a bit more than the green or blue.
At one point I developed a module for darktable that would do this in linear brightness space for physically accurate results, but it never got merged.
As for me, I own a Carl Zeiss Softar I filter… but never use it because even though it’s the lightest effect version of the line, it’s too strong.
My suggestion for doing it in post: Convert to linear color space, gaussian blur on duplicate layer, radius dependent on effect you are going for, opacity to taste as well. If you want to add haze, just add another layer with either global fill or big brushstrokes of the color of your choice, then drastically reduce opacity. Then merge and convert back to scene referred gamma, and maybe add a slight touch of contrast back, especially in the shadows, and maybe some very fine radius sharpening if so desired.
Example: I don’t have the before but here is a shot I added some subtle softening by blurring in linear color space.
You reminded me of some shots I took a few years ago of a Rhododendron but bloomed completely. This was shot using a Venus Optics Laowa 15mm f/4 macro, wide open. It’s actually a pretty sharp lens wide open, so I used the soften module in Darktable to maybe get at what you’re looking for.
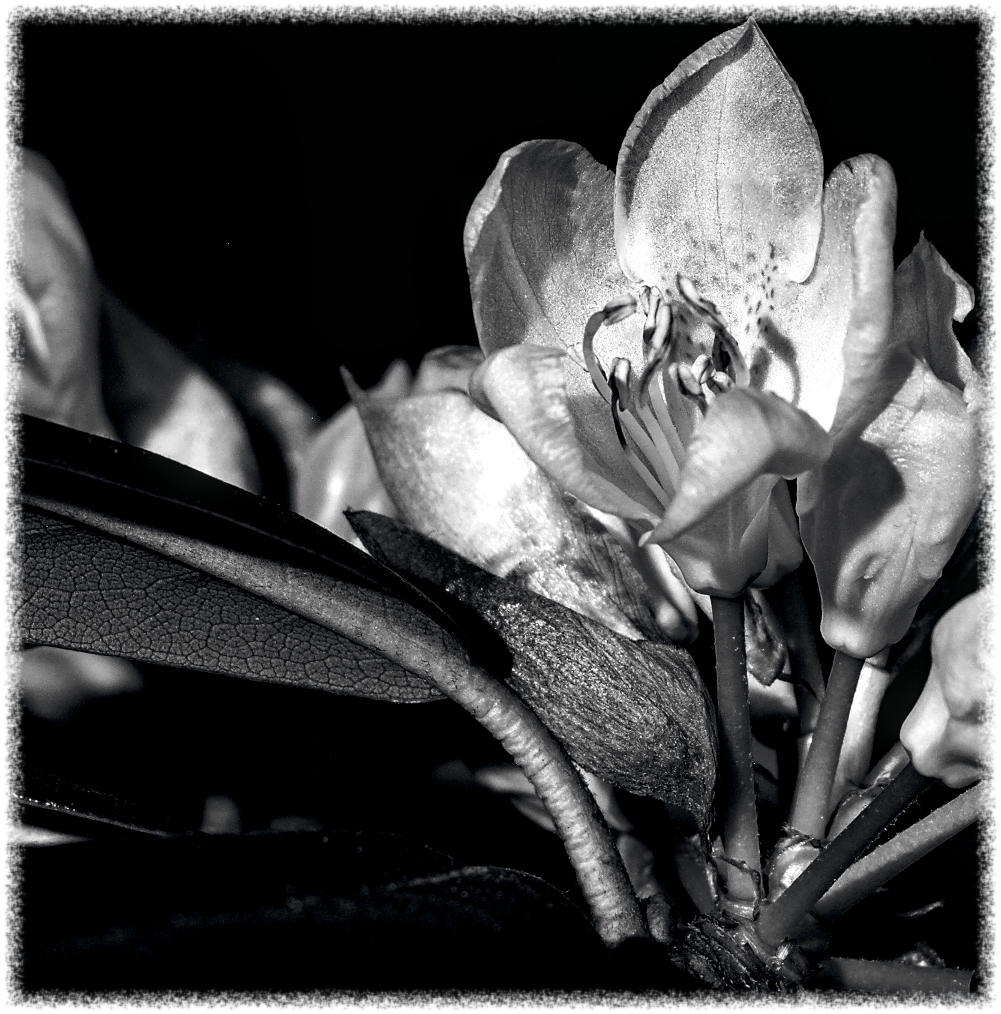
Thank you for all suggestions. I have just altered the title of this thread, to put emphasis on my dilemma: how to post-process a delicate model.
When I follow my normal post-proc steps, a delicate flower becomes quite hard (please disregard its lack of colour, it is a shot from a b&w experiment):
Sounds like you are using dt from the mention of contrast equalizer. Personally I have not made my choice between RT or dt yet I like some aspects of both… One such approach you may try would be negative clarity with the Contrast equalizer assuming you want to stay in a Raw only approach. If Clarity is the same definition as a mid tone contrast with dt this would soften the image nicely to create a more dreamy look and less rugged.
If you are not opposed to a raster approach once you are done in dt you can go to gimp or whatever editor of choice then create a new duplicate image layer apply a gaussian blur to said layer with a radius of 1/2 your sensors mega pixles so if 24mp use a radius of 12. Then anchor it with a midtones mask or highlights mask and switch to softlight blend mode. If you want a little more pop you can also apply a curve to push the midtone brightness up on the blur layer as well. With this approach if you don’t anchor the effect with a mask it might make the image too soft and dreamy depends on what look you want.