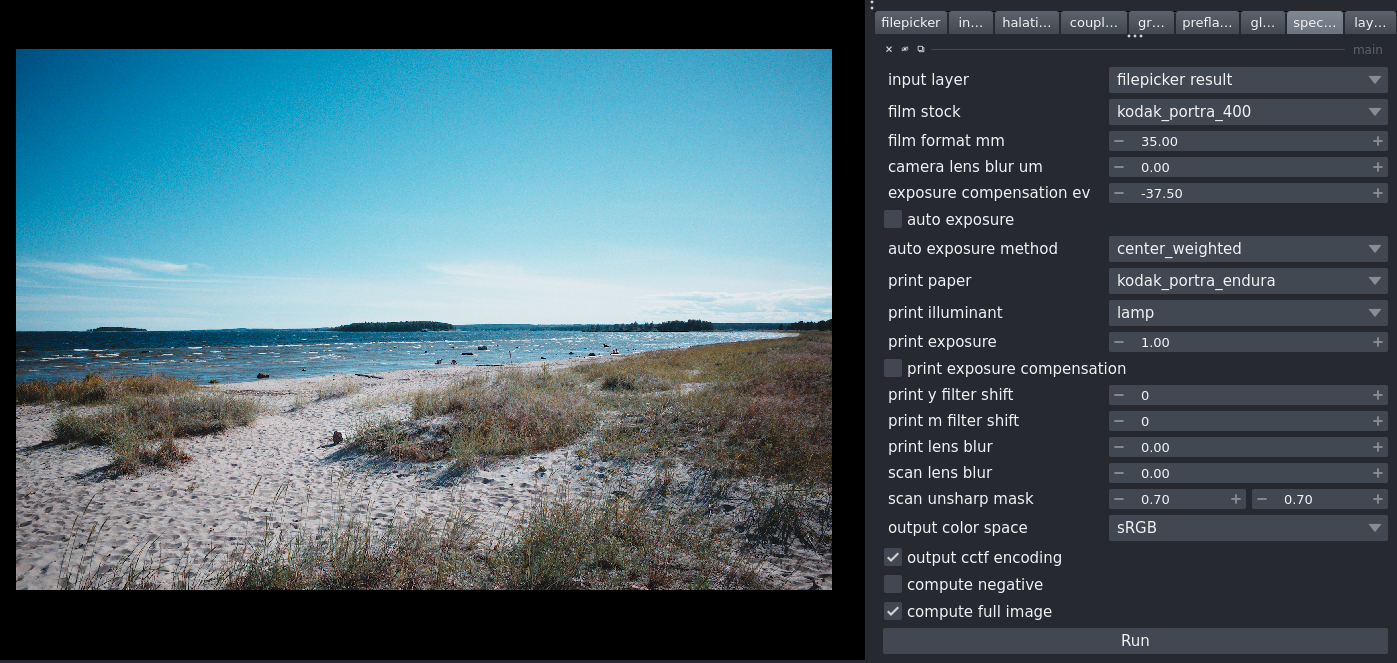
I’ve now tested in on two computers and files from various cameras. All similar requiring between -30 and -40 ev compensation.
Boring sample photo:

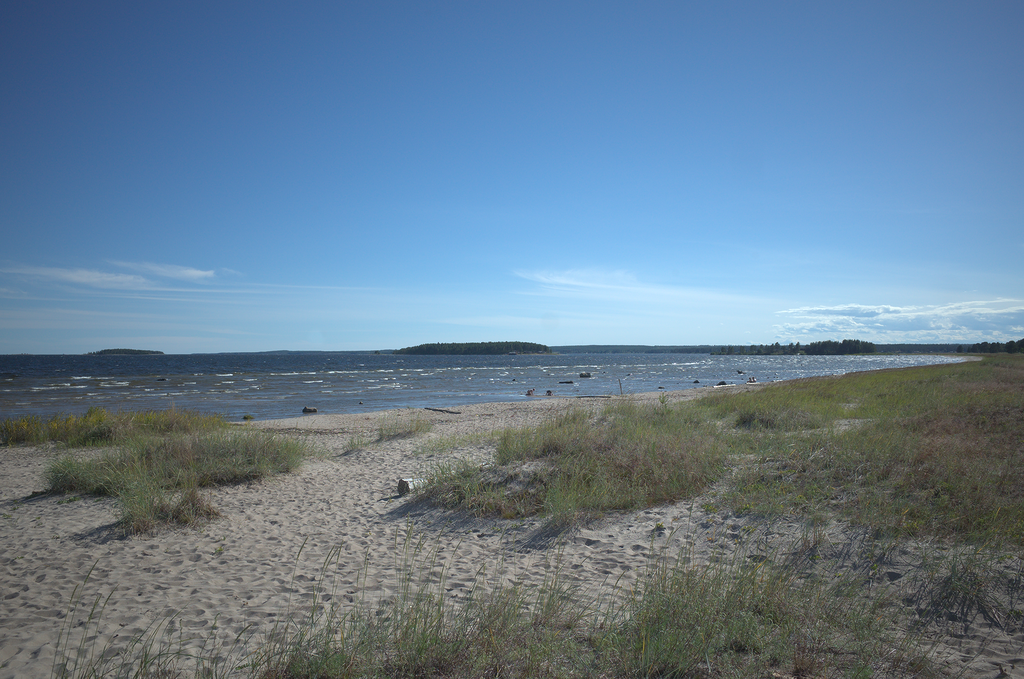
beach02.pp3 (15.0 KB)
I’ve now tested in on two computers and files from various cameras. All similar requiring between -30 and -40 ev compensation.
Boring sample photo:
Wow, this is really cool! Great work! I look forward to playing around with it more and seeing it develop. ![]()
Also thanks @liam_collod for those installation instructions. It made it extremely easy on my macOS system.
@arctic : Is there any way to see a version of the image without heavy simulation (without de selecting the layer altogether)?
I would really like to be able to see what settings have what impact on be the image.
At the moment it feels like try and error (which is probability how it really was back in the days).
Another issue is the massive loss of details I get pretty much independently of the settings. What am I missing? Or is it really meant to work this way?
For now switching layers is the only way I think. By renaming a layer you can save snapshots done with different settings and compare them
I agree that everything is very rough in the interface. I don’t plan to stick with napari+magicgui, it is just a quick GUI to be able to test things fast (and let people try at this stage). I think this sim should be more like a module to be integrated somewhere else where this features are already in place.
There are a lot of controls for sure. If overwhelmed start with this ones:
plus:
I could extend the README with a better quick-start guide if this will help.
There is a small gaussian blur applied by default at the density level right after generating grain (grain >> blur = 0.6 in pixels). You can set it to 0.55 or 0.5, or even zero. There is also sharpening done in the “scanner”, I would set scan unsharp mask to (0.7, 0) if you switch off grain blur completely. I usually test this things on a small crop of the image using “input >> crop” and “compute full image” (full resolution cropped image). Then when happy with the texture I get back to uncropped editing with a downscaled preview.
I would say that this is partially intended to get a smoother-correlated grain texture, and it will work better in higher resolution images. Especially when after optimizing the sim, it will not take ages to do full-res processing.
Not sure why this is happening but i committed a small fix that should take care of this. Thanks for the files. ![]()
Hello,
your project looks promising and I have been reading with great interest this conversation.
I have been able to run the app (thanks Liam!) but so far I cannot get a “good” result.
I have tried to do the following:
Then I load the png into the software and I get strange results. It looks very dark or completely washed-out.
Maybe I got confused about these parameters:
Thanks for the help !
From my testing I would recommend starting without tweaking any settings. Then turning off auto exposure and then dialling in manual exposure.
The full image tickbox creates a full resolution layer with the applied settings. When not ticked a low Res version is created to judge overall effect. Size, crop etc of this preview is determined in the input tab.
The software is extremely slow so I wouldn’t recommend checking tha full image box until you’re happy with the overall tones.
Please help me catch up - does “ev” mean stops, like in exposure compensation?!
Welcome to pixls.us @ChrisB!
I usually export in PNG 16bit with the transfer function applied from darktable, then in the GUI I leave clicked the box “apply cctf decoding”. If you don’t export with the transfer function applied, leave unclicked the box “apply cctf decoding”.
The box “output cctf decoding” control if a transfer function is applied to the output image. Keep in mind that napari is not color managed and will always show an image as if it was sRGB (with transfer function). The underling data should nevertheless be in the right color space and cctf. I am borrowing all the color computations from the colour-science package.
As @nosle commented this will make the program compute a full-res image. By default a downscaled preview is computed because the program is very slow for now (still faster than developing a real world RA4 test print strip ![]() ).
).
Yes, you are correct.
Interesting but puzzling … I calculate -30 EV to be a reduction factor of 9.3^(-10) ![]()
So I must be missing something. for example, on my monitor screen, it only takes -9 EV to get down from white to black. I do realize that my monitor brightness is not exposure. But still, Ansel Adams “scene” only spans 10 EV.
What am I not understanding?
It was a strange bug, possibly with overflowing of integers. Indeed 30ev is not normal, I usually set just a few stops of over or under exposure when using the simulation.
Got it. Thank you!
Thanks for your answer !
I think my question is mostly about getting the input (png) in the expected state.
So (according to a few contacts of mine) I would need to do the following to convert my file :
(Normalize as in expose down until the maximum value in your exr is equal to 1.0. A 16 bit png is an integer data type and therefore does not support pixel values greater than 1.0.)
I will try that as soon as possible. Thanks !
Also make sure that, regardless of the transfer function (applied or not, and the corresponding checkbox clicked or not), your data is scene referred, i.e. the RGB values (without the transfer function) should be proportional to the amount of light that reached the camera sensor.
If other non-linear transformation were applied, the image will most likely look washed out. For example in darktable these are sigmoid, filmic, or base-curve. The simulation already applies a sigmoid filmic curve derived from real characteristic curve data, that assumes scene referred input.
Exact! Adjusting the exposure to not clip the PNG 16-bit range is also necessary.
Andrea. This is incredible. I’ve been trying to use density graphs, print emulation profiles/LUTs, custom profiles, commercial Davinci Resolve power grades, DCTLs, etc, etc, to come up with a linear digital → negative → print pipeline for years and the results with what you’ve made here are better than anything else I’ve seen. In the world of still photography software there is NOTHING else like this. I can’t speak to the technical “accuracy” of the emulation because I’ve never done analog RA-4 printing, but I can say that the results absolutely look like film in all the best ways.
In the short term, a couple requests for the sake of testing/experimentation… Is it possible to add more output color spaces? On a Mac, just having an ImageP3 or DisplayP3 output ICC profile would come pretty close to having a color managed preview. Also, a button to reset settings to the defaults would make experimenting easier.
For fun I tried to match a Noritsu film scan. I can’t remember what film it was, but the 400H + Fuji Crystal Archive comes really close. I tweaked the print gamma factor and then clipped to the black and white points which is what I assume was done to my film scan as well. Left is film, right is AGX:
Great! ![]() What kind of image is this? Is this a render you made, I am quite curious!
What kind of image is this? Is this a render you made, I am quite curious! ![]()
Soon we will able to do much larger resolutions! I am experimenting with moving the spectral calculations to intermediate LUTs, that should remove the memory bottleneck, and it should make the code more clear for GPU translation. Also, I am testing some small optimizations with Numba (totally new stuff for me) for faster grain synthesis.
So maybe not 20k, but hopefully 8k-6k easily. ![]()
Thank you for the feedback @NateWeatherly!
I also think that still photography is somehow lacking in this kind of physically based simulations. There are a few options coming from video programs: for example Dehancer available also for Lightroom, Capture1 and Photoshop or Filmbox but only for DaVinci resolve. But nothing truly dedicated to physically simulating still photography as far as I know. The ones I’ve seen somehow are always related to the movie industry or are less customizable profiles/LUTs (RNI and VSCO for example).
I just added DisplayP3 to the gui on the main branch. I couldn’t find ImageP3 in the colour-science RGB color spaces. Is ImageP3 the same as P3-D65?
I love this comparison! Thank you for sharing. It is the kind of reference we need to bring the project forward and improve the results. The Noritsu scan is more green prominent and I don’t think it can be fixed in the virtual color enlarger. The dress and skin tones are impressively close!
Nice photo too! What kind of lens did you use for that swirly bokeh?
I haven’t tried Filmbox, but I played with sever versions of Dehancer and struggled to get results I liked. For whatever reason, the color in your transform is so much more pure and organic. Apparently VSCO has done a lot of research and work to measure profile film stocks and the Fuji Frontier scanner response, but their implementation in the app is so simple and limited that it really doesn’t matter.
All the Lightroom/C1 LUT profiles can do is emulate film at one exposure and scanner response and 3D LUTs just aren’t high enough resolution to map an “underexposed” linear image to the dynamic range of film like your transform does. The way you’ve implemented the auto exposure and exposure compensation for the negative and print is really smart. Can’t wait to see where this goes!
Thanks! That will be helpful. ImageP3 is basically the same thing as DisplayP3 as far as I can tell. Apple includes it with Mac OS and say it should be used with images, but I don’t see any difference. Display/Image P3 has the same primaries and white-point as P3-D65 but use the piecewise sRGB transfer function whereas P3-D65 uses gamma 2.6 like DCI-P3.
Yeah, I tried matching a few other images to film scans and the scans seemed to usually have more blue in the shadows. I was wondering if it might have something to do with film’s much stronger response in the deep blue/UV portion of the spectrum compared to digital cameras and spectrometers? Maybe there’s some way to optionally add UV exposure to the sRGB spectral reconstruction?
Thanks! I’m not 100% certain, but I think it was a Leica Summilux 35mm FLE. I think the swirls happened because I wasn’t thinking and was using it on a Techart pro AF adapter, meaning the floating element wasn’t being adjusted for the distance. Also just using the rangefinder glass on a Sony sensor does some of that.
Oh, question regarding white balance—should the linear digital image be white balanced to make a neutral image, or set to 5500K to match film’s native response?
Not sure if it helps, but there are/were a bunch of pictures (synthetic and real world) which came up regularily in the ACES2.0 workgroup iirc this one as well. These reference pics served as a wide variety of inputs to test DRT implementations.
Also there are some spectral renders in that workgroup, specifically the cornell box illuminated by spectrally pure wavelengths including exposure ramps!
I would love to see how all of those pictures look through “agx-emulsion”. But I don’t know how easy it is to get those pics from the workgroup.
But maybe @ChrisB can elaborate on this.
A good read:
ACES 2.0 Workgroup DRT dev thread.