I must say that I am still puzzled that quite a few people say that one of the sharpening presets of D&S are enough to give them a sharp image. Are you perhaps starting with a jpg out of the camera? I ask because, a RAW image from my Canon 80D, or a RAW from my Lumix FZ80 for that matter, needs quite a bit more sharpening than that. I now have a preset for D&S that approximates what sharpen used to do, but does much more intensive sharpening than those default presets supplied.
Maybe share that preset…although it may be specific to your hardware it might also provide a bit of insight as to your preference for sharpness… maybe along with a test image that you apply it to…
No, it’s from a raw file. And i repeat , it’s all subjective and to taste !
But yes, with ‘sharpen demosaic aa’ and ‘lens deblur: medium’ presets I’m already scared of overdoing it  . If you want more , then i wonder why .
Maybe post a raw file you’re willing to share ? Because maybe you are just right, or maybe we just have different tastes.
Using the kit lens vs a nice L series, accounting doe shutter shock and handling movement and subject movement , … Pff. There are so many reasons why your images might not be as sharp as you would like .
So maybe you apply more sharpening that might not be needed with ‘a better approach at the shot’. Maybe because its a limit of your gear. Maybe because you just like more sharpening.
A lot of maybes, and I’m sure i don’t have them all :).
For my part the preset is aa filter sharpening apllied with noise profiled and basic colorfullness as a style applied at the start of processing…then exposure and filmic.
Appreciate the thoughts, however, for me, the comparison with the OOC jpg version of the same image as the RAW file, tells me I am not being silly with the amount of sharpening. I only want similar sharpness to what the manufacturer of the cameras has determined to be “correct”.
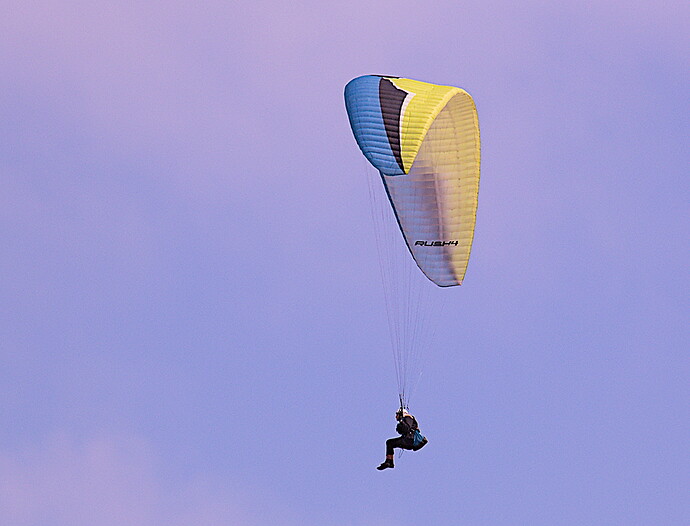
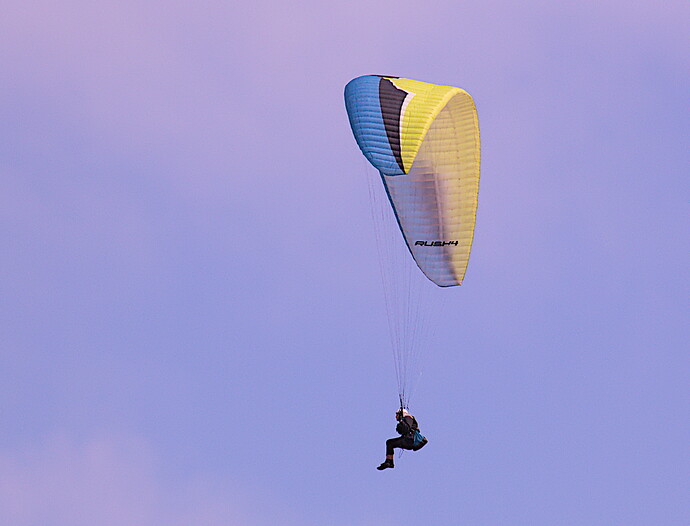
I thought an example might help. First is with sharpening demosaicing default preset, second is with increased sharpening (from D&S plus a little of the old sharpen module) I will admit the second is heavily sharpened, but I wanted an good example. I prefer the second one.
For most manufacturers the level of JPEG sharpness is also user-defined from a menu in the firmware, though they often provide a number of basic styles to choose from. I guess you’re talking about the default out-of-the-box style (for Canon I think it’s called “standard”)?
Yes.
edit: although you can set the camera to save jpg and RAW, even when not using the automatic styles, even in full manual, it still does the sharpening etc to produce the jpg.
What I dislike aobut the second one is the harsh black line along the left edge of the glider(?), and the purple line on top of it – I think it’s haloing.
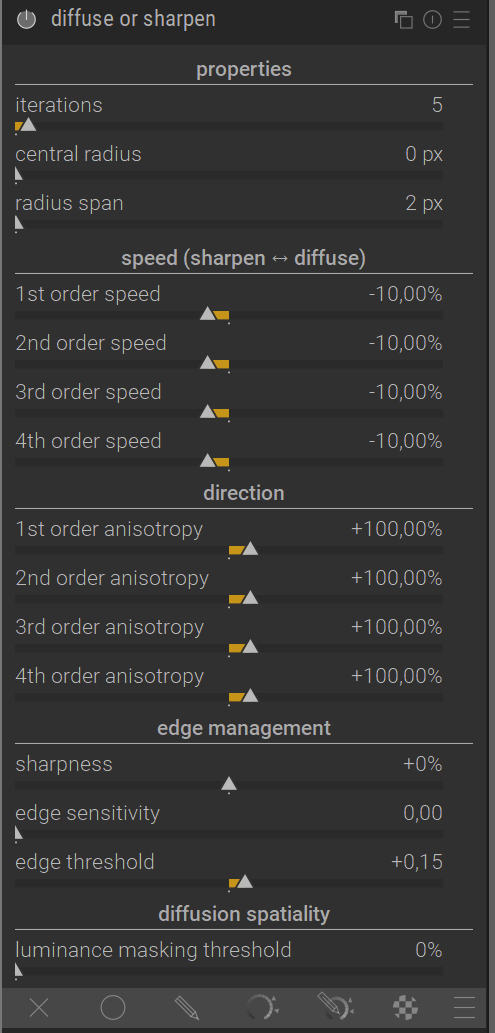
You are right. With the new D&S module, I can back off a bit using the edge sensitivity control and reduce the halo, with the old sharpen module, it is harder to control. Another reason I chose this image is that haloing is most problematic in situations like this with high contrast against a plain sky background.
This one is with D&S alone, using my new tweaked preset. I think I like it best.
For a portrait I find the demosaic aa filter preset of D&S is sufficient. For a landscape I also use the sharpen module with the amount set from 0.50 to 2.0. There is a real danger of over sharpening images. I more often than not use local contrast module as I like the ‘clarity’ it gives an image. I still have a lot to learn with the D&S module and defer to the comments of more experienced users of D&S here. Good luck.
Sounds like you pretty much see it the same way I do. Yes, for a portrait of someone, you do not want pin-sharp images. For images that need it, I find the sharpen module set to 1.0 is plenty and just vary the radius to suit the image.
When I was creating my better sharpening D&S preset, that’s what I was comparing it to. I then adjusted the setup so I had some leeway to under or over sharpen the average image. The D&S module is definitely more adjustable in sharpen mode, than the old sharpen module. It will cope with a wider range of situations for sure.
You mentioned local contrast. Yes I have used that, although, filimic, along with the color balance rgb module contrast and perceptual brilliance sliders with adjustable shadow highlight masks, has pretty much replaced a bunch of older modules for me, so I seldom use shadows and highlights, and local contrast, and even haze removal is now mainly used as originally intended, and not as an effect. I also used to use the velvia module because I liked the look, but I am finding the color balance rgb - global vibrance and perceptual saturation and chroma, are allowing greater control and producing great images.
If I was to need more, the contrast equaliser and tone equaliser would be my choice these days.
I have certainly heard Aurelian speaking bad of this module, but I often like the look it gives as it can add color and contrast to the shadows. Tone equalizer creates a different look. I often use both together.
100% agree. As time goes on I am liking this color balance RGB module more and more. However, I am yet to master the D&S module, but with time I am sure I will get my head around it. I have watched AP’s video on it. At the moment I just stick with the presets and in time will experiment more.
I see Color balance RGB as the replacement for shadows and highlights, not tone equalizer. I only use the latter if I can’t get what I want with the former. ![]()
Just saying, those sharpen settings are still subjective decisions, made by someone else on your behalf, for some theoretical “average” image.
This is way too much sharpening IMO, which comes from the bad habit to view 20+mp images at 100% or more. We have all been there.
A more sensible approach to sharpening is to split it in three phases:
- capture sharpening: only correct the effect of the antialiasing (AA) filter of your camera sensor. Note that many recent cameras don’t have this anymore, so you can skip this step
- creative sharpening: make the image look crisp; this is mostly fake sharpening, a.k.a local contrast
- output sharpening: counteract blur due to resize or prepare the image for printing. DT does not handle this natively, but there are lua extensions
See this example. My camera, DPR studio image with a very sharp lens
No shapening
Your preset
see the halos around high contrast edges
For example, see instead a more gentle approach to capture sharpening
with these settings
It was never intended to be used withut further adjustment as needed
I wanted the preset to be able to over-sharpen and undersharpen. I set it initially so it worked on many of the types of images I shoot, and I am fine tuning it as I see the results on more images. But even then, I always intend to adjust the amount of sharpening after the initial values are applied. If I had worked on your test image, I would have reduced the sharpening that the initial settings are at.
Why limit fake sharpening to local contrast methods?
What do you mean by this? I do not set sharpening by pixel peeping, if that’s what you mean by 100%.
With “local contrast” I don’t necessarily mean the local contrast module in DT, but all those “sharpening” methods which actually only increase acutance (for example contrast equalizer).
In this recent video AP explains the difference between resolution and acutance, and why our eyes are not very good at separating those. See 9:15 for example.
What I want to say is that any recent high MP camera + decent lens is plenty sharp already, to an extent that we old timers, grown in the analog film era, never experienced before.
Digital imagery brought the possibility to see pictures a 100%, which is equivalent to look at 1m print from few cm. It can be done, but it is not the normal viewing condition.
And at 100% any camera + lens combo, no matter how good and expensive, looks unsharp.
Therefore the overshapening habit that we see everywhere.
I am talking in general here, not about your specific case.


