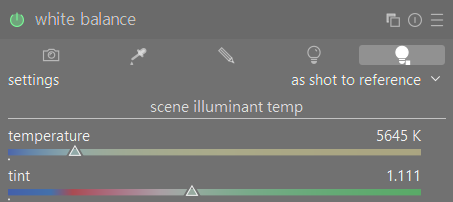
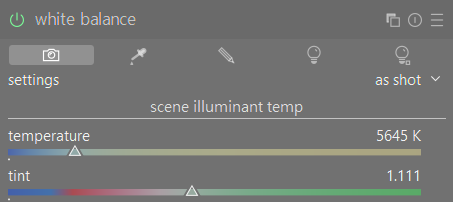
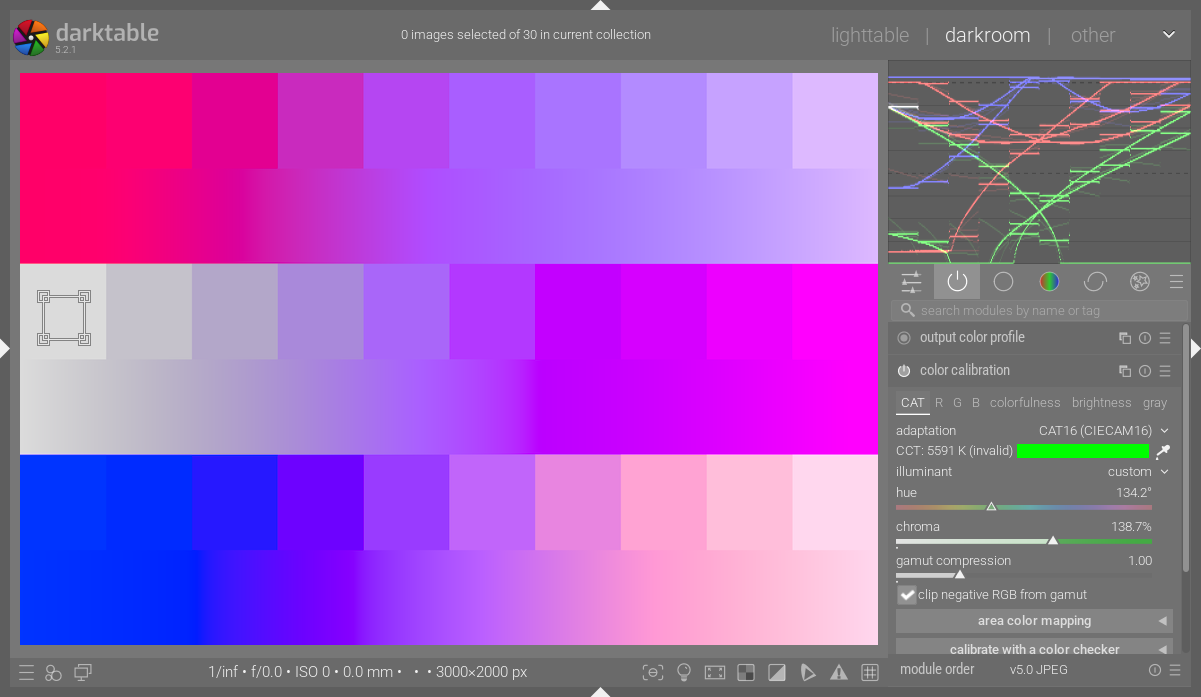
So after getting to edit my Z5 ii’s photos I noticed that WB is set in a very strange way. I shot the photo with unmodified cloudy preset. What does this mean?
I’m used to seeing Planckian (Black Body) with a slider for temperature.
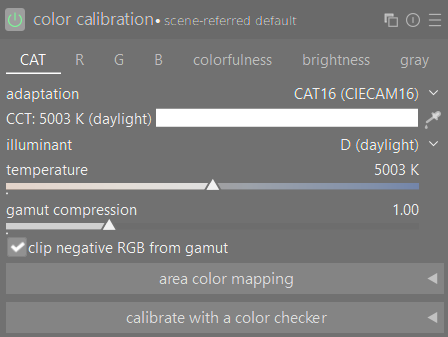
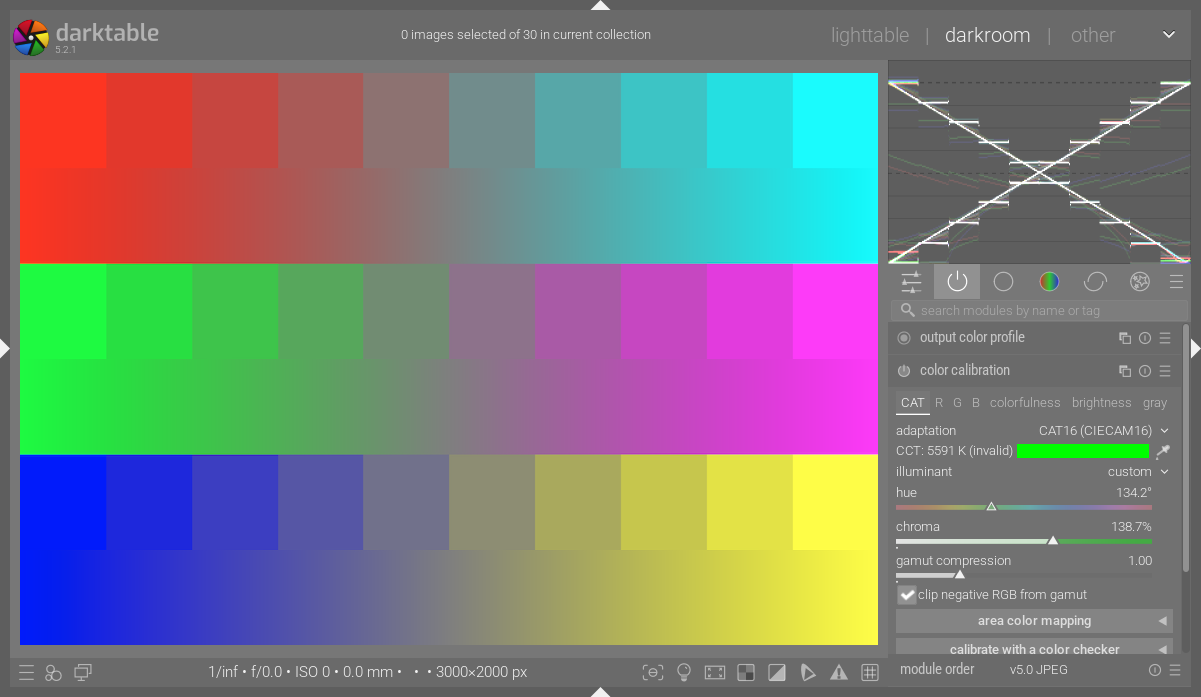
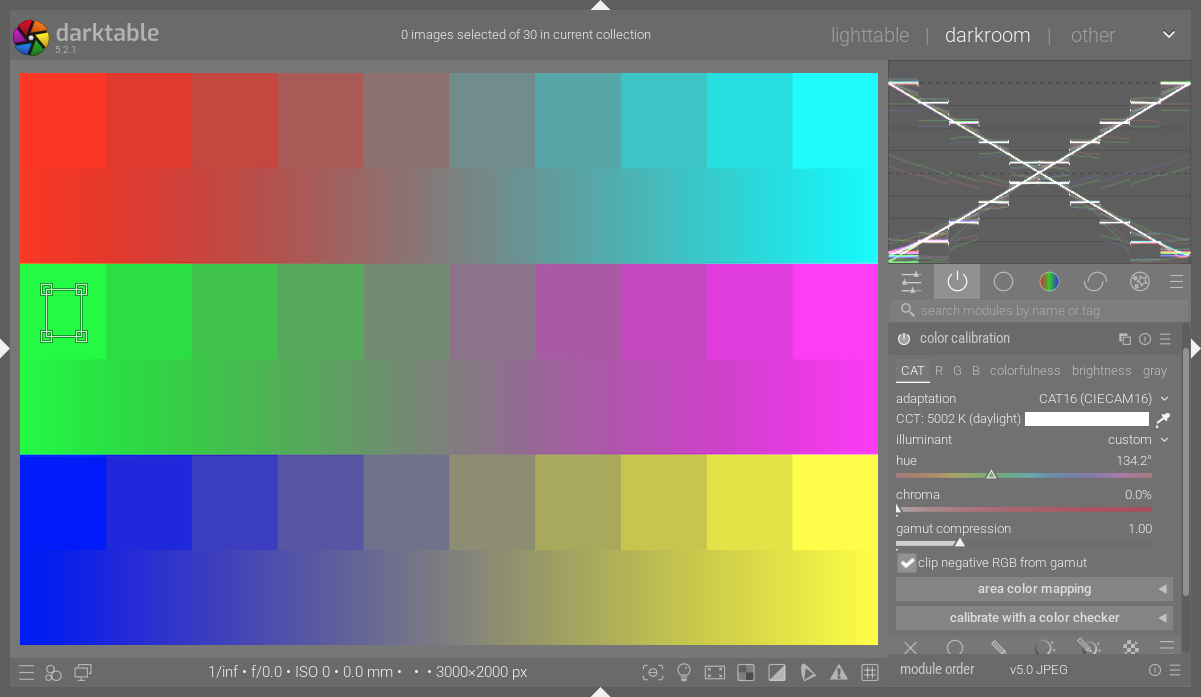
It simply means that the calculated CCT (correlated color temperature) doesn’t fall on the planckian or daylight locus, so you get the hue/chroma controls. That’s also why it says (invalid), by the way.
Here’s how the initial parameters are calculated:
The rest of that post is worth reading, as well.
Was that with the same camera and WB settings? If not, it’s to be expected that CC will arrive at different values, since both the D65 matrix and the “cloudy” WB value are likely not the same.
I don’t know why, but for some reason resetting the module will always give different parameters (and look).
That shifts the image towards magenta though. When I switch CC to bypass and WB to as shot, it’s the same effect. The white balance is correct, but the colors look compressed, kinda like using negative green rotation in RGB primaries
I am intrigued by what happens with your image if you disable the CC module and just use the WB module alone set to ‘as shot’ or ‘cloudy’. Does it give a more expected WB than when CC module is involved?
Switching to daylight mode means you tell the module the incoming light (the illuminant) is daylight/blackbody radiation (they are not the same, but “close enough”). If the scene is lit by by light that does not correspond to that, you get colour casts.
And it’s very easy to have an illuminant that’s not “daylight” (in the spectral sense): just stand on a lawn under a tree. Or in the shade near a red brick wall, Or…
The colour calibration module can take such effects into account, but that needs two controls, as you need to adjust two variables (R/G and B/G). Just like other programs use temperature and tint (which is a more restricted way of doing the same thing color calibration does in “custom” mode).
I’d first like to understand your issue with those two modules. Do you get wrong colours when you let the modules do their job? (With WB on “as shot to reference” or “camera reference” and CC on “as shot”).
Or are you just unhappy when you don’t get a CCT slider?
In general, I start from the camera settings (“as shot” in CC), then look and correct as needed. Correction is usually (only) needed in images with a strong dominant colour: I do some microphotography where the samples are stained red, which misleads any auto white balance routine which uses the whole image → use the picker on a small area of white background.
The “best” way to correct white balance depends in part on the image, unfortunately.
This. I get the WB mostly right just by using in-camera presets, but I like to make temperature adjustments. I’m used to having the temp slider always available by default and I’m confused what to do
The colors are actually correct out of the box. As I said, I’m looking for a way to get back the temp slider, or have an alternative way to achieve the same effect.
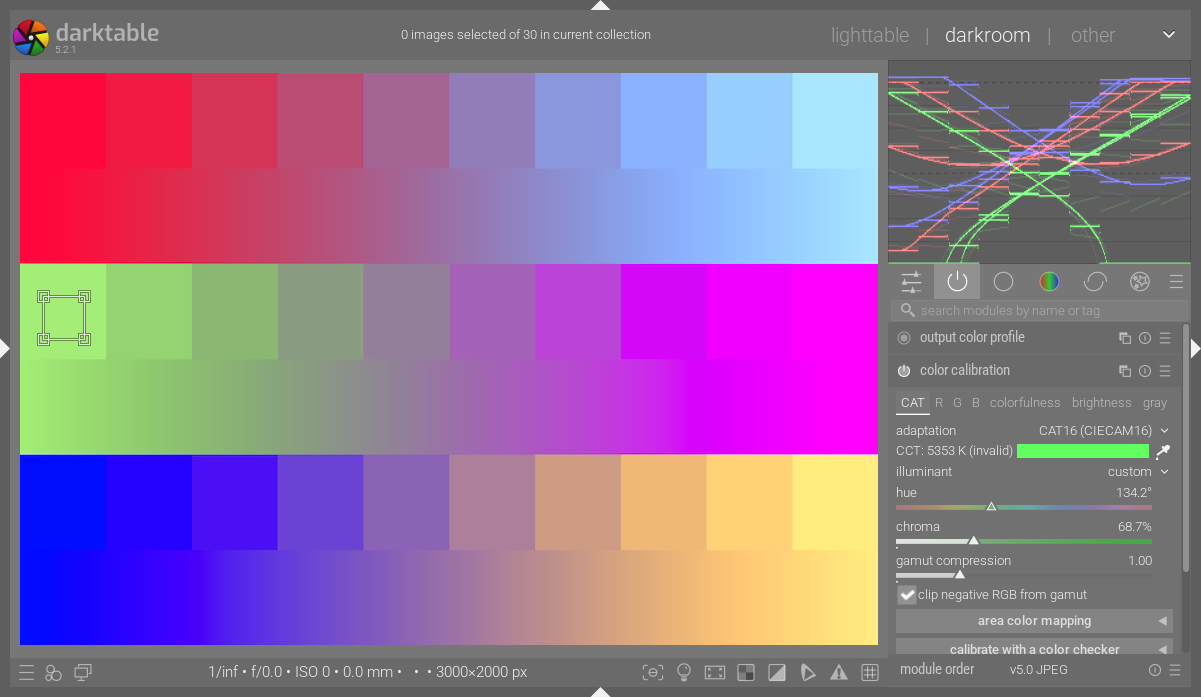
Anyways, here’s an example of the color compression I talked about above. WB set to “as shot” and then I reset CC. Compared to the default state (16 in history stack) the colors look like they’ve been compressed in some way. DSC_1497.NEF.xmp (11.5 KB) DSC_1497.NEF (26.7 MB)
This file is licensed Creative Commons, By-Attribution, Share-Alike.
The principle remains the same, the axes on which you operate change. Thing is, in some some cases (e.g. coloured lights) you cannot define a color temperature (some programs try, that’s why they need the tint slider, but the effects are hard to predict). With the hue/chroma sliders you basically decide the colour of the illuminant, and the “intensity” of the colour (its chroma).
If you have a spot that should be white, its apparent colour would be the illuminant hue, then you set the chroma to make the spot white.
The most common issue I have with a “custom” whitebalance, set using the pipette on the whole image, is the chroma level (hue is normally pretty close, as far as I can judge it…).
I think that’s it… the adjustment the op needs is likely to increase or decrease chroma to modify things. I rarely mess with the hue… I think it’s not apparent to some at first that selecting that mode when it doesn’t already come up by default is just giving you those sliders and not actually changing the module adjustment or behaviour.
I am unsure of a technical answer, but I often prefer to do it this way. I remember an image I was having trouble with a couple of months ago (maybe longer), and when I used the “Daylight” wb setting, it popped to a fully realistic result. The same also goes sometimes for “Shady” or “Cloudy”.
I find the hue-chroma principle quite unintuitive at the moment, it’s just randomly clicking around till I get the right effect (let’s say make the colors warmer)… I may be getting some feel for it, but the workflow still feels off. As a work-around I find that increasing R(input-R) and G(input-G) in the ratio 1.2:1, it makes the image warmer the way I expect, more or less Idk I’m experimenting, this method sounds kinda stupid.
Also, if I set CC to bypass and WB to “as shot”, I kinda get what I want - the temperature slider in WB. Is there any catch to using WB module only? (well, besides the strange slight color shift)
Well, in this case chroma seems to works similarly to the tint slider. If I rotate the hue and then play with chroma, then I can mostly change the temperature too, but eh, I dunno if this is the way to go.
I guess now that I have used DT long enough I think and edit in terms of the illuminant and not really temperature. The patch on CC is going to show you what it calculated as the scene illuminant. Adding Chroma will make a stronger correction and pulling back will allow some of that back. Since it’s not a white balance but a CAT of the color of the image for perceptual correction from the scene to the monitor I usually leave it or just tweak chroma a bit. From there I use all the other tools to color grade as I need it.
That’s my use and there are lots of other workflows besides mine. Standard wb is possible so there should be a solution for everyone…
The important concept to understand is that you’re setting the color of the illuminant at the scene. CC CAT then “subtracts” this color from the image.
Ignore the temperature (CCT), it’s all but meaningless. When using the hue/chroma interface, the only things that matter are the color of the patch and what you see happen to the image.
This was worth the reading time in my view. It explained the logic of the CC module to me. However, in a simple lit scene such as a sunlit landscape I can see that WB module alone is sufficient in my view. For more complex lighting where there are mixed sources of light the CC module comes into its own.
I always remember AP once saying photography is about the look. I agree and I am happy to use which ever modules to achieve the look I am happy with.