Here I am, struggling again with colors on my edits. I did a custom white balance setting with my R5 for the shooting using a color checker passport to get a neutral grey. Out of camera jpegs look great and true to what I see the person’s hair for example. Yet the raws, obviously, looks different but I don’t know where to start even.
The RGB matrix in the color calibration module is the way to go I suppose but I fail to grasp how I would create a setting which mimics the jpg at least closely in skin and hair tone. It doesn’t even need to look like the jpegs, a way to make it look more brown/less color x/ etc would be fine already. Too many degrees of freedom for a clueless person as me it seems…
Is there an easy way to create a matrix with given color values for lets say pixels? I don’t know if that makes sense or if I am just stupid to grasp basic concepts of color but this is driving me crazy. Any pointers in stuff to read or try would greatly be appreciated! I tried changing colors the way Nicolas Winspear describes in his youtube video about the module but it doesn’t seem to work for me the way I want it to.
The right-hand crop is contrastier, which has at least a bit to do with the difference. I’m often surprised at how even small changes in contrast can significantly affect colors. If you have post-processing exposure compensation dialed in, you might back off that a bit and see if it helps.
That’s about all I can suggest from the crops, would really need to look at the linear RGB right after demosaic to tell more…
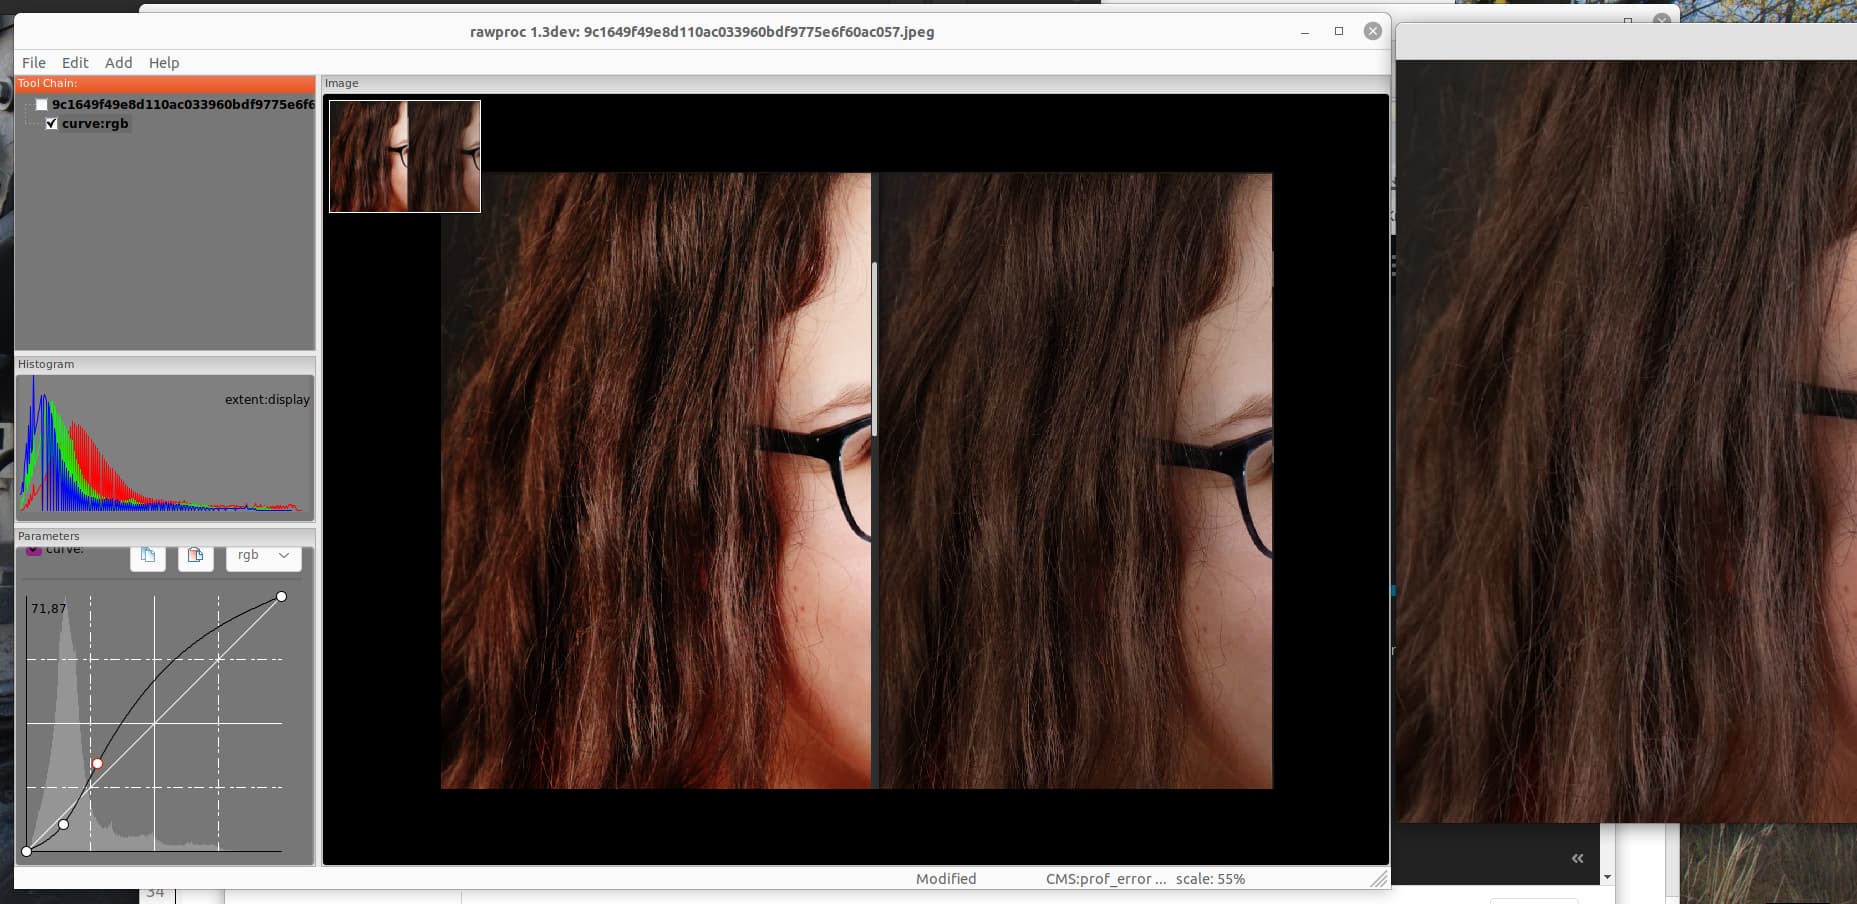
I took this jpeg and applied an s-curve to it, and was able to approximate the color and tone of the OOC JPEG. Here’s a screenshot of rawproc with your image, the tone curve in the lower-left, and a snapshot of the left-hand side before processing:
Ignore the leftmost part, that’s the OOC JPEG further amped with the tone curve.
Now, this is a rather hacky demo, but I think the right variables were presented for play. Really, you’d be surprised at how much a simple tone curve will affect color presentation…
Note that going through the process described under extracting settings using a color checker will not lead to out-of-camera JPG colours; instead, it’ll lead to closer to reality. All camera manufacturers apply colour manipulations.
imaging-resource.com test image, CR3 with (bottom) and without (top) color checker fine-tuning: