Struggling to pull out the subject in this photo

There are test builds in the AGX thread…you need to install and run in parallel to your current version…take care when doing so…instruction can be found there

EDit…ah I see it was you…on that thread that had the issues…sorry my advice here came too late


DSCN4802.NRW.xmp (19.7 KB)

3 Likes


DSCN4802.NRW.xmp (20.0 KB)

2 Likes

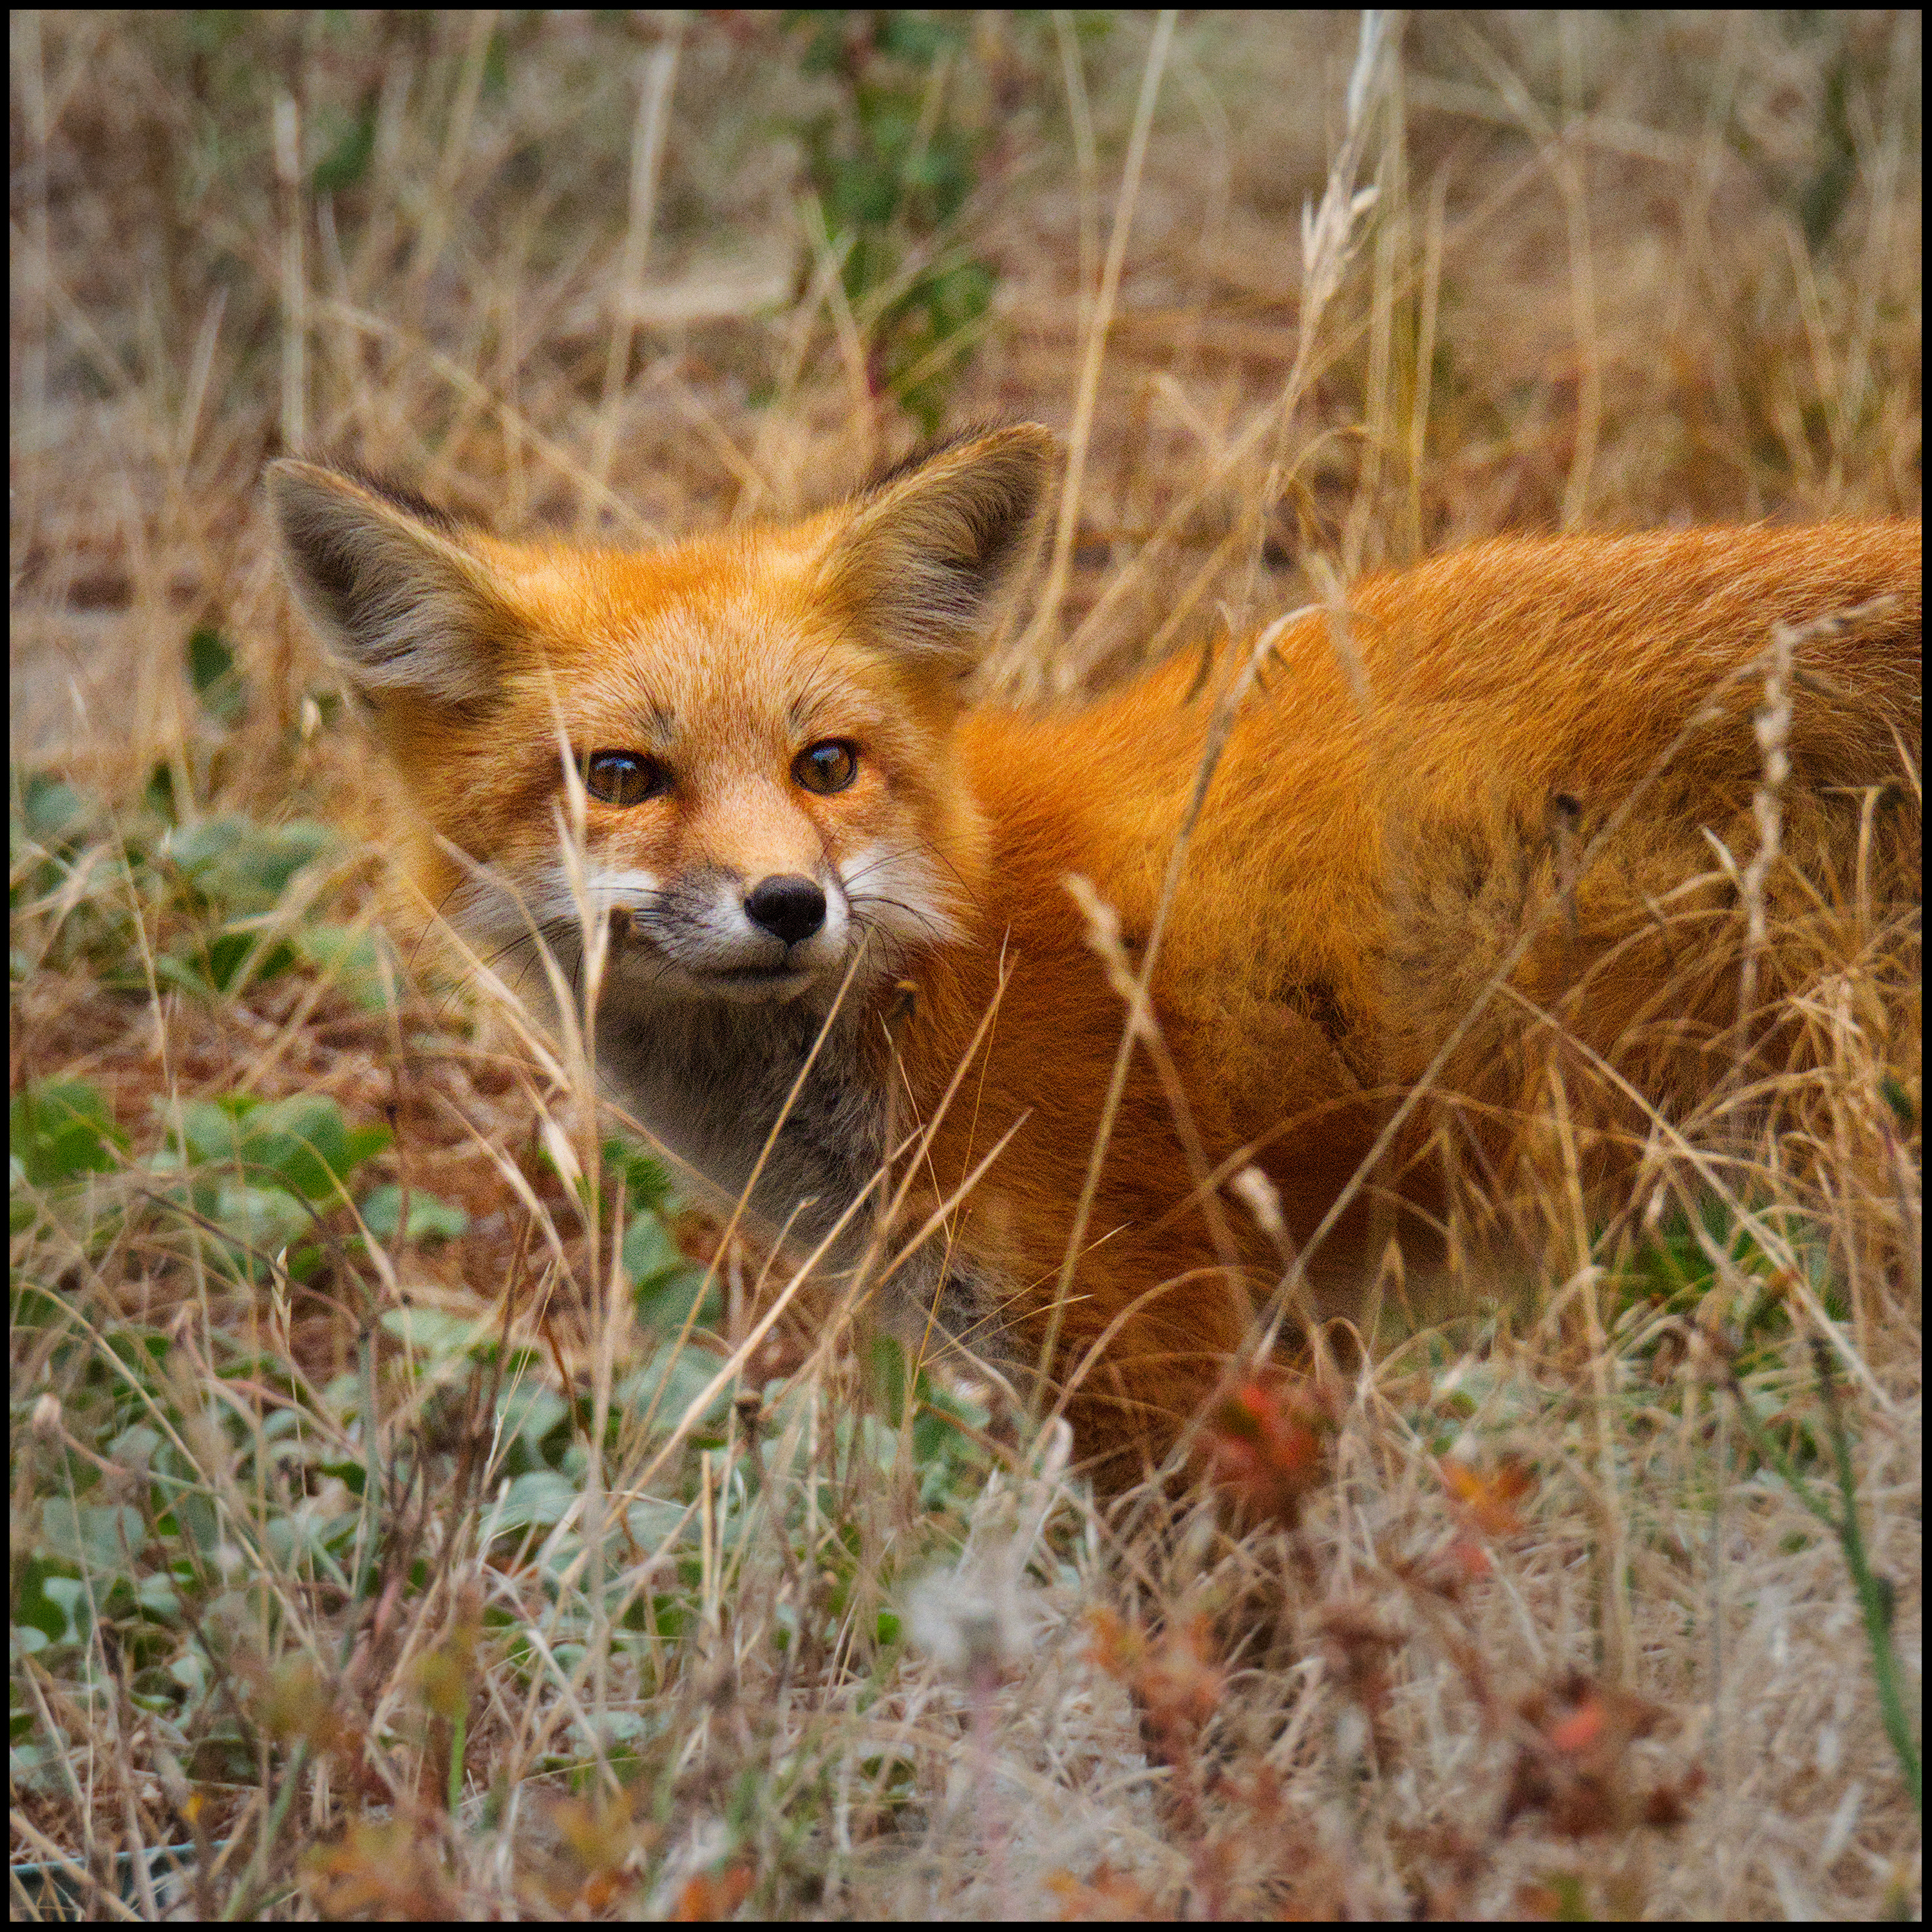
I’ve figured out how to load the AgX module into darktable and now I’m diving into your edit. Love the look btw and I’m interested in hearing your thought process.

Mind explaining why you used certain modules before doing AgX? I’d like to pick apart each step, so if I happen to ask something very basic feel free to just redirect me to a “darktable basics” tutorial or something xD

I apologize for the beefy reply here. But here we go!

When I pull up your xmp file and view the edit history stack, I notice you aren’t using sigmoid, filmic, agx, or legacy. Does that mean you usually don’t use an auto-applied pixel workflow? If that’s the case, then when you loaded my raw file into darkroom, your edit stack began at 11. orientation?

If the previous is true, your first edit was highlight reconstruction. I wasn’t able to notice any difference with this module on/off. How come you enabled it? I also didn’t notice a difference astrophoto denoise made.

Next you made a big exposure adjustment. Why did you choose to bring the exposure up this high? Was my shot substantially underexposed to begin with?

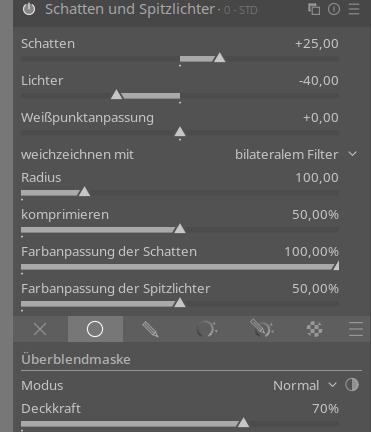
Shadows and highlights. Looks like you left the default values here. Guessing this is part of your typical workflow?

Next you did denoise (profiled). Did you create your own preset and name it minimal?

Rotate and perspective. When making this edit, I’m guessing you just right clicked and dragged along the picture? Were you dragging along where you thought the ground was level?

Contrast equalizer. Happen to know any guides on this module? I’ll look around after writing this. I don’t fully understand the inner workings going on here. What’s the reason behind adjusting contrast based on luma, chroma, and edges? I’m not even sure what each of these represent… I have some serious learning to do on this one.

Sharpen. Normal workflow?

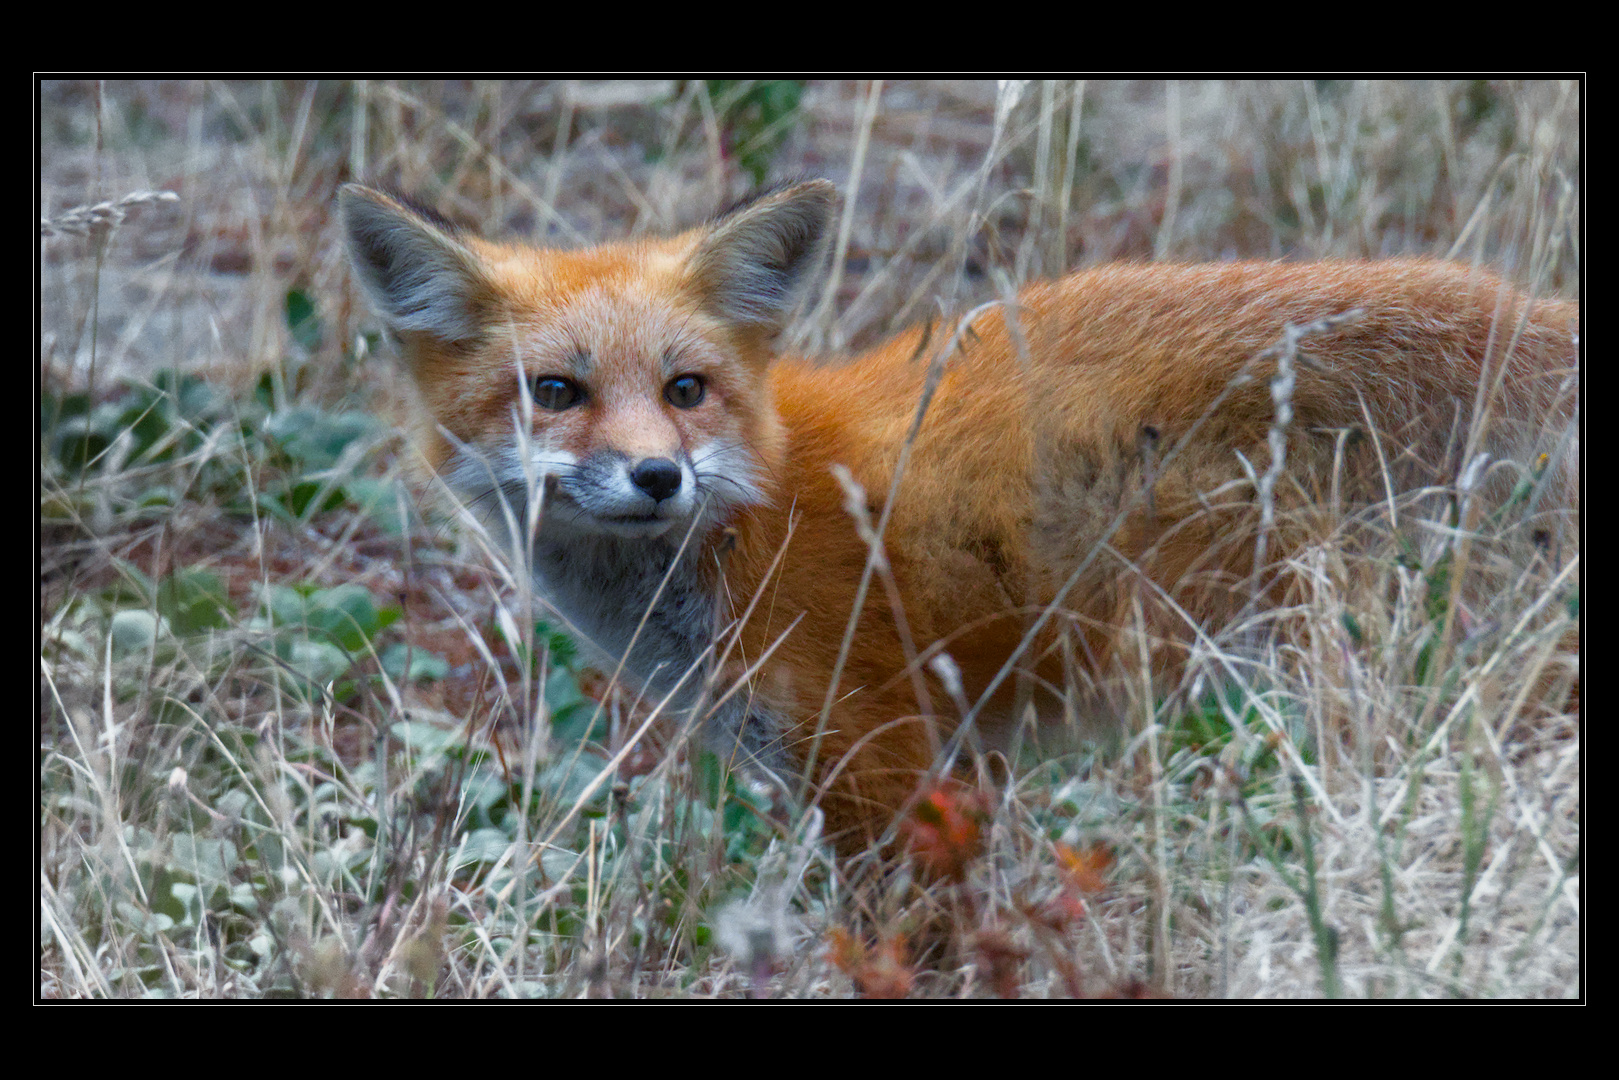
Crop. Nice crop to concentrate on the subject. Makes total sense.

Exposure (again). This is a cool edit! I love how you used this module to bring out the eyes some more. I’ll have to mess around with it to see if I can replicate this. Looks like you used a drawn mask with two shapes used.

White balance. Looks like you adjusted the valves in the module to reduce the saturation. How come not just use color balance rgb and bring the saturation down? To me it looks like this achieves the same effect.

Agx. I also have a lot to learn in this module. Mind explaining what you adjusted in each slider? I should also read up on the documentation and experiment with this.

Exposure (again x2). Looks like you darkened the foreground a bit in order to bring the subject out more. A drawn parametric mask was used. Then you used exposure again to bring the fox’s face out more.

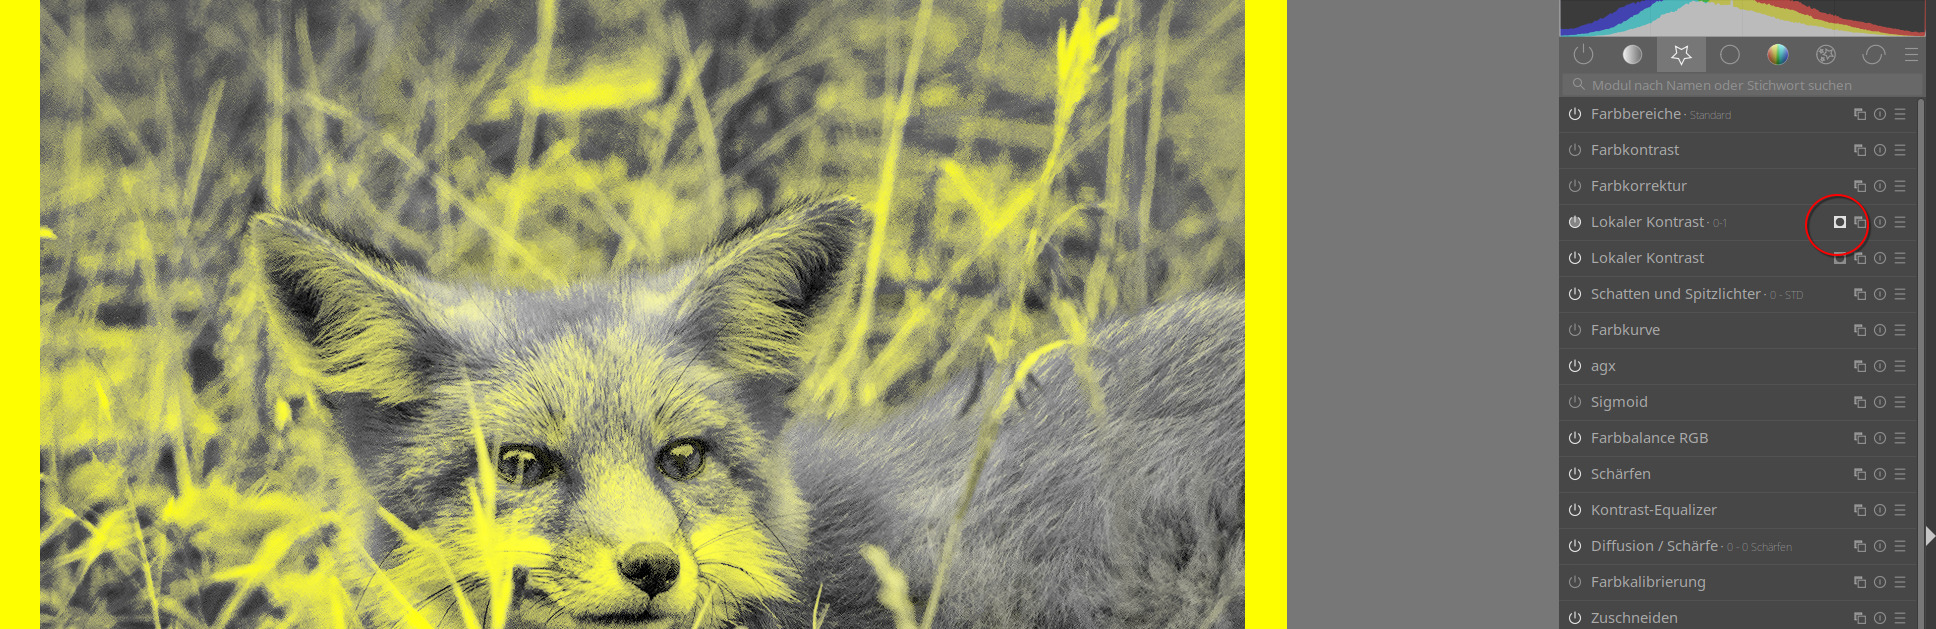
Local contrast. Normal workflow? Looks like you increased the detail and highlights, and reduced the midtone range. All done in order to bring the subject out more, I assume? It also looks like you used a mask, but I’m having trouble figuring out what the mask was selecting. Mind sharing? You then did another instance of local contrast with a drawn mask. Same question as before: was the mask selected around the subject? Are you working on blurring the background here?

Vignetting. Great tool for concentrating on the subject.

Color zones. I’ll need to dive more into this module on my own. It looks like this was used to make the shot more colorful.

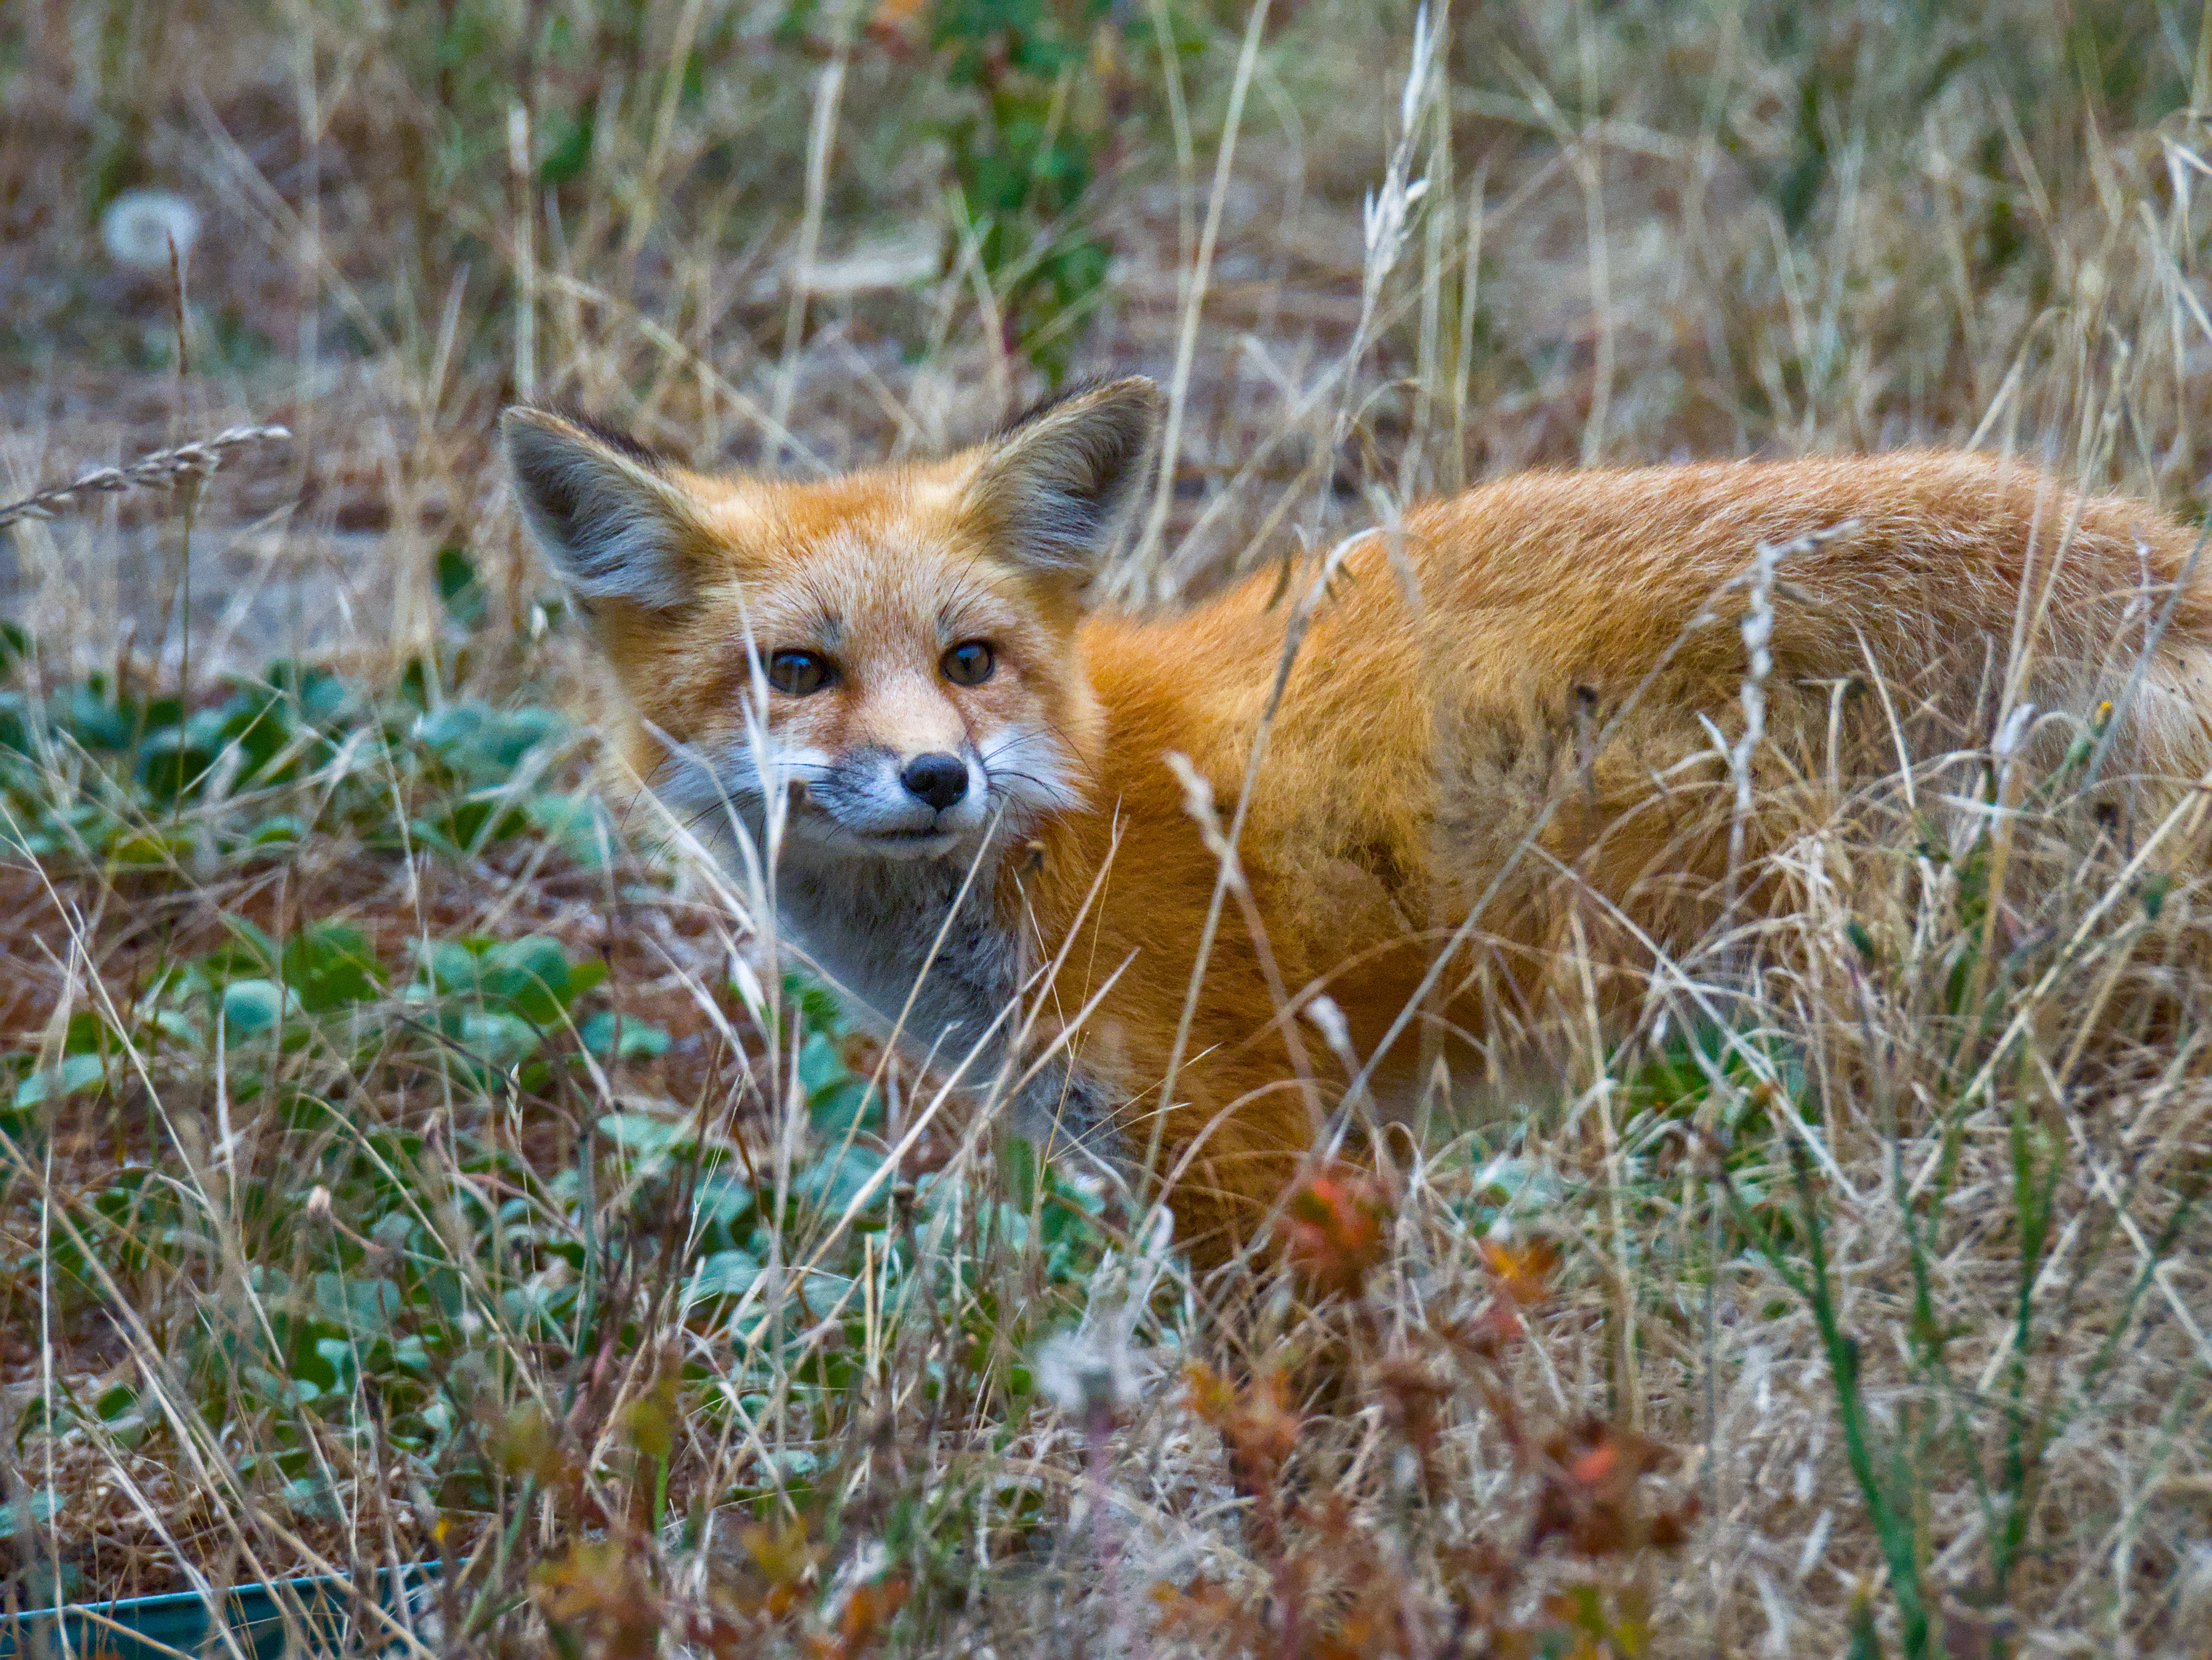
Framing. I like this edit too; however, I notice when I pull your edit into darkroom, the framing looks different from what you have posted here. I can provide a screenshot of my viewpoint if you’d be interested.

Graduated density. Used to darken the background in order to pull the subject out more. This is another module I’ll have to tinker around with more.

And now we arrive at your beautiful completed edit! Can’t wait to pick this apart some more in my free time and see what else I can learn. Thanks for any explanations you can provide and for submitting your edit here :slight_smile:

I’ll let @Popanz justify his choices…just know that the history stack doesn’t tell you how DT actually applied the modules. The modules by default are applied in a calculated pixel pipeline order. This order is shown from bottom to top in the active modules tab. If you know what you are doing you can rearrange them but this needs to be a calculated change…often it’s part of doing things in the scene referred part of this pipeline vs the display referred or to apply a change that will build on current state of the edit because you do t want the change earlier in the pipeline.

As for the contrast eq…one of the best videos imo is an old one when the module was just called the equalizer…

1 Like

Wow, that’s a bunch of questions. :open_mouth:

At first, what @priort says is true. The history stack has nothing to do with the true order I made this edit.

Anyway,

This is correct. I lay my base with two different styles which I worked out to be a good starting point for my style and my camera. So the first thing I do is loading one of these two styles, depending on what the picture shows.

In both styles, there is highlight reconstruction enabled. It doesn’t do harm on images where it isn’t needed, but helps on images with smaller areas which a slightly burned out and often overseen on a quick edit.

Because it was necessary. :stuck_out_tongue_winking_eye: I usually try to expose to the right, so shoot every photo as bright as possible without burned out areas. (And still can’t understand why there is no exposure mode on all the cameras I know, which does exactly that). Still my standard value for exposure module is +0,750. So I would say your photo is right exposed, and it is part of my workflow.

For shadows and highlights, I weakened the effect a bit with transparency slider. Apart from this, I took the standard. But that is not my standard setting. This is the setting which is usually load at the beginning:

Yes, I have different presets build on my own. I have for every module I use more than just now and then a bunch of presets, which I just apply when I think they are fitting. This speeds up my workflow a lot.

I hardly use the right mouse button function on this module, but use the scrollwheel on the sliders to adjust to my liking.

There is an official document: darktable 4.0 user manual - contrast equalizer

Yes

Definitely not. I have no clue how this should work. I use white balance for exactly what it is named for.

AgX is not yet official. @kofa has written a documentation and I’m not yet finished to review it. I guess it would make sense to read the documentation and have a look if it is good for one who wants to start with it. Give feedback where it can be improved.

Partly. I use it to work out details. One of the instances is just wor lively highlights. One is limited to the fox, to leave the background calm. Use the mask button, for seeing what is selcted:

It’s definitely worth it. A very powerful tool, which I use definitely for more than just making things more colourful. The module is in my opinion self explaining. So play around and you will discover it’s power.

Graduated density and vignetting both have flaws, when you use them with high values. Exposure module is then the better choice. The quicker way though is to use vignette and GD module.

Pentax K3-III has the possibility to protect the highlights… works like a charm.

Kind regards, Jetze

1 Like

What does this mean? Is this a proper ETTR mode? Or something like this crappy Canon Option to enhence DR? A proper ETTR mode would be a killer feature. Because often I simply don\t have the time to make a proper measurement.

Hard to say what is a ‘proper ETTR mode’.

I use this setting nearly always and have far less blown out highlights in my photo’s since. See here for some experiences: Mk III Highlight Weighted Metering - PentaxForums.com

There is more on the Pentax forum when you search for ‘highlight weighted’.

It is not so that I do not have any blown out highlights, f.i. shooting straight into the sun - which I regularly like - still requires some exposure compensating. But generally I am very satisfied.

Hope this helps, further questions welcome of course.

Kind regards, Jetze

If you like I may take some test pictures for you f.i. with center weighted and highlight weighted and share the .dng’s the camera makes.

Sony (‘Highlight Metering’) and Nikon (‘Highlight-weighted metering’) seem to have it.

2 Likes

May I ask, @Popanz, what does this mean for you?

My version…

DSCN4802.NRW.xmp (31,7 KB)

1 Like

A bit classic sharpening module + some diffuse and sharpening. The rest comes through local contrast. In the meantime I reduced classic sharpening and diffuse and sharpen a bit and use capture sharpening on top. Sharpen module and capture shapening have both the advantage that they are not emphasizing noise.

1 Like