Recently, my workflow has been quite generic (meaning I think a lot of people have a similar workflow):
Adjust exposure
Set the auto-pickers for white/black relative exposure in AgX
Do other stuff
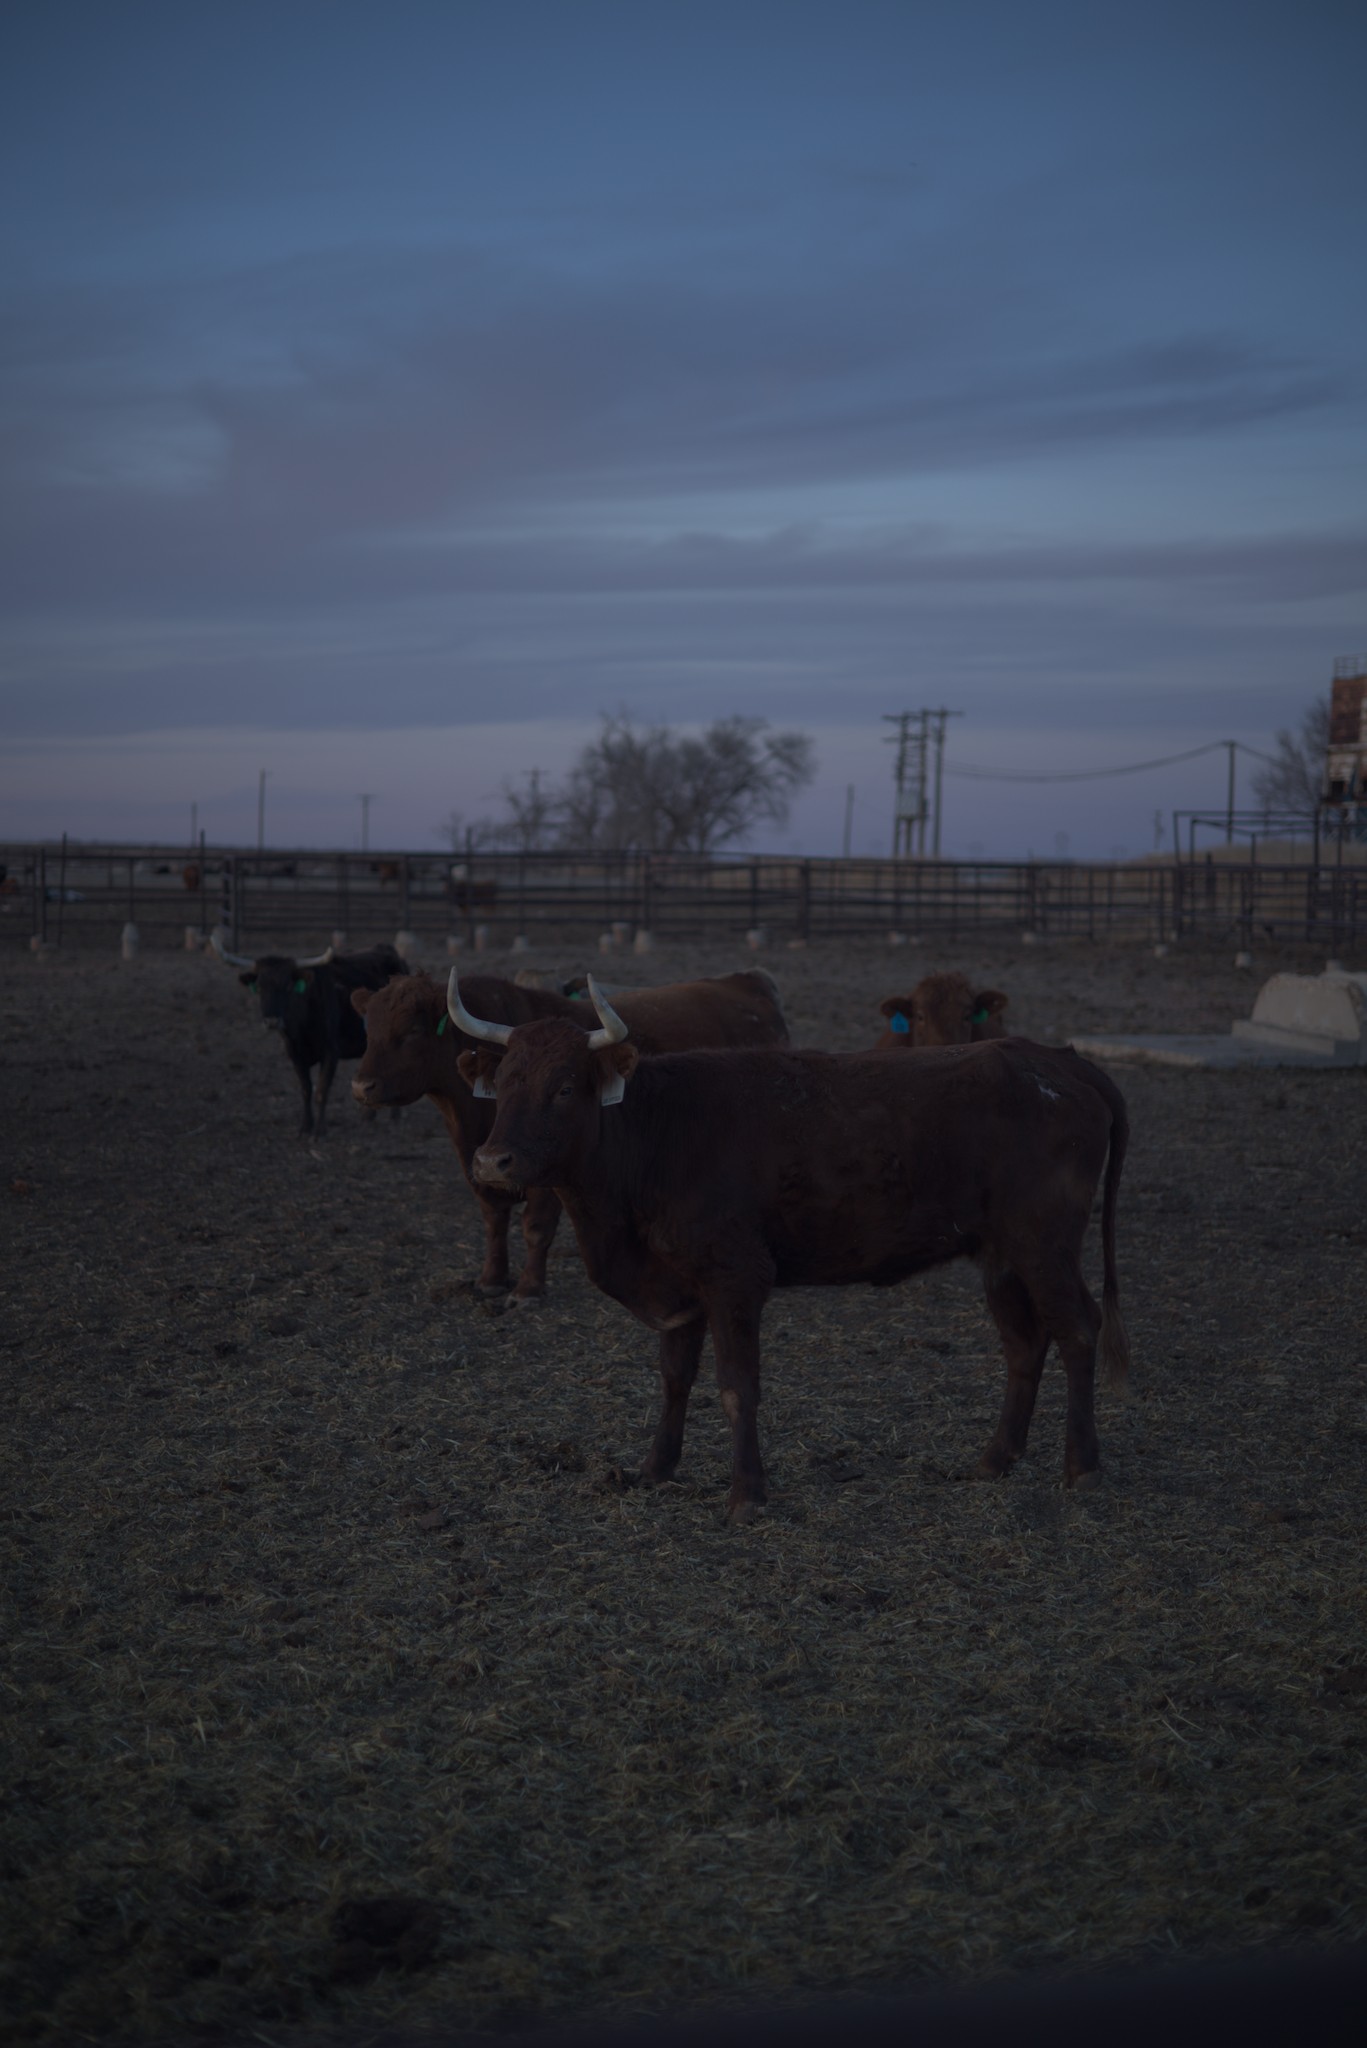
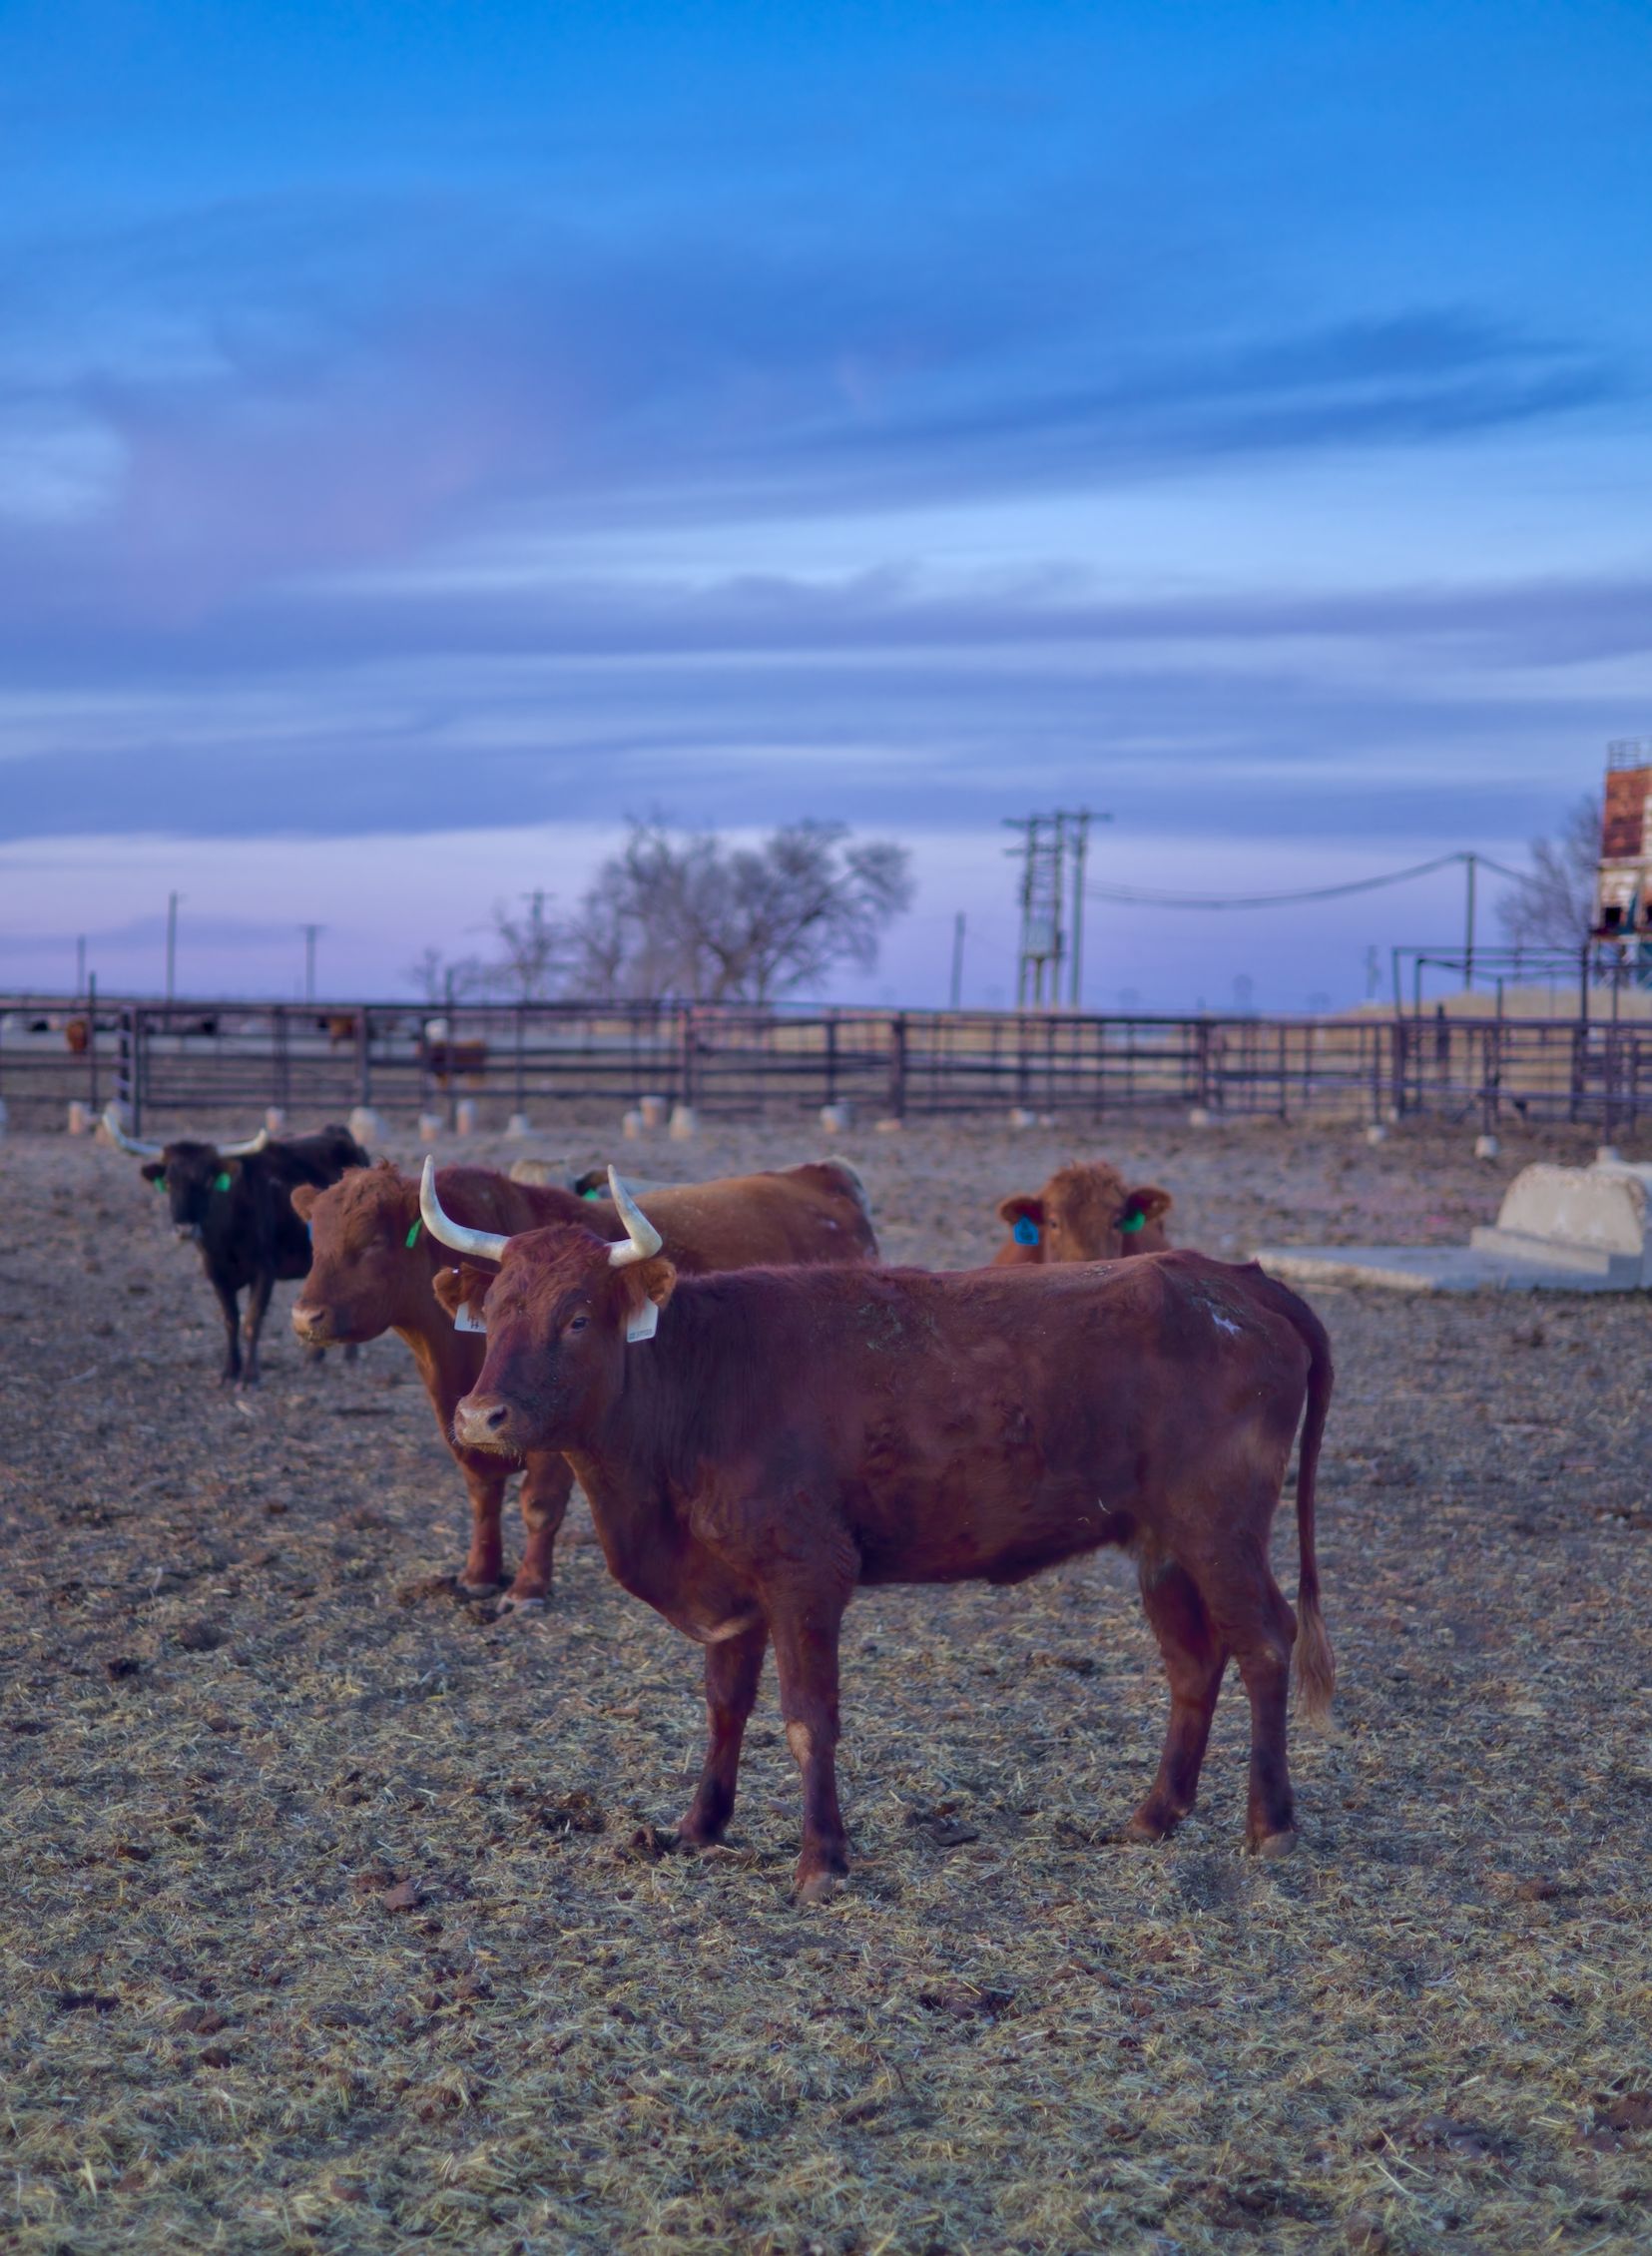
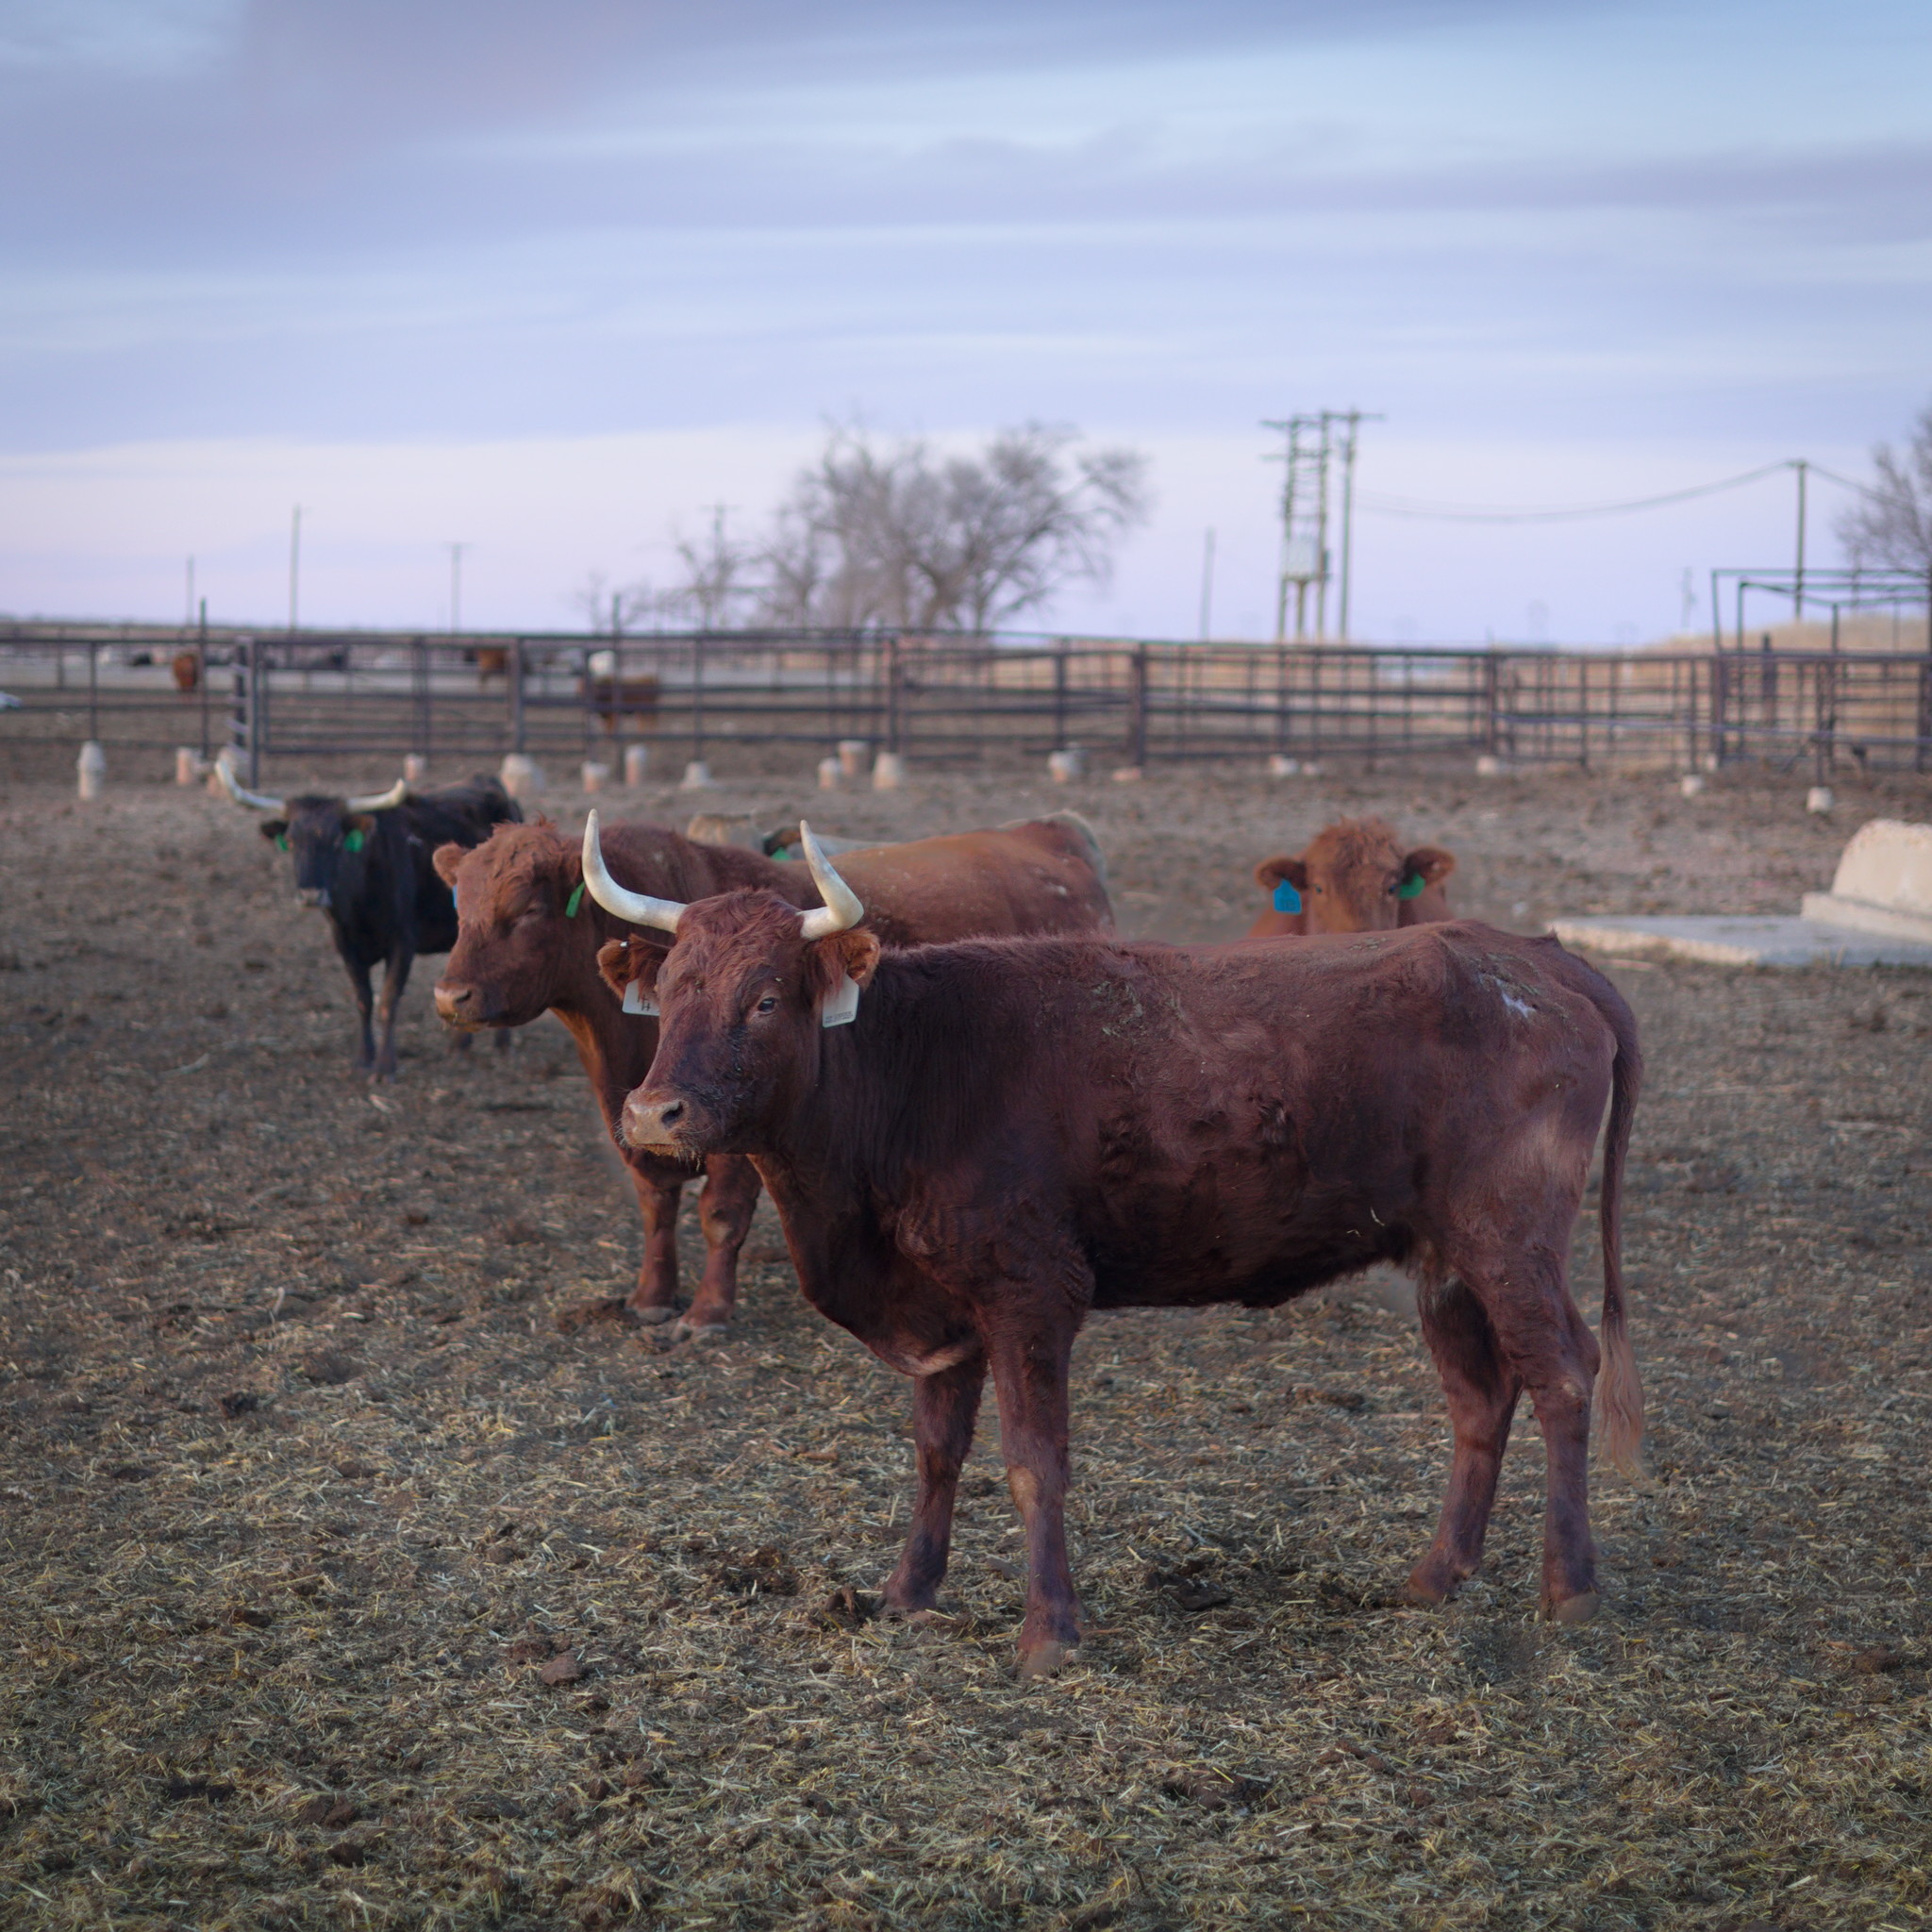
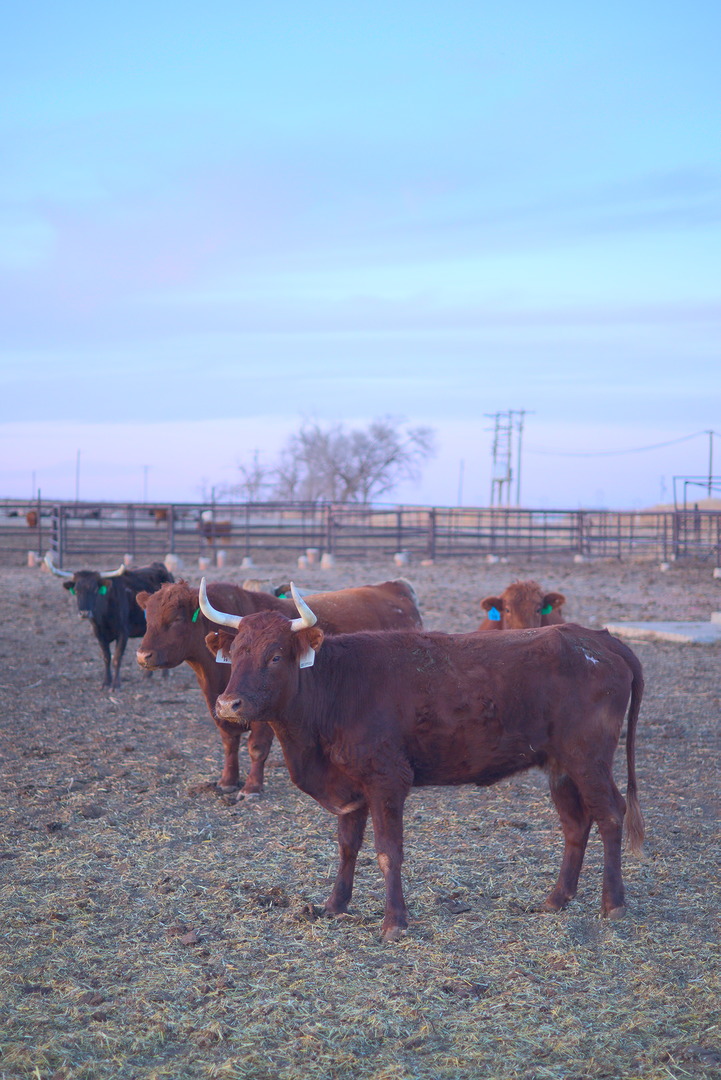
But the above image made me have to think a bit about how I wanted to tackle it. The image has two subjects in my view: the sky and the cow closest to the camera. I have some priorities for the edit:
I want to preserve the contrast and colorfulness of the sky.
I want to brighten the cow so that it reads clearly.
I want the image to look natural. In real life, the sky was nice and colorful, and not very bright (it was almost opposite the sunset). The cows were easy to see (because human eyes are pretty awesome).
I would prefer not to mask the sky or the cows.
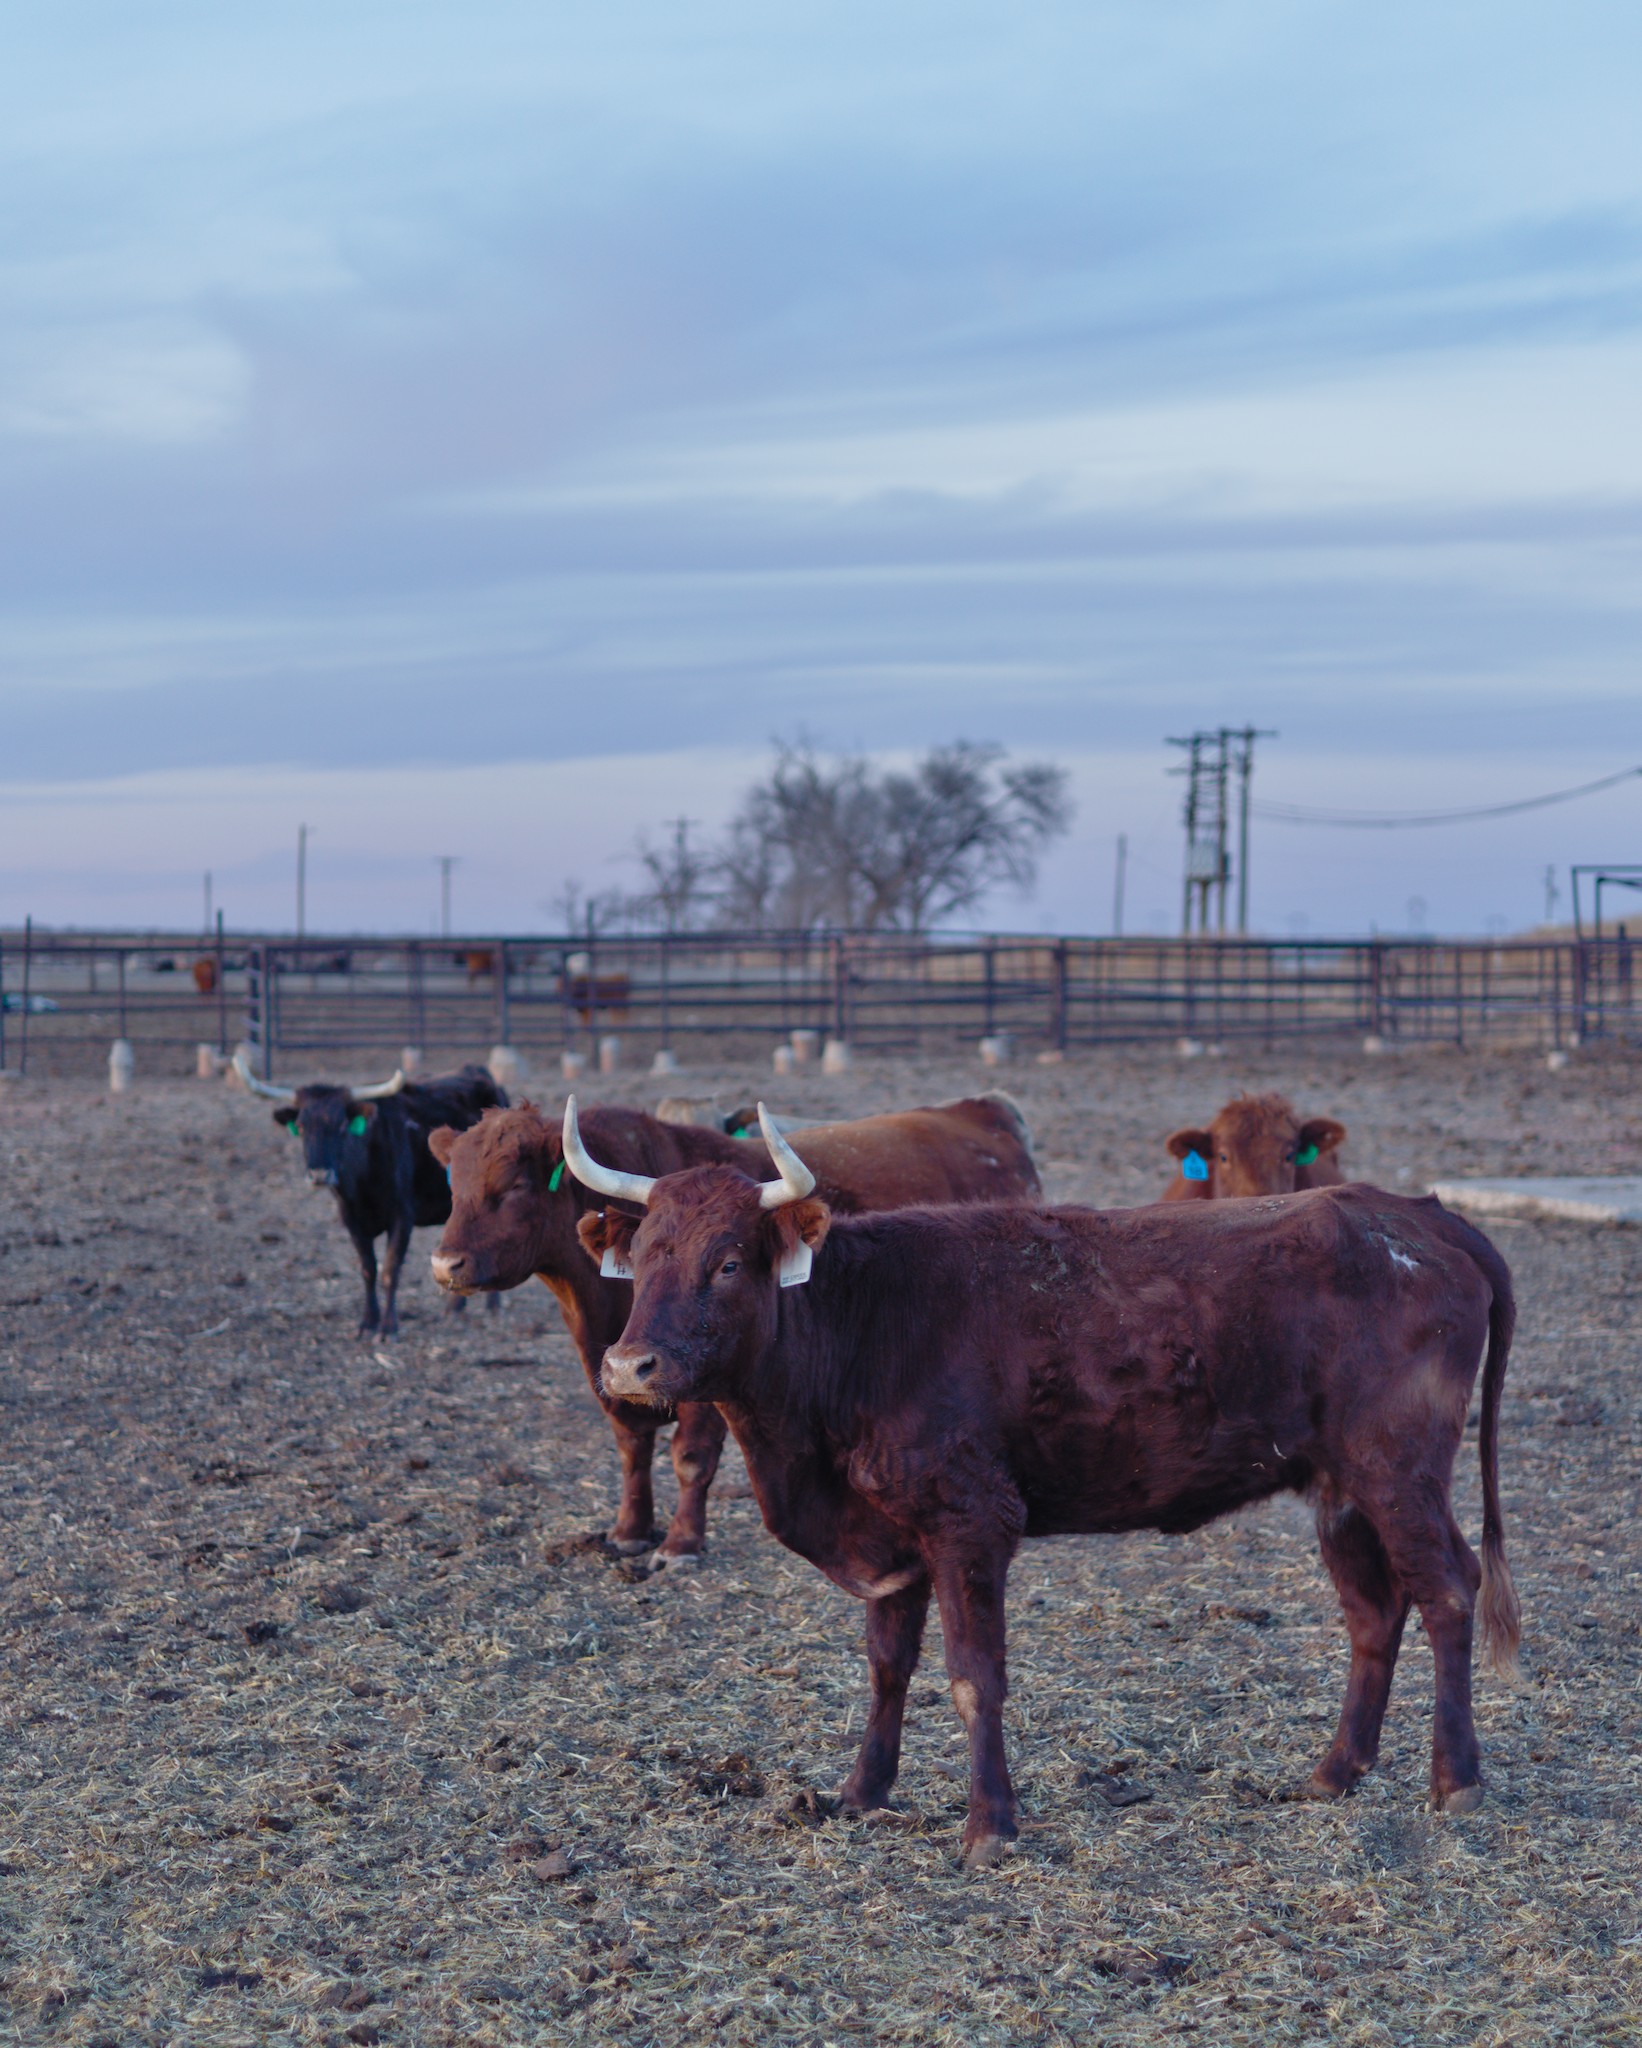
I know that the last one makes things difficult. Of course, we can still use the tone equalizer module to decrease the brightness of the sky, but it feels difficult to balance things properly. Here is my final edit:
I am fairly happy with the way it turned out, but I would love to see some other people try to tackle what I think is a tricky dynamics image. You don’t need to copy this style, but I would love to see how others accomplish an exposure balancing act like this.
Also, if possible, add some explanation to your responses beyond just the xmp so that others can understand the thinking behind the various edit choices you make.
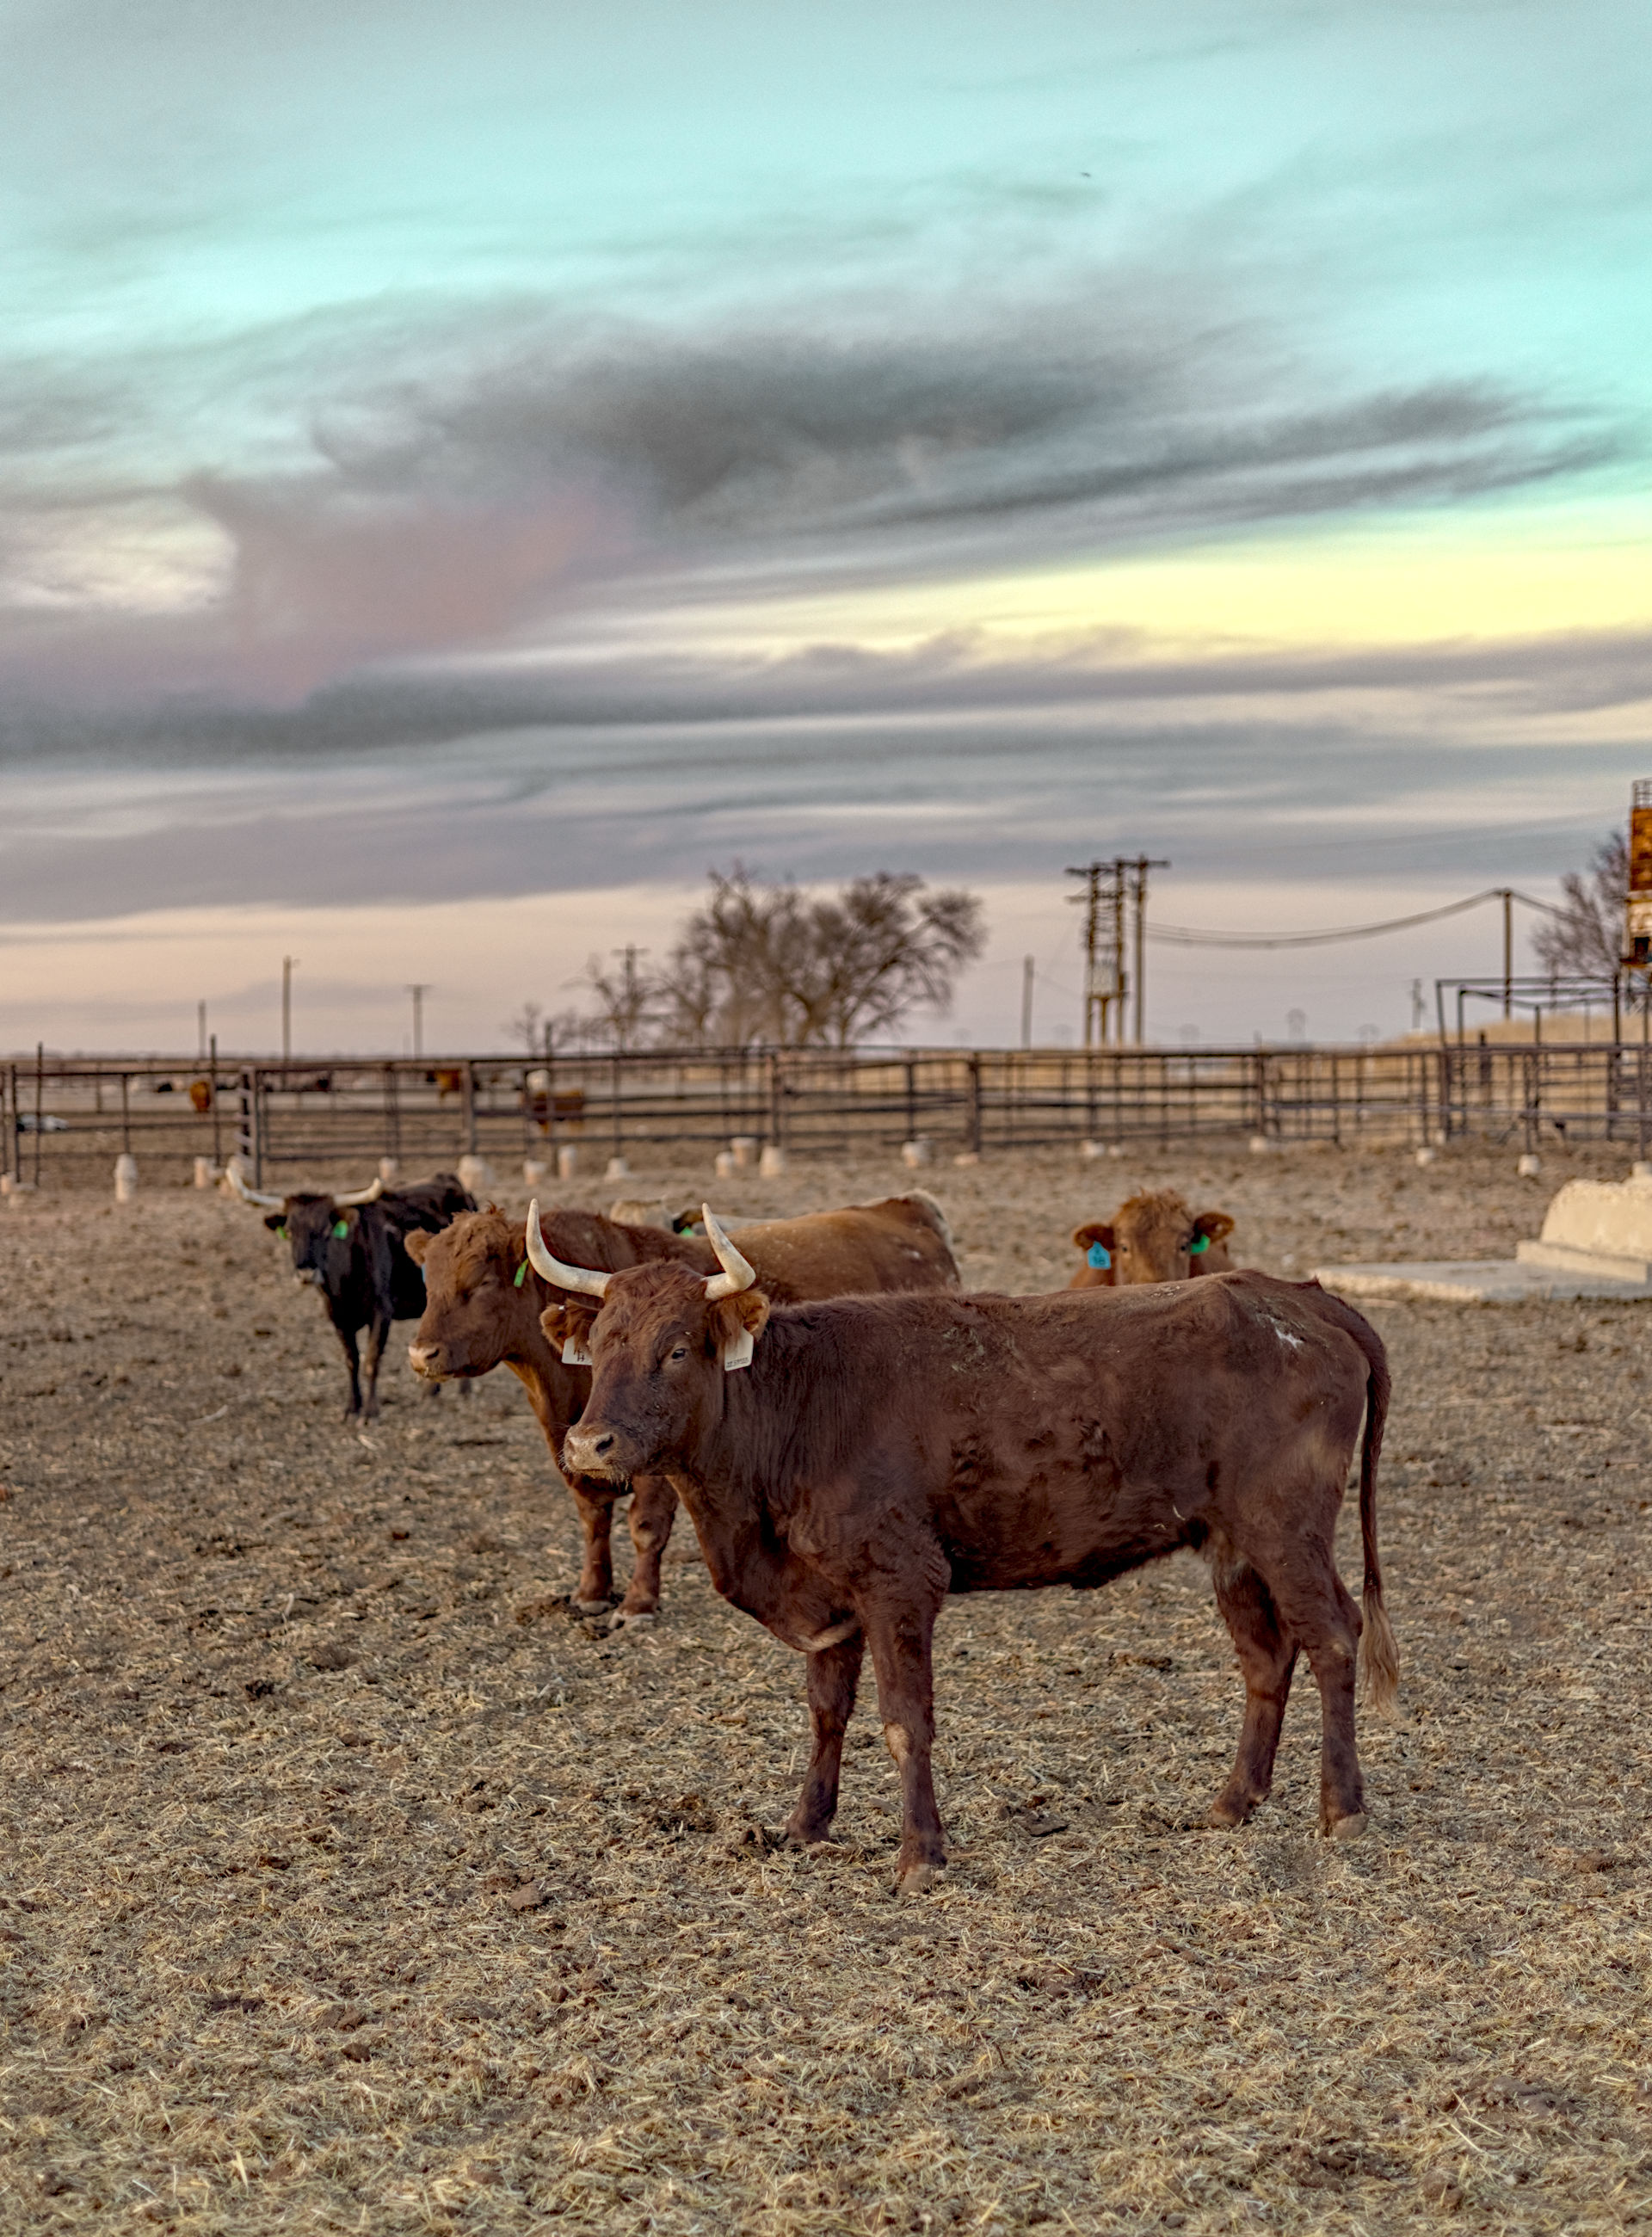
I’ve been liking bright skies of late even if they are not very realistic sometimes. I tired focusing on the cow through saturation, vignette and highlight bloom. Added a bit of yellow/orange tones to simulate late afternoon sun. Besides that I can’t really explain, just went by vibes as usual
Edit: I skipped some of your goals for the image, such as darker sky, no masks, etc, sorry about that Need to read the post better next time. I think no masks is a bit limiting, especially when it comes to vignettes
I gave it a shot…
I ended up with a slightly purple cow, but otherwise tried to keep it as natural as I thought I could.
I always use at least the same 30ish modules, and that might sound like a lot…But I’ve learned to apply them just enough to get the look I want.
I use the local contrast global adjustment first, then I apply whatever AgX changes I’d like (still working on that one…but I use it primarily to set the maximum white and black, and a bit of toning).
Then I’ll use the Color Balance quick access to either add or subtract vibrancy and chroma…I’ve stopped using the global saturation slider unless I can’t get the adjustment using the other two sliders.
After that I’ll use the quick access Exposure slider to get the scene lit how I’d like, then use the Capture Sharpen module to select what part of the scene I think should have the Capture Sharpening applied. In this image I adjusted the contrast sensitivity until it was focused mainly on the cow and the surrounding area.
After that I’ll crop it, then apply the tone EQ to adjust the sky and the cow making minor adjustments. After that I’ll open the full exposure module and make any further exposure adjustments I may wish to see.
Now I use the ColorBalance module to mainly adjust colors and then luminance using both the master (color correction) and the 4 ways tab (increase viewability of color changes). Then I’ll apply Haze removal, chromatic aberration, denoise, hot pixels, annd raw chr. ab. adjustments…mainly out of habit. It only takes a second to activate them, and I see no harm in activating them. With this image I did adjust the denoise to reduce purple in the shadows from my previous adjustments.
Finally, at the end of it all I use the contrast EQ to slightly soften the coarser details with the Luma sliders, then sharpen slightly the edges with the Edge tab sliders…after that I apply a 3 or 4 instance application of Diffuse and Sharpen with 1st and 2nd order biased to the diffuse side, and 3rd and 4th biased to the sharpen side. All anistropy sliders are biased to the right, with the 3rd and 4th order being influenced more heavily. I’ll adjust the edge sensitivity and sharpness after that, then if I need to I’ll apply the luminance masking slider…even though I still don’t know what it does…but things seem to mask out of the image, so I use it
With this one I did go back and apply a color balance rgb radial mask with a detail threshold set to just the foreground cow, and with that I tried to highlight it just a little bit more with the 4 ways tab.
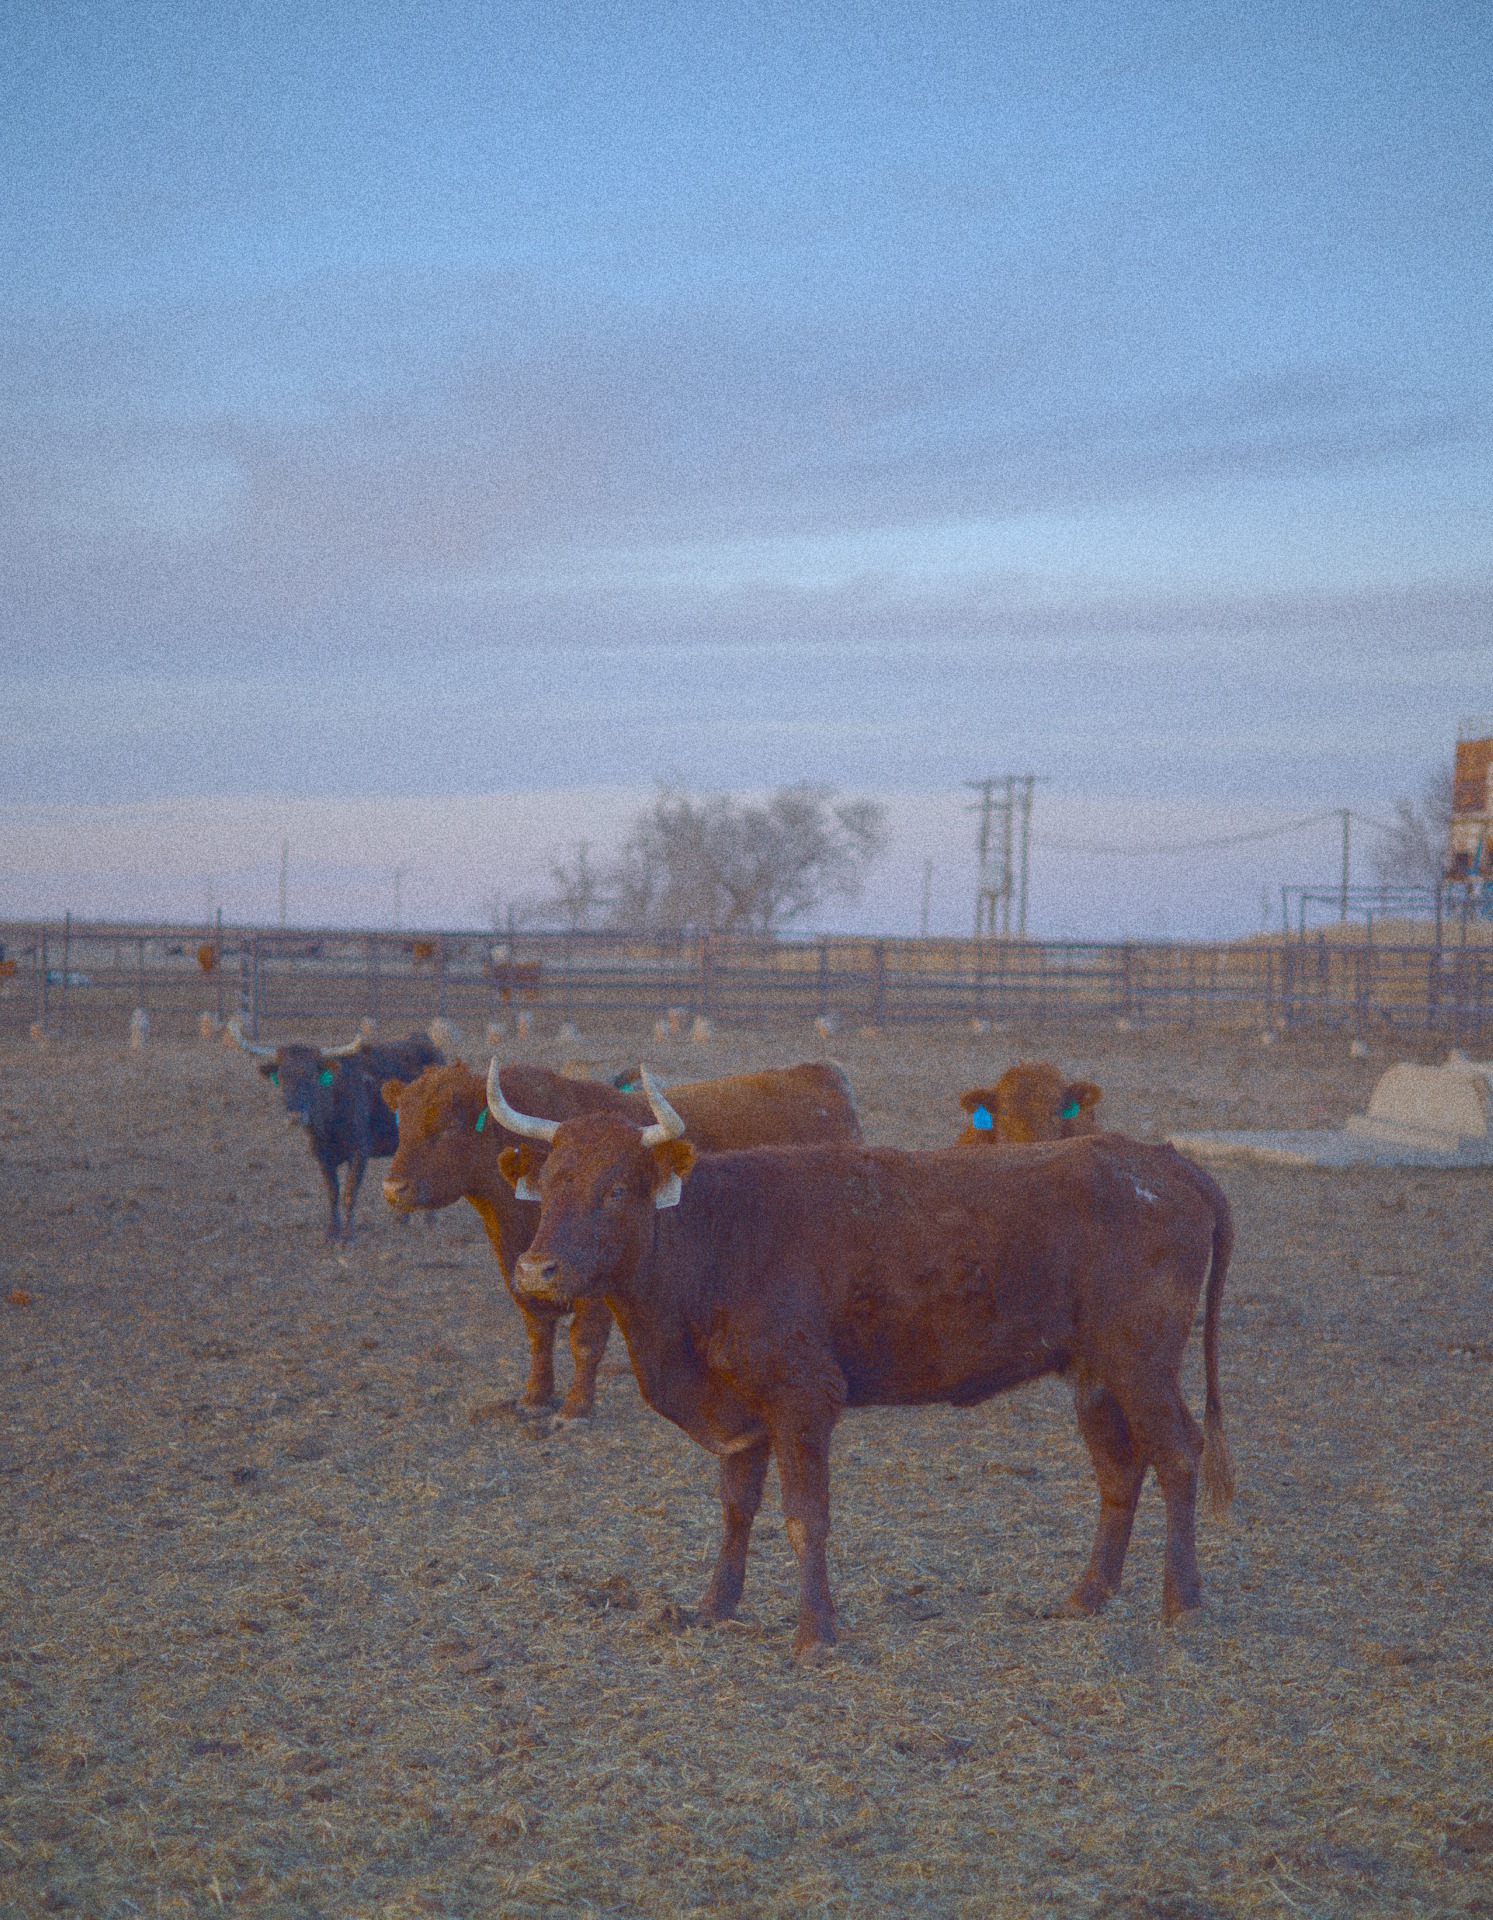
Image is Display P3 so might not work as well on sRGB. I thought ‘Tone Equaliser uses a mask, so I’ll avoid it.’ History is compressed, so doesn’t follow my edit precisely.
Colour Equaliser seems to suggest the nearest bovine is some shade of purple to begin with. Just a result of scene lighting I guess. I’m wondering if the front one looks a little patchy in my edit.
White balance, crop, lens correction (not available?? Left it on anyway to fix vignetting), denoise.
Started with Exposure, filling the screen dynamic range.
Went straight to Colour Equaliser to bring the sky and cow together in lightness and increase saturation. (They’re slightly different colours which makes them suitable for this)
Went to CB RGB to increase saturation again, and to bring back brightness lost in Colour Equaliser.
Added some local contrast with DorS and Contrast Equaliser (masks used here to avoid crushing darker values).
After that I went to AgX; it eliminates some cyan clipping in the sky. Lost some contrast in the sky and gained some brightness in the cow with AgX.
There’s an optional CB RGB instance I added afterwards that darkens the sky a bit more, so AgX does less desaturation. Again, masked on brightness to avoid darker values (which is still everything but the sky)
Edit: Didn’t like the result so I fixed the purple-ness in Colour Equaliser and brightness in CB RGB.
I used Filmulator for this because… this is why I made it, quick handling of dynamic range.
The exposure settings were easy: +1.5 exposure comp to brighten, 100 drama to reduce global contrast, white clipping point 0.3175 and shadow brightness reduced to 150 to boost the overall contrast at the end.
The harder part was properly leveling the image, and selecting a crop. I chose to have the horizon at the exact center to emphasize the perspective of the cow heads.
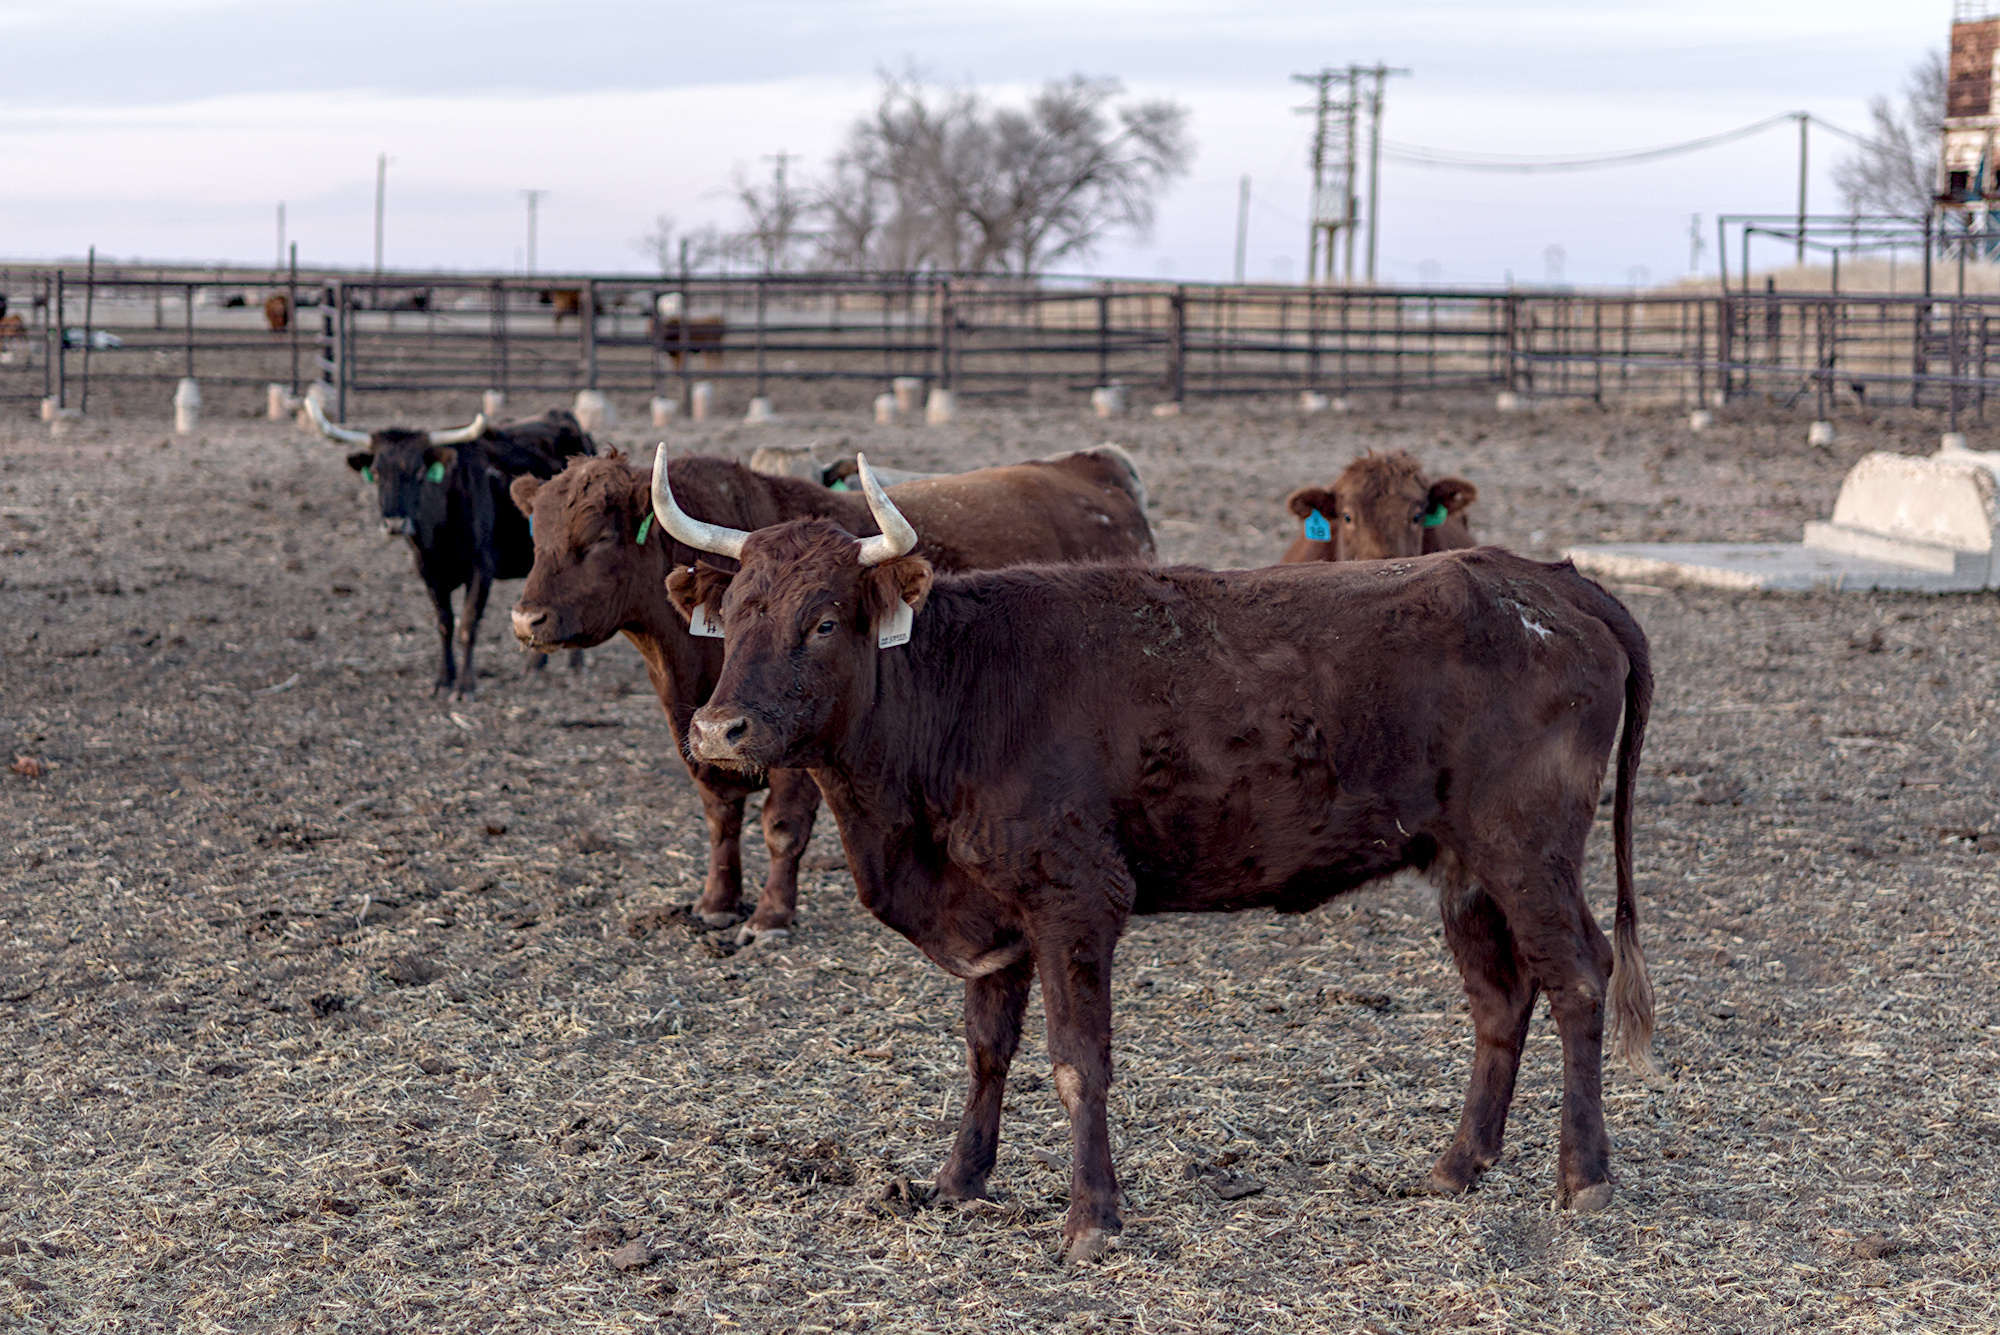
Here is my simple edit. I was shocked by how much lens correction changes the brightness of this picture in DT. I have never experienced such a level of change before.
I notice that with this image and previous images that you tend to expose to the dark side. I have a Canon R7 and I find I get best results for noise if I expose to the brightest image without clipping the highlights. I often bracket exposures and find that the brightest image at 32000 ISO has less noise than darker images with lower ISO value. With my Canon R7 under exposure is the biggest cause of noise, not the ISO. I wonder if the same holds true for your R6 or if the sensor behaves differently to my R7.
I think I have managed that part, using RT 5.12-318 dev, with a global spot to tone map using Michaelis-Menten tool (with some adjustment), and a fair bit of CAM16 colour lightness, chroma and contrast adjustment.
This graph is measuring dynamic range. I am doing direct visual comparisons of images for noise by comparing bracketed shots.
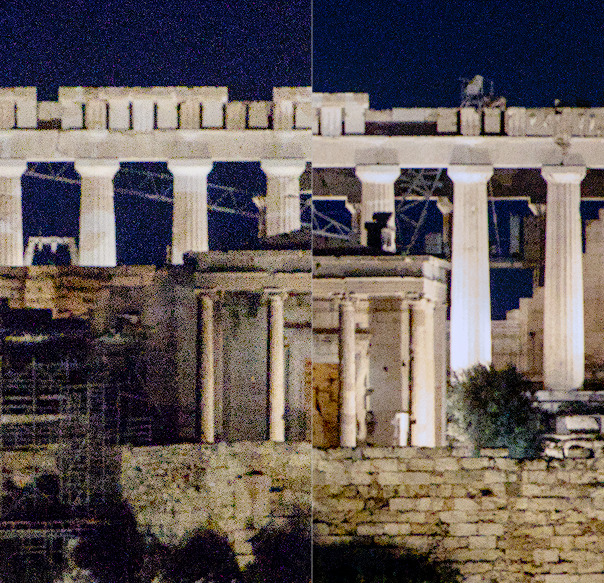
With this screen shot the one on the left is 10000 ISO and underexposed compared to the 32000 ISO on the right. The left has a shutter speed of 1/100th and the right has 1/30th. Demonstrating exposing to the right reduces noise with this sensor even if a higher ISO is used.
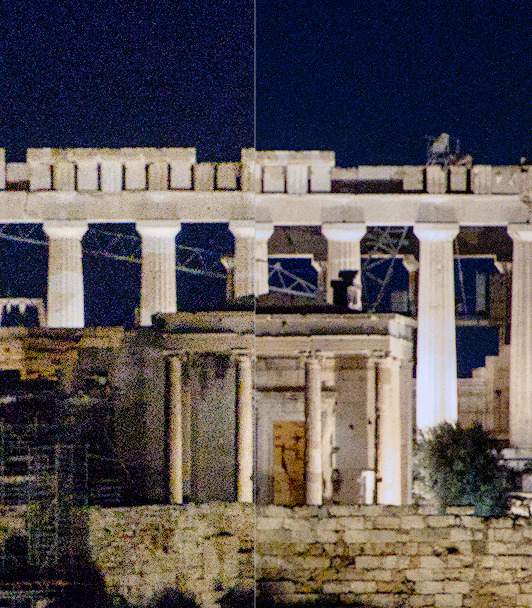
With this second screen shot both images were shot at 32000 ISO but the exposure difference between the two is +1.67 EV for the one on the right. Demonstrating that a brighter exposure reduces noise for the same ISO.
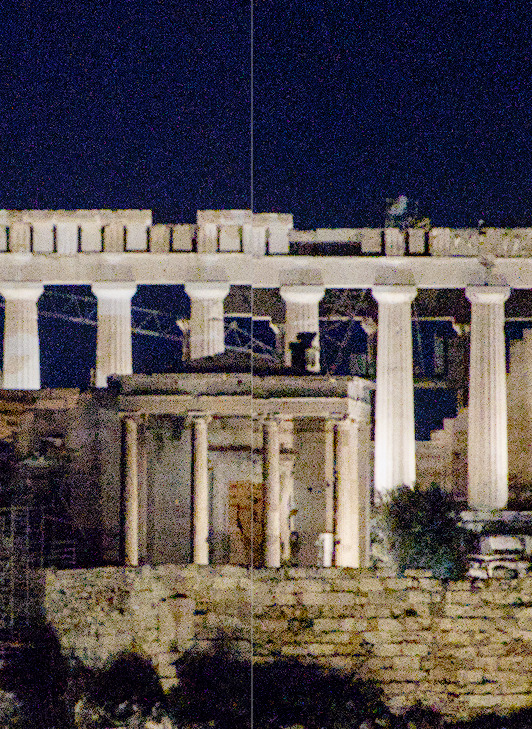
In this third comparison both shots have the same shutter speed and aperture but ISO is 10000 on the left and 32000 on the right. The noise is marginally less at 32000
The graph isn’t measuring dynamic range. The graph is measuring how much the noise is reduced by increasing the ISO at the same shutter speed and aperture and scene brightness, which is what your third comparison demonstrates.
Going to the source and looking at the graph it does show that with the R6 there is noise reduction for ISO 1273 and lower compared to higher ISOs. However, for the R7 no noise reduction is shown for any ISO.
Not trying to be combative here. I am just sharing my experiences with my Canon R7. With my R7 under exposure is a bigger source of noise than ISO.