Source Image: .DNG File, no data clipped according to histogram and RAW clipping indicator in DT.
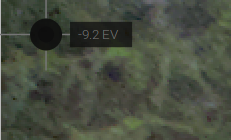
Töne Equalizer: Applying adjusted mask (mask is not clipping). Mouse hovering over deep Shadow indicates -15.x EV. TE will not lift this shadow area whatsoever. In masking-view the area appears as completely black.
What ist wrong here and how how can I make this work?
Before I had applied color calibration, exposure and filmic. For masking I always adjust the mask-histogram to spread out as wide as possible without clipping.
I think you will need to provide the image…and sidecar…guessing but your mask is not your histogram so you don’t match them up in any direct way…just pull the mask way over to the right until lots of the shadow area is on the mask histogram using the exposure comp in the TE and re-try…Also different norms help…try RGB sum and reconstruct the mask…
What @priort said , having the image will help.
Try not to adjust the mask so that the entire image ‘fits’ in it , but only focus on the shadow region . Move the exposure comp down far enough so the whole shadow region is in the -7ev to -1rv range or something .
But if your working with dark regions like that , is raising exposure not the first thing to do ?
I mostly use tone equalizer to tone down extreme highlights if filmic’s rolloff doesn’t bring nice results , and maybe s little nudge here and there on darker regions .
Did you check that the detail you are looking for is even in the file ? By disabling filmic (temporary) and just raising exposure a lot you can at least have a look at what is in the file.
But most often my little rule in Darktable is to raise exposure more instead of lifting shadows . Middle grey needs to be middle grey first.
1 Like
Tone EQ only works on mask values between 0 EV and -8 EV. If the value of the mask covering an area that you want to modify is outside those limits, your settings are wrong. Reduce mask contrast compensation and/or modify mask exposure compensation.
When you say ‘mask is not clipping’, do you mean you don’t see orange markers on the outline under mask post-processing, like this?

That does not necessarily mean there is no ‘clipping’. (BTW, the mask is not clipped, it just cannot be adjusted if it’s outside the range. The -8 EV value is used for anything darker than that value, the 0 EV setting for anything brighter, but no adjustments may be done on the UI when hovering over the image.) For example, if I raise the contrast, the outline will still show no warning:

but the mask will have areas under -8 EV - see the spike directly on the left side:
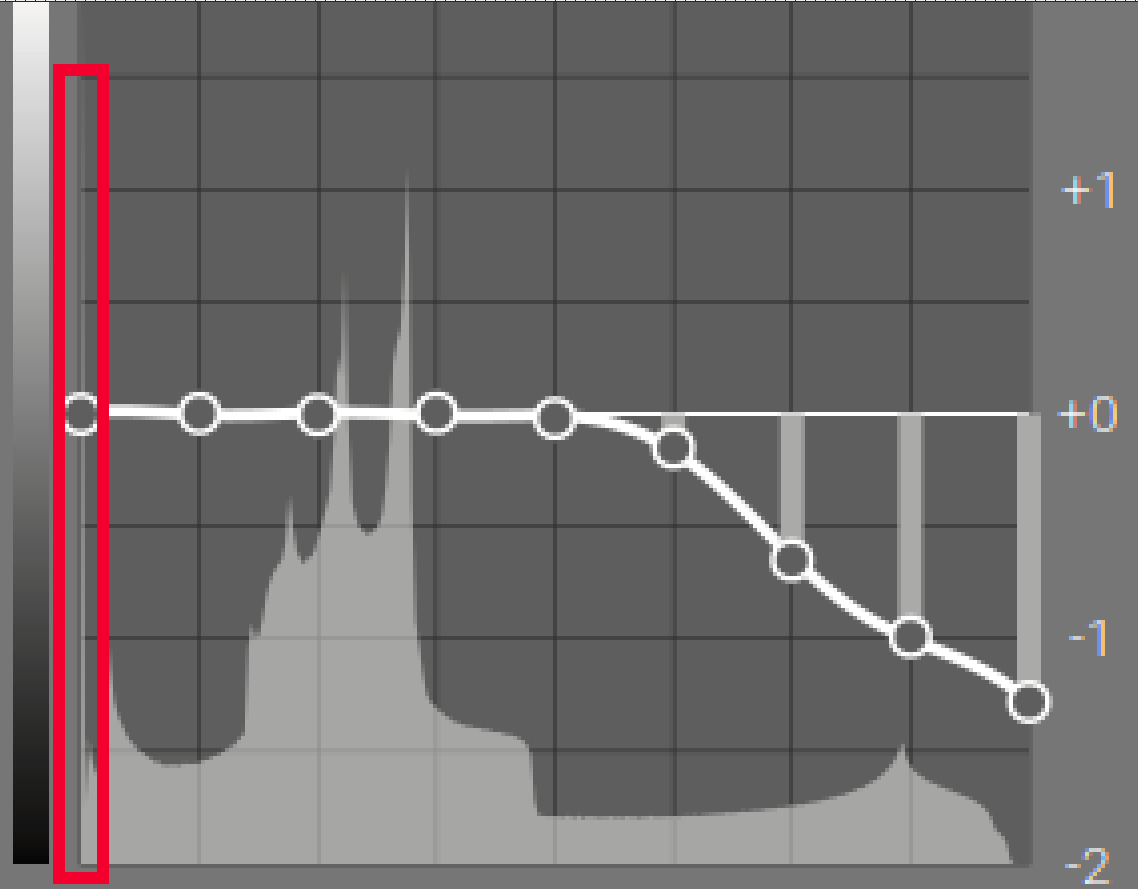
Here is an area I wouldn’t be able to adjust using tone EQ, because it’s below -8 EV:
The docs say the grey area represents the middle 80% of the tonal range:
a gray bar under the “mask post processing” label displays a representation of the middle 80% of the histogram. By using the controls in this tab to center and spread out this gray bar, you can expect to have a nicely shaped histogram when you return to the “advanced” tab. If you see orange at either end of the gray bar, this means that part of the histogram is outside of the 9 EV range of the mask, and needs to be further adjusted.
You’ll only see the orange markers if a substantial portion of the mask is outside the range (the darkest 10% is below -7.9 EV and/or the brightest 10% is above -0.1 EV):
Okay, I’ll try that. Thank you!
Wow! What alot of information! Thank you! It surely will help.
Usually I apply 2 or more instances of TE, following filmic RGB.
- Pulling down Highlights
- Adding contrast to Highlights
- Modifying general contrast
I think, because of what I read here, I’ll need to return to the masking Procedere and study that all over again. I think, there is some misunderstanding in my side, that I need to get out of the way first. I still find this module quite complex and hard to understand.
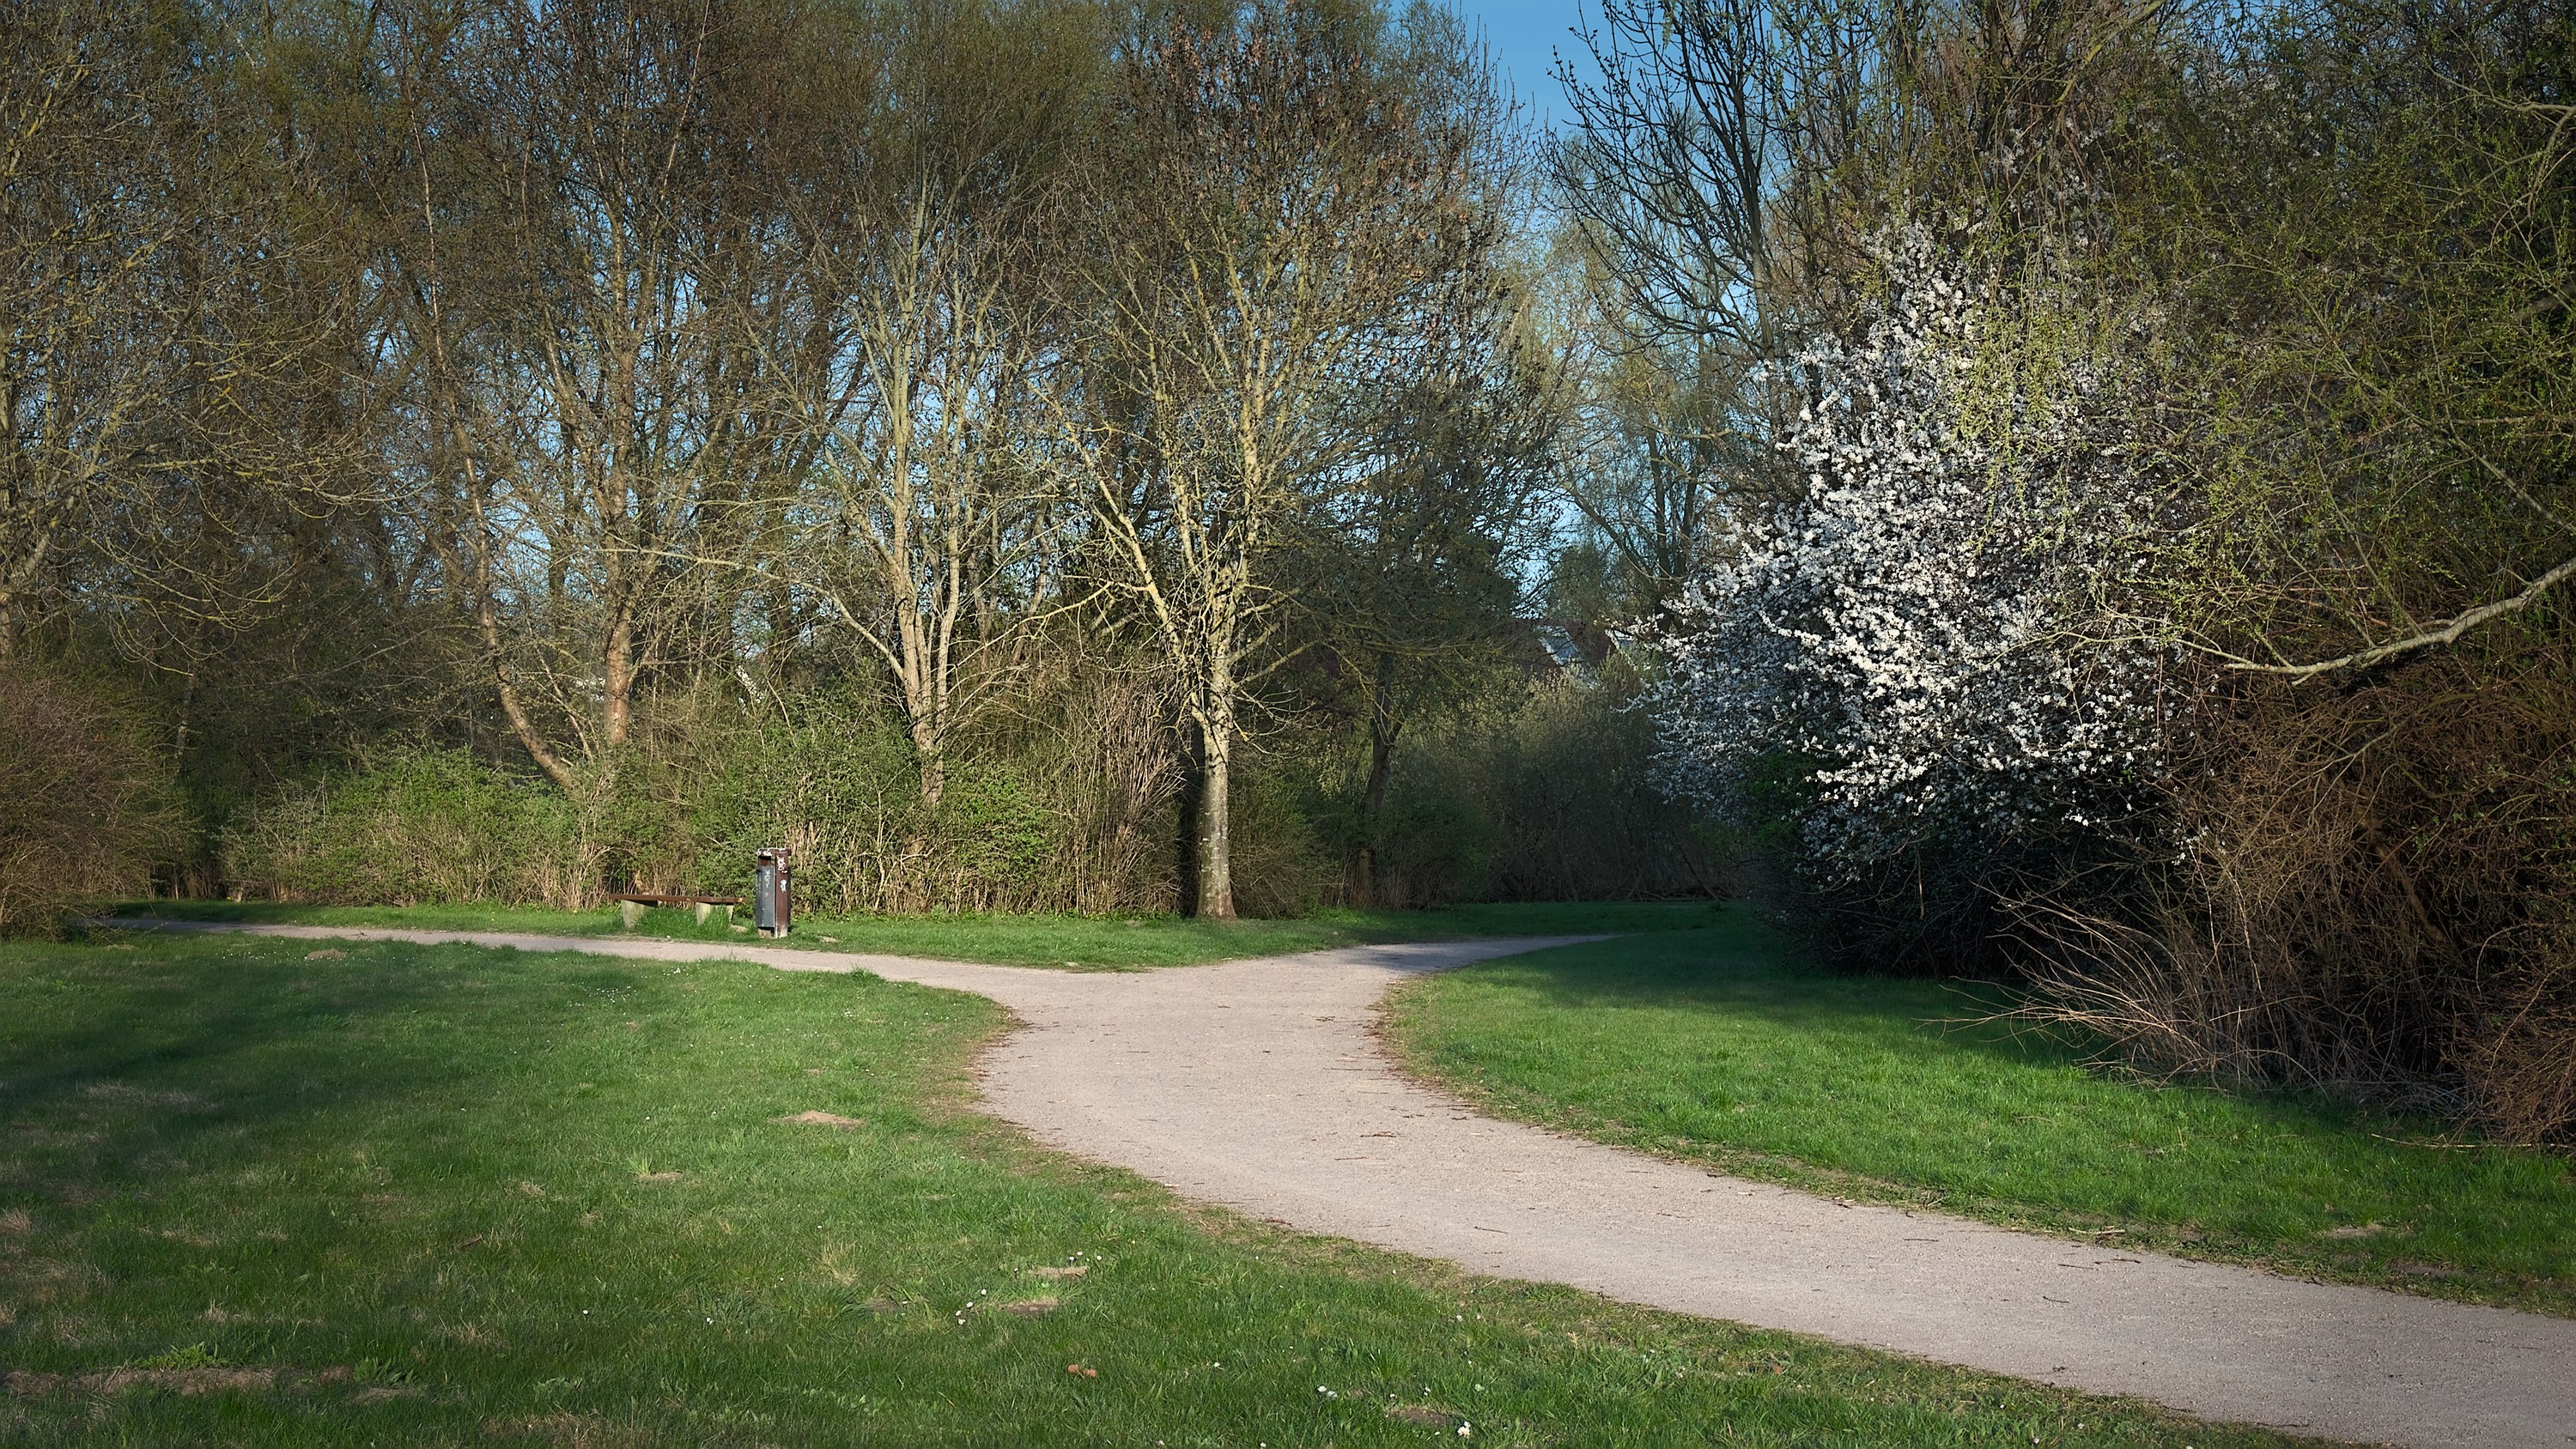
Btw: the overall exposure was fine. May be, I should have paid more attention to that dark area inside and under the bushes. I could try opening up the black in filmic RGB and see, what happens.
If you posted that picture, either here, or as a separate PlayRaw, we could post our processing approaches, which you could then review.
1 Like
This is my end-result, but it is just a quick test image, so don’t expect any great Art😅. The RAW Image will follow within a short time…thanx for your great Support!
Thanks for sharing…it is always interesting when you see what people do with the edits and there is always something to learn…I suspect if this is the same image you were trying to lift those shadows near the flowering tree??
Correct, and after finishing the Kitchen😅 I will Upload the RAW Image.
1 Like
_IMG3389.DNG.xmp (32.9 KB)
_IMG3389.DNG (33.2 MB)
I’m glad someone asked this question, as I have been seeing the same issue on many photos!
And thanks for the explanations as I had not registered that the Tone Equalizer mask only covers an 8EV range. If I use the auto-adjust options for mask exposure compensation, and then mask contrast compensation, very often dark shadows will show as -15EV - for exactly the reasons that Kofa states.
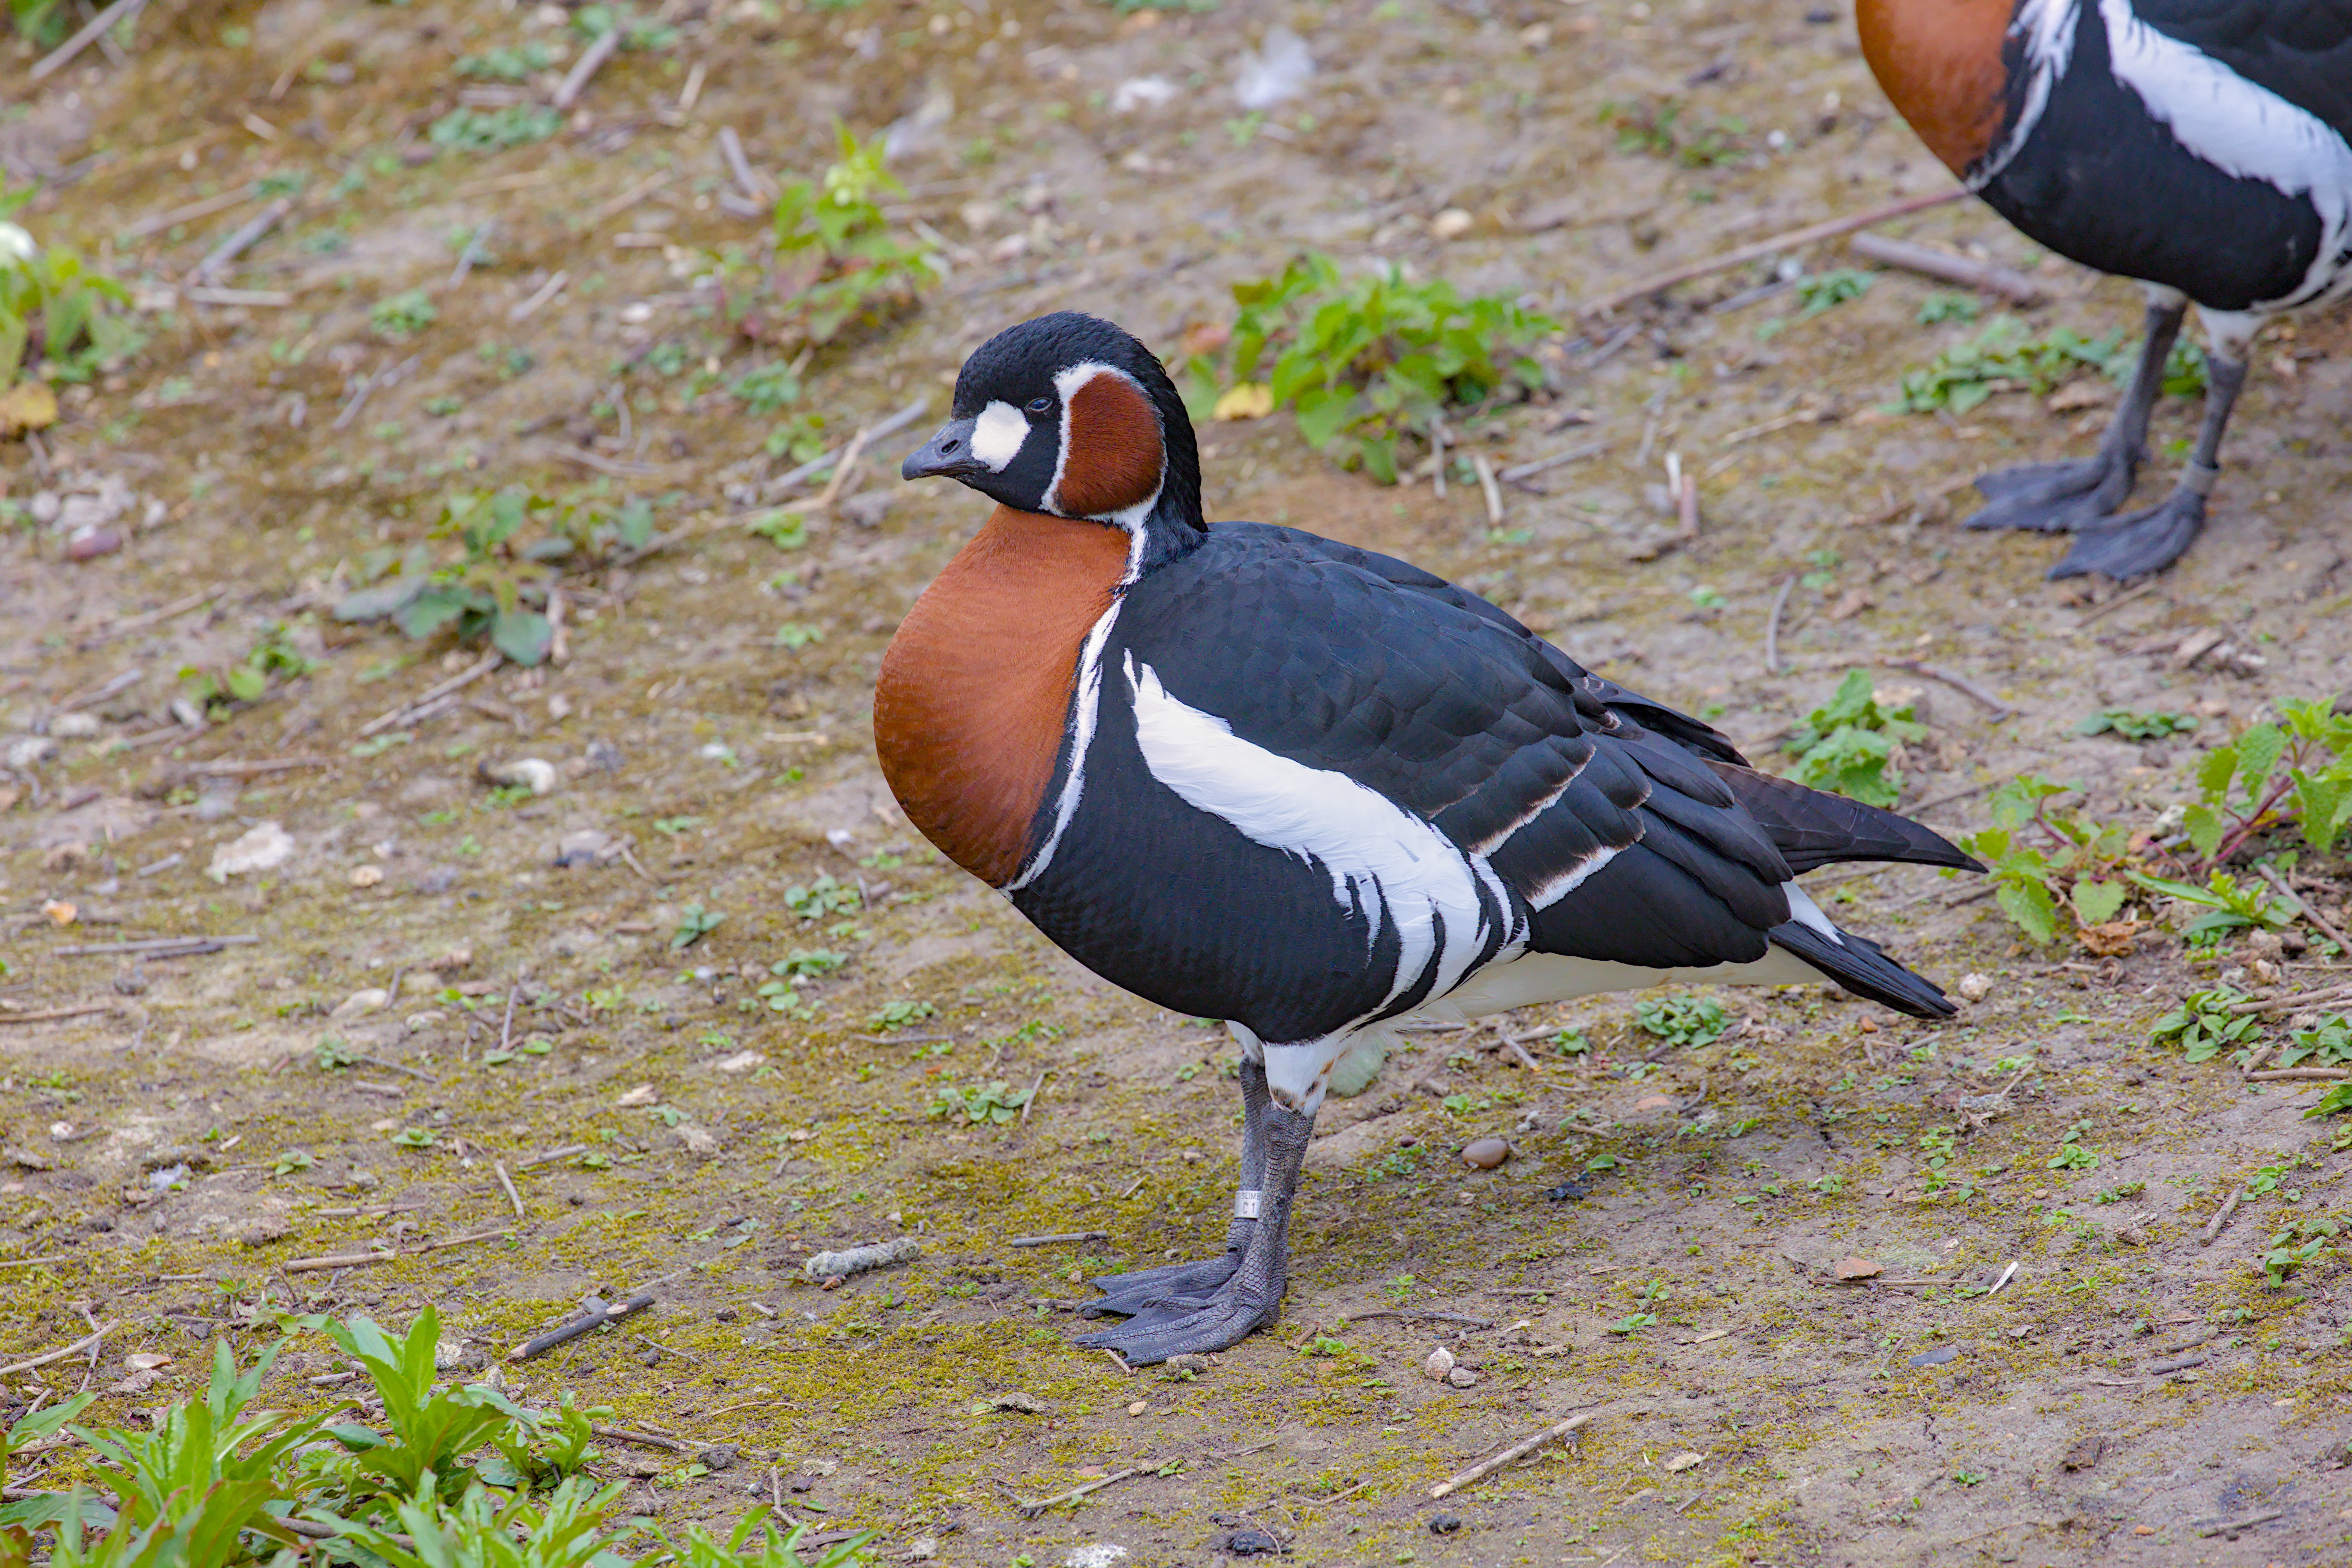
As an example, here is an image of a Red-breasted Goose taken at the weekend in a wetland park in London. It’s part of a collection of waterfowl from round the world so it has clipped wings to keep it inside its designated area - and therefore you can get good close up photos. (I’d prefer to photo the bird in the wild, but its basically an arctic bird that winters in Ukraine so not much chance there)
The sun was clouded over for this shot, so the overall contrast is weak, but its a black and white bird, so there is still a big exposure range, and worse the white feathers are clipping.
Auto mask adjustments with the TE “magic wands” will show the dark feathers at -15EV
With a better of selective masking and Tone Equalizer, I can get detail in the dark feathers, and some highlight recovery, but even Highlight reconstruction with guided laplacians struggles here.
ER6_3357.CR3 (27.8 MB)
ER6_3357.CR3.xmp (13.0 KB)

These files are licensed Creative Commons, By-Attribution Non-commercial.
Are you using multiple TE instances?? That can be useful…
No special tricks here. Just careful use of filmic reconstruction and not using the highlight reconstruction module (or in mode “reconstruct in Lch”) to remove as little information as possible. No selective masking, just make sure the tone equaliser mask is about correct for the zones you want to change (here: not clipping in the blacks)
But for the top of the white band on the wing, there’s not much you can do: at the best of times it’s a low contrast area, and it has at least two hard clipped channels.
Also, you only have so many levels to play with, you can either go for general contrast in the midtones (compressing the highlight and shadow detail) or for more detail in shadows and highlights (lowering overall contrast). Adding local contrast only helps up to a point. Personally, I often prefer somewhat less global contrast and better detail, but that’s a matter of taste (and also depends on the subject).
If you are using filmic also be sure to try color preservation at none. I find it can exaggerate issues in highlight areas with blown channels making them harder to correct
Yes I was using multiple TE instances, but I had filmic color preservation on MaxRGB. Much better for the white feathers to turn color preservation off - I’ll add that to my tips and tricks list.
You can see how each mode shifts the color channels by looking at the histogram and cycling them. I find that setting it to no produces less shift and thus less impact on those extreme highlight areas that seem to get exaggerated as one or more channels can be weak or clipped.
You can also reduce filmic contrast to say 1 and use almost a linear filmic curve or at least shift the latitude section towards the shadows and you might squeeze a bit more out of the highlights