Understanding how wavelets are used in the diffuse or sharpen module

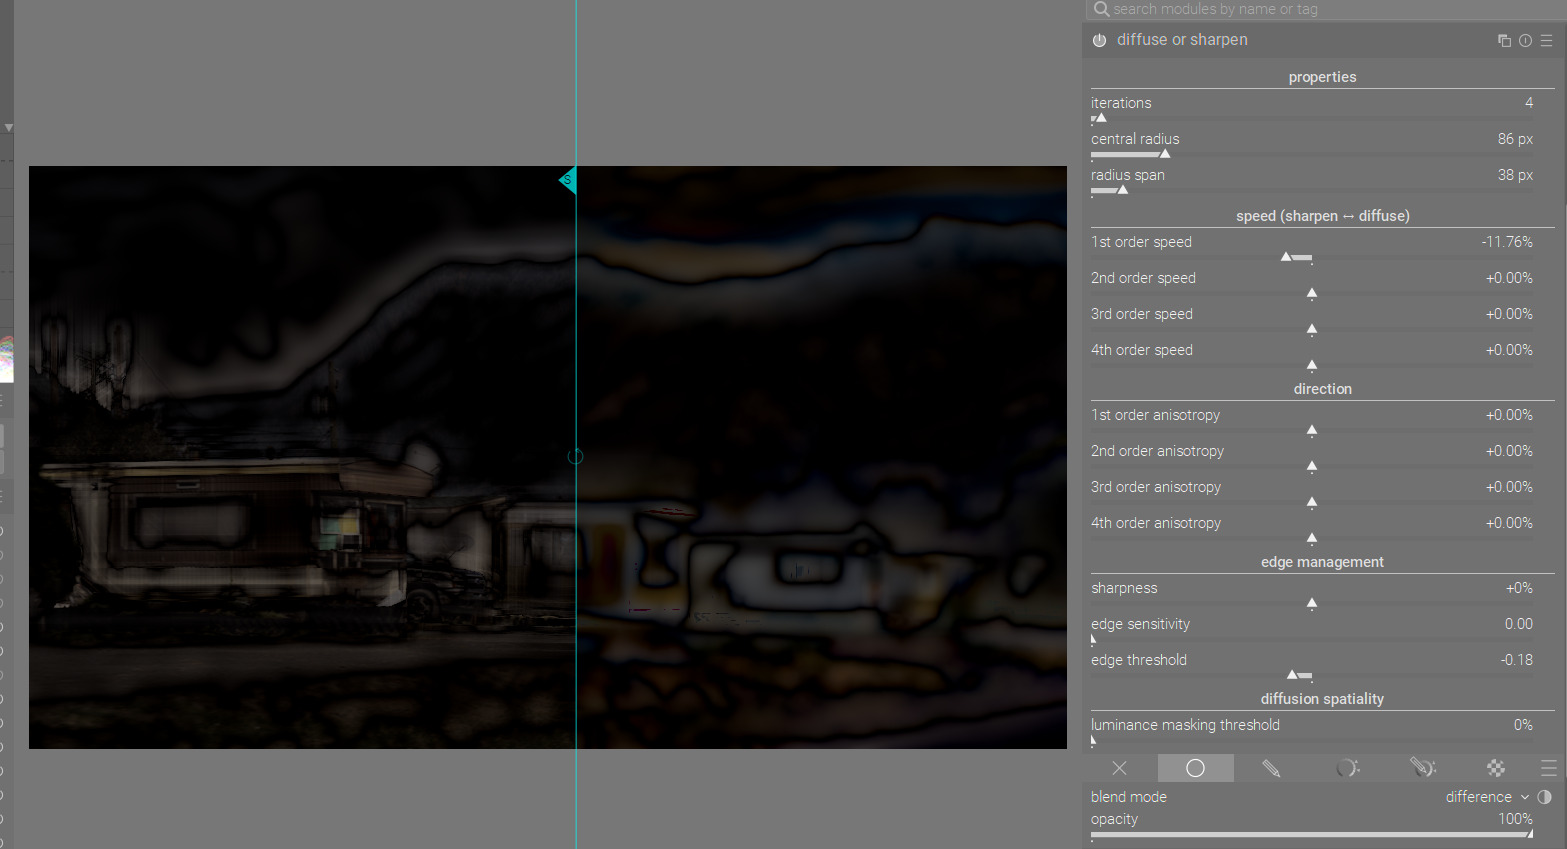
I understand the contrast equalizer module and wavelets (also found in the retouch module), so I’m trying to apply this knowledge to the diffuse/sharpen module. This is what the manual says:

"Scale: Here, we fast-track things a bit to save time and reuse the multi-scale wavelets scheme from the contrast equalizer module, so that we can diffuse at different scales. The maximal scale of diffusion is defined by the radius span parameter.

Regardless of the diffusion, a sharpness parameter allows you to increase or decrease the details at each scale, much like the spline controls of the contrast equalizer. Along with the edge sensitivity slider, this provides the same features as the contrast equalizer module (luma and edges tabs) but in a scene-referred RGB space."

As the manual indicates, the same features as the contrast equalizer module should be available in the diffuse and sharpen module, but I’m having trouble finding the equivalents.

Specifically, I want to find the equivalents for the 6 nodes on the Luma section of the contrast equalizer, with the far left one acting on the coarsest wavelet scale, and the far right acting on the finest wavelet scale. Or, if we use the retouch module as an example, I’m looking for the equivalent of creating x number of scales using wavelet decompose.

On the one hand, the “speed” sliders in the D&S module work on the different scales (low frequency and high frequency); and on the other hand, the manual text above says that the “radius span” parameter defines the maximal scale, and the sharpness parameter increases or decreases the details at each scale.

It’s all a bit baffling as to how we can recreate the nodes on the contrast equalizer in the D&S module.

I have experimented a lot, and although I have managed to produce the effects I want, it hasn’t got me any closer to really understanding the module and applying my knowledge of wavelets to the module.

Is the “radius span” slider analogous to the central line of the contrast eq module? And different settings along that slider would create nodes similar to the contrast equalizer? And if so, where do the speed, sharpness, and central radius sliders come into the equation?

I know many of you just use the presets, but my interest here is more about properly understanding the module rather than just getting the effects I want. To make things simple, can anyone explain how they would go about creating the far left contrast eq luma node and far right one? (I can fill in the rest :slight_smile: )

To me if I recall you have one node you pick the scale so you set that with the radius and span sets a sort of range +/- and then think of that as being like the circle that you create in the contrast eq but you position it for a single adjustment there…you don’t have 6 nodes…

@nwinspeare explains it pretty well… https://www.youtube.com/watch?v=DV8eey79ukc

He explains it in even more detail here…

1 Like

I know you don’t have 6 nodes with the d&S module, but I’m thinking you should be able to recreate each one of them separately when you know what you’re doing.

I have watched a lot of Nicholas’s videos but I think I missed this one. Not sure if he’s still updating the channel now either. I’ll give this a watch and see if it fills in the missing gaps I have. Thanks!

Given the analogy provided so then approximately 0 radius is fine and 512 is coarse and you would divide the 512 by 6 and at those intervals you would have something like those nodes and setting the span would be like expanding or shrinking the circle of impact as you do in the contrast eq sort of but the sliders seem also to impact levels of detail scale (frequency) so I am not sure if you can set up a one to one conversion as you are suggesting…

Yes, that was what I was thinking as well, but I’m not sure that a central radius of 512 pixels in the d&s module corresponds to the furthest left node in the contrast equalizer module. In my tests, it seems to extend much further.

What I did for the test was push up just the furthest left node of the contrast eq, with the smallest width I could get, then blend the image in difference mode to see the detail levels. I then took a snapshot and played with the radius sliders in the d&S module to get a similar effect.

The snapshot on the left is the contrast eq and the one on the right is the d&s module.

As you can see from the screenshot, I only needed to get the central radius up to 86px to be working on the same level of detail as the contrast eq.

So, this might suggest that we would divide 86 by 6 to get the equivalent nodes from the contrast eq.

Obviously those numbers are quite arbitrary, and we could round up to 100px to make it neater, but this does show there’s quite a difference between the two modules. I’m thinking the maximum central radius of 512 pixels in the d&s module would be a very blurry residual image after wavelet decomposition.

Its also working in LAB and doing different math so I am not sure that we are really looking at something entirely mappable between the two as you are intending but hammer away…

86*6=516, quite close to 512. I know nothing about the inner workings of the module, though.

I must admit I didn’t have 2 hours to rewatch the whole video from AP but I got a sense also that the wavelet selection is more like a bias favouring the selected wavelet. As he says after working through that part of his video that the sliders below it work on all the wavelets so I am not sure but I think maybe the tone eq targets a select frequency detail and spares the rest whereas the diffuse correction affects the whole image but can be biased to do so more strongly on the selected wavelet area… Like you I have no real ideat just trying to interpret his words and explanation in the video… and then there is the different math on top of all that…

Yeah, of course, they are two very different modules. But apparently the underlying math from contrast eq was used for the wavelet decomposition in diffuse and sharpen. Anyway, after watching Nicholas’s video and doing more of my own tests, I think I have a better understanding of it now. The key was in seeing the central radius as setting the “node” from contrast eq, and the radius span as the width.

It’s such an interesting module. The results from it are great, but it’s really not intuitive. And I think even AP might even agree with that, despite the fact he hates the word “intuitive” :slight_smile:
It’s a nice tool for the darktable toolbox, but without the presets, I doubt anyone would use it.

3 Likes

Totally agree with that statement. I depend on the presets and just love the results. With time I will try and learn to tweak the sliders a little more, but at the moment I 100% depend on the presets. The module seems to sharpen without any of the artefacts that come with most sharpening techniques including the USM based modules.

4 Likes

Yeah, when I was getting a bit frustrated with it, I was thinking all those sliders were a waste of screen space and it should just be a bunch of presets. But of course, that’s the difference between darktable and commercial software: Luminar or similar would probably put all the presets to the side with thumbnails, and you just cycle through them to pick the one you like. But with darktable, the sliders are there for those who want to tinker. It lays bare the inner workings so you’re not limited to the presets if you don’t want to be. I still wonder if the terms used and/or interface could be a little more comprehensible, but maybe that would only be possible if it’s dumbed down somewhat…

2 Likes

The thing about this module is that for each image many maybe 80 or 90% of the possible combinations will actually break the image. The presets are in many cases similar just more or less iterations, small changes in radius and span and maybe the key some tweaks on the edge sliders… even this recent review due to your question was a reminder that the edge threshold impacts the dark areas and this helps as some time you need to spare that or bump it up … tweaking that can make a preset have a wider applicability… also sharpness will break the image if you use too much but using 1 or 2 percent with some of the presets can really dial in some sharpness if that is needed…

Definitely yes. I also think it would be great if the D&S module was simplified a bit or used clearer terms. Currently, I can only rely on presets, and despite watching a few tutorials, I still don’t know how to use D&S consciously.

It’s true. The module D&S is unintuitive. However, there is nothing to complain about :slight_smile: After all, we get the program for free and I am grateful to the authors for their work.