Unexpected behavior in first-view modules: White Balance, Highlight Reconstruction, and Demosaic

Hello first of all Thanks a lot for all the help and information in this forum and specially to the Darktabel devs for making this Software!

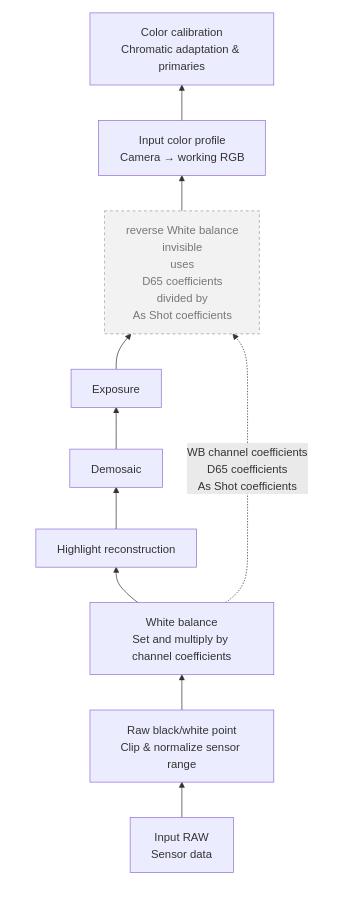
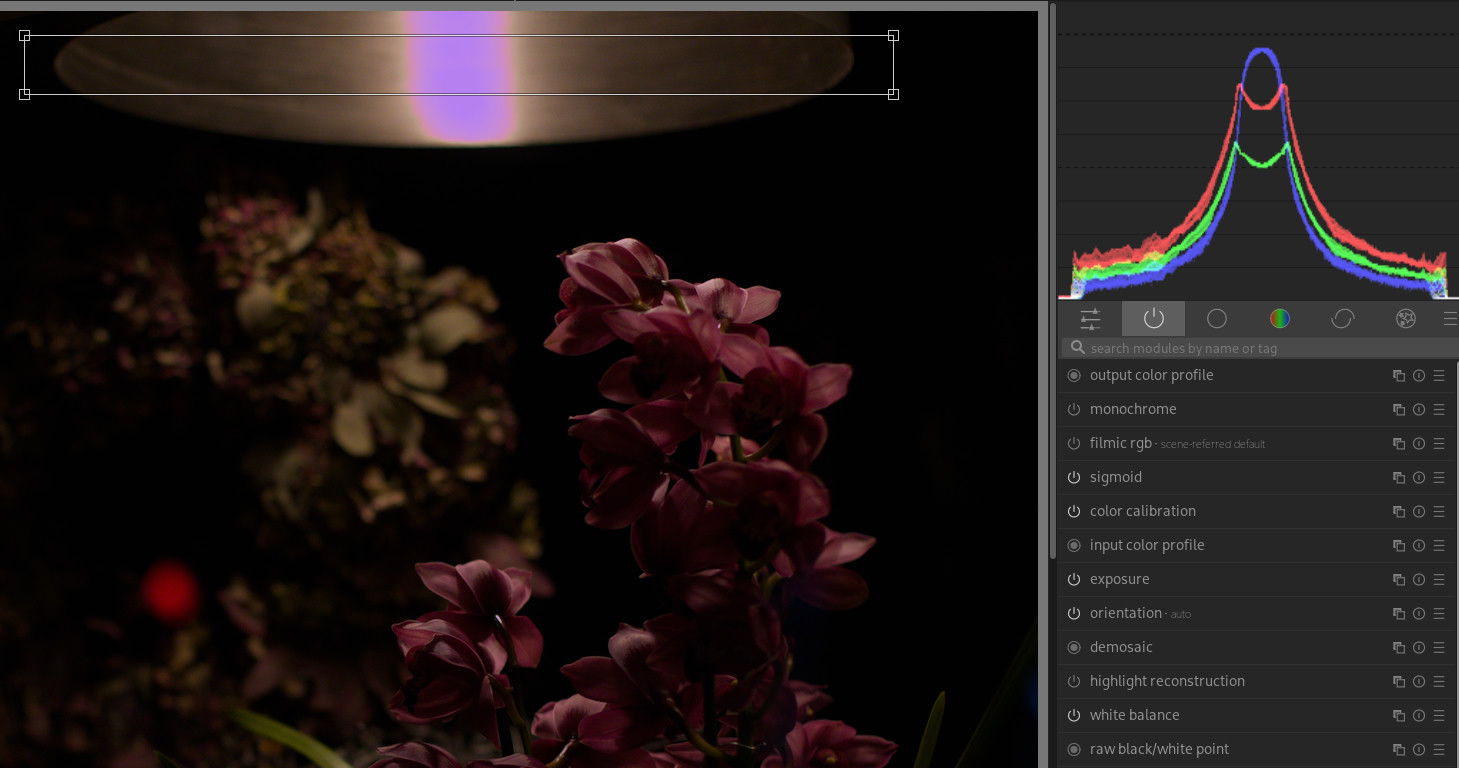
I am observing some unexpected behavior in Darktable related to the first-view modules, specifically White Balance, Highlight Reconstruction, and Demosaic. Some of my assumptions about how these modules behave do not seem to be correct, and I would like clarification on whether this is expected behavior or a misunderstanding on my side.

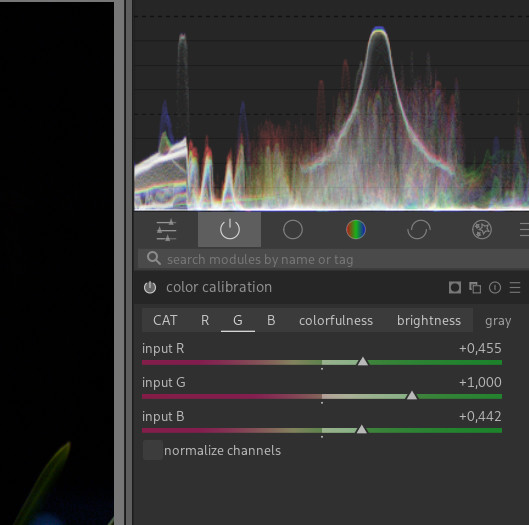
1. White Balance module behavior

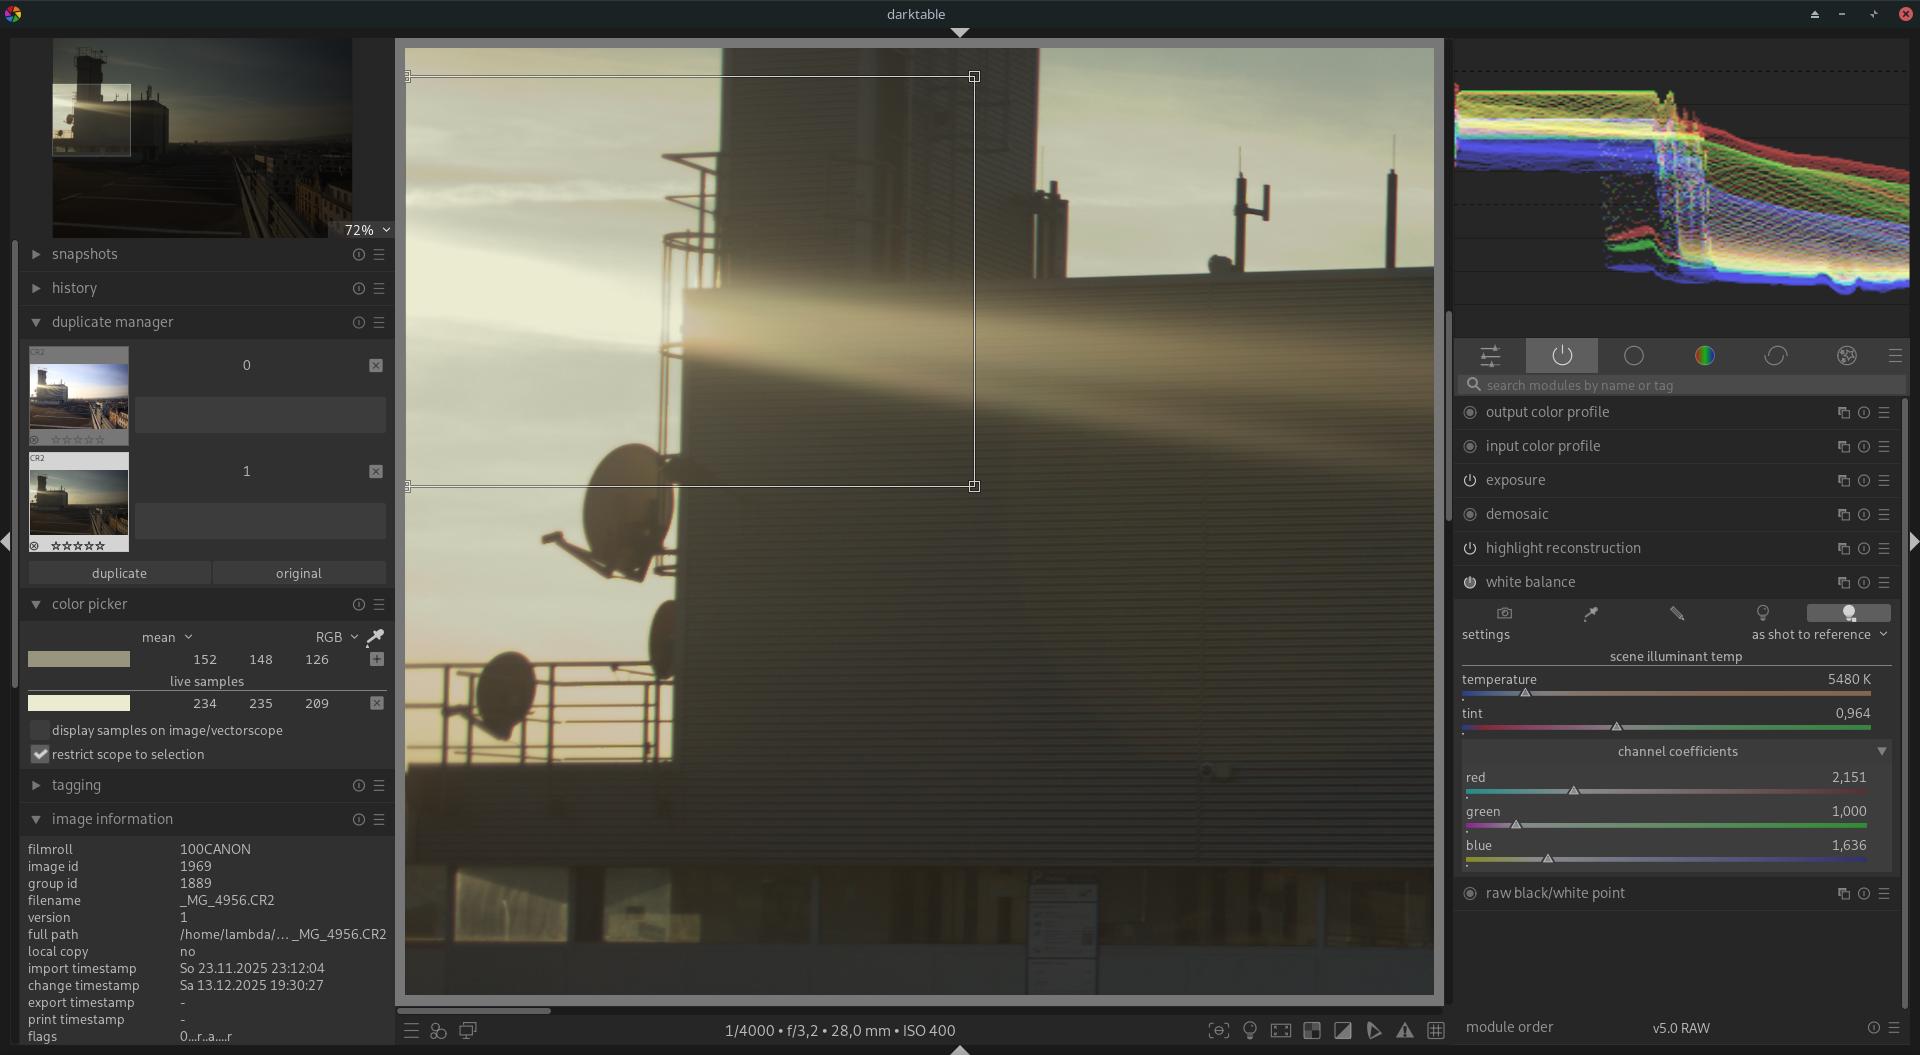
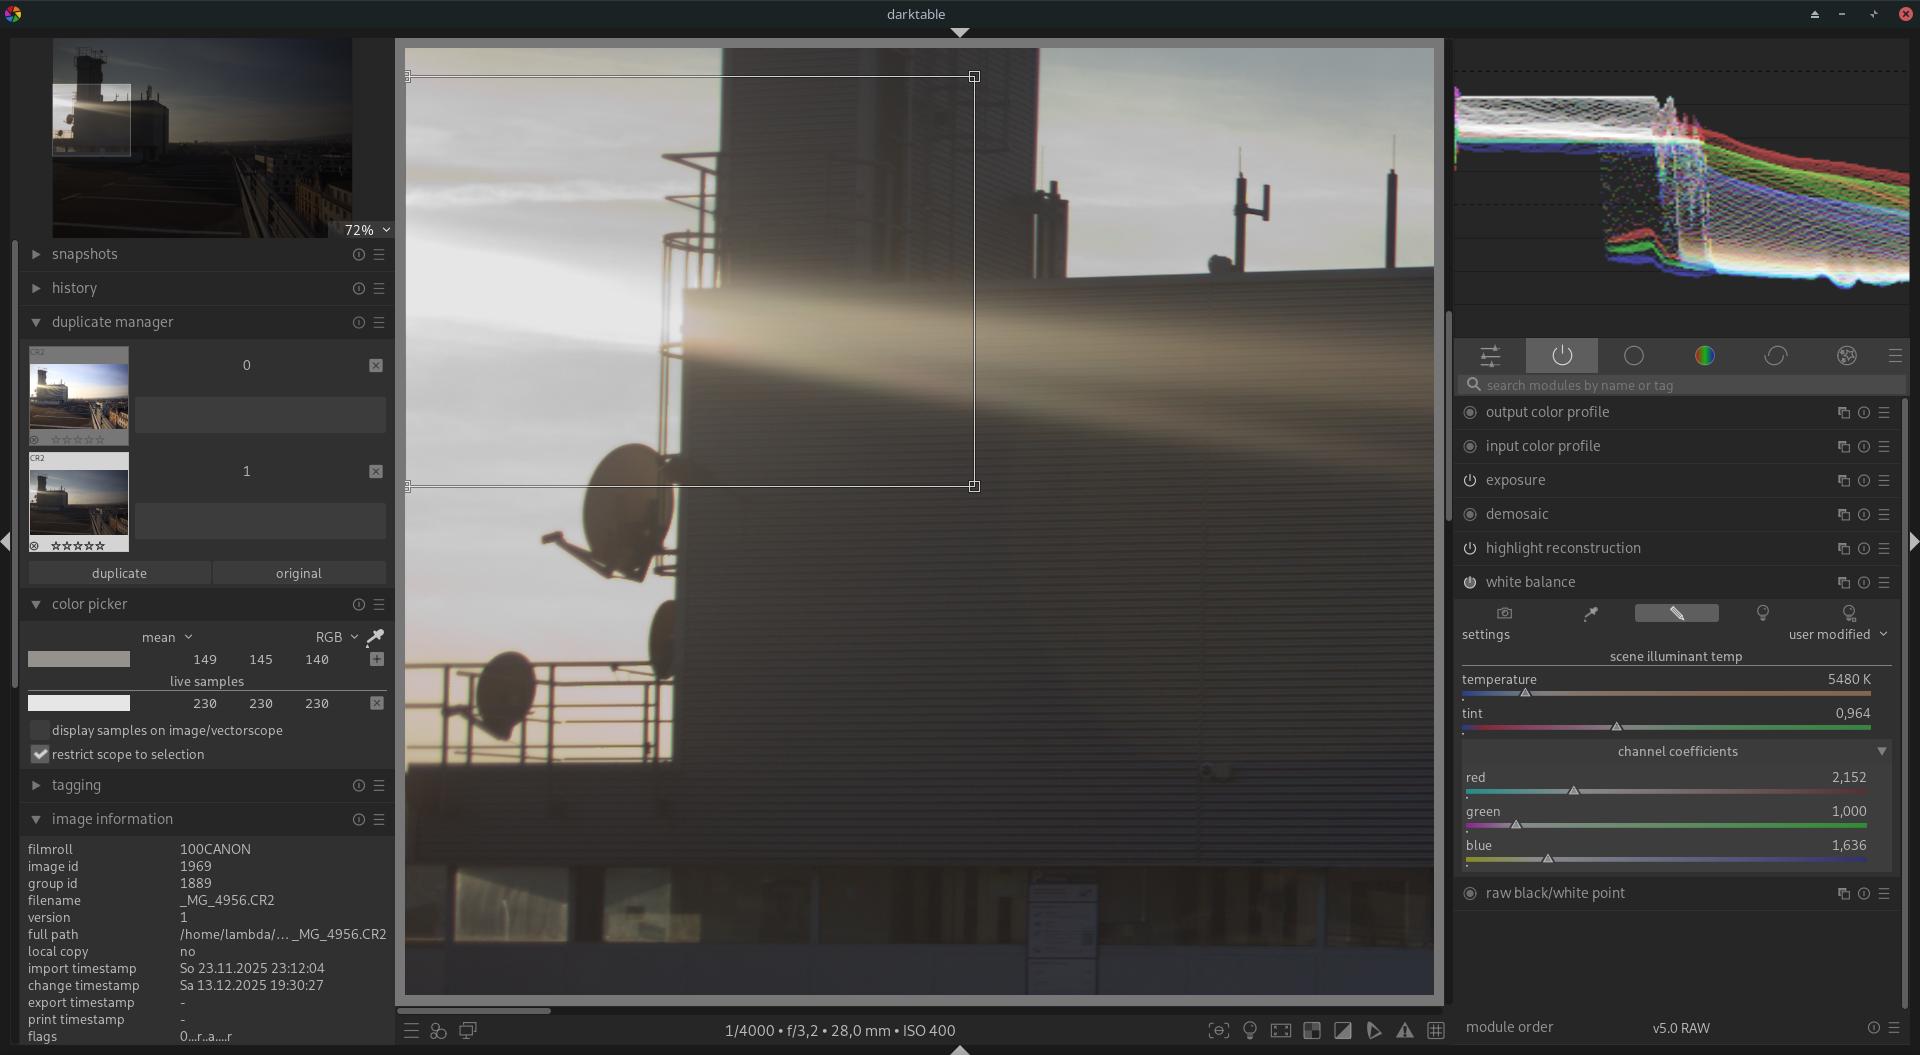
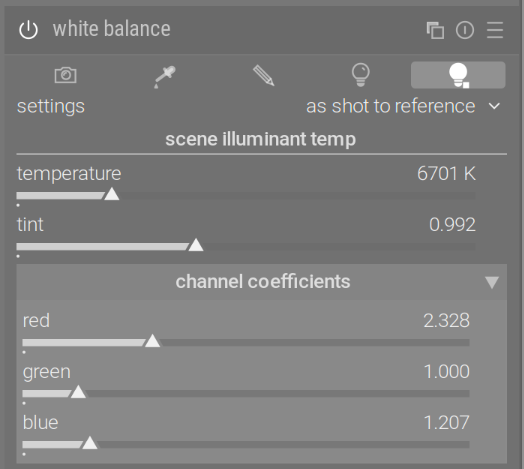
I assumed that all functions of the first White Balance module act only as shortcuts, helpers, or automation for setting the channel coefficients of the module.

However, this does not seem to be the case. When I manually set the channel coefficients to the exact same numerical values that are produced by clicking “as-shot-to-referenceD65”, the resulting image is different.


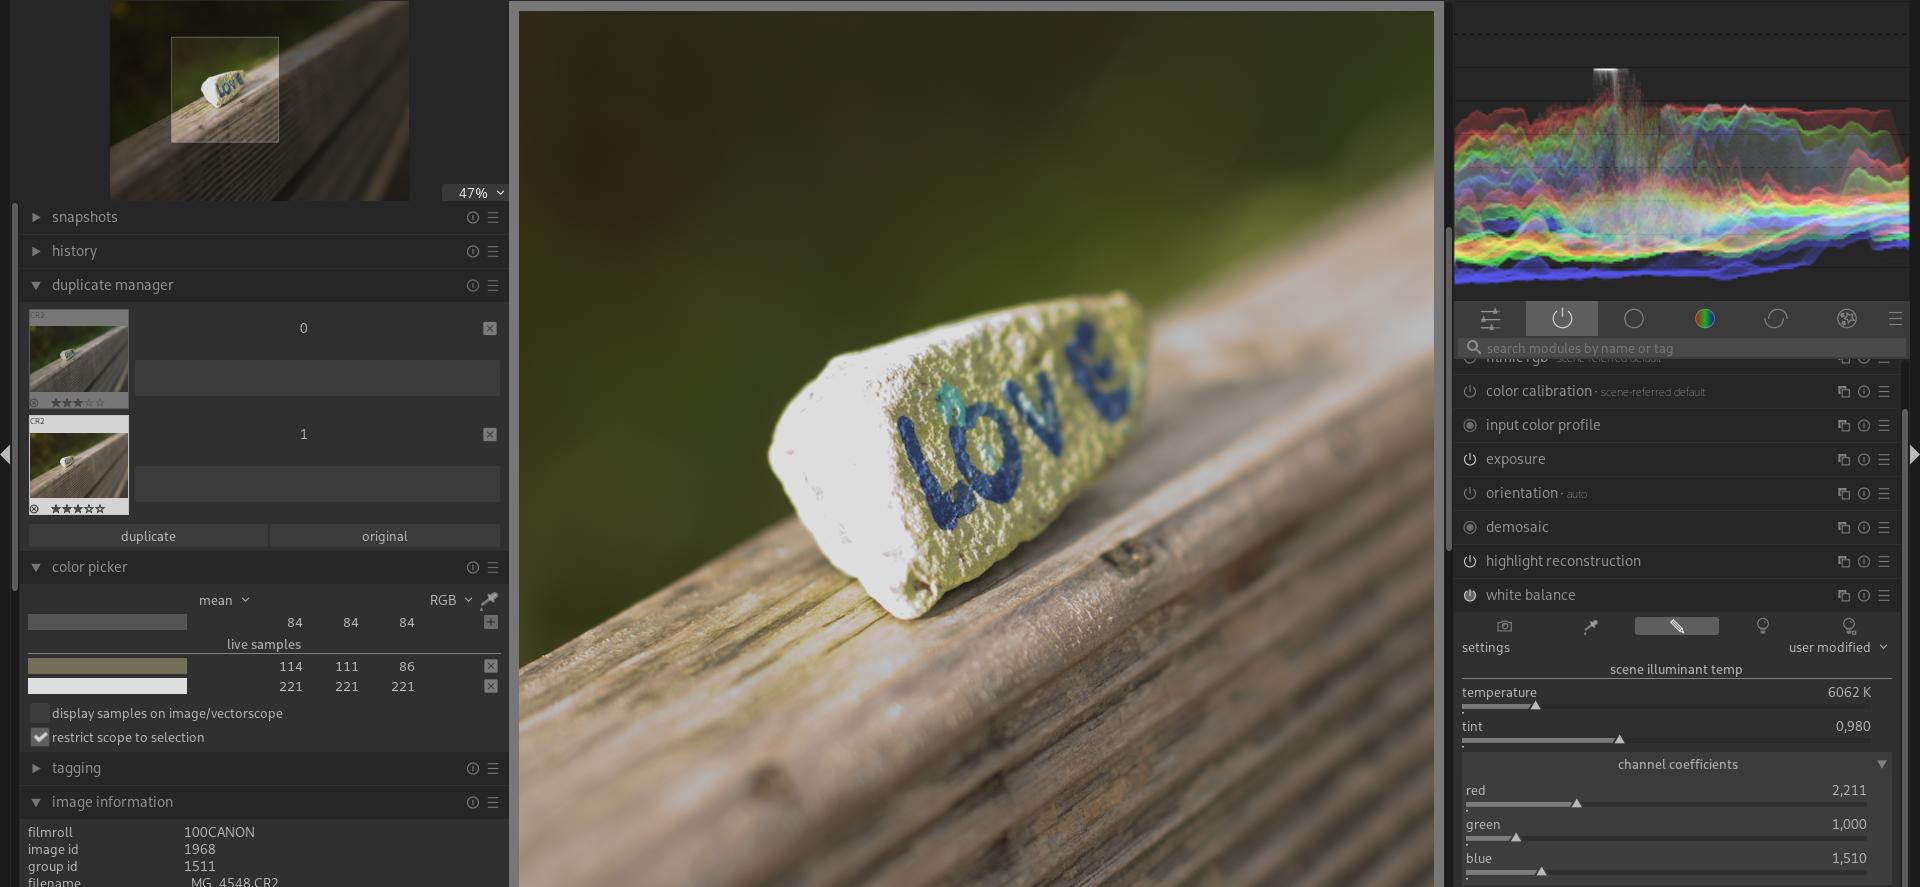
This suggests that there may be additional processing or state changes happening in the background beyond simply setting the coefficients.

  • Is there any additional “magic” or hidden behavior involved in these presets?
  • Are the coefficients alone insufficient to fully reproduce the same result?

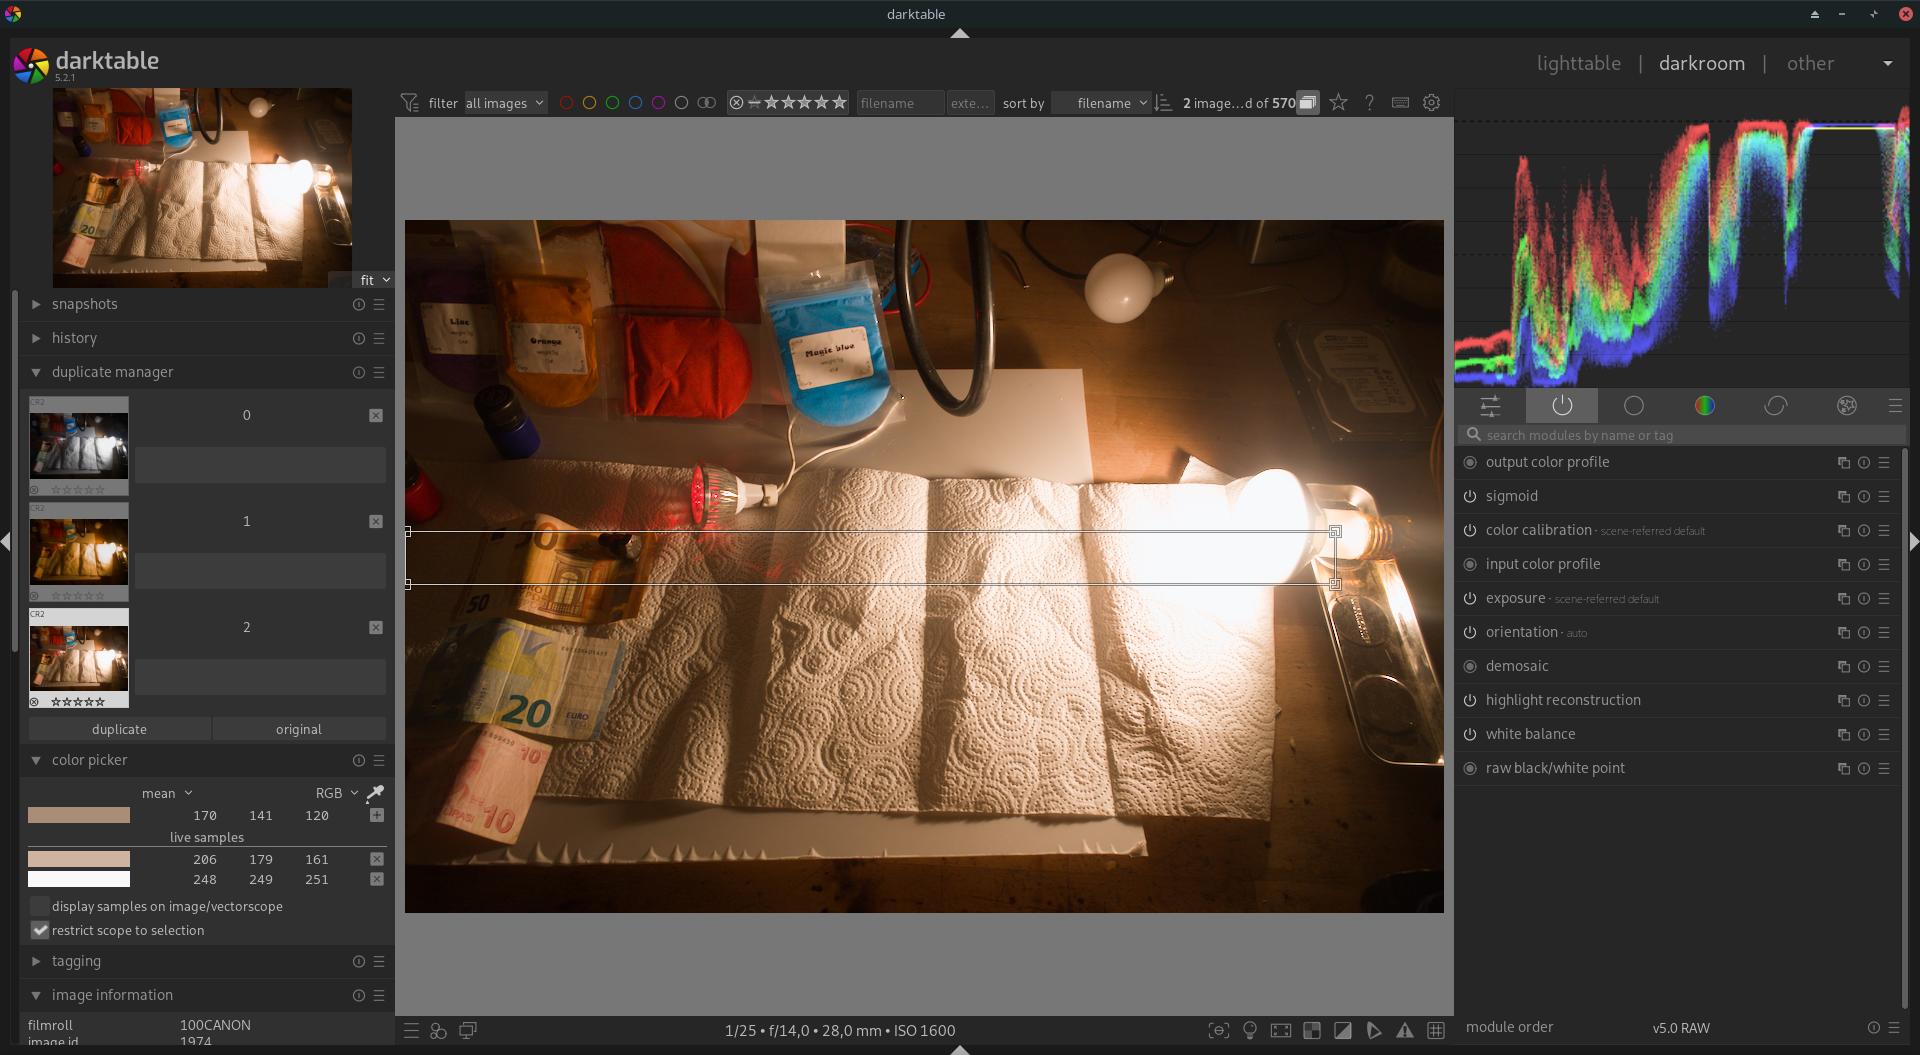
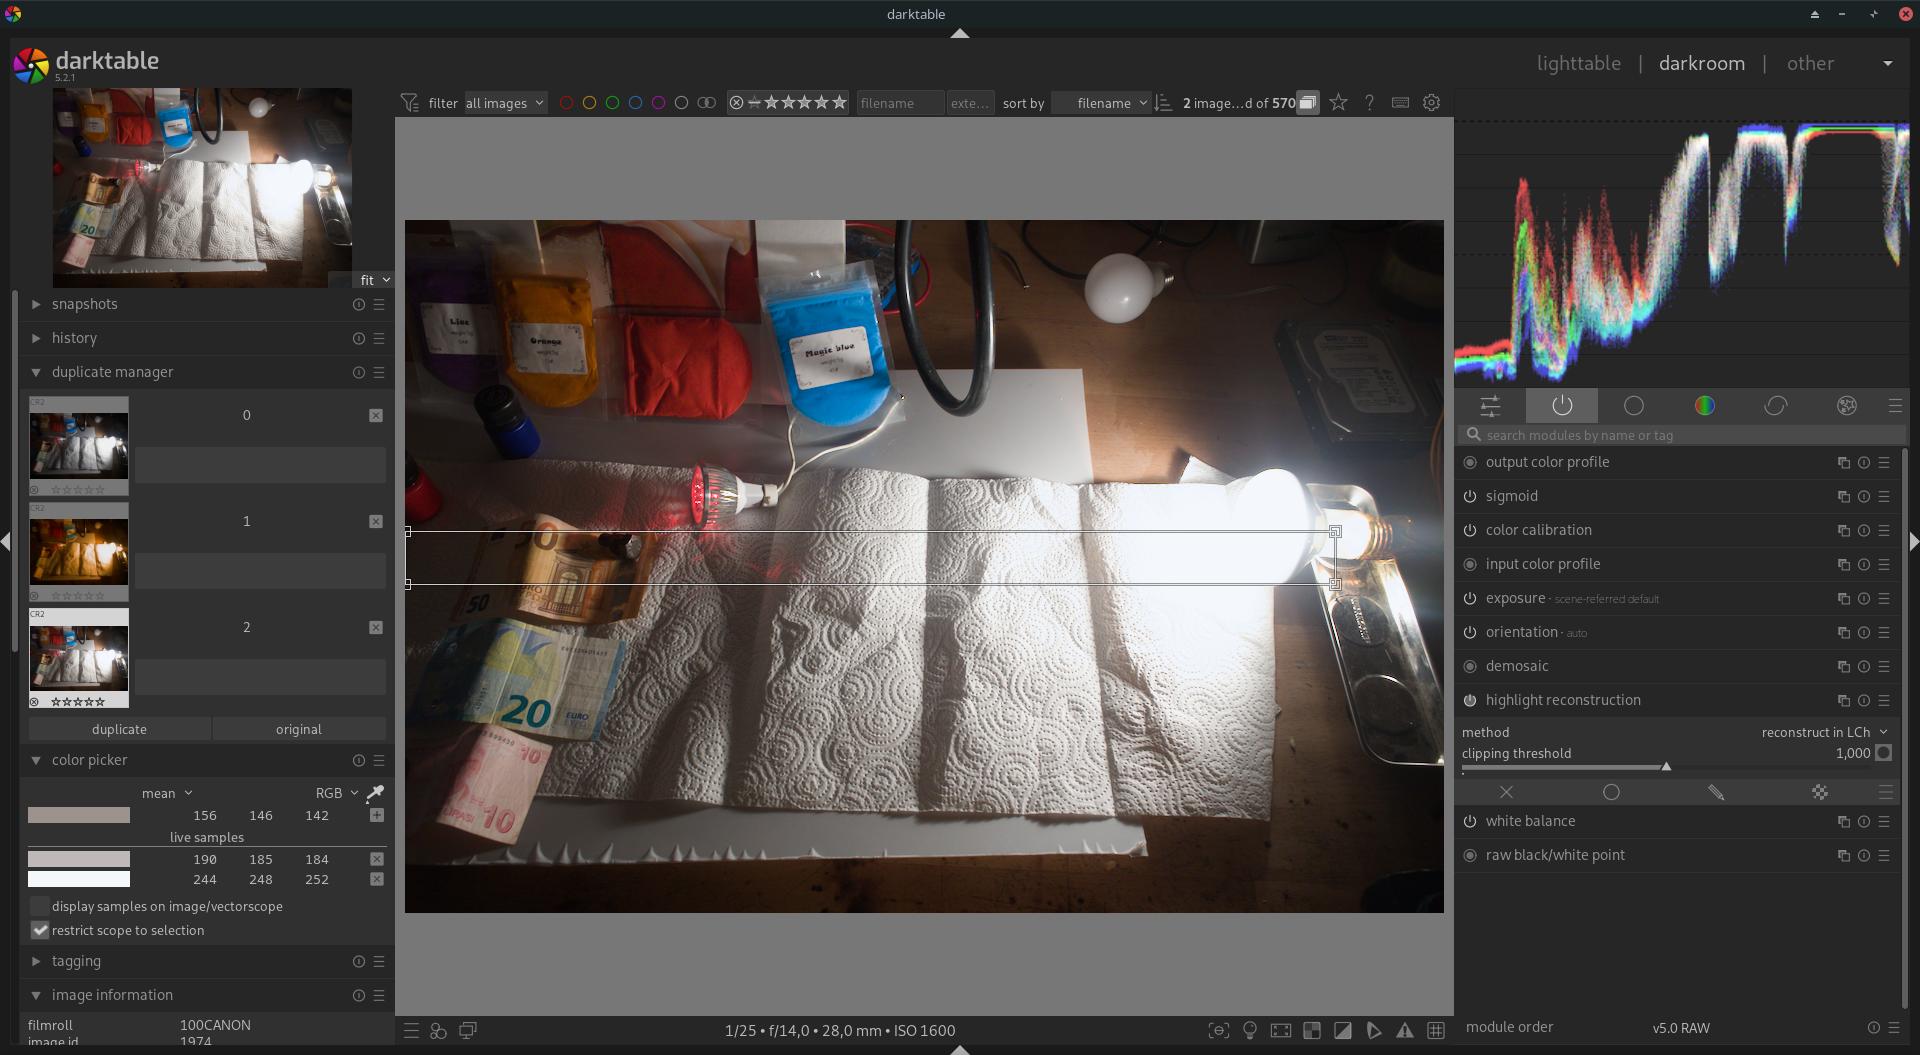
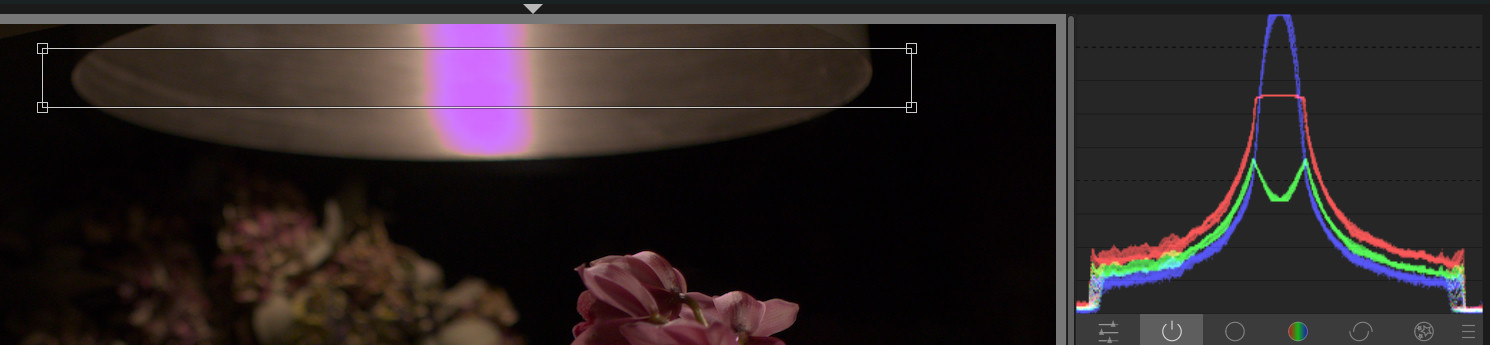
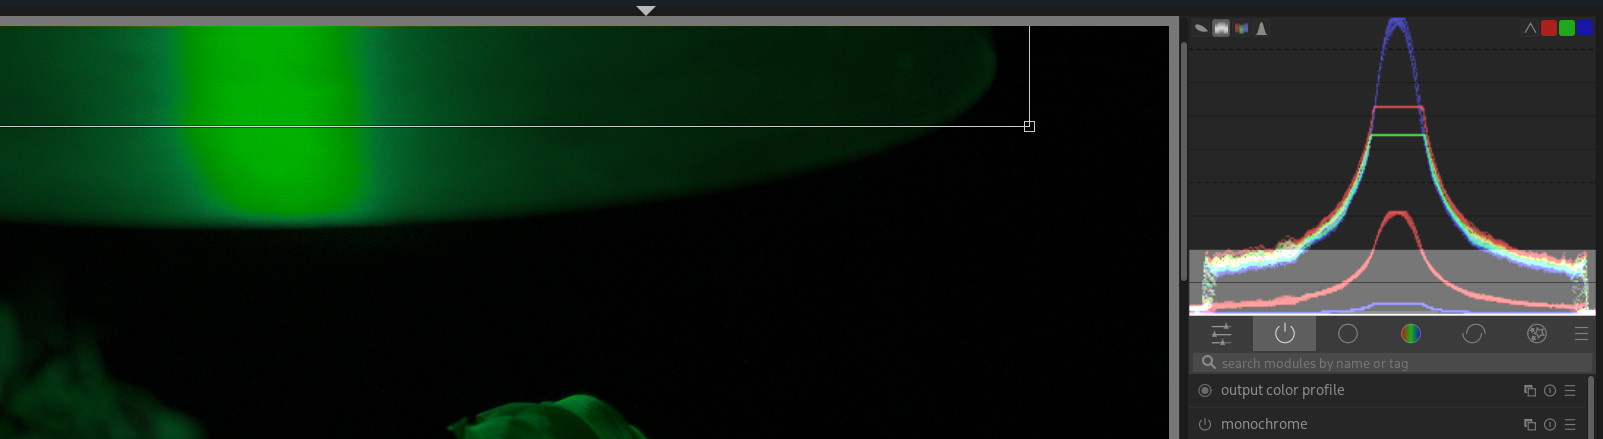
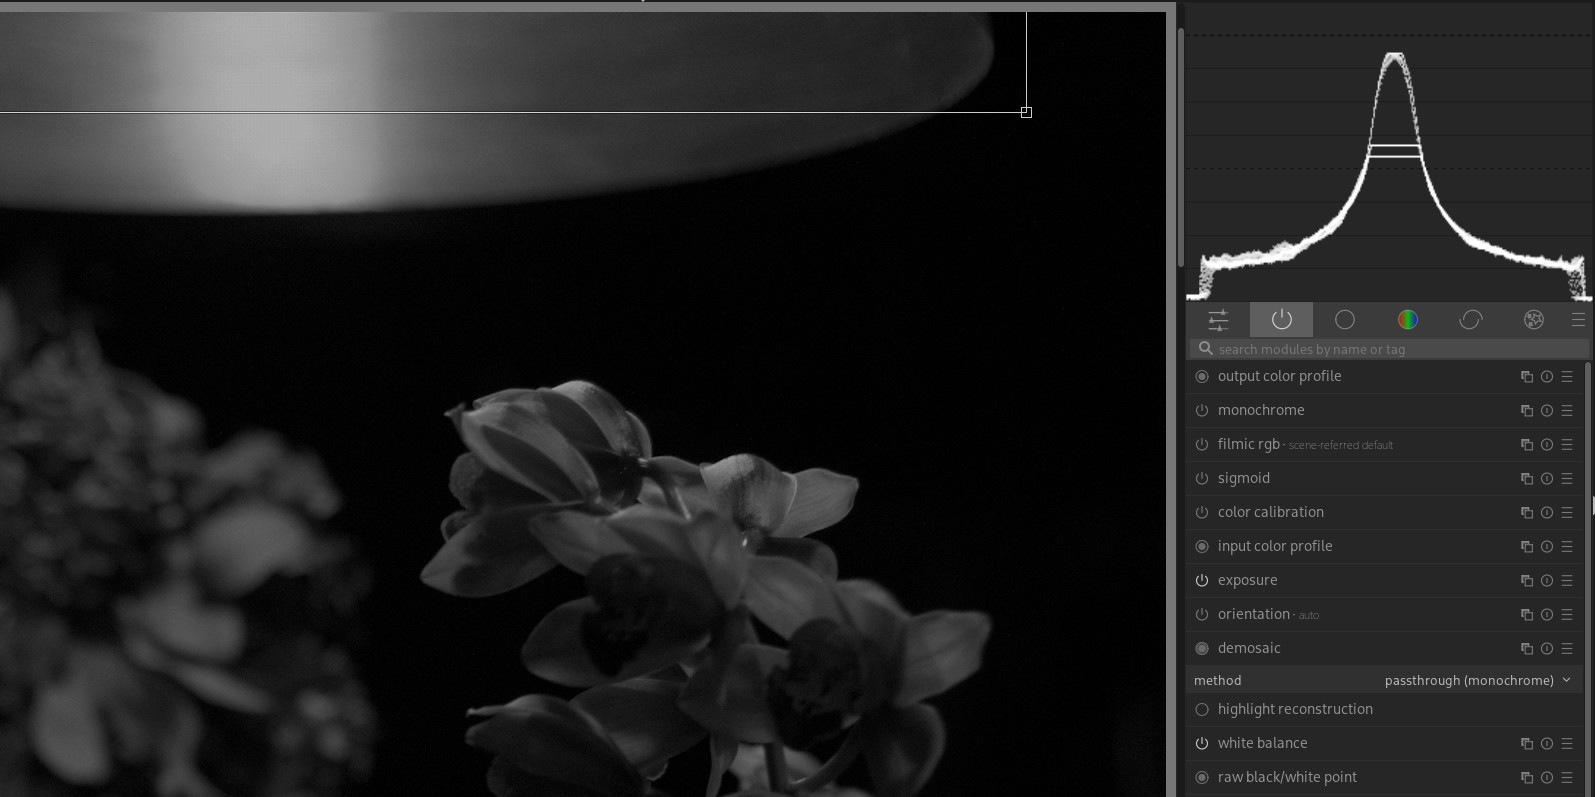
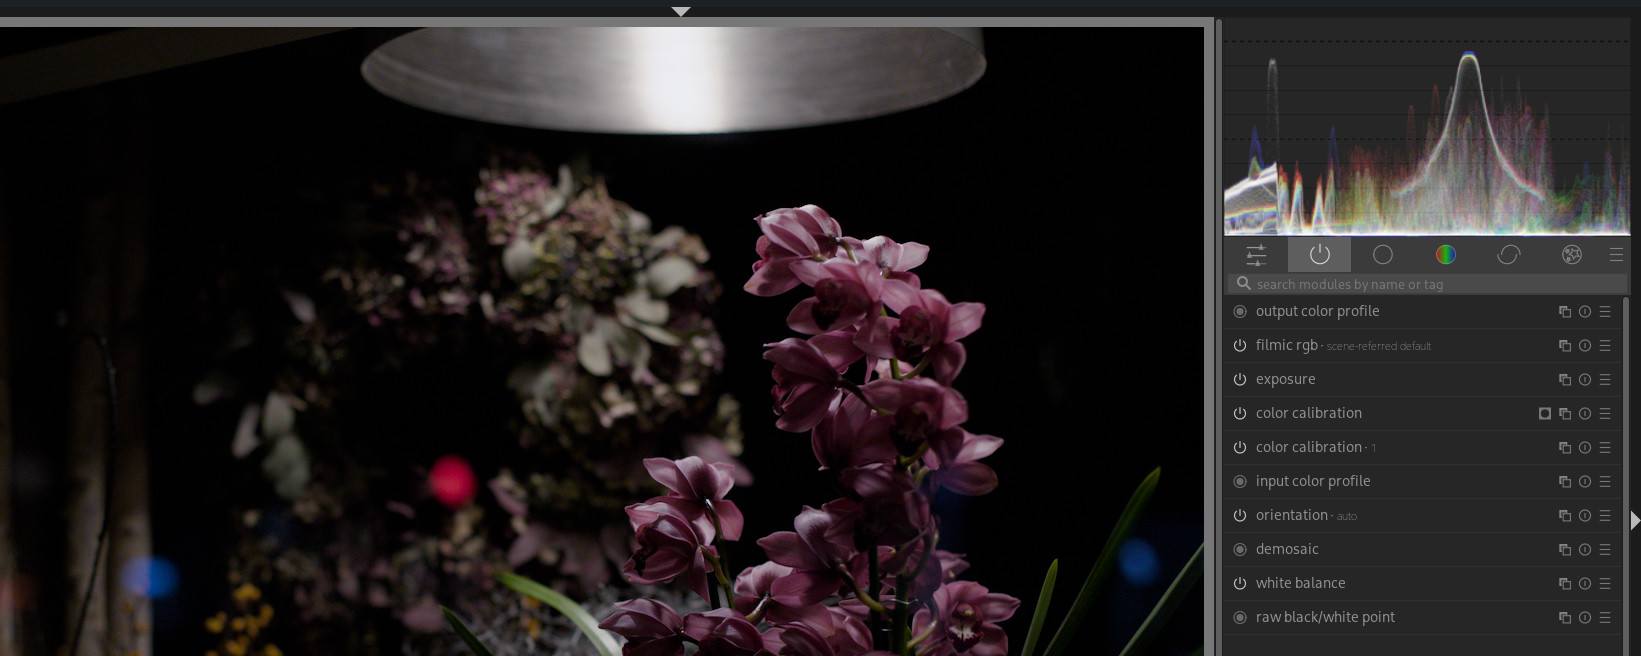
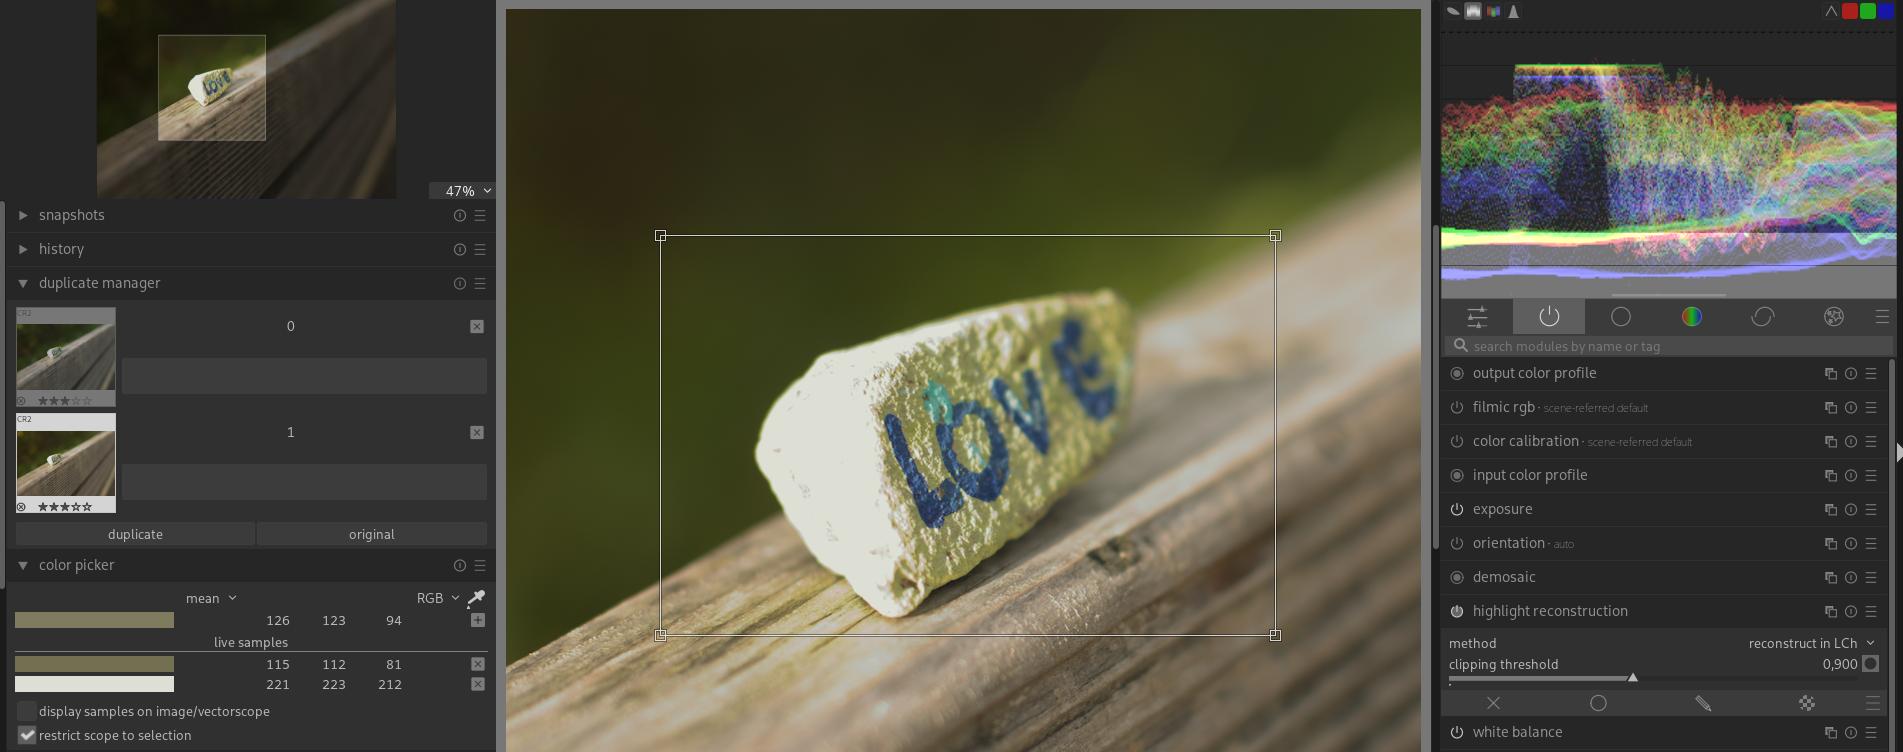
2. Highlight Reconstruction in LCh mode

My assumption was that using Highlight Reconstruction → Reconstruct in LCh would result in blown-out highlights becoming white or neutral gray.

This does not seem to be true when “as-shot-to-reference and later to D65” is selected in the White Balance module (which is the default).
It also does not appear to be true when the Color Calibration module is active.

Is this expected behavior? If so, could someone explain how white balance and color calibration influence highlight reconstruction in LCh mode?

3. Brightness of fully clipped highlights

I also assumed that pixels which are fully blown out (clipped to white in all channels) would always be brighter than surrounding non-clipped pixels, regardless of which highlight reconstruction method is selected.
However, this also does not seem to be true?

Actually, you have two choices:

  • you can use only the white balance module, and do the illuminant correction there, in that case, you should use “custom” or “as shot”;
  • or you use the white balance module together with the color calibration module, in which case you should use “camera reference” or “as shot to reference” in the white balance module. The “why” is a too complex to go into here.

As to the examples you show: in the second image, you show the “highlight reconstruction” module with a threshold set to 0.9. That will influence the result…

For the remainder of your questions, you don’t give enough information to show what’s going on. I do get the impression that you have moved away from the defaults (e.g. no color calibration active), without quite understanding why the defaults were chosen.

1 Like

Maybe sharing the image and your xmp files might be helpful to work out what you are experiencing.

Thanks a lot for the reply.

I moved away from the defaults to understand exactly what each module is doing and contributing to the pixel pipeline.

The behavior with the defaults was always kind of strange to me (with off-white colors in the highlights), so I tried to break it down to what each module is doing and why.

The “why” is kind of what I try to understand.

I don’t understand how and why the last option that is supposed to be used with color calibration works, and how it is different from just setting the same values manually.

I conceptually get that some sort of “rough” white balance is necessary before highlight reconstruction and before demosaic.
But how can I set this “rough” white balance manually (and add the “and later to D65” option)?
Using “double white balance” gives me a warning.

You are right, the attached screenshot is not ideal, but the settings are the same.
I don’t know how to edit the post, so I add here two more hopefully better screenshots.


I hope some to repeat this experiment and see if they get the same results with their pictures, and to judge if this is the expected result…

I moved away from the defaults to understand exactly what each module is doing and contributing to the pixel pipeline.

Here I constructed a test with an intentionally overexposed real tungsten bulb.

The first image is stock default settings with Sigmoid:


As you can see, highlights are somewhat white but not perfect, and the midtones are too warm.

Next, I keep it default, but highlight reconstruction is set to LCh:


Now the Highlights are pure white (but not 255?!) and still to warm.

So I try to apply white balance in the color calibration module: (as i’m supposed to do)


Now Mid tones are White :slight_smile: but the clipped reconstructed highlights are no longer white. :frowning:

A solution is to apply do what i’m not supposed to do… Apply white balance manually twice :

Now Clipped highlights are white as well as the mid tones. But i get this warning about doube WB

This might help you see how it was introduced and why it works as it does… It was debated to allow you to set the wb for the initial part of the pipeline . But it was restricted to as-shot in the end as the safe default… Introduce as-shot to later D65 workflow (improved highlights) by jenshannoschwalm · Pull Request #15602 · darktable-org/darktable · GitHub

My suggestion… Use the defaults then go in to CC if you need to tweak wb the hue of the illuminant is usually okay… If you aren’t given the custom option change to that… It initially changes nothing and gives you a hue and chroma sliders… Now just tweak chroma … more will correct the color cast more and less will let you bring some back… This is usually sufficient to adjust things … Using CC module is doing a CAT on the data which is not exactly the same as wb which can be thought of as a partial CAT…

1 Like

Since you want to go deeper: in darktable, there are two ways to deal with white balancing. The first is the one you may be familiar with, the ‘legacy’ way. In this case, only white balance is used. This uses the multipliers (from the camera, or picked from the image, or manually set). If those are set correctly, your greys and whites will be neutral, which improves highlight reconstruction, demosaicing, noise reduction. However, this skews other colours slightly (the effect, compared with properly done white balance + color calibration, is often hardly visible; in other cases, there’s quite a difference). It’s a crude approximation to how human vision would see the colours change.

The other way is the ‘modern’ white balance + color calibration way. There are 2 paths:

  • white balance set to camera reference. In this case, reference white balance multipliers calculated from the camera’s colour matrix are used, which do not reflect the scene (the matrix is usually for D65). Colours will not be correct, and this affects highlight reconstruction, demosaicing, noise reduction. For example, if you took the shot under warm indoor lighting, the image will be very yellow at this stage. Highlight reconstruction, demosaicing, noise reduction will not perform optimally. Later, in color calibration, a more sophisticated method than simply multiplying the RGB channels by some white balance multipliers, chromatic adaptation, is performed, which uses maths derived from characteristics of the human vision, to actually set the correct white balance. This results in better colours overall, but if highlights were broken previously, those will remain broken. This is why recovered highlights will not look neutral.
  • the 2nd path sets white balance to as shot to reference. It uses the as-shot multipliers from the camera (same as when the module is set to as-shot mode with the legacy workflow), but also sets an additional processing flag, ‘late D65’. If the camera’s multipliers are good, your highlights will be neutral, giving you the benefits of the ‘legacy’ workflow for demosaic, noise reduction, highlight reconstruction. However, in the input color profile module, if ‘late D65’ is set, the incoming RGB is divided by the ‘as-shot’ multipliers, and multiplied by the values derived from the matrix (again, values that would usually be for D65), undoing the rough approximation, returning to reference state. When the data reaches color calibration, it converts the reference state to correct white balance, initially using values derived from the in-camera multipliers (which are passed along the pipeline), or from whatever values you set/pick in the module.

The trouble with the ‘double white balancing’ we have now (and why you get the warning) is that the color calibration module expects its input data arrives was converted via the D65 reference values. Now, if you pick an area in color calibration to white balance on, it will make that are neutral, but the rest of the colours will still be skewed somewhat. This is not a night-and-day difference, but the result is not as good as it could be.

I’m only at the beginning of digging myself into this code, so there may be errors, but this is my understanding. What I want to do is to make sure manually set multipliers in the white balance module can be used the same way as in camera (as-shot to reference) multipliers are, ensuring neutral greys/whites for demosaic, highlight reconstruction and denoising, but still reaping the benefits of correct chromatic adaptation later on (For the modern workflow, treat user-set WB just like 'as shot to reference' · Issue #19873 · darktable-org/darktable · GitHub). Real dt devs, please correct me if I said something silly. :slight_smile:

5 Likes

Keep in mind that the highlight reconstruction isn’t some kind of magic. In LCh mode, it just sets the values for RGB to 1.0 where all channels are saturated. (And does “something” when only one or two are). But any module after highlight reconstruction can modify those values. That starts with demosaic and ends with sigmoid (in addition, sigmoid never maps anything to 1.0!)

It also means that any later color correction will give a tint to the white generated by LCh.

Thanks for the detailed explanation! Do you understand why the numeric values for the white balance module when set to "as-shot to later D65“ sometimes differ from picture to picture? If they are specific to a certain camera then I would expect them to always be the same?

‘as shot to reference’ uses the same values as ‘as-shot’: the ones recorded by the camera.

The only difference is setting the ‘late D65’ flag (should input color profile undo applying the camera multipliers and apply the D65 (or whatever the camera matrix uses) multipliers. In the 2nd case, color calibration will need to be used to adapt the white point (an all colours) correctly (via proper chromatic adaptation, instead of relying on the simple per-channel multiplication).

4 Likes

The “as shot” means the camera’s white balance setting is used.

If the camera is set to “auto white balance”, the white balance values can (and should) differ between scenes if the light is different (sunny → cloudy makes a big difference, with strong colours in the frame, a change in framing could make a difference)

They still are specific to a certain camera (model), in that they are based on that camera’s basic color rendering. So everything else being equal (same scene, same lighting), the coefficients will differ between camera models.

2 Likes

Thanks a lot everyone, and especially @kofa and @priort.

I have read the linked GitHub thread as well as your comments, and I feel like I understand it better now!

I was kind of gaslit by the pixel pipeline idea and modules strictly working in order.
My current mental model and conclusion is that this is not actually the case.

I spent the last 2 hours making a flow chart and refining my mental model of how I now think it works.
Warning: this is likely wrong and needs confirmation from someone who actually knows what he is talking about.

Code mermaid.live

flowchart BT
RAW[Input RAW
Sensor data]
BWP[Raw black/white point
Clip & normalize sensor range]
WB[White balance
Set and multiply by channel coefficients]
HR[Highlight reconstruction]
DEM[Demosaic]
EXP[Exposure]
IWB[reverse White balance
invisible
uses
D65 coefficients
divided by
As Shot coefficients ]
ICP[Input color profile
Camera → working RGB]
CC[Color calibration
Chromatic adaptation & primaries]

RAW --> BWP --> WB --> HR --> DEM --> EXP --> IWB --> ICP --> CC

%% Coefficient side-channel
WB -.->|WB channel coefficients <br/> D65 coefficients <br/> As Shot coefficients | IWB

%% Styling for the "invisible" inverse WB
classDef invisible fill:#f2f2f2,stroke:#999,stroke-dasharray:4 4,color:#777;
class IWB invisible;

Since input color calibration (and input color profile?) expects D65 white-balanced data to work properly,

I made up this concept of an invisible second “inverse” white balance module sitting in the pixel pipeline just before the input color profile (or maybe just before color calibration?).

If “set white balance to as shot and later correct to camera reference point, in most cases it should be D65” is selected in White Balance, this second inverse white balance module “later” in the pipeline becomes active and “corrects to camera reference point”.

To do this, I imagine all it does is take the D65 coefficients and divide them by the as-shot coefficients, thereby correcting to the same white balance as if “set white balance to camera reference point, in most cases it should be D65” were chosen.

I hope I’m not too annoying with my stupid and pedantic questions.
I feel like I’m not the only one not fully understanding this.

Thanks!

The reversal is done in input color profile.

1 Like

Thanks for confirming, @kofa.

May I make a user interface suggestion?!

If the reversal happens in input color profile, it would be way less confusing to have a toggle in the “input color profile” module,

with some alt text like:
“Reverse WB to D65 before applying input color profile to working profile transformation”.

Furthermore, if there were a “Reverse WB to D65” option, this setting could be combined with or applied to any white balance setting, and not only to “as shot”.

I get that technically it’s “the right way” to do highlight reconstruction and demosaic on a “correctly” white-balanced image. Furthermore, I understand that color calibration can only work properly if it gets an image as if it were white balanced with D65 coefficients.

But what I don’t get is why the only way to do this is:
a. if I set the WB to D65 (that’s wrong if the illuminant is not D65),
b. if I set WB to “as shot” (that’s also wrong for most of my pictures, since I learned I don’t have to worry about WB if I shoot RAW).

Even if there is such a thing as “the” technically correct white balance for a picture…
which there is not, since a picture can have multiple illuminants with different CCTs in different parts of the image.

I don’t think it’s good to intentionally limit the user to “as shot” WB in this step.

Yes, the issue is there, and there’s also GitHub - kofa73/darktable at colorcalibration-also-for-manual-wb :slight_smile:

It’s NOT usable yet, it’s not even a pre-release test version, it’s incomplete, but I’ve been working on it, slowly.

3 Likes

It took me some time rubbing my brain cells together to even identify the “problem”, and then trying to express it in a comprehensible way…

I’m not gonna pretend I understand your code, but from what I think I see, you already implemented the “checkbox” to correct to D65 coefficients?!
And all this 12 hours before I was able to make this post??

So after all, my idea was not so novel.

I have deep respect and wish you lots of fun and success with your coding adventures.
Thanks for making an awesome software even better!

1 Like

The checkbox was added a few days ago, but as it’s incomplete, I don’t push my changes to often. But the hardest part, color calibration, is still to be done.

1 Like

I think I shared the topic with you and likely you read it…but you can see that a few of us asked a question(s) about this limitation and a justification was provided at at that time that as-shot did no harm and was safe… it did seem like an unnecessary limitation to me but it was the design decision made. It seemed logical that the hybrid of using wb early and then reference values would have been served best by having the best wb…esp when lighting was weird or fooled the camera but the trade off for safety sake was made …

Another thing related to this is the typical pink / magenta tones in clipped highlights.

Without highlight reconstruction, it’s common to see magenta-colored artifacts.

This is commonly explained with something like
"the green channel clips first and white balance amplifies red and blue, so in the end there is more red and blue in the image.

And that this is the physically accurate way to do it, without making up green pixels that were not captured in the first place."

So far so good, but this is only half the story, to my feeling.

Since what I actually see is the green channel going negative.


Sigmoid or filmic make it even worse:

My current working theory is that this is caused because the input-to-working-profile transformation has negative values, so the brightness of a display-referred green pixel is the brightness of a green measured pixel minus some amount of a blue and red pixel (close to it).

This still might be technically a correct way to do it, even if it looks bad.
But if technically correct, this should be luminance-wise correct?!

The camera might not “see” or is not able to capture that there is more green in the blown-out area, but it still can see that blue and red increase, so luminance still should increase??

But if converted to black and white, it does not. So luminance information that was there is somehow lost.

To show that this information was there to begin with, let’s look at this gradient with demosaic set to photosite and passthrough:


As you can see, the RAW data seems to be there, and the black and white version is even a respectably smooth gradient.
So the question is: if the magenta highlights are technically the correct color (without interpretation or style/look applied), is there maybe another “technically correct” way to do this and preserve luminance?
Maybe wrong or less saturated colors, but more natural and smooth luminance in the highlights?

And yes, I know there is a highlight reconstruction option early in the pipeline, but for this example I intentionally did not use it, to investigate the “negative green values”.

And I also know there are 1001 ways to deal with this and correct it later.

For example, using two instances of Color Calibration with a parametric luminance mask.


The second Color Calibration instance then uses RGB Mix to undo the color space conversion matrix applied in “color in”.

By the way, can someone tell me how to figure out the actual matrix coefficients that get applied by the input color profile if “standard color matrix” is selected??

As an aside just to be safe, I think you need to test the impact of your display profile on the histogram…what profile is this histogram using… basically DT has the display profile before the histogram profile…there can be instances where it can impact the output…things won’t look right on the screen but for example if you have the histogram profile set to linear rec2020 then you should change your display profile to linear rec2020 and see if the histogram changes, if so your display profile is introducing some clipping and impacting the results when you are doing these sorts of analysis…

1 Like

I think they come from rawspeed, for most cameras.

1 Like