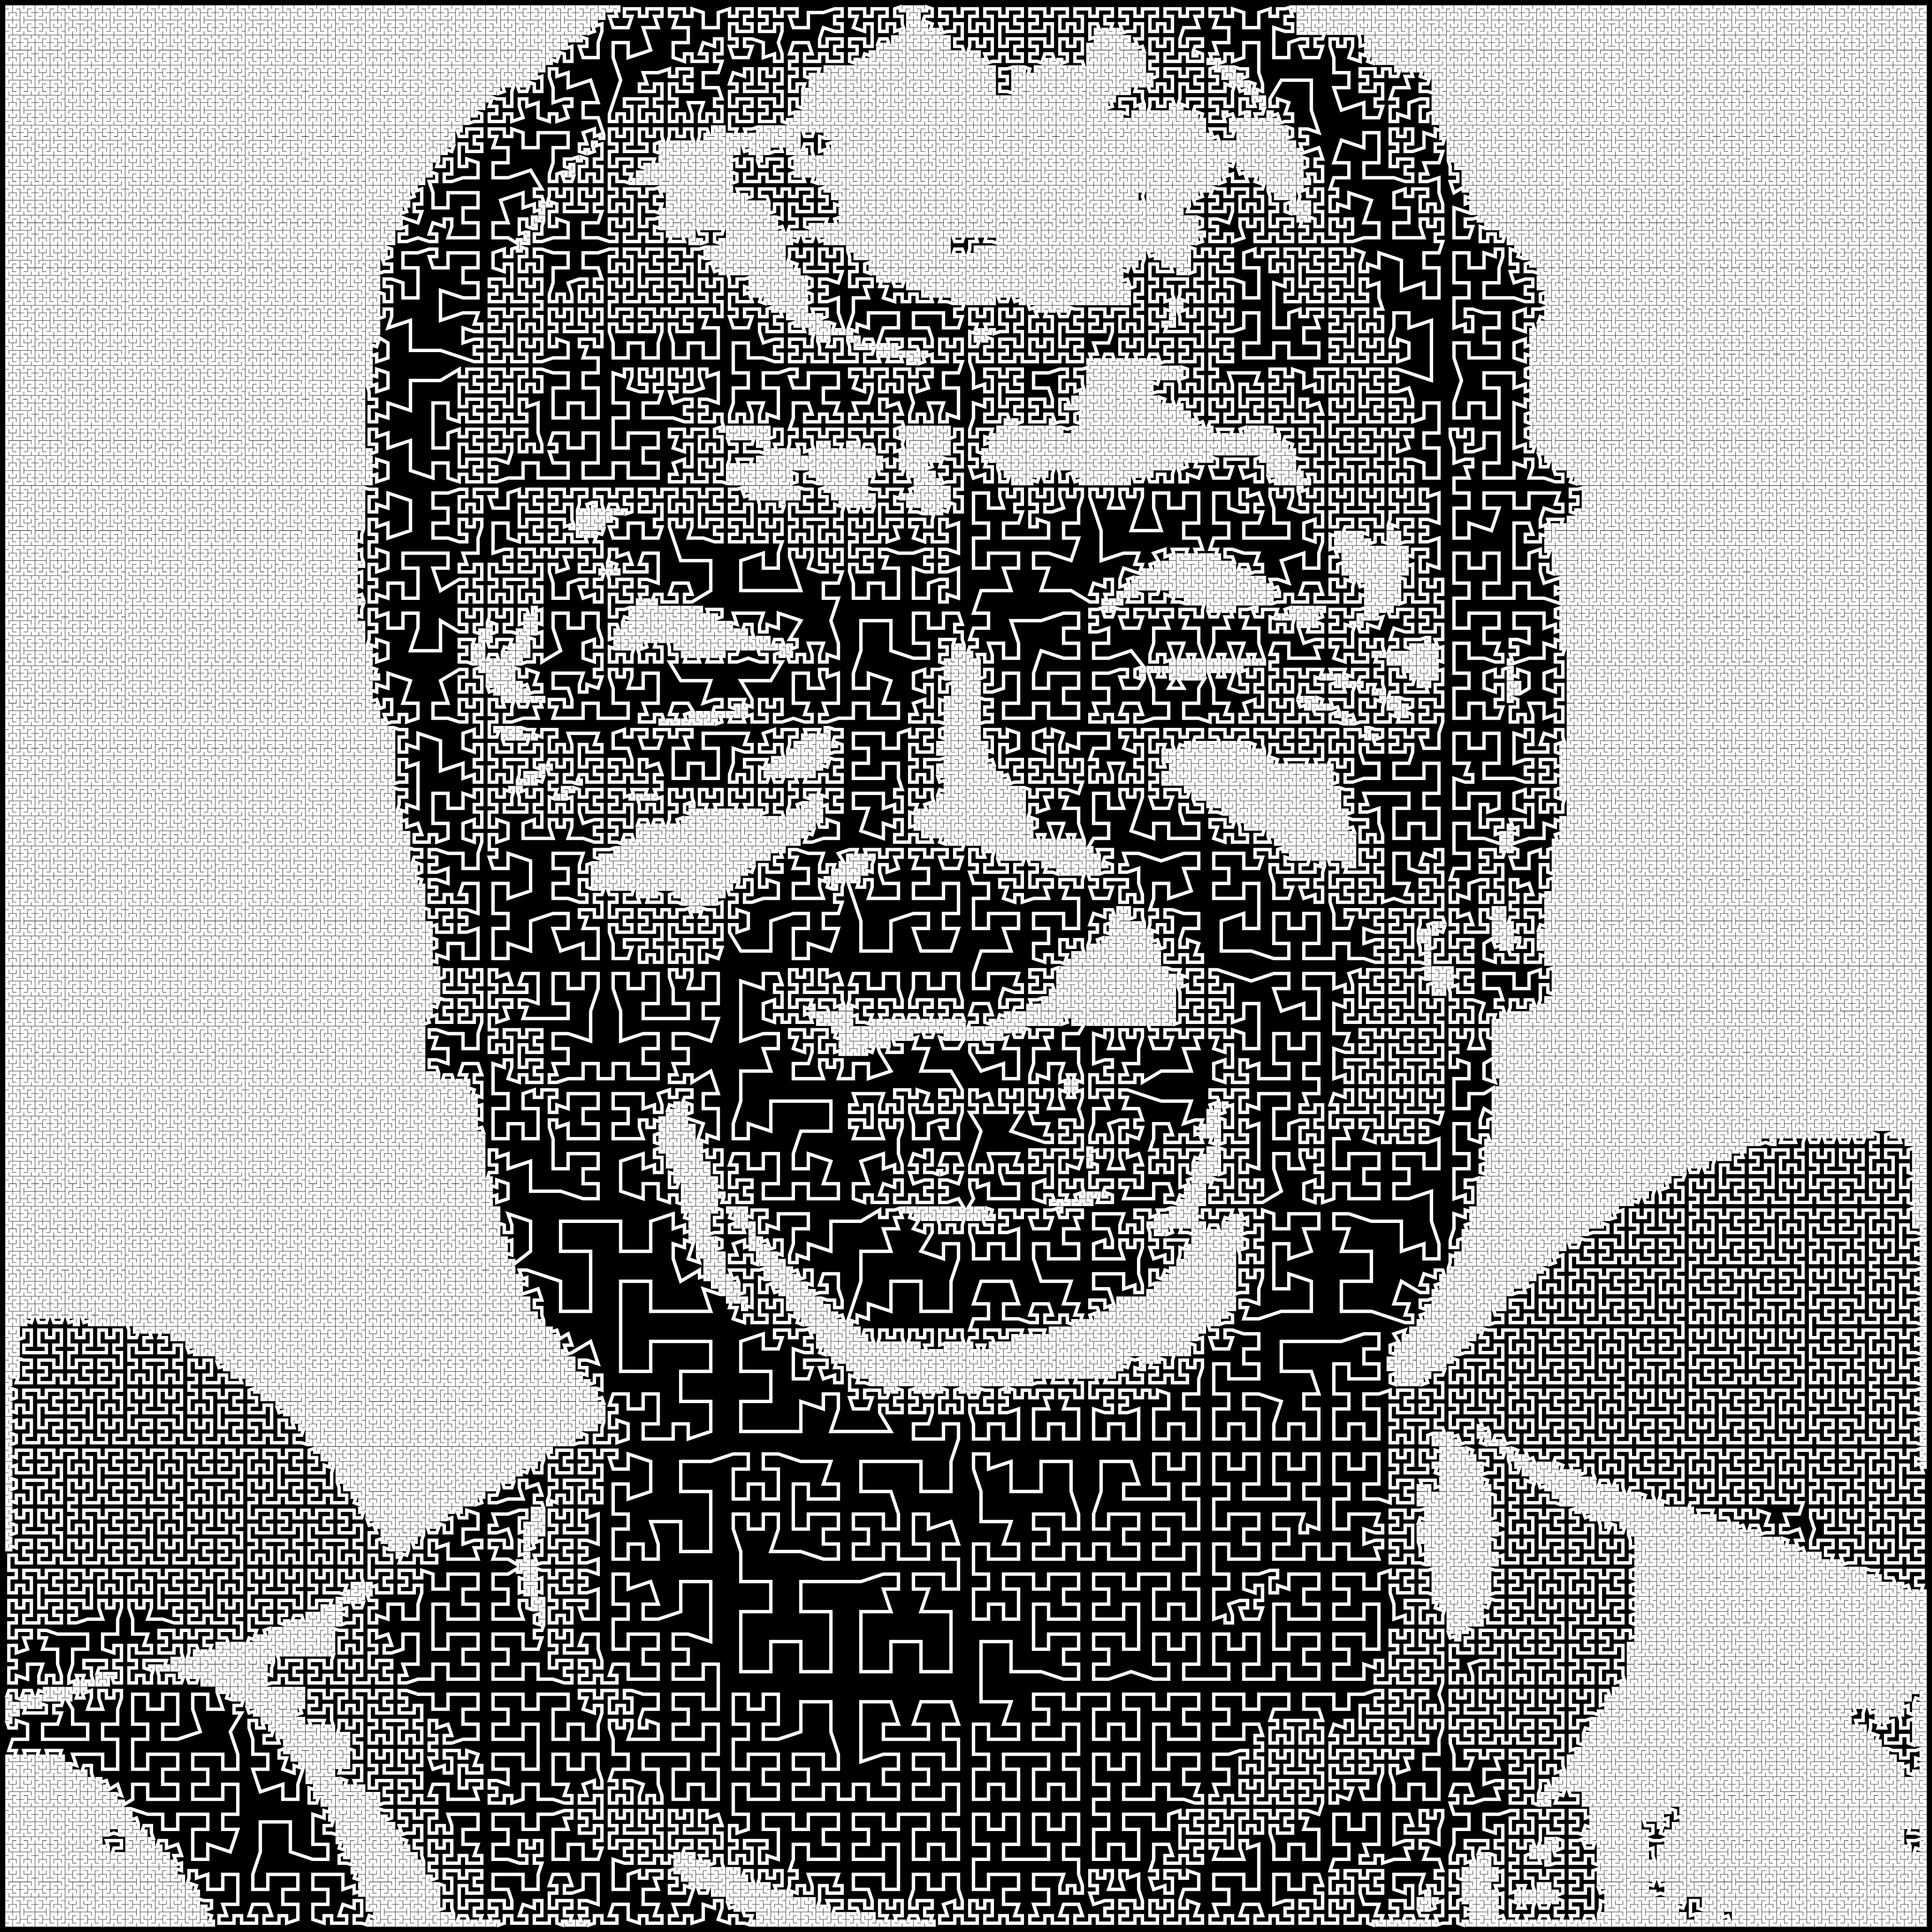
Does anyone have the g’mic skills to create a preset that can do this? Looks pretty cool. Also, it’s a single line fill much like the traveling salesman curves. Anyway, if so, even better if other single line fill formulas could be chosen. 
At GIMPChat, Tran’s been vibe coding, if you will, various cool tools. Asked him if he could make this, and he did.
Online tool: Adaptive Continuous Hilbert Image Maker
Example
1 Like
Where is the repository? I can see there is a tool, but where is the code for this? Is it FOSS? Also what an absolute mess that gimpchat website is! Nothing but ads that keep moving everything on page making it blink on and off, etc. I feel like I lost brain cells following this shallow rabbit hole.
code for it given as is from chatGPT: code for Adaptive Continuous Hibert Curve Image Maker
1 Like
Hi @lylejk
I’m not sure this is relevant, but just in cast see:
The new shape_hilbert command generates, as its name suggests, a 2D image of a Hilbert curve.
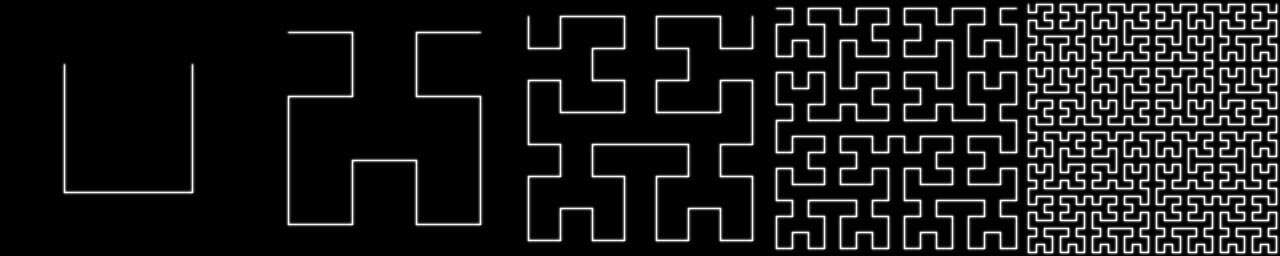
Fig. 3.2. The shape_hilbert command renders a Hilbert curve, illustrated here with increasing recursion levels.
If I’m off-base, just ignore. 
Thank you Mr. Tin. What kind of license do you attach to the code. for example MIT, or GPLv3?
The motivation is to create a single line fill that adapts to an image using, in this case, the Hilbert Curve. Already have tools such as the Traveling Salesman voronoi method to create such single line fills, but wanted to using more structured fills. Not sure how hard it would be for Tin to allow fill choices such as Peano, too, but not going to press him further since he figured out how to coax the AI bot to create this which is awesome and something I wanted for over 5 years now. lol

1 Like
I’m absolutely sure this is something that can be done in G’MIC; I understand the concept. I just need to take the time to brush up a bit on how to set up the Hilbert curve.
It’s like anything else, it takes a little time
2 Likes
you’re welcome. Thank ChatGPT! I am not sure what license since ChatGPT made it I just prompted. Maybe ChatGPT can decide what kind of license I was more interested in the tool’s ability.
Because this is a highly recursive vector, I thought it would be fun to use Metal to run a GPU shader on iOS.
My first attempt (Mode 1) was inverted compared with Lyle’s sample output from Tin’s web app (Mode 2).
K=
\begin{cases}
1-L & \text{Mode 1} \\
L & \text{Mode 2}
\end{cases}
T(K)
=
d_{\min}
+
(d_{\max}-d_{\min})
\left[
\operatorname{clamp}
\left(
C(K-0.5)+0.5,
0,
1
\right)
\right]^{\gamma}
where T is the continuous target recursion depth, L is normalized luma, K is the normalized detail weight, C is contrast, and \gamma is the Response exponent controlling how detail is distributed across tonal values.
The formula does not draw pixels directly. It calculates a continuous target depth. The program then tests successive integer recursion levels to select the final depth for each point on a fixed order-9 Hilbert curve. Metal moves those points to recursion-cell centers and draws lines between consecutive points.
The first few Hilbert curves
Order 0: 4^0=1 point (S = start, E = end):
S=E
Order 1: 4^1=4 points:
+--+
|  |
S  E
Order 2: 4^2=16 points:
+--+  +--+
|  |  |  |
+  +--+  +
|        |
+--+  +--+
   |  |
S--+  +--E
Order 3: 4^3=64 points:
+--+  +--+  +--+  +--+
|  |  |  |  |  |  |  |
+  +--+  +  +  +--+  +
|        |  |        |
+--+  +--+  +--+  +--+
   |  |        |  |
+--+  +--+--+--+  +--+
|                    |
+  +--+--+  +--+--+  +
|  |     |  |     |  |
+--+  +--+  +--+  +--+
      |        |
+--+  +--+  +--+  +--+
|  |     |  |     |  |
S  +--+--+  +--+--+  E
And\ so\ on.
An order-9 Hilbert curve contains
N=4^9=262{,}144
ordered points.
Rendering of the Hilbert Curve according to luma:
Let the integer Hilbert mapping be
(x_i,y_i)=h_9(i),
\qquad
(x_i,y_i)\in\{0,\ldots,511\}^2.
The normalized position used by the renderer is
\mathbf{p}_i
=
\left(
\frac{x_i+0.5}{512},
\;
1-\frac{y_i+0.5}{512}
\right),
\qquad
0\le i<N.
The 0.5 places each point at the center of its order-9 grid cell, and the second coordinate is inverted to match the renderer’s vertical coordinate convention.
At recursion depth d, the point belongs to a grid containing 2^d cells along each axis. The center of its cell is
\mathbf{c}_d(\mathbf{p}_i)
=
\frac{
\left\lfloor 2^d\mathbf{p}_i\right\rfloor
+
(0.5,0.5)
}{
2^d
}.
The floor operation is applied componentwise.
The camera image is sampled around this cell center. The sampling spread at depth d is
\Delta_d
=
0.34\,2^{-d}+s,
where s is the Smoothing setting after conversion to normalized curve coordinates.
For offsets u,v\in\{-1,0,1\}, the sampling positions are
\mathbf{z}_{uv}^{(d,i)}
=
\operatorname{clamp}
\left(
\mathbf{c}_d(\mathbf{p}_i)
+
(u,v)\Delta_d,
(0,0),
(1,1)
\right).
These positions are transformed to account for the camera crop, orientation, and mirroring before the camera texture is sampled with linear filtering.
Let
\left(
R_{uv}^{(d,i)},
G_{uv}^{(d,i)},
B_{uv}^{(d,i)}
\right)
be the RGB sample obtained at the transformed sampling position. The nine samples are converted to luma and averaged:
L_d(i)
=
\frac{1}{9}
\sum_{u=-1}^{1}
\sum_{v=-1}^{1}
\left(
0.2126R_{uv}^{(d,i)}
+
0.7152G_{uv}^{(d,i)}
+
0.0722B_{uv}^{(d,i)}
\right).
The mode converts luma into a normalized detail weight:
K_d(i)
=
\begin{cases}
1-L_d(i) & \text{Mode 1} \\
L_d(i) & \text{Mode 2}.
\end{cases}
If Invert is enabled, the program applies
K_d(i)\leftarrow1-K_d(i).
Contrast and Response reshape the detail weight:
Q_d(i)
=
\left[
\operatorname{clamp}
\left(
C(K_d(i)-0.5)+0.5,
0,
1
\right)
\right]^\gamma.
Here C is contrast and \gamma is the Response exponent. The resulting continuous target recursion depth is
T_d(i)
=
d_{\min}
+
Q_d(i)
\left(
d_{\max}-d_{\min}
\right).
The program tests successive integer recursion levels and selects the first level that reaches the target:
d_i
=
\min
\left\{
d\in
\{d_{\min},d_{\min}+1,\ldots,d_{\max}\}
:
d\ge T_d(i)
\ \text{or}\
d=d_{\max}
\right\}.
The d=d_{\max} condition guarantees that the search always stops. Because the camera image is sampled again at every candidate depth, L_d(i) and therefore T_d(i) can change as d increases.
The original order-9 point is then replaced by the center of the selected recursion cell:
\mathbf{p}'_i
=
\mathbf{c}_{d_i}(\mathbf{p}_i).
Fine points inside the same selected coarse cell therefore collapse to the same position. If two consecutive points collapse together, their segment has zero length. More generally, the vertex shader culls any segment shorter than 0.25 viewport pixels.
Each remaining pair of consecutive points defines a centerline segment
S_i
=
\left\{
(1-t)\mathbf{p}'_i
+
t\mathbf{p}'_{i+1}
:
0\le t\le1
\right\}.
The complete centerline path is
S
=
\bigcup_{i=0}^{N-2}S_i.
The vertex shader gives these centerlines a finite width by expanding each surviving segment into a square-capped rectangle.
For a viewport of width W and height H, let the segment endpoints in pixel coordinates be
\mathbf{a}_i
=
\left(
W p'_{i,x},
H p'_{i,y}
\right)
and
\mathbf{b}_i
=
\left(
W p'_{i+1,x},
H p'_{i+1,y}
\right).
The segment length is
\ell_i
=
\left\|
\mathbf{b}_i-\mathbf{a}_i
\right\|.
For each surviving segment, where \ell_i\ge0.25, define its unit tangent and normal vectors as
\mathbf{e}_i
=
\frac{
\mathbf{b}_i-\mathbf{a}_i
}{
\ell_i
},
\qquad
\mathbf{n}_i
=
\left(
-e_{i,y},
e_{i,x}
\right).
The effective line width in viewport pixels is
w
=
\max
\left(
0.5,
w_{\mathrm{setting}}
\frac{\min(W,H)}{800}
\right).
The square-capped rectangle generated for segment i is
\mathcal{Q}_i
=
\left\{
\mathbf{a}_i
+
\lambda\mathbf{e}_i
+
\rho\mathbf{n}_i
:
-\frac{w}{2}
\le
\lambda
\le
\ell_i+\frac{w}{2},
\quad
-\frac{w}{2}
\le
\rho
\le
\frac{w}{2}
\right\}.
The complete rendered stroke region is
\mathcal{Q}
=
\bigcup_{\substack{0\le i\le N-2\\\ell_i\ge0.25}}
\mathcal{Q}_i.
Apart from the GPU rasterizer’s boundary-coverage rules, the final monochrome pixel value at pixel-center position \mathbf{x} is
I_{\mathrm{Mode\ 1}}(\mathbf{x})
=
\begin{cases}
0 & \mathbf{x}\in\mathcal{Q} \\
1 & \mathbf{x}\notin\mathcal{Q},
\end{cases}
and
I_{\mathrm{Mode\ 2}}(\mathbf{x})
=
\begin{cases}
1 & \mathbf{x}\in\mathcal{Q} \\
0 & \mathbf{x}\notin\mathcal{Q}.
\end{cases}
In Metal, the adaptHilbertPoints compute kernel evaluates all adaptive point positions in parallel. The hilbertVertex vertex shader turns each surviving Hilbert segment into a four-vertex triangle strip with the selected line width. Finally, the hilbertFragment fragment shader writes the final black-or-white line pixels.
Together with the mode-dependent render-pass background, Mode 1 produces black Hilbert segments on white, while Mode 2 produces white segments on black.
This entire process repeats each camera frame.
Disclaimer: The Codex tool was used to generate the ascii diagrams and aided in the translation of Metal Shader Language code into mathjax for discourse purposes.
Way out of my league, Richard. Still cool stuff.
Definitely understand, David. Believe you started a thread where you were going to use Claude to create G’MIC presets, but I’ve not kept up with that thread.
@Tin_Tran btw welcome to the forum!
I am not a lawyer, but without a FOSS* license you essentially retain Copyright All Rights Reserved ^†.
According to OpenAI:
…you (a) retain your ownership rights in Input and (b) own the Output.
MIT is the most free FOSS* License, besides public domain (aka CC0). A lot of non-code artistic things on this forum are licensed CC4-BY-SA. Some development teams like RawTherapee use GPLv3.
* Free as in freedom
^† No freedom
@lylejk Here is a sample taken at 4k/60FPS:
Awesome stuff, Richard. Remember watching a episode, I believe, from Ancient Aliens where they mentioned that dimensions were not true; that all dimensions in the universe could be reduced to fractal like objects such as Hilbert curve (I know I’m botching the description a bit; lol).
1 Like
For any iOS user who has Apple TestFlight installed you can try it with this link:
Thanks for welcoming to the forum  I only want to join to share the code as asked (I know nothing about the code).
If ChatGPT rule says I own the code then as the owner of the code, make it MIT (or whichever one that is the most free then). hehe
Can’t get it to do Peano which is bugging me. It did it but it was tiled and not adaptive like the Hilbert one so it failed.