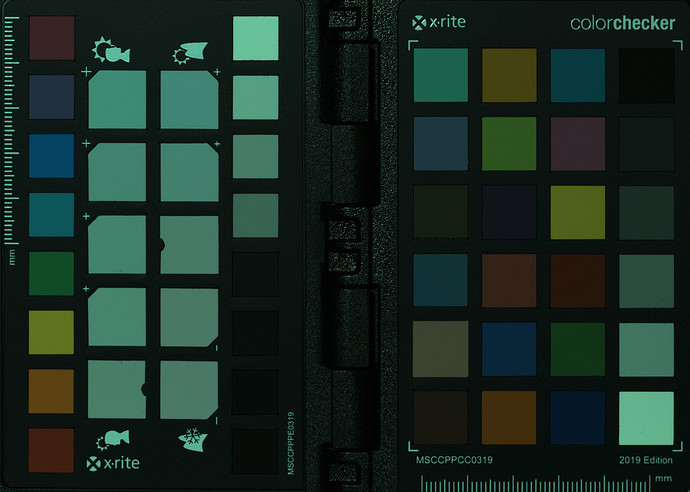
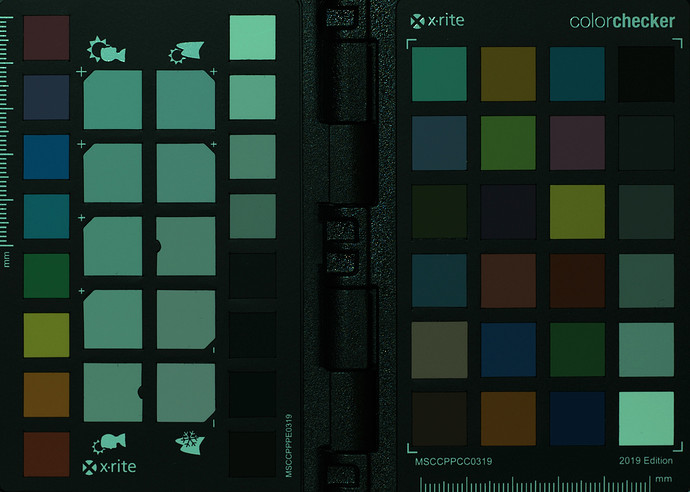
Warning: auto-selected neutral patch (D02) [...]

The finicky part I run into is mainly about cropping and perspective. If either or both aren’t exactly right it just aborts and doesn’t create any files (so no diag.tif either). scanin being able to do its job doesn’t guarantee anything though, that where diag.tif comes in (otherwise dcamprof make-dcp… will crash/abort or create a non-useable dcp profile).

Well, scanin was basically created for scanning targets that are placed on a scanner…

That is nice to know, thanks!

I’ve been using ColorCheckerPassport.cht (from Argyll_V2.1.2) and cc24_ref-new.cie (created by Anders Torger). Haven’t noticed any issues. But I’ll keep an eye out for possible problems.

EDIT: @Entropy512 Just had a look at your github issue and I do believe that I ran into that. I’m not able to create usable 16 bit linear tiffs using RawTherapee. I put that aside and am using dcraw instead atm, but it is on my list to check why that doesn’t work. You might have saved me some work.

I’m pretty sure the reference TIFFs are linear, they’re just not tagged as such. You need to manually tag them as linear with exiftool. (I use RT’s ICC profile generator to make a linear profile, and tag it using:
exiftool '-icc_profile<=foo.icc' file.tif

Alternatively you might be able to use the following:
Set camera profile to “none”
Set working space to sRGB
Use the ICC profile creator tool to create a linear sRGB output profile

@Thanatomanic found some sort of differences, I had no issues myself, and haven’t yet had time to track down the issues he saw.

Weird that ColorCheckerPassport.cht worked from you, every time I tried to use it, I got really bogus results in my .diag file

@Entropy512 or @Jade_NL could you try processing these two shots with dcamprof to see if there are noticeable differences in output?
https://drive.google.com/open?id=1IwoNkv6gkuWDBgJe0BKzxu3YTH5afJH3
https://drive.google.com/open?id=1aMLJOnbH2yplDGno-Bds08hOPl4BsucX

This has not so much to do with the original issue from Jacques, and more with the linked GitHub issue about embedding a linear icc profile. But if you could check that would be great. The ‘reference’ image is created by the ‘Save reference TIFF’ option in RT, the ‘manual’ image is created by disabling WB, setting input profile to ‘None’, working profile to ‘sRGB’, the abstract profile to ‘Linear’ and export profile to a custom linear sRGB icc profile that gets embedded.
When opened in GIMP these files look identical, but the color spaces are interpreted differently.

Used the wrong cht file in my first attempt, results are slightly different:

Having a look at these with XnView, immediately after downloading: Roughly half of the patches of the manual tif are noticeably darker compared to the reference tif. Not sure if the other patches are influenced as well, but I’m guessing they are.

Running scanin on colorcheckr-sample-manual.tif:

$ /opt/Argyll_V2.1.2/bin/scanin -v -p -dipn colorcheckr-sample-manual.tif   /opt/Argyll_V2.1.2/ref/ColorChecker.cht /home/jade/.local/git/dcamprof/data-examples/cc24_ref-new.cie
Input file 'colorcheckr-sample-manual.tif': w=1090, h=719, d = 3, bpp = 16
Data input file '/home/jade/.local/git/dcamprof/data-examples/cc24_ref-new.cie'
Data output file 'colorcheckr-sample-manual.ti3'
Chart reference file '/opt/Argyll_V2.1.2/ref/ColorChecker.cht'
Creating diagnostic tiff file 'diag.tif'
About to allocate scanrd_ object
Verbosity = 2, flags = 0x62a01
About to read input tiff file and discover groups
adivval = 1.000000
About to calculate edge lines
94 useful edges out of 107
About to calculate perspective correction
Perspective correction factors = -0.000010 0.000000 545.000000 359.500000
About to calculate rotation
Mean angle = 0.108095
Standard deviation = 0.653510
Robust mean angle = 0.091734 from 81 lines
About to calculate feature information
About to read reference feature information
Read of chart reference file succeeded
About to match features
Checking xx
Checking yy
Checking xy
Checking yx
Checking xix
Checking yiy
Checking xiy
Checking yix
Axis matches for each possible orientation:
  0: xx  = 0.168754, yy  = 0.177742, xx.sc  = 0.293563, yy.sc  = 0.293267
 90: xiy = 0.084548, yx  = 0.191020, xiy.sc = 0.573383, yx.sc  = 0.372608
180: xix = 0.168315, yiy = 0.132635, xix.sc = 0.293563, yiy.sc = 0.293267
270: xy  = 0.084583, yix = 0.187454, xy.sc  = 0.573383, yix.sc = 0.234639
r0 = 0.244845, r90 = 0.135748, r180 = 0.214079, r270 = 0.084157
There are 0 candidate rotations:
About to write diag file
/opt/Argyll_V2.1.2/bin/scanin: Error - Scanin failed with code 0x3, Pattern match wasn't good enough

Error occured and I cannot continue. The diag.tif

Running scanin on colorcheckr-sample-reference.tif:

$ /opt/Argyll_V2.1.2/bin/scanin -v -p -dipn colorcheckr-sample-reference.tif   /opt/Argyll_V2.1.2/ref/ColorChecker.cht /home/jade/.local/git/dcamprof/data-examples/cc24_ref-new.cie
Input file 'colorcheckr-sample-reference.tif': w=1090, h=719, d = 3, bpp = 16
Data input file '/home/jade/.local/git/dcamprof/data-examples/cc24_ref-new.cie'
Data output file 'colorcheckr-sample-reference.ti3'
Chart reference file '/opt/Argyll_V2.1.2/ref/ColorChecker.cht'
Creating diagnostic tiff file 'diag.tif'
About to allocate scanrd_ object
Verbosity = 2, flags = 0x62a01
About to read input tiff file and discover groups
adivval = 1.000000
About to calculate edge lines
153 useful edges out of 199
About to calculate perspective correction
Perspective correction factors = -0.000002 -0.000001 545.000000 359.500000
About to calculate rotation
Mean angle = 0.104256
Standard deviation = 0.610275
Robust mean angle = 0.088960 from 124 lines
About to calculate feature information
About to read reference feature information
Read of chart reference file succeeded
About to match features
Checking xx
Checking yy
Checking xy
Checking yx
Checking xix
Checking yiy
Checking xiy
Checking yix
Axis matches for each possible orientation:
  0: xx  = 0.308687, yy  = 0.358595, xx.sc  = 0.287892, yy.sc  = 0.291609
 90: xiy = 0.156132, yx  = 0.264904, xiy.sc = 0.570563, yx.sc  = 0.372744
180: xix = 0.337920, yiy = 0.337946, xix.sc = 0.287630, yiy.sc = 0.291609
270: xy  = 0.157982, yix = 0.292337, xy.sc  = 0.570563, yix.sc = 0.372705
r0 = 0.467127, r90 = 0.200882, r180 = 0.471389, r270 = 0.217062
There are 2 candidate rotations:
cc = 0.467127, irot = 0.088960, xoff = -43.273007, yoff = -19.679275, xscale = 3.473525, yscale = 3.429254
cc = 0.471389, irot = 180.088960, xoff = -1111.115879, yoff = -757.046693, xscale = 3.476690, yscale = 3.429254
About to compute match transform for rotation 0.088960 deg.
About to setup value scanrdg boxes
About to read raster values
About to compute expected value correlation
About to compute match transform for rotation 180.088960 deg.
About to setup value scanrdg boxes
About to read raster values
About to compute expected value correlation
Expected value distance values are:
0, rot 0.088960: 2728.691291
1, rot 180.088960: 3972.455379
Chosen rotation 0.088960 deg. as best
About to compute final match transform
Improve match
About to setup value scanrdg boxes
About to read raster values
About to write diag file
Writing output values to file 'colorcheckr-sample-reference.ti3'

The diag.tif

Not sure if still relevant but: No errors in the following 2 steps, here are the files created (tie, json and dcp):

colorcheckr-sample-reference.zip (802.1 KB)

Hmm, those results are different from what I got - I wonder if the problem is that new “abstract profile” functionality. When I last did the manual workflow, I got nearly identical data to the reference TIFF, and “abstract profile” wasn’t a thing yet. Your data is vastly different, almost like an attempt was made to convert sRGB->linear on data that was already linear.

At its core, the ‘Abstract profile’ is exactly the same as the options your previously had to set the slope and gamma for the working profile.

Hmm, I don’t remember those options, only for the colorspace.

What happens if you use “None” for the abstract profile?

(I unfortunately didn’t get around to looking at this last night and didn’t see your post until this morning just before leaving for work. I’ve been tending to get nerd-sniped in the evenings by reverse engineering an oddball 360 camera…)

I’m just going to put my findings up to now here. It is not a how-to but it might be of use to others.

Goal: Using RawTherapee to create a useable 16 bit linear tiff file from a X-Rite ColourCheckerPassport (2019 edition) that can be used to create a dcp profile. And I’ll add the commands I used to create the actual dcp profile.

After some inconsistent results and outright failures I’ve been experimenting most of today to get together steps that ensure a high success rate. I’ve been able to repeat what I’ve found and determined that failure using these steps are most likely due to not cropping or applying perspective correction correctly.

I’ve been able to create these profiles using dcraw to create the 16b linear tif, loading that tif into rawtherapee to do the perspective correction and cropping. But that’s just one step too many. These profiles I want to create are scene specific and not meant as a global, very precise, dual-illuminant input profile for a specific camera. I want to be able to spent as little time creating them and still be assured they are correctly created and usable.

Up till now I either got a result that did not match the dcp profile that was created using dcraw (and didn’t look right when applied) or I wasn’t able to complete the process due to an array of errors thrown by either the scanin command or the dcamprof make-dcp command. @Thanatomanic mentioned in post #11 using the ‘Save reference TIFF’ option which seems, at the moment, the only way to create usable 16 bit linear tifs using rawtherapee.

The resulting dcp profile created with the below steps matches the dcraw based profile (well, it does when meticulously looking at it on a good calibrated monitor…).

Needed software: RawTherapee, Argyll and dcamprof.

These steps work for me:

Creating the 16 bit linear tif

  • Open RAW with colourcheckerpassport in rawtherapee,
  • Set profile to neutral,
  • Set correct perspective,
    • Don’t use the automatic options but draw your own control lines (2 horizontally and 2 vertically) to straighten out the image. Use the 4 check-marks on the right pane to do this.
  • Crop the image,
    • Crop on the border of the matt black and the plastic cover. Ignoring the vertical centre, do try not to include any of the plastic.
  • Save this using Save Reference image.

This is what it looks like after saving and still in rawtherapee:

Read patches
scanin -v -p -dipn ccp.tif ColorCheckerPassport.cht cc24_ref-new.cie

ColorCheckerPassport.cht can be found in Argyll’s ref directory.
cc24_ref-new.cie is part of the dcamprof files.

Check the created diag.tif file. It should look something like this (I converted it to jpg for showing here):

Make json profile
dcamprof make-profile -i D50 -C ccp.ti3 ccp.json

Convert to dcp profile
dcamprof make-dcp -n "Camera name" -d "Profile name" -t acr -g adobergb-strong ccp.json ccp.dcp

Please, do not just copy and paste the above commands. I put them up here to show what I have done and to give people a bit of a reference. Depending on the circumstances and colour checker used some options need to be changed.

I strongly suggest to have a look at, or better still, actually read the following:

Encountered errors/warnings are:

  • glare warning is being mentioned when running the scanin command.
    • Try a better crop. The surrounding plastic might be the cause,
    • This could be caused at shooting time and especially semi-glossy targets seem to suffer from this (no personal experience),
    • This specific warning will not end with an abort, but the end result will be far from preferable!
  • Failed to generate TPS! Aborting (by dcamprof)
    • I’m not sure yet what actually causes this to happen but I only see this if I try to create a 16 bit linear tiff using RawTherapee and do not follow the above mentioned steps (not using the Save Reference image step in particular).
  • Scanin failed with code 0x3, Pattern match wasn’t good enough
    • Crop and/or perspective are set incorrectly. scanin is very, very finicky when it comes to those two!

I still don’t have a clue if the neutral patch warning is to be ignored or not. I’m guessing it is.

1 Like

Great write-up! Though, you are aware this exists? How to create DCP color profiles - RawPedia

2 Likes

No I was not. I am now though :laughing:

Just read the RawPedia article and it is more elaborate then mine and less technical then the dcamprof articles I linked to. Nice.

There’s one thing that I need to retry though:

I started today only using the 24 patch panel, rotated +90 and cropped to be in line with ColorChecker.cht instead of ColorCheckerPassport.cht. But whatever I tried the scanin part did not work correctly. No errors where shown but the allignment was off (as if the bottom part was pushed up 1/4 of the way).

This was not RawTherapee specific, also happened when doing the conversion to tiff step with dcraw instead of rt.

Another item on my list. Aren’t lists supposed to get shorter :thinking:

So I finally figured out why using the “ColorChecker Passport” chart has always failed for me - I only used the panel that is a 1:1 map with a CC24 - the “chart” assumes that you opened up the Passport flat and shot the whole thing - which I didn’t!

Not sure if that improves or hurts the profile.

I can tell you that if you just shoot the main panel with fiducials, using scanin’s -F argument works wonders. I’m planning on doing some edits to the rawpedia article to point people to that argument if they have issues with autodetection.

Using -F to point to the check-marks seems a last effort resort, at least for me. Although it is rather nice to know that this can be done. Figuring them out, using GIMP, seems a bit of a pain.

I’m not at all intimidated by rawtherapees (manual) perspective correction process and noticed that I get rather good results, better then the automated one, which is too often rejected by the scanin command.

About the 24 vs 50 patches: I don’t have the experience yet to say that the created dcp file will be (significantly due to the 8 saturation patches?) different, but I’m guessing that scanin will be even more finicky when using 50 instead of 24 patches.

The steps I describe work for me at the moment so I’m going to stick to that and figure out if I can fine-tune/optimize this process.

I must say once I sorted out which way I had to orient the target I have never had all these issues with my spyderchecker 24. I wonder if your cht files are a bit off or something like that??

I think here you have the camera profile applied when you show it in RT but the reference image is saved before that is added to I think setting that to none would look more like what your saved tiff would look like in another app…ie more like the diag.tiff …much darker…

This is what the saved tif looks like when using Save Reference image (again, converted to jpg for viewing pleasure):

And this is what it looks like using dcraw (and cropped in rawtherapee):

Not much difference, the rt version might even be a tad darker.

This from RawPedia about using Save Reference image:

Clicking the “Save Reference Image” button saves a linear TIFF image before the input profile is applied.

So, changing the Input Profile doesn’t change anything when saving this way.

No sorry I meant when you display it in RT as in the screen shot it will be using the camera profile to show the result in the display with the camera profile added and so that would be what would be a bit different than what gets saved using that option…the results you show are what I would expect in the saved image for sure…I was just commenting that setting it to none might make the displayed image a better match for the saved one for the purposes of your screenshot…no big deal I agree you are creating a perfectly valid input image…It funny looking back now that when I created the tiff in DT using the suggested pass thru method and in RT using the save reference the tiff files would show differently one was much darker I can’t recall but checking with xnview I could see that one had and embedded profile and one did not…again I can’t recall which was which without going back and running through it…

Yeah, I know that that what is shown doesn’t correspond with what it saved.

The problem is that everything else might look good in rt but when exporting it it isn’t accepted by scanin and/or dcamprof. Look at the replies by Entropy512 and Thanatomanic. This is a known issue (see github entry mentioned) and is being worked on/evaluated.

Out of ignorance and curiosity would the DT method work in RT?? Set all the profiles to the same linear color space and export…would you get the same pass-thru as in DT??

That used to be the case, or seemed to me last time I tried it, but it’s been a while. @Thanatomanic had issues (they’re pretty obvious in the examples he posted) - It might be due to setting Abstract Profile to Linear instead of None. I’ll try a few experiment revisits tonight… Well if I remember after I finish dinner. :slight_smile:

Reference TIFFs are saved properly, but lack an ICC profile that tags them as being linear. This causes problems if you need to do any subsequent tweaking - not necessary if you’re REALLY good with the crop and PC tools, but necessary if you are profiling a fixed-lens fisheye device such as a singleshot 360 camera. (I filed that issue after my adventurs in profiling a Mi Sphere). Morgan’s response was that the Reference Tiff feature may no longer be necessary, so the discussion Roel and I were having was regarding reproducing the Reference Tiff functionality using existing settings in RT other than the RefTiff button.