What do people use to get the most detail out of the shadows in images with large differences between highlights and shadows?

You should be careful with the non-pixel-wise operations, such as tone mapper and local contrast.
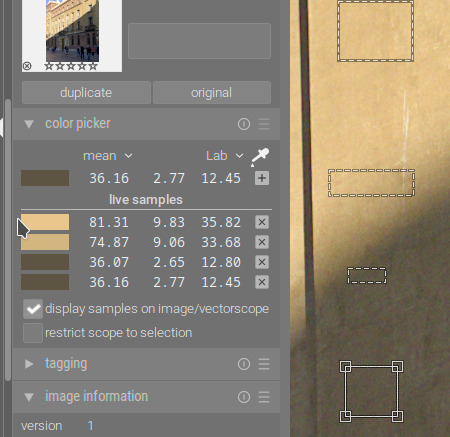
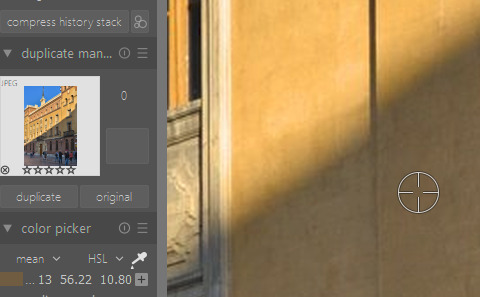
Here is an example. It is easily visible, but also measurable, that in the area where the directly sunlit area transitions into the shadow, the shadow first drops too deep, before becoming a bit brighter again, creating an artificial dark outline.
image
image
Note the L value is <9 in the transition area, >10 in the shadows.

Approximately the same area in the original image, without tone mapping/equalising (only exposure is boosted):
image
image
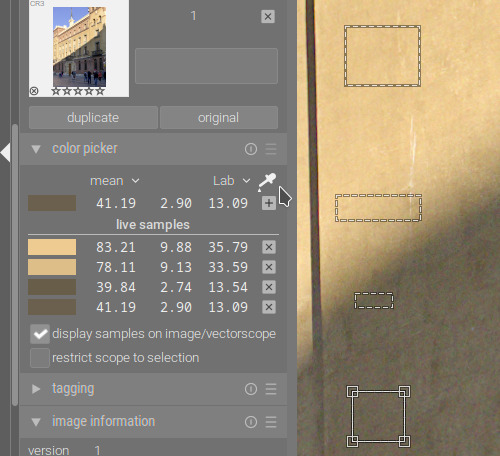
L is slightly above 11 in the transition area, slightly below 11 in the shadows.

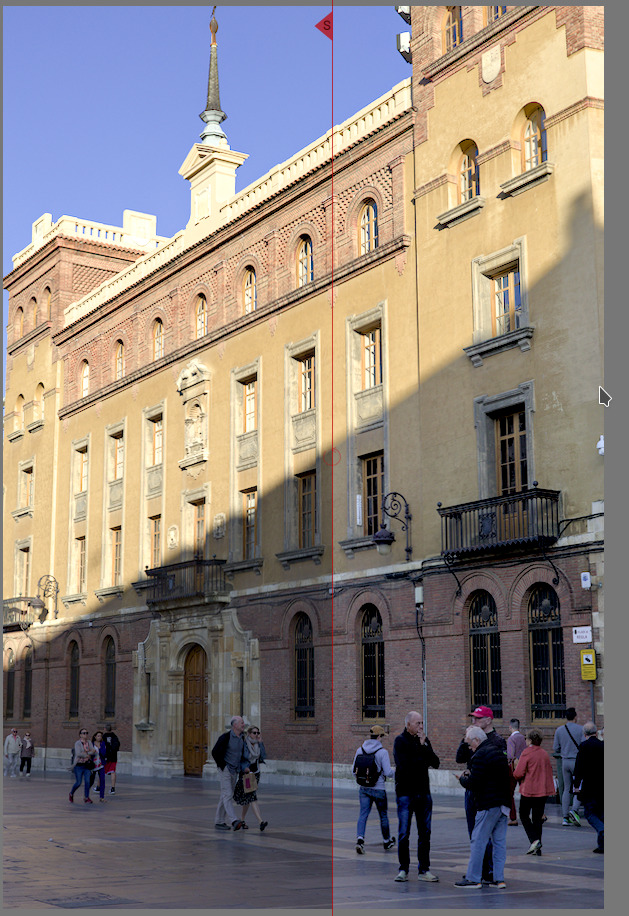
Looking at lower zoom, this is even more visible. Top: tone eq/local contrast; below: only filmic (pixel-wise).
image
image

1 Like

@kofa I was about to comment on that effect but you actually explained why it happens and how to avoid it. :slight_smile: Not that I could personally do any better with darktable though (or even as well). I’m just not practiced well enough these days.

Colour pickers with just filmic applied:
image

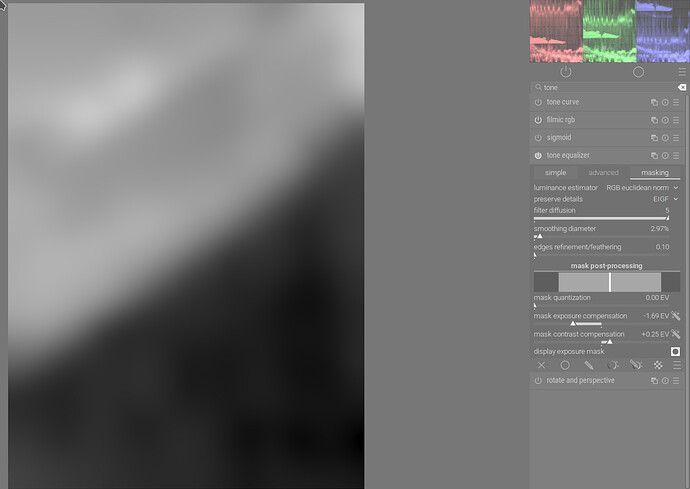
With a heavily blurred tone equalizer mask to lift the shadows:
image

The transition (brightly lit, well above the boundary → brightly lit, just above the boundary → shadow, at the boundary → shadow, further away) is preserved (the L order is always 1, 2, 4, 3 (81.31; 74.87; 36.16; 36.07 and 83.21; 78.11; 41.19; 39.84)).

The tone equalizer mask:


And the gentle curve to lift the shadows:
image

1X1A5669_01.CR3.xmp (11.3 KB)

A more heavily pushed version (I shifted the mask so it only covers the shadow parts, as I didn’t want to affect the highlights).
image
1X1A5669_02.CR3.xmp (11.9 KB)

1 Like

I’m confused. Isn’t 39.84 darker than 41.19?

1 Like

Sorry, right. I read the wrong column values.
The order is 1, 2, 4, 3 in both cases → I’ve updated the post.

Late to the thread , so there will be a lot of tips already i guess.

But the OP already talked about ‘raising exposure and handling highlights with filmic’ and then you already have a good base. People not wanting to raise exposure - afraid of clipping highlights - then have issues with brightening shadows.

I often raise exposure for shadows/mids and deal with highlights later.

The quick and lazy fix if it seems ‘too much’ for filmic or sigmoid to handle , is to use the tone equalizer with one of the 'compress shadows/highlights ’ presets .

And in the category ‘whatever works’ , i find that the easiest to do is to put that preset BEFORE exposure in the module order .(so under it in the module list).

And if i only want a bit instead of the light/medium/strong presets, i take one of those presets but reset the curve by double clicking the curve in the advanced tab.

All to avoid having to mess with the masking tab of the tone equalizer :).

There is a lot to learn and master in that masking tab and it can really help with nasty scenarios, or fighting haloing. But the first thing I try is also one of those presets, and maybe a straight curve where i use the mouse to hover over a shadow part in the image and hen nudge the scroll wheel up.

Finally, I’ve seen it mentioned around here: both tools like Lightroom, but also the old shadows and highlights tool do more than just brightening. They use local contrast to bring details out. This might be the missing link for some.

I’ve talked before about my dirty ‘clarity trick’ for highlights: local contrast module, in bilateral mode, contrast set to 3 (or maybe even 2 for shadows ) entered on keyboard , then crank the detail slider (way too) high. Then enable parametric mask to have it only apply to highlights with a bit of feathering , and then adjust overal mask opacity blending percent to lessen effect and dial in how much you want.

This will work for shadows as well I guess, but noise is more of an issue, you dont want to bring out those details.

And like kofa said, haloing and other weird edge artifacts is something to be careful about, specially with the local contrast module.

Disclaimer: I’ve never mastered the scene referred local contrast options in DT so I’m stuck with this, does not mean you have to! Try diffuse and sharpen local contrast preset and see what you can tweak (for me it always seems too low radius compared to what Ilike, and crushes blacks too much to my liking ).

2 Likes

My try with dt 4.2.1. I probably haven’t brightened the shadows as much as OP is asking for, but they look right to my eye.

1X1A5669.CR3.xmp (9.1 KB)

3 Likes

I’ve done this :
quite the same as other people : tone EQ in two instances + Diffuse & Sharpen


1X1A5669.CR3.xmp (Ansel, 13.6 KB)

5 Likes

I need to update my libraw, rawproc read the image just fine but got almost none of the needed metadata: black subtract, as-shot white balance. I pulled them out of a exiftool dump and entered them manually. Did get color primaries, go figure.

Anyway, I used a movie-trick tone curve strategy: first apply a loggamma curve, then shape the data with a control point curve. Those are always interesting, so I’m posting the rawproc screenshot to show it:

Note the flat part in the interregnum between the shadow tones and highlight tones; those pixels are being severely mistreated, but there are so few of them and the effect is thusly minimal…

7 Likes

GIMP Colors Shadows-Highlight

1 Like

This is one of my main struggles with post processing. The tools have become much better lately both in dt and RT (I mainly use the latter). My conclusion so far is that you can’t really push it very far despite the excellent tools. It ends up looking unnatural. Theoretically I guess you should be able to make a high contrast scene look like a low contrast one but in practice I’ve not succeeded in making it work consistently, Neither have I seen others do it well.

Recently I’ve accepted deeper shadows than I did before. Soon I’ll be blowing highlights instead.

3 Likes

You’ll be limited by the amount of data in shadows and you will have to correct white/color balance too because of that.
Only increasing exposure + contrast isn’t enough.

1 Like

Depends on the image.

This particular one is a really good example of high dynamic range and varying color temperature. There are two very distinct regions of light energy, one lit by direct sunlight, one lit by indirect sky; the tone curve itself can pull up the lower region but there are two different white balances to consider. I just played with the white balance in my rawproc rendition; they’re not that different, but what do you prefer, neutral top/blue bottom, or warm top/neutral bottom? Neither one really looks that bad, just what you want to put out there…

Even un-natural has its place; witness real estate portfolios in the US…

2 Likes

Ouch. :laughing:

Oh, I’m not above abstraction. I did this with GIMP some time ago, dug it up for a post elsewhere about departing reality:

DSC_7696c-small

I mean, what do you do with a noisy JPEG??

Destroy the structure with small radius blur, convert to monochrome, increase contrast, add grain. :white_check_mark:

Edit: this also works with clean RAW files. :sunglasses:

2 Likes

Here’s my take on it. DT 4.3 dev.

Edit minor tweak… the women next the door had blue-ish skin which bothered me. So I used to Color Balance RGB to neutralize the shadows with the color picker (or at least that’s how I thought that worked) than another instance to warm up shadows slightly. That seems to have fixed it


1X1A5669.CR3.xmp (15.8 KB)

2 Likes

Mine too … Win 7, FireFox, 99% sRGB LCD.

The second one looks greenish for me. I am using Firefox. I download the xmp that I thought was for the first one, but when I opened it, it appears to be for the second one, as it is greenish.

At the same time, many others looks more greenish here than when I open them in dt. I have been wondering if it is Firefox.

Green on my phone was well although that’s in Firefox mobile. But I have no reason to suspect it’s the browser.