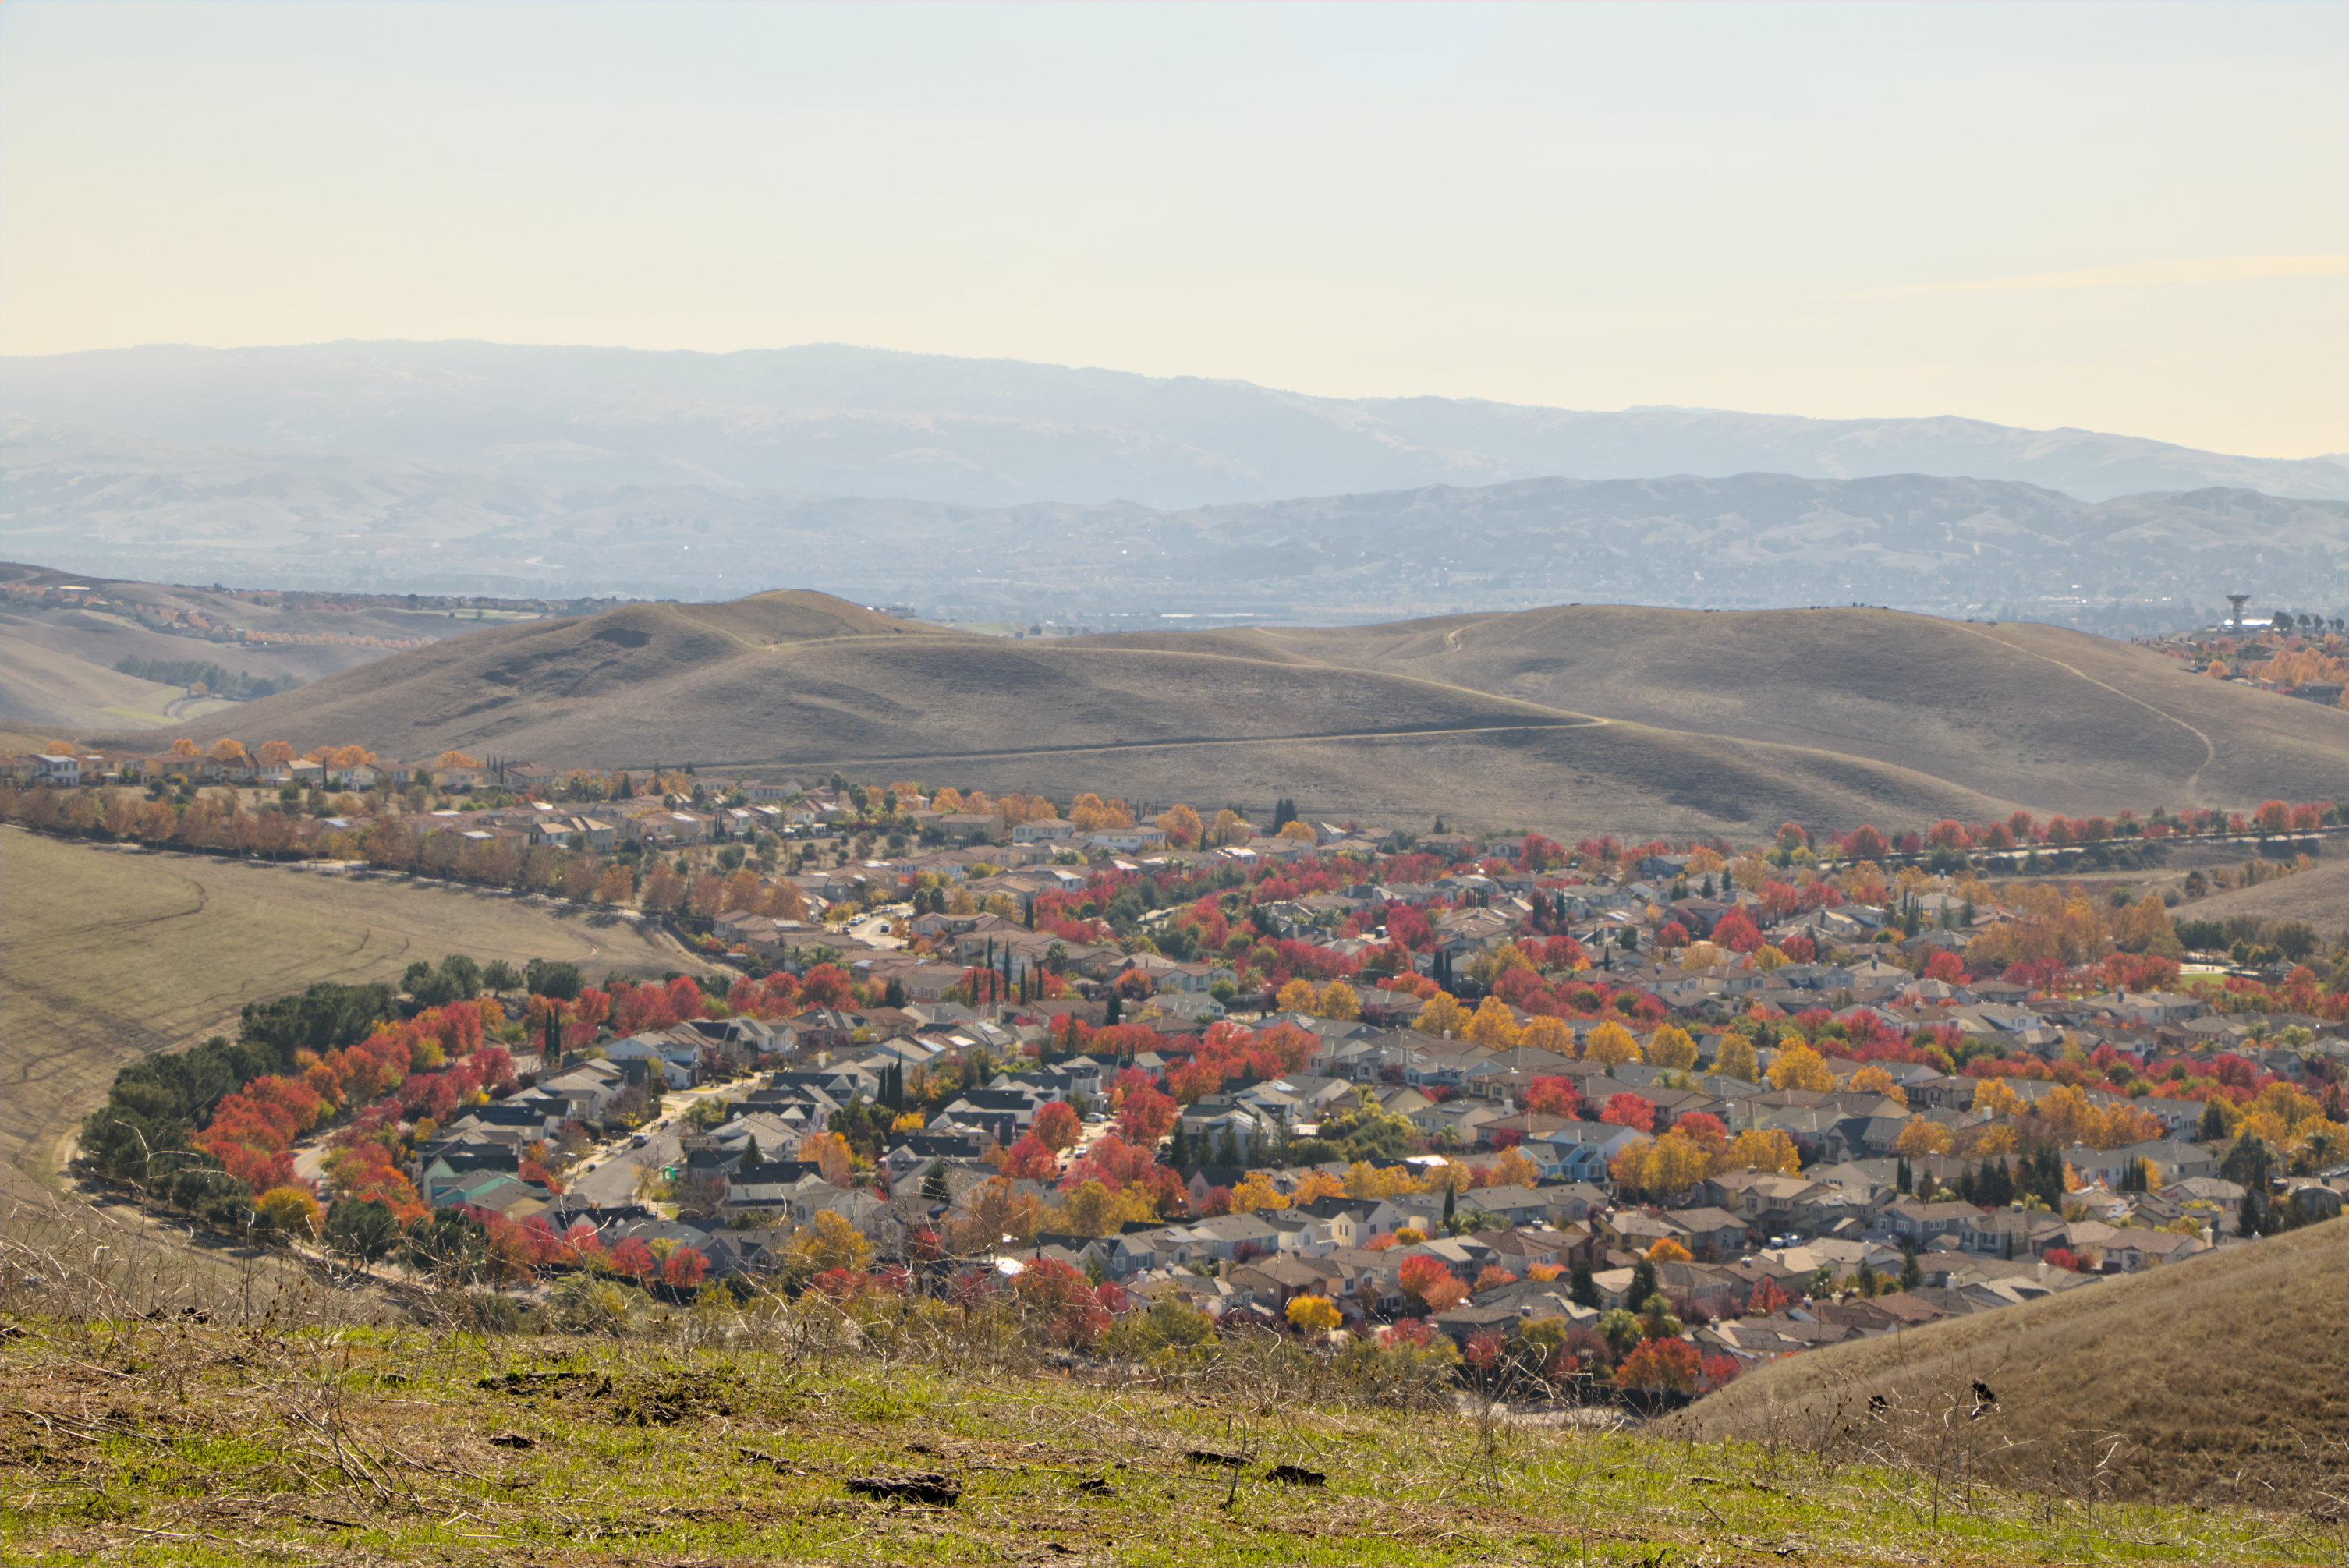
I understand I should probably be using HDR / bracketing in these cases. I didn’t exactly shoot into the sun, but I still captured a part of the sky that was almost directly under the sun in this picture. Is there anyway to recover a part of the bluish white sky near the sun? Or is the sky normal, as in as white as it should be?
IMG_6663.CR2 (28.5 MB)
2 Likes
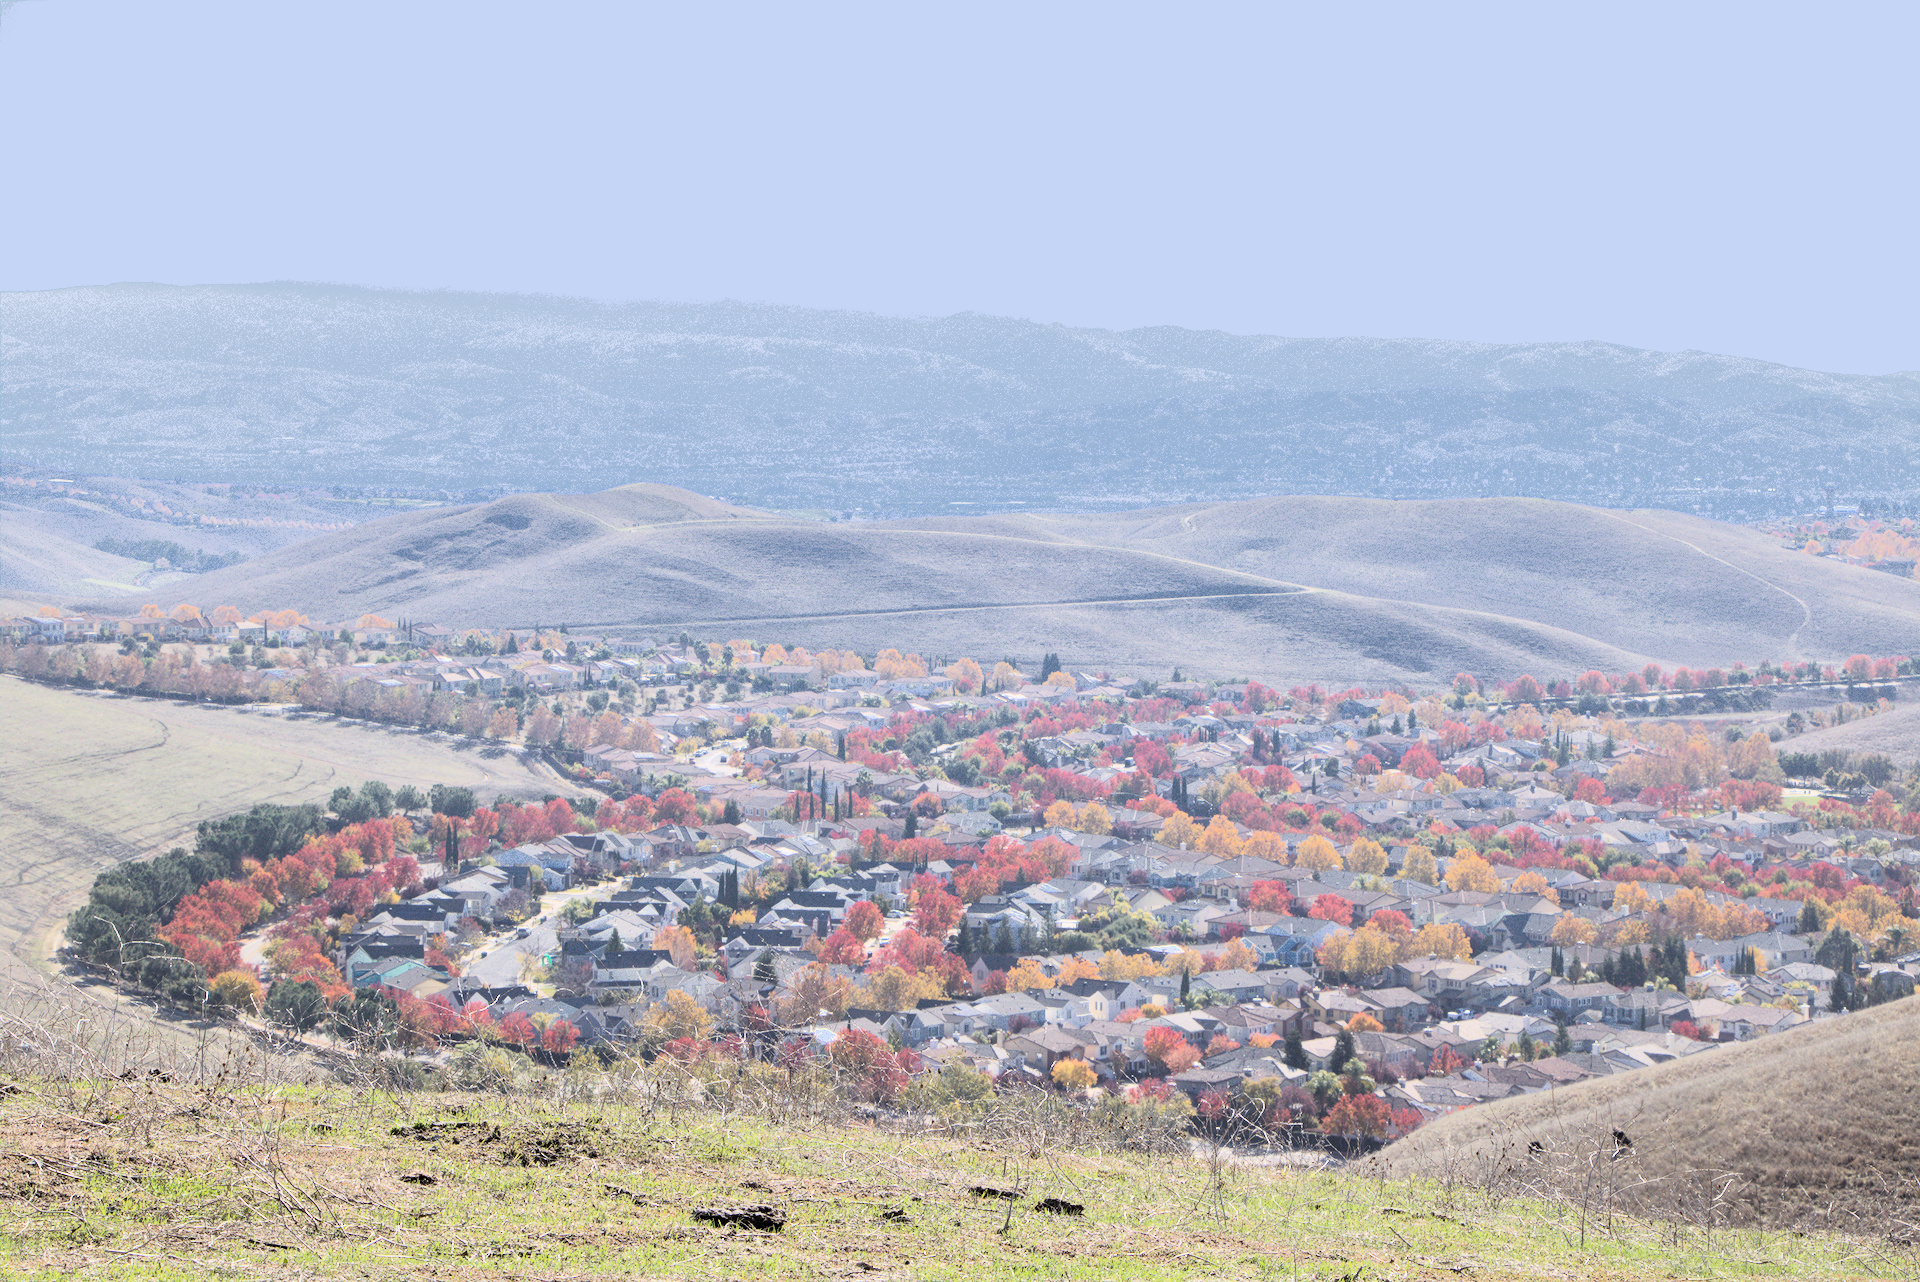
Darktable 4.0.1. Edited, the sky had a bluish tone and I have corrected it

IMG_6663.CR2.xmp (24,7 KB)
1 Like
Try to upload the photo too, not just the file, so people will get more attention


3 Likes

IMG_6663.CR2.xmp (11.4 KB)
1 Like

2 Likes
Thanks I like this one. What did you use and how did you do it?
Ps, you should not have to do bracketing, just underexposing so the sky isn’t clipped will get you there
Underexposing is far less destructive than overexposing, specially if only done with like -1ev or -2ev.
Capturing as much light as you can is always a good idea, but always taking the limits into account (such as movement, ease of taking the shot, and yes, nl raw clipping)
1 Like
Thanks … that estimate helps. I did visit the same spot today and did a -1ev and -2ev shot. let me see how that comes along. The sky was clearly clipped in the previous version as the edits have more details than I could bring, but there is still lack of detail in the clouds which probably has to do with clipping.
Thanks … This is probably closest to how it looked in reality. What software did you use?

IMG_6663.CR2.xmp (10.1 KB)
Used a watermark sky for effect…not sure where I got it so can’t share it but you could substitute one in the watermark module to see the effect or turn it off…
1 Like
In new latest weekly build of DT4.1 I found the new default ‘inpaint opposed’ highlight reconstruction did a great job here. (it’s due in the up-coming release of 4.2)
Nothing special otherwise.

IMG_6663.CR2.xmp (12.7 KB)
Edit: the above was using normal filmic in v6 max rgb. Out of interest I tried using sigmoid instead, and found that in the per-channel mode that I often like, it noticeably looses details in the sky. I know others have found this, but this is the first time I’ve really noticed it. In rgb ratio though, it comes out looking much more like my filmic result.
sigmoid in per-channel, with color balance rgb also tweaked compared to above.
IMG_6663.CR2.xmp (15.2 KB)
![]()
Another thing to remember is that having details in the data and having details visible are two separate things .
If the sky is clipper in your raw data , you need highlight reconstruction to try to fix that clipping and get some details back.
But, all kind of tone mappers (base curve , filmic , sigmoid , …) have some sort or highlight rolloff. Which means the highlight data gets squished together, making details harder to see.
So to bring those details out more , you have to use some sort of local contrast / detail enhancing.
The (in)famous Lightroom highlight slider does both at the same time. It reduces the roll off, but also adds clarity / local contrast to the highlights. Making it a one-slider easy fix if that’s what you want , but a nightmare if that’s NOT what you want.
It might help to play with all modules off in Darktable , add highlight reconstruction (or not) and then turn DOWN the exposure by a massive amount. Just to see and learn what data is in your file. Details that are not there, will not magically become visible later.
But details that ARE there, well now you know, and you know that there probably is something to bring them out again if they suddenly disappear.
Clipped sensor data can be prevented by underexposing bright scenes (or using bracketing , etc…). Getting the details to show is something to do in the edit 
1 Like
IMG_6663.CR2.xmp (6.7 KB)

local contrast in multiply mode (masked), to bring back details in the sky (and to dehaze the distant hills a bit).
6 Likes
Love your treatment of this…only thing I notice was the foreground seems a bit crisp to the point of distraction as eye flows from the front of the image into the town…but really nice treatment of the sky …nice edit…
Yep, diffuse or sharpen with the dehaze preset. I do find it too harsh at times, but didn’t reduce its strength this time. I concentrated on the sky, and forgot to check the photo as a whole. Also, I was working on the laptop (where I normally only do quick tests for the Windows build). On the desktop, my normal environment, I usually use a preset based on dehaze, masked for lighter, not too saturated, bluish areas, to only remove haze where it is present.