If you reduce the contrast in the tone curves in ART, the brightest areas of Alberto’s grayscale suddenly turn black.
mid.tif (3.4 MB)
Not only in the view, but also when exporting the image.
Is this normal?

Hi,
it’s a known issue; will be fixed in the next release.
Best
I see, no hurry.
Tell me, how do you get the Color Picker to show 0.18 for grey?
PS: Maybe we can delete this topic now. Do you know how to do that?
It was a legit observation and so I think the modified title is fine… I think it only happened with linear and neutral as the combination… I could be wrong… As for the picker…click on the numbers in the left panel picker display…
Hello Todd,
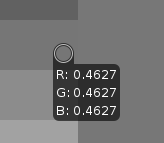
When I click on the numbers on the left, the display changes to
46.3% or 118 or 0.4627 - How do you do it right?
I think histogram values take into account the output profile… change from the gamma profile ie likely you have srgb and go to linear rec2020…that should do it…
1 Like
Perfect, you’re absolutely right. How do you know something like that? I’m very surprised.
I had never paid attention to it before. So far I obviously had sRGB (ICC V4). Does it matter what you choose when exporting a jpg or tiff?
Is it generally best to always use this Linear Rec. 2020 (ICC V4)?
Depends what the next steps are… the rec2020 or prophoto are good for further processing and sRGB still good if you are just showing it on the web
…finish the photos with Gimp. Do you know which is the best profile?
If you only want to do touch-up and the like, sRGB is probably the best. The wide gamut of Rec2020 comes at a price: the wider gamut you want to represent with a given number of bits, the larger the steps are between the levels that the numbers (at least integers, so 8- or 16-bit images) can represent, which can lead to visible posterisation. With float, that’s not a problem.
If you need the wide gamut (you do intensive colour manipulation in Gimp), Rec2020 could be an option, but then it’d probably be best to use float. And, of course, when you open the image in Gimp and it prompts you if you want to convert to internal sRGB, you should dismiss that dialogue without conversion.
2 Likes
Yes, there were endless discussions about which color profile was the best for Gimp, and I decided years ago to leave it to Gimp to continue working in its profile. I will leave it at that. Thank you for your words.
If you ask Gimp to convert the image to sRGB, there is no point in exporting from darktable in any wide-gamut space.
What are you doing in GIMP with the image… just curious
Hello @priort
As surprised as I am by your question, it is also justified.
It’s a white border that I make around the picture, something like a passe-partout.
This separates the pictures from the background of the table or wherever they are placed.
And occasionally I make small retouches.
And today, by chance, a bigger one, one that probably won’t work with ART or dt: a stupid decorative picture above the model’s head has to go. Stupid work, because I don’t normally manipulate the pictures.
If you know how to make a white border around it with ART, it would be great to know how.
Not off the top of my head… DT has a borders module but not sure without thinking how you would do that in ART… lots of clever folks out there… seems like a lot of effort to get your border when that is all you are doing and its a simple white one…
yes, only a simple white one
There’s a kind of hack to add a white border in ART, but it is actually eating the border of the image instead ogf adding white pixels around the canvas:
- in Color/Tone correction module, add a rectangular mask for the border
- inverse the mask
- set all 3 sliders (Highlights, Shadows and Midtones) to their maximum
- duplicate this mask to ensure the border goes really white
- and voilà
You can also do a black border, with the sliders set to their minimum.
A screenshot:

2 Likes
Hello @sguyader
Oh, that’s a great screenshot - but the wall - isn’t it easier to quickly open the image in Gimp, enlarge the canvas and open a new white layer, move it to the back and you’re done?
It could be simpler indeed, but it implies you need to leave ART, and requires several clicks.
In ART you can save the Color/Tone correction settings in a partial profile and apply it quickly to any image which has the same dimensions. For example, in general I tend to resize my images to “full HD” size (i.e. with a 1920 pixels dimension for the largest edge). If I create 2 partial profiles from a “full HD” image (one for landscape orientation, one for portrait) then I can batch apply the profile to my images on their way to the batch processing queue.
Edit: now that think about it, I think I did a custom command a while ago, which uses Imagemagick in the background to add a border. I have to try and find it.
1 Like
I’ll think about it, especially since it’s already a hassle to make those white borders around my photos. I also change their dimensions from time to time because sometimes I like more, sometimes less. Maybe one day I’ll order the pictures without white borders, then the issue will be obsolete anyway.
Do you also do small retouching with ART? I’ve already noticed that if there are a lot of small fluffs that I want to remove, then dt becomes very sluggish. It won’t be any different with ART, but the original image is always retained.