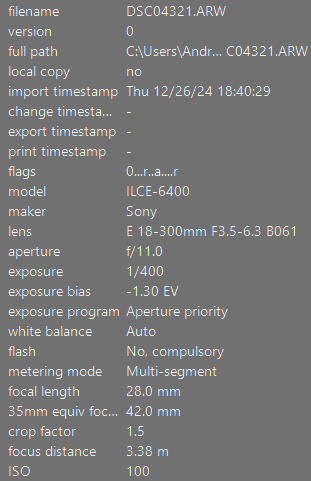
I switched to a Sony A7 iv recently, and something I’m noticing on my first set of images is that for very bright scenes where I’ve upped the exposure comp significantly to account for a blown out sky, the difference between the on-camera histogram/JPEG preview and the RAW file processed in DT with default settings is huge. Like I have to go +3 or 4 EV on the exposure module to get exposure roughly in the range seen on camera.
Is this something any of y’all have run into before? I know DT and the manufacturer obviously aren’t going to interpret a given RAW file the same way, but this is just so egregious it has me wondering if my camera is lying to me (maybe some helpful “image style” or whatever setting I need to turn off?) or if maybe some module in the default set of DT modules is automatically darkening the image.
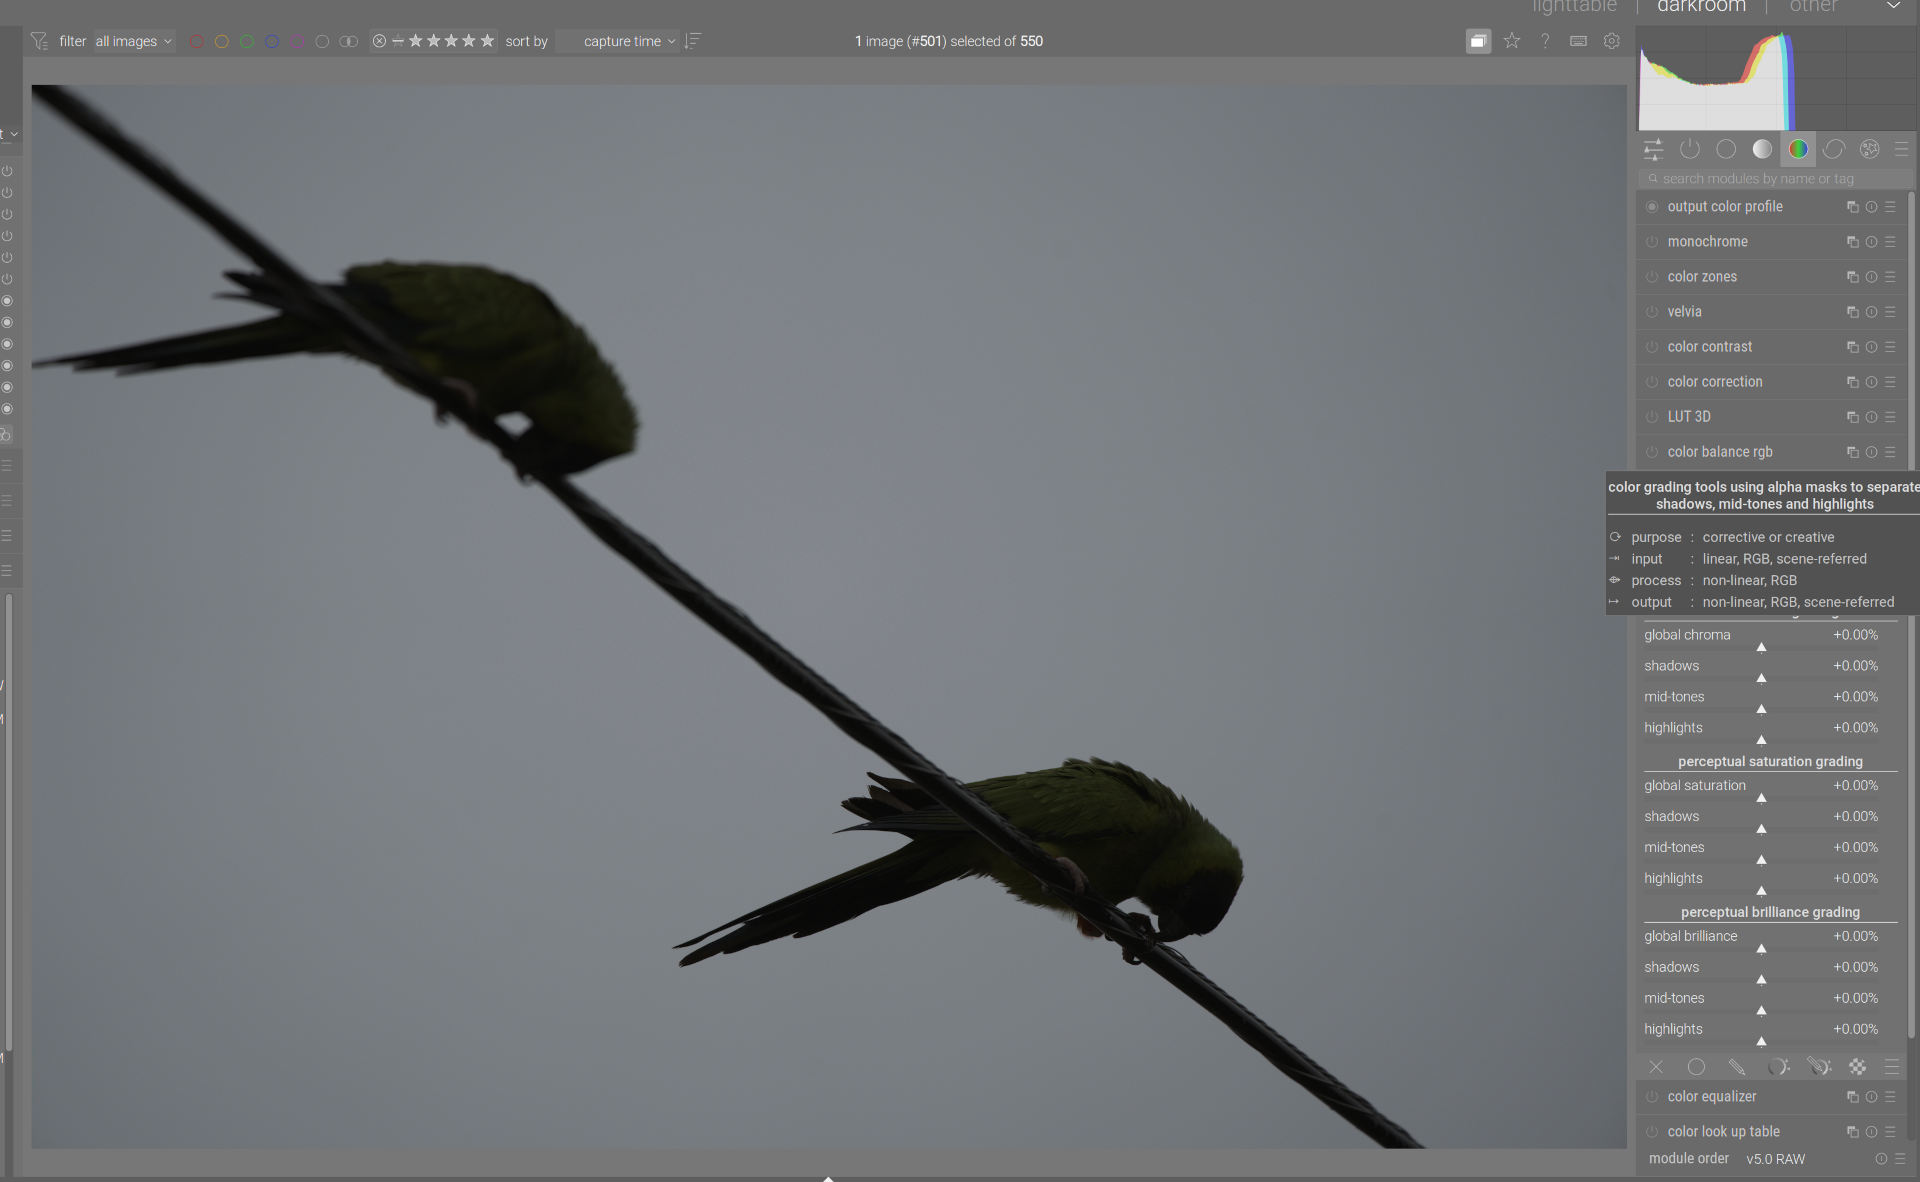
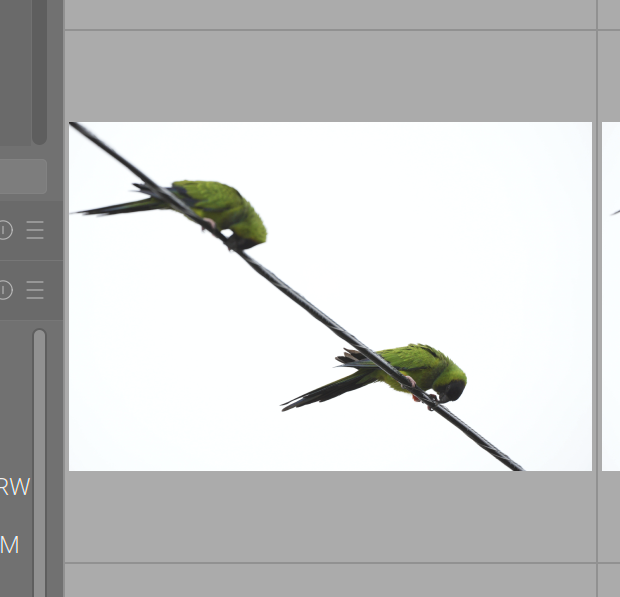
Attached is an example of the JPEG preview before processing the image vs. the default rendering in DT. It seems like my camera is telling me the sky is blown out with almost half the histogram empty to the right?
Is exposure comp checked or unchecked in the exposure module??
There is also this in the release notes…not sure if the Sony potentially has a mode that will get boosted…
“- Added automatic compensation of camera’s hidden underexposure for
Canon Lighting Optimizer mode, Nikon Active D-Lighting and HLG tone
modes, Olympus Gradation mode, Pentax Dynamic Range Expansion mode,
and Fujifilm DR200/DR400 modes. This affects both the “exposure” and
“denoise (profiled)” modules.”
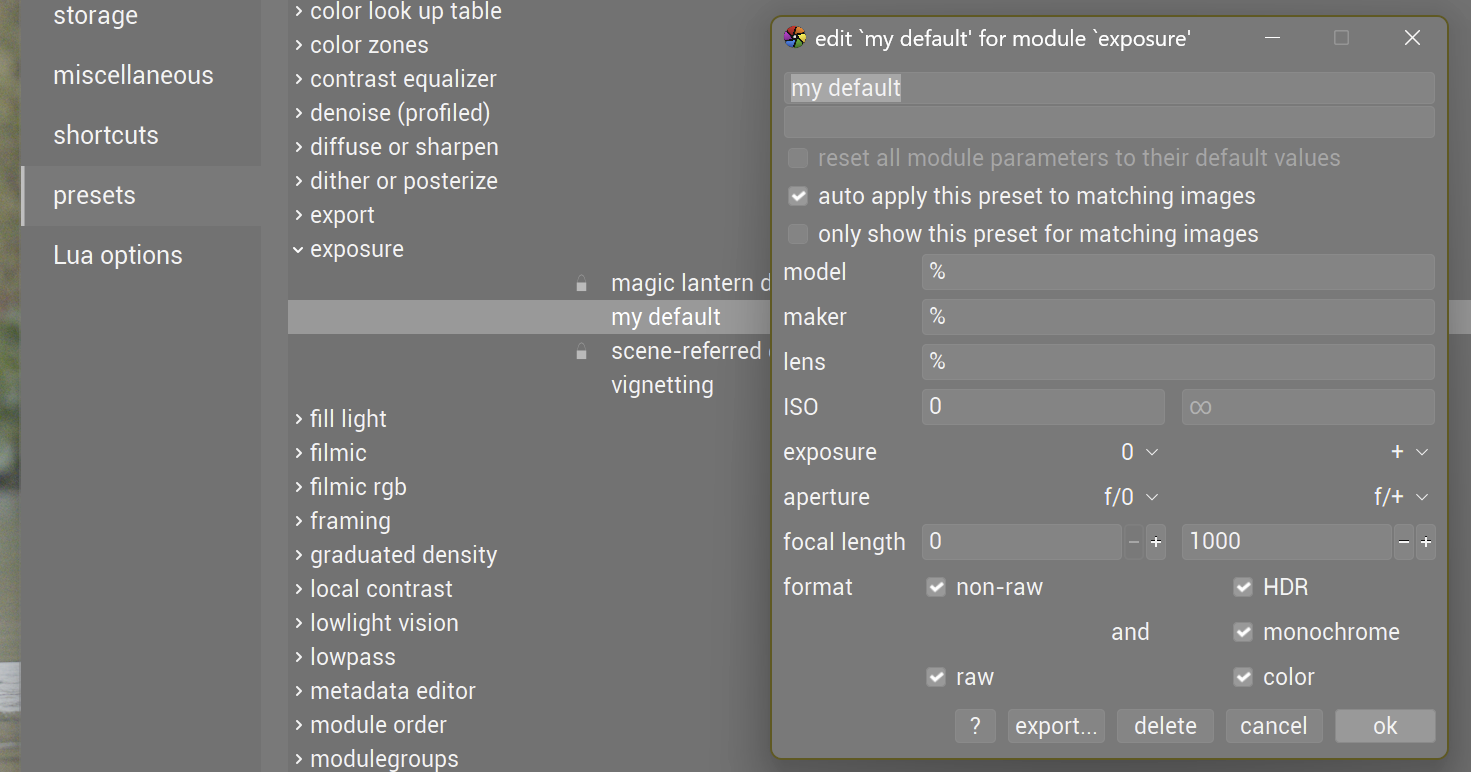
Oh, nvm, I found a lengthy discussion about it in another thread. This seems like a really bizarre thing to turn on by default, but that appears to have been argued at length already so I’ll just set a new default preset and move along
I’m well aware the processed RAW isn’t going to look exactly like the JPEG preview, I just didn’t expect to have a multiple stop exposure correction applied automatically
I wonder if this exposure comp issue could be addressed as a new preference setting or if that is just too much trouble when we can simply make a style or preset to set this how we want?
I shoot bracketed exposures and find it handy as is, but can understand why others would find it annoying.
I understand this can conflict with users’ workflows. Maybe there’s already a feature request on GitHub (where you could voice your support), and if there isn’t one, you could create it. That way, developers (who don’t read all forum discussions) could be made aware of it.
I think the question is whether there are more users who benefit from this default (which can easily be implemented by a preset) or confused. I tend to think it is the latter and wonder whether changing this default would make sense.
Usually preventing a blown-out sky requires a negative exposure compensation. And in that case it’s normal that:
the jpeg appears darker (that’s what you asked for, after all);
and you need to add that exposure back in darktable (or let darktable do it for you…).
Add to that that you are using a Sony camera. In my experience, Sony raws (from older models at least) require at least 1EV extra exposure to get near the brightness of the camera jpeg (for the midtones, which is what the exposure module is mostly concerned with). And that is without using any of the enhanced dynamic range settings.
Before adding (to) a feature request about this, perhaps read the existing threads about the subject, e.g. here and here.
The problem is the subject was heavily backlit, so I needed to let the sky blow way out to get the detail I actually cared about. Keeping the sky in range would leave my subject barely visible
I will say, at the risk of restarting a discussion that probably doesn’t matter, framing this setting as a tool for ETTR seems very odd to me. Exposure compensation was a feature in common use decades before digital cameras were widely available or anyone had ever conceived of exposing to the right. It exists because reflective TTL meters famously have no idea what they’re looking at and can be easily thrown off by scenes with subjects that reflect different amounts of light.
Whether you ETTR or try to make your exposure look “correct” out of camera is orthogonal to the exposure compensation setting, which you’re going to need to achieve whatever your desired exposure level is in real life. If my scene is perfectly neutral, sure, I may have added some exposure comp to ETTR. I also could have added some exposure comp because there are a lot of white objects in my scene. I could have a lot of dark objects in my scene, add negative exposure comp, and still be exposing to the right!
This feature can’t reliably reproduce accurate exposure while exposing to the right any better than your camera’s built-in meter could if you never touched the EC dial, which is to say occasionally, but not at all reliably.
Yes, I agree. And the way you want the exposure module to behave is different for the different cases:
when you are using ETTR you need to remove that exposure correction you applied in camera;
when you are correcting for particularly dark or bright subjects or scenes, you need to keep it.
in mixed cases, you may have to remove part of the applied correction, or add to it.
For this particular feature, you have two possible defaults, “on” or “off”. The devs chose “on”, making a group of users unhappy.
Thing is, setting the default to “off” would have made another group of users unhappy.
And there’s a third group, who realise that neither choice would fit all cases, and that both cases can even happen in the same shoot, let alone between shoots…
tbf from a UX perspective here I think how many people are happy with what end state is far outweighed by the greater concern of whether it confuses new users (lol, or in my case long time users who haven’t been shooting a lot of digital recently). Generally you expect a RAW editor to apply a deterministic base set of operations to your image that you can build on from there, I would never in a million years have expected it to be dynamically applying huge amounts of exposure comp between different images, and I can’t imagine any typical photographer anticipating that behavior either.
If you really want DT to try to nullify your exposure comp settings you can set it to do that and be happy, and vice versa if you don’t want it to, but if you’re someone who just tries it for the first time and half your photos are either completely blown out or drastically underexposed for no apparent reason, you’re probably just gonna walk away…or make another forum post asking why this is happening
I made a preset with ‘compensate camera exposure’ turned off and which is applied when opening new (not yet edited) images. In certain cases I turn it on again manually.
I have found that different cameras need different exposure settings because of how the manufacturer chooses to underexpose the raw file to preserve highlights. The arbitrary +0.7 EV is chosen by a developer based upon what is ‘average’ correction needed between camera models. I know that my Canon R7 needs about +1.0EV and my Canon G16 needs 0.0EV. I would be surprised if any camera needs such a large EV correction as 3 or 4.
I would recommend making a style to apply for your specific camera that may include exposure module, capture sharpening (demosaic module), Denoise (profiled), and tone mapper of choice. Apply this at start of editing and life should become much easier.
I shoot sony raw+jpg with exposure compensation. I use zebras to show highlight clipping. Most of my shots are outdoor daytime. I typically have to lower exposure to get rid of the zebras. Sometimes by a lot (e.g. to keep detail in clouds, reflections, etc.)
The default jpg pipeline seems to be a “no edit”. This makes sense to me, because it is the camera-produced jpg. They are “dark”, but I intentionally shot that way to get rid of the zebras.
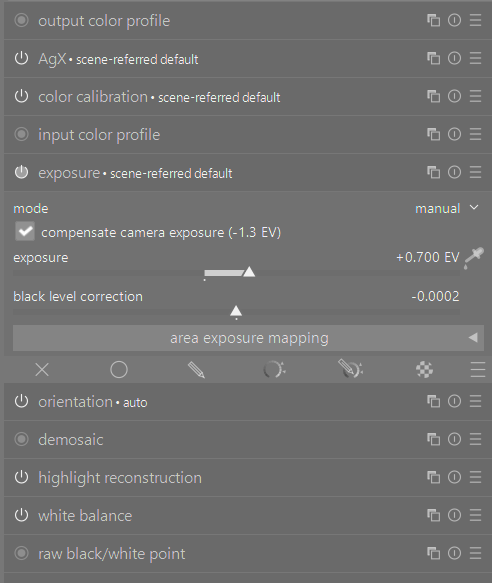
The default raw processing pipeline has an exposure module. At least on my system, it has an in-built offset of +0.7 ev, regardless of the photo. I’m not familar with the background.
In addition, by default, it reads the exposure compensation. I think this is helpful. Since I’m intentionally lowering (or raising) the exposure, this brings it back to the “neutral” exposure that the camera metered.
Below is the scene-referred (AgX) “no edit” edit. It shows the exposure automagically offsetting the exposure compensation.
When editing jpg, you can toggle the exposure compensation on. But you’ll clip white or black without other countermeasures.
It may be useful to do some tests on that (depending on your camera settings): in my experience, Sony processing is rather contrasty, and the jpegs clip well before the raws. Unfortunately, that means the optimal exposure will be different for raw and camera jpeg
The +0.7EV the exposrue module adds is an emperical amount, found to be needed for most cameras the dev team had access to. I found my Sony cameras need +1.0EV or more, probably again related to the default processing (and perhaps a slight underexposure to keep some highlight detail.