Recently one of my students who has converted to using DT asked me the following question and I could not provide a satisfactory answer.
“When I have 3 images bracketed -1, 0 and +1 and I view them in Lighttable fullscreen to work out which ones I want to keep and edit and which I want to discard, they all appear the same because Darktable is compensating the exposure of each. If I open them each in darkroom and turn off the Exposure Compensation, then go back to viewing them in Lighttable they are correct as shot.
Is there a way around this or better still can you permanently turn Exposure compensation off for all images you import so that when reviewing them you are seeing them as you took them.”
Well I am on DT V4.7 and in my lighttable fullscreen view I see the effects of exposure compensation so I don’t know if V4.6 behaves differently and this has already been addressed. However, I always do bracketed exposures to basically cover my butt when taking travel shots. So when I open these images in the darkroom view exposure compensation is applied by default and all three images look much the same. To resolve this issue I have a style created that applies exposure and WB as shot and initial denoising and sharpening. But I feel it would be a very valid choice to have exposure as shot as a preference for users who want this rather than being forced to apply a style. Is there currently a way we can do this?
The way to do this would be to create a preset instead of a style, and make it applicable to all raw images. This should override the automatic preset that’s applied by default currently.
I do wonder why you would want this behaviour though. Perhaps to tell at-a-glance which ones are shot at which exposure? You could use the image information module for that. If you want to see which ones are overexposed you’ll need to go into the darkroom view and use the “raw overexposure” indicator. The settings on the exposure module won’t affect this.
First I’d make sure that they’re not looking at the jpeg preview in the raw file. Unless they’re actually using the exposure compensation in their camera, then the default dt exposure is 0.7EV, and they should see the difference.
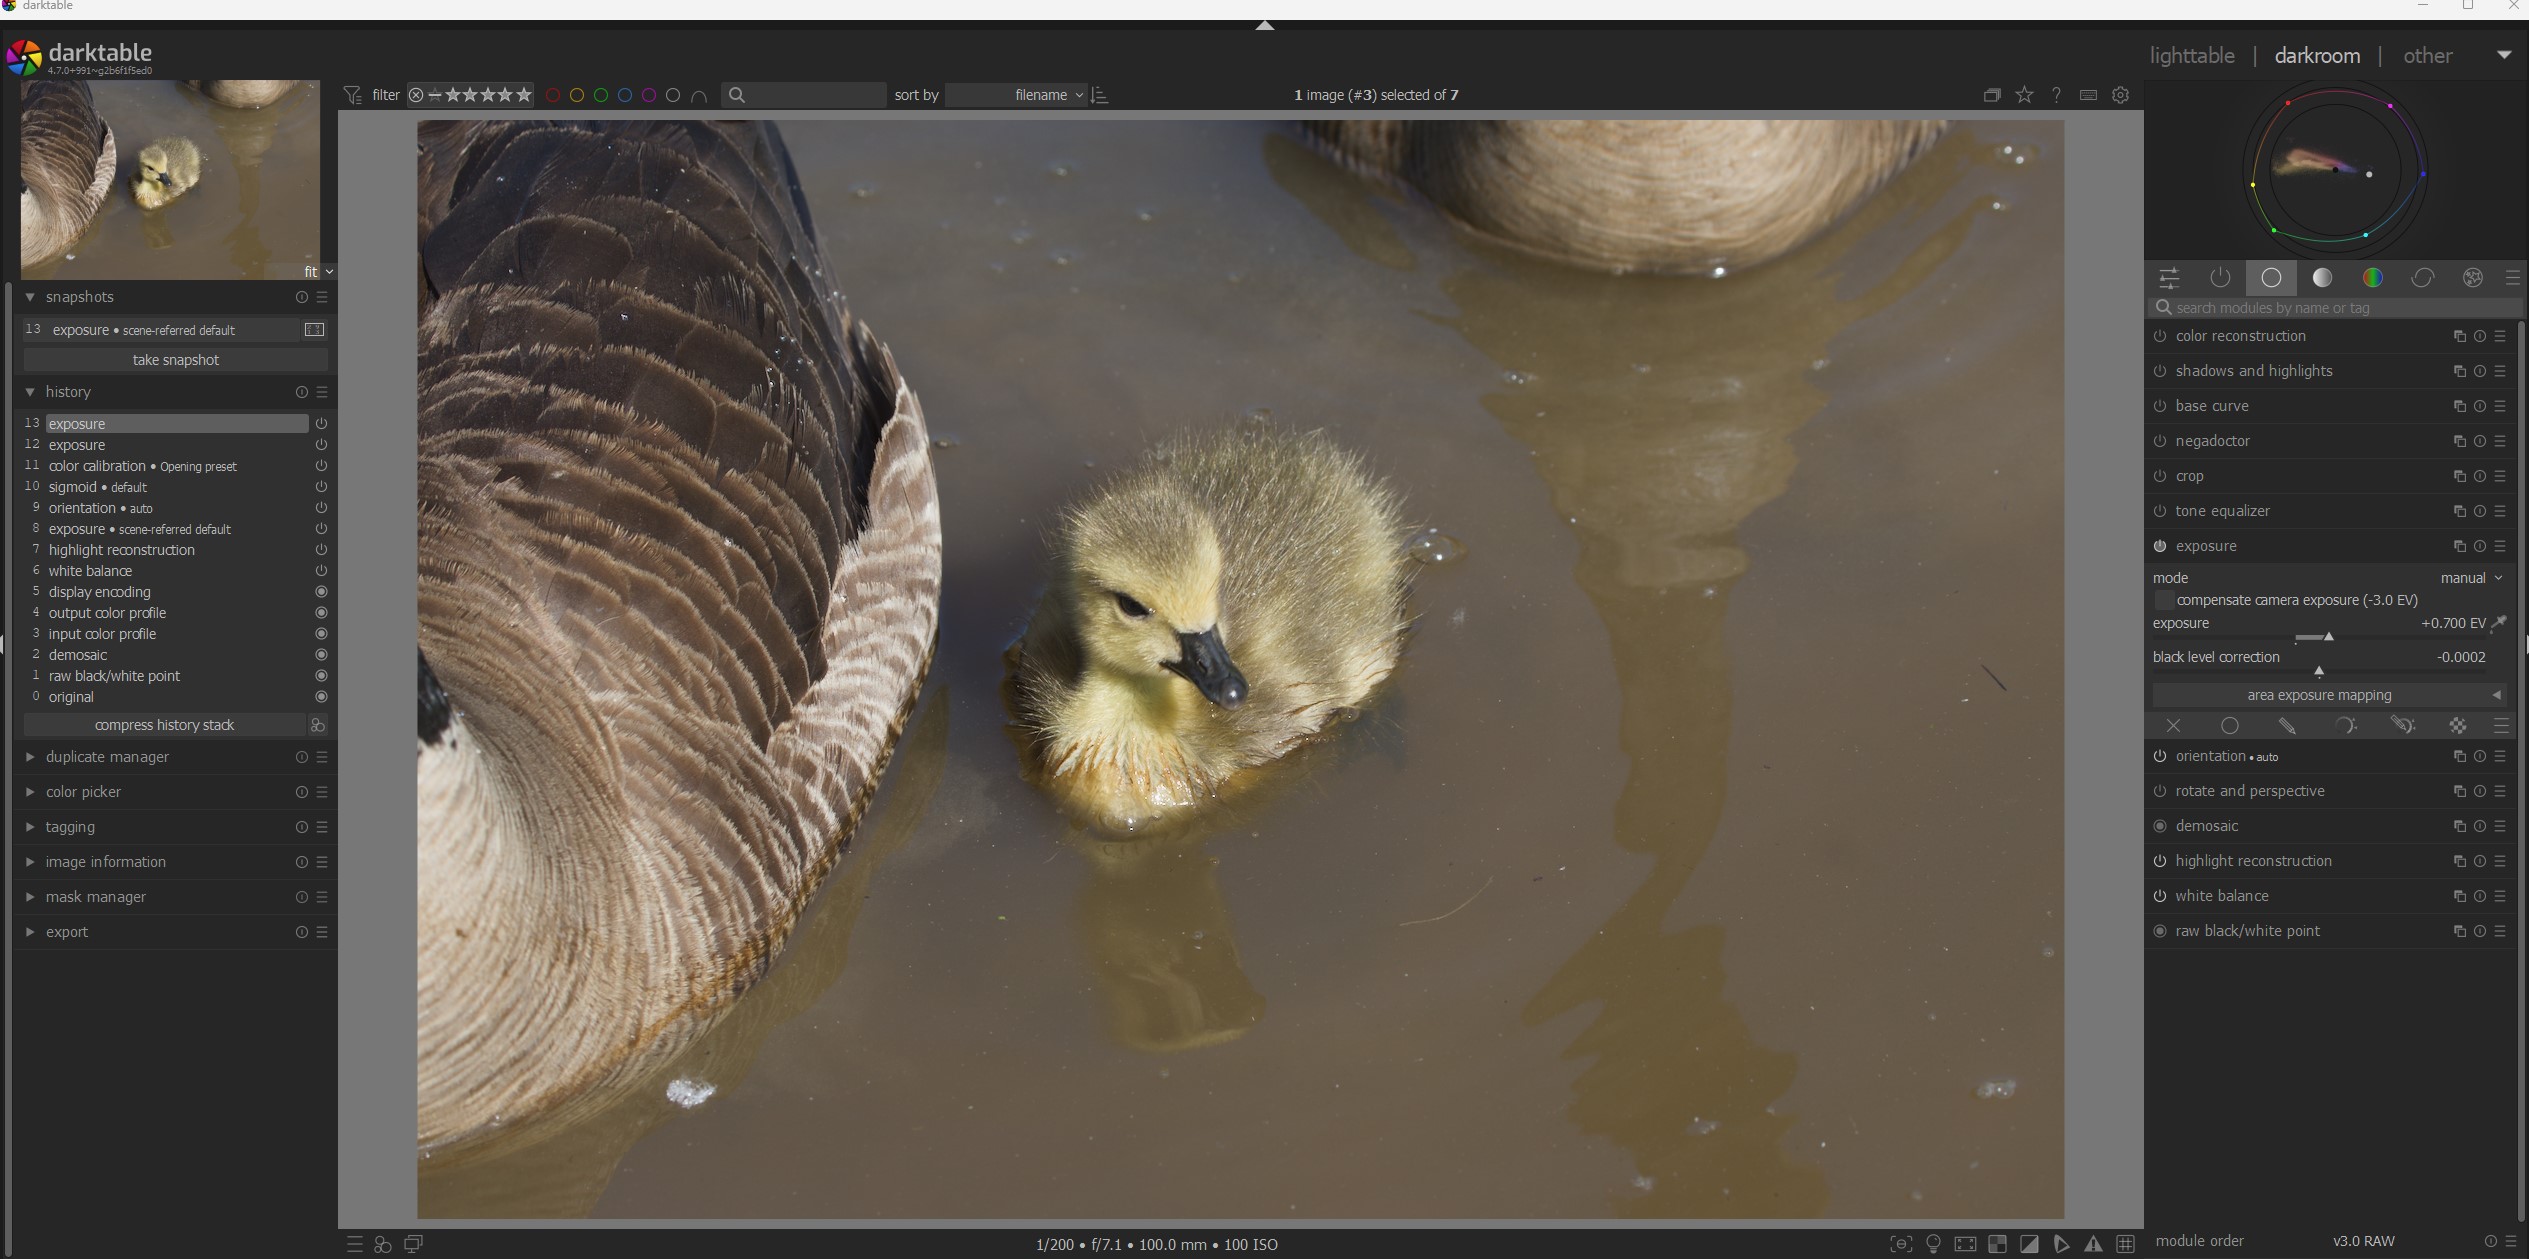
By default the “compensate camera exposure” control is ticked, which reverses any exposure compensation present in the image’s exif. So, for example, the +1EV exposure compensation (from the last bracketed shot) would have -1EV adjustment applied by the exposure module to cancel it out, in addition to the default 0.7EV exposure boost.
I frequently apply exposure compensation and if the setting is aggressive then the shot can wind up extremely bright or dark. I prefer to see the exposure as-shot when culling so I use a preset with EC turned off. But I’m curious why the default exposure is set to +0.7 in DT.
Its an addition for the scene referred workflow. Most times exposure is needed esp when you use the tone mappers so this is a best guess start so that when you apply say filmic you are close to what you would see in the jpg most often…infact a different default might be more appropriate for some cameras and shooting styles or of course it could be zero’d…
My recollection, from back when undoing exposure compensation was introduced, is that it was based on the assumption that the photographer used exposure compensation to do ETTR to get better data, rather than to get differently exposed final image. Of course, that is based on the further assumption that the camera’s choice of exposure would have given an image that “looked good”.
I think, cameras tend to underexpose a bit to protect highlights in their jpegs. They also tend to use fairly steep S-curves in their processing. The exact amount to add depends on the camera make (e.g. for my Sony, I have to add 1EV instead of 0.7 EV), the 0.7 EV seems to be a good starting point for most users (or devs, using the cameras they have?).
I base this on what I see with the basecurve module: many of the curves have a rather large flat shoulder in the highlights (compressing them), and are fairly steep (to add punch?). Those basecurves are derived from raw/camera jpeg pairs, so reflect the in-camera processing.
Keep in mind that the camera (maker) tries to make the jpegs look good, based on the kind of subjects the average camera user shoots and the look they think their customers want (or pleases whoever has to sign off for the result).
The only way to do what you want is to auto-apply your own presets for Sigmoid/Filmic and exposure and set “auto apply pixel workflow defaults” to “none” in the preferences.
This has been brought up before. Apparently the darktable devs have decided that they know more about your intent than you do, and no amount of “I’m using exposure compensation for creative control” will change their minds.
Some assumptions have to be made if you want to have defaults out of the box and whatever is chosen someone will be unhappy with it. If you don’t like those assumptions then you have the freedom to create your own defaults.
BTW I still don’t really understand in what way you can use exposure (i.e. the amount of light that hits the sensor) for creative control, unless you’re using the OOC JPEGs and not doing any post-processing. Using it as a way to alter the shutter speed (and hence motion blur) when in aperture priority (or vice versa) perhaps?
If you’re post-processing the image, then its final brightness is part of that post-processing and it doesn’t matter what the exposure was in-camera (excepting that it might affect noise levels if you’ve underexposed too much). Perhaps I’m missing something
I think if the aim is to see what the camera recorded, instead of darktable’s expo compensated version, they should be looking at the preview while culling.
@Terry: the following works even if raw previews are on. Tell your student to:
Open a raw image.
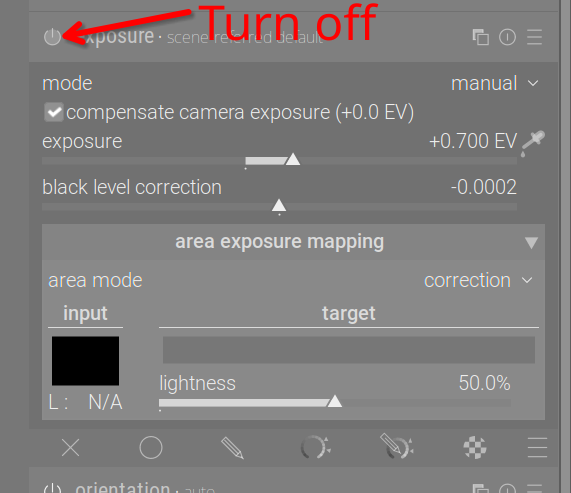
Turn off the exposure module:
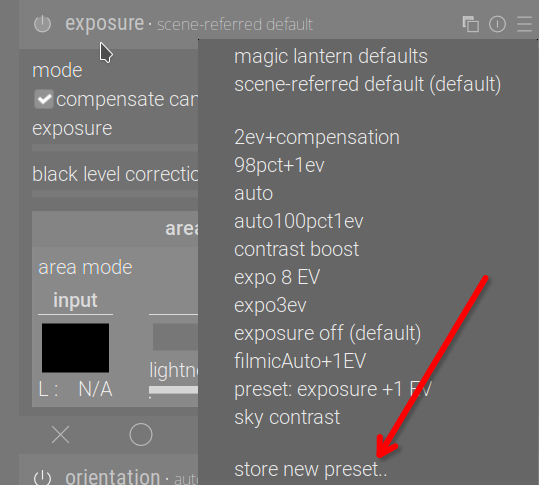
Create a preset:
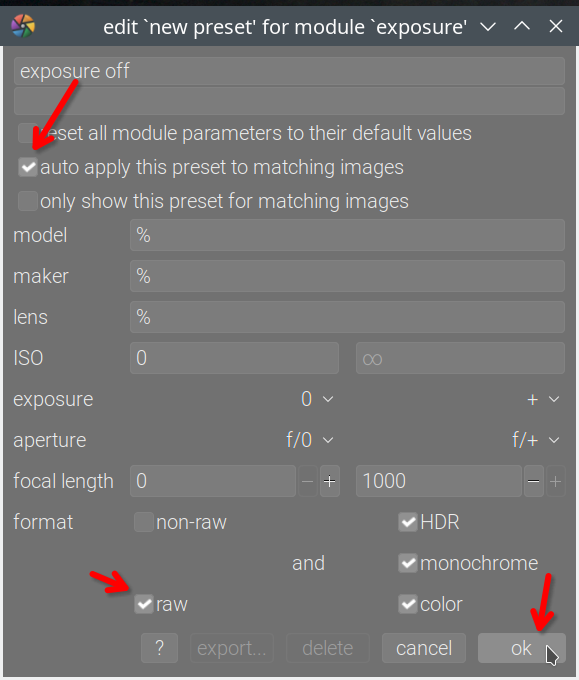
Set it to auto-apply to all raw images / based on manufacturer or whatever filter they need:
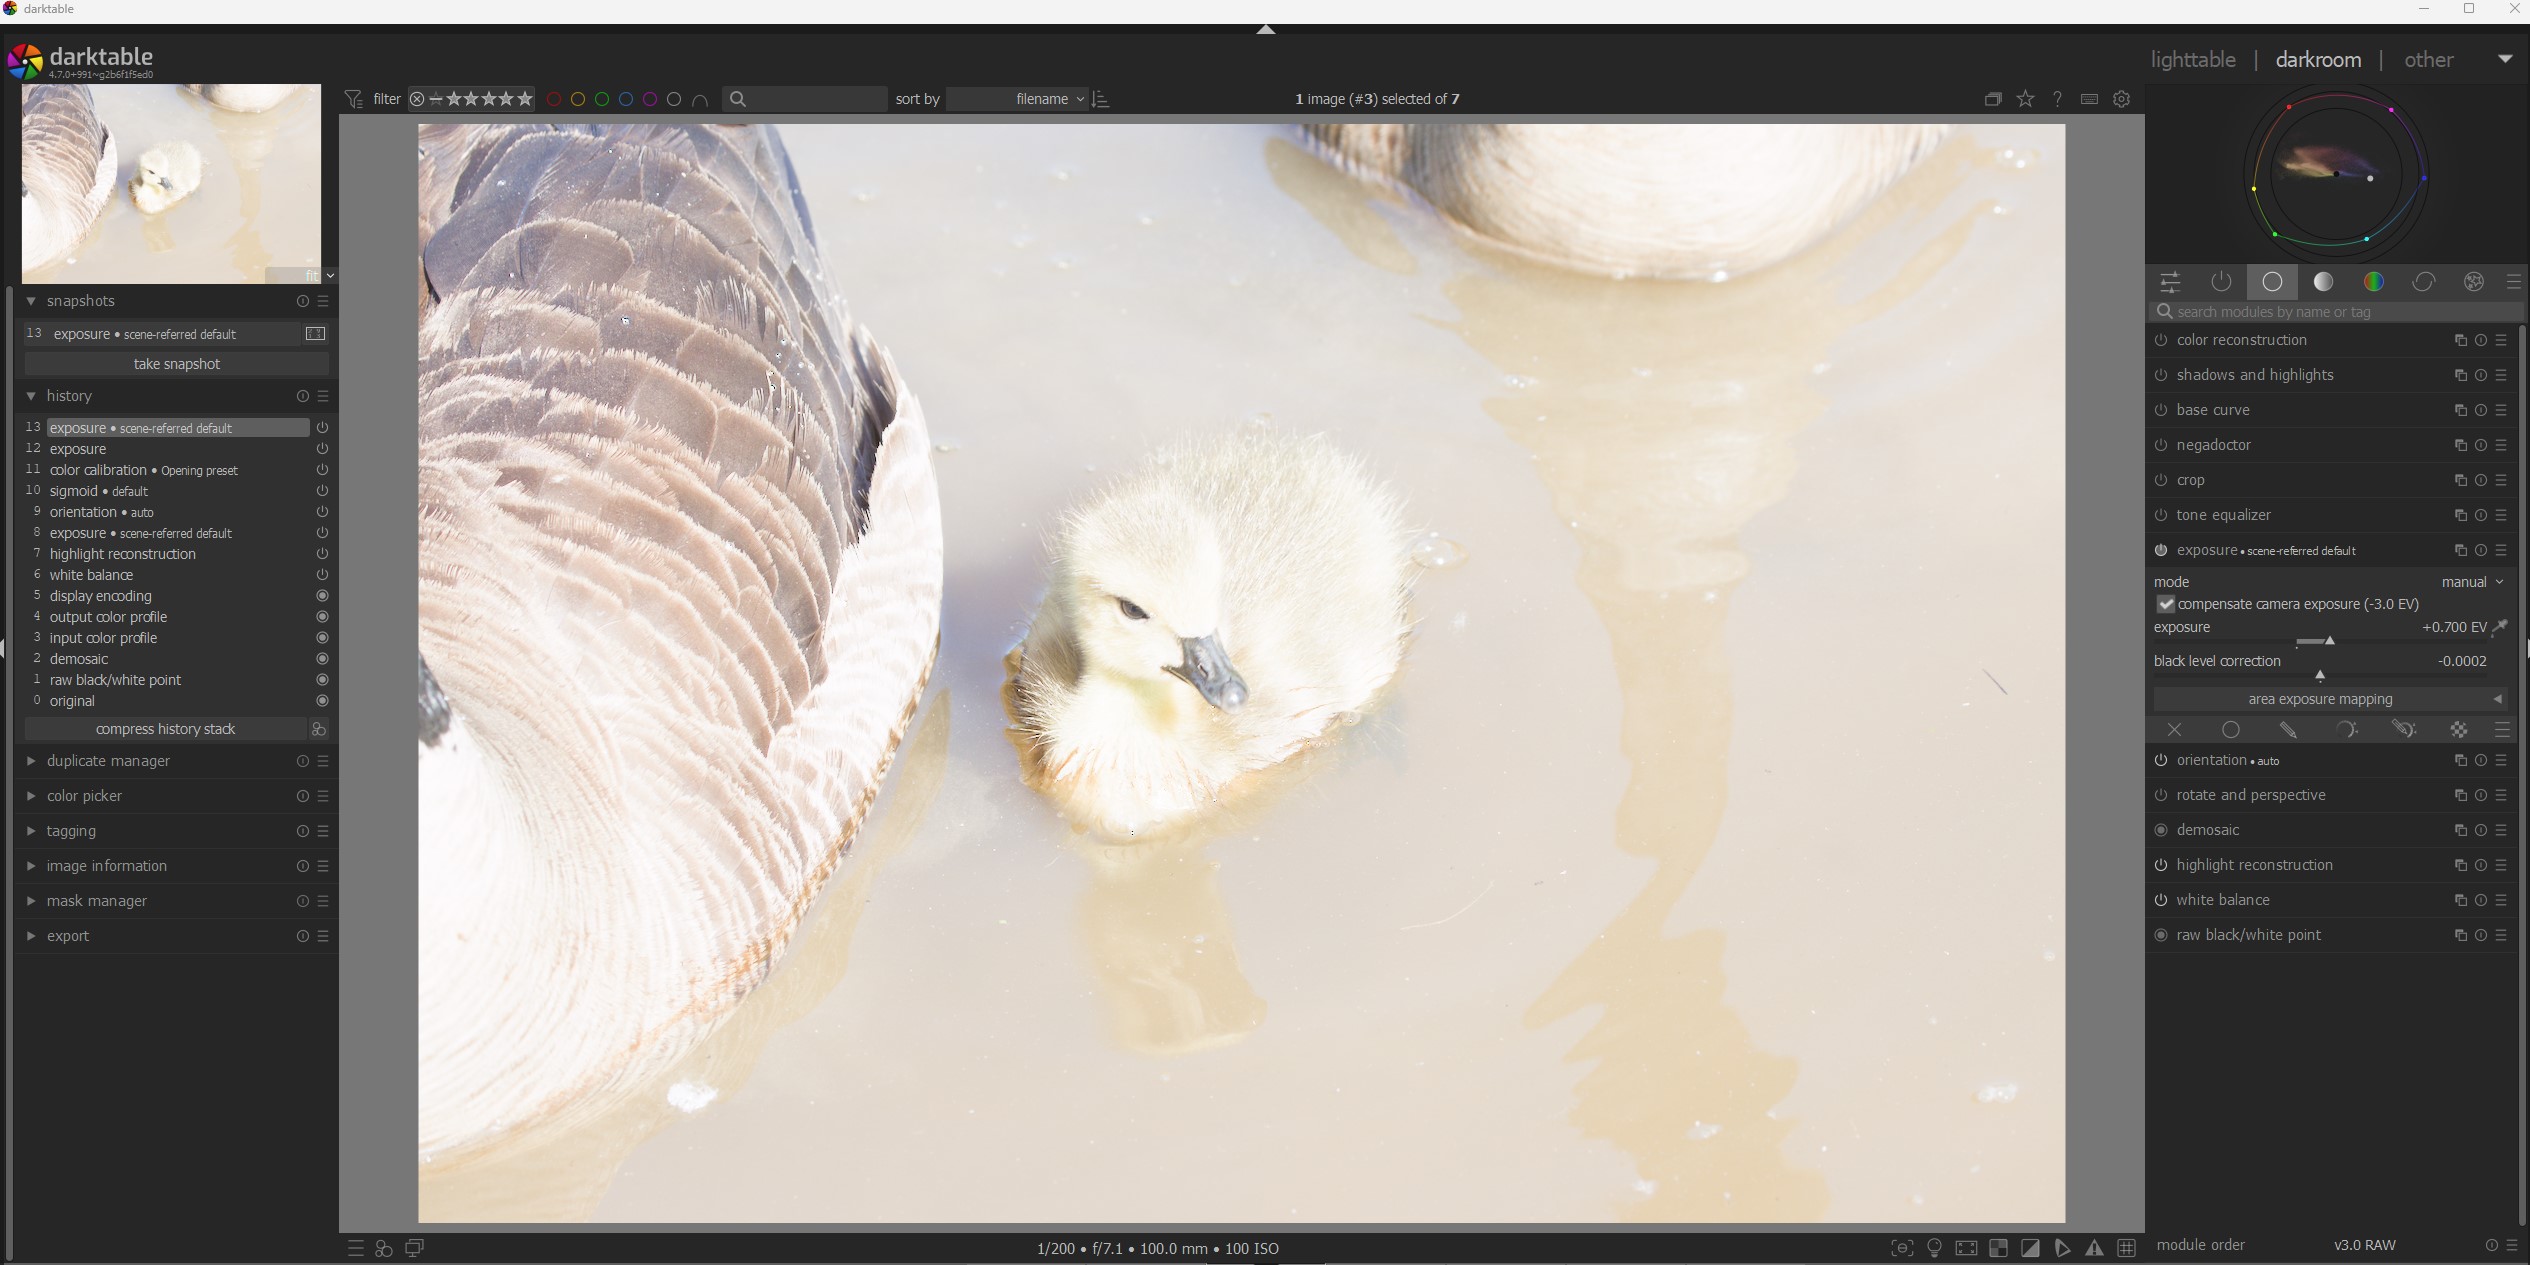
For any not yet edited raw files that they have already edited in the darkroom, they can discard the history; this will cause the exposure off preset to be applied, taking precedence over the workflow defaults:
Maybe you are and maybe are the developers who force upon the user this undoing of the exposure compensation applied in the camera. DT is about the freedom of choice and creative control, but in this one instance it is being removed from the user. To me the simple answer that would keep everybody happy including yourself is to have a preference tick box for compensate camera exposure that the user can decide the default action that is preferred.
I bracket exposures to cover my butt when shooting and having all the images open in the darkroom and looking the same is fine by me. However, that would not be the case for everyone. If a person shoots on P, Tv or Av then the only way to set the desired exposure (look) is to modify the the cameras EV compensation. For example, a groom wearing a black suit photographed against a black background would need a negative EV compensation to give appropriate exposure. A bride in a white dress photographed against a white background would need a positive exposure compensation to give an appropriate exposure. But DT undoes this necessary and sensible action. And for some reason some developers and some users dig their heals in and won’t acknowledge the valid reason that some people want to disable this feature.
For me this is not a deal breaker, but it is certainly a quirky action applied by DT that I have learnt to work around by creating a picture style that keeps exposure as shot or another picture style that accepts the default DT exposure settings. I am unaware of any other program paid or free that behaves in a similar fashion. That in itself is not a justification to change anything in DT as DT is not trying to clone any other program and therefore has succeeded in becoming one of the best editing programs available. I am always grateful to the developers who volunteer their time to make DT the great program it is and am reluctant to criticize their efforts. I can live with this behaviour of undoing camera exposure compensation by default if I have to, but I don’t have to agree with it.
And thanks for all the replies here and the proposed solutions to my student’s question.
No choice is removed from the user. Create your own preset or set the workflow to ‘None’ so that none of these modules are enabled and you have the ultimate choice!
I think this is where I struggle. I choose my “look” (by which here I think you mean accuracy of the brightness in the image?) by how I process images and will often process black things to look grey in-camera because I want to capture more light, and then put it back to black in post. This is not a creative decision I make in camera but one designed to (as best I can in the circumstances) reduce noise (increase amount of light captured).
Sensible in your workflow yes. The workflow assumed here is (I think) to use exposure compensation in order to protect the highlights (ETTR), which is normally a sensible workflow if you post-process your RAW files (again, assuming this is possible given your other creative choices around shutter speed and aperture). In this case you’ve let your camera decide what mid-grey is with its auto exposure and then dialled in some compensation to protect the highlights.
This is not a workaround, it’s what you’re supposed to do if the defaults don’t fit your workflow. IMO there’s a good argument for just turning everything off by default (except the few necessary modules) but we’ve gone with suggesting a workflow that includes possibly changing how you shoot (to target the fact that you’re post-processing it with darktable). See darktable 4.6 user manual - process.
Full disclosure: I shoot in manual and have a bunch of my own presets so much of this doesn’t really apply to me, but the user manual entry above is based on suggestions from the dev who wrote many of the key aspects of darktable’s scene-referred workflow.
@Terry:
Another, probably better choice would be to keep the module on, and simply uncheck the compensate camera exposure box. That would still keep the +0.7 EV boost which is usually required to shift middle-grey to where it’s supposed to be (since base curves won’t brighten the picture). Then create the preset as described above.
@elstoc thanks for your reply. The original developer, AP, had strong views on what was right and what was wrong in photo editing. He would hate me because I still use and recommend the shadow and highlights module in addition to using his tone equalizer and color balance rgb modules to lift shadows.
I use a preset to disable compensate camera exposure, and it works well for me. But I would like to share a couple of examples of the sort of problem I encountered with the compensate camera exposure enabled:
This is a shot where I exposed to the right and the option enabled:
At first glance I would have assumed the image was destined for the trash bin, but there was nothing wrong with the exposure.
And here’s a sample I took of a lovely set of garage doors, both at identical exposure settings; on the left with auto ISO and adjusted by exposure compensation and the one on the right manually entered. Same shot, same exposure settings but a completely different appearance. Aside from the option, there’s no technical reason why they would appear different.
So for me, the issue wasn’t a technical consideration, but a matter of consistency. And to be clear, none of this is intended as a complaint with darktable or the decisions by the developers.
@Dave22152 these are excellent examples of what I am talking about and my student is experiencing. The garage door is a great example of what can go wrong with the default behaviour.