Yes, and Agx is now super easy to use. ![]()
1 Like
Does it help any with the photo from Blender AgX in darktable (proof of concept) - #315 by s7habo ?
Here’s my 2p worth to this interesting project.
Firstly, congrats @kofa for what you’ve achieved. I know you’re saying there’s a lot of copy and paste, but nevertheless I think it’s great what you’ve done.
But of course I have some comments! Though remember my colour science knowledge is rather limited.
Looking at the last-but-one appimage - you’ve posted another whilst I’m composing! - there are a lot of user inputs. It makes me think of DorS which I couldn’t / wouldn’t use if it didn’t have the presets. Though your control names are generally more obvious than DorS. It feels like the game is to make the user define a curve by providing technical curve-fitting parameters. I’m wondering if this could be simplified and made less scary, something like this -
Just 5 controls. Set white and black point. Then 3 controls called something like
Mid-range Contrast
Shadows Contrast
Highlight Contrast
You’d adjust Exposure, white and black points to get something resonable. Then adjust Mid-range Contrast to taste. Then tweak shadows and highlights if necessary.
The lightness range could be split into four, perceptually, with Shadows and Highlights controls operating on the top and bottom quartiles.
So if this is the current curve under the bonnet (or visible) in your edit -

and you increase Shadows, then it becomes something like -
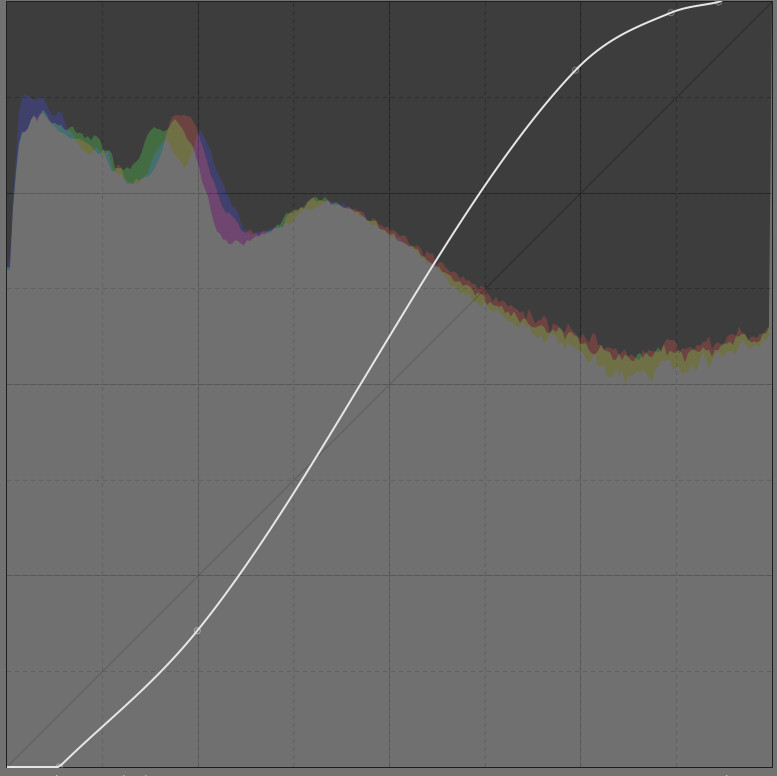
If you now increase Mid-range contrast, this -
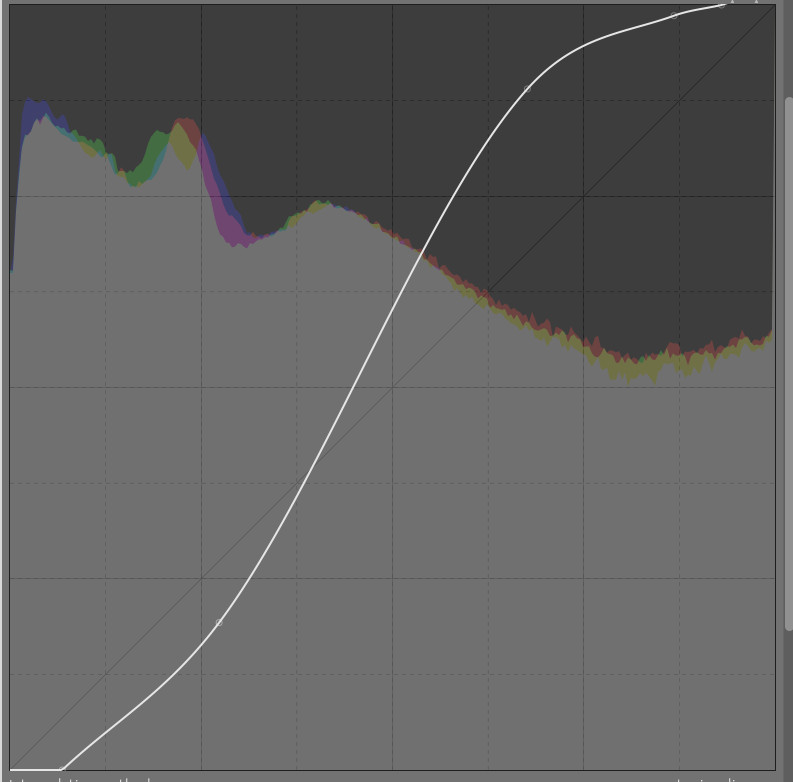
and if you carry on increasing shadows then I suppose this -
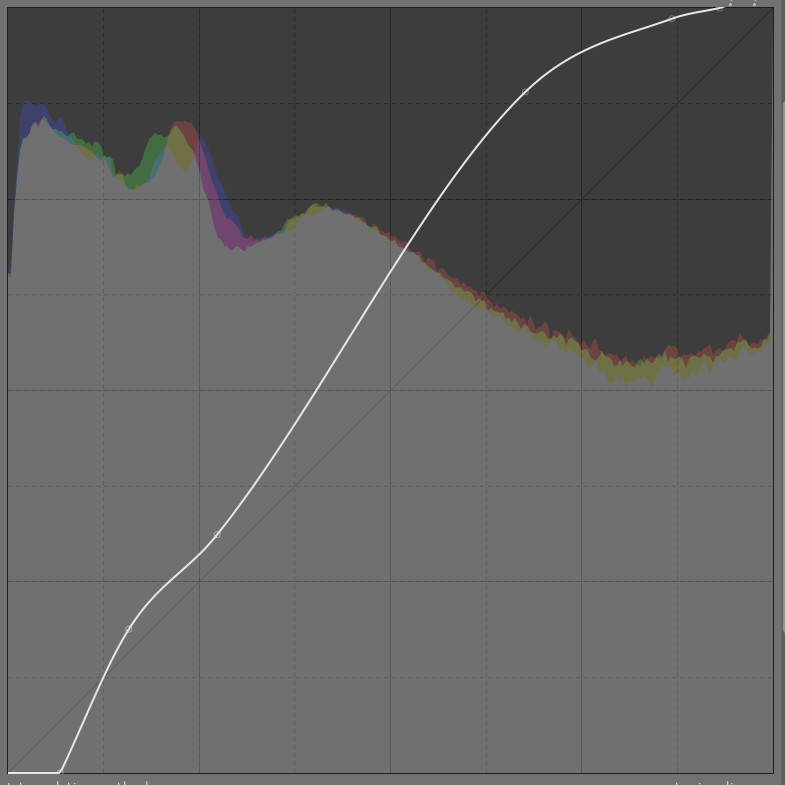
Highlights could operate similarly.
It sounds like most people would like saturation included also. Though where do you stop? - why not local contrast also?
Just a thought… it sounds like the curve-fitting is tricky. I suppose the guts of the Rgb curve and Tone curve modules could be used as black boxes for curve fitting. You give them a set of points and they create a smooth curve for you. But I don’t know what if any mathematical requirements AgX has of the curve.
That’s it! Good luck!
3 Likes
Yes.
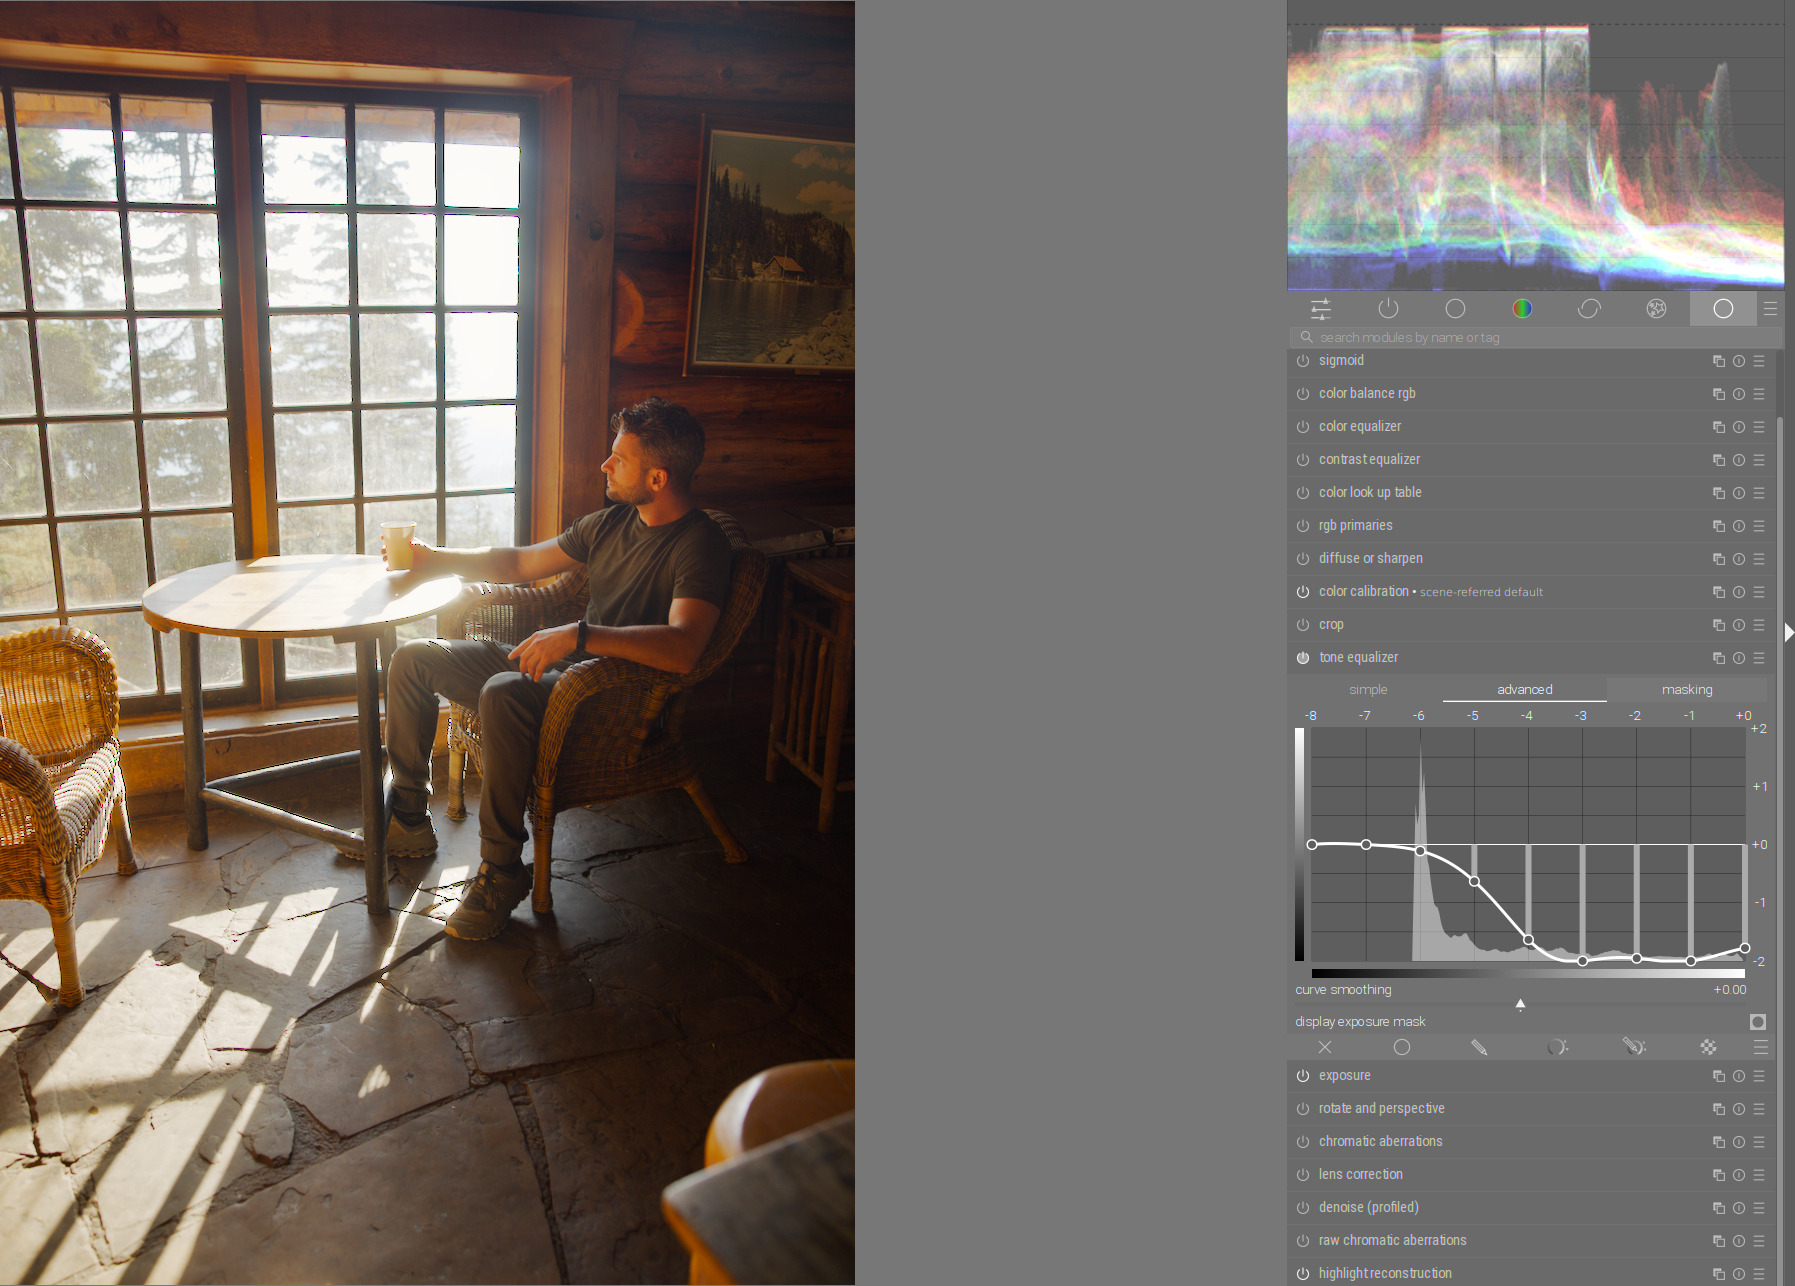
Original:
Steps:
- Exposure:
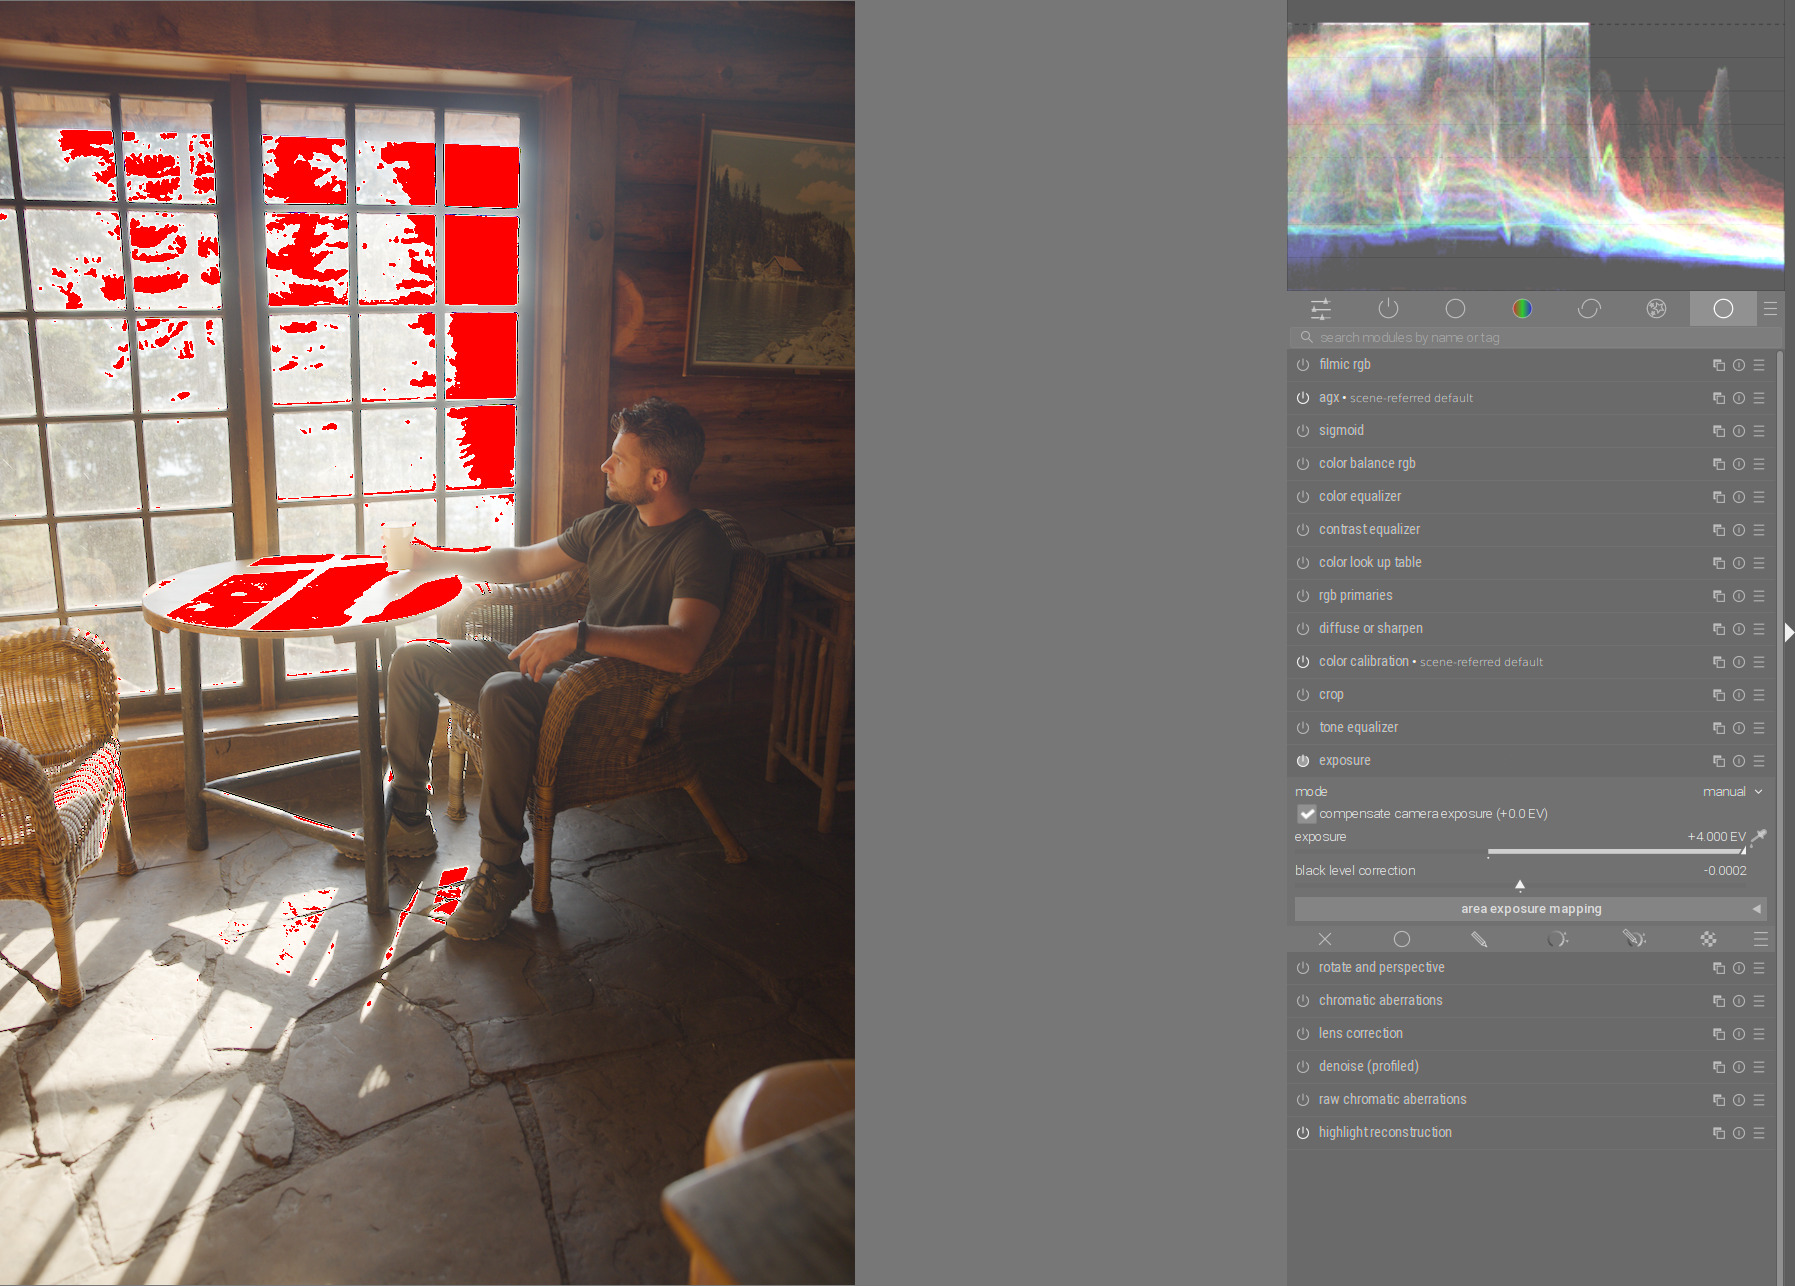
- In Agx: White relative exposure:
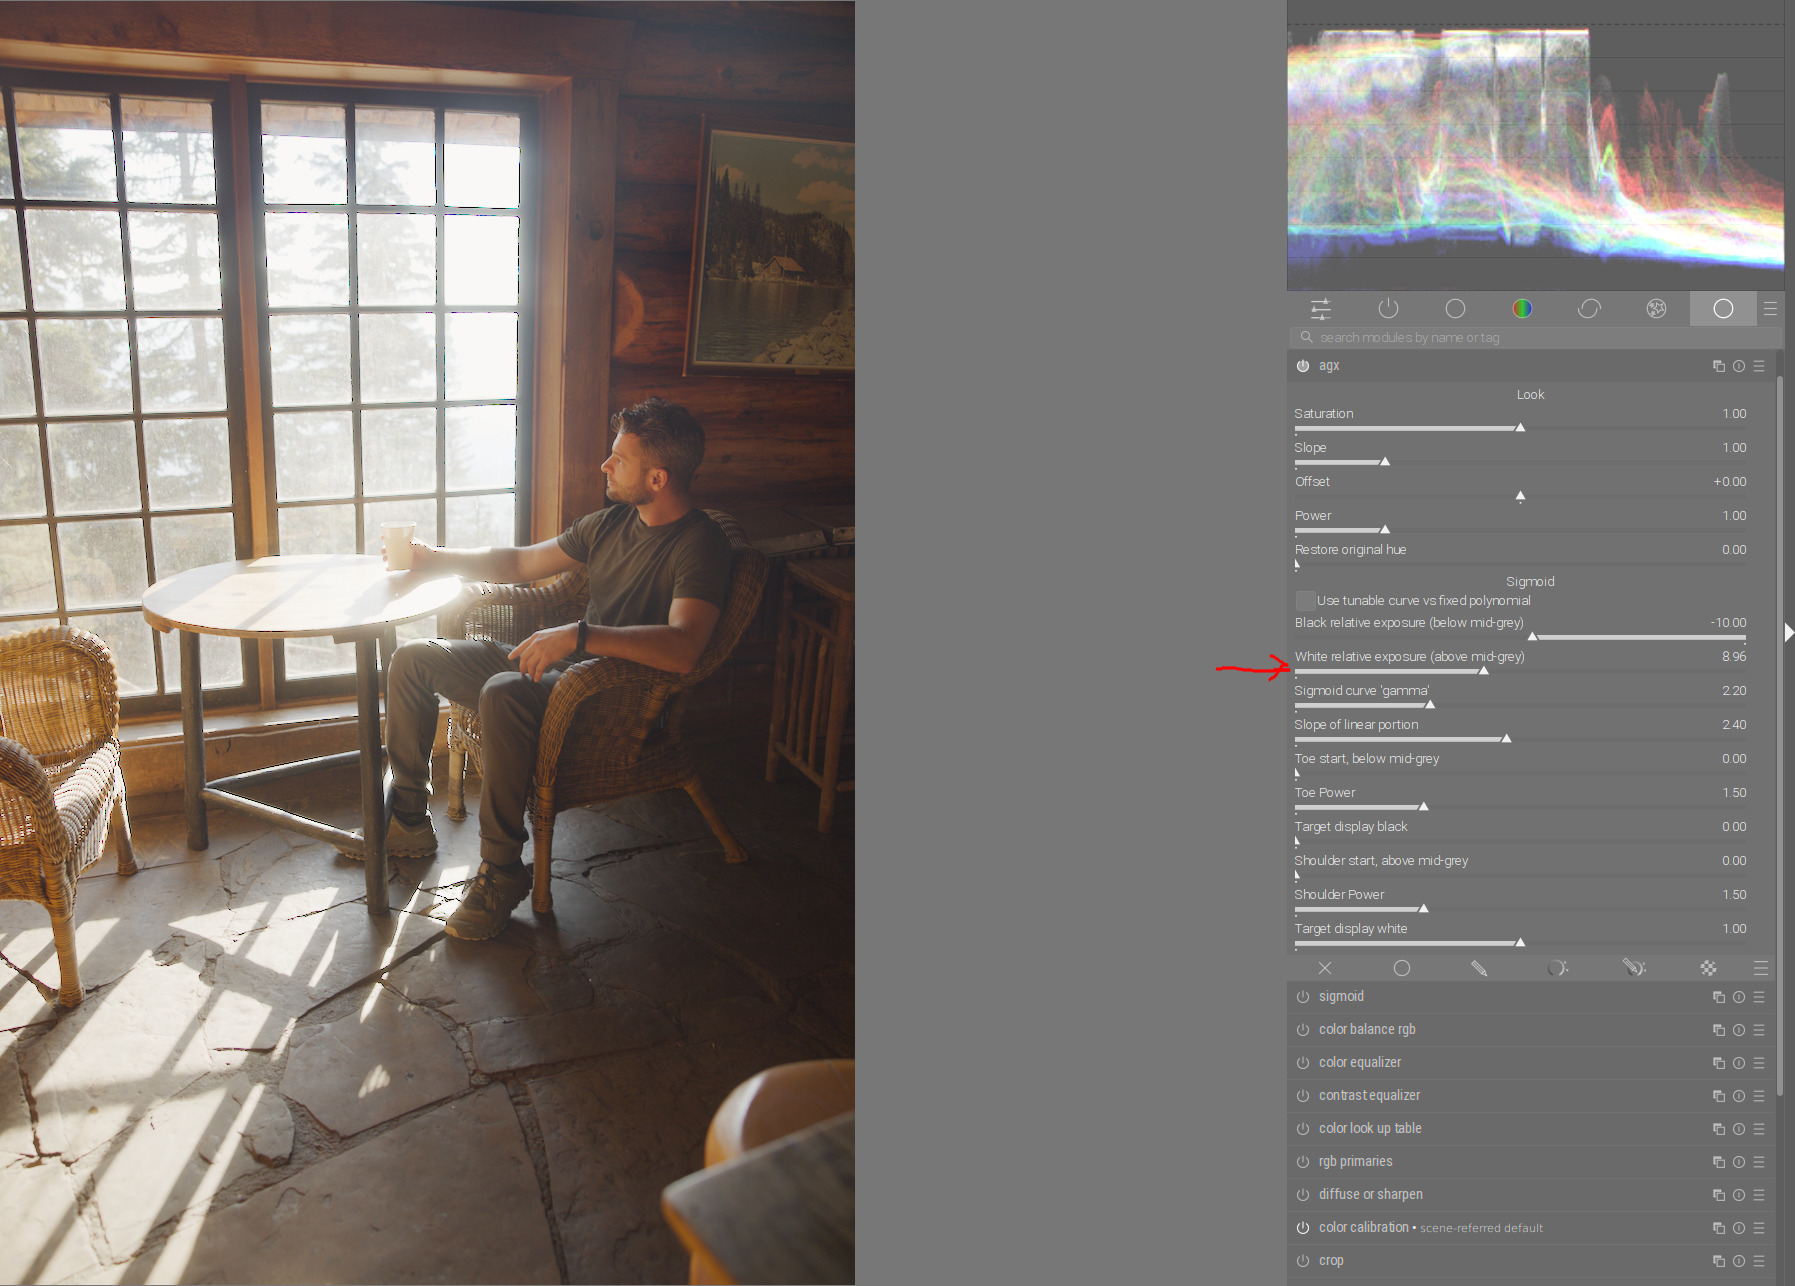
- Sigmoid curve gamma:
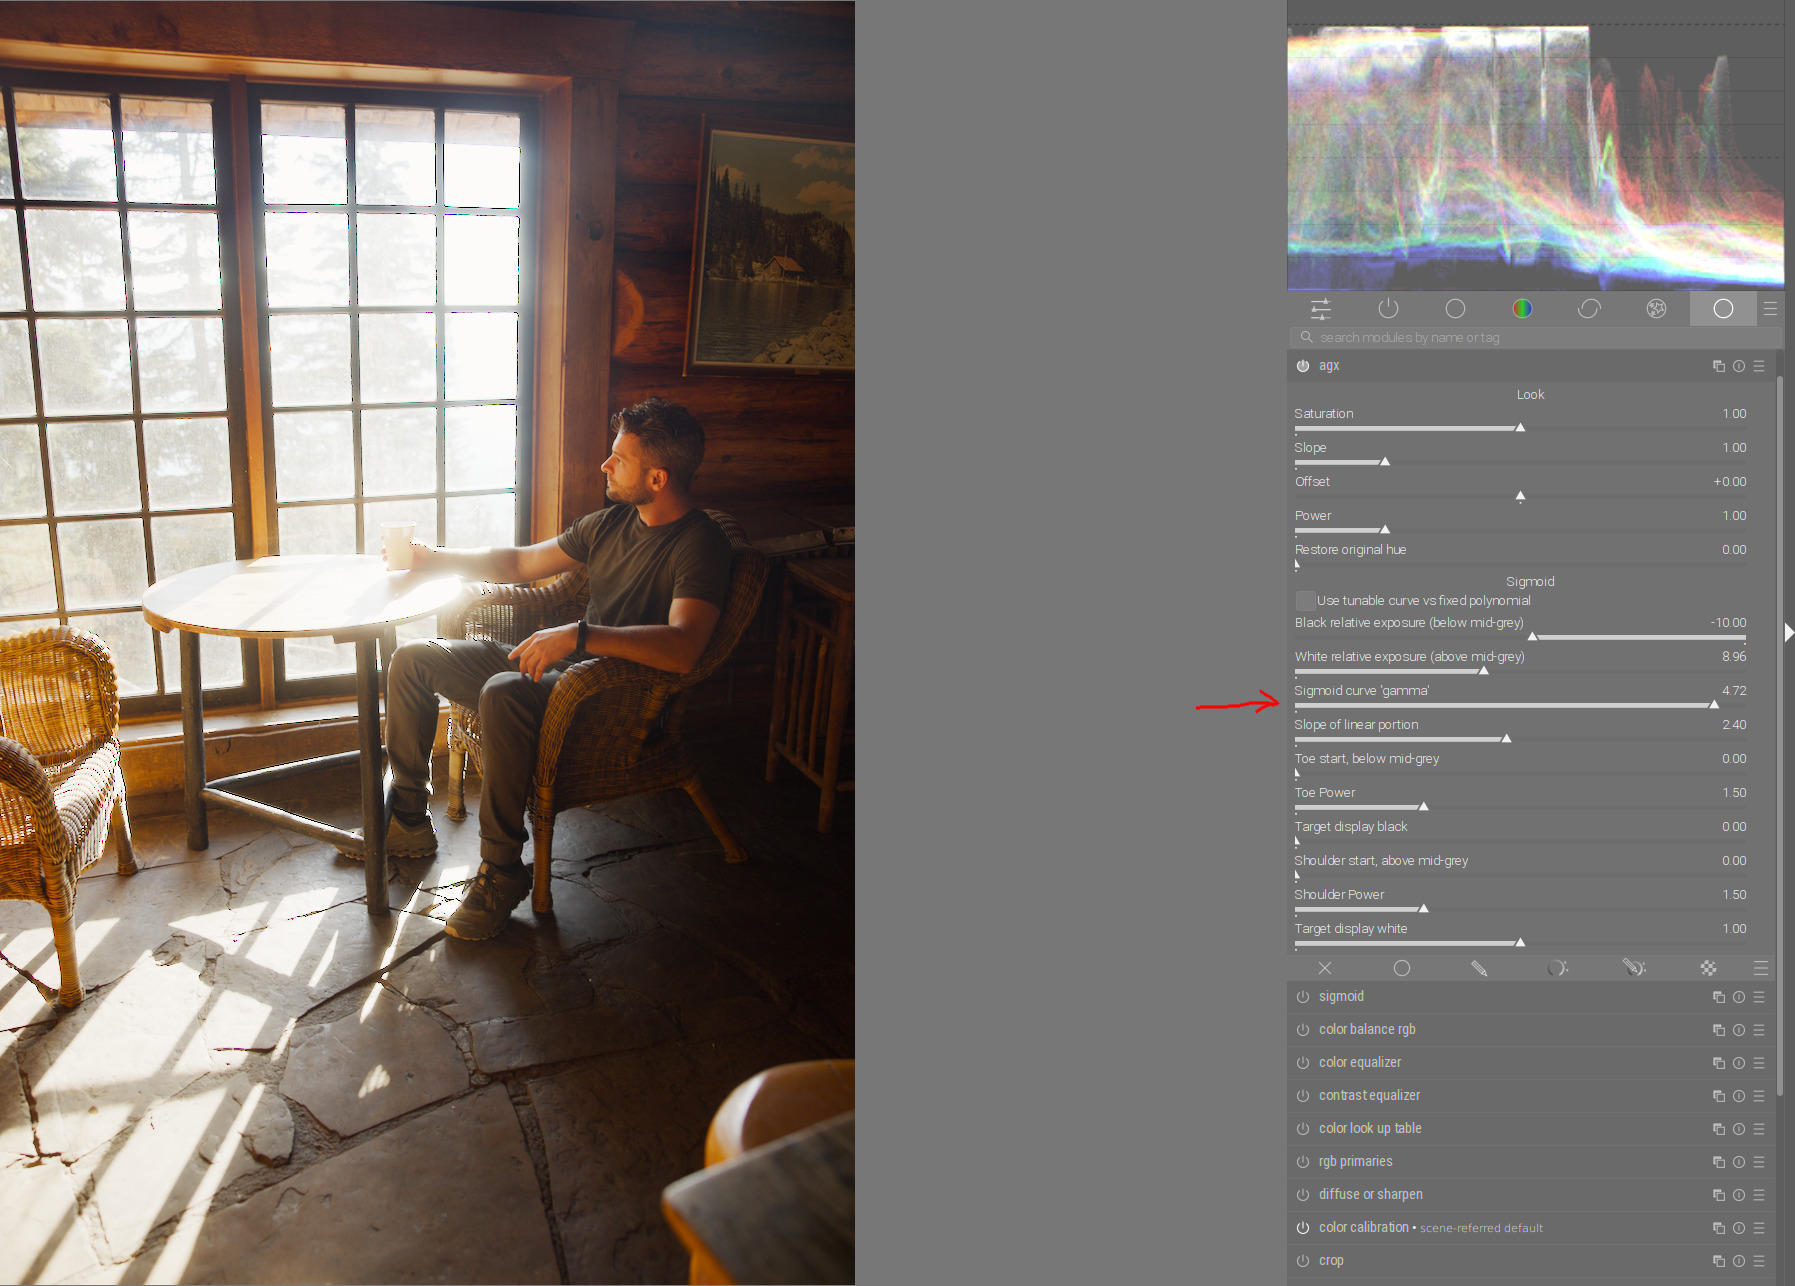
- Decrease shoulder power to get details in windows:
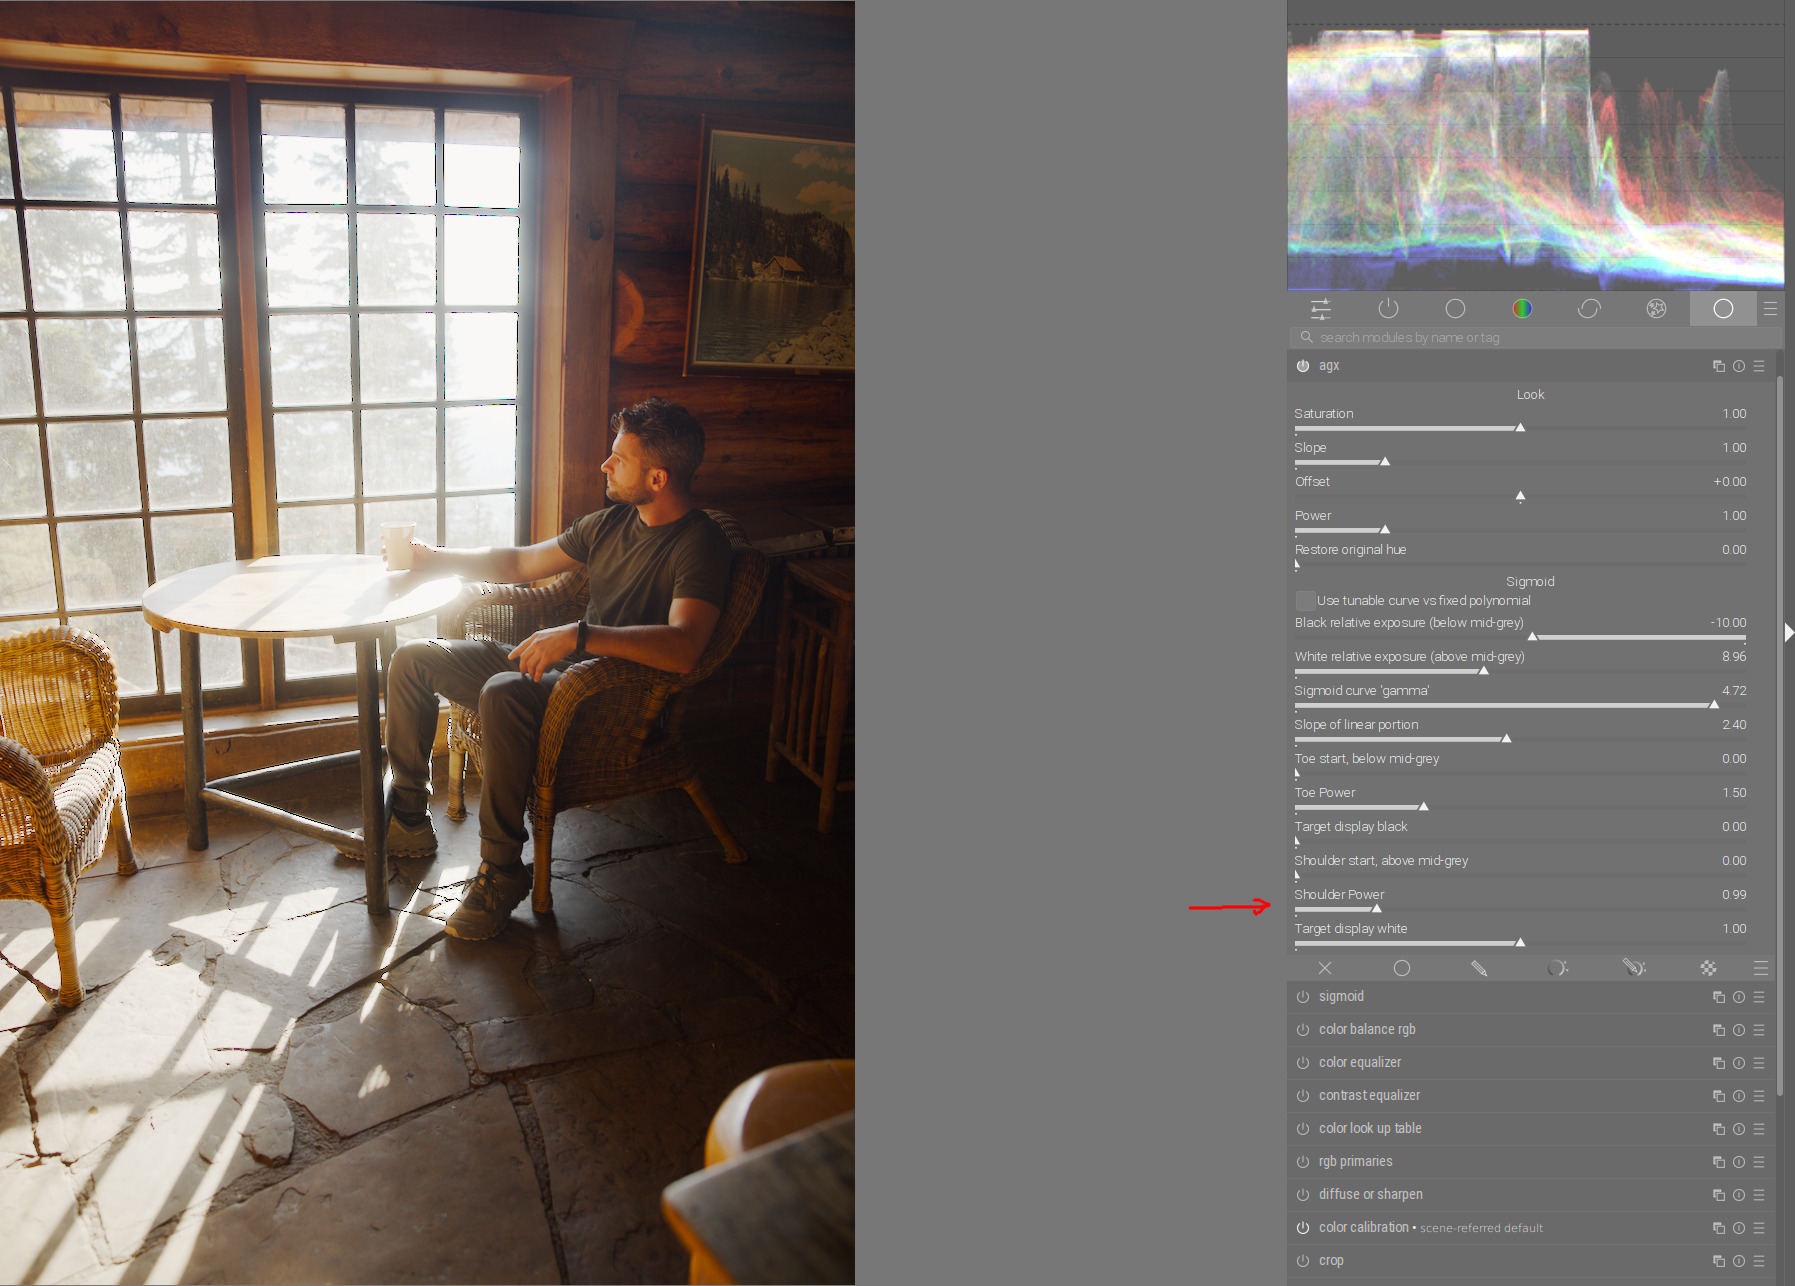
Done.
And possibly, tone equalizer to save even more details from the window area:
4 Likes
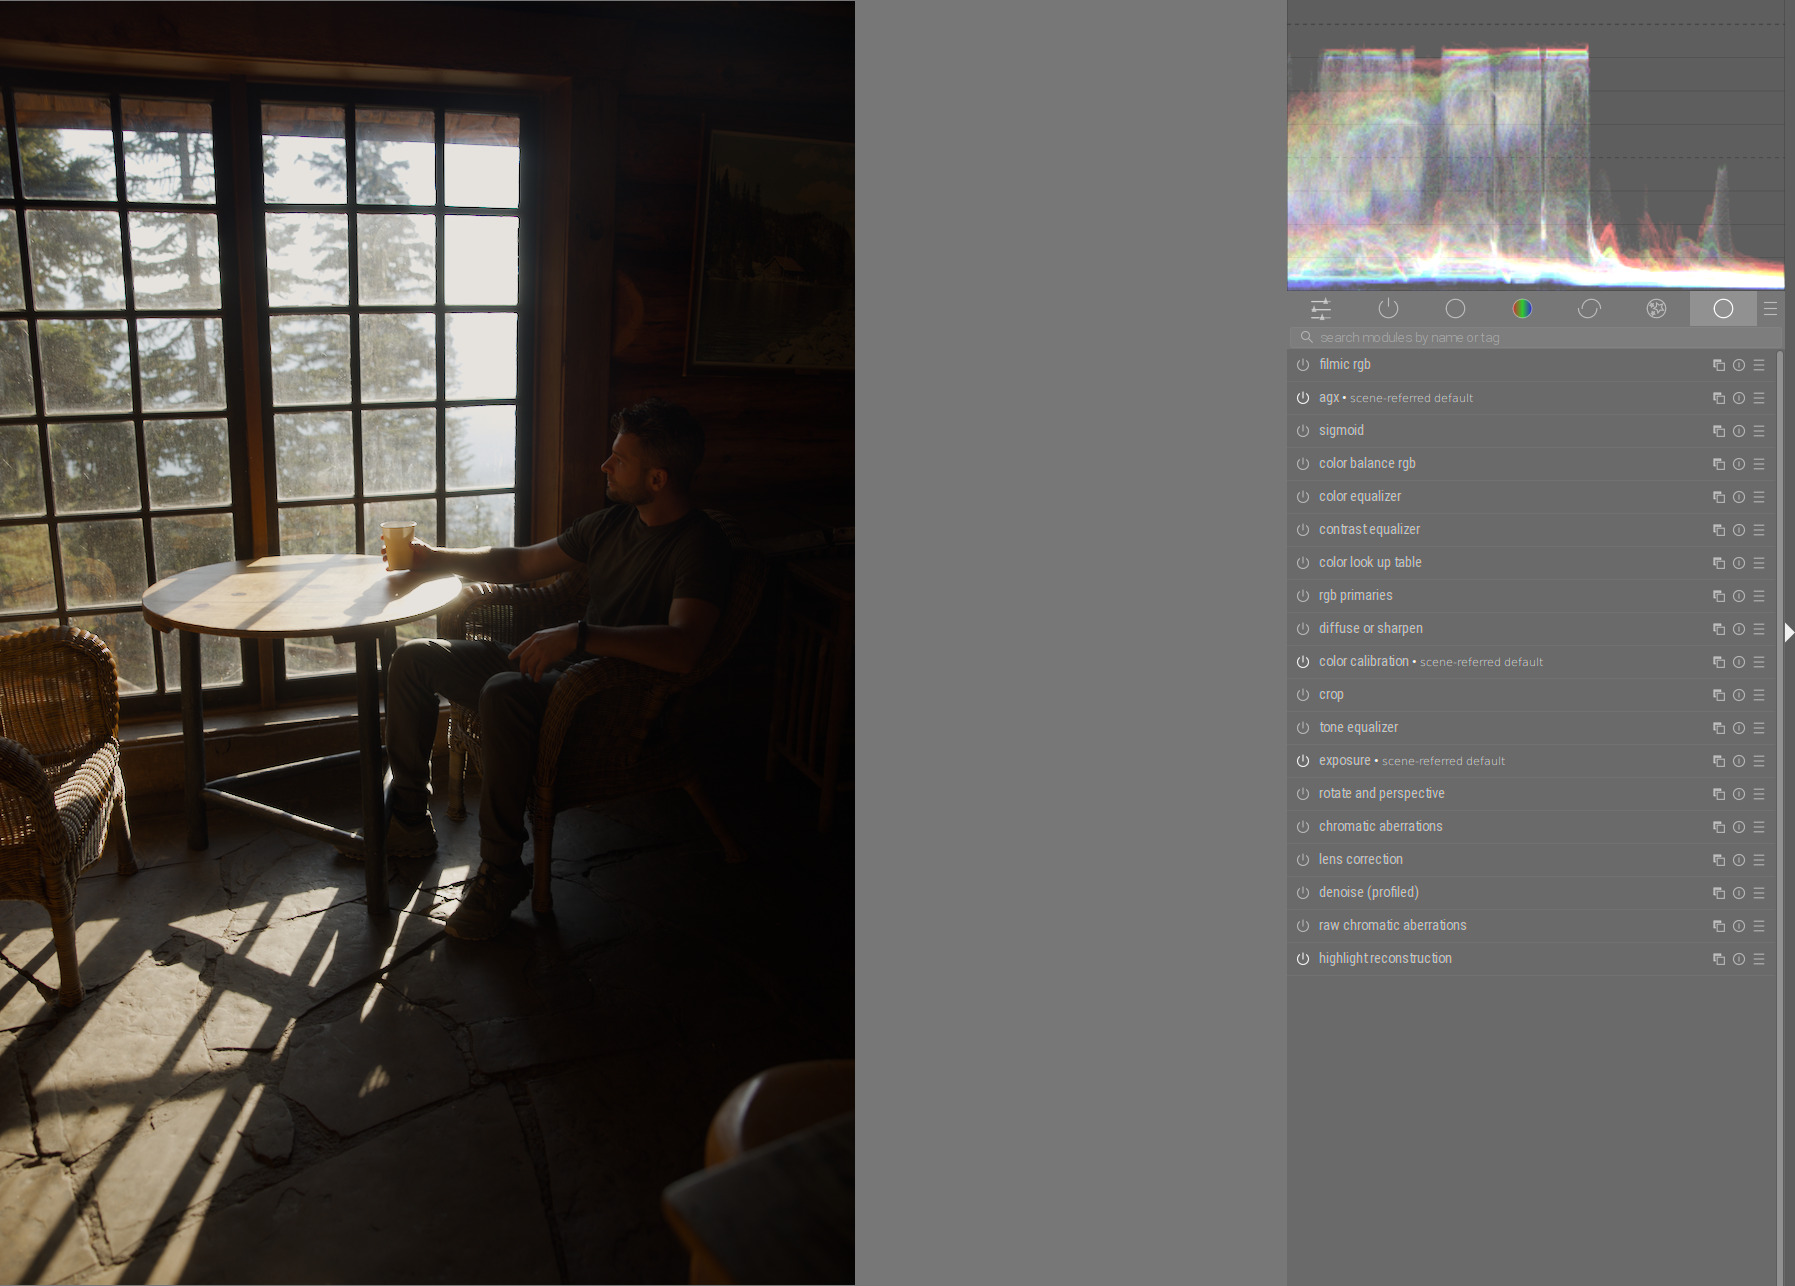
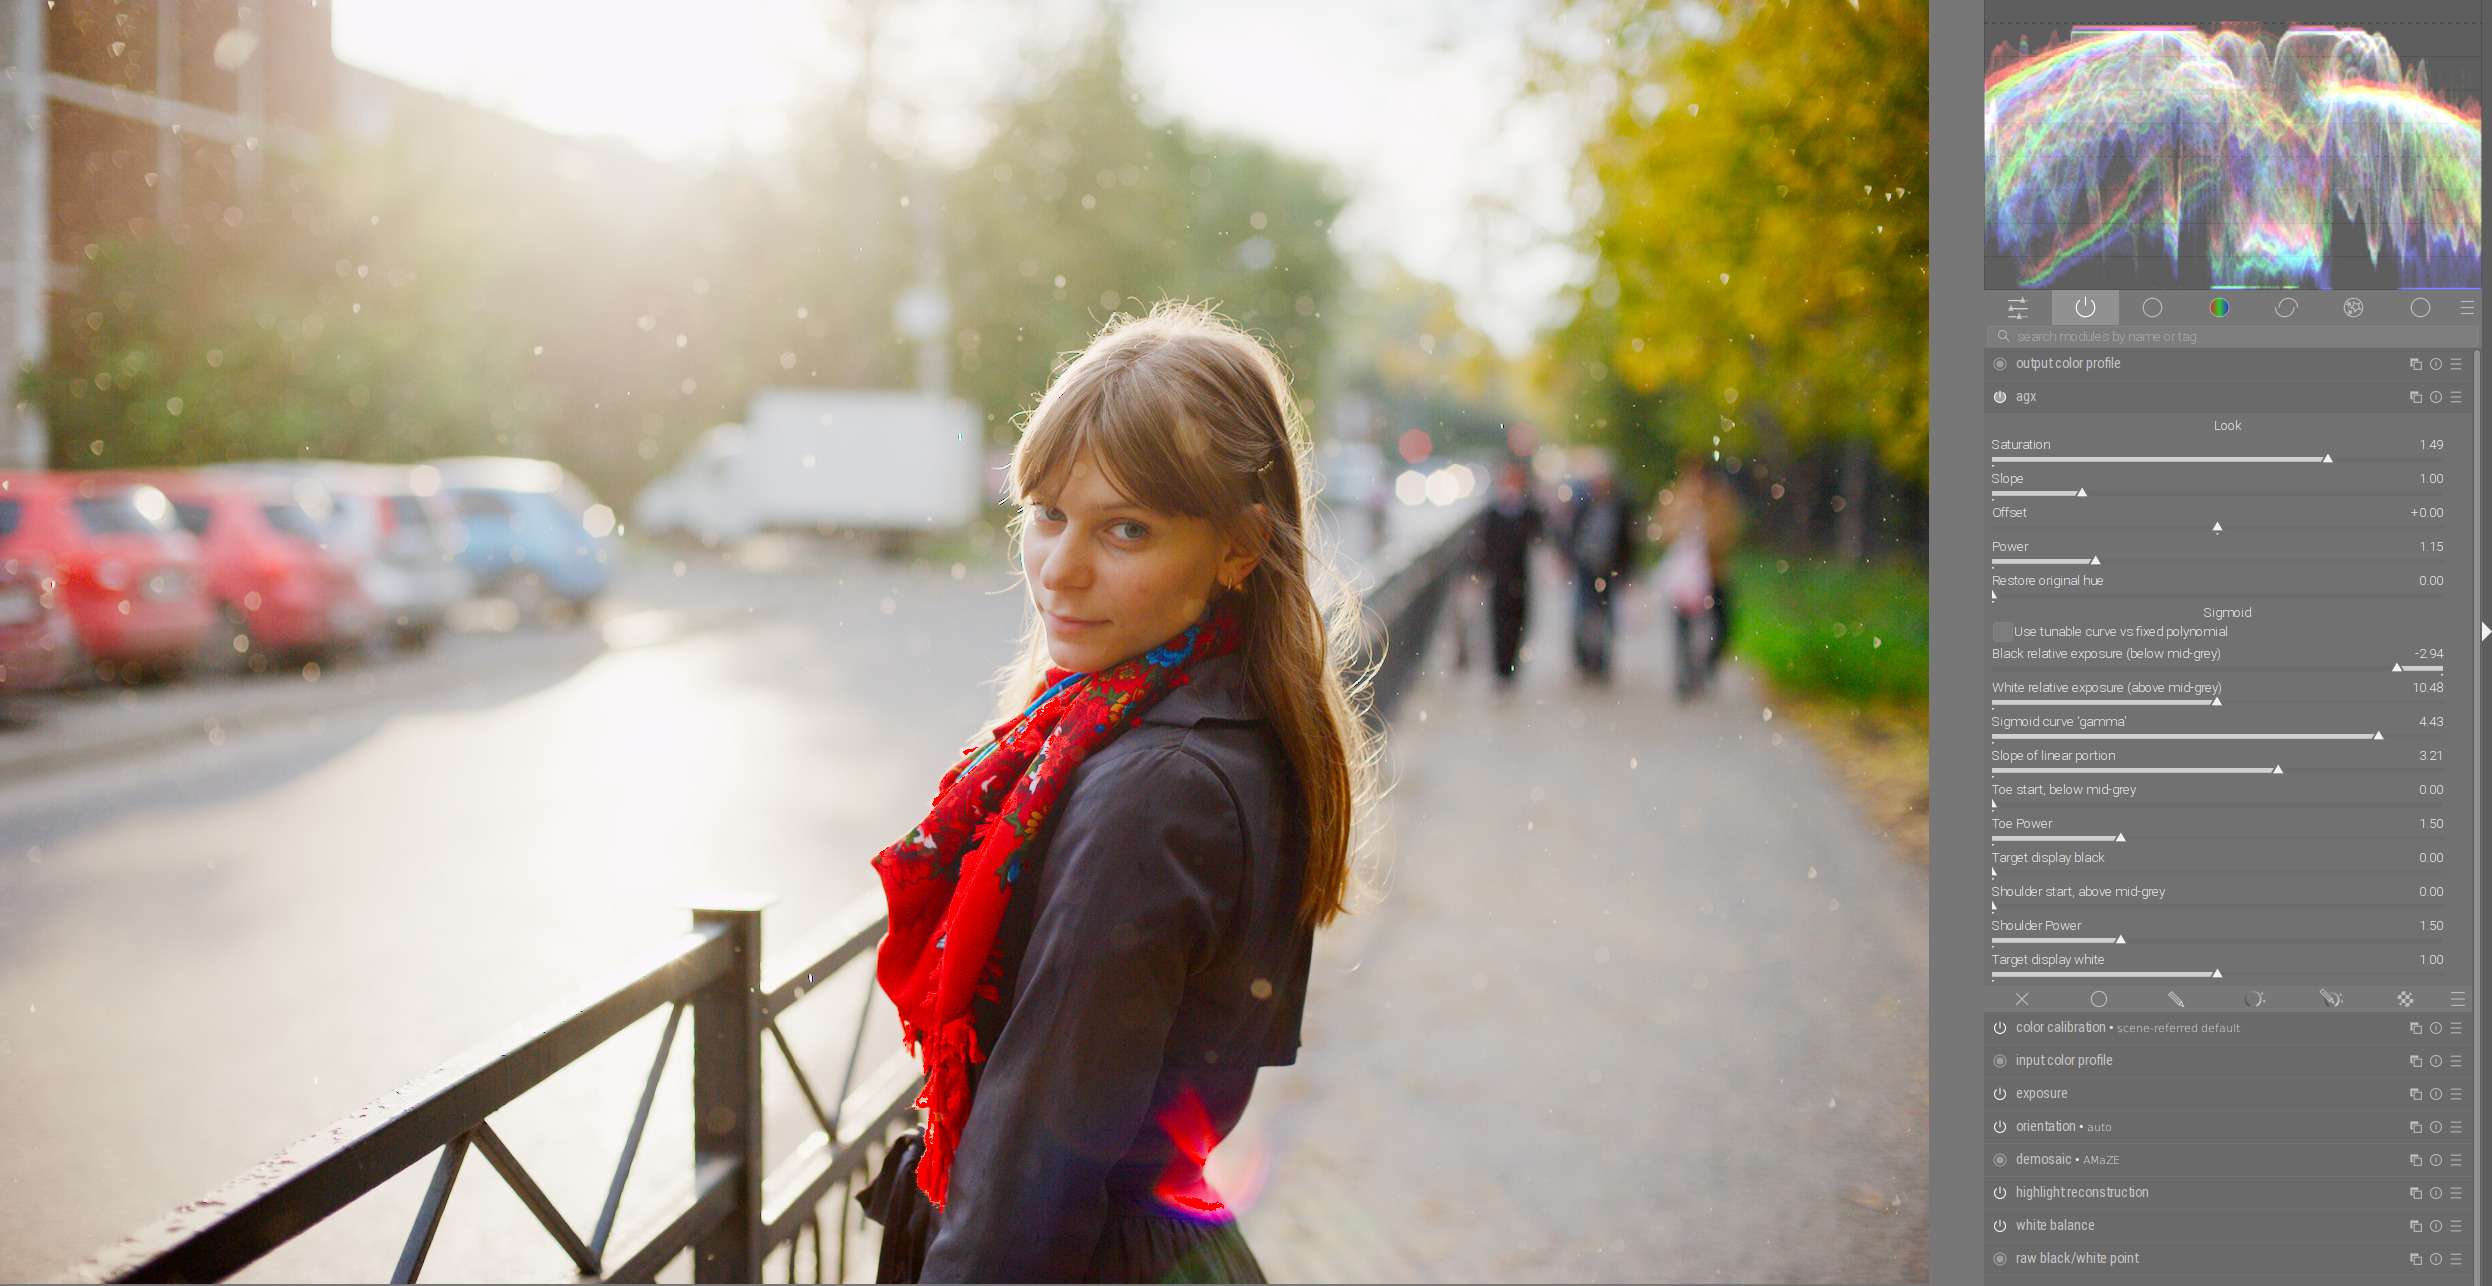
Agx handles cases like this perfectly:
Backlight, subject in dark, raw file overexposed:
Exposure module and Agx only :
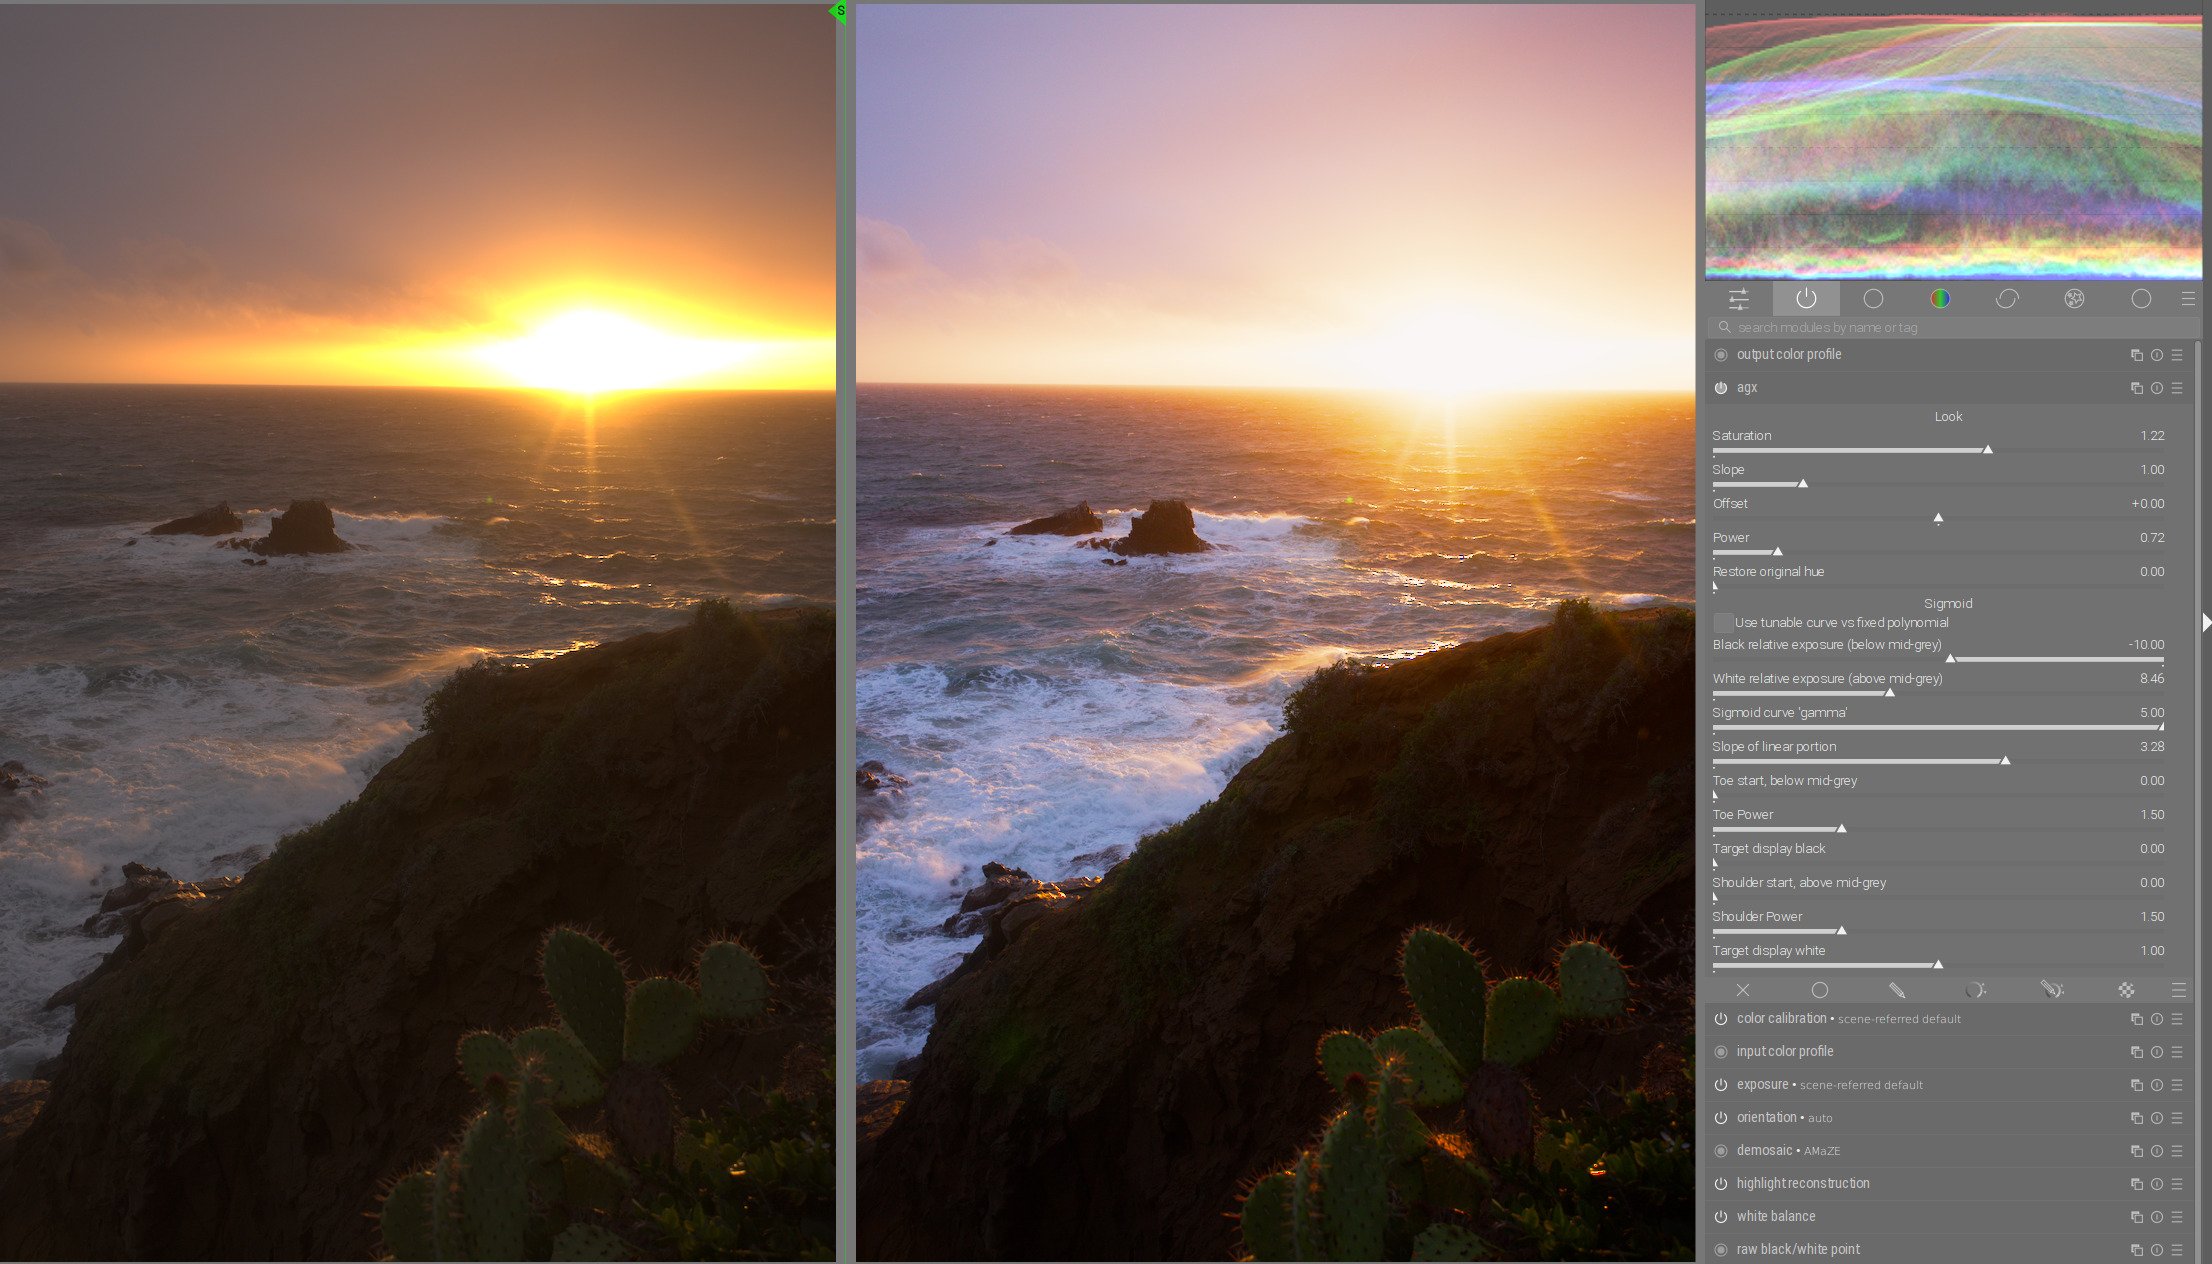
Another example with sunset. Agx only:
9 Likes
Here’s a Windows executable to download:
I had a lot of strange “failed to load external entity…cannot parse” errors while compiling, but it seems to work ok.
4 Likes
And I use windows
Are you using the executable that I set up? I’ve been running it for a couple of hours and haven’t had any issues, but I run it as a separate installation using a Windows shortcut and its own config file
I’ve been playing with the new gamma, and I like the result but its a subtle difference from the Slope of linear portion. I am a little concerned that this could cause some confusion with new users who may not understand the differences between the different sliders that appear to do similar things.
I wonder if a discussion on the general workflow might be in order at some point. Right now I adjust exposure and then I use the AgX Look controls to achieve basic tone mapping and I’ll refine the picture with the Sigmoid section.
Within Sigmoid I can usually get by with toe/shoulder power and slope of linear portion and not much else.
I have difficulty effectively using the black and white relative exposure sliders… they only seem to work for me if I’m tweaking the Look parameters. I get undesirable effects if I push them too far on their own.
2 Likes
No I used another one I’ll try the build that your put
1 Like
Hi, they introduce clipping if brought too close to neutral grey / pivot, so they are expected to introduce undesirable effects.
If pushed in the other direction, especially if the toe and shoulder starting point is not the pivot, they can also introduce issues.
However, both are completely independent of the look params that are applied after the sigmoid curve.
Could you share examples? Since the xmp files are fluid at the moment, screenshots of the params would be best. And let’s not upload many raw files; please link images. If you can use one from an existing PlayRaw, all the better.
The workflow is new, we’ll have to figure it out for ourselves, so I rely very much on your feedback and tests.
I think it’d be nice to:
- find a few easy-to-use sliders that are enough to handle most photos
- find user-friendly names like ‘contrast’ etc. instead of powers and slopes and whatnots. toe and shoulder are probably well-know in photo editing tools, but maybe even those could be renamed to (abruptness/hardness of) shadow transition / highlight transition, but then the names get very long and don’t fit on the UI, so it’d be best to place those in the description pop-ups
- make all sliders available under an ‘advanced’ section, much like how sigmoid’s primaries sliders are collapsed by default.
On Blender, the curve is fixed: you cannot set black/white exposure, slope of the linear section, toe/shoulder power, starting point of the toe and the shoulder. You only have the look controls.
This video on Blender actually shows some more processing done after AgX is applied: https://www.youtube.com/watch?v=hS7uaTquwWc (but I really don’t want to extend the scope of the module right now, otherwise it will never be done; we’re not in a hurry, but there’s a reason why the adjustments recommended there are also done in separate ‘modules’ (processing nodes)).
6 Likes
to simplify UX maybe put toe/shoulder start and target black/white into a collapsed view, since these seems to be user for very specific cases.
regarding terminology: slope, offset, power seems to be common used terminology when it’s about color grading. So better keep the ASC-CDL specification confrom terms but maybe explain the effect in tooltips. These standardized terms makes it easy to search the web for information - especially for non english speaking users.
Using arbitrary terms makes it hard to proper translate the UI (not all terms can be translated without losing their context specific meaning).
For this reason, i reverted several pseudo-german translations of technical terms since translations into non standardized terms can lead to confusion (eg: slope/offset/power → Neigung/Versatz/Stärke → Inclination/offset/strength - what the heck does that mean in terms of color grading ![]() )
)
4 Likes
Fantastic @Dave22152, thanks for this! I played with this a couple of weeks ago and have been following the thread (most of it is high above my head). Excited to try the latest and greatest.
@kofa thanks for bringing this out into the wild for people to try out.
2 Likes
hello
i can’t really contribute anything, but this module is just brilliant and so much easier to use.
thank you so much for your fantastic work
1 Like
Thats a really nice video esp that control panel that he has created and is selling on the blender marketplace. I could totally see something like this making its way into ART. @agriggio Alberto has made or converted several color grading tools as CTL panels and one like this with all that control you could do so much and some of it might be hints for naming conventions that make “sense”… Maybe its too blender specific but I could also see something like this integrating agx and some of the recent film sim work making its way into something like vkdt as well…
Yes, that makes sense and I think there’s a risk in trying to put too much into a single module in an attempt to do it all.
But let me ask, given that Blender only has the look controls, do you see any advantage of using the black/white exposure relative exposure sliders over the Look controls? I’m not suggesting doing away with them, I just want to better understand if there’s a technical benefit that I might be missing.
…and existing ones!
1 Like
I think in Blender you need fewer controls because:
- with rendered scenes, you have control over the lighting
- since you are processing many frames, you want everything to be consistent
The sliders on the UI are what Blender’s config-generation script supports.
(actually, there is no slider for -fi FULCRUM_INPUT, --fulcrum_input FULCRUM_INPUT and -fo FULCRUM_OUTPUT, --fulcrum_output FULCRUM_OUTPUT … yet; and no controls for the matrix, either).
The only thing I added myself is the ‘gamma’.