For some time now, I’m using Darktable 5.4.1 on Ubuntu 24.04.4 LTS.
I’m using a Panasonic Lumix DC-TZ99 camera. So pretty budget friendly.
In the past, I just shot jpg and edited in Gimp. But switched to raw and currently gaining experience in Darktable.
But what fails to work is denoising! There is either way too much noise left, or the image is completely washed out. I’ve been trying to get a raw-image to be as much denoised as the camera-generated jpg, but without succes.
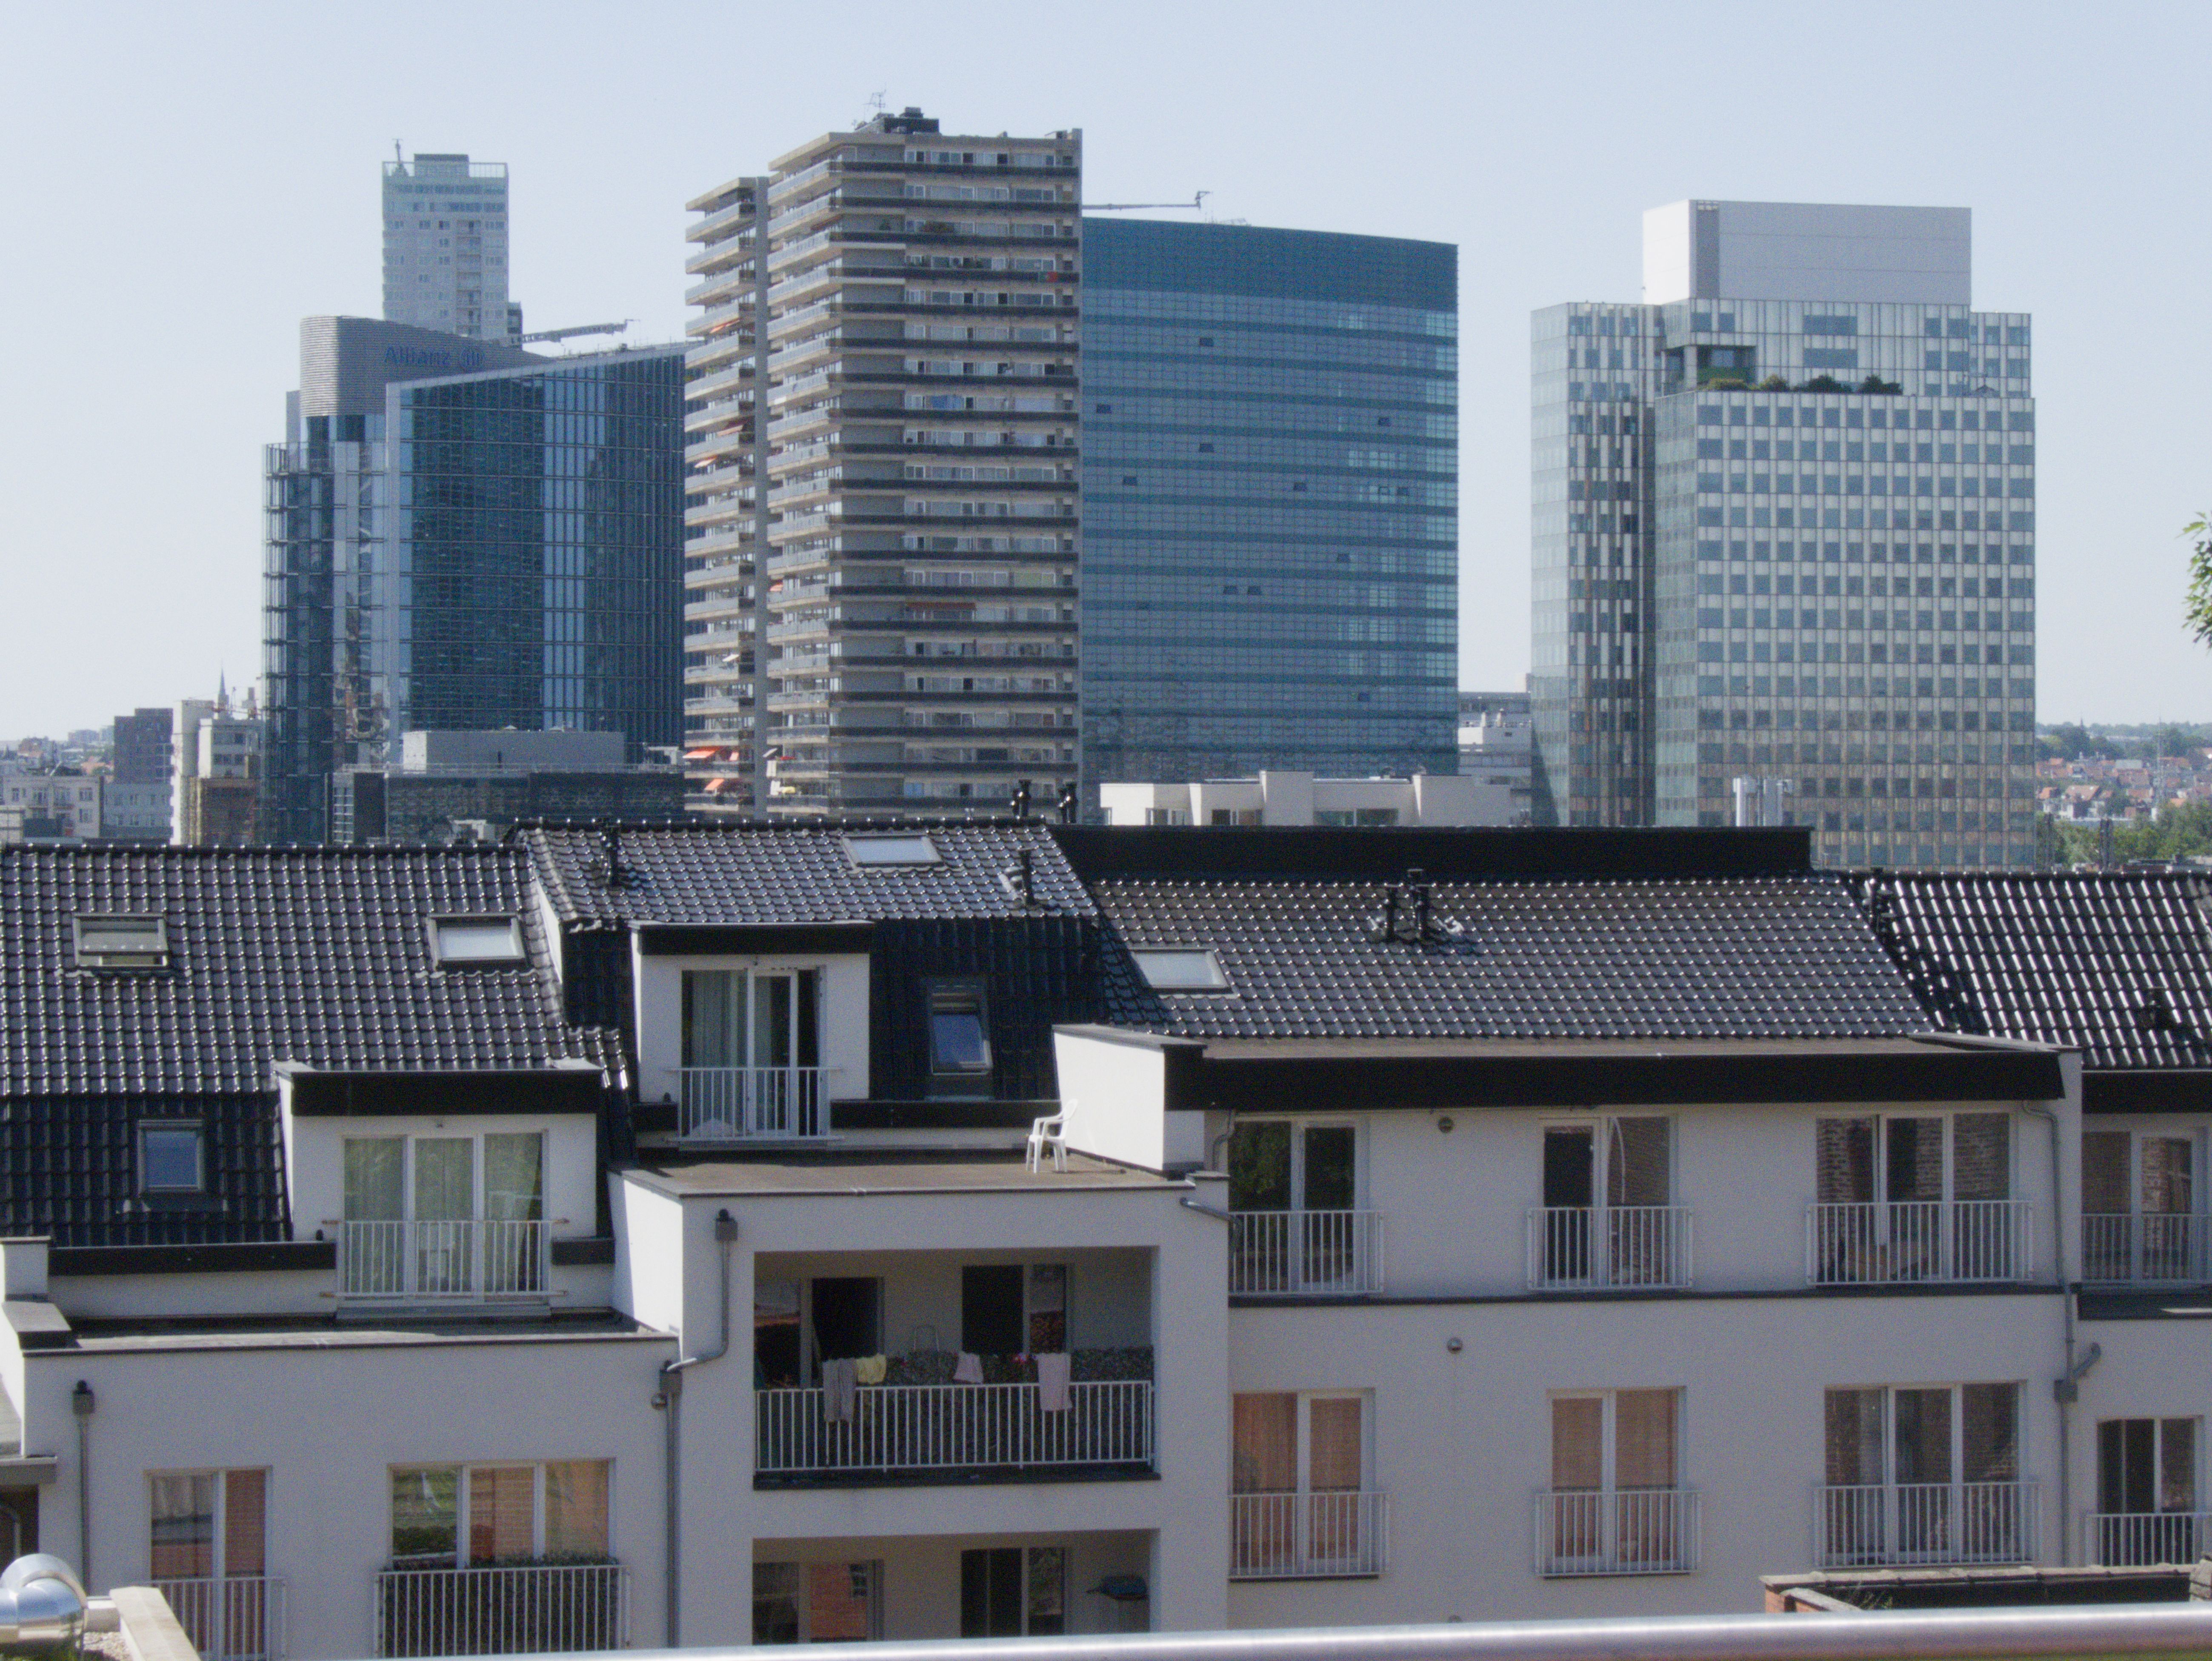
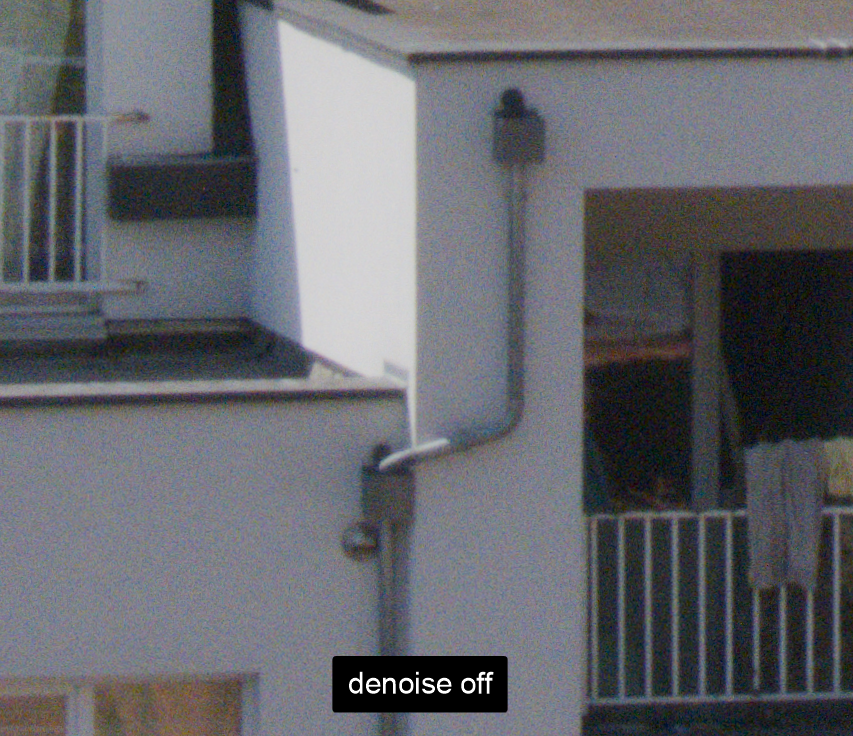
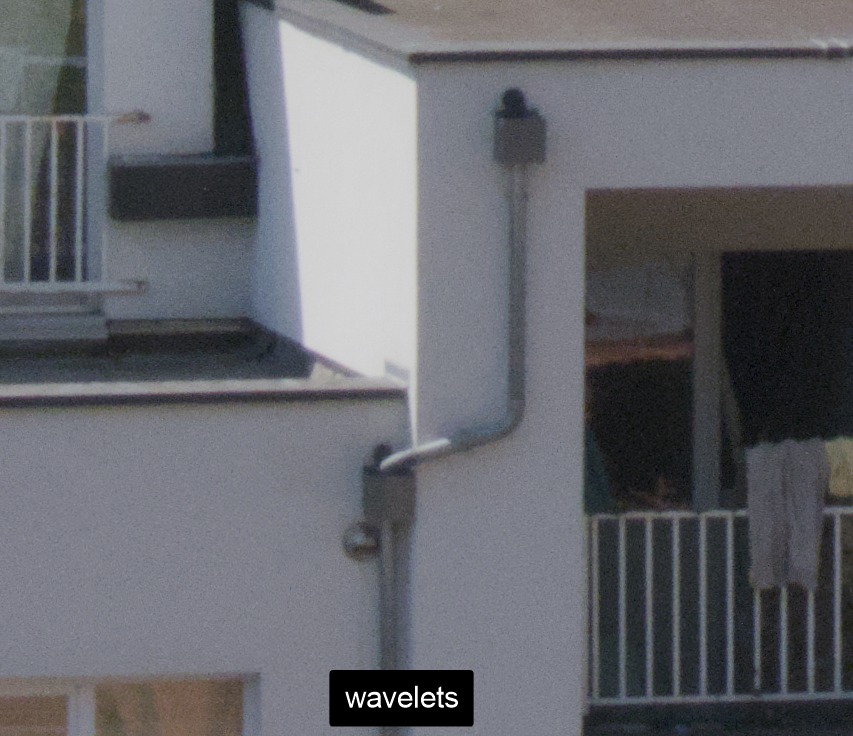
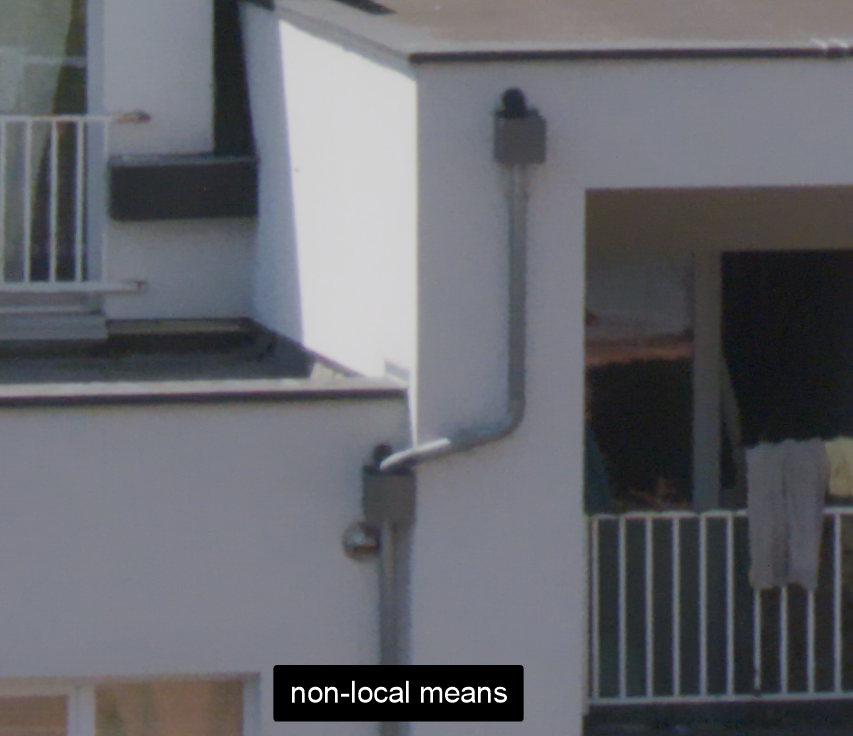
Here some samples:
the camera generated jpg (downloaded through Whatsapp, 'cause currently at work ; ), so lower quality):
One thing I must add: in Darktable, I add pretty aggressive sharpen operations to the picture. It is clear to me that this adds to the noise. But I can’t use these sharpen operations on an ISO 200 picture in sunny daytime, when can I? So it seems to me the problem is definitely denoising related. Raw denoise makes the image all washy.
What to do? Any tips? Someone who can generate Darktable settings that have great results?
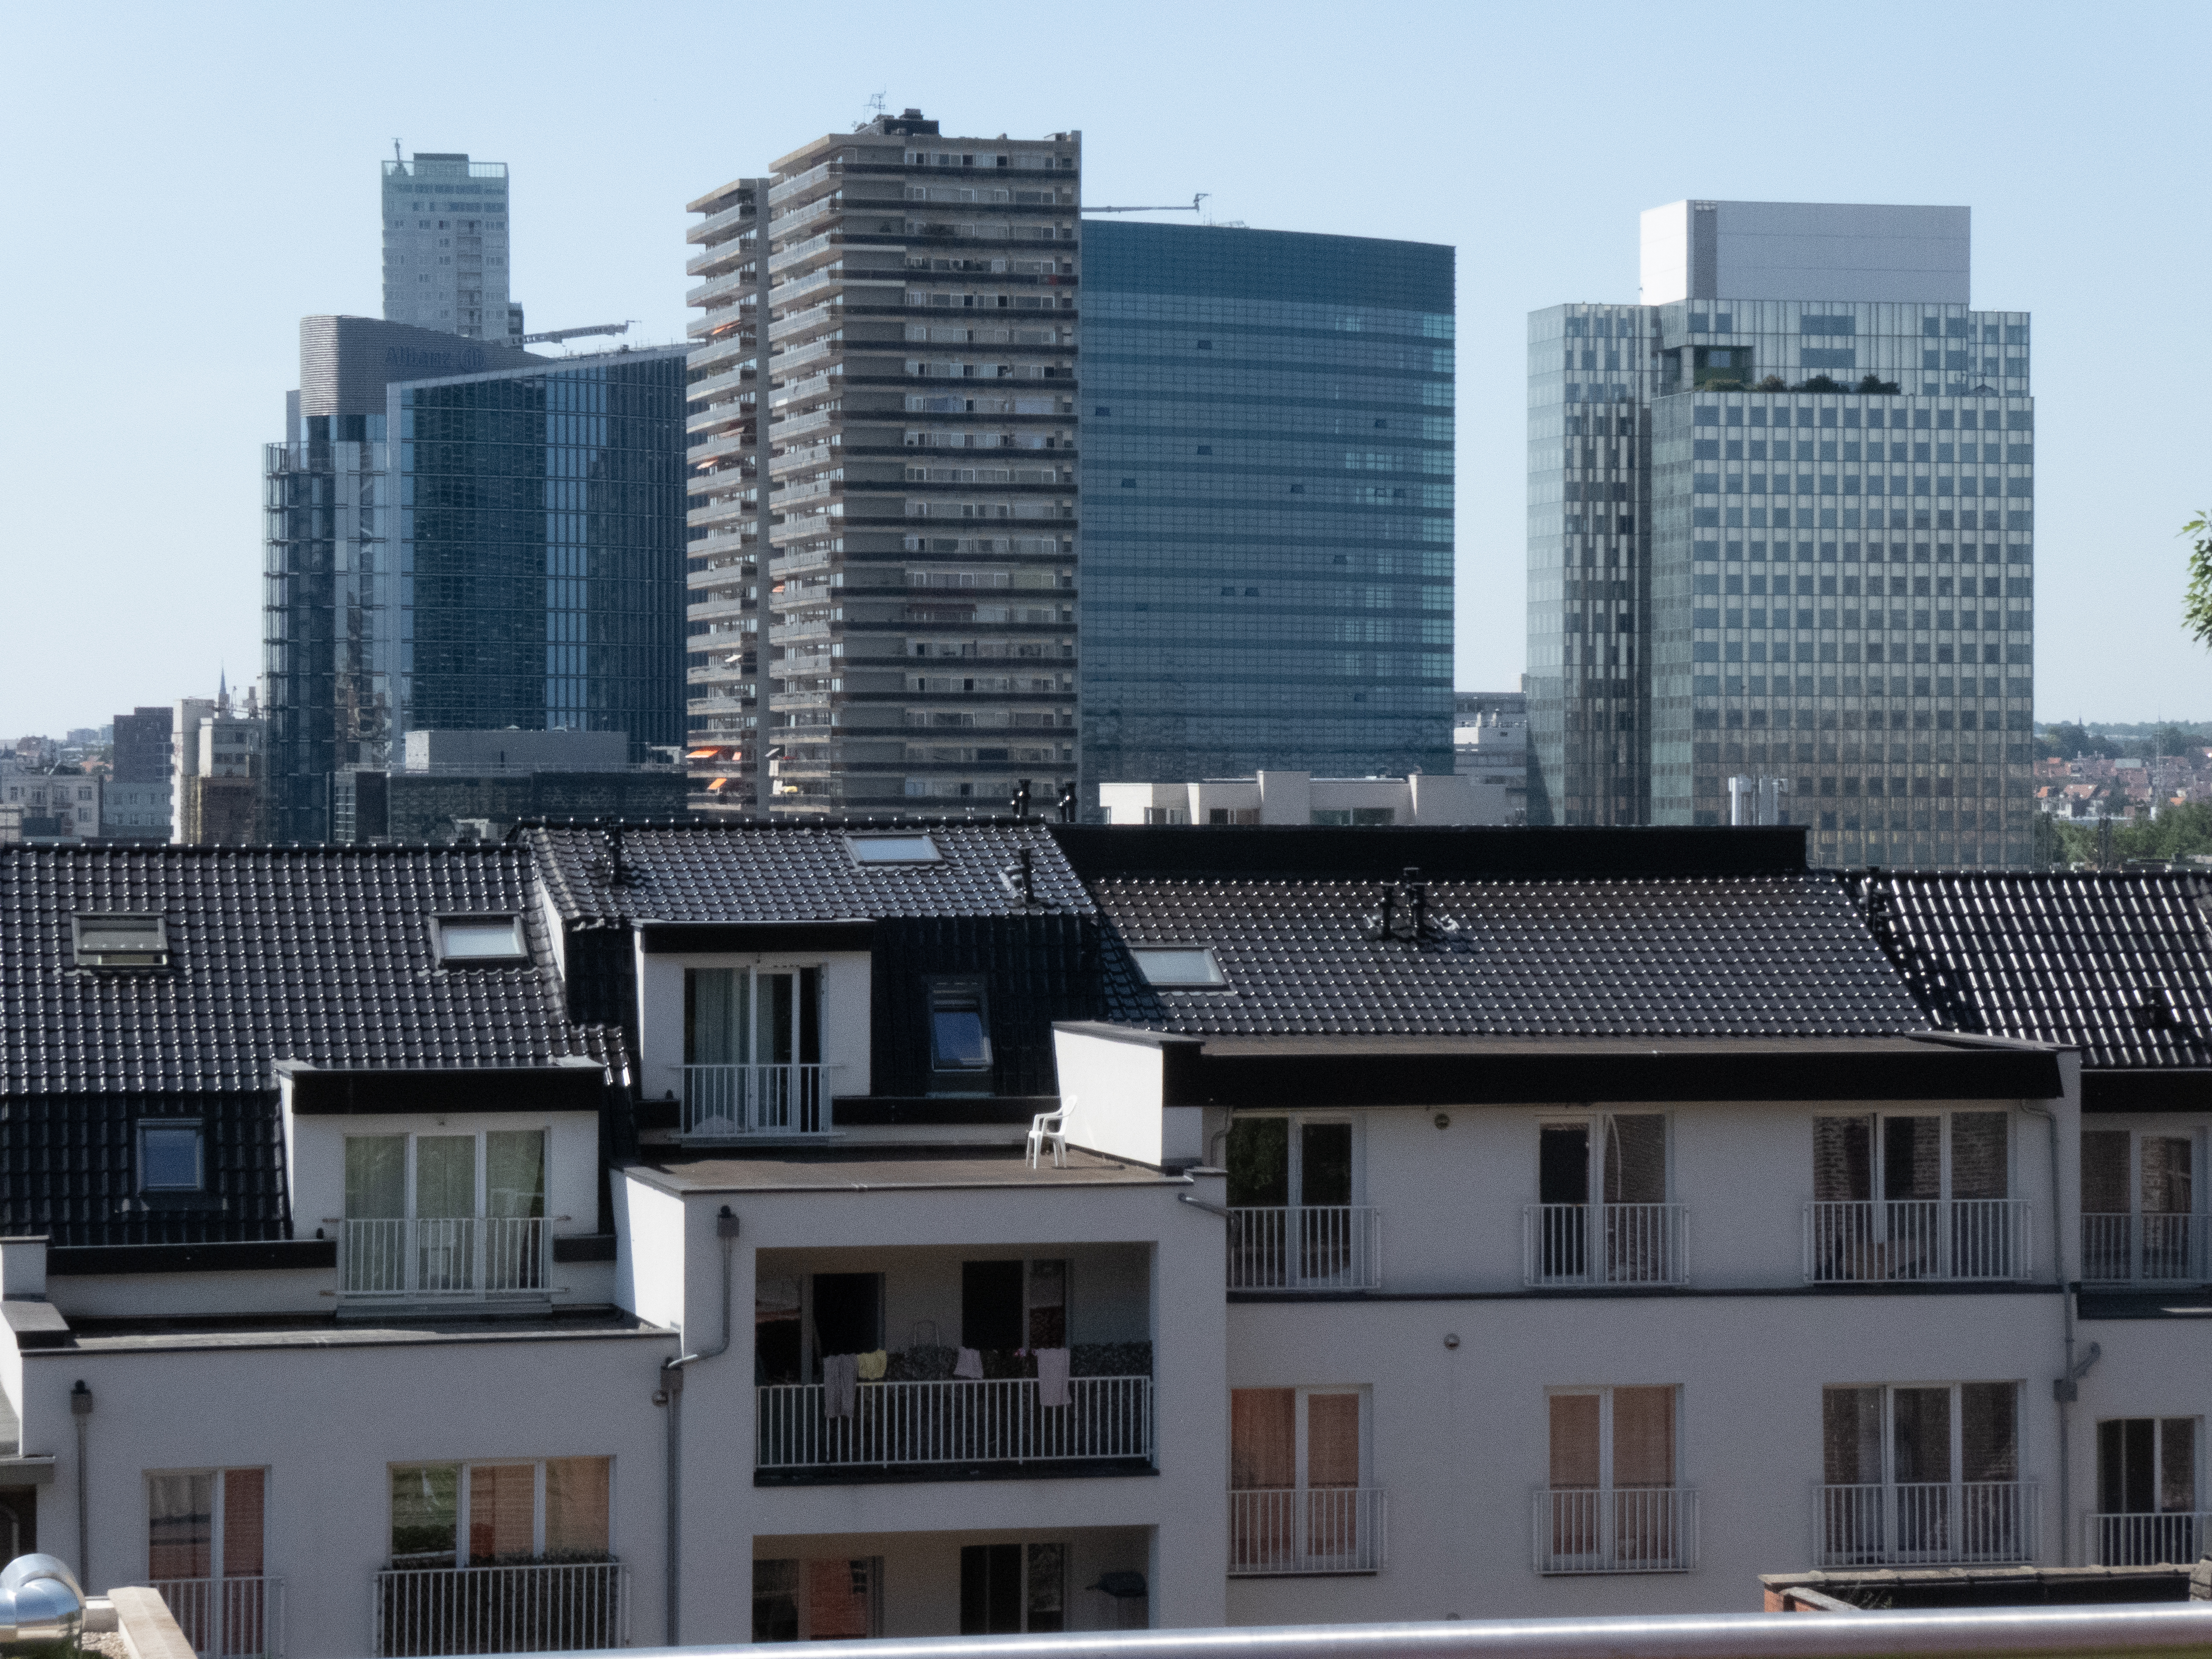
Made a mistake, the raw through Darktable export is one with only the unmutable modules enabled. To see the problem with Denoising and sharpen modules added, look at for exaple this image:
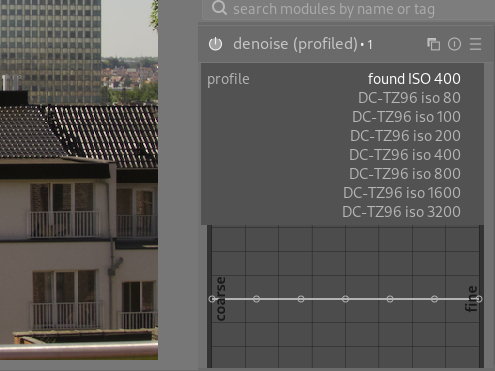
The problem is exactly what I expected it to be – your camera’s sensor ISO profile is not supported and therefore only generic poissonian corrections are applied.
Are you planning to use this camera a lot in the future? It might be worth to create a noise profile and submit it to Darktable devs so that it can be merged and used by other people.
When sharpening (especially a noisy image), it’s best to use a mask to avoid sharpening the noise.
In demosaic- capture sharpening that means tweaking contrast sensitivity. In tools like Diffuse and Sharpen, going in drawn and parametric mask and tweaking details threshold as well as the “gray value” slider to get the mask off the deepest shadows.
First, denoising will always make the image seem less sharp (in part because it “diffuses” the noise over the nearby pixels, in part through an optical illusion).
The raw denoise doesn’t work well if you activate it after cropping: the algorithm estimates one or two parameters from the actual image data, and for that to work correctly, it needs the full image. It’s best to also avoid zooming in the darkroom. For both, that’s only when you activate raw denoising (I don’t think many would use it if you couldn’t crop when using raw denoise…)
Then, you have a small sensor in your camera, so small pixels, which can hold few photons (relatively speaking). That will increase the inherent noise, which is related to the number of photons captured (more photons means lower relative noise level, or better signal/noise).
But do you need perfect denoising? You have images of approx. 5000×4000 pixels, which is more than most screens can handle. It’s also enough for a print of 50×40 cm (or anything larger, such prints aren’t meant to be observed at 30 cm). So a lot of time you’ll be downsampling for export, which in itself reduces visible noise.
I don’t need perfect denoising, but I would like to simply reach the same level as the camera generated jpg image. That doesn’t seem to be possible at this point, which is making me consider stopping with RAW and switching back to camera jpgs with Gimp…
I didn’t know this about denoise raw. But to be clear, I do activate denoising (either profiled or raw) early on in the process. Cropping is last.
Would wavelets mode of Denoise (profiled) be enough for you by any chance? As rvietor said, noise doesn’t matter that much for the vast majority of uses. It’s internet’s favorite thing to analyze and there are many people that will try to convince you noise matters … more than it actually does.
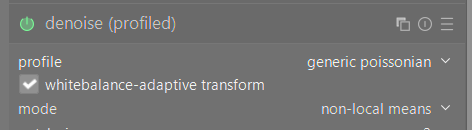
How did you get that? I’m on 5.4.1 too, but I don’t see that… have you tweak something to get that?
Well, I’m on 5.6, but iirc, 5.4 has the same behaviour: it’s the dropdown that gets shown when you click on the down caret next to “profile”. But it only shows the options for the recognised camera (which is not illogical).
And if you are sure the TZ99 and TZ96 are “close enough” (as far as sensor noise is concerned), you could try to modify the noiseprofiles.json to include a copy of the data for the TZ76 with the model identifier changed (in all relevant places)… But for that, you’re on your own…
It’s the version of Darktable 5.4.1 from the Fedora repo (meaning not a flatpak or appimage). I didn’t tweak anything.
I didn’t even have to select anything. That was the noise profile Darktable recognized when I opened the OP’s raw file. Meaning it recognized the TZ99 as a TZ96. Interestingly no lens correction profile iirc.
Try this:
1 - do not apply any sharpening;
2 – in “denoise (profiled)”, from the list that appears proposing the different options for the TZ96 choose “DC-TZ96 iso 400” (they are mainly “the same camera” as is the TZ95, it’s just the TZ99 does not have a viewfinder and some other little hardware details not important to this case);
3 – for sharpening, in “demosaic”, activate “capture sharpen”, then activate the square box to the right of the option “contrast sensitivity”.
When you do this all your image becomes mostly yellow, meaning it’s applying the sharpening to all the image, and you want to apply it just to the limits of parts of the image (like lines…); to do that you move the “contrast sensitivity” option to the right, as you do so the yellow begins to disappear and just the referred limits are the unique ones that remain yellow, this means that the sharpening is just applied to them and not to the rest of the image, in this case I have found that around 0,50 is acceptable.
Final notes: shoot always to the lowest aperture you can – in my opinion the f/8.0 you used is too much (the bigger the aperture number the more diffraction you have with these small sensor cameras and thus the less sharp the photo will be), so for the 90mm full frame equivalent that you used, the aperture should have been around f/5.0.
You talk about ISO 200 in your post, but the photo was taken at ISO 400. My advice is for you to try to shoot always the less ISO you can, in this case ISO 80 would have been the best.
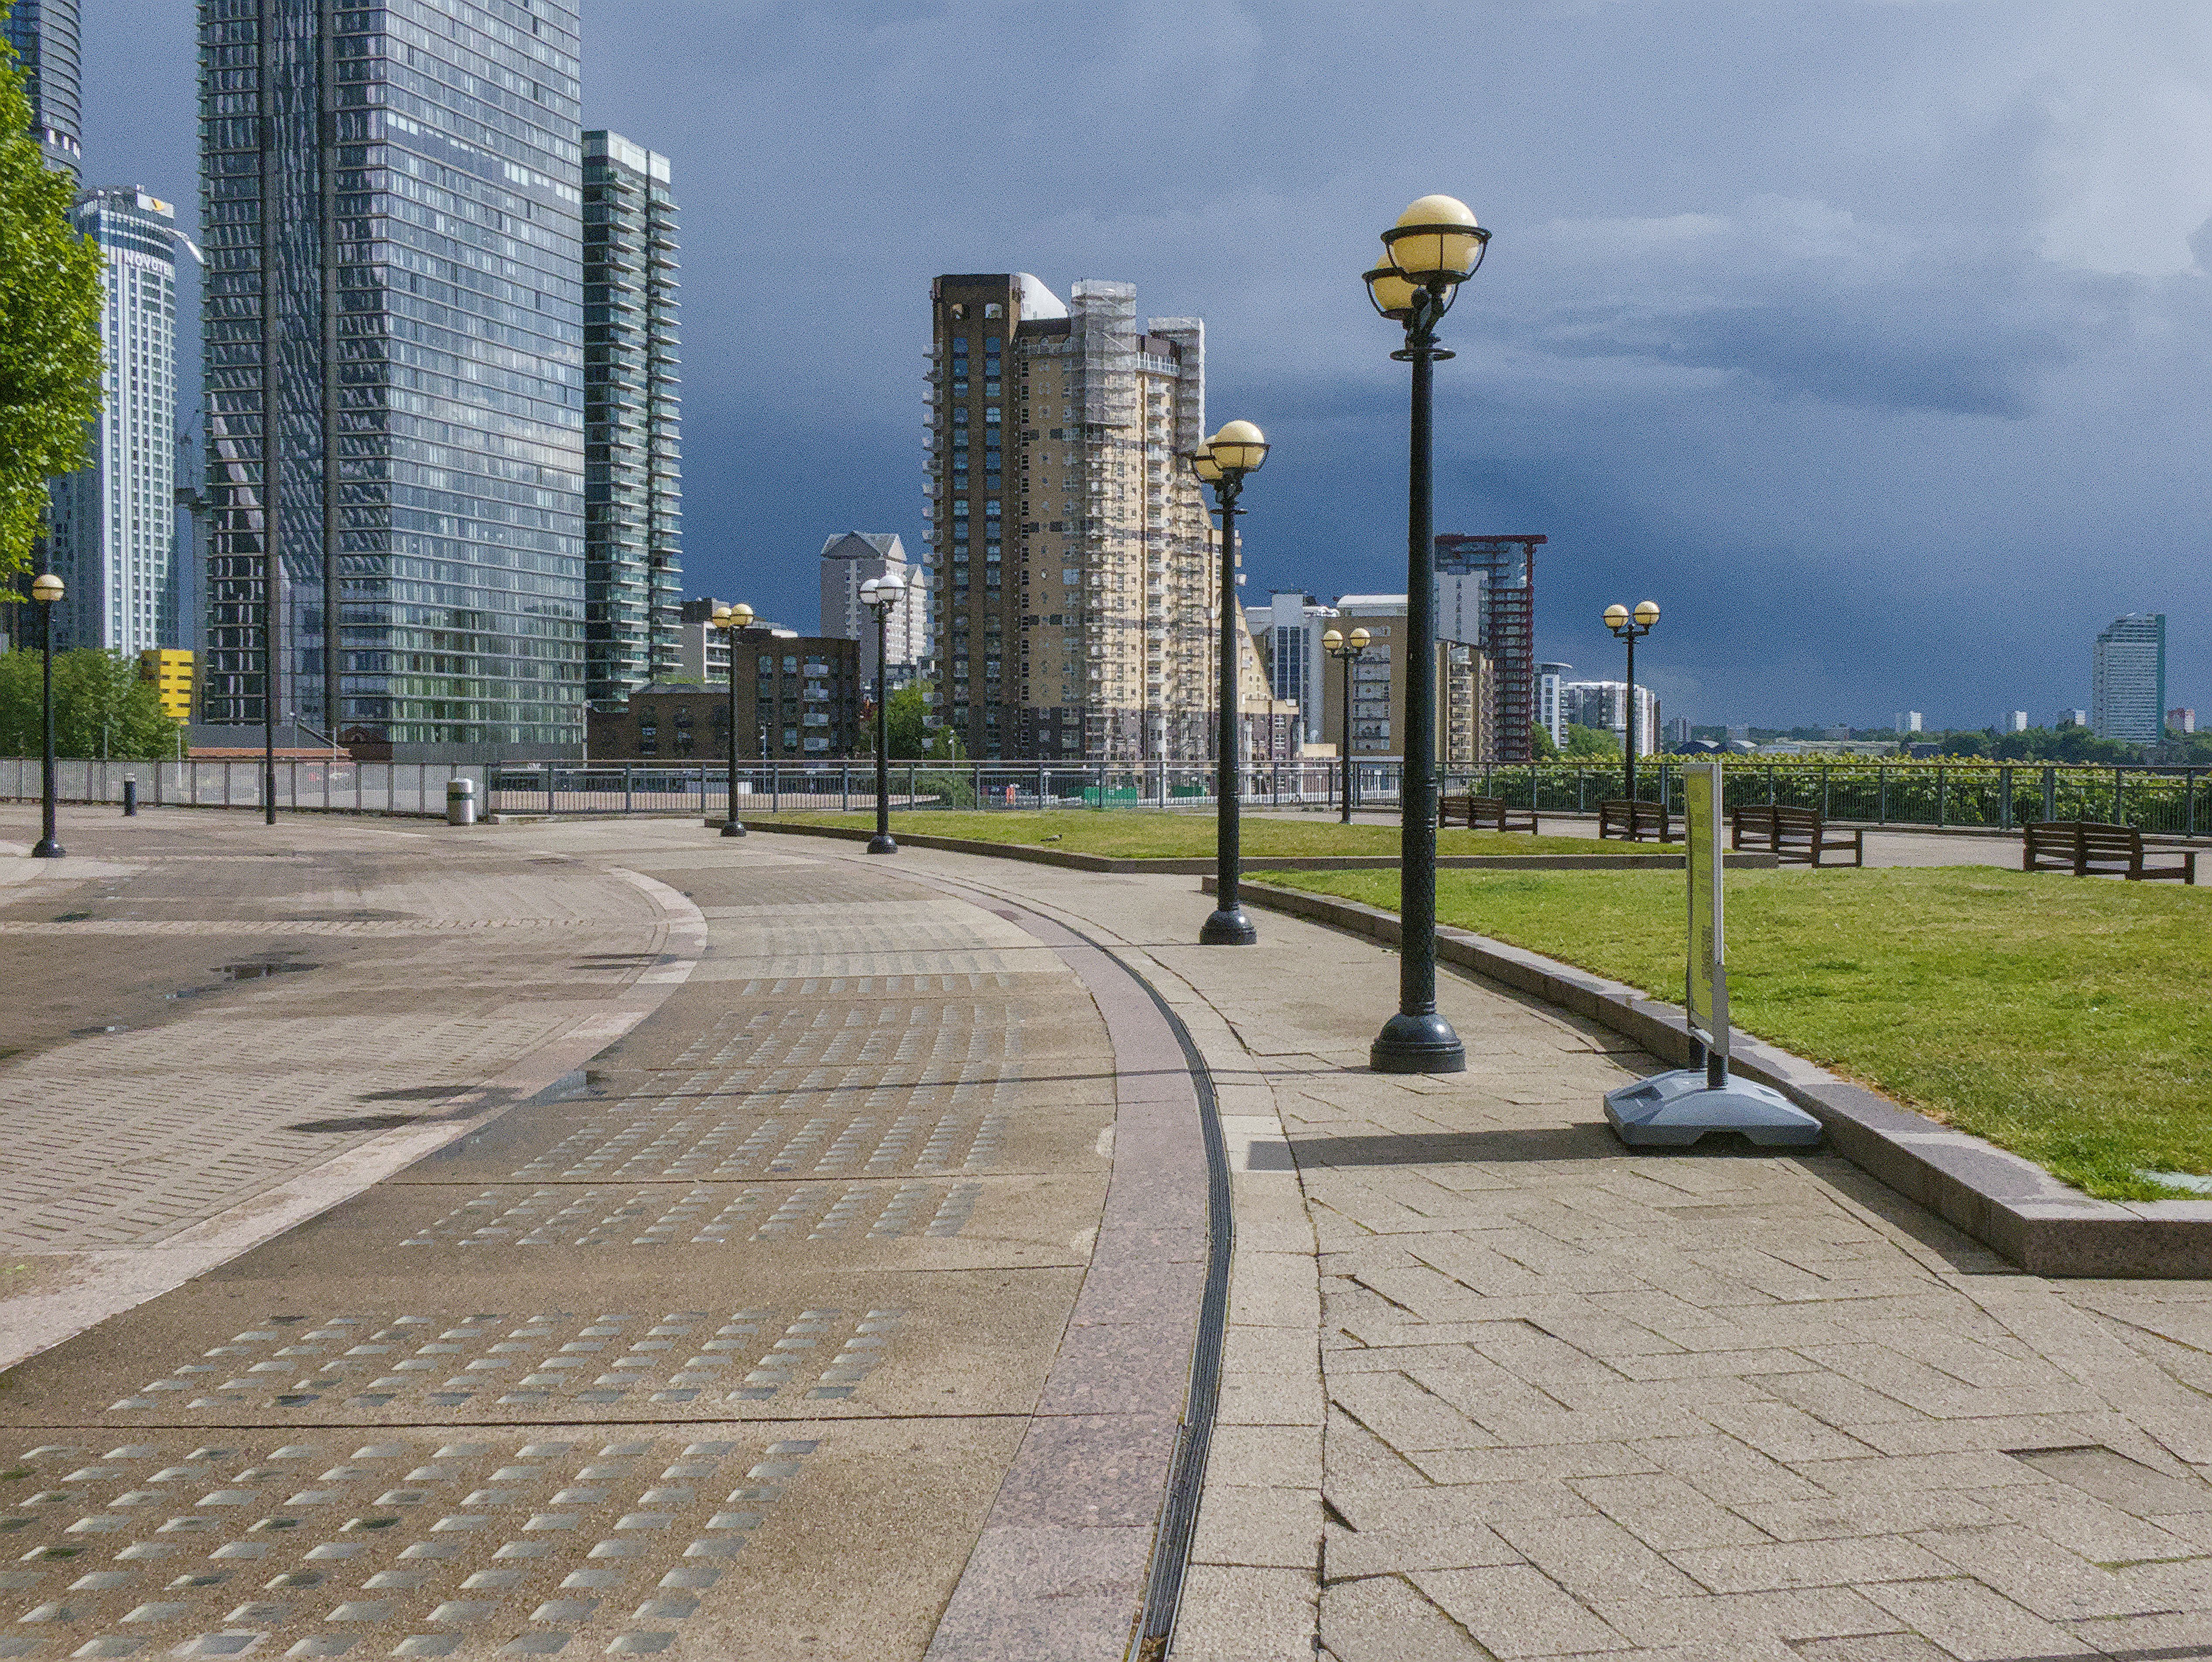
Also I’m posting here an exported crop of the jpg from your raw file using the settings I describe above.
I just opened your image in DT 5.6 and there is a denoise profile for the raw image you supplied. I would upgrade to DT 5.6 as a first step to resolving your problem.
One could post (small) crops at 100%. We don’t need the full image at full resolution to see the noise. Especially not when the raw + xmp are available.