Not sure that what I said was incorrect, sorry.
It occurred to me that I’ve been using a preview build that has capture sharpening, and I just haven’t been using it.
First impressions are… WOW! I really need to think more about sharpening in my photos but this seems like a huge step up for me.
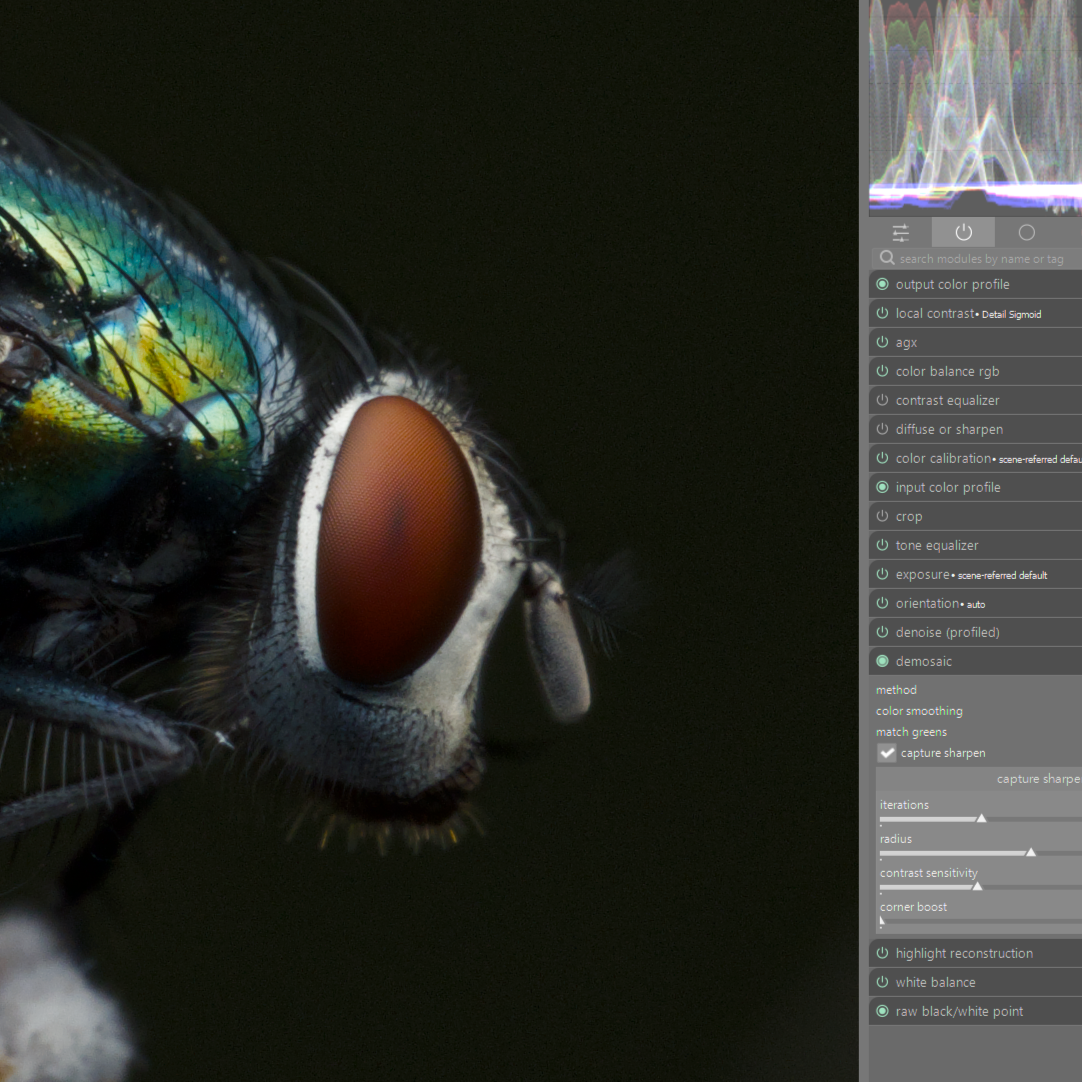
I have a question about how it works, just so I understand how best to use it. I have a lot of photos where there is a relatively smooth blurry background and normally I would use diffuse or sharpen and contrast equalizer with a drawn mask around the subject, just so the background noise doesn’t get affected. Since the demosaic module can’t have a mask the only way to control what’s being sharpened is the contrast sensitivity, but I find that adjusting it to so it’s not sharpening the background pretty much removes the sharpening from many points of interest (such as the eye in this case).
HOWEVER…
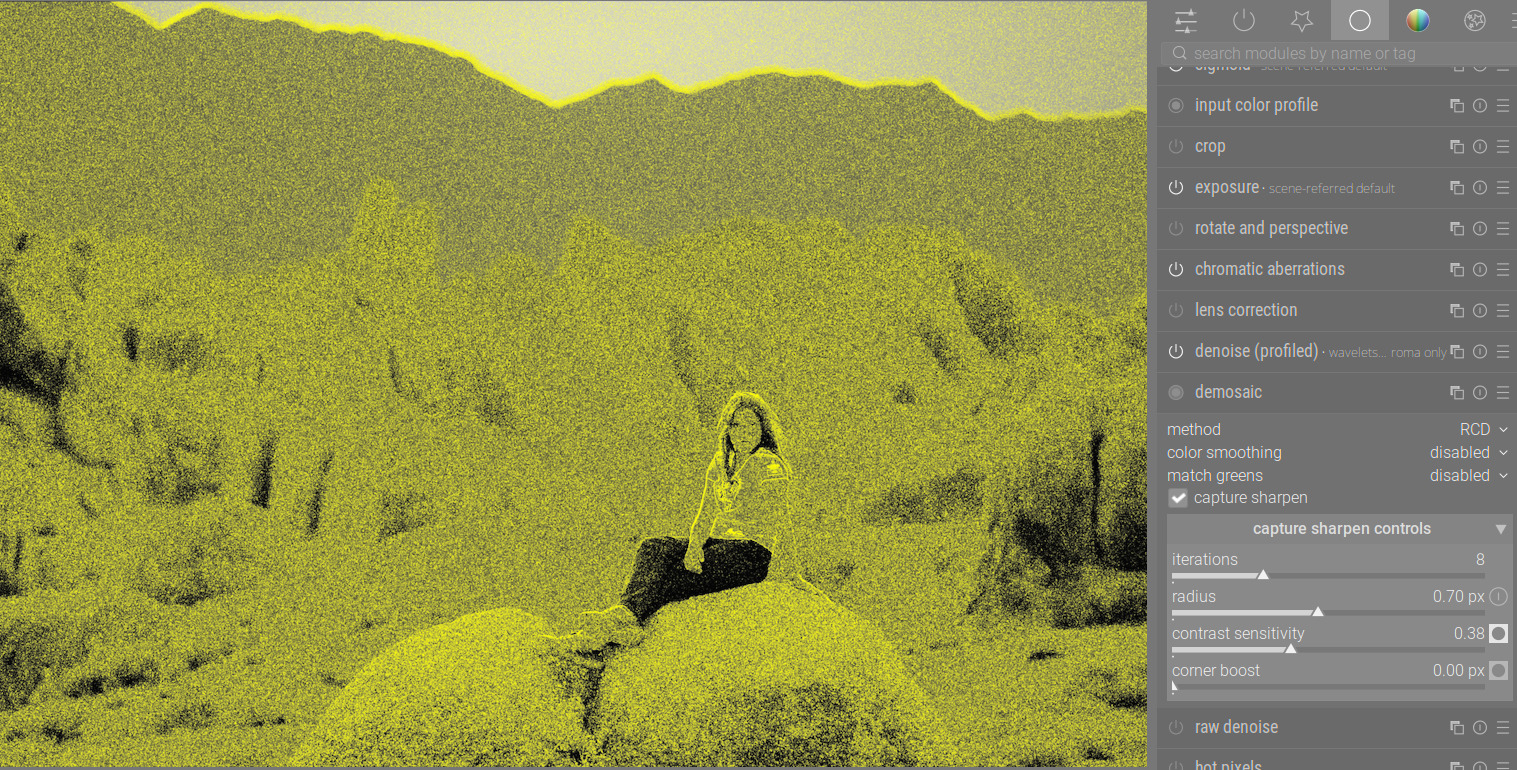
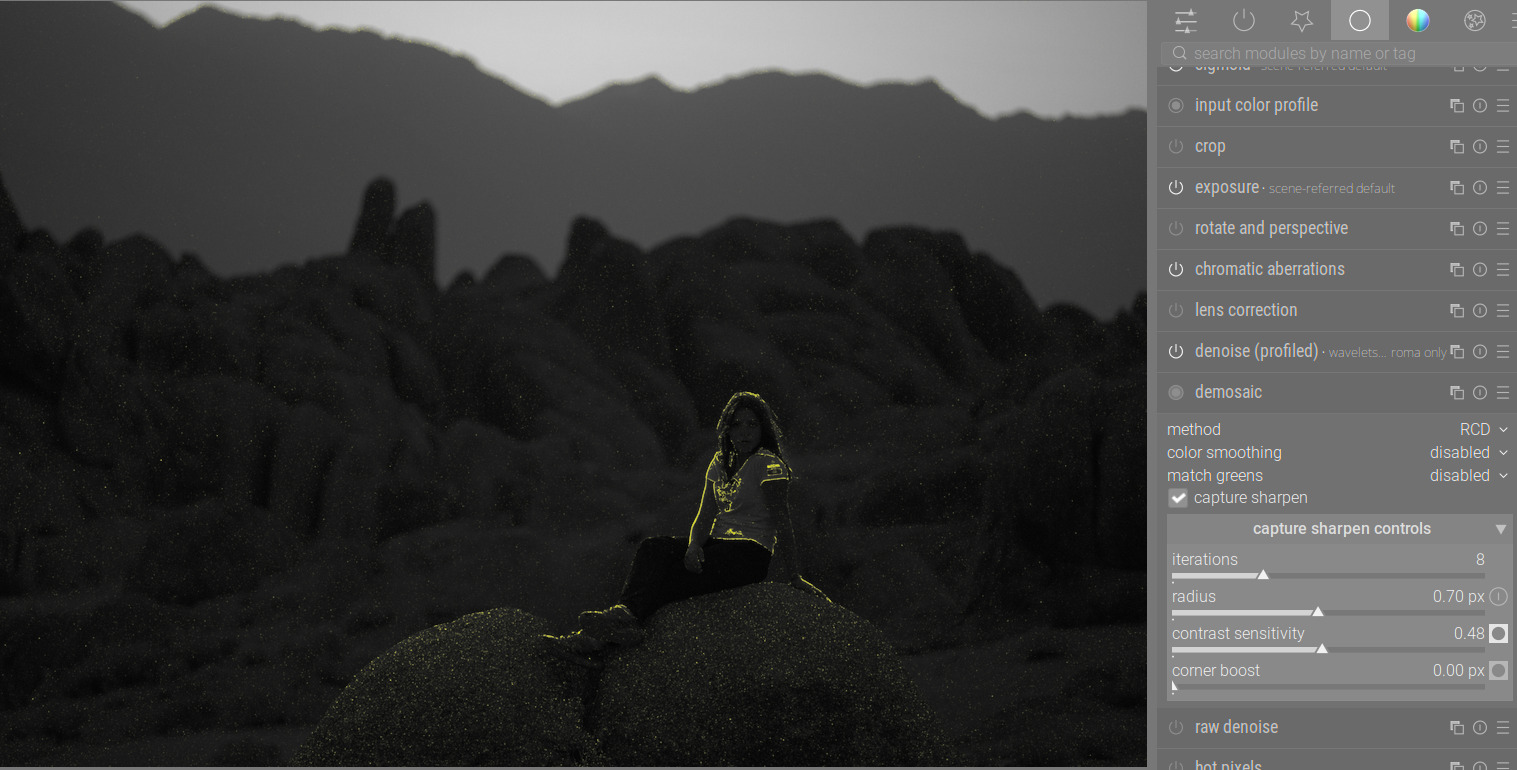
I don’t really notice much of a difference in the background anyways if I don’t adjust the contrast sensitivity. In the screenshots below, fully zoomed in:
- No sharpening
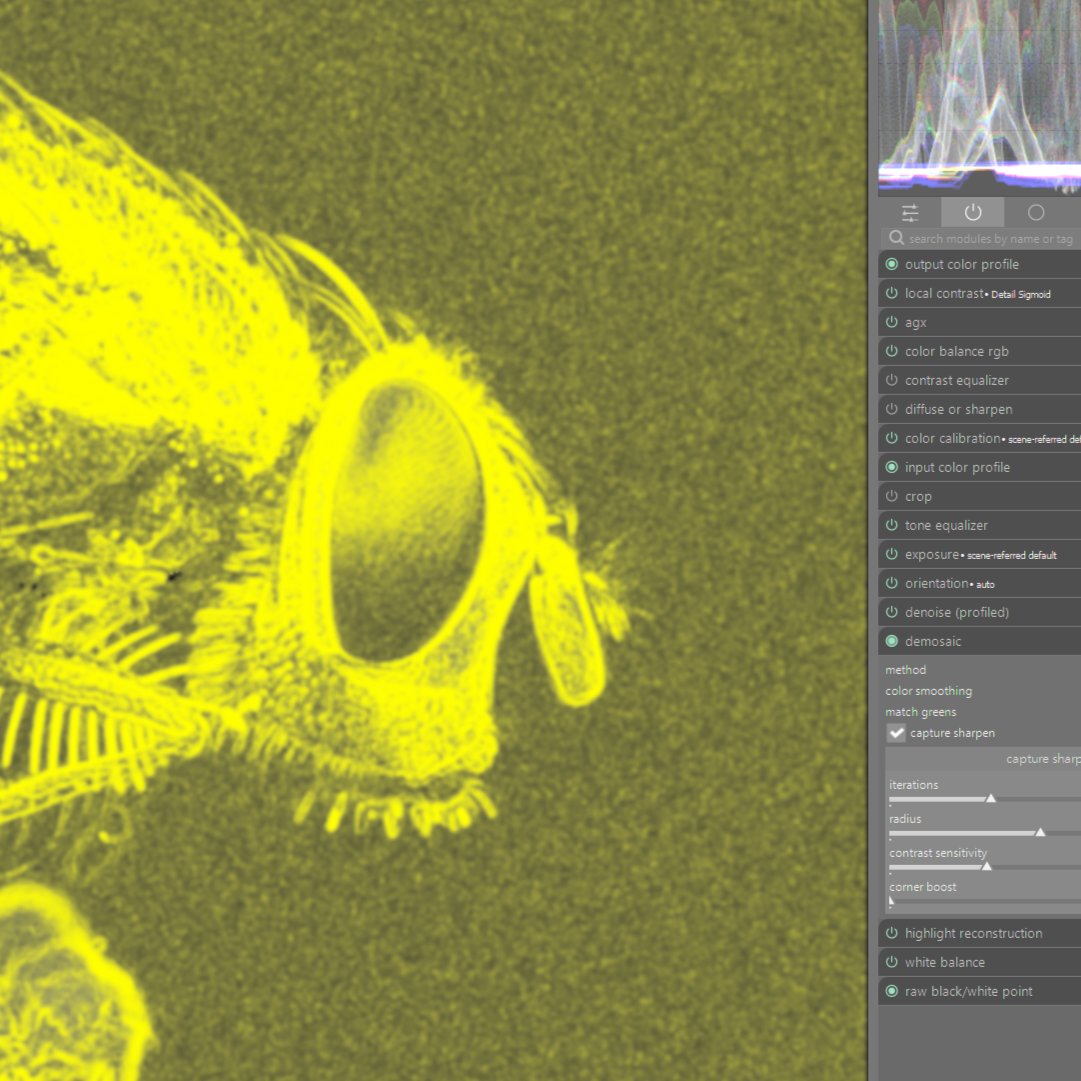
- After applying capture sharpening (no changes the auto calculated values)
- The mask

I did notice slightly more difference on an image with a lighter background, but the type of difference that I only saw fully zoomed in and even then it’s questionable how much of a difference I’m actually seeing.
So for my own sanity, is capture sharpening pretty good about not increasing noise even if the mask is covering those areas? Worst case scenario I can invert my subject masks and apply some negative clarity or something if needed.
I suspect like DorS you may need to view things with the HQpreview enabled to get an accurate assessment of the adjustment.
EDIT
And there were some good notes linked above by @kofa
3 Likes
Excellent thank you. I forgot about the high quality processing. I just checked again with that enabled and saw similar results.
From the PR notes:
contrast threshold
As sensor noise will be amplified by CS we take some care about this by a per pixel variance analysis and use a logistic function with this threshold to avoid CS in noisy areas. The default is good for low iso images.
To me this implies that there is some additional analysis going on in addition to the mask, but maybe I’m misinterpreting that.
I haven’t tested yet I just suggested it as even without considering this there can be quite a difference esp in the perception of sharpness when this is on vs off and one module in particular that can look substantially different between previews is D or S if used…I was assuming likely visual assessment of CS would or may also be impacted…I recently exported fairly low quality playraw attempt of the raven…there you can see looking at the tree bark how the grain/sharpness can appear quite different so its something to be considered for all discussions around sharpness evaluation when talking about modules and workflows in DT…
1 Like
This is a followup from my earlier question that I’ve posted on the dt 5.4 announcement:
First time for me trying the new capture sharpen option in demosaic, I’ve read the github discussion mentioned in this thread but I wonder about the “contrast sensitivity” value.
Consider this first exampe (iso 100, good lens/good camera/good light – eos r with 35mm f1/.8):
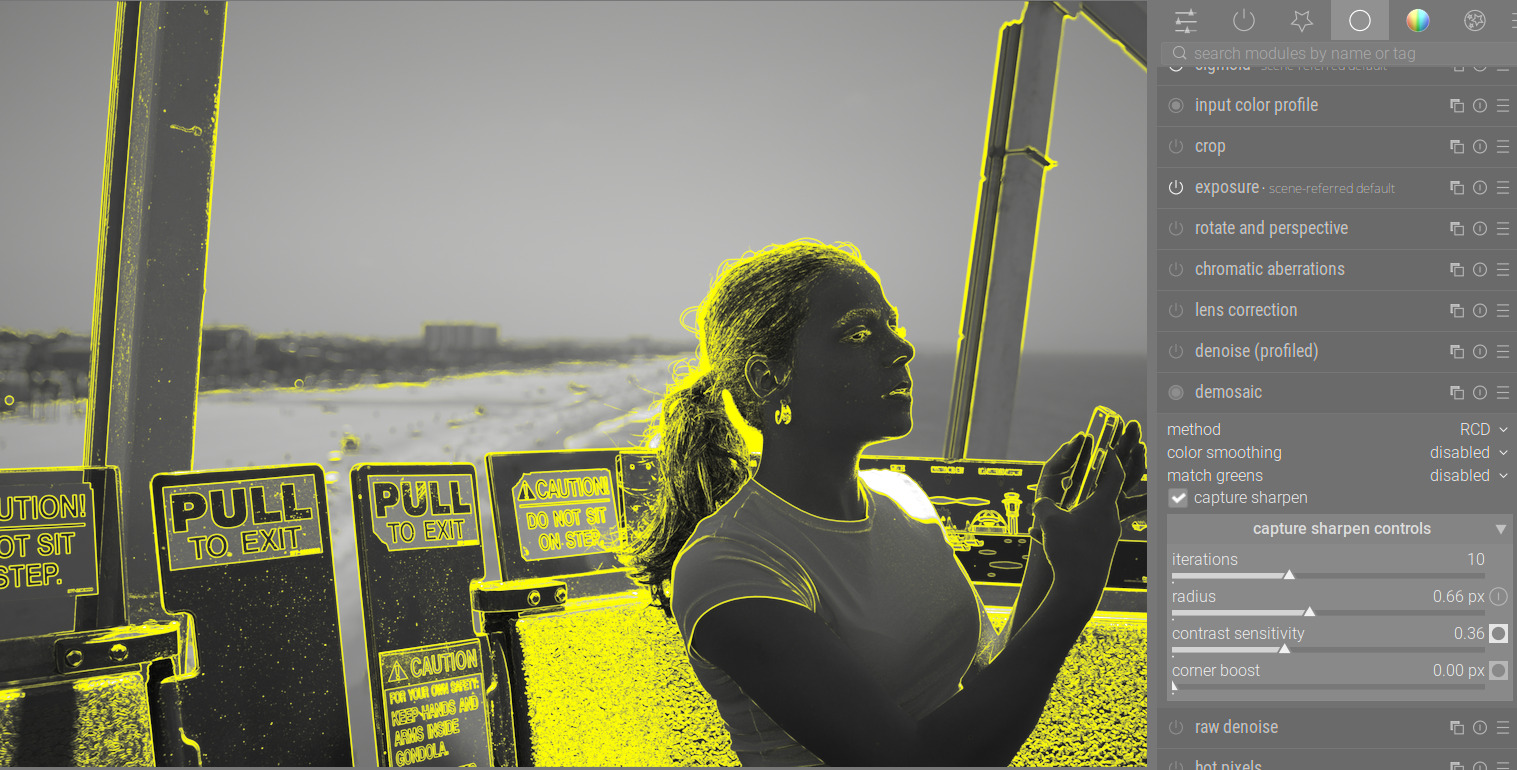
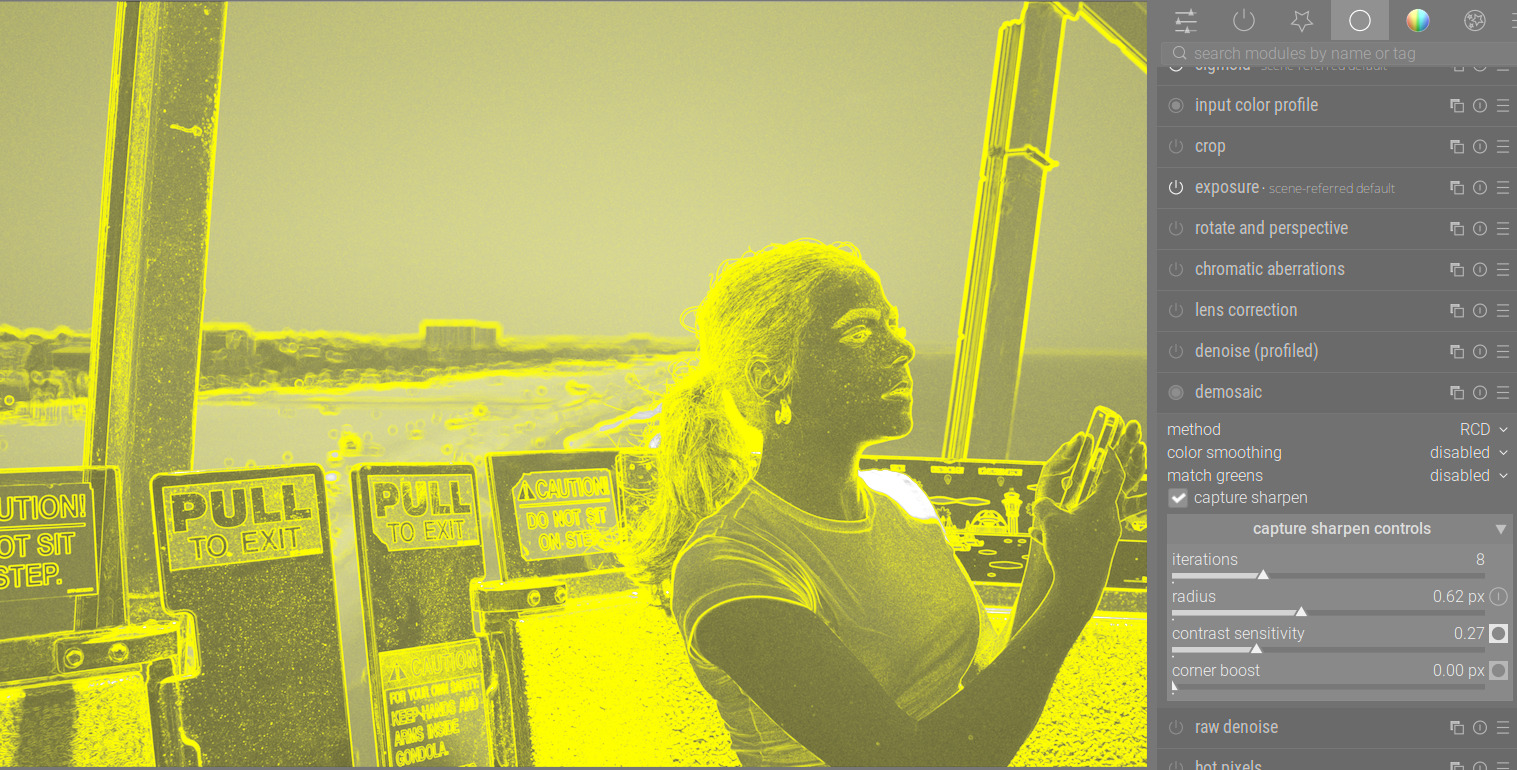
I have increased the contrast sens from the default which was this, (the thinking was, I’m applying this to the flat parts of this image so I should dial it back i.e. increase it from 0.27):
Is this sort of reasoning correct?
Now an example of an ISO6400 image (same camera, eos r with rf70-200 f4): do I accept the increase sharpening of the noise?
…or should I again, “dial it back” i.e. increase the sensitivity to 0.48 and only focus on the subject in foreground?
Yes, that’s the idea, although it’s completely up to you to decide what gives you the look you want.
As a rule of thumb, you are looking to sharpen details on your subject and NOT sharpen noise (or blurred areas), so your first and last images above fit with that philosophy. Usually, as soon as the yellow flecks creep into an area like a clear blue sky, that’s a sign that you are oversharpening and need to back off.
But there are certainly times when you can add more sharpness and the noise still won’t look bad. It can even add pleasant grain in some shots.
Note that on images shot with higher ISO, you may never be able to fully “mask out” areas with less detail (because the noise adds details everywhere), so there’s a bit of a compromise needed. I just keep turning off the mask and using my eyes to judge what I can get away with. For tricky images, I would tend to use higher contrast sensitivity with Capture Sharpening, and then use another module like Contrast Equalizer to do final sharpening (because you can use masks to ignore areas with less detail).
2 Likes
This!!
2 Likes
Just 2 comments
- It’s not really necessary to finetune the contrast sensitivity control, the defaults are set from iso and sensor precision and are mostly fine. A rule of thumb if you want to check, the mask should be mostly black in noisy parts.
- remember, you can define an auto applied preset with radius and contrast sensitivity both set to zero and dt will calculate both accordingly when importing. I am using this personally for all images with iso < 3200 since a while.
7 Likes
If you have two different sensor types, which use different demosaicing methods, do you need different auto applied presets for each type?
And when you say “importing”, does this also apply to clearing the image’s history and starting from scratch?
Nope, if will fallback to the default of the other sensor (RCD, Markje1)
Sorry, yes of course. fresh history while importing for the first time or clear history.
BTW - that’s now in the current manual ![]()
3 Likes
I noticed that capture sharpening seems much more effective in Bayer files than X-Trans. It’s almost invisible in X-Trans, actually. Do you know why that is?
I had the same observation. According to @hannoschwalm it shouldn’t make a difference. My understanding is, that my Fuji is simply already so sharp that not much is to be gained.
That may be so, but if you are curious about how it works, you could try testing it on eg an image with intentionally introduced diffraction (narrow aperture).
I didn’t observe this as a “capture sharpen” issue, i will check again if the auto-calculated radius is not perfect but first tests show, “all is good”.
2 Likes
Yes, well, it seems X-Trans files just are less sharp than Bayer files in general. Perhaps there just aren’t enough gradients to sharpen.
@hannoschwalm I have created a preset with radius and contrast sensitivity set to zero and in the auto apply section set the ISO to 0-1000 (all other values as default).
Then, I switched to lighttable and discarded the history for the image. But when I switch to darktable again, radius and contrast sensitivity remain at 0. Only after pressing the calculation button, the values are adjusted.
What am I missing?
This is what I thought too, and why I moved away from xtrans.
2 Likes
Off-topic but could this be “solved” by a better demosaicing algo? Markesteijn seems good but Fuji’s OOC jpegs have great resolution and even aberration correction which is hard to replicate in darktable even with all these tools + lens correction. It can’t be anything computationally intensive since Fuji does it in camera.
Obviously not expecting any researcher to spend time on this, bayer makes sense to research due to its universality, but sadly x-trans seems like a dead end.
2 Likes
- You have set the preset to being auto-applied?
- No other auto-applied preset for demosaic?
- You have waited until the pipes have processed?
1 Like