Creating/getting an ACES AP0 LIN profile/PP3 to 16bits TIF

Hi, I was looking for a PP3 file to configure/export ACES AP0 Lin images, but i didn’t find. I didn’t managed to create one from the software: everytime i enable AP0 profile, i get a normal picture on the screen and in the image file…


On the left, an ACES LIN AP0 export from REsolve, on the right the tiff output with my ICC setup on rawtherapee

My goal is to process my tons of DNG files coming from a Sigma FP into ACES APO Lin Tiff 16 bits files with RAWtherapee-cli (with the correct PP3 file) in order to ingest the TIFF into RESOLVE to colorgrade them (to avoid the bad demosaic process in resolve).
Who did succeed to create a ACES AP0 PP3 file already ? (TIFF 16 or 32 bits export)
Regards,
JC

@Jean-Charles_Fouche Welcome to the forum! There is a tool for creating profiles at the bottom-left corner (well, it depends on your UI settings) of the app. The icon with the +.

image

1 Like

I think the profile you need to create is an ICC profile that incorporates the AP0 primaries, with a linear tone curve. RawTherapee’s ICC Profile Creator will allow you to do that.

http://rawpedia.rawtherapee.com/ICC_Profile_Creator

Once created, you would then use this profile as an Output profile, which RT will use to convert your image and embed it in the TIFF.

http://rawpedia.rawtherapee.com/Color_Management#Output_Profile

The pp3 profile doesn’t directly have anything to do with all that…

Hello, thanks for your response.
i did create an ICC profile, but i didn’t get the result i was looking for.! i attached the picture i’m looking for, on the left from RESOLVE export in ACES APO, on the right with rawtherapee; i was not able to get the same result.

Maybe i will not get the same result, what do you think ? The DNG source is the same for the 2 software.
I’m trying to build a PP3 file that will allow me to batch convert tons of .DNG with CLI version of RAW THERAPEE.

Salut, @Jean-Charles_Fouche, and welcome!

Could you please share your DNG source?

Have fun!
Claes in Lund, Sweden

Hi:

I will take as a fact that you know at least the basics about color management, input/working/output profiles, and how not to make a complete mess with them.

But as there may be other people reading this without such a knowledge, I’ll try to explain what I understand step by step.


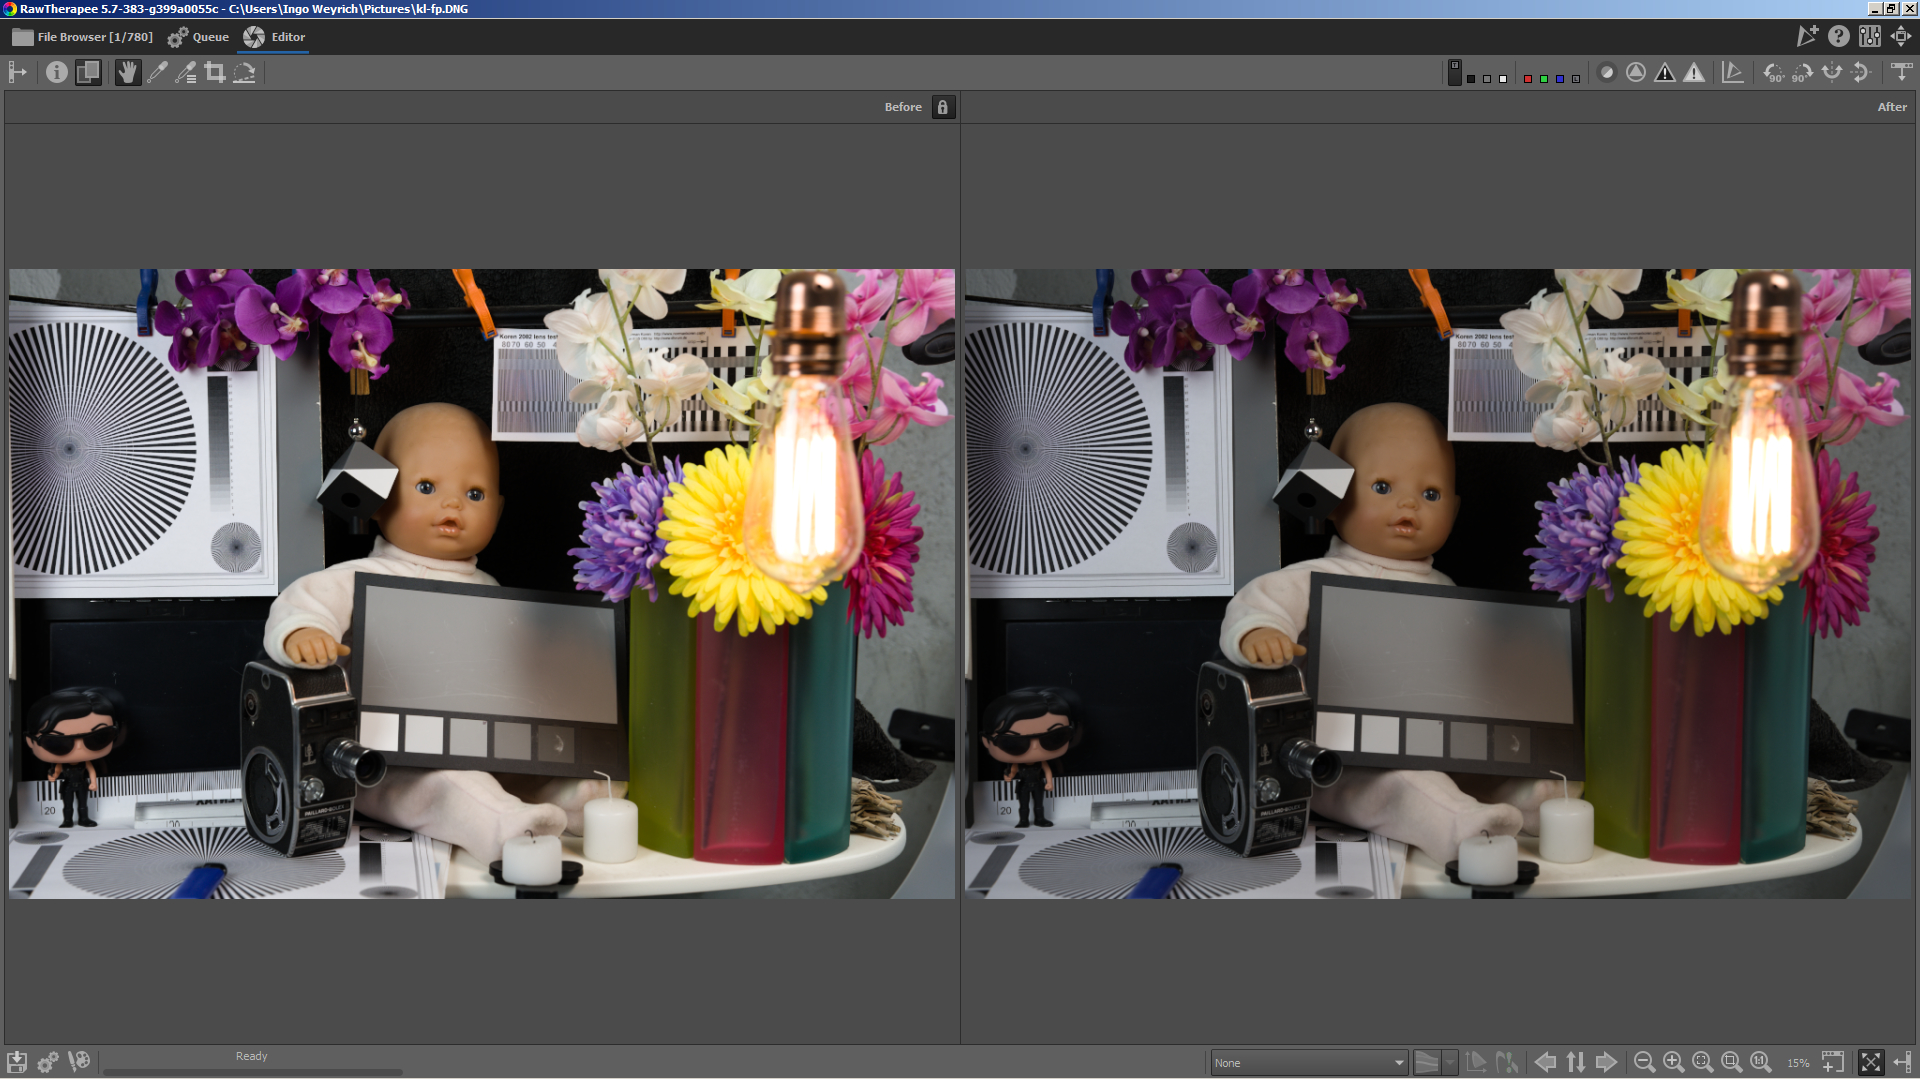
Let’s start with RT and it’s configuration: @ggbutcher almost nailed it, but as the documentation is a little sparse, it may lead to confusion.

You can create custom profiles, but as Rawpedia states, you have to put them in an specific folder to work with them.

iccwp

In this Preferences>Color Management screenshot, I have pointed RT to a folder called icc working profiles.

The fact is that in that specific folder you have to place any icc profile you may need to use, as RT will look for it there (which may be a camera/input profile, a working profile, or an output profile).


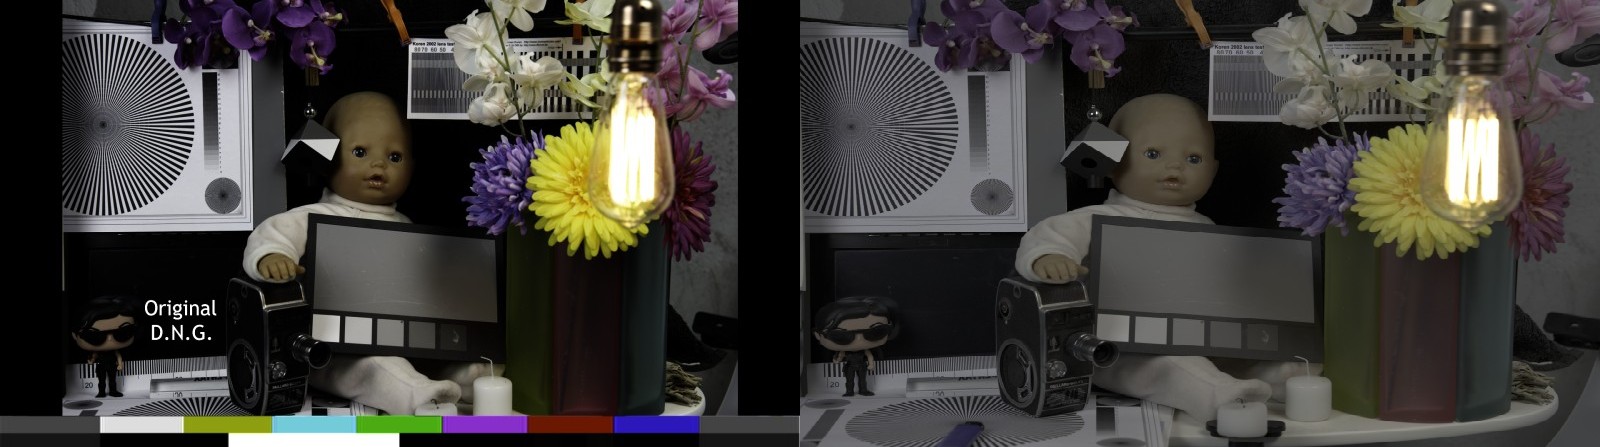
Now to your images: to process them you must use the proper input color profile to get the correct colors your camera is able to give. Without the right input profile, you won’t get true colors. And it’s a good idea that you create you own custom camera input profile.

Then you will have to select the proper working color profile: in your case it should be ACESp0 (if I’m not wrong). It has your needed ACES primaries with a linear tone curve.

And finally you have to select the desired output color profile. For your images it should be an ACES output profile, and I would advise to use one from Elle Stone’s collection of profiles (donwload them and extract all the profiles into the folder set in the previous preferences screenshot example).

This is her explanation about her own profiles:

https://ninedegreesbelow.com/photography/lcms-make-icc-profiles.html

And here you can download the collection of profiles:


To sum up:

  • you have to point RT to a folder where your custom profiles are located
  • then select one of your images and edit it
  • apply a neutral Processing Profile to it (to turn off every tool within RT, but Demosaicing, Exposure and Color Management)
  • choose the demosaicing algorithm you like the most
  • set the appropriate input profile (and that will not be an ACES profile, as there are no cameras capable of capture such range of colors)
  • set the ACES working profile
  • set the output profile (ideally one of Elle’s ACES profiles, as you can trust them)
  • go back to the File Browser, right click the image you have just developed and copy the Processing Profile Operations
  • select all the images you want to process in command line, and paste the copied Processing Profile to them
  • launch the command line process with the desired options

You should get good images, but that doesn’t mean they will be the very same as Resolve gives, as it may add some hidden, beautifying processing that may please your eyes, but is not done by default by RT.

Hope this helps

6 Likes

@XavAL, thanks. I know just enough to be dangerous… :smile:

@Jean-Charles_Fouche, With regard to equivalent images, Resolve may have a different camera profile than RT. That would also have to be “resolved” (no pun intended, but… ) to isolate differences between the two processing pipelines.

1 Like

Hi Claes, here is the DNG file.
kl-fp.zip (31.8 MB)
regards.
JC

1 Like

Thank you!
Wow, what a resolution from that camera/lens…

After dinner I plan to play with your dng, to see if I will be able to get even more “oompf” out of it :slight_smile:

Have fun!
Claes in Lund, Sweden

Your RT version of the image seems to be stretched horizontally. How comes?

Here’s a screenshot from RT dev. Left using Auto matched curve ISO low, right using Standard film curve ISO low`

1 Like

Thanks alot XavAL,
i will check this tomorrow.
As i will process all my TIFF files with Resolve at the end, i just want a usable workflow with correct color and correct settings for ingest from RT.
Have a beautiful new year for everybody !
Regards,
JC

1 Like

Hi ggbutcher, i imagine i will not get exactly the same result, but if i can get the correct color i will be pleased (i can make a 3D LUT to manage the gamma difference in Resolve), it will be fine. I can manage the gamma, but i need to control my color workflow.

Hi Heckflosse, Resolve manage 16/9 4K picture, where RT is working on the original 6K file.

Hi everybody,
to compare with what you get, here is the ACES TIF 16 bits HD that give me correct gamma and correct colors if i ingest it in RESOLVE in a ACES CCt AP0 workflow.
DNG-direct_AP0_bb_1.1.2.tif.zip (4.9 MB)
regards.
JC

That does not explain why your screenshot shows a horizontally scretched image from RT while my screenshot shows it correctly…

Well then, my comment is pertinent. Having the same camera profile in both workflows is all about that - a set of primaries that appropriately represent the camera’s spectral response. If the color primaries are different in the two softwares, the output color could be different…

To be fair, most folk who make such are likely using sufficient tools to render similar results. But, in comparisons, I’d want to eliminate as many such differences as possible so the real differences are apparent.

I might be missing something but appending a profile to raw processing won’t give you the same result because the rest of the processing workflow would be different between apps. My guess is that @heckflosse’s edit isn’t as heavily tweaked and processed as yours.

My comment was mainly about the horizontal stretching…

I was referring to the side by side images of @Jean-Charles_Fouche. The main question should be about colour accuracy and keeping the workflow colour managed. My remark is that the display-referred appearance of colour at the intermediary steps should not matter and a side by side comparison irrelevant as long as the data is intact and the profiles are correctly done.

Regarding the first point, that is not the reason that we don’t use ACES as the input profile. The input profile should be the camera’s profile, either stock profile or manually profiled profile. Once specified, RT will know what to do to convert the data to the working profile according to RT’s extended Adobe coefficients info.

Selecting the output profile is the most straightforward step, as you should be able to set it to anything you wish. In particular, since ACES AP0 is so large, you don’t need to worry about gamut clipping or compression.

Notice how I skipped working profile just now; because this is where it gets complicated. It isn’t as simple as making it the same as the output profile and your job is done. That is okay only if there are no other subsequent operations. I don’t know if RT’s neutral preset has nothing in the pipeline after the working profile is appended. It would also depend on what you plan to do at the ingest stage prior to exporting to Resolve.

You may ask, What is the fuss if my working profile is sufficiently large and the output profile is the same so no final conversion takes place? There are things to discuss but they are out of my depth. The thing to note is that if the working space is too large or too small or the profile is malformed, you could have problems with artifacts or discontinuities. Moreover, not all operations are compatible with all spaces.

If you insist on using ACES, note that ACES is mainly a storage format. That is a monkey wrench for you. @XavAL mentioned @Elle’s profiles. You would have to double check but if memory serves her ACES profiles should be AP1 not AP0. This is for the explicit reason that I described above: AP0 is for transport and too large of a colour space is no good. There are other more specific ACES specifications but that is over my head again.

The takeaway is that at this point we are getting in the weeds. The topics discussed might not matter to us regular folk. The reason behind all reasons is that ICC profiles, CLUTs and matrices are limited and don’t sufficiently describe the psycho-physical properties of colour or how colour is designed to be stored and processed digitally. It is a broad and complex subject that is still being researched. E.g., characterizing a camera’s actual spectral sensitivities and implementing them into the workflow.

Certainly, we can do our due diligence, learn from one another and control our workflow as much as possible but then we need the resources, people, expertise and close collaboration to accomplish that, especially in the cases where the project is expansive like those in Hollywood.

1 Like

This happens because RT does not support (yet…) the use of the embedded (in the DNG file) dcp profile. Only uses the cameramatrix2 …

We can extract the dcp with dngtool and use it as custom profile … then the renders match if we use the the “tone curve” checkd or maybe the RT’s “auto-matched tone curve” in exposure tab :wink:

kl-fp.dcp (4.7 KB)

Although I find the embedded in dcp tone curve too aggressive (see the curve shape using the “automatched tone curve”) … I would prefer a better smoother tone curve with at least better handling of bright tones.

2 Likes