A dcp profile can contain so many parameters… I think it’s just hard to do right.
They DO support ICC as a profile easily. And there is the colormatch program to generate an icc from a it8 target to match the ooc jpeg.
When trying to convert dcp profiles to ICC I get ok results with some, and horrible results with others. Which is a nice example of how different the contents can be (which illuminants, tone curve or not, look curve or not , hue/sat map or not … and I spectral data can be in there too ? I don’t know, but when converting a dcp to json I can get quite different blocks of data in the json depending on who made the DCP :).
and in the end , most ICC files that contain a lut of some sort (instead of just a matrix ) I find will clip the highlight data to the range of the lut. This often means everything above 1.0 is clipped to 1.0, but the exposure module sots in front by default , so it’s quite common to have data over 1.0. highlight reconstruction also can cause this. This is all no problem with a matrix icc, but when working with lut-iccs like that I need to toy around with exposure module to preserve all the data (apply highlight reconstruction , lower exposure so everything sits between 0.0 and 1.0, apply input profile , raise exposure by 2nd instance to where I actually want it). I doubt that the profile is actually accurate at that point.
Thanks for the info! Complicated isn’t it…
Funnily enough I just had a go at converting an Adobe profile for my camera to an ICC using dcamprof. It worked, but didn’t seem complete, for want of a better word. I used RawTherapee as comparison, and the ICC profile, in results, resembled the DCP with both tone curve and look table disabled… which seemed to throw the colours completely off.
I came to the conclusion that the Adobe DCP didn’t really help me all that much anyway. But I’ve ordered a ColorChecker, so when it gets to me I’ll try my hand at some custom profiles. Might be interesting!
HI,
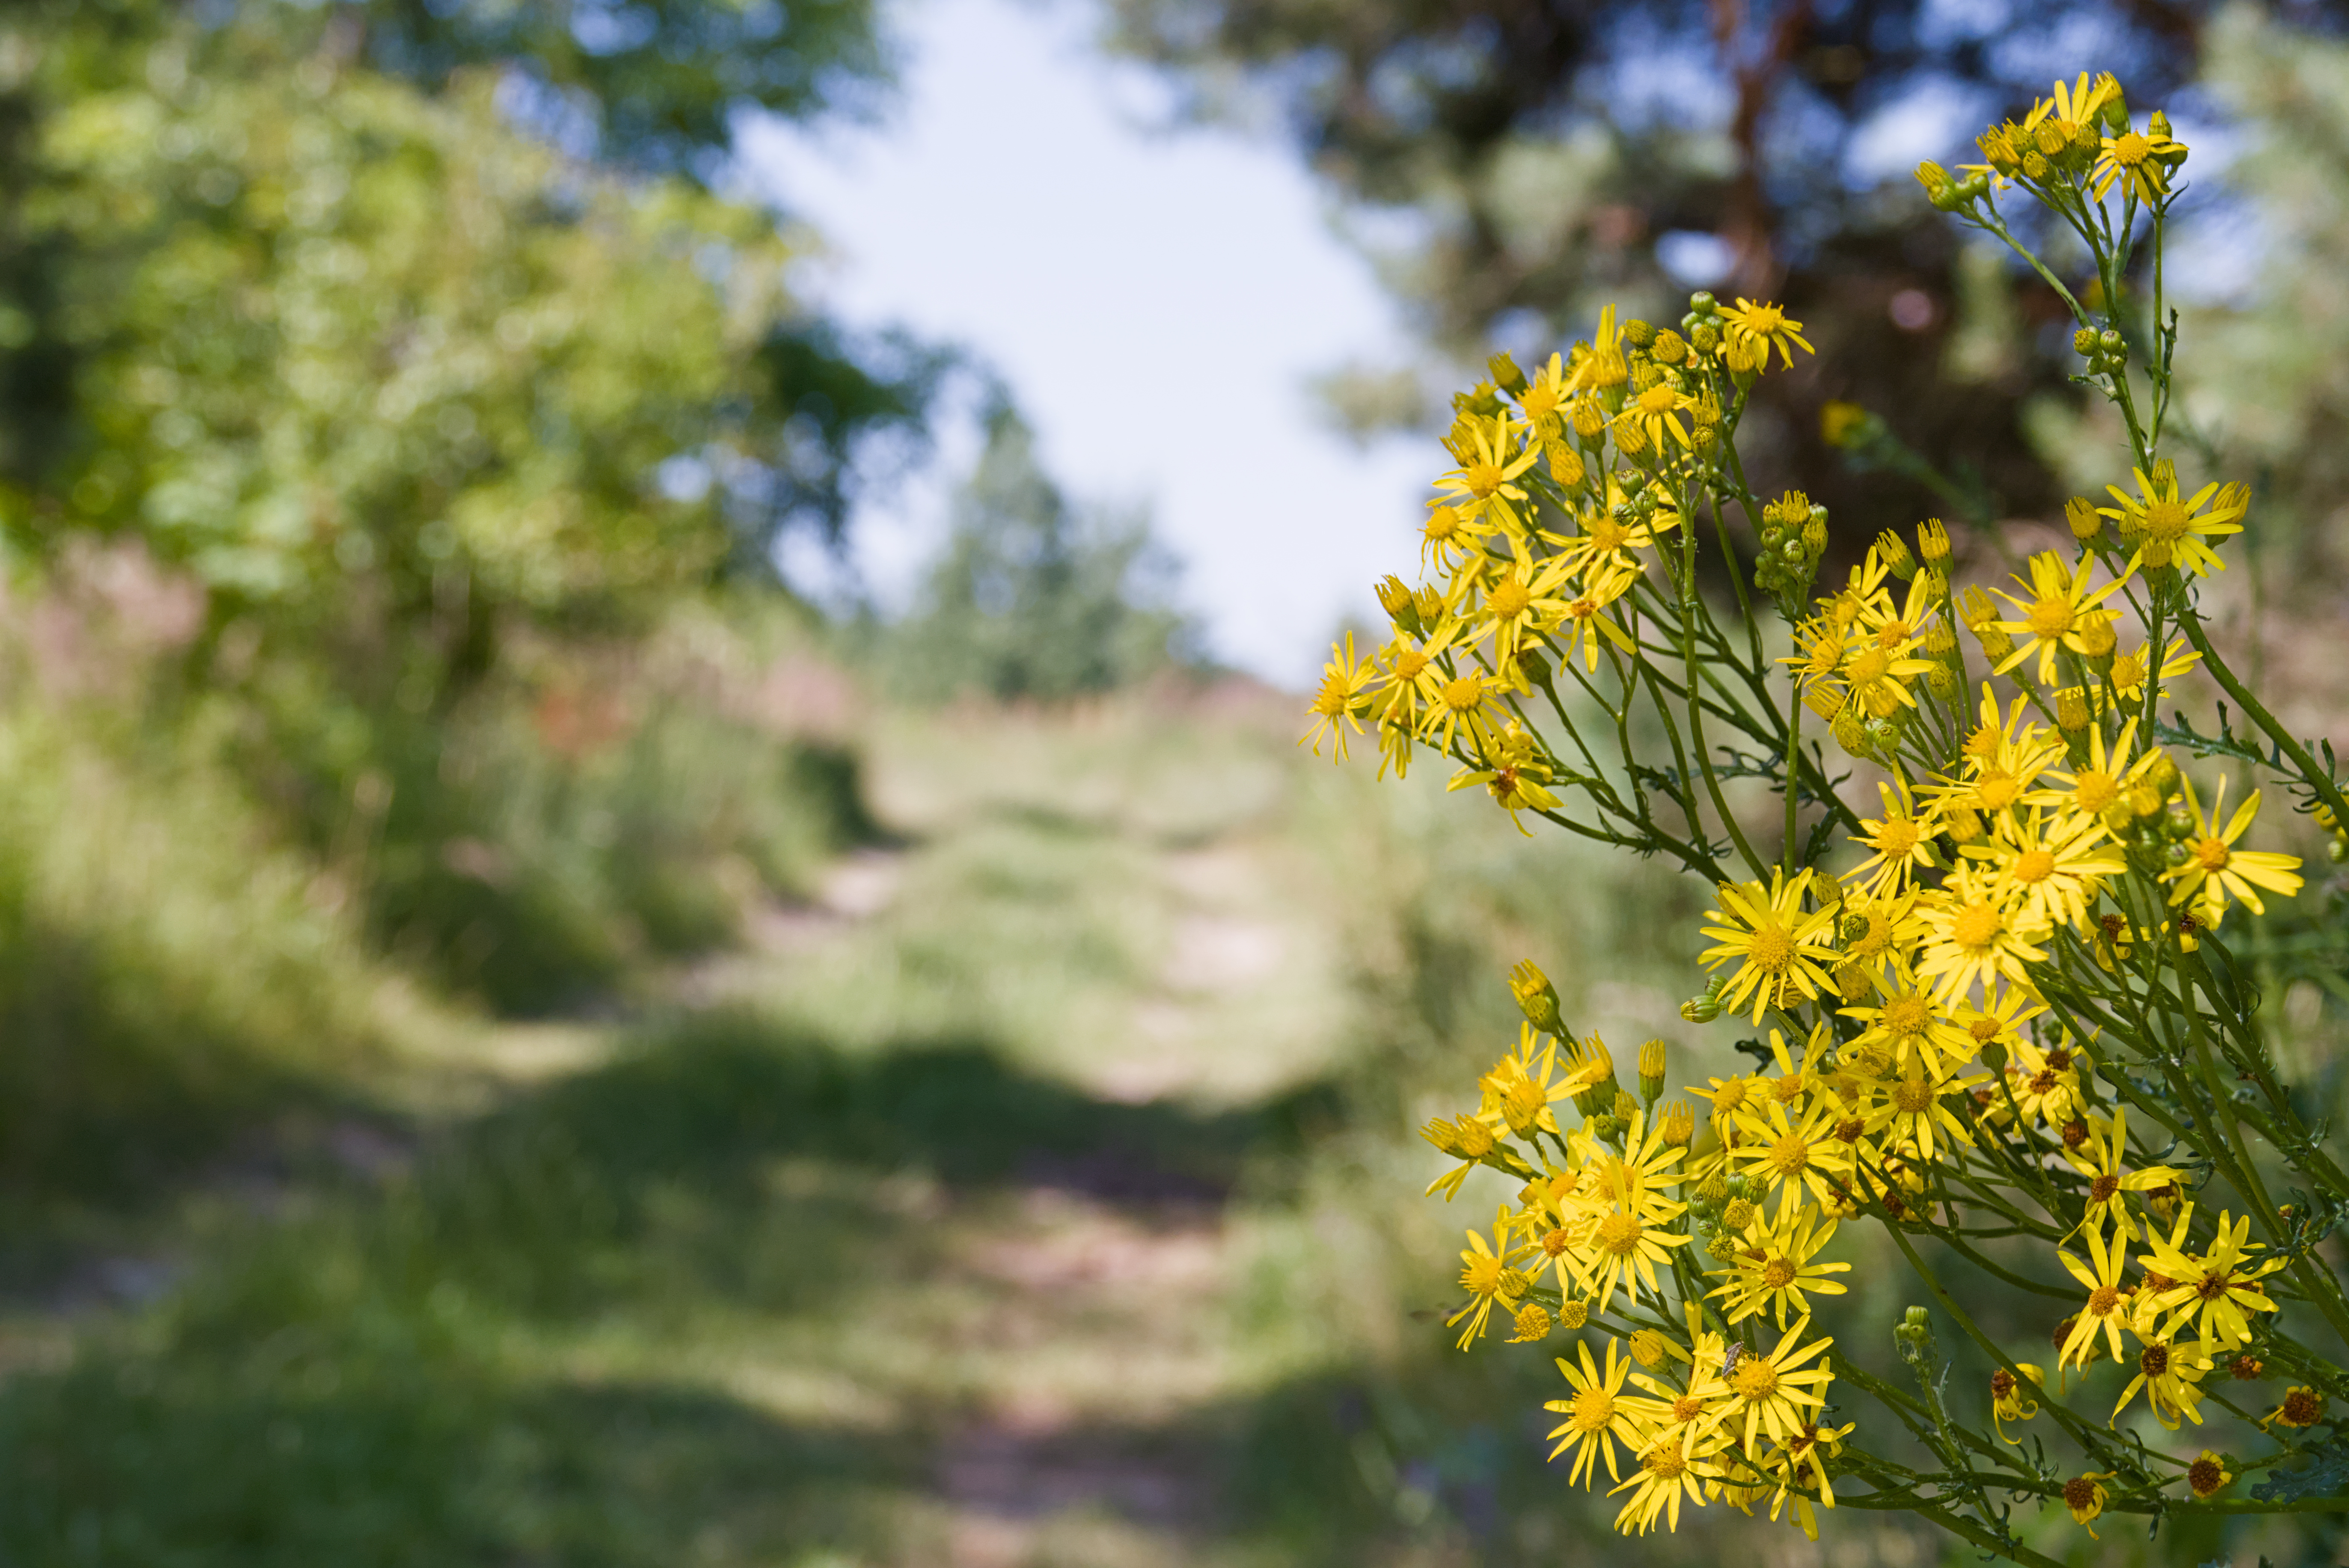
I watched Boris’ video episode 45 where he used the color table module. I followed this lead, chose orange and moved towards magenta. I noticed that I got the desired effect. However, I don’t know if this method is correct.
Regarding DCPs, there are different levels of commitment. First is just extracting the D65 ColorMatrix and using it as the camera profile, but that result won’t probably be different than using the dark table matrix. Next would be using the two ColorMatrixes to make a temperature-specific matrix, I haven’t messed with that so I can’t comment on the difference. After that would be a commitment to the Adobe workflow, a significant software effort.
Mmm… yes. Since my last post on this thread I’ve got myself a ColorChecker mini (same Classic but smaller and cheaper) and bought a copy of Lumariver (gui version by same author as dcamprof) and got stuck in making profiles.
I discovered among other things that ICC profiles can be matrix only or can have a LUT as well, but the ones with LUTs don’t work in the standard scene referred workflow in darkrable, as they don’t allow values over 1, and the input profile comes before the tonemapper. Not quite sure if I’m missing something here? @qmpel did you find that too?
Time for me to add some pure ignorance, wildly off topic, to this highly informative discussion; I think the raw image (.RW2) is from a Panasonic Lumix camera, so how did you get a Canon JPG out of it?
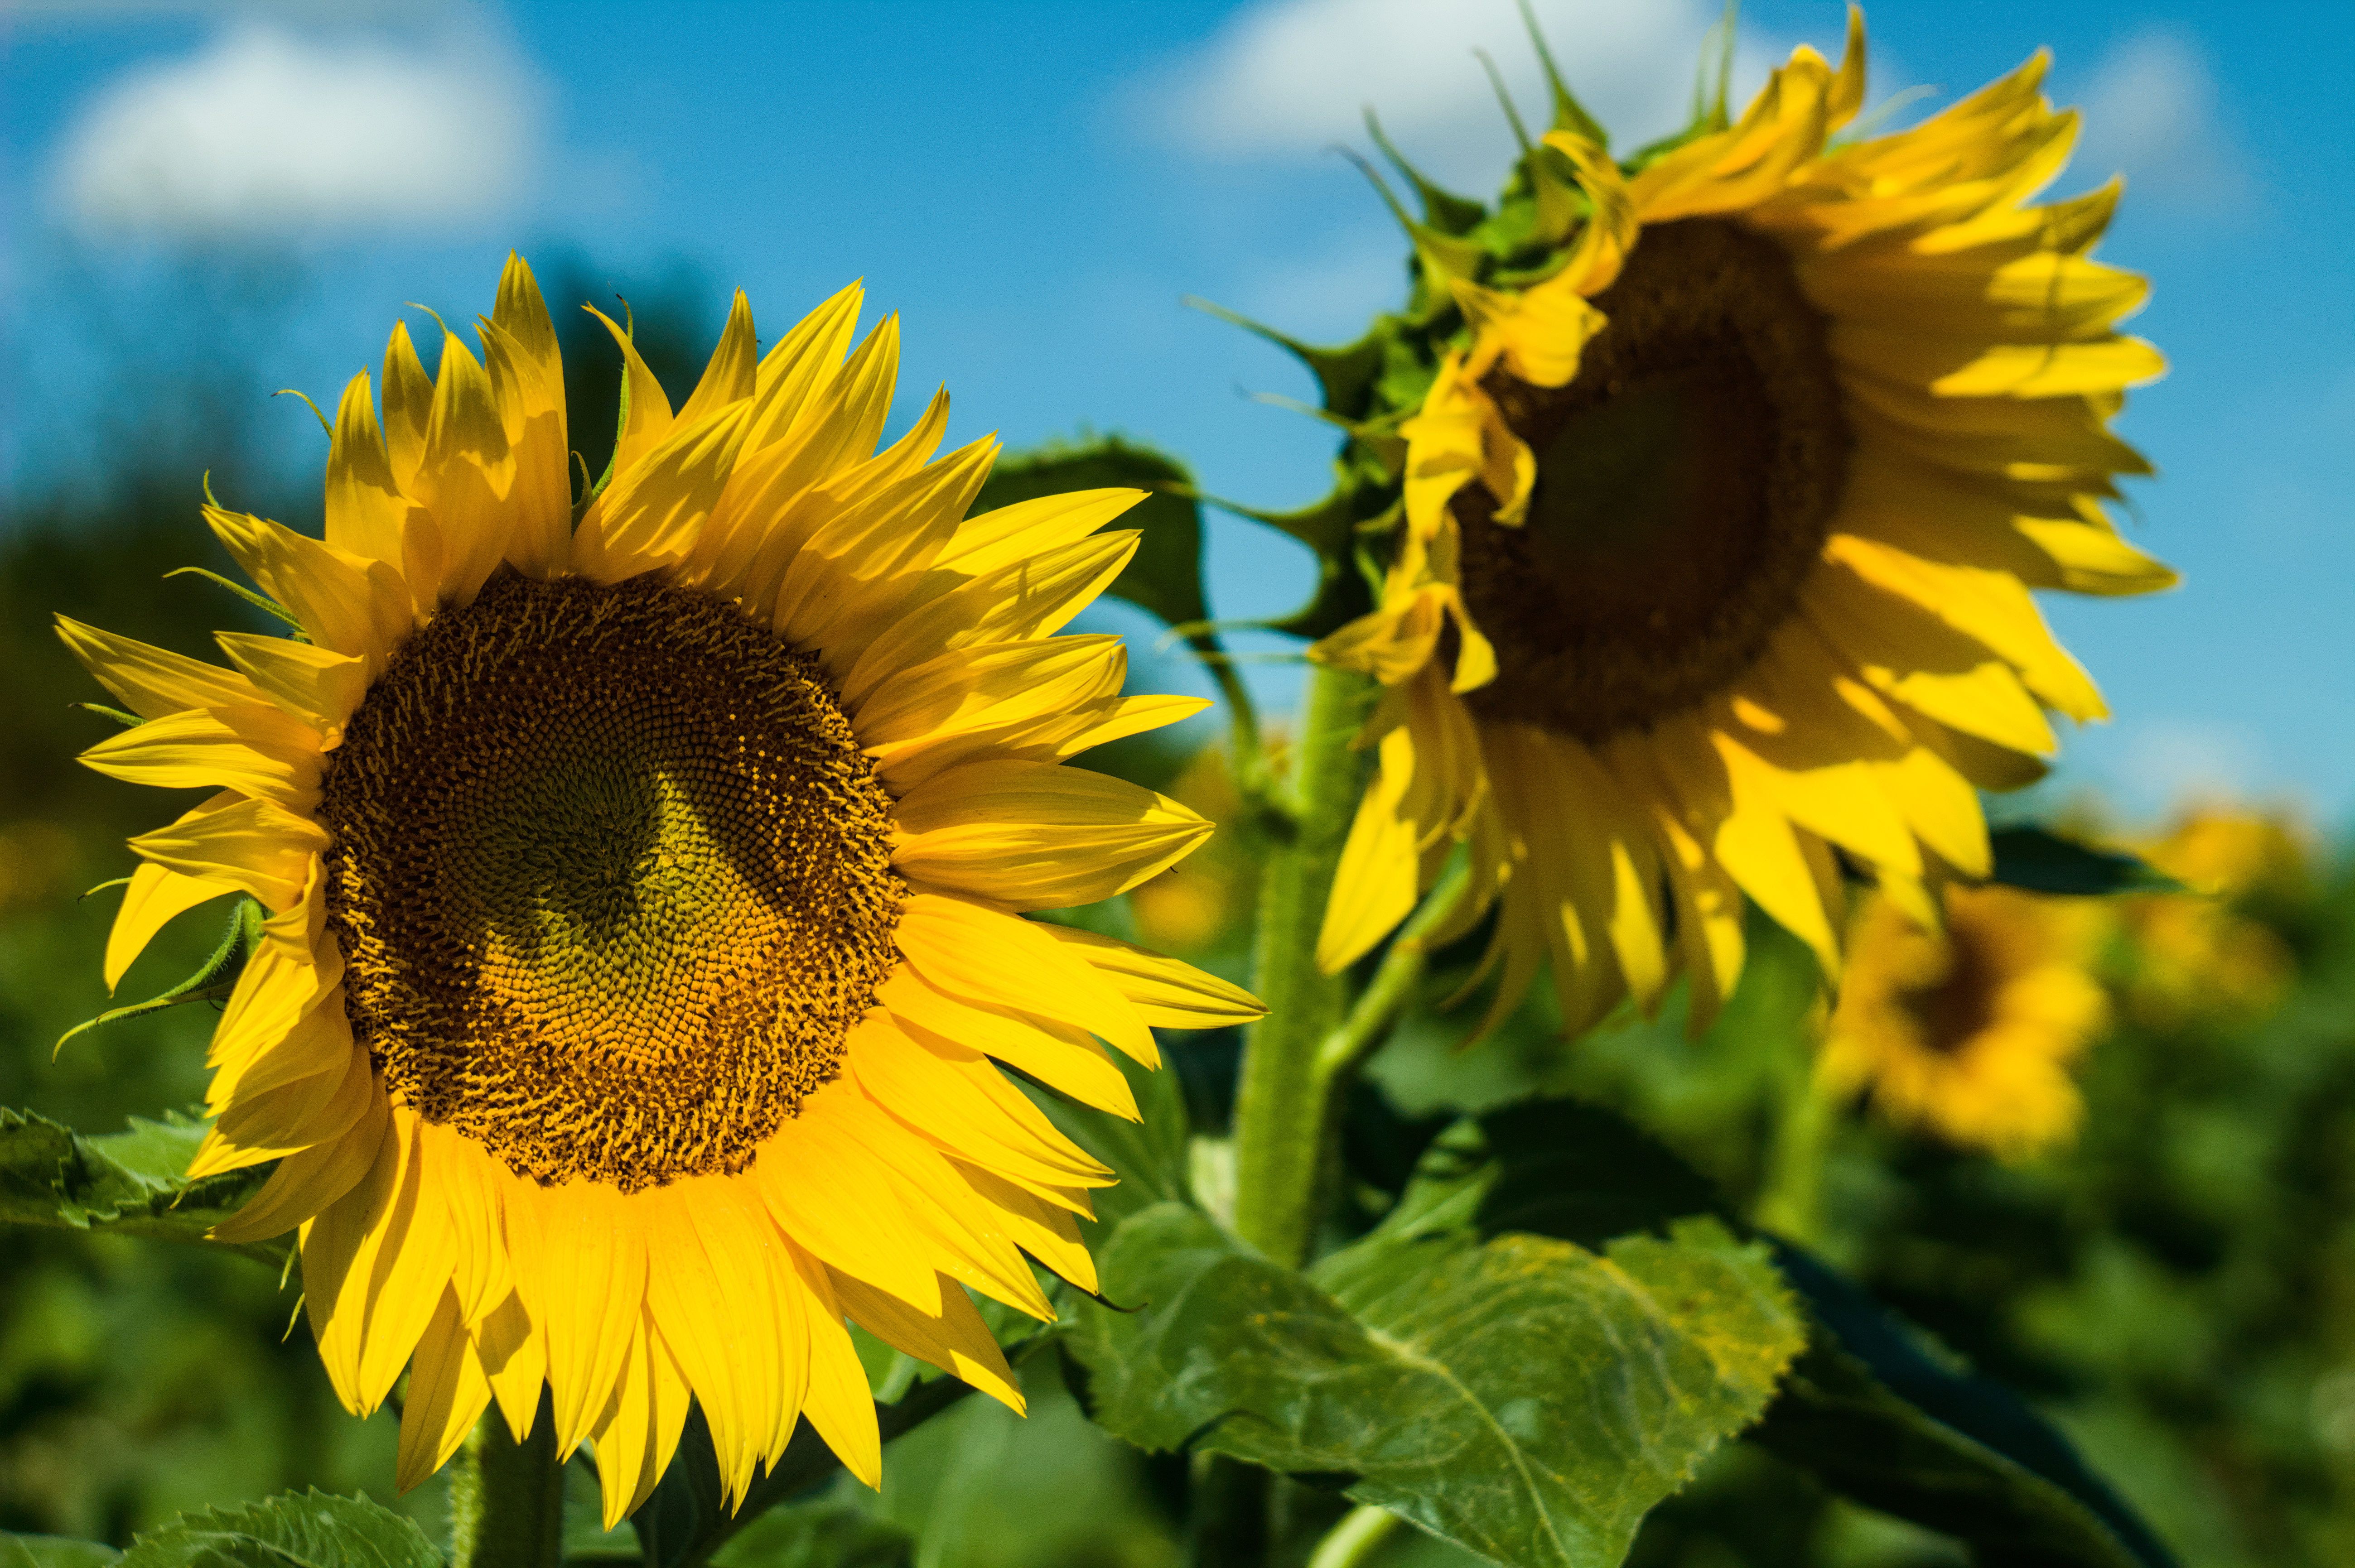
@Todd Prior The original dt edit has some small blown highlights (desaturated) on some petals where as in your edit they don’t appear thus giving a slightly more saturated look.
I’d have to check… and see if I did any local adjustment to address that or if it was just setup that way from the modules and settings that I used… Filmic can do that sort of desaturation depending on how its set and the current exposure…
Icc can work with scene referred. Like I said , you need to work with multiple exposure instances.
Keep your exposure low enough before ‘input profile’ is applied so you dont clip anything , then add a second instance of exposure after it to put exposure where you want it, continue like usual.
How accurate your ICC profile is when you lower your exposure first , I honestly don’t know.
I tried to do as you write. Unfortunately, I can’t get the expected result despite watching your videos on the subject. I know how to make the sky bluer, but when I want to get different shades of yellow or green, I can’t do it in the channel mixer. I would like to ask if you would be so kind as to post a screenshot of how to set these sliders in the channel mixer?
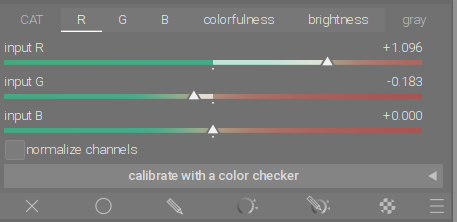
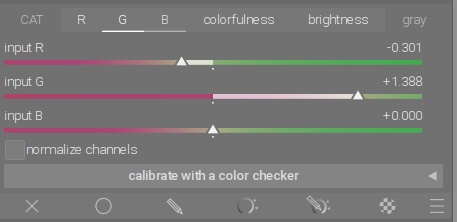
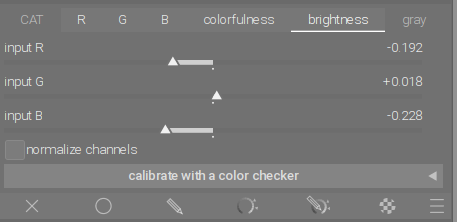
After doing white balance with first instance of color calibration module, in second instance I did the following:
The logic is: differences between flower petals and the flower center lies in the proportion of red. Yellow color is created as a combination of red and green with the same proportion of both color channels. Orange is also a combination of red and green, but the proportion of red is higher there, or green is lower.
This color difference between petals and flower center was not very clear and had to be enhanced with the help of channel mixer.
If you then increase the amount of red in the R (Red) channel with input red, the red will increase in the whole photo, which means that the flower will be more orange overall. Now you can use the input green to remove the red. Input green, because with input green red is removed much stronger where the green is strongest. And these are the petals.
In the second step, we use input red in G(Green) channel to remove green, because we want to reduce the amount of green where the red is strongest. And that is the center of the flower. Now the photo as a whole becomes a little redder. To compensate for the loss of green in the rest of the photo, increase the green with input green, that is, only where the green is strongest - on the flower petals.
Mmm… good point. I was actually doing that while trying to work out what was amiss when I used an ICC profile with a lut, but somehow didn’t think of doing that in practice.