Any idea for your experiments: you can easily create values > 1 (such as those you’d have with the scene-referred workflow using a raw file) by adding exposure to the grey image having values between 0…1. With +2 EV, you’ll have values up to 4.
However, given that the smooth 0…1 transition has no edges, it’s ‘smooth enough’ to start with, so you won’t really be able to observe the effect of the mask (and edge preservation).
2 Likes
Your curve in SH is dictated by the compression and the radius…but it is more or less that horizontal S
You can achieve this with TE…just add back some exposure and you can produce that sort of inflection
Gradient with no exposure

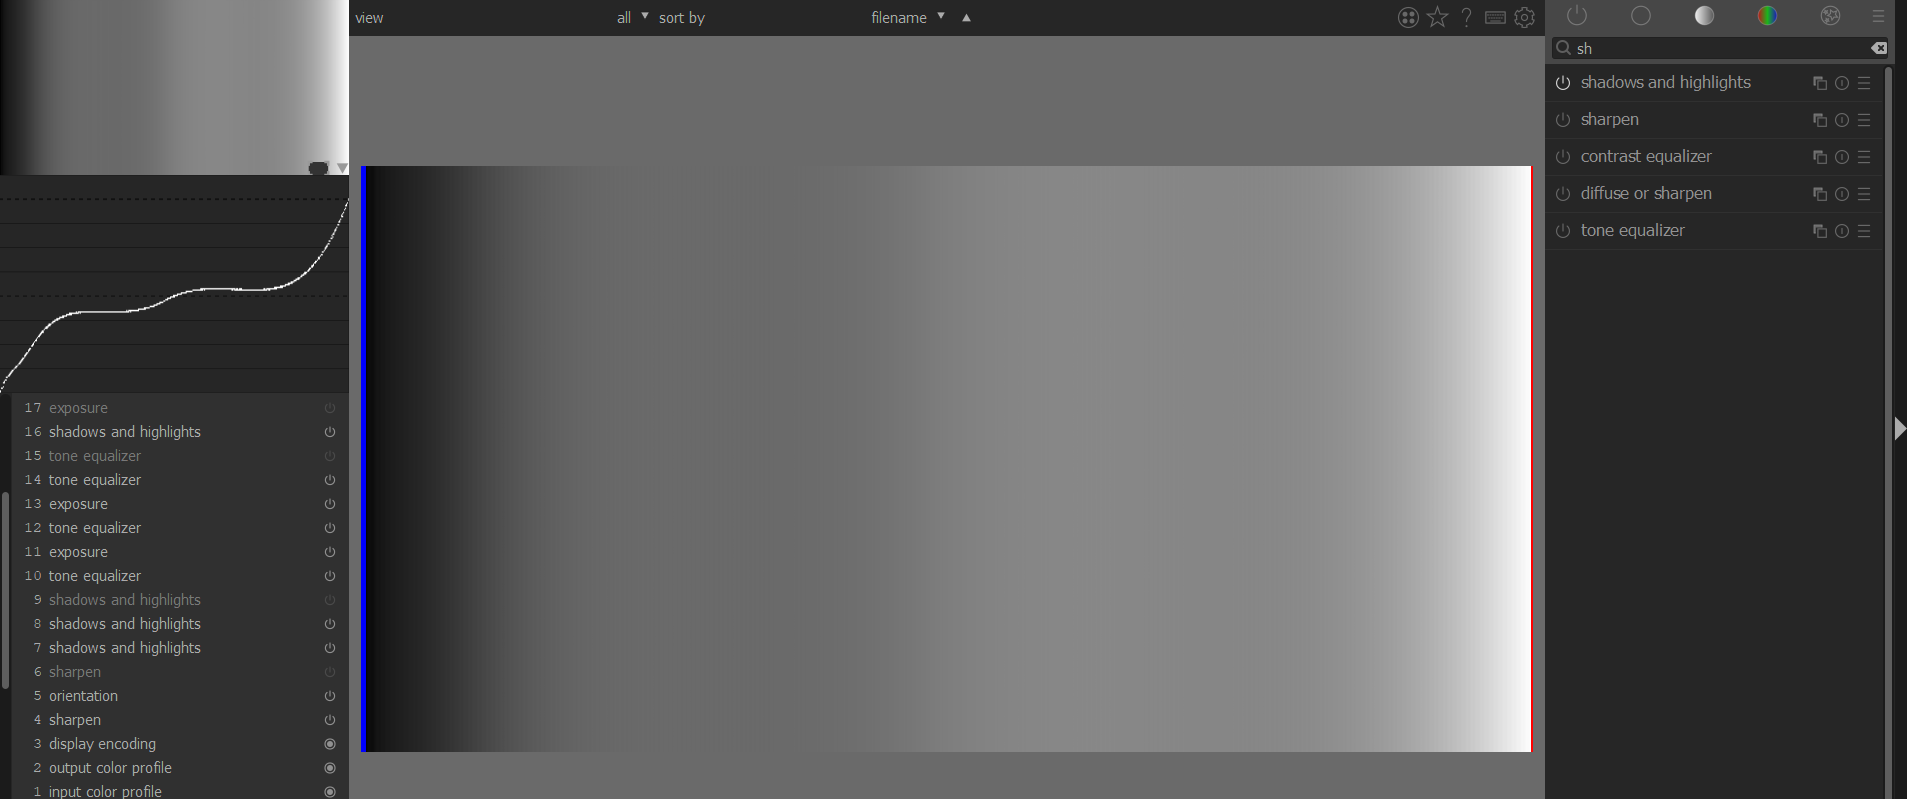
With SH 85%
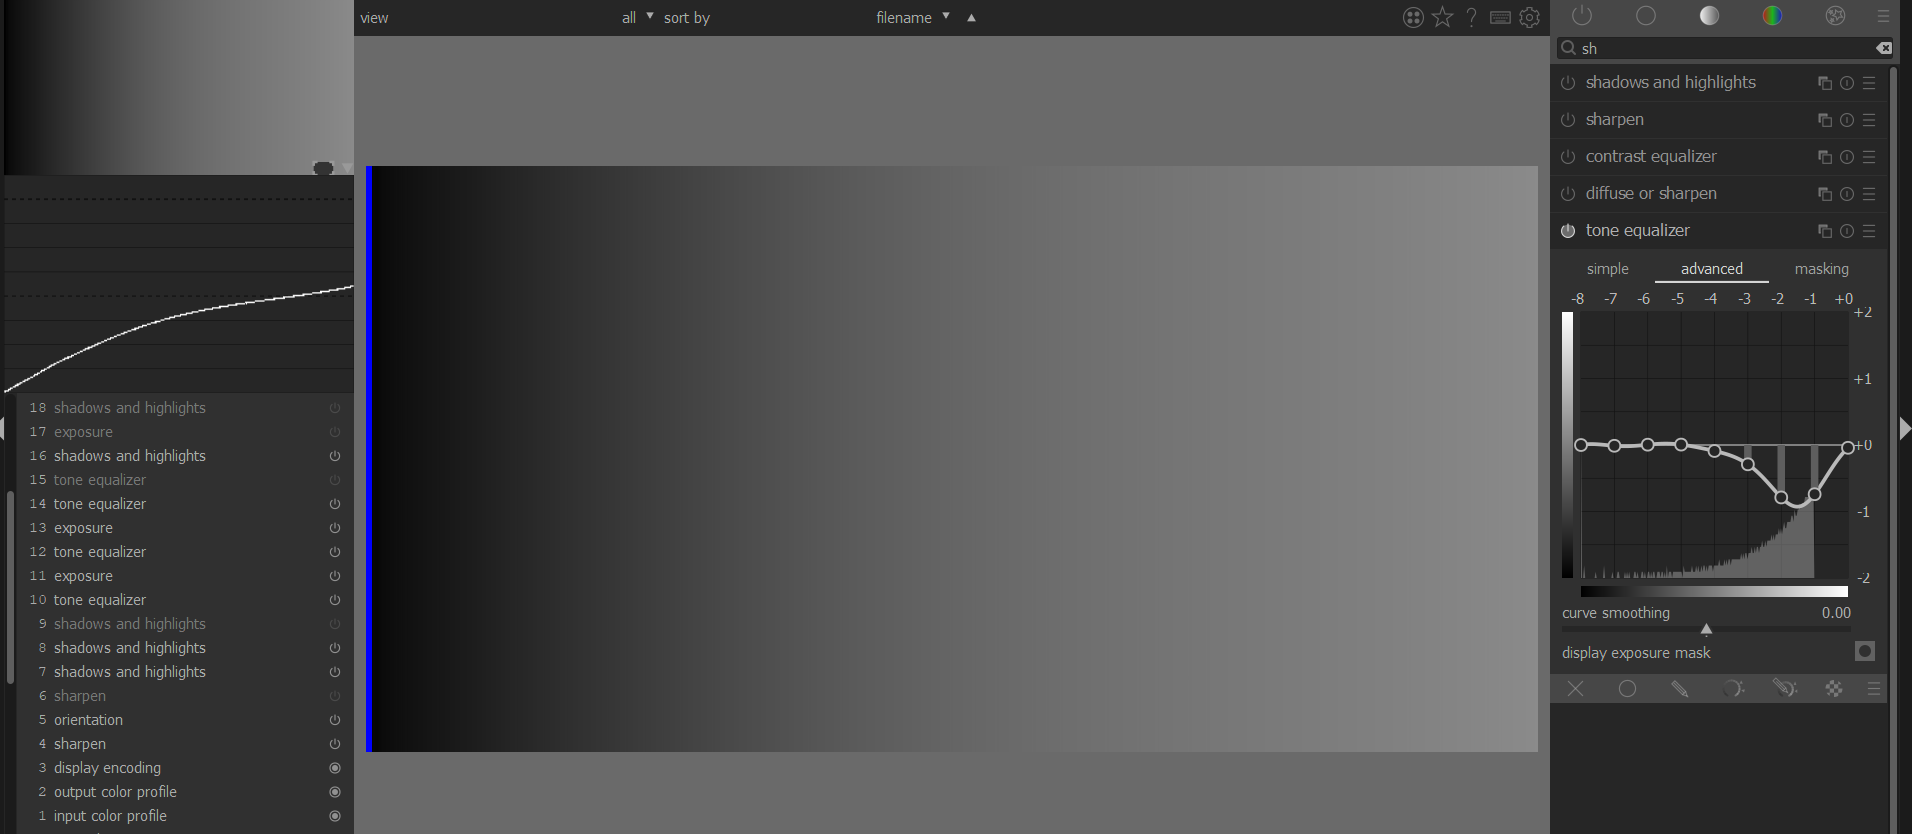
With Tone Eq
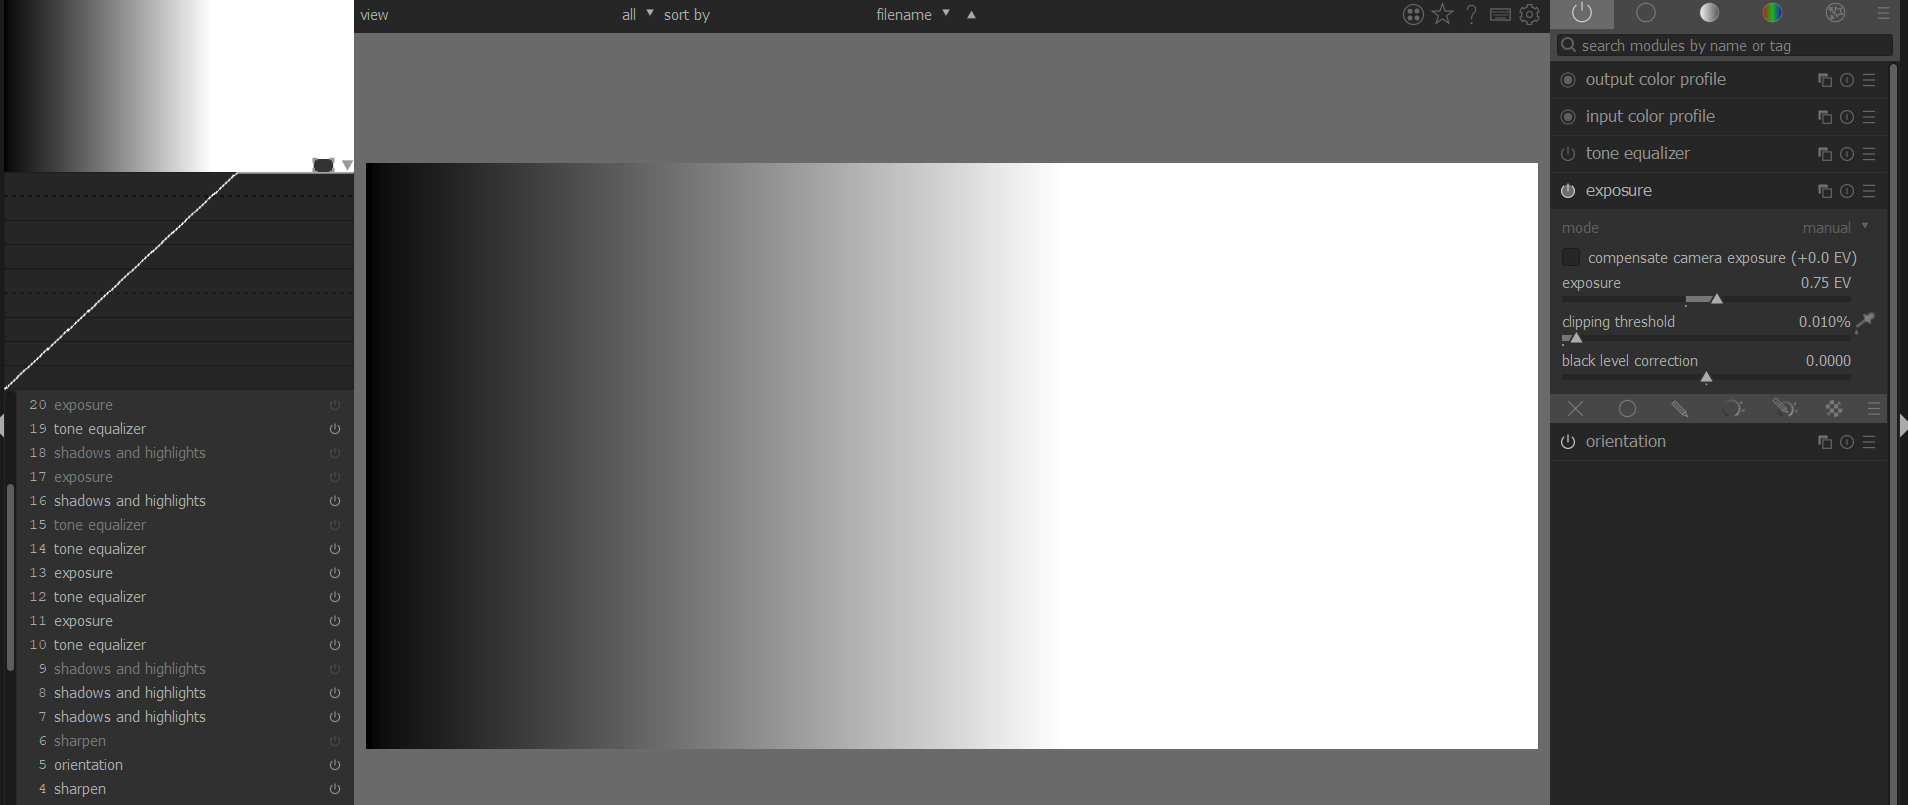
Now add exposure no change to TE

Without TE and still keeping the added exposure
Showing clipping
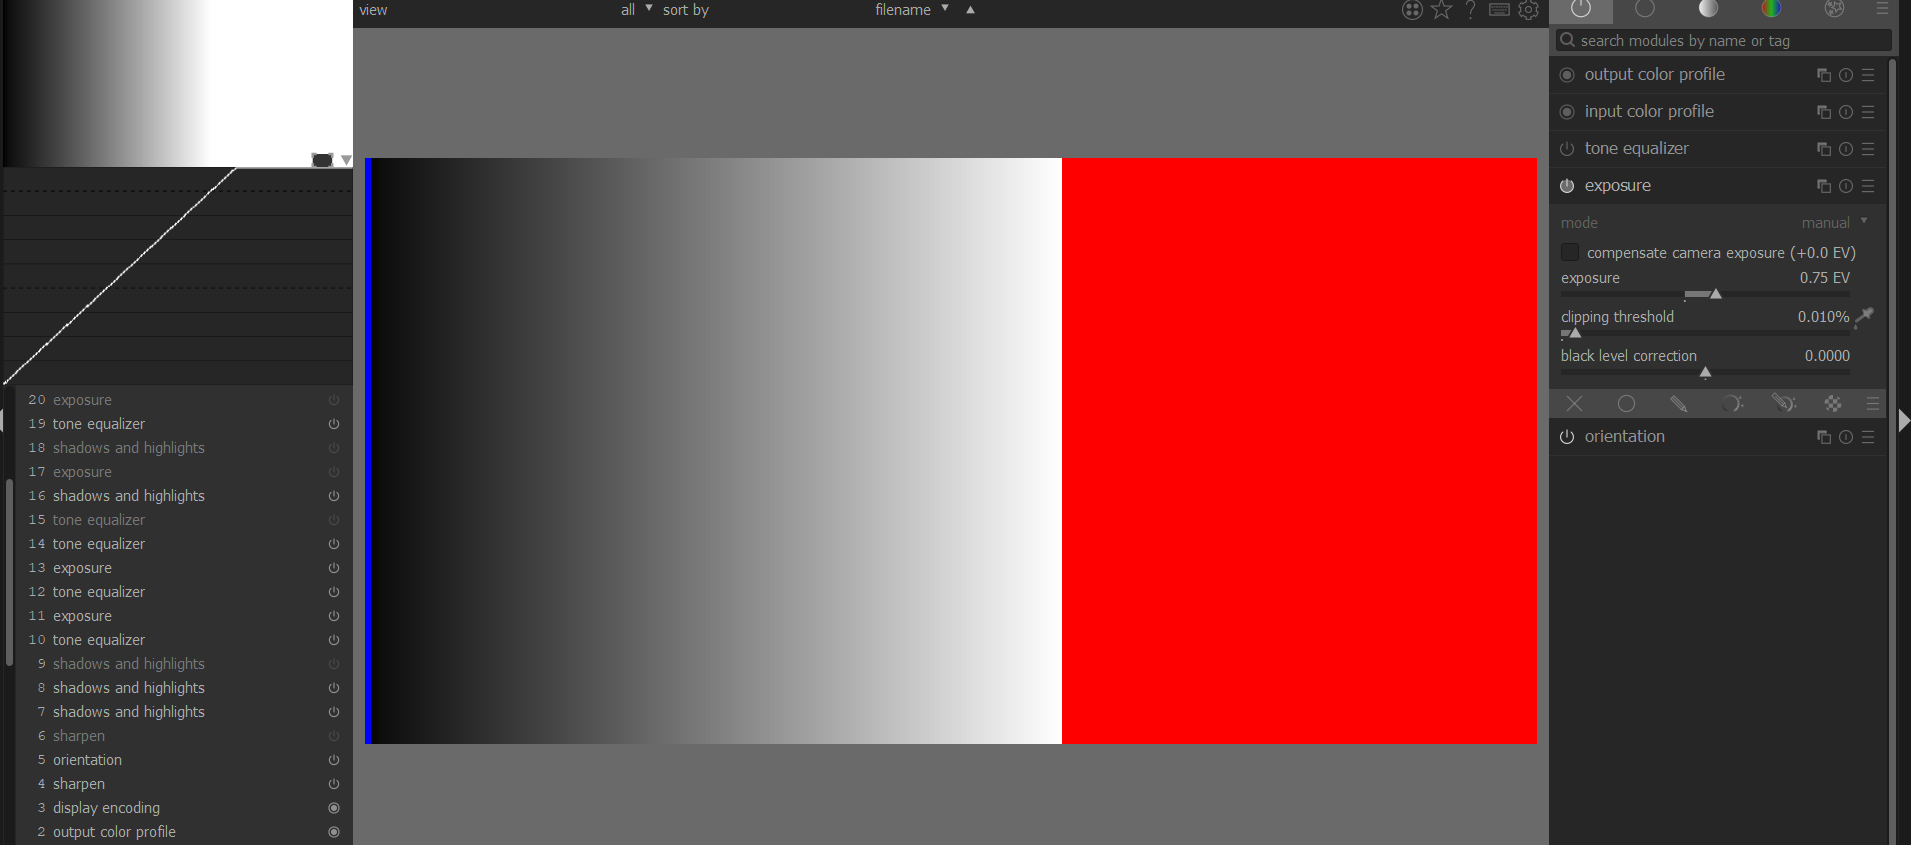
WIth SH…got something weird…maybe due to the clipping it is just a random ramp I downloaded and not high quality but likely still reflective of trying to use SH with bright values…

2 Likes
It gave me no rest. So another experiment.
I thought it would be difficult to get a gray gradient in RAW to test the tone equalizer under real conditions. But there are different shades of gray in a color target. This can be used to test the behavior of the modules.
My settings:
- filmic on default settings,
- Increase exposure until medium gray is at 50.
- Then I put different color pickers on each stage.

… and then shadows and highlights with the default settings:

Shadows are changed, highlights are changed, midtones are slightly less, and mid-grey is the same value.
and now the tone equalizer. Preset “compress shadows/highlights: medium” and optimizing the mask so that the histogram fits.
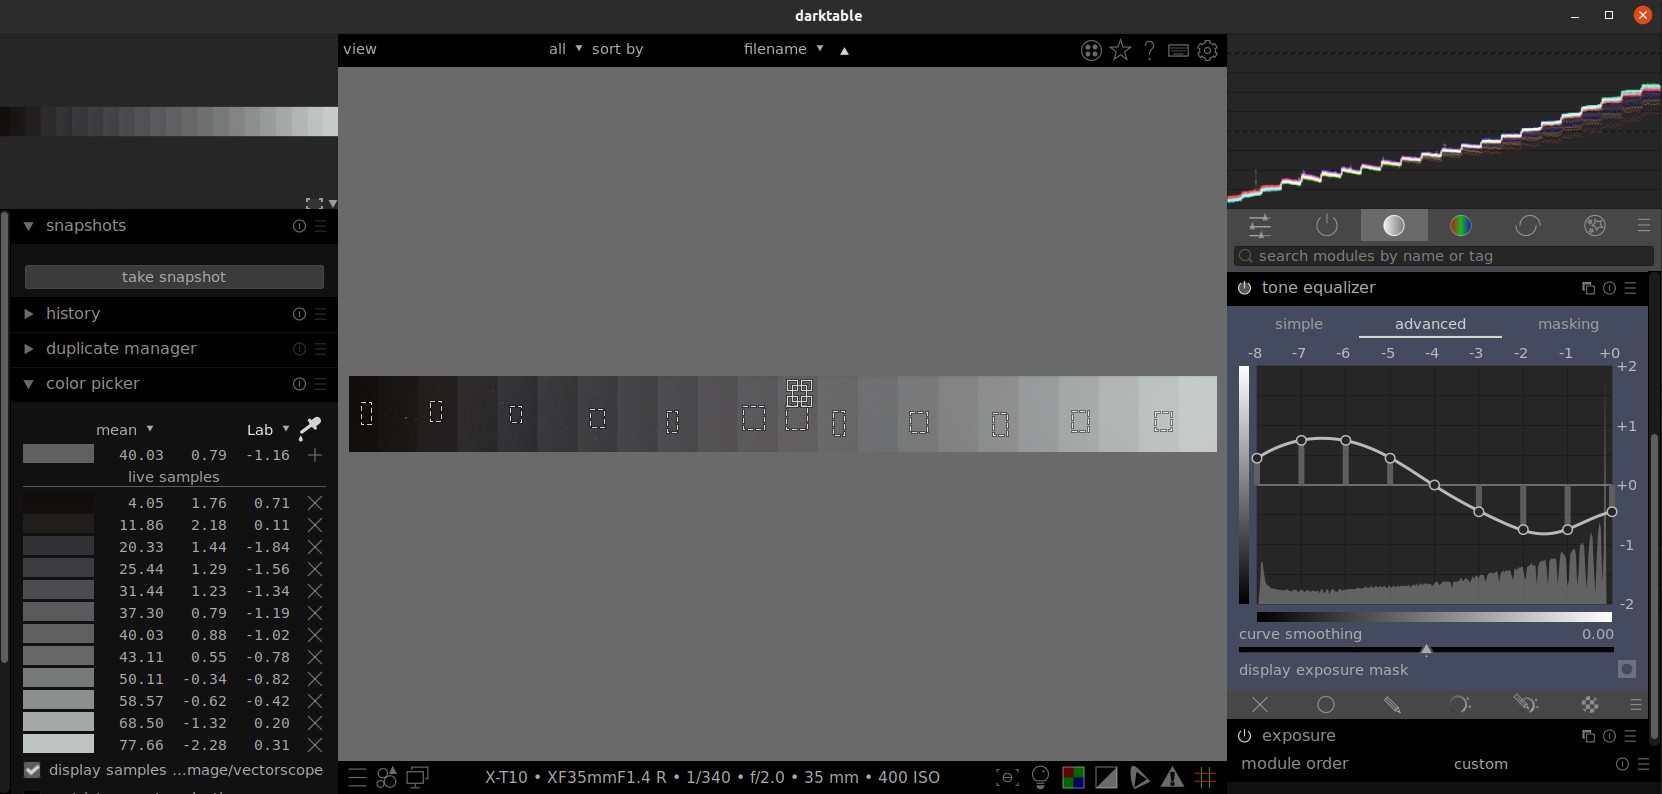
OK, shadows are getting lighter, lights are getting darker, but something is wrong.
The mids are changed too much. And - ooohh - medium gray has changed.
How can that be?
But of course, we are in the linear color space. Here is middle gray somewhere else.
So the curve must look very different and have its 0-crossing at about 2.4EV.
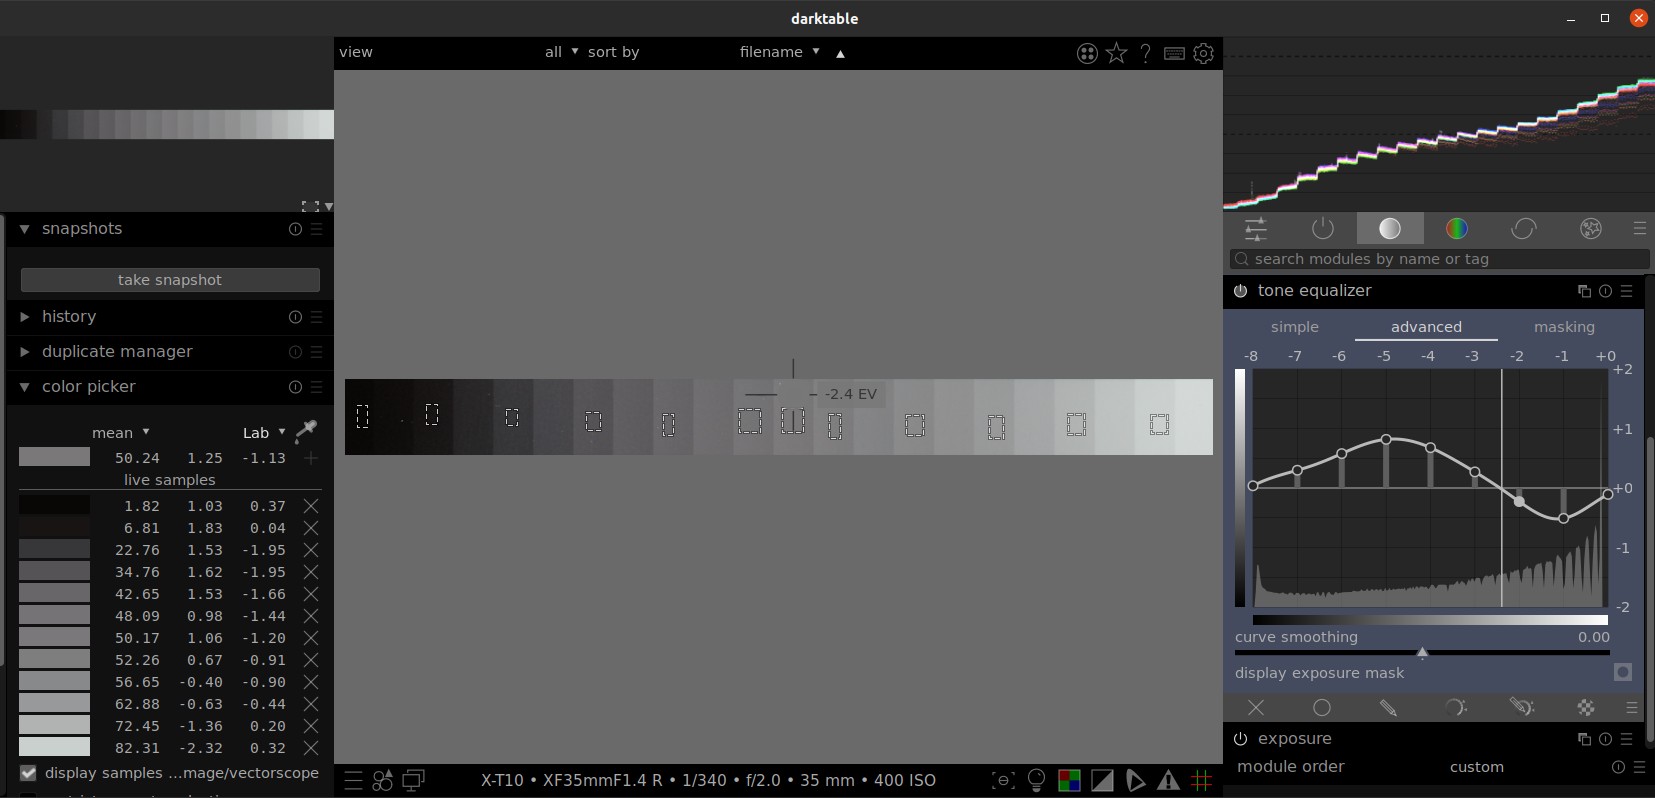
It’s slowly becoming clear to me what is meant by “scene-referred thinking”.
For the photos this means that I have a lot more options for the shadows than for the highlights.
Hmm, looks familiar.
Ughh, a liitle step for darktable and a big step for me 
7 Likes
I really love the work, efforts and achievements that Aurélien brings to Darktable. But I totally disagree with his statement that shadow highlights is bad and never to use it. It works different to the tone equalizer. Sometimes better and sometimes worse. Often I find I use a combination of both to achieve my desired edit. I am even known to add further shadow/highlights adjustment later in GIMP. To me it all depends on what the individual image needs or the photographer desires. I don’t see it as a competition between which module is best. They are both great. BTW, if I get fringing in shadows highlights module I can normal avoid that issue by switching from soften with gaussian to bilateral. When I teach DT to my students I teach them to consider using both modules. I feel the Shadow highlights lifts the colour and contrast more in the shadows and there are times when this is desirable and times when it may be less desirable. The beauty of DT is the choice of options and sometimes Aurélien’s comments may be too black and white (no pun intended)
2 Likes
I can’t find where he’s said this but I may not have searched hard enough. Regardless, the problem with some of the display-referred modules mostly comes when you try to push them too hard and, as such, a good general principle is to do as much of the heavy lifting as possible within the scene-referred section of the pipe. Working this way means that if you do end up turning to the display-referred modules, you need to push them less hard and will be less likely to experience issues. I also still occasionally use shadows & highlights (in bilateral mode) as well as the tone curve but just to make “finishing touch” tweaks to the image after I’ve already got it to nearly where I want it to be.
I do like the idea of doing everything in the scene-referred space and agree that it’s probably technically better, but if display-referred modules are not noticeably ugly and they solve a problem, I won’t hesitate to use them.
3 Likes
@anon41087856 warned against the module in the article about filmic vs. Lab, quoted by @herbert-50 (1st post).
But that the advice is not “never use it”, bit to prefer tone equalizer. There’s a warning that “it gives halos quickly as soon as you push the parameters”.
3 Likes
That’s what I looked at too.
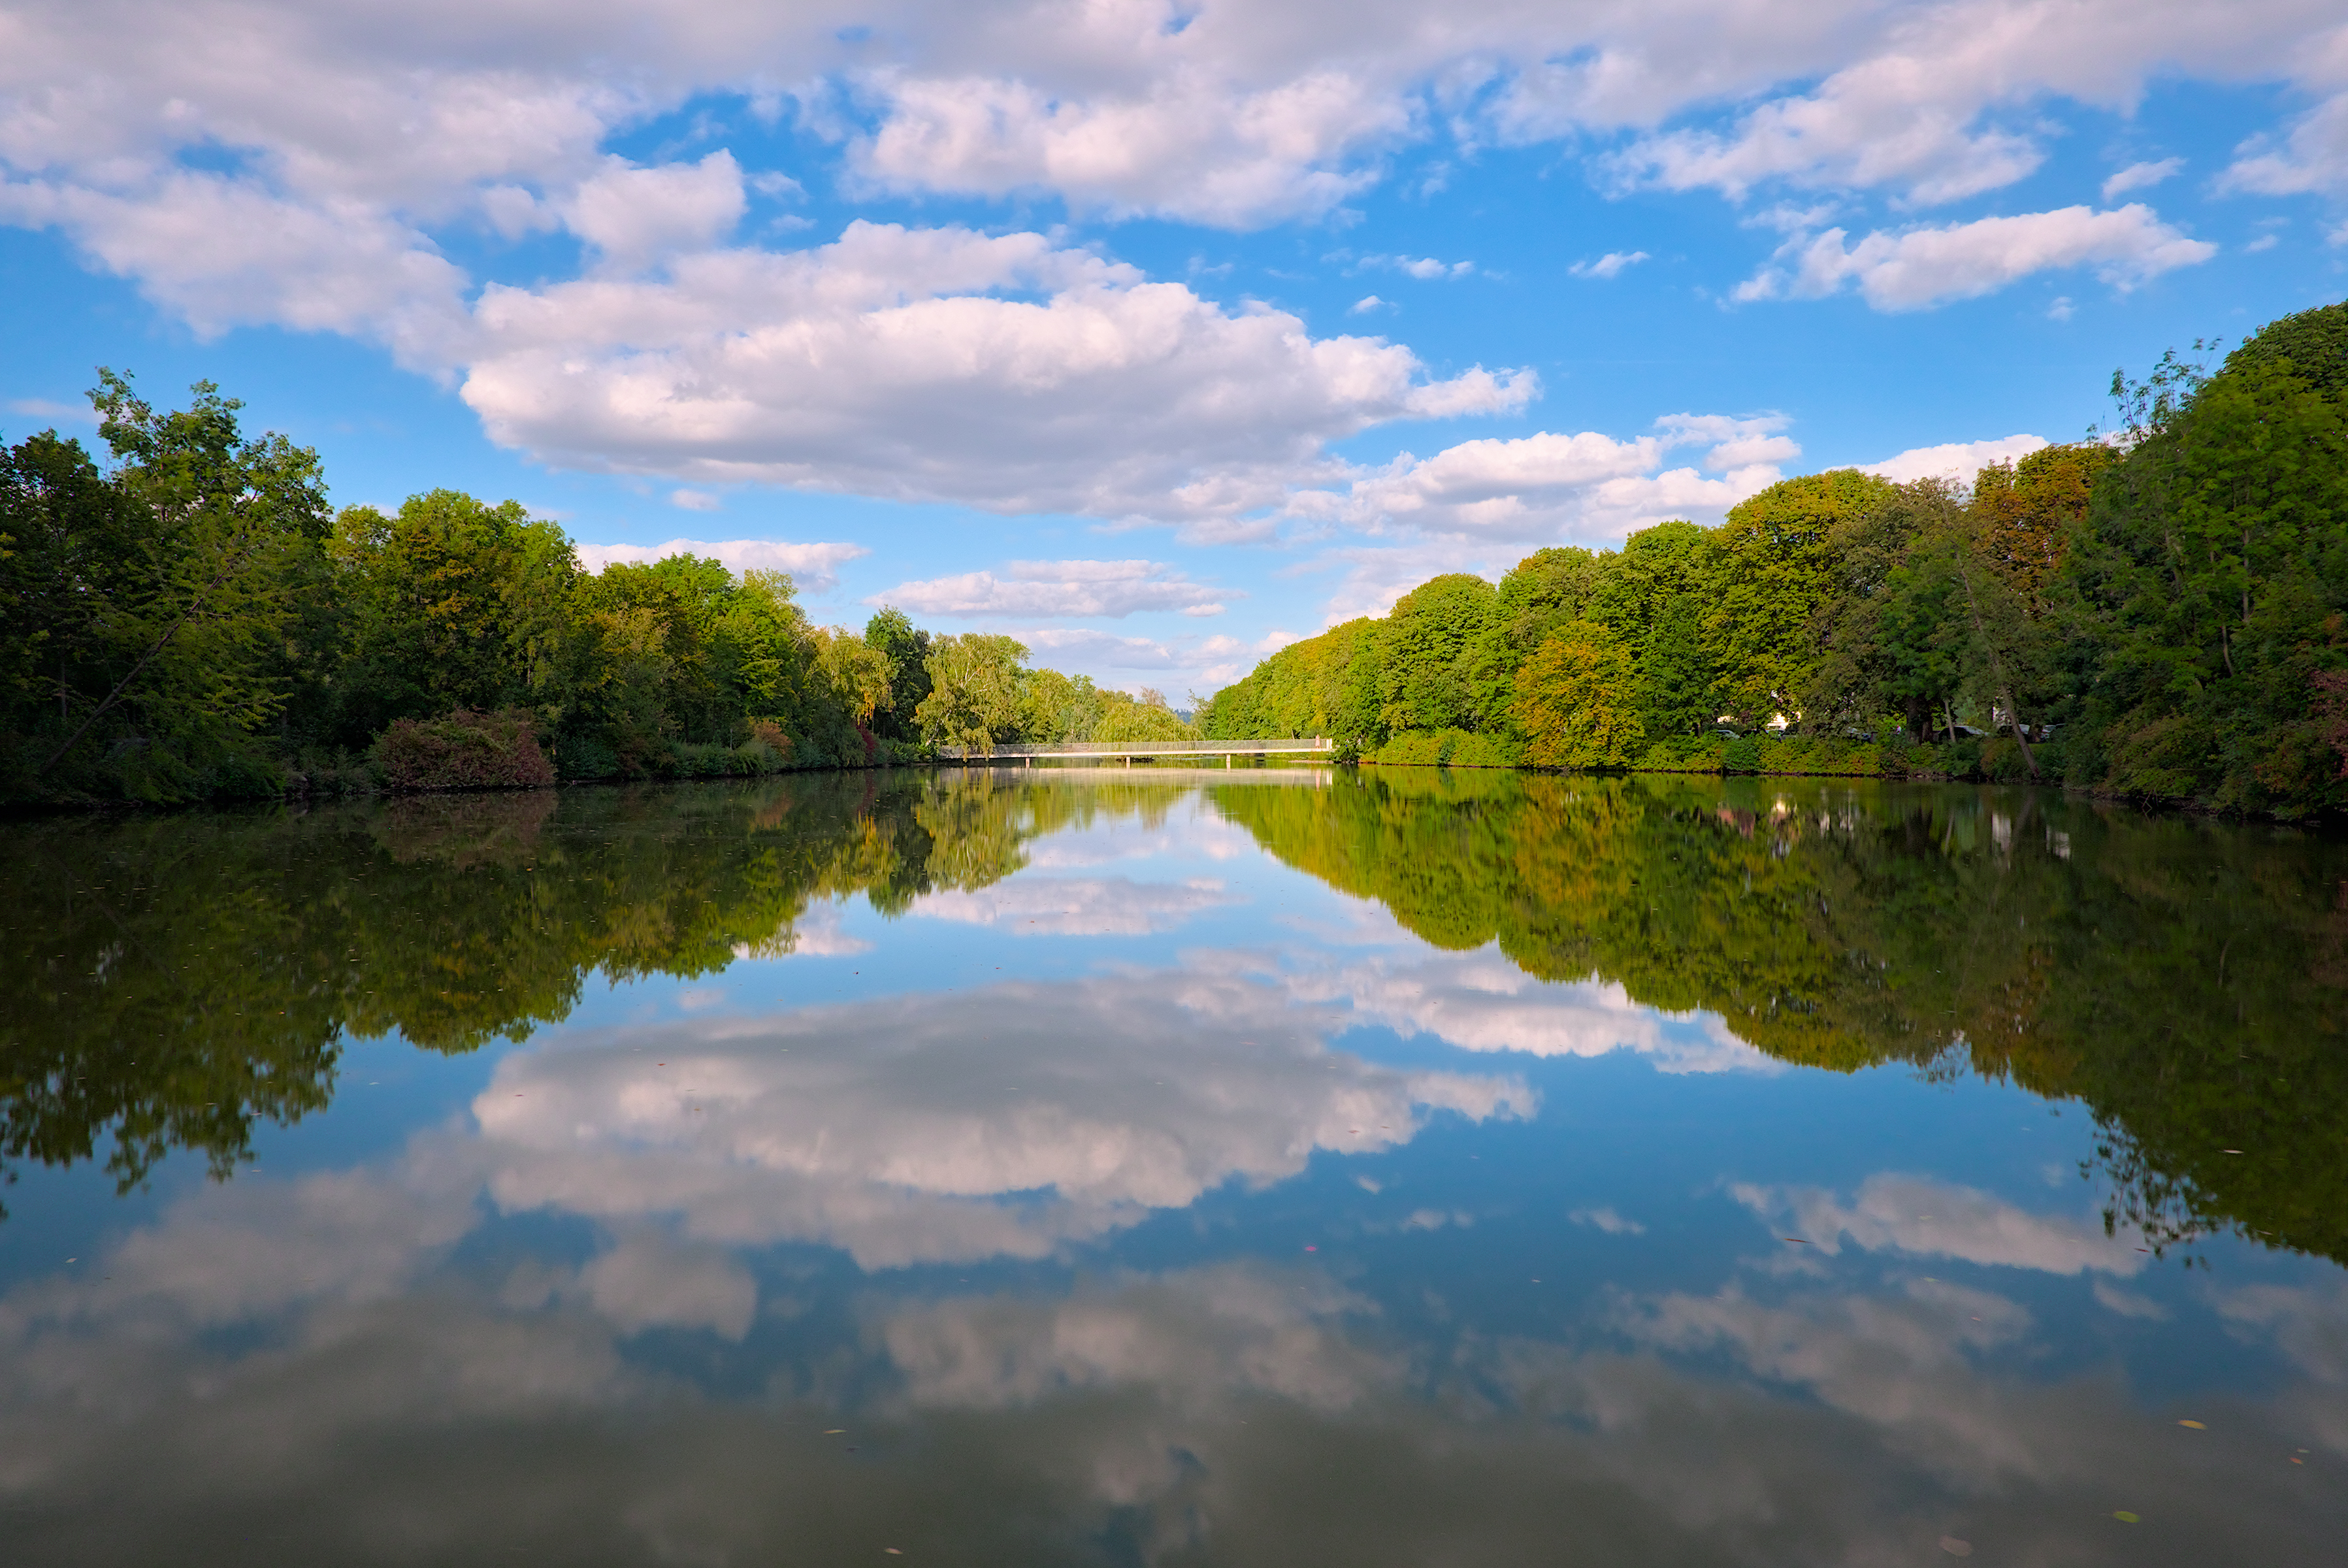
Sorry, not Darktable. I just could not resist seeing what I could achieve with this photograph using GIMP and my equal luminosity mask plug-in. Adjustment using curves and saturation in each of the plug-in’s “zones”.
6 Likes
Hi!
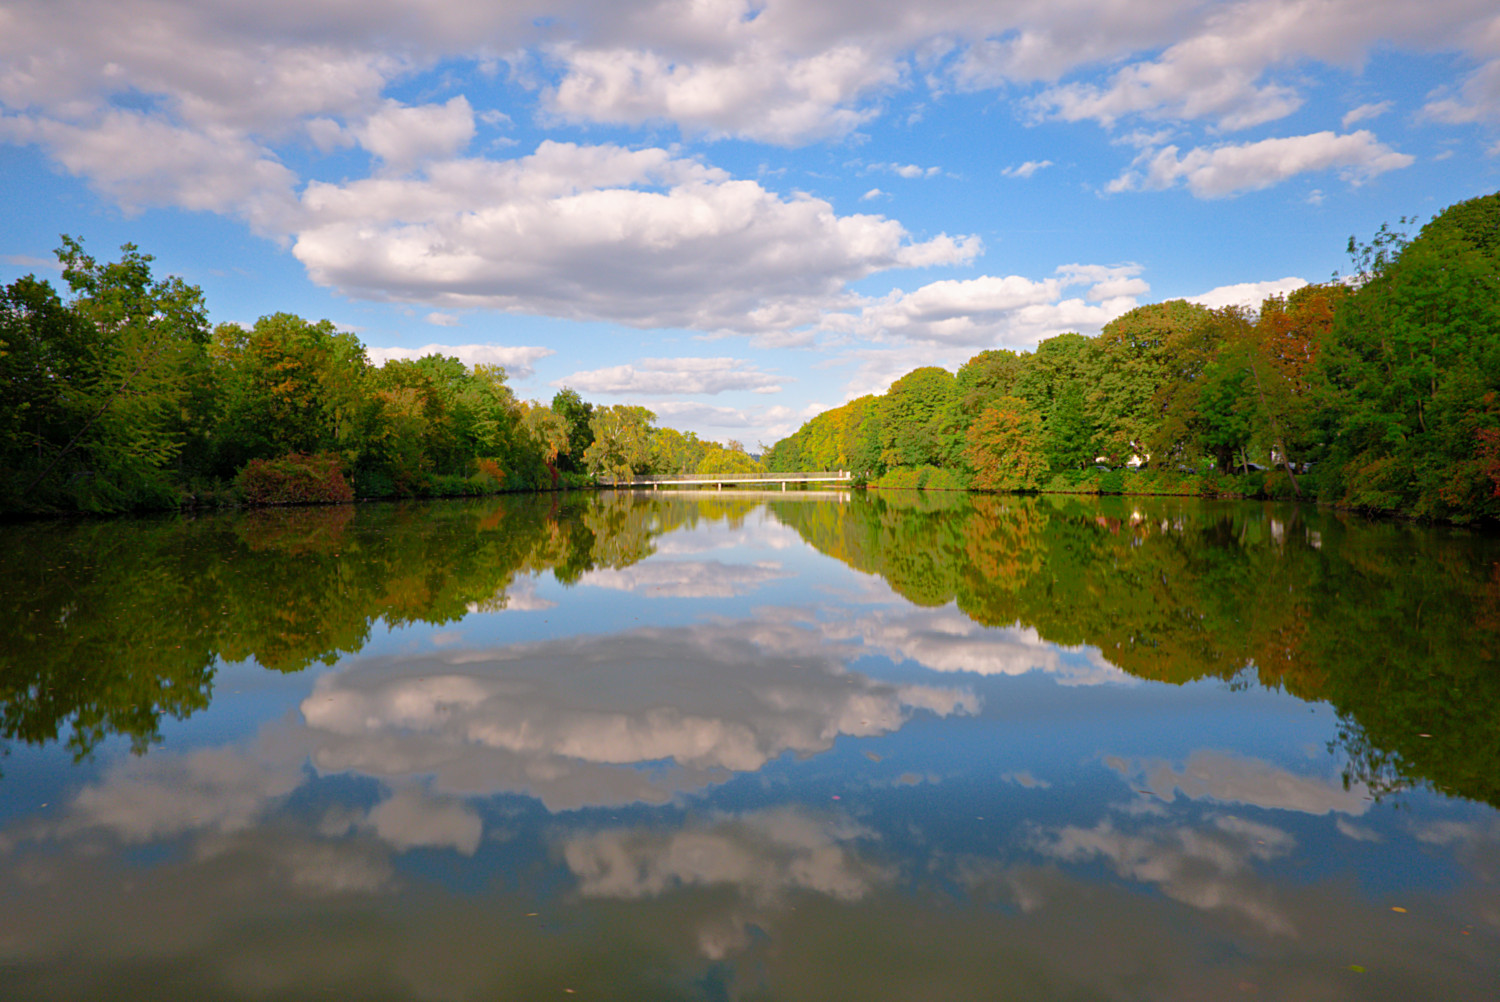
I have just given a try, basically trying to use the recommendations / methods of Boris Hajdukovic as well as I can  .
.

190918-T10X2232.raf.xmp (14.1 KB)
Best regards
Ariel
3 Likes
Did you try setting “preserve details” to none? I know it sounds counter intuitive but turn on the mask setting and then turn on and off preserve details and I think you will see something interesting.
Is that a custom plugin or one that comes with Gimp or gmic??
It is a custom plug-in which I created. It creates multiple layers each of which has a mask. Each mask is effectively a “zone” of luminosity, but with a small amount of overlap between masks.
1 Like
Ah yes I have seen this done I think Pat David did a Gimp article back some time ago and Michael Davies has as well.
In case you are interested, here it is: GimpScripts: Equal Luminosity Masks Ver. 1.2
Have fun!
Claes in Lund, Sweden
@priort
I used the Pat David luminosity masks (as scripted by Saul Goode) for several years. Eventually this plug-in stopped working - I think as a result of an upgrade to GIMP. That started me on a long journey to create my plug-in with much help from other people.
It is more akin to the Ansel Adams zone concept, in that it makes ten equal independent masks ranging from the darkest to the brightest parts of the image. A copy of the original image is stretched to the full dynamic range and then divided into ten “chunks” to create the masks. The division is done with curves so that there is a slight overlap between masks otherwise it would be impossible to achieve a blend at the transition.
All the usual controls - hue, saturation, contrast, brightness, curves, etc. can be used on a masked channel without affecting the adjacent ones.
I also find it useful for solving difficult masking problems, frequently using the created masks in combination.
The latest version (Revision 10) can be found at Updated Luminosity & Saturation mask plug-ins - GIMP LEARN
1 Like
Thanks for sharing…
@david, I honestly think this is the best edit of this image, so far. 
It used to be in the user manual, but seems it was removed. Not sure when that happened, but here is a link to page where it used to be mentioned why the use of shadows and highlights is not generally advisable:
Yes I think you wrote that originally, based on the RGB article. But still it doesn’t say “that shadow highlights is bad and never to use it”. I don’t ever recall seeing it stated in such black & white terms. That text was replaced with the new processing guide we wrote last year but such warnings are now in the module reference sections of the user manual.
1 Like