It’s really not rocket science…
https://darktable-org.github.io/dtdocs/overview/workflow/edit-scene-referred/
It’s really not rocket science…
https://darktable-org.github.io/dtdocs/overview/workflow/edit-scene-referred/
These were my thoughts also, but is appears there there must be a variety of highlight clipping scenarios.
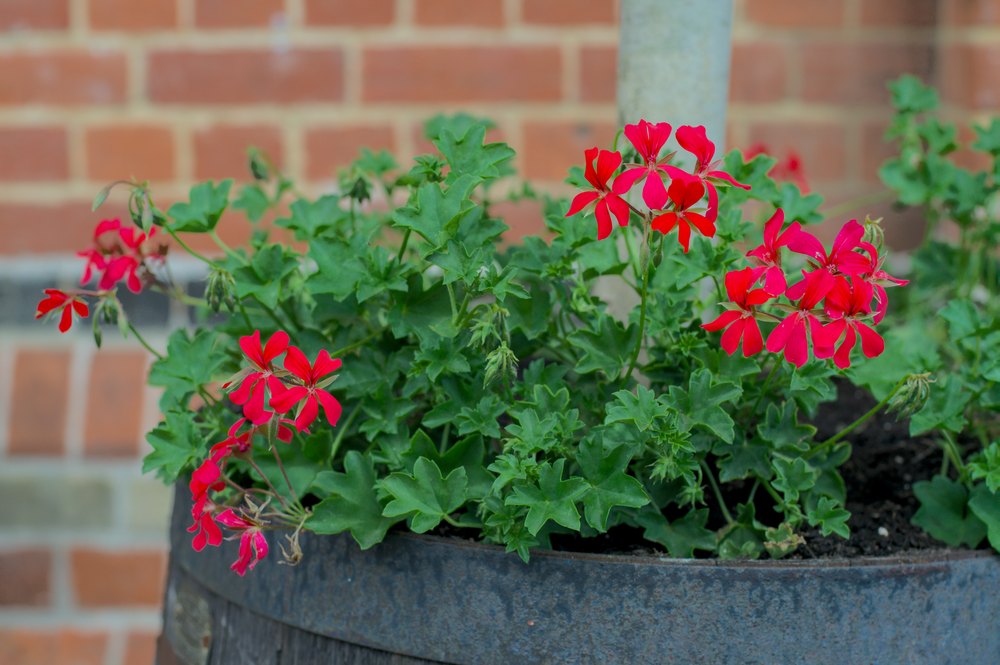
With the image I posted, there was no highlight clipping in the raw image, of the combination of red, green, blue channels, nor was there any clipping of any single channel, so on the camera as well as using the indicator tools in the photo editors, absolutely no clipping of any highlights, in the source.
But in this case there was a strong predominance in the red channel, in the raw file itself, (its attached). So any attempt to brighten the image, because of the predominance in the red channel, pushes it into saturation. in processing I;ve adjusted White Balance to 5500, cos this looked more accurate, to the scene (no significant impact on red channel with this change)
I’ve been able to find workarounds using masks, but I’d love to avoid too much tinkering with an image, cos what I enjoy is taking the photos and looking at the end result, not hours of slaving over a pic, or what I call light bending!
A nice challenge, to figure out whats the best practice for getting it optimal at the source. I do remember in the old days, if you were attending an event at a TV station, there were some colours you were advised not to wear… Could be something related… the is some info out there about how red and blue are amplified more than green, in the sensor. Anyway, a good challenge, if I can resolve this at source… So I can easily add , more “light” to it in post, without running into the risk of saturating any colours, or introducing out of gamma issues, in the photo editor, none of these being issues which exist in the raw file.
DSC01997.ARW (16 MB)
I have attached the raw file in a post before this response, so its easier to discuss in case anyone wishes to appreciate the challenge. In simple terms, there was a lot of Red channel in the raw file, but not clipped in any way.
So any attempt to make the image brighter tends to saturate the red channel. So rather than do this, I had to leave the final image a bit darker than intended… I;d hope to find a solution that fixes this at the time of picture taking, rather than have to mess with the colour channels in post and “distort” the colours… My wish, we’ll see how this goes.
Some more practice out on phototaking sessions and coming back to view them on the computer should lead to a better understanding and a solution/or accept that under certain conditions, I have to accept some limitations in the capture process, that will lead to this kind of constraint…
Appreciated. I think Im already an adherent of the process, and well adapted to the scene referred workflow.
Ive attached the raw image, in a prior response, in case anyone wishes to try with filmic, and also avoid any saturation, while making the image brighter than what I have achieved, using simple methods like a bit of brightness, not any complex arcane approach.
The image was well captured, no issues there, but it seems we are running into one of the well known issues with attempting to make optical changes to a digital image, such as making it brighter, in this case, it becomes a bit of a challenge. A compromise.
The apps which enable a brighter image, also distort the colour from what I know it is. The app which gets it right in colour which is darktable filmic module, and I think it does a good job of this, then establishes an image which is difficult to make bright, without running into saturation and out of gamma issues.
The image was shot in the shade not direct sunlight, so maybe more light at source might have been the ideal solution rather than attempt to fix it in post… via digital tricks of the trade…
@OK1 can you upload your xmp file for this image as well?
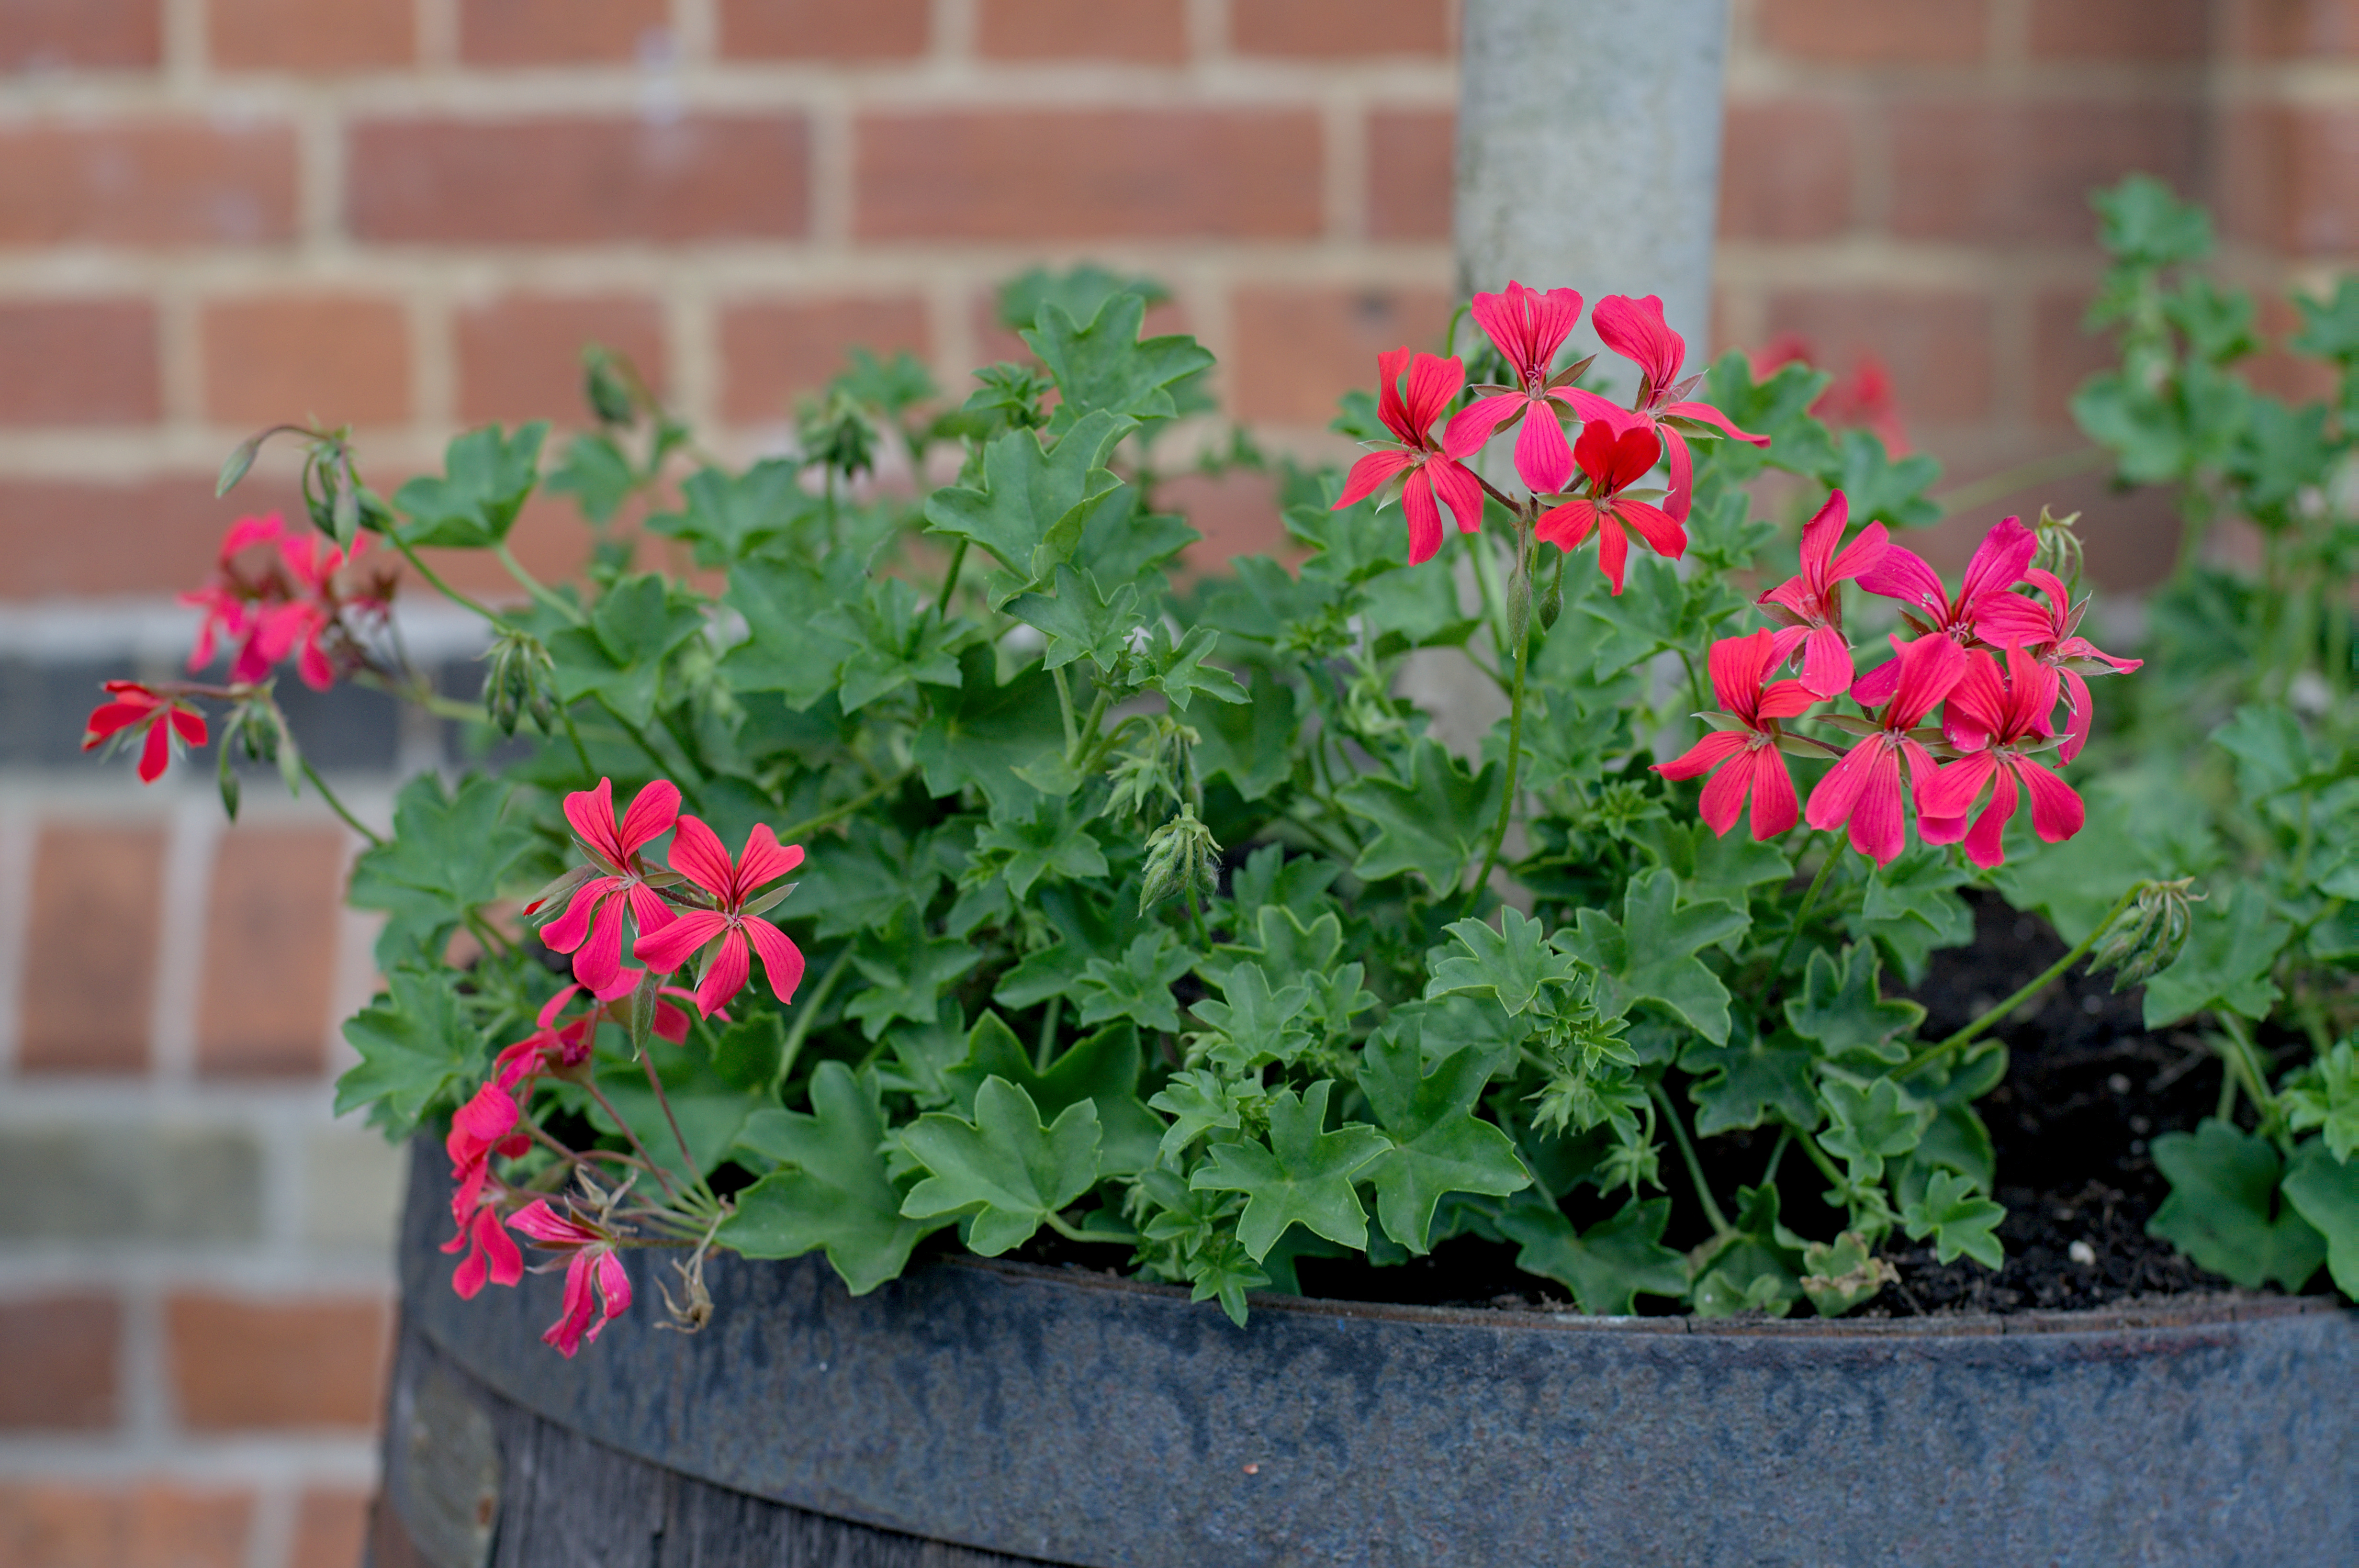
So not quite sure what you are looking for – the following image is brightened a bit (exposure, filmic white/blackpoints), colours not too saturated (color balance rgb), applied a bit of sharpening (contrast equaliser). Does seem to need much in the way of denoising.
And here is the out-of-camera JPG:
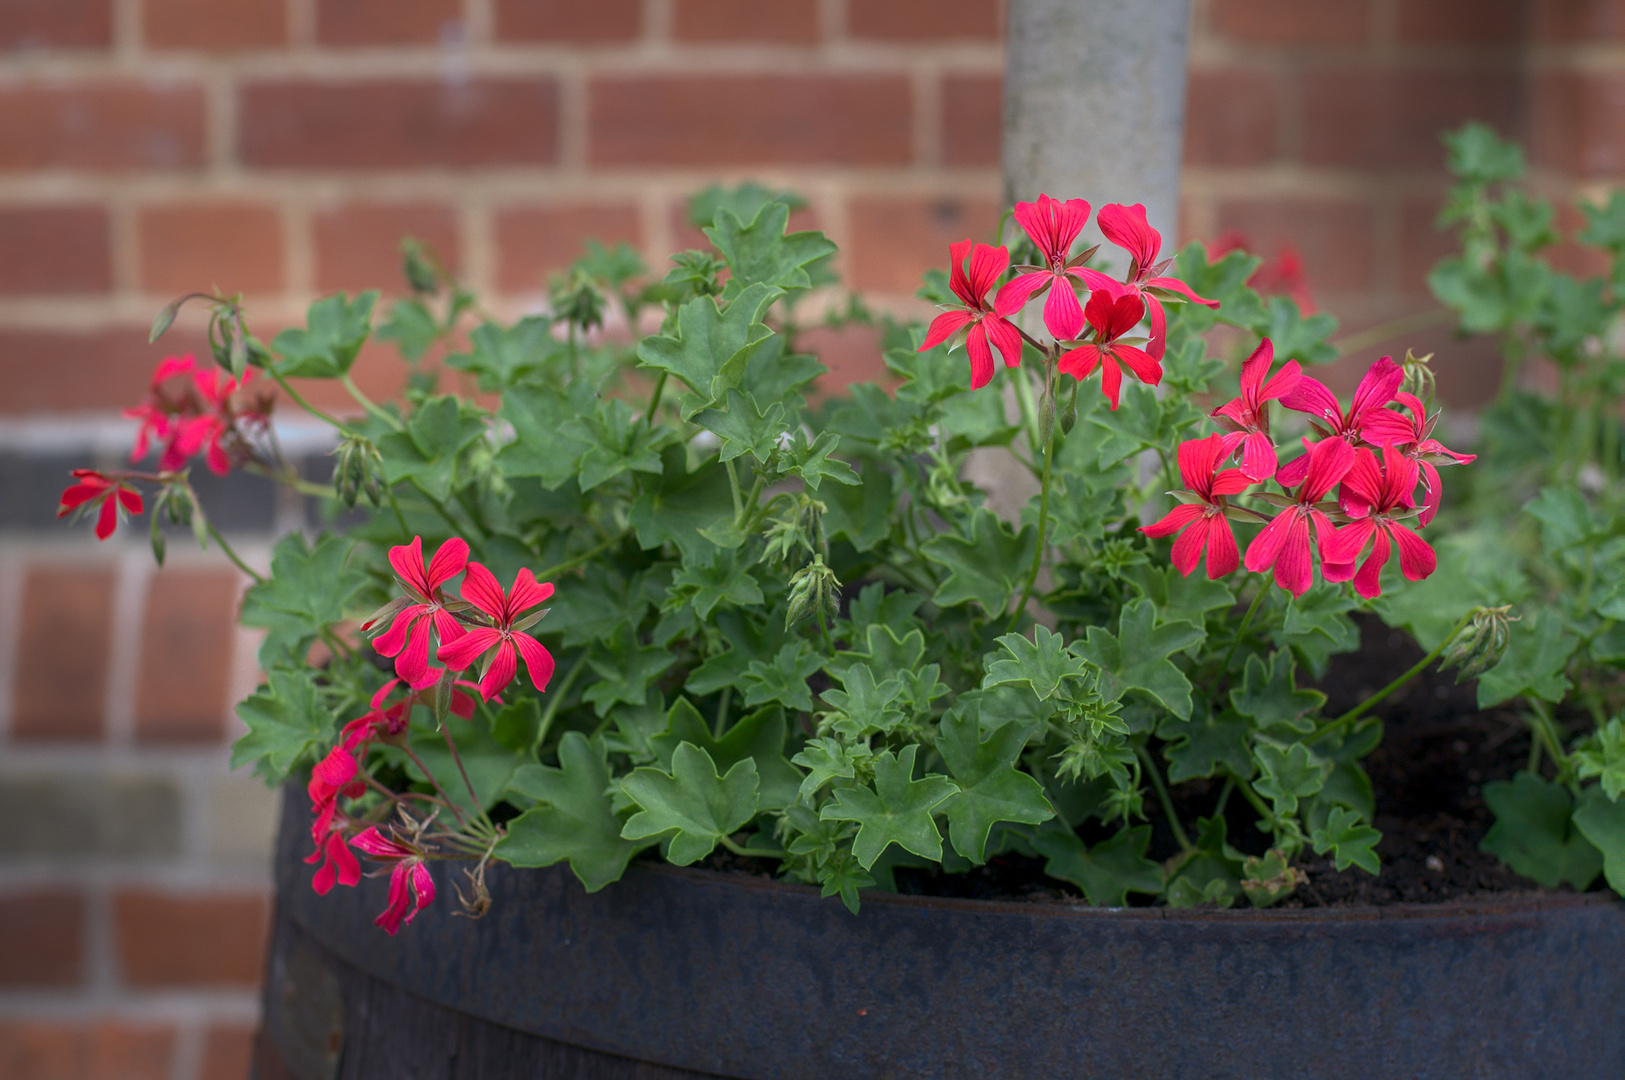
This one seemed pretty straight forward to me. I darkened the shadows a bit to try and make the flower pop out more. This is using a recent master build of darktable.
Only exposure, filmic rgb, local contrast, then tone equalizer to darken the shadows.
Much the same for me. 1 minute edit in current darktable master. I maybe pushed the saturation a bit more than I normally would:
Brilliance in rgb color balance might do the trick try that…
I tried a little but wasn’t sure how bright or desaturated you were looking for??
And I think not trying to get so much out of it. It can certainly give a great result at times wrt all aspects of a photo and other times it should just be used to map DNR and leave the rest to other tools. I still think this is often the issue, ie people trying to get “too” much out of filmic rather than just using it for its primary mission of managing DNR…
I still don’t understand what people are expecting to get out of it. I literally only expect it to set the upper and lower bounds of my data. Sometimes I don’t need to do much more than that, but if I do its in Tone Eq or Color Balance mostly, not in filmic itself (sans highlight reconstruction).
I think the discussion has veered off from the topic; the content is good and interesting though. I suggest we move this to a new thread @paperdigits.
I agree we should stick to style but lets face it filmic is the main player in a style that will use the scene-referred workflow so as long as the discussion sticks to how one might better use DT to best match a jpg is still on topic as far as I can see. Not that I really care one way or the other. I think one experiment would be to actually see how people do on a few photos that they struggle with using both workflows rather than compare against each other. Is it that one or the other is actually better and easier to get the jpg look. Then maybe the answer is use that one. If it turns out not to be scene referred then maybe use scene referred for the technical advantages it can offer but don’t try to shape it in to the jpg look as the other method is better suited for that particular goal… In any even it will be interesting to see what people propose.
This is my little modification I mentioned earlier to the colormatch script to use it with a Spyderchecker 24. The raw/jpg matched icc gives nice results in my opinion…and could assist in getting closer to the jpg out of the gate.
I added the OOC jpeg to to post above for comparison.
So which one is right? We’ve had a number of interpretations above. I tried to keep the saturation low since that was something that @OK1 said he was looking for. Did I go too far? Maybe. I think probably I like @priort 's the best. The point is you set the sliders how you like, depending on what you are trying to achieve. All the edits above were done quickly using just a basic set of modules that you would typically use for all images, nothing fancy.
OK1 wrote:
In simple terms, there was a lot of Red channel in the raw file, but not clipped in any way. … The apps which enable a brighter image, also distort the colour from what I know it is.
Your image DSC01997.ARW developed in sRGB colorspace has red values near or at 100%. So any operation to lighten the image will change the green and blue channels far more than red, which changes the colour.
I thought the purpose of this thread was to find a darktable process that transforms a raw to the OOC JPEG. I’m not a darktable expert. Using a more primitive tool, ImageMagick, in Lab space, a simple gain-and-bias of L* and gains in each of a* and b* gives a result that is 0.025 RMSE from the embedded JPEG. It looks close to the JPEG except for the saturated reds.
Where L* is in the range [0,1], and a* and b* are in the range [-0.5,+0.5]:
L' = L * 1.207378 + 0.0546299
a' = a * 1.028002
b' = b * 1.272474
I guess I’m wondering why no mention of the algorithm behind RawTherapee’s auto-matched tone curve. It’s a pretty straightforward calculation of the CDF of the linear RGB and the embedded JPEG, and using those to calculate the curve that would transform the linear RGB to the same distribution as the JPEG.
That should get one quite close…
From a non-colour managed screen @snibgo’s rendition looks closest to what I would consider an out of camera experience. How did you arrive at those gain-bias values?
@ggbutcher Yes, I find RT’s matching to be good enough in most cases, at least for me because I set my camera’s engine to be as neutral and untainted by processing as possible.
If the ooc JPEG is considered a good starting point, I would only use the color balance module and no filmic.
Top: ooc JPEG
Bottom: darktable color balance module plus minimal sharpening (contrast equalizer).
DSC01997.ARW.xmp (5.4 KB)
This is a very good point. Does this picture need fimic. Makes me recall a video by @s7habo where I think he only used colorbalance to to a series of photos…
For comparison, here what I would do “freestyle”. Due to the limited dynamic range also without filmic but with the use of much more modules to make small changes.
DSC01997.ARW.xmp (18.2 KB)