Thanks for offering your styles maybe also a raw for each so that we could see what you see styles in action …
Good idea. Som raw files from 6D here Scene referred, display referred, and the Colour Science of Canon/Fujitsu/Nikon/etc. in Darktable (filmic-rgb module in particular) - #8 by Peter
How did you arrive at those gain-bias values?
The formula for the L* channel is:
newL = oldL * gain + bias
… where:
gain = (SD of L channel of JPEG) / (SD of L channel of raw)
bias = (mean of L channel of JPEG) - (mean of L channel of raw)*gain
where SD is the standard deviation. SD is a measure of the spread of values. For the L channel this is tonal contrast. For the a* and b* channels, this is chroma. So multiply a channel by a number greater than 1 increases tonal contrast or chroma.
For a* and b* channels, I assumed zero bias. A bias in these channels would change hues.
I thought as much, though it is always good to elaborate or clarify, making it easier for our readers. 
That sure takes all of the fun away!
Thanks. For those like me, new to all of this Light magic, this is a whole new universe, like rocket science.
I just want to mention one thought: I think Fuji (maybe) has the best out of the box look or looks and that’s because of their film simulations, especially the effects Provia and Classic Chrome. I think it is remarkable and no coincidence that Fuji is one of the very few camera producers that are doing comparatively well financially, because afaik most camera producers are in trouble. Fujis looks simply sell.
I think that’s also because they picked a strategy different than others and now they’re executing it well.
I think they have the best APS-C cameras, and now their medium format is competing on price with full frame systems from other manufacturers.
As an observer—never a buyer—they seem to be doing the little things that make a difference; e.g., updating firmware on older cameras, and catering to nostalgia while adding interesting and fun tech.
A question. Does the objective of achieving an image similar to a jpeg, in addition to emulating the colours and the gradient (assumed), also include emulating the other characteristics typical of OOC-Jpegs, such as reduced dynamic range, and what looks to me like strong use of local contrast, in the camera?
And here (below), is the corresponding raw file, processed 100% in darktable, no other apps or tools used, in the workflow.

Images are downloadable in full resolution as jpgs(no more than 5MB each), via the image links above which points to their location on imgur.com.
At first glance, many may not see much of a difference, and this is one of the reasons I also love darktable - IMHO, I think its viewer is pretty good. But you may use any image viewer, and you should still be able to observe the following, if viewed in full screen mode.
-
The OOC version compresses the colours and the dynamic range., reducing the gradual transitions between light and dark areas.
-
The OOC version looks less natural when you view it in detail, like some image taken in strange lighting, harsher, and more 2 dimensional, with everything emphasized, rather than a smooth separation between foreground and background.
-
Especially in the highlights, the raw image processed in darktable (with filmic, in case you wondered), looks more natural, with a greater dynamic range, you can see the different shades of brightness in the flowers with much more ease, which is due to the different angles, height and reflection of light, from each petal to the camera lens, retained in the image.
Sure the jpg, still looks ok to the casual observer, and most people see a lot of the world through such images, and have become accustomed to this. And might even prefer this version, cos it immediately grabs your attention, but you may not want to fix your gaze on the image for too long.
With the image processed in darktable, it invites your eye to roam around the image, for a bit longer, cos it looks more like the real thing, and has more “depth”.
It is possible to emulate this dynamic range reduction in photo editors, and not difficult to achieve, but as I asked above, do we want to?
For 6D, M5, 1Ds and 7D.
Created with darktable-chart. Faithful, Fine Detail, Landscape, Neutral, Portrait, Standard.
Canon EOS 6D six Canon styles LUT.zip (12.5 KB)
Canon EOS M5 six Canon styles LUT.zip (12.5 KB)
1Ds six Canon styles LUT.zip (14.4 KB)
Canon EOS 7D six Canon stiles LUT.zip (12.5 KB)
To create LUT with darktable-chart I have been using Spydercheckr with 48 patches. Would Digital target studio edition and its 988 patches be much better if my goal is to get closer to camera manufactor’s profiles?
Maybe, but be aware this won’t be reliable in a scene referred workflow with filmic since it depends on the tone curve created by darktable chart. And it’s just valid for images shot at similar Illumination onditions.
So practical the increased precision won’t be noticeable.
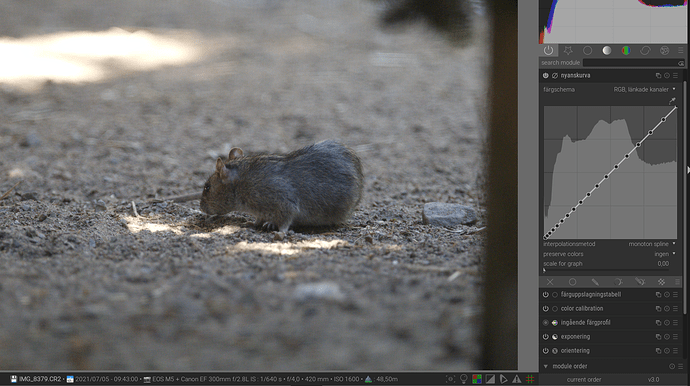
One more question, because my curve is not applied. Turned on or off doesn’t matter. But I assume the same goes for Color look up table (display referred)?
The curve in your screen shot seems to be perfectly linear, i.e. output == input.
So what do you expect to see when your curve is applied?
The curve was on after darktable-chart. Doesn’t seem to do anything.
Sometimes it seems that DT chart gives just a linear curve and other times you get some sort of s curve…
Have got it one time before. Don’t know the reason why I get a nice curve one time and a straight one another.
Well, if output==input, that’s what I’d expect… But that doesn’t mean your curve isn’t applied, which would have been a bug in darktable.
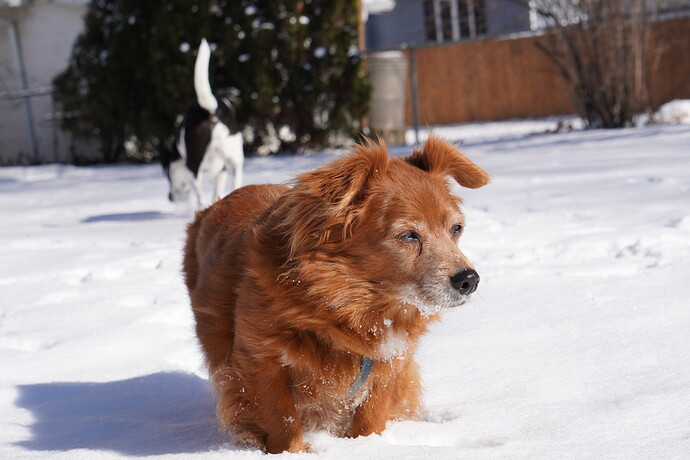
Sony a6400 (ILCE-6400), ISO 320.
DT 3.8. Thanks in advance.
The JPEG is accurate. Cloudless day around noon. I set the camera white balance set for sun before shooting. His coat is that nice reddish brown and his face has the nice white highlights (he’s 14 years old).
DSC06918.ARW (23.7 MB)


