I would echo Mica’s comments but you can get a bit of milage out of the local contrast module using the hdr preset and then dropping the opacity or tweaking any settings that help…then a couple of other tweaks…this might be going the wrong direct from what you would want but you can see some improvements can be made but its hard to do much with those blown areas…
In this particular situation, probably not.
In the past, I’ve shot intentionally underexposed JPGs (to protect the highlights), raised the exposure in darktable, which then produced > 100% highlights, and then used filmic to tonemap the result.
You can’t save overexposure JPEG highlights. But mild underexposure is easily corrected.
I sometimes think we’re overcomplicating things with raw development. Log formats and conversion LUTs such as they are used in video seem a much saner solution to the tonality problem. Of course they have baked-in white balance, which can’t be edited as easily.
If it does what you want, the tool is usable. Otoh, tone equaliser might also be possible.
Before the scene-referred workflow, I used to “tame” such highlights with e.g. masked instances of the exposure module (as we had to contain the dynamic range before the “base curve”)
The “tone mappers” like filmic, sigmoid and AgX do a bit more than just compressing the dynamic range. E.g. at least some also modify the colours in the highlights, which may not always be welcome. Keep in mind that a jpeg has already been edited, possibly quite heavily.
And as said, if an area is overexposed on the input file, the detail there is lost, and there’s no way to get it back. But that’s not limited to jpegs.
Isn’t the whole chain (starting at capture) much more controlled in professional video, compared to photography? And of course, they don’t deal with one image to correct, but 1000s, so treatment speed is important.
(I don’t quite see where log formats simplify image treatment; one of the reasons scene-referred processing was started was to get away from a log-encoded image. Note that “Log + LUT” can circumvent the issues with log encoding!)
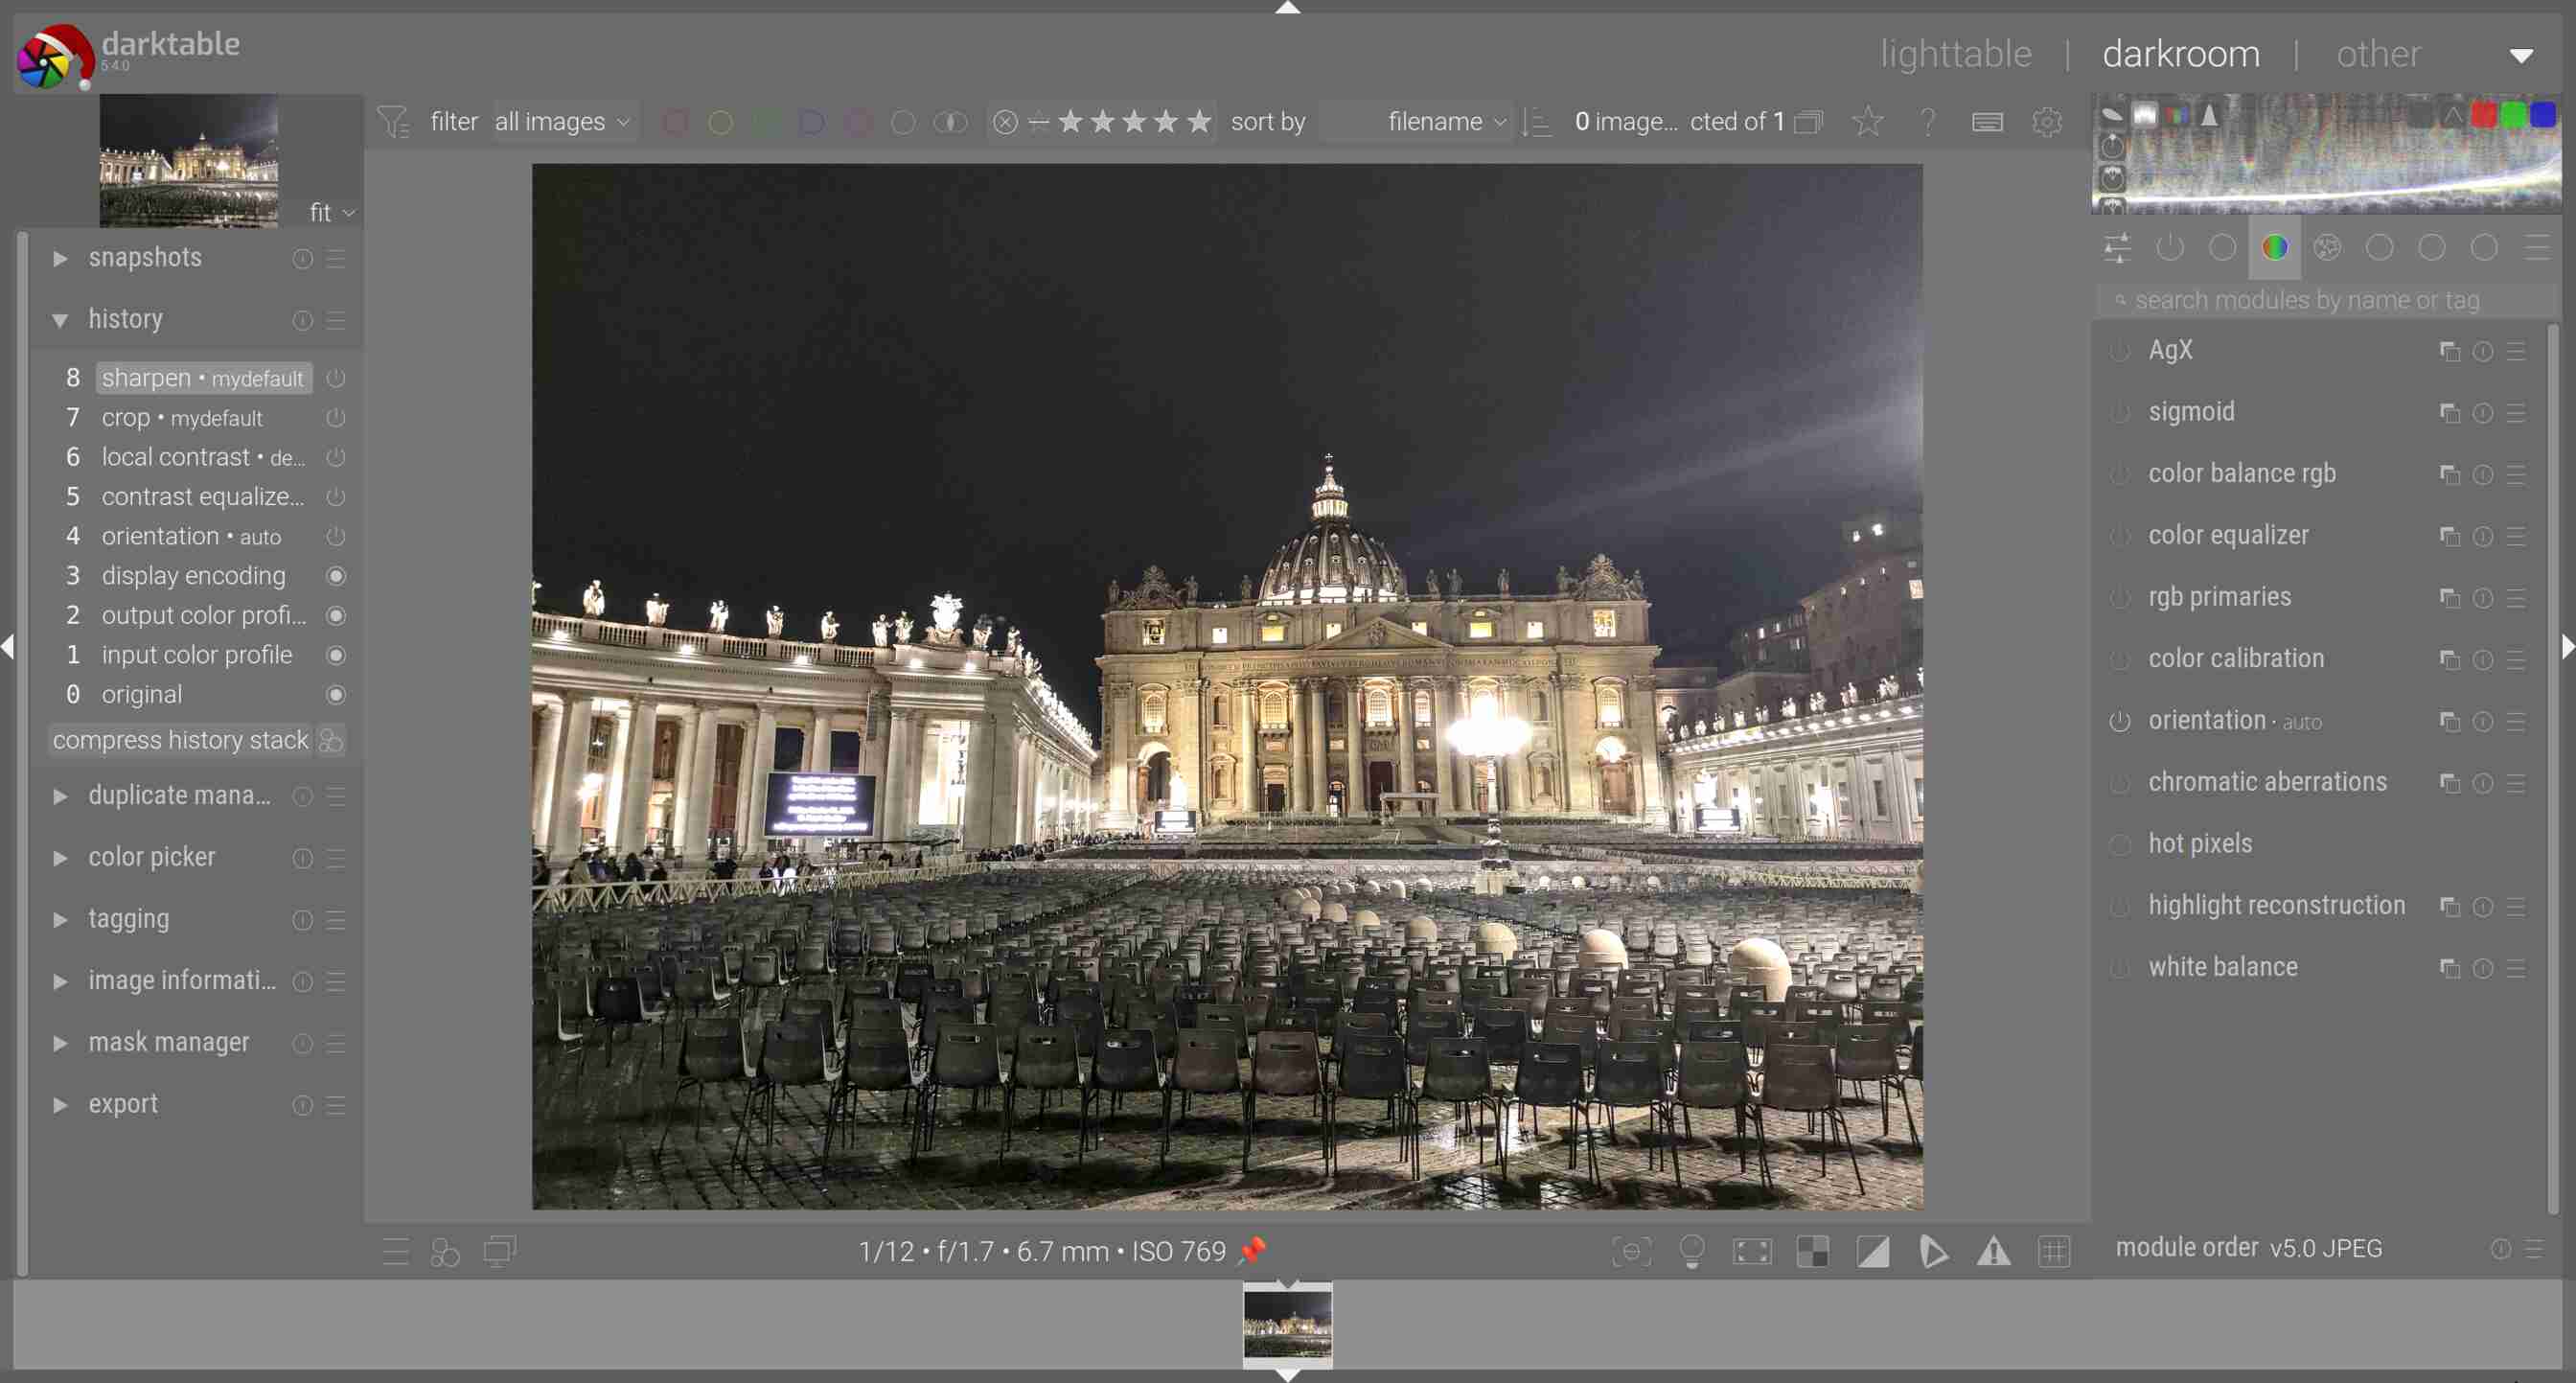
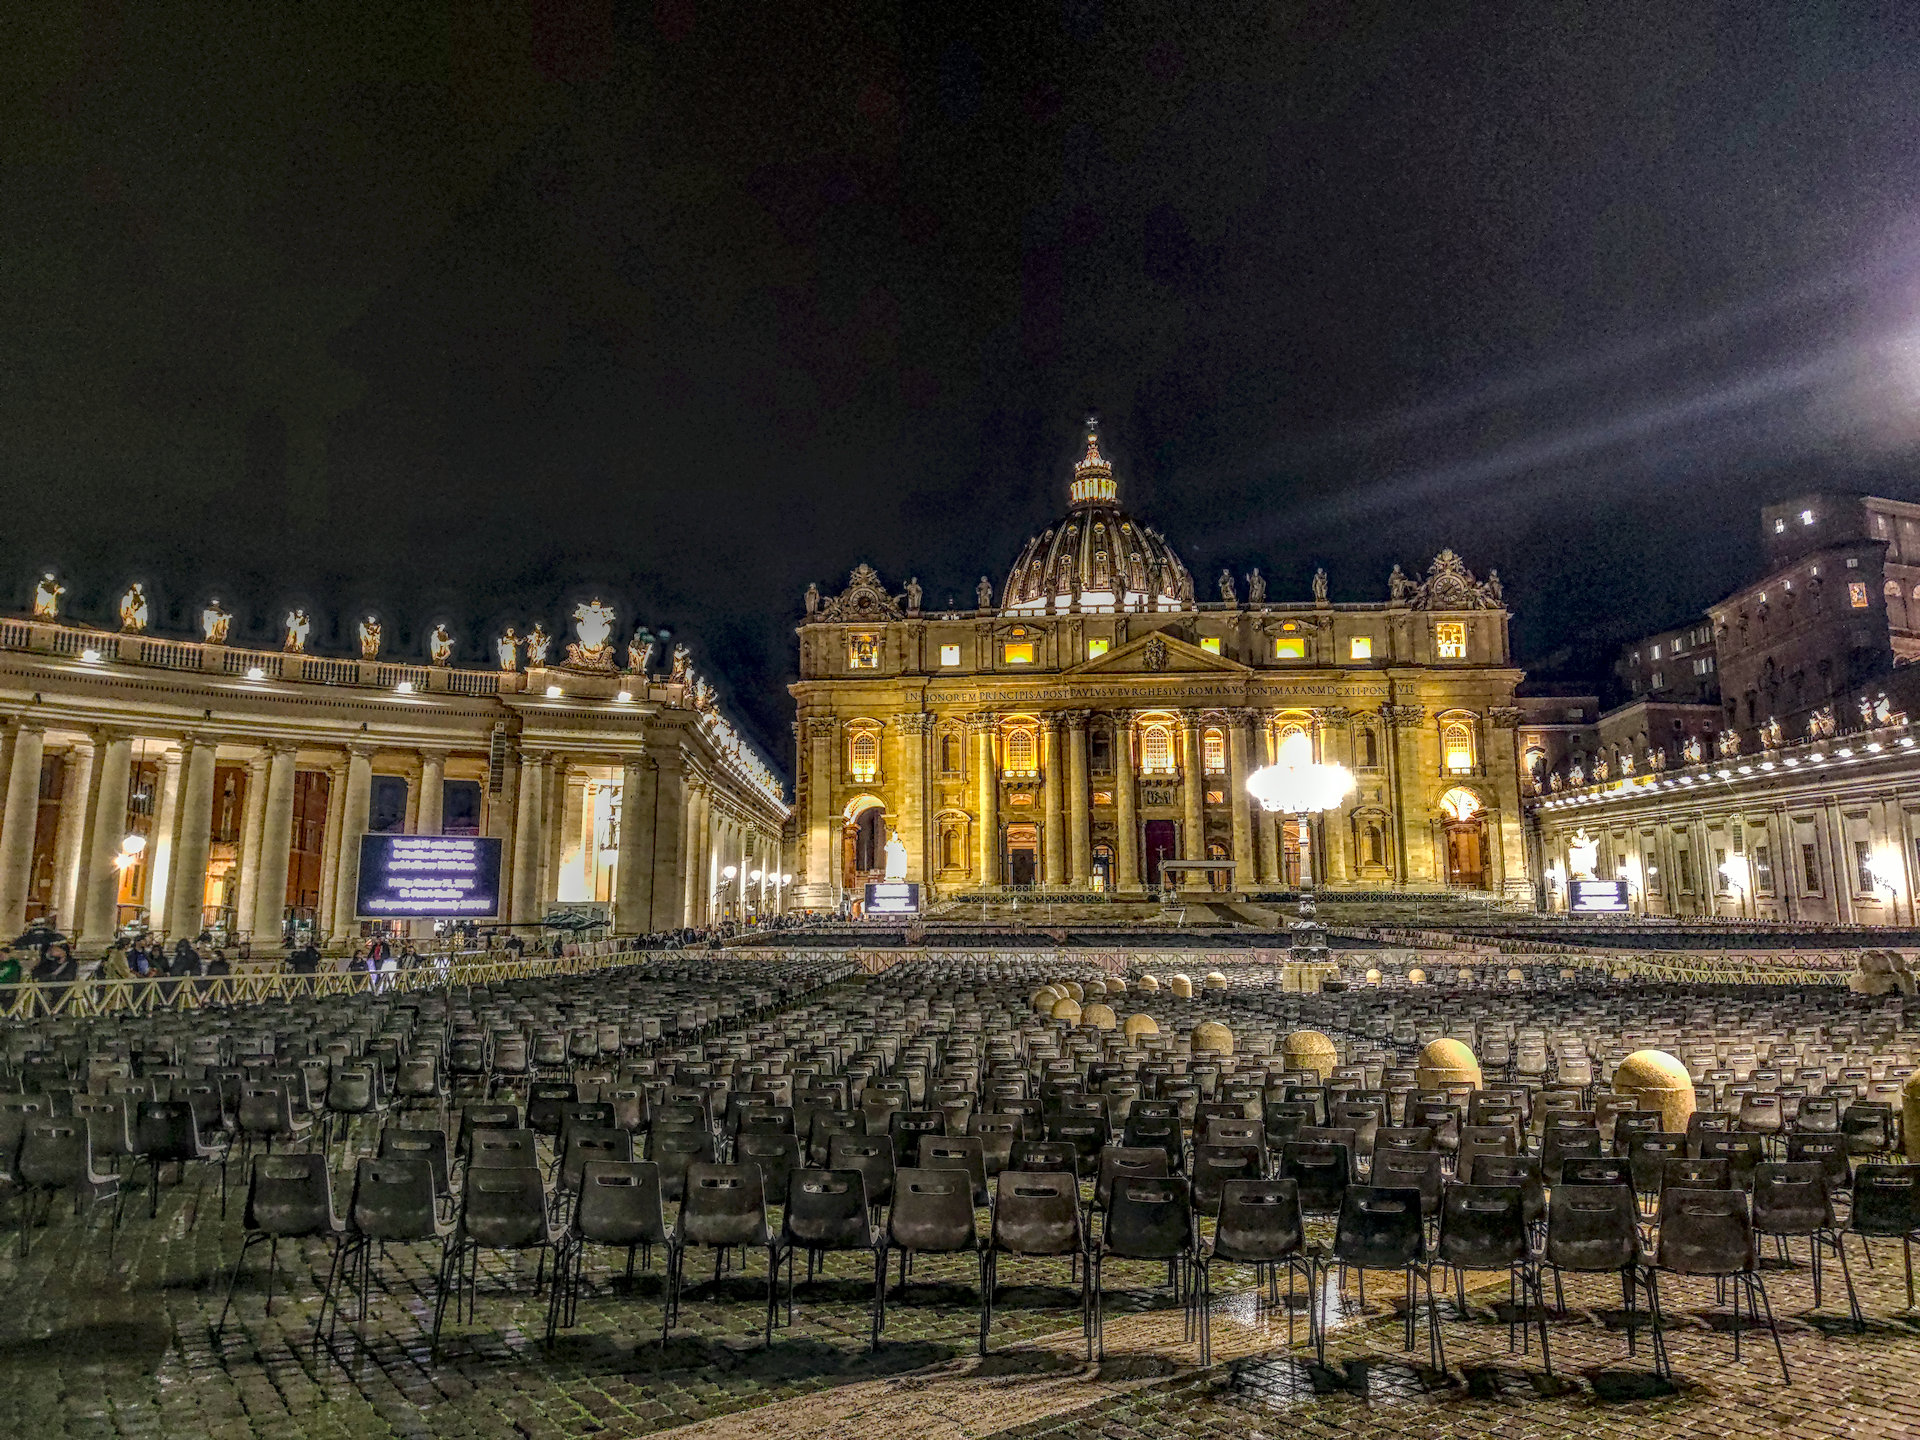
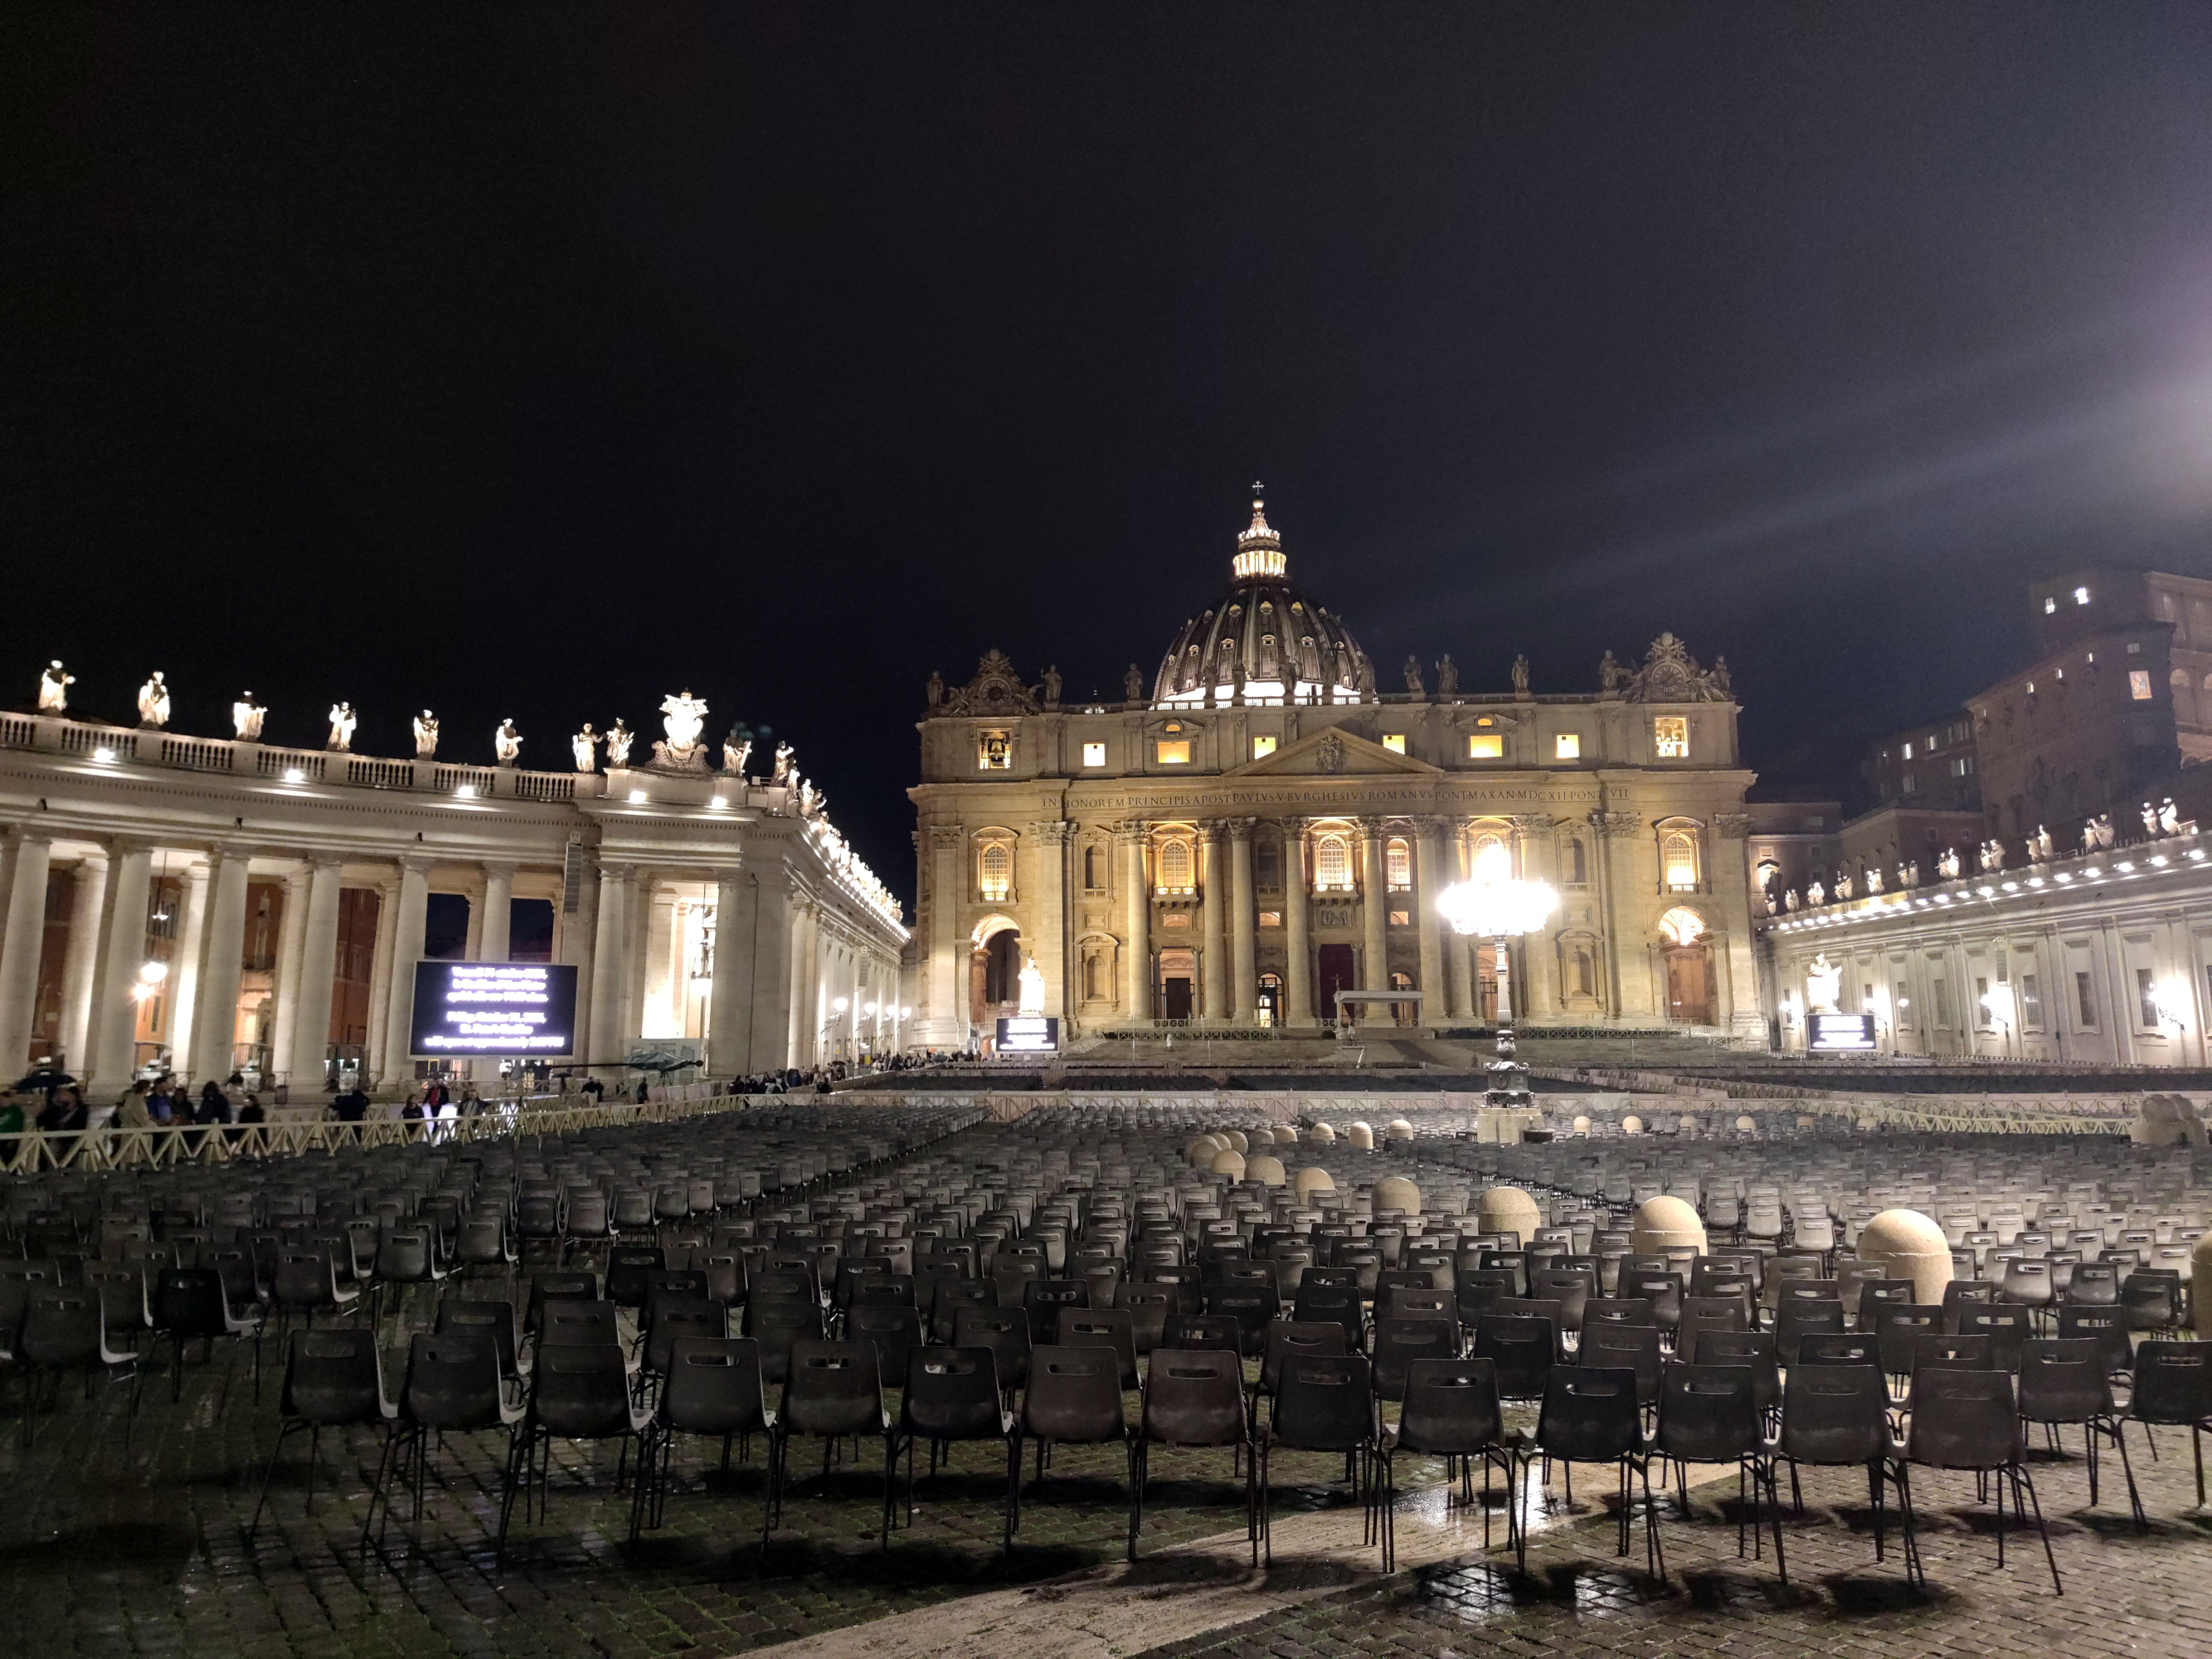
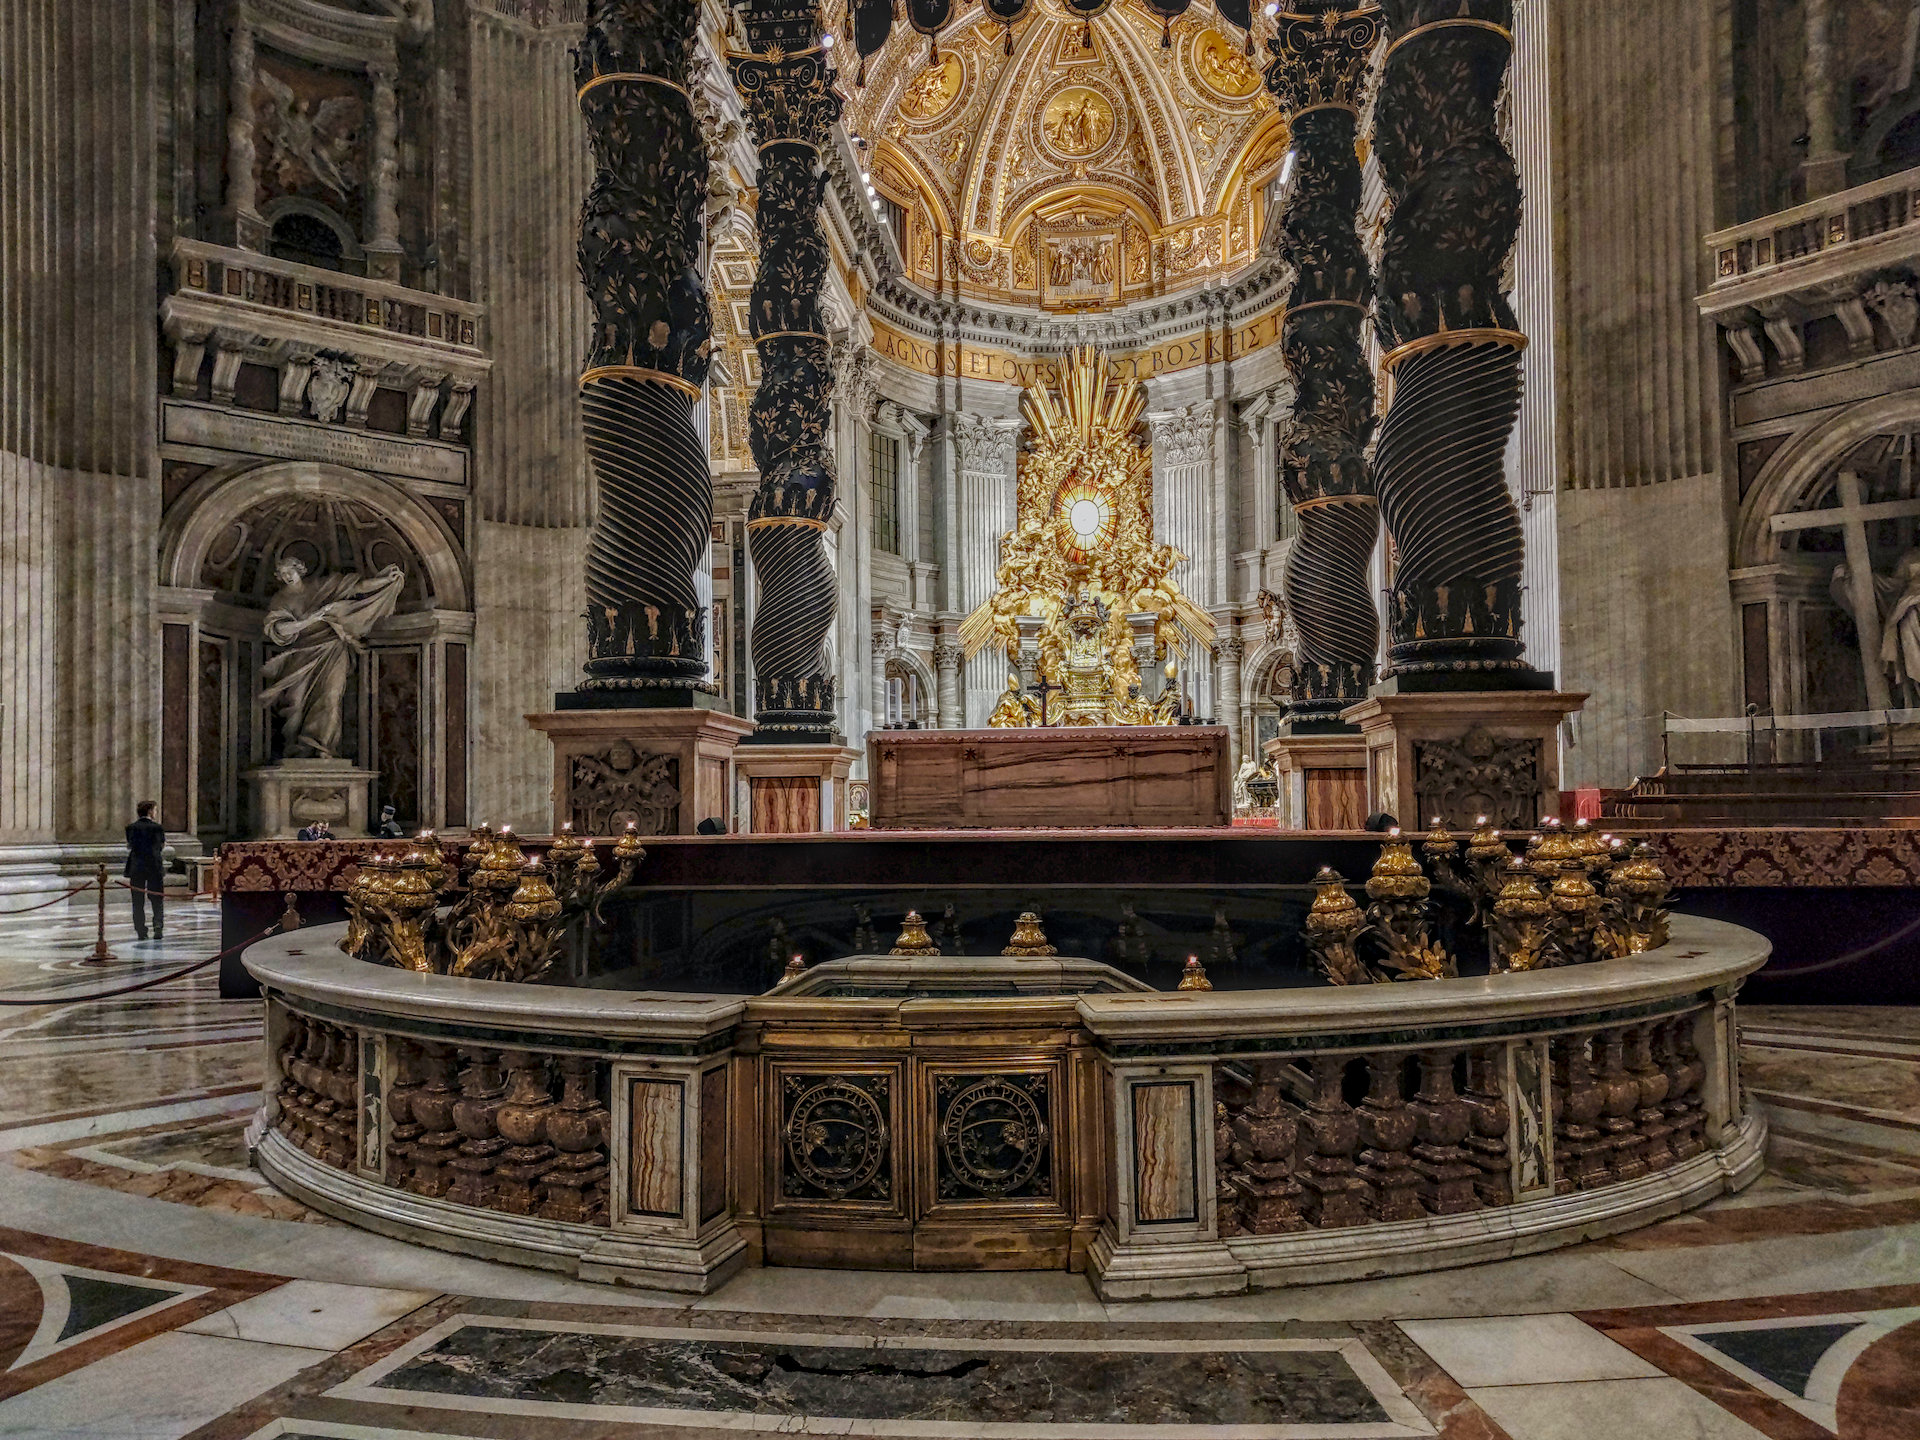
The first issue I have with this image is the blacks are not even black so the original exposure needed to be darker which would help preserve more of the highlights.
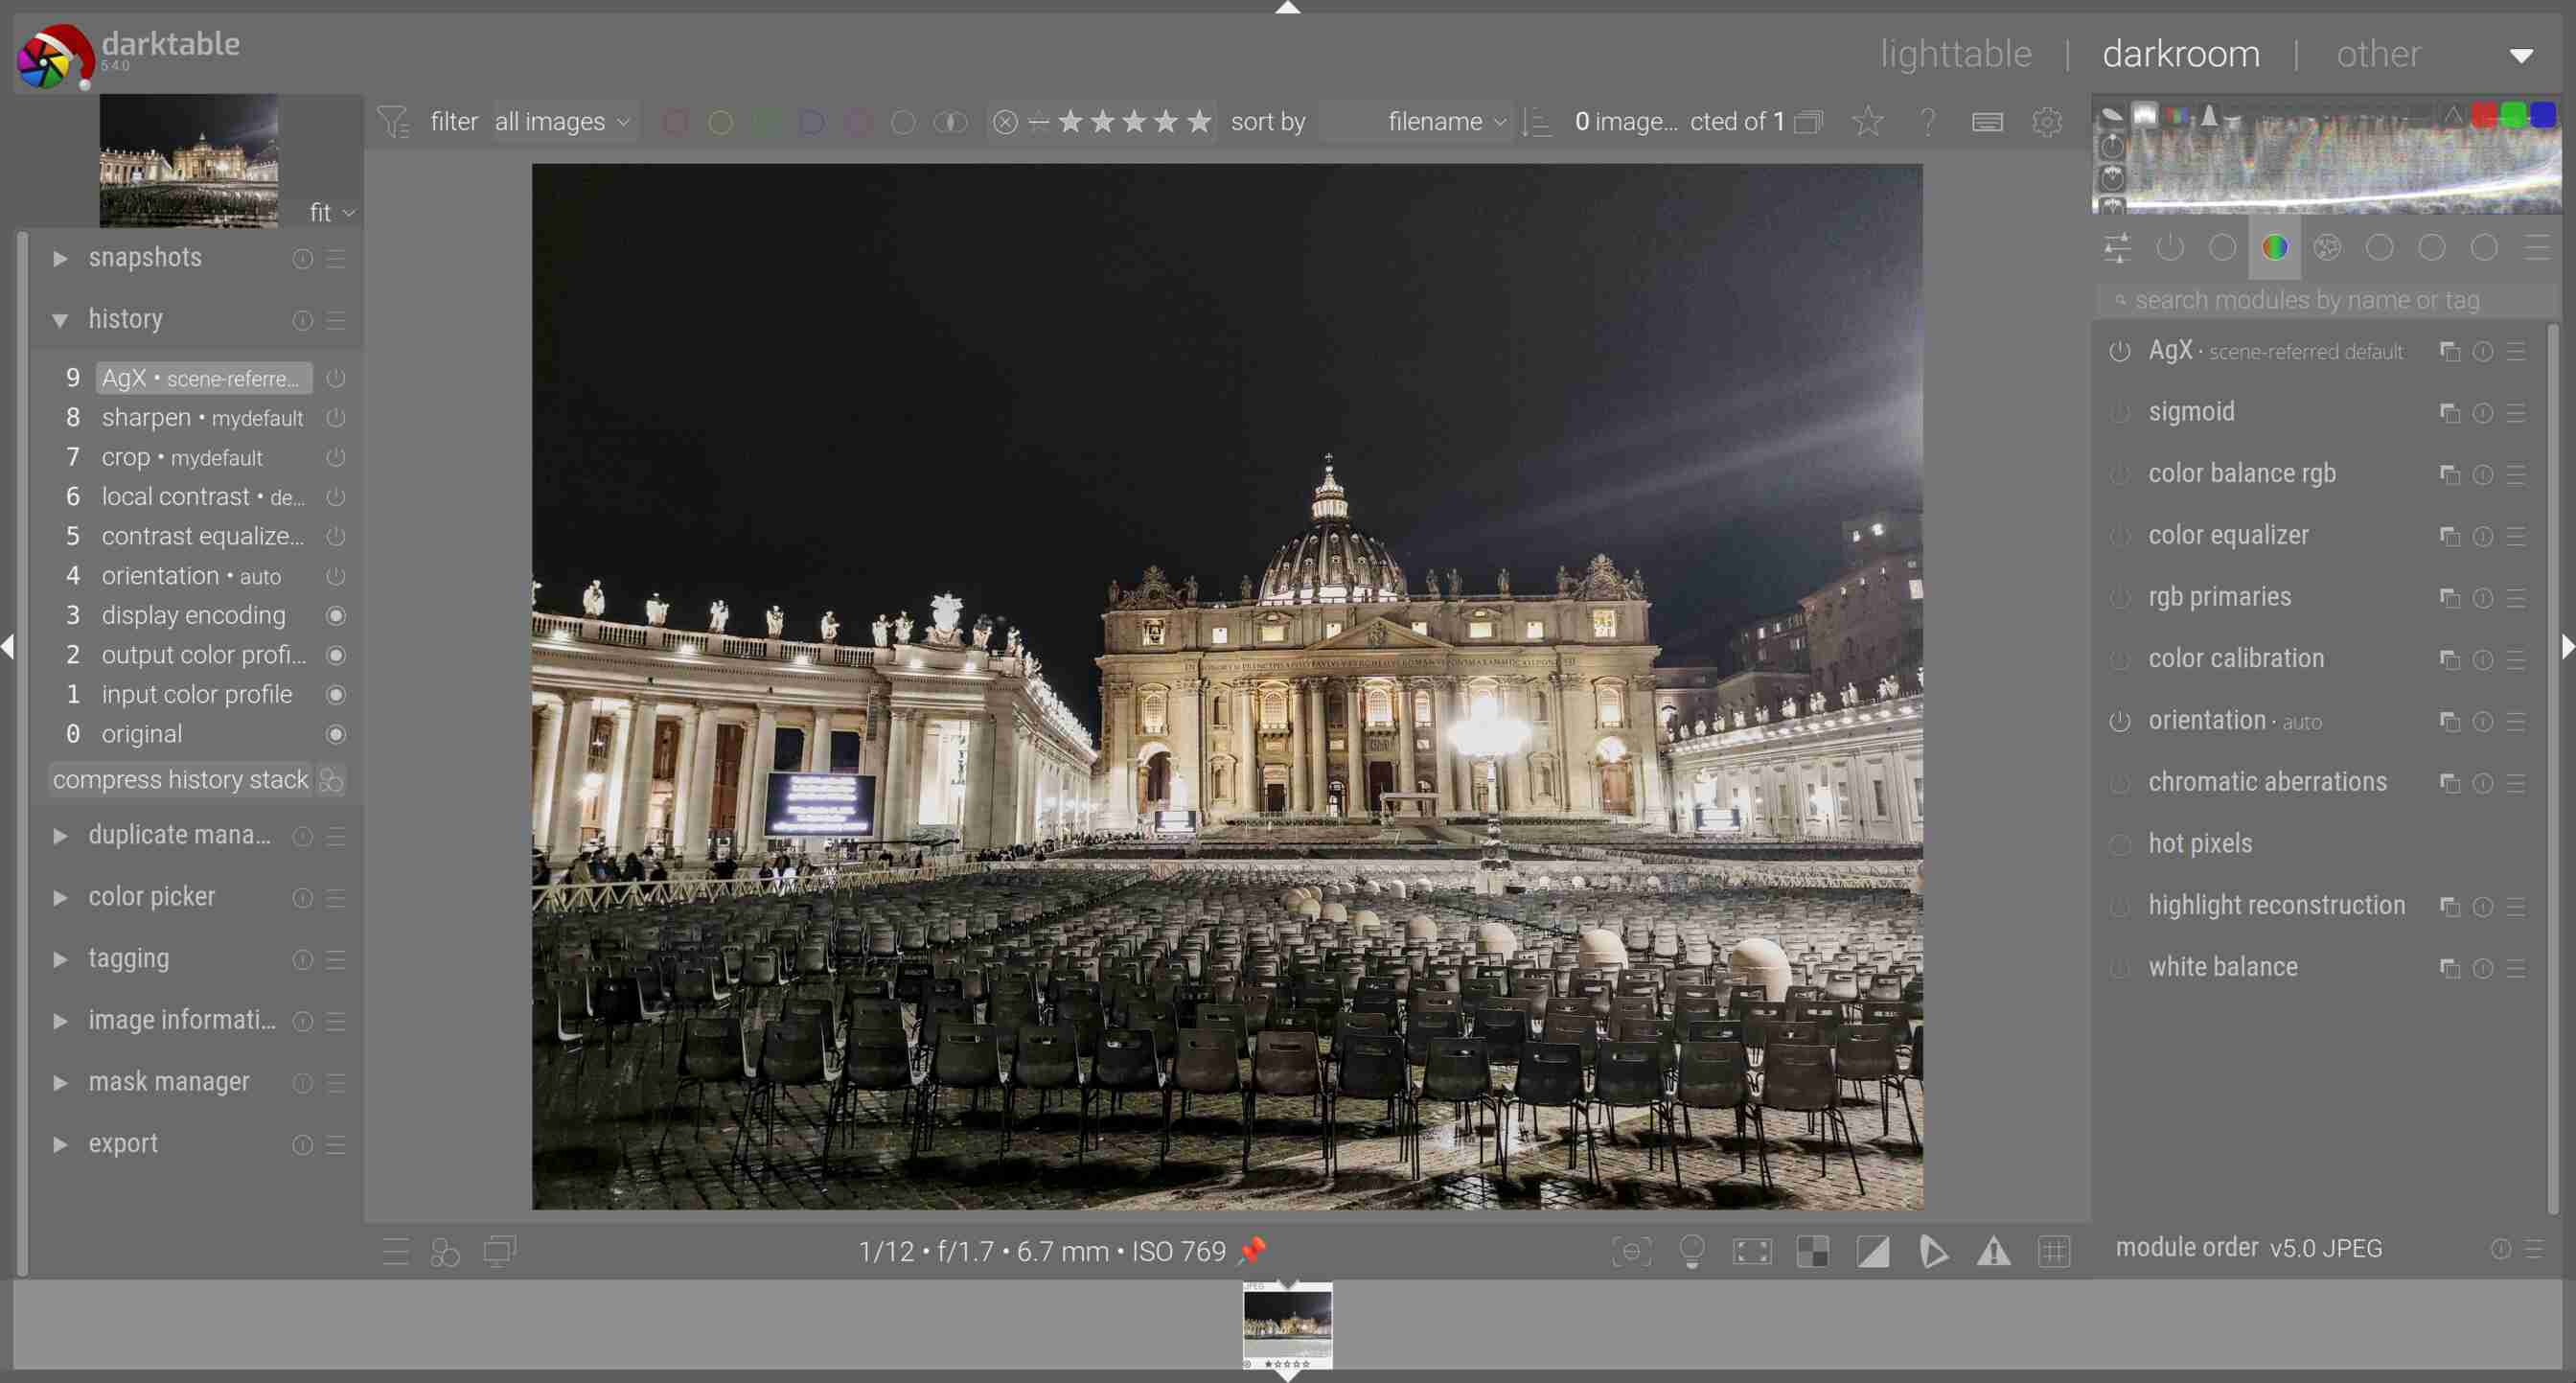
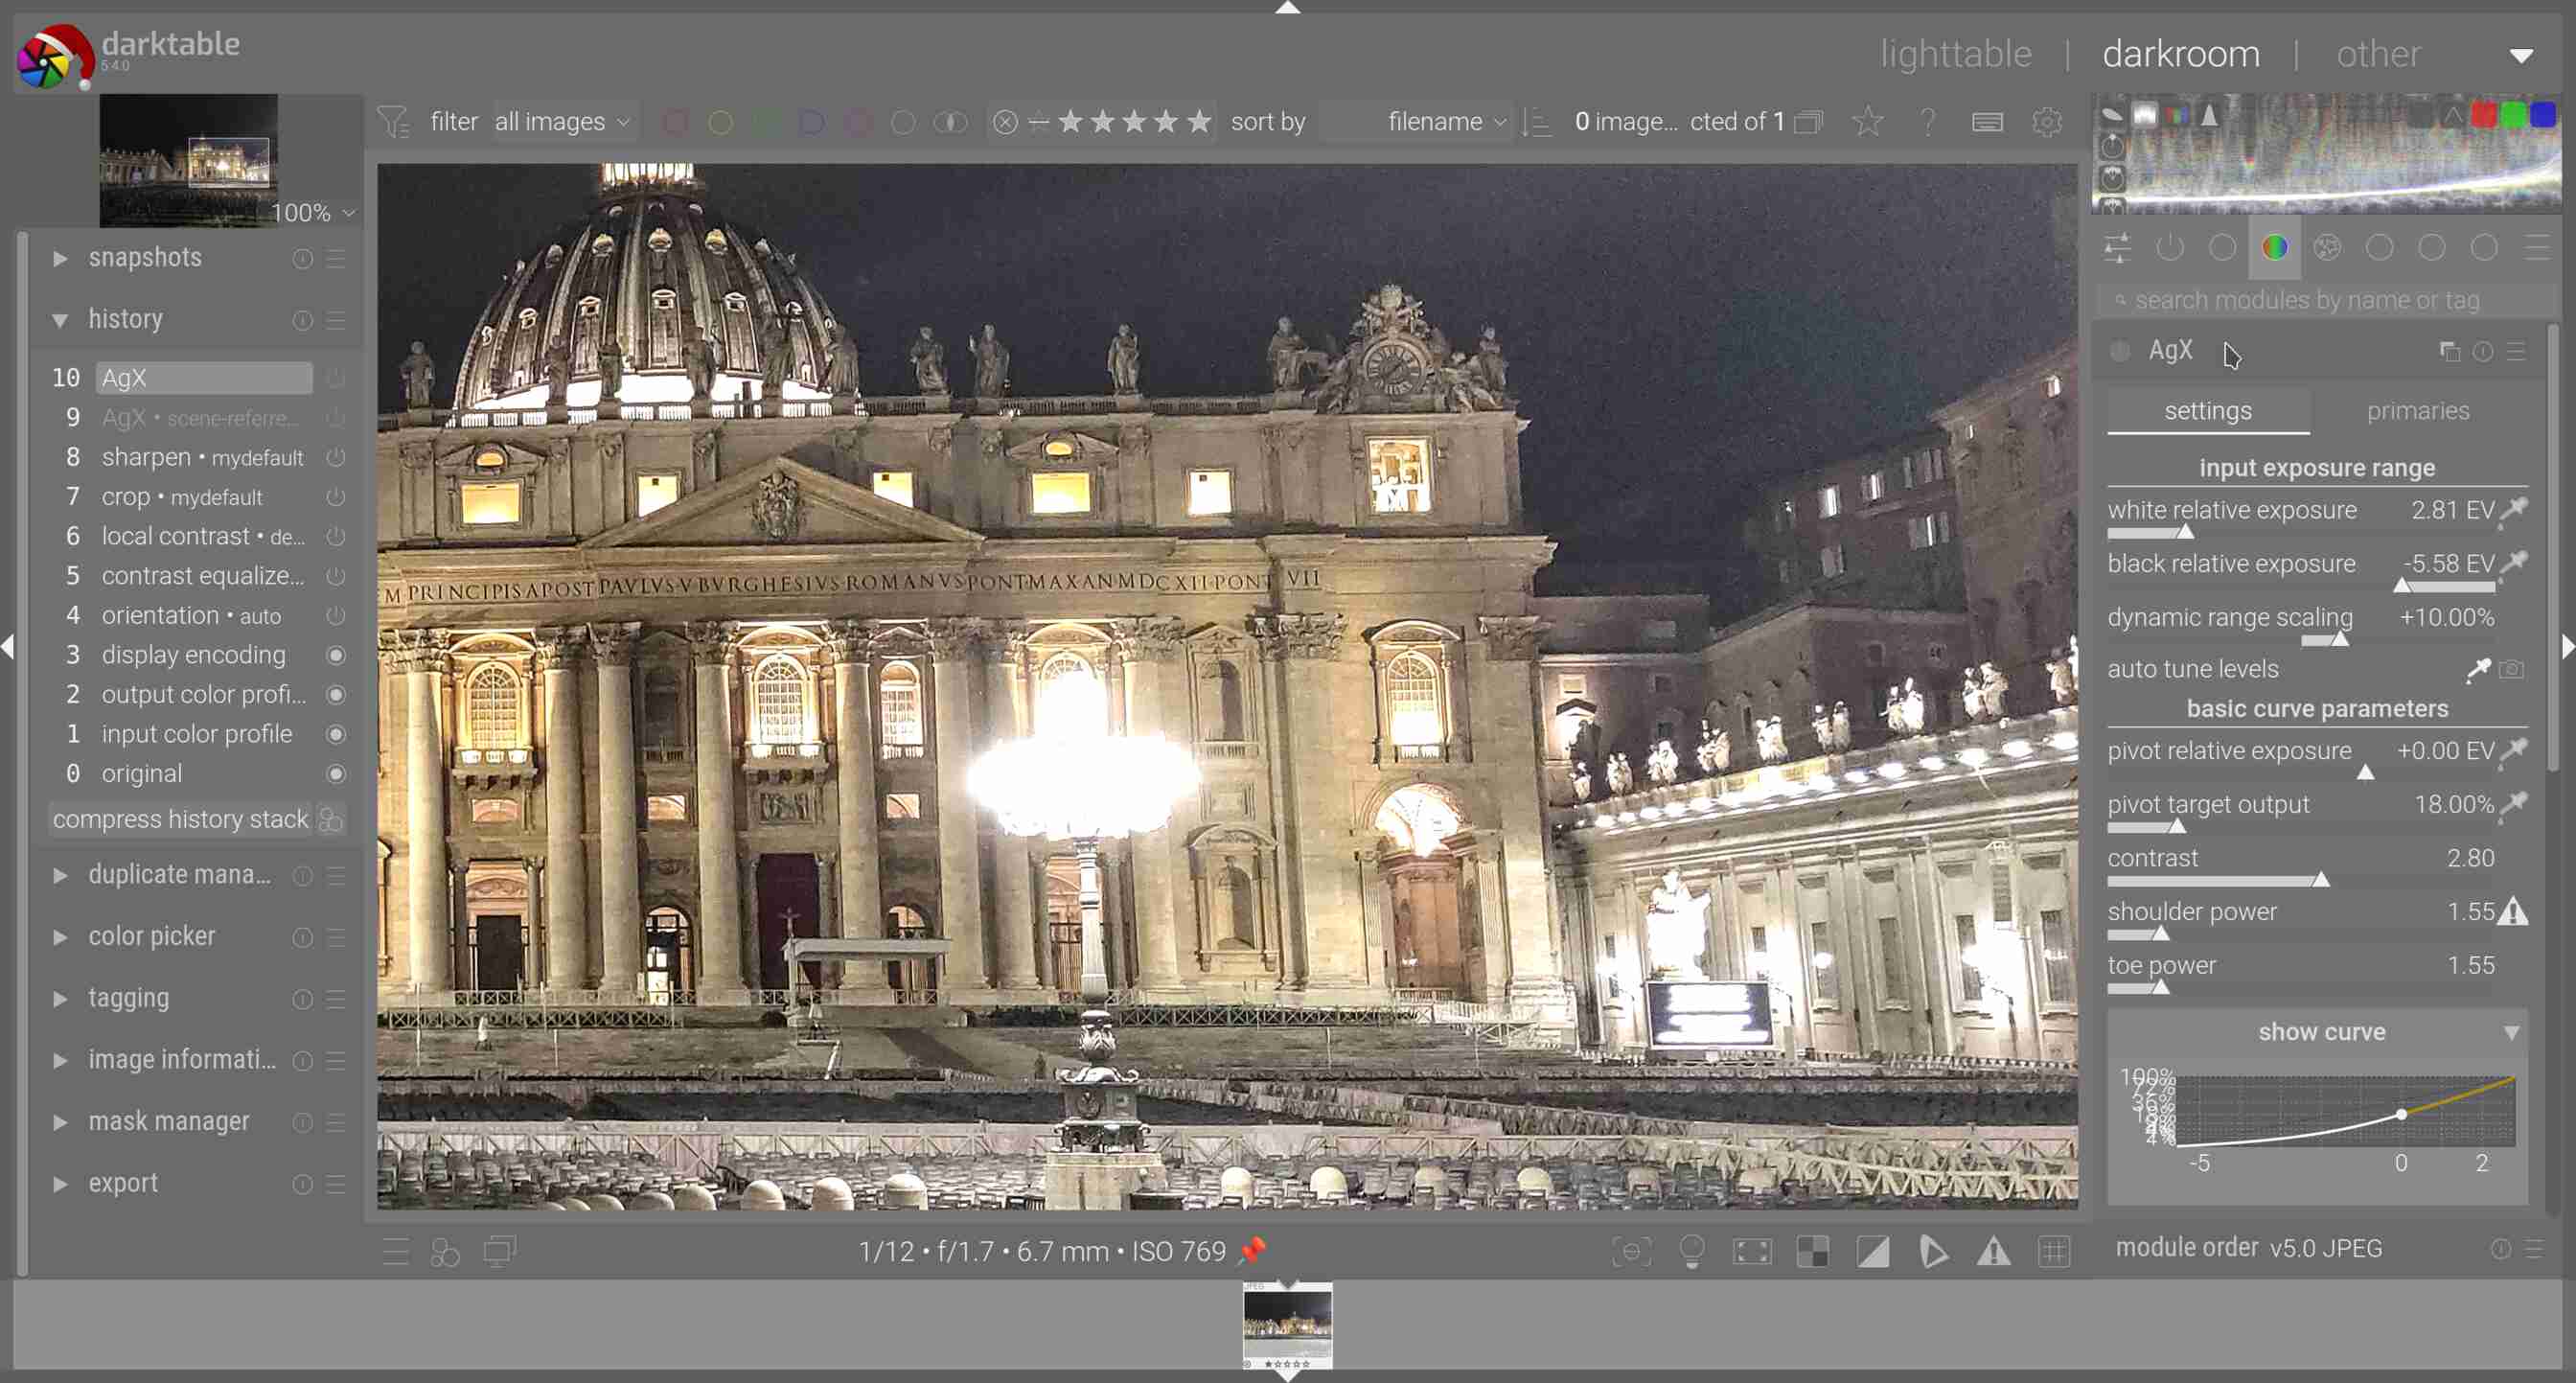
I opened the image in DT and used AgX auto tune levels and the image was improved.
I also open the image in GIMP and applied auto levels adjustment. DT is the top image and GIMP the bottom image. Judge for yourself. I am known to use color balance rgb, tone equalizer, local contrast, shadow and highlights, rgb levels and rgb curves for adjusting non-raw files, but I was impressed with AgX on this occasion.
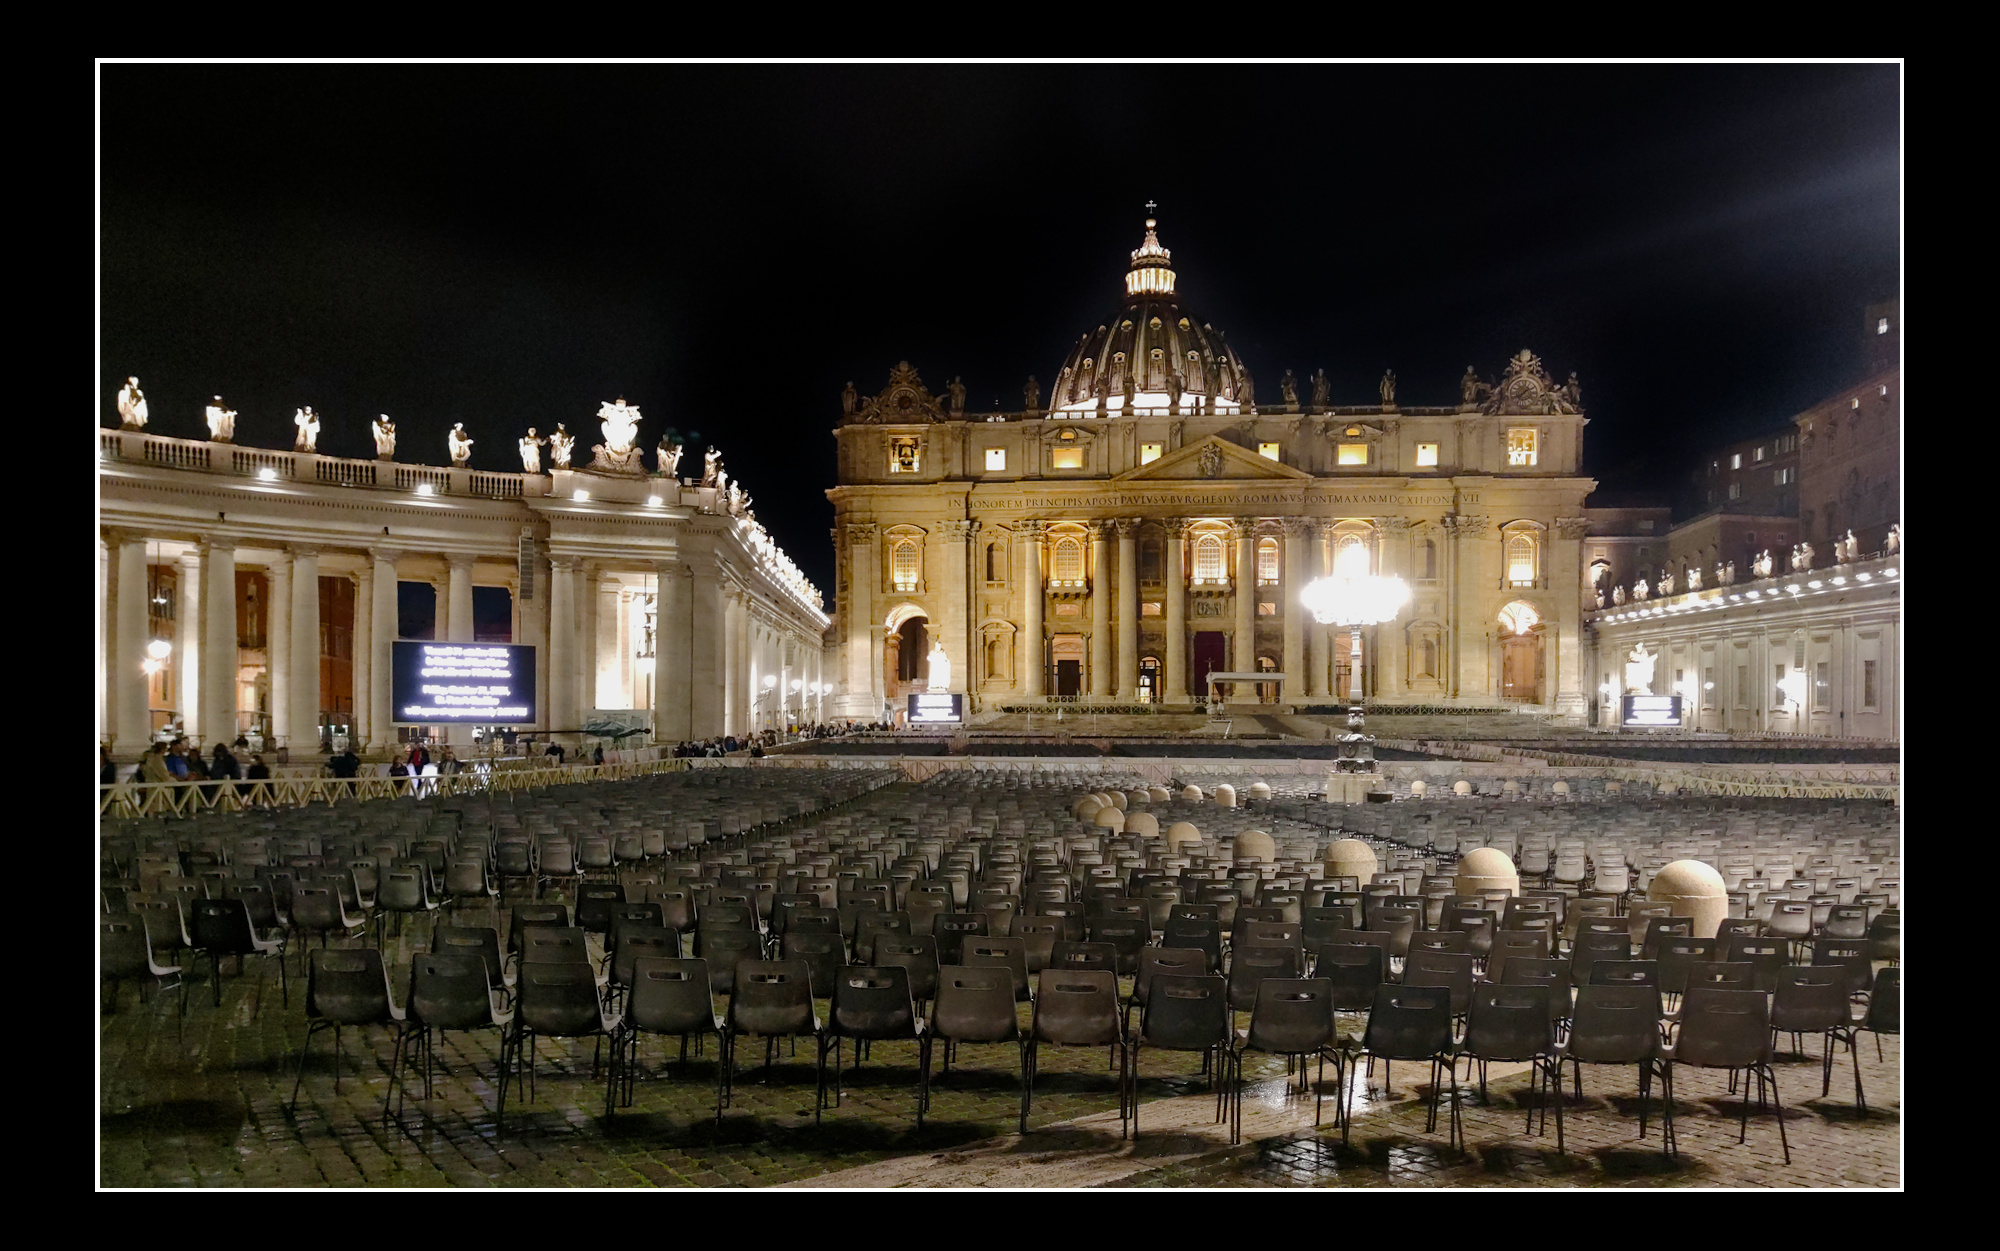
First I want to say, it is a photo of a family member. They are traveling with hand luggage only and say the mobile phone is enough, no place for a small Ricoh GR III. I think different, but I have to accept this.
Let’s forget the totally overexposed areas. Can any other agx-slider emprove the image?
Yes it is, Thanks for your image priort. The problem is, on the one side, the building should be not too dark, increasing the dark with tone equalizer increases the noise, so the light areas (must) get over exposed. Whatever you do, some areas are wrong.
The photo was taken as an exposure series of 3 and then the best was chosen. And it had to be not the best for the hightlights.
That is the point I described. Exposing according to the light, gets underexposed areas elsewhere.
That is one of my questions. So it is not limited to jpg, but to raw-files too. That means agx can be used with jpg-files in some situations.
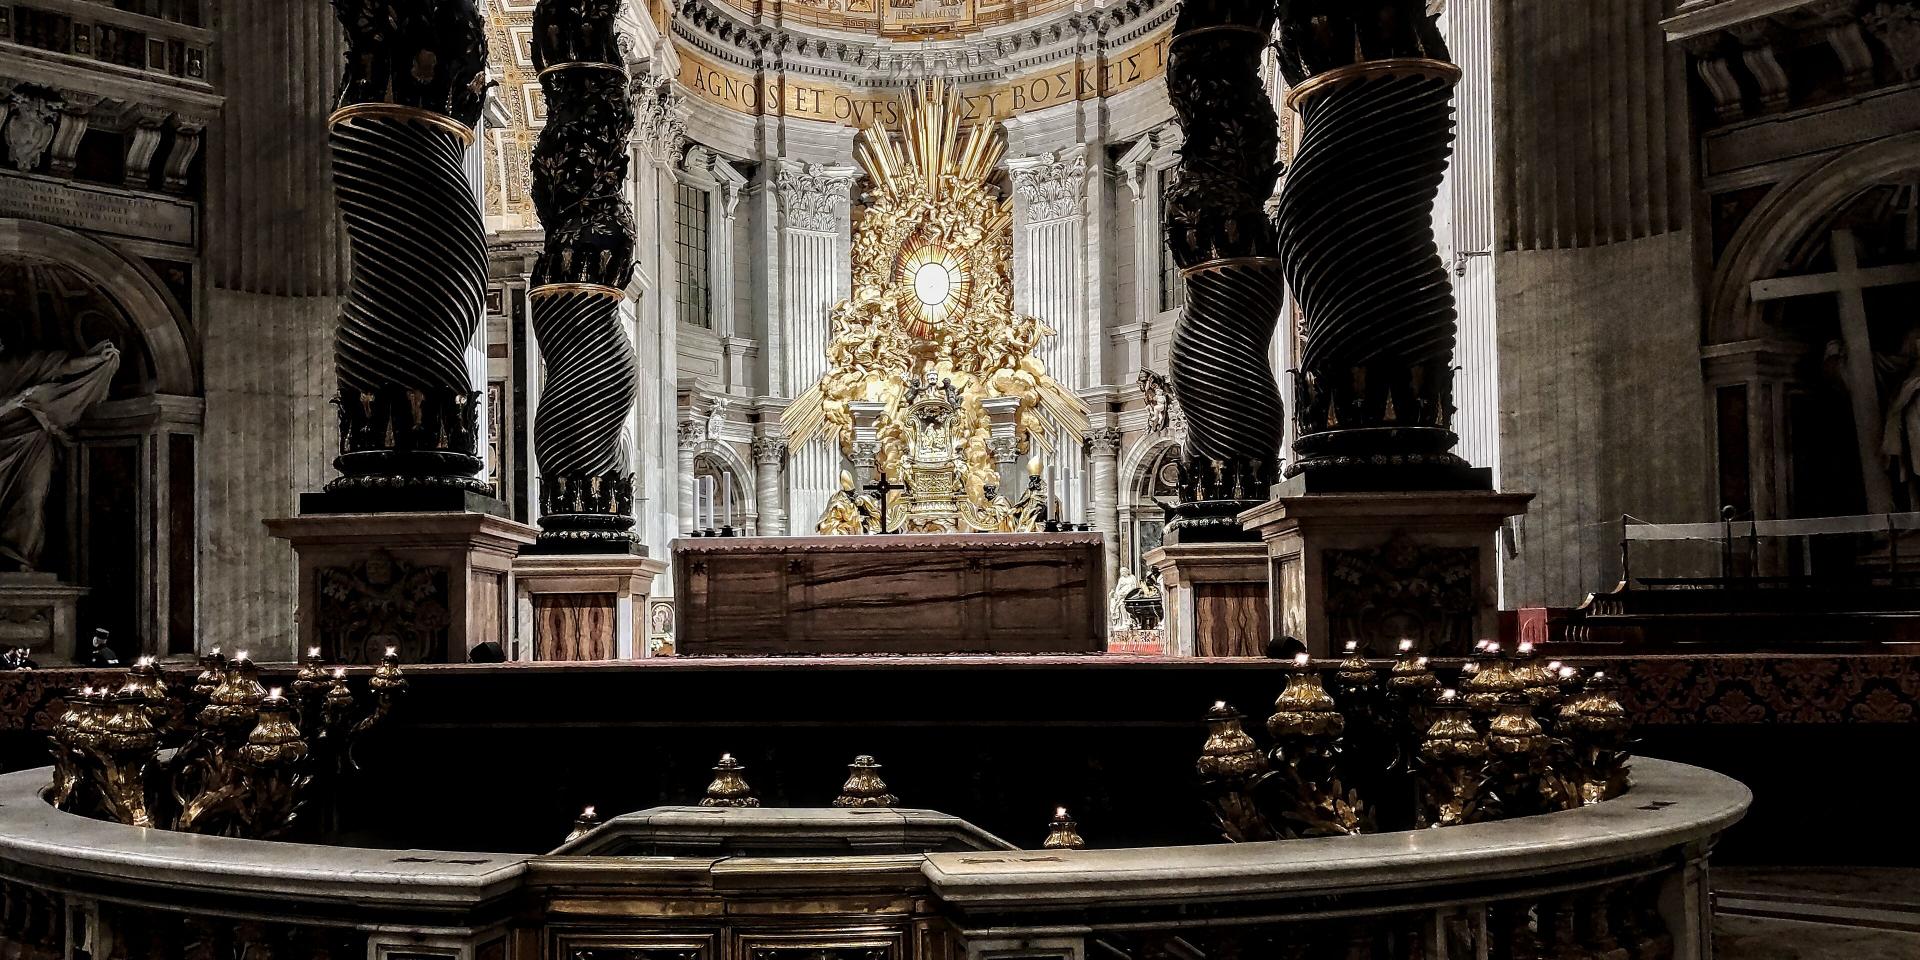
I have photos from the inside of the cathedral. I think the best dslr is limited there by the light. Of course with raw there are more possibilities.
That was about the first thing I said… Of course you can use (almost) any module on any file. Some are just less suited for certain file types… (and some, like “demosaic”, cannot be used on non-raw)
There are two main differences between jpeg and raw:
a jpeg has less data (8 bits/channel), where a raw file has at least 12 bits/channel (perhaps less for very old cameras);
a jpeg has already had a tone curve (S-curve) applied to the data (in camera or in earlier edits); so you may not want to apply a second S-curve…
The first item means that you have to be a bit more careful in editing, as there’s more risk of banding.
The second item means that shadow and highlight contrast have already been compressed. AgX (or filmic, or sigmoid) will compress them again, making it harder to maintain detail in those areas.
Sorry, I was glide-typing on the phone, and sometimes it inserts a word not shown in the suggestion bar, and I failed to re-read the text. I think I wanted to write intentionally shot underexposed JPGs. So, the images were underexposed by me to avoid blown highlights.
I think someone mentioned in another discussion (but I cannot recall who or in which topic) that they use a curve to undo the camera curve. I assume that would be an approximation, but as long as the result looks fine, why not?
The new sharpening in 5.4 is part of the demosaic module and therefore only applicable for raw, but DT has many great sharpening options that will work on a jpg.
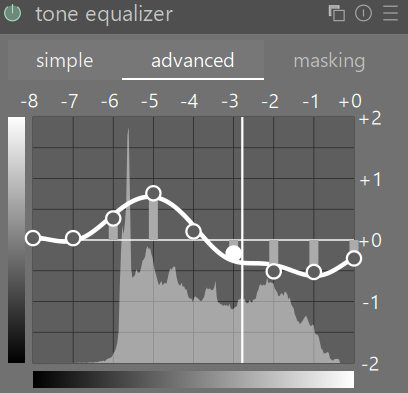
With respect I would say this argument is a mistake. On tone equalizer the shadows of the cathedral are placed around -3EV which is a long way from black. It is easier to brighten shadows and recover shadow details than deal with blown highlights.
I had a bit more of a play with the picture. I am happy to include AgX in the process. My main problem still was the overexposure which I couldn’t do anything about. Jpgs are best under exposed rather than over exposed if it is not possible to get correct exposure for the whole scene.
You can still do some things with the JPG…again maybe not at all the look you wanted but as Terry and some other note you can get a bit out of the shadows… As the one shooting you would know best where to land with something like this ie darker or some other version with less color or contrast…