I’ve been through the documentation on the pixelpipe and processing order, scene- versus display-referred workflows, and other basics. I’ve also watch some of Bruce Williams videos. Actually, I am learning quite a lot from your first couple of videos, just to see how specific modules can be used effectively.
I find it’s too easy for me to overdo various effects, so my end products look unnatural. Just watching how you make adjustments that look minimal at first, but contribute to a desirable final product, is very helpful.
I’ll skip ahead in the videos and watch those that seem most relevant.
Hi’ Boris
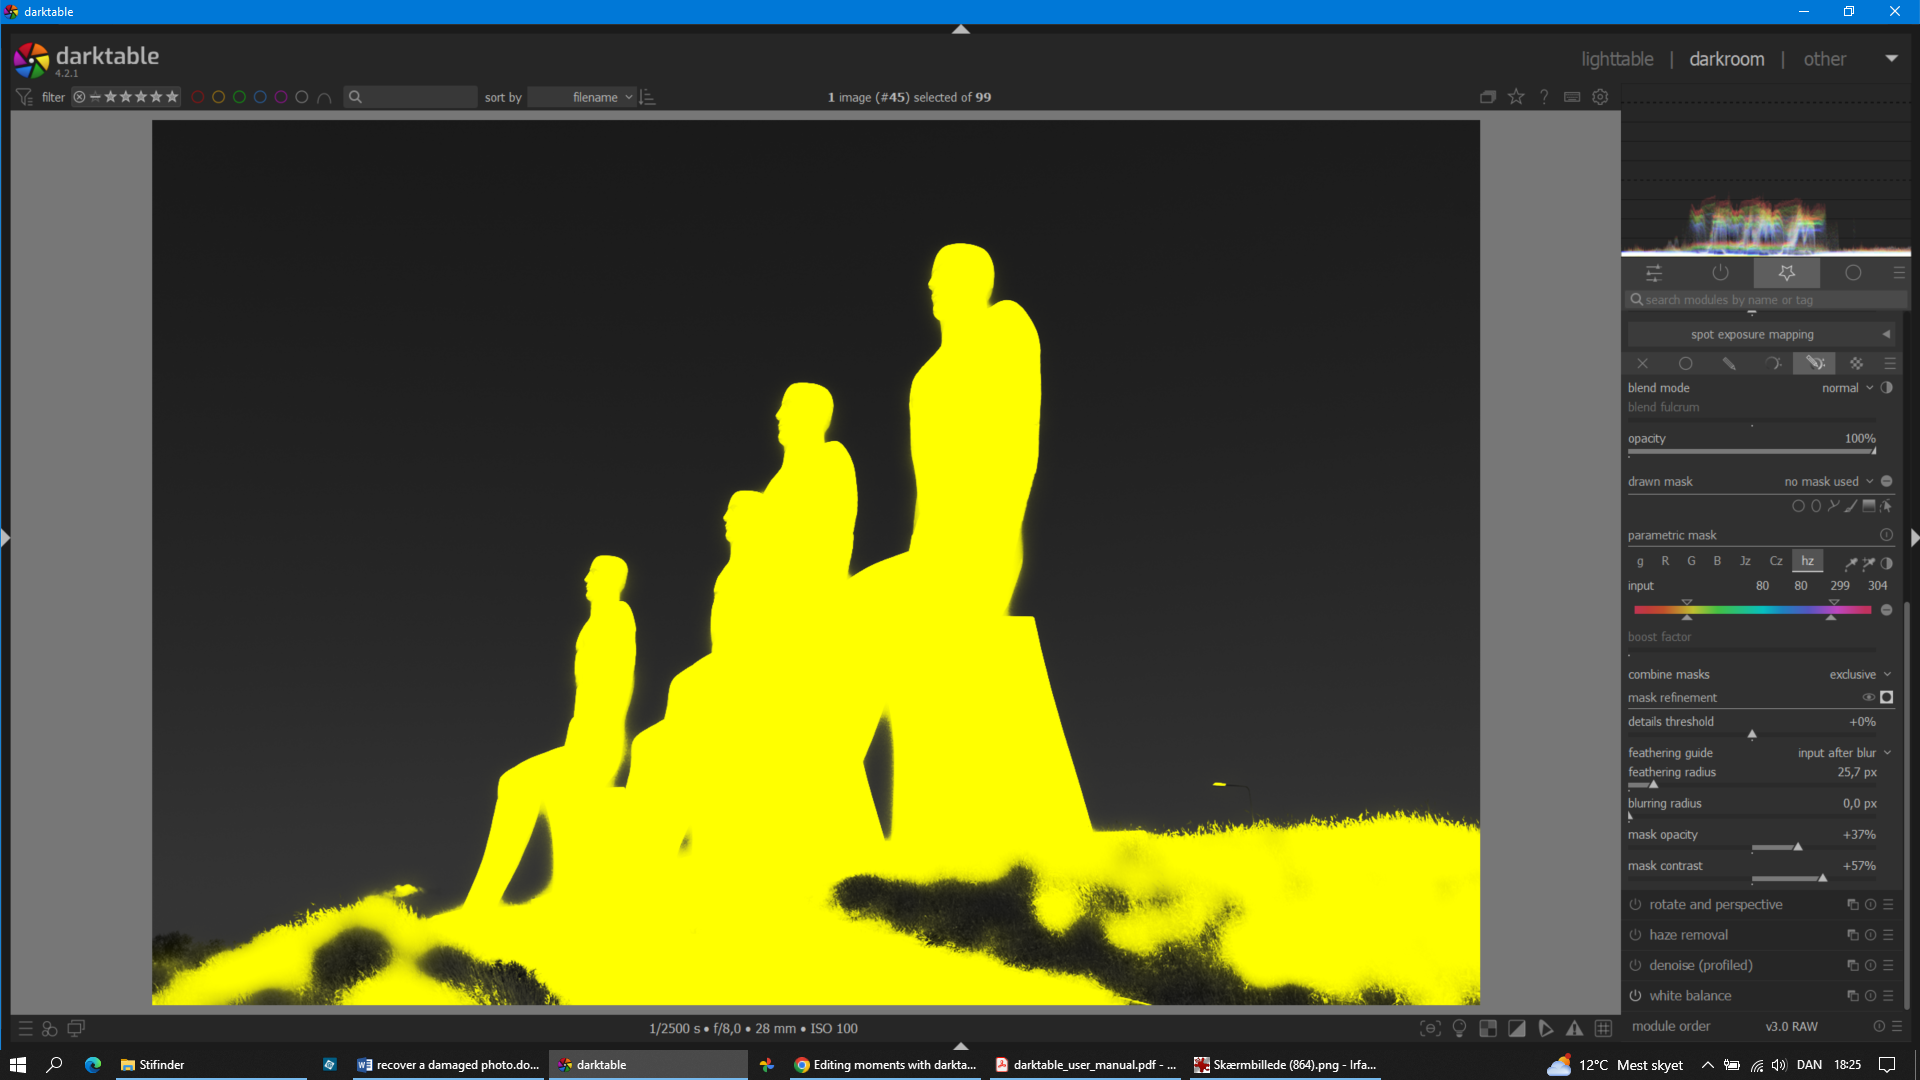
I was impressed by your simple and elegant result so I tried to copy the method but did not succeed! See below. The slider settings in the parametric mask are the same as yours but the result is very different. Why is that?
I can get closer to your result by adjusting the left set of sliders somewhat but then I fail to get details in the grass and no details in the statues. Mask refinement isn’t easy after all. Maybe a subject for another video?
I do not know. I use the developer version, it may be that something has changed that affects the masks.
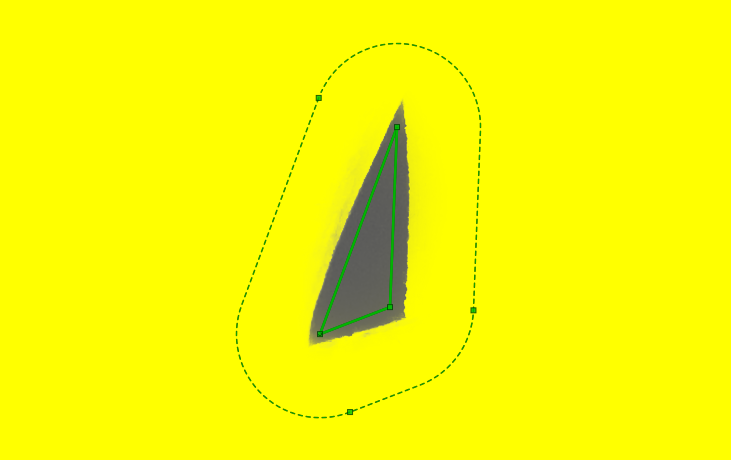
Nevertheless, the masking is pretty good. Now why don’t you use the drawn masks to remove the rest? They can also help with the places where the figures “bleed” into the sky.
No, I’ve already covered that in episodes about the masks. What is left open? What remained difficult?
Yes, I know but that’s not the problem I am talking about.
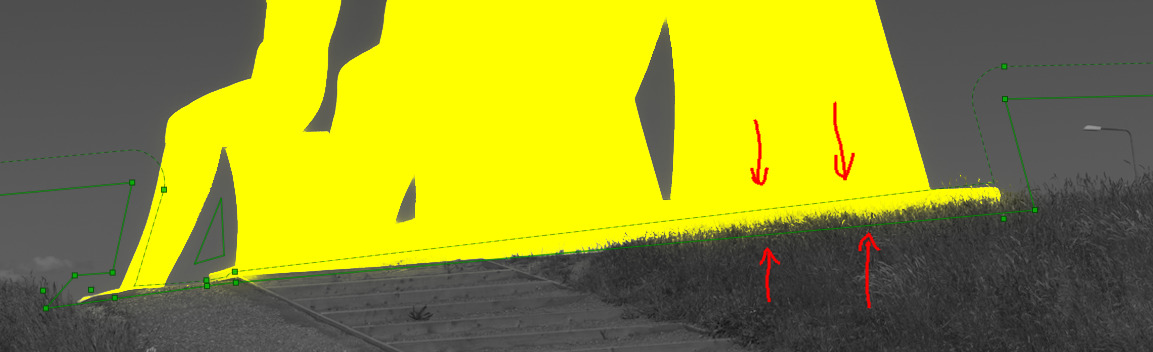
The result of the parametric mask is not the same. Look at the grass at the base of the statures and at the body of the sculptures.
What the Pascal means and so do I, in my example above I also used drawn masks to remove grass. You can see the two drawn masks in the snapshot. This is not the result of the parametric masking alone.
Maybe that is where the misunderstanding lies
Are you using the exact same modules and sequence… if not your input data is not the same and the same slider settings are not going to give you the same mask. In that case you can copy the approach that Boris used but not the exact same settings to get the parametric part of the mask… and then as he notes he has used some drawn masks for some further refinement…
It’s not a problem with the missing drawn mask.
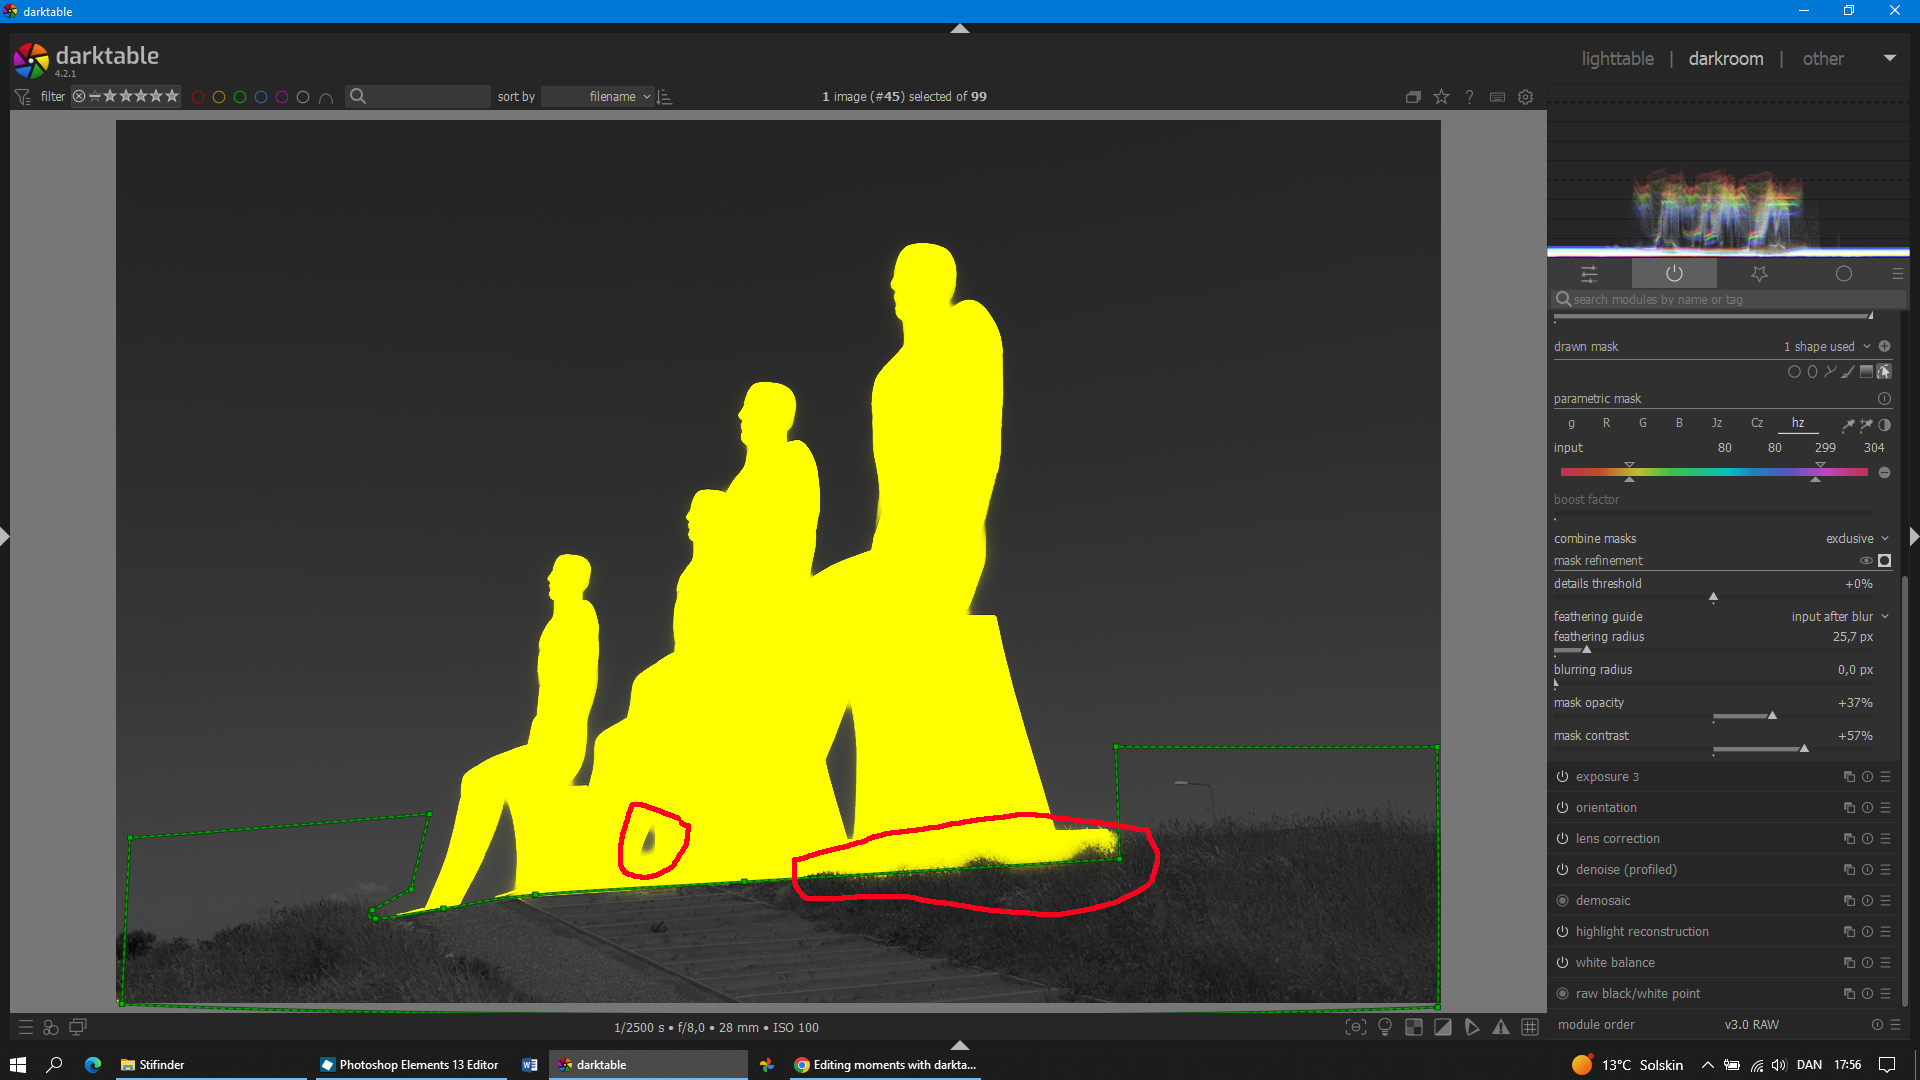
Here is a screenshot with the drawn mask. Look at the areas marked with red. Here you see some big differences.
You can also see my active modules. I think they are the same (mostly?) in both cases.
You also seem to have more than one exposure… There is chance that in your current history you have changed the pixels luminosity and/or shifted there colors. So it is expected that the parametric mask behave differently in this case.
You are right about the feathering of the drawn mask. What should it be to follow your edit?
You didn’t clean up other areas by means of drawn masks, did you? So there is some difference.
I added an exposure module because you have an extra exposure module in your edit. It makes absolutely no difference.
I am sure if you ask then Boris can just share the xmp and you can see where yours may differ… there could just be a small setting somewhere that is configuration specific or an oversight…
The bottom line is that for your parametric mask to be identical then you need identical input data
I had thought of asking for a copy of the XMP but I know that Boris uses a developer version of darktable. I have experienced earlier on that the newest standard version of darktable is not able to apply a developer version XMP.
Is it “easy” to deduct module settings by inspecting the XMP? I have never seen such a deduction demonstrated in this forum.
You can hover over them in the history stack once you load the xmp and it shows what is changed but I often find that display a bit overwhelming so I think most people just use snapshots to determine a reference and then work from the bottom to the top of the active modules stage and look at the module settings, number of instances and the order… enabling and reactivating where you are curious to see what the impact was …
Yes, you are right (as always…). The feathering of the drawn mask does the trick!
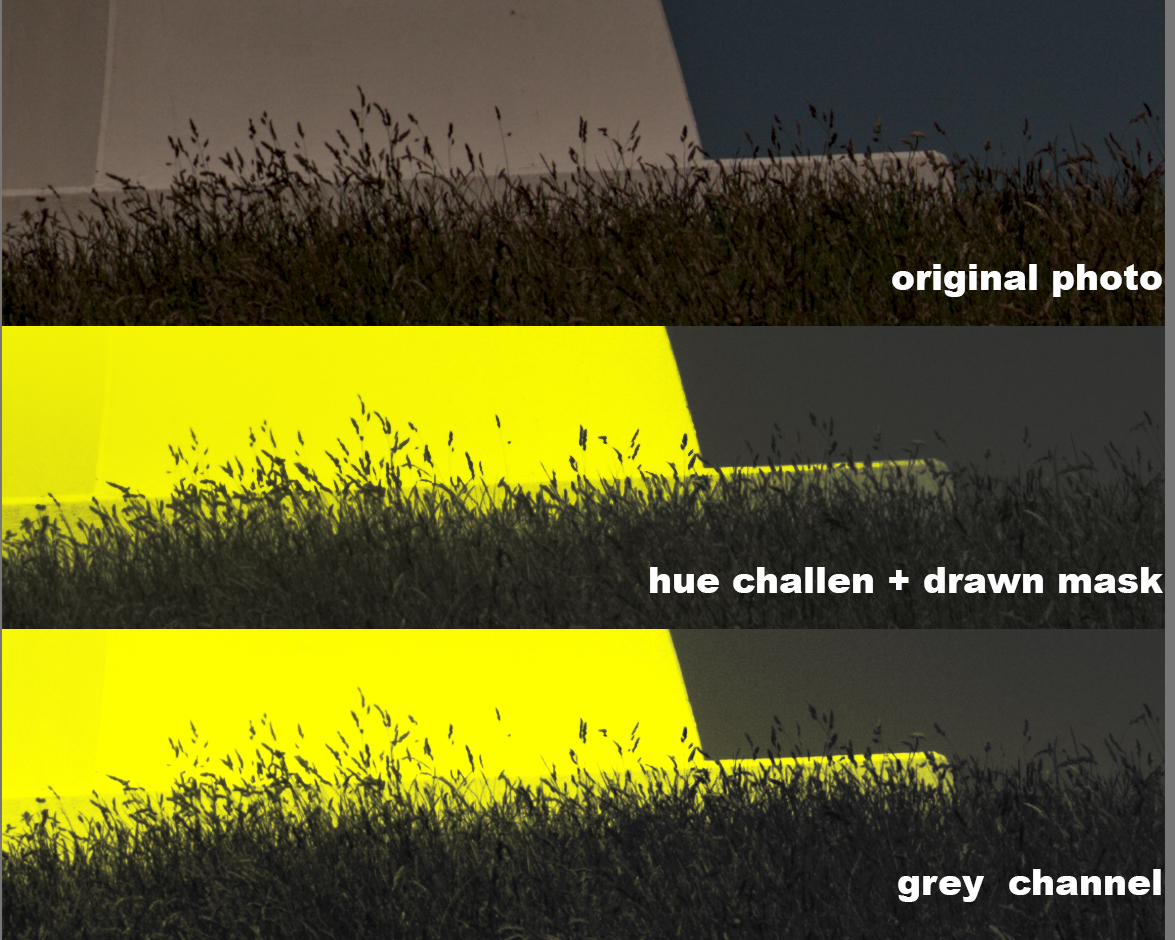
Creating a mask taking care of the fine details in the image is one of the most challenging tasks in photo editing. Inspired by your excellent series on masking I have tried to create such a mask using a combination of a parametric mask and drawn masks.
I’m impressed by what can be achieved. Feathering seems to be the most important tool, but choice of channel, the setting of the channel sliders, the shape and feathering of the drawn mask, mask refinement by means of blurring radius, mask opacity, mask contrast and exposure of the input image play a role as well. Many, many things to tune.
Actually, the grey channel turned out to be an even better choice and easier if I only look at the grass at the base of the statues. See below.
Tuning the mask in respect to the straws of grass may lead to unwanted changes in other parts of the image and you have only limited possibilities to handle this.
The manual explains under the heading “inspecting data channels & masks” that “Press the letter M to see the resulting mask for that slider overlaid on the image”.
I thought that I could inspect the masking effect of the setting of the individual color channels by pressing M but I always get the combined parametric mask.
First thank you so much for you videos they are a great compliment to the manual.
I am curious how much time you spend masking and editing your personal photos compared to in the videos?
I am sure we do not see the full fidelity of your screen on YouTube, and you probably make time accommodations for the sake of teaching rather than the finished work product.
Thanks
It would be great if you could use a cursor highlighter for your videos to make it easier to follow.
It depends on the purpose and assignment. When I work as an event photographer I do not spend too much time on processing individual photos. It’s all about quantity and a solid look.
When I have other jobs - for example, photographing museum exhibits, portraits, etc. - I pay attention to correct lighting during the shooting. I choose the best ones from the series and pay attention to every detail during processing, so that the photos could be used in a higher quality for different media (web, print, etc.).
And then there are photos I take in my spare time when I’m out somewhere. There it’s about the aesthetics and the impression that the scene has made on me. That’s what I try to bring out. There the realism plays the least role. From some motifs I then sometimes make different versions to have comparison. I also like to experiment and sometimes go to extremes to test the effect.
As for photos for video, I process them beforehand to remember the steps that I then have to explain in the video. Since I am not yet so confident in English, the focus shifts to good explanation and if I have to talk in parallel, I can not concentrate too much on the processing itself when recording the video. Accordingly, the processing in video takes much longer than I would normally have needed for the same photo.
That highlighter does look busy/distracting. I saw a video which had a faint circle highlighting the pointer, like a spotlight. Don’t worry about it, it was just a thought. You already are doing a lot. Thanks.