I haven’t read the whole thread, but I have to say that your work is really inspiring and, for a new user of DT like me, tremendously useful. Thank you very much!
6 Likes
Really useful demo of mask operators, which I always think I understand until I try to use them and end up randomly right clicking options. Thanks! Also the teaser on the colour harmony guides in the vector scope (who knew?!) is super intriguing
3 Likes
Thank you for a very interesting demo.
One question: When you draw a mask then the default opacity is 100%. When I draw a mask then the default opacity is 49%. How can I change this?
in your ~/.config/darktable/darktablerc change plugins/darkroom/masks/opacity= to 1
2 Likes
But this will change again when you - while creating the mask (in the so called create mode) - change the opacity.
Create mode is when you click on the mask symbol of a shape, go into the canvas and then change the opacity with pressed CTRL key and mouse wheel, before you have created the mask on the canvas.
When you have created the mask, and then change the properties, that is called edit mode:
3 Likes
This can happen in retouch and maybe other times using the masks… If you set the opacity before you draw the mask that becomes a sticky setting for the subsequent ones… if I recall correctly… so if you set an opacity of 49 and create the mask then the next one will also have that… So the key to be sure is set it to 100 before you draw the next mask element and I think this will correct it and also explain how it happens…
1 Like
It’s not so consistent, it will be saved in retouch also after if the ui is used.
IME as long as you set it after you draw the shape then it goes back to default for the next shape. If you change it before you draw a mask then that becomes the new default until you do the same thing again but use 100% so that the default is restored…
That’s not true in the situation i mentioned.
NP SOrry from that brief comment I really am not sure what you mean exactly…
I was referring to the following sequence.
You select a drawn mask as the option. You then ctrl scroll before drawing the mask say 75%. Then you draw the mask and you have a masked area at 75% opacity. IME then the next drawn element will have that same opacity. If you now tweak the second mask after it is drawn to say 50% and draw a third drawn mask element then it will be at 75% ie the way you set it before starting to draw and this is the setting used for subsequent object… At least that is how it works for me…
Perhaps its just that I don’t understand what you mean by using the ui… other than you are referring to the user interface??
Thank you for your answer on default mask opacity.
Another question: How to refine a parametric mask by means of drawn masks? A parametric mask does a good job masking small items which would otherwise not be possible. But sometimes a parametric mask selects too many items in some areas and too few in others. Is it possible to subtract some items and at the same time add other items to the parametric mask by means of drawn masks?
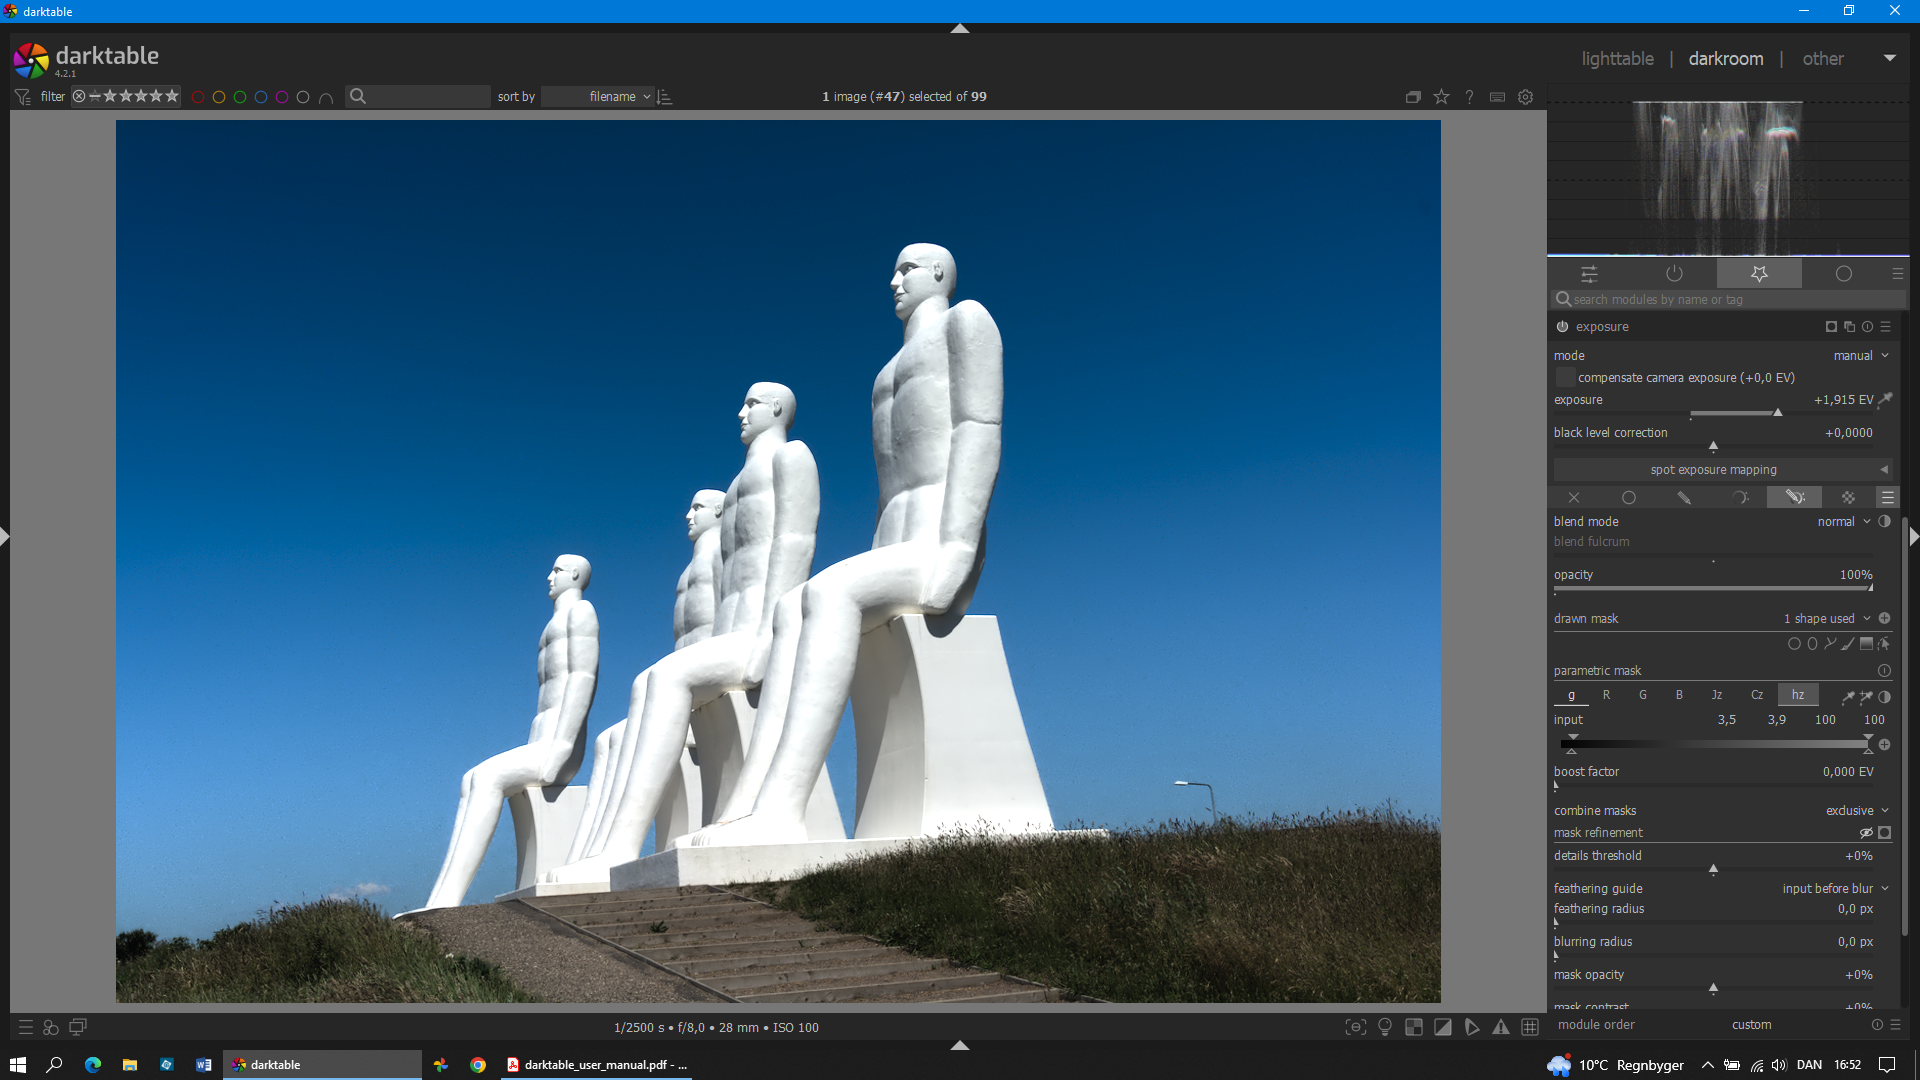
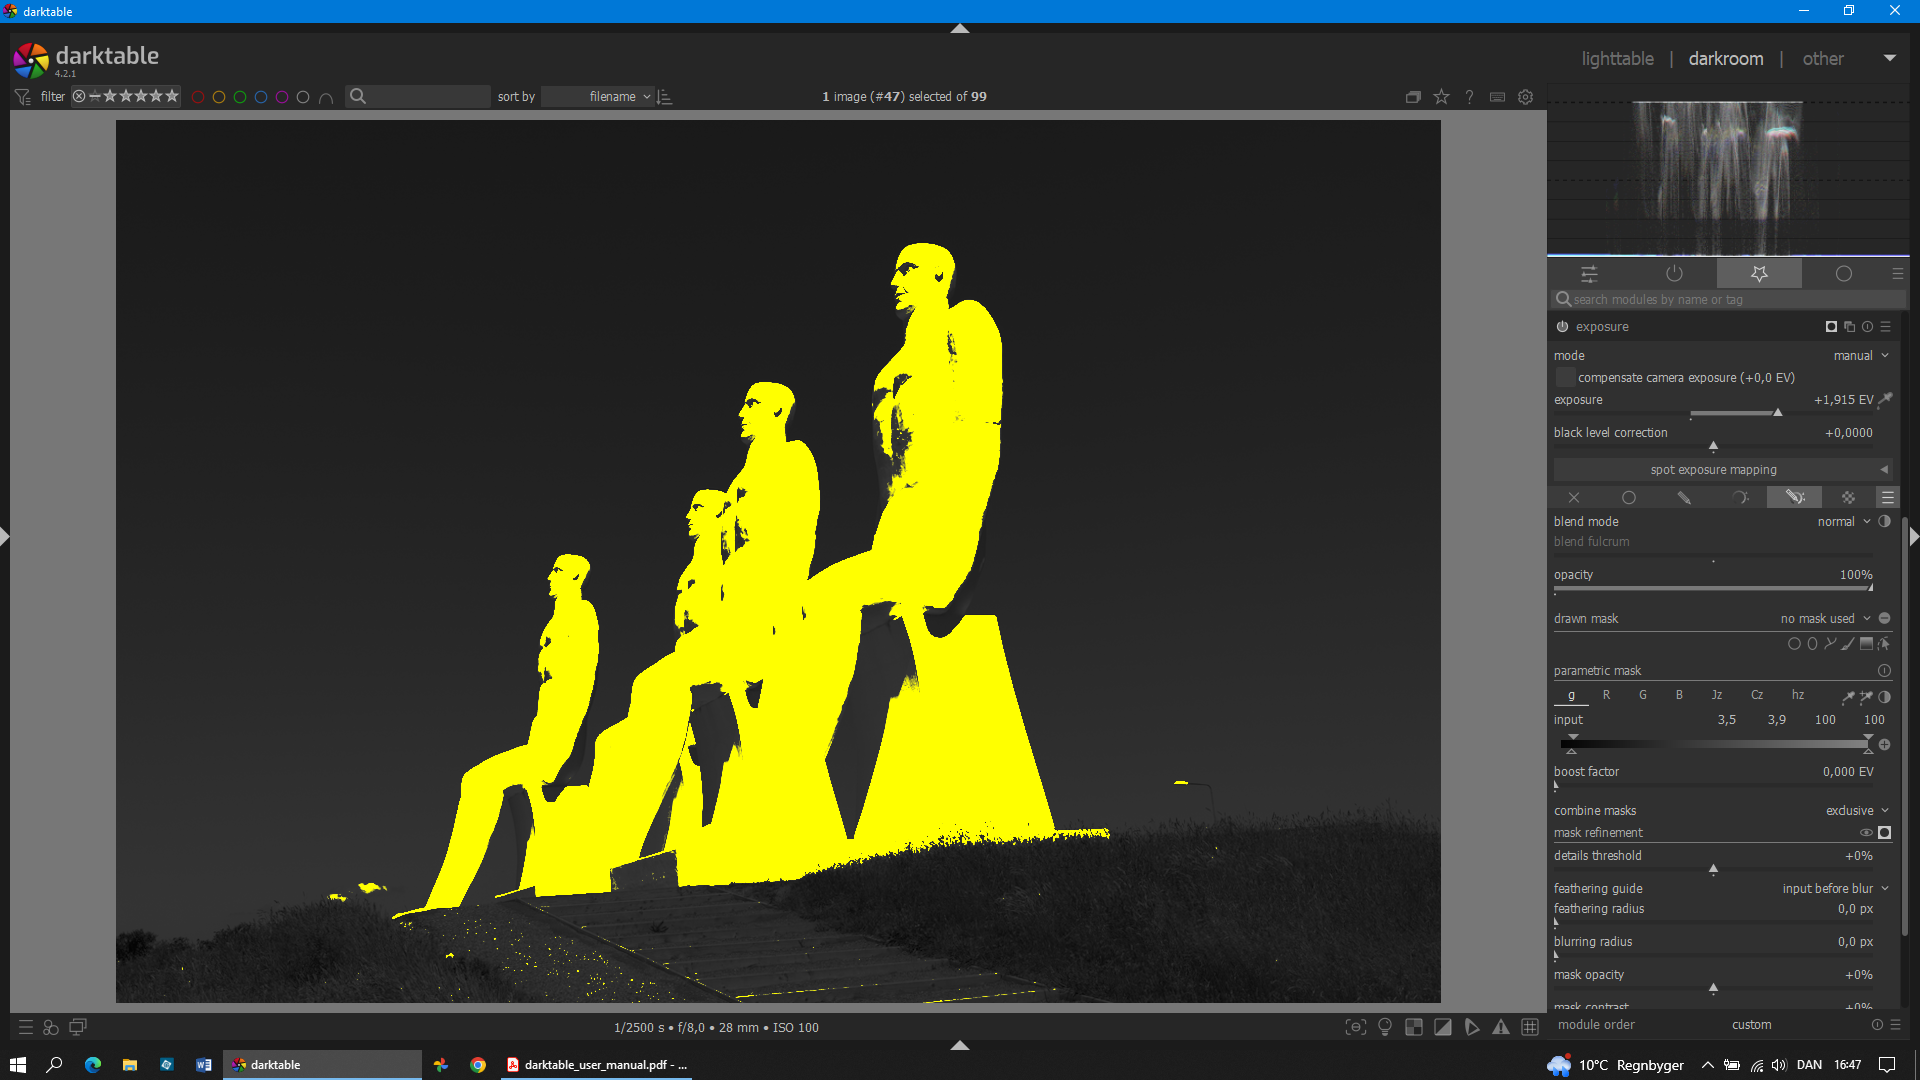
Look at the following example. I want to mask the white statues but not the grass at the base of the figures. A parametric mask works fine but selects a little too much. These areas can then easily be excluded by a drawn mask. But how to add the missing part of the figures?
Please see my first two episodes about masking in darktable (ep 67 and 68) where it is about how to combine the masks.
As for your case:
You can also combine different channels of the parametric masks. In this case, instead of using gray slider, - with which you can’t select the figures’ breasts because they are as dark as parts of the sky, - choose for example blue or saturation channel to isolate the figures.
You can also offer your raw file here and I’ll explain what I did.
1 Like
When masking there are so many possibilities…
The resulting mask is a product of the drawn mask and the parametric mask…
They can be introduced using inclusive or exclusive mode. I like to think of these as exclusive being like an “AND” operator and inclusive is like an “OR”.
So lets say you use 2 channels say a hue and chroma… in exclusive the parametric mask will be the pixels that satisfy both ranges that you construct where in in inclusive it will be the pixel that satisfy either of the conditions and then if you have a drawn mask on top of that it will be applied to the parametric one with the same logic either an and/or overall result for the mask…
So these modes define how the channels of the parametric mask are combined and how the parametric mask combines with the drawn mask.
So its something to consider when you build your mask.
Also you can invert individual channels and drawn mask elements to achieve a result.
Finally as Boris demonstrated you can also further use the mask manager to control how the individual drawn elements interact with one another to form the final drawn mask…
So given all these possibilities and a little experimentation you can usually define the mask you need…
One tip can also be …don’t always try to mask your intended target… mask the elements that are the easiest to mask and then invert and modify that to give you the mask for a more complicated element…
2 Likes
I have watched all the excellent episodes in the masking series and studied the manual. I understand that you can fine-tune the parametric mask further by using other channels as well but that may not be sufficient in all situations.
My simple “theoretical” question is the following: You have a given parametric mask is it then possible to add and at the same time subtract areas from the parametric mask by means of drawn masks? I can figure out how to add or subtract areas from the result of the parametric mask but not how to add and subtract areas.
I upload the raw file.
DSC_2122.NEF (25.0 MB)
You can try e.g. to make path in retouch module, adjust afterwards opacity slider, and the opacity value will be saved.
No. But you can always select bit more with channels of parametric mask and then remove the unwanted areas with drawn masks.
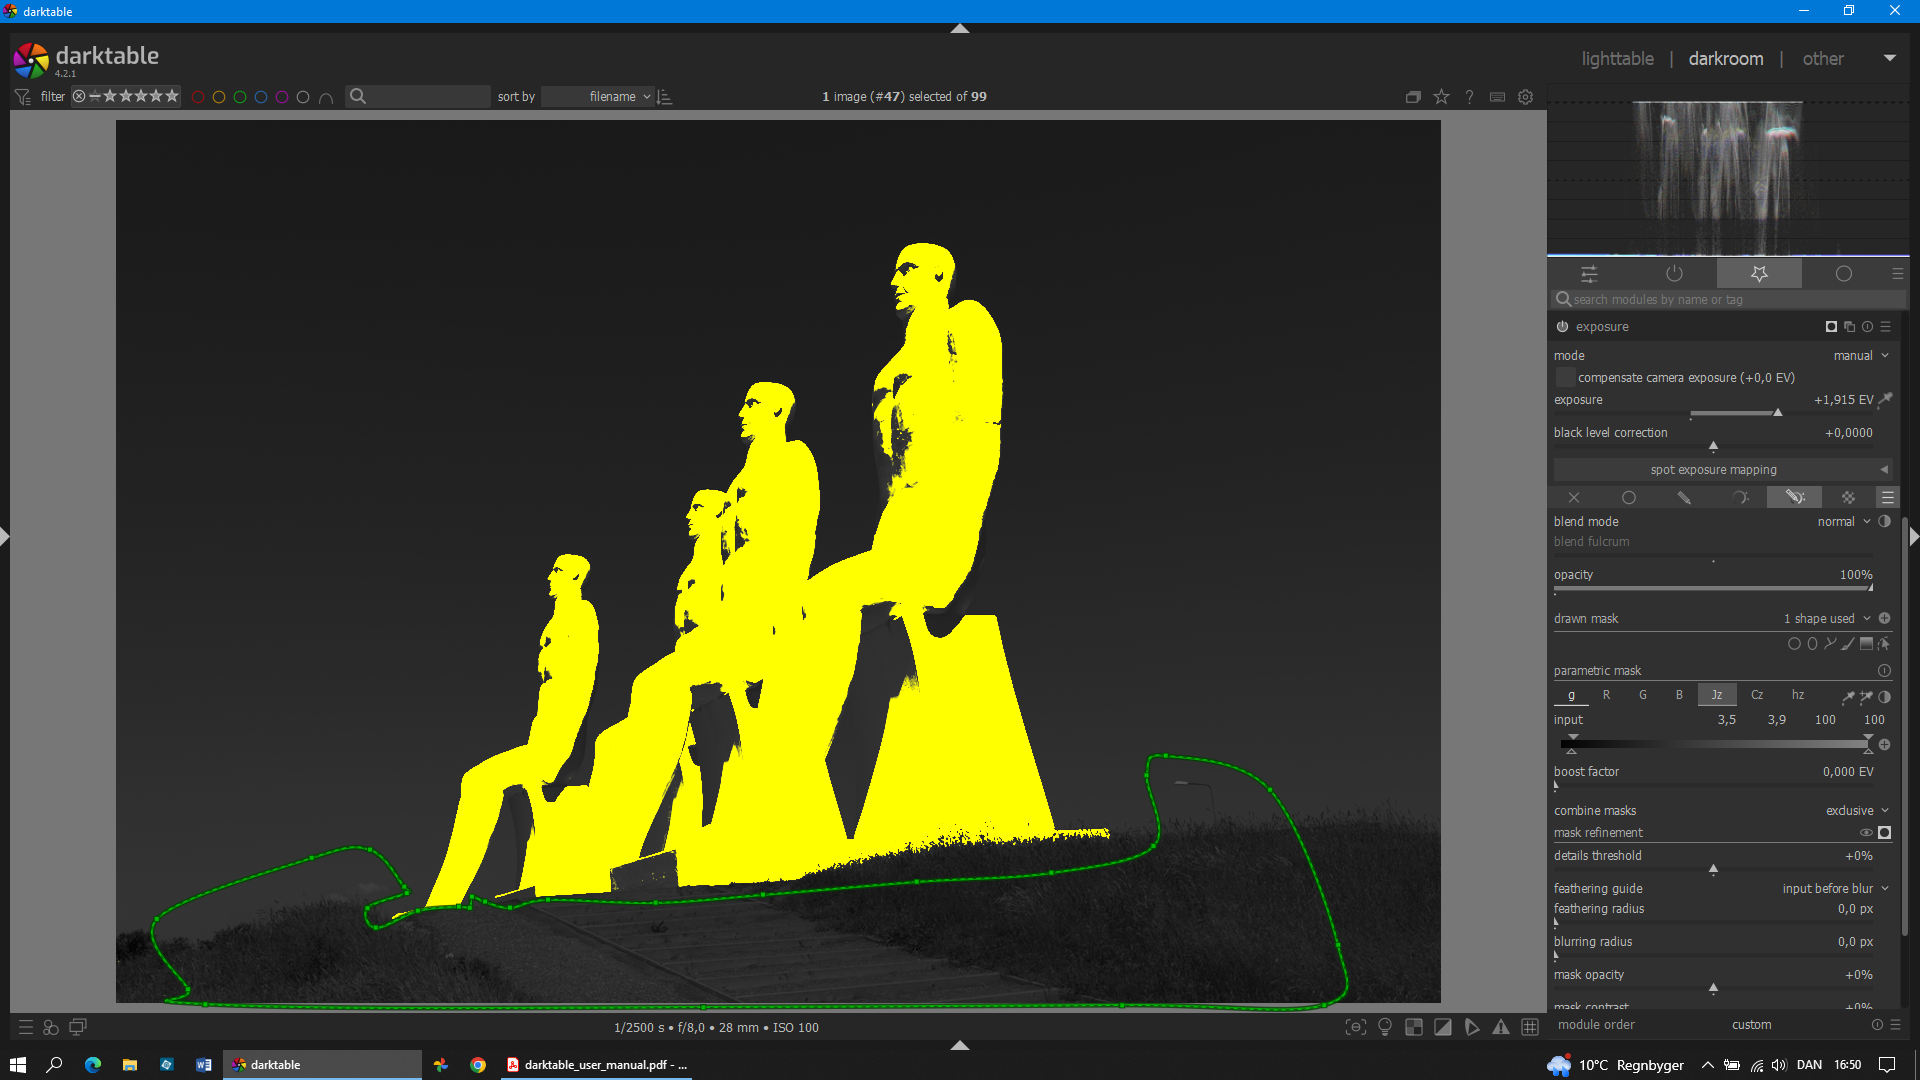
In this case, I excluded the blue sky with inverted hue channel of the parametric mask and lower area with the grass using the path:
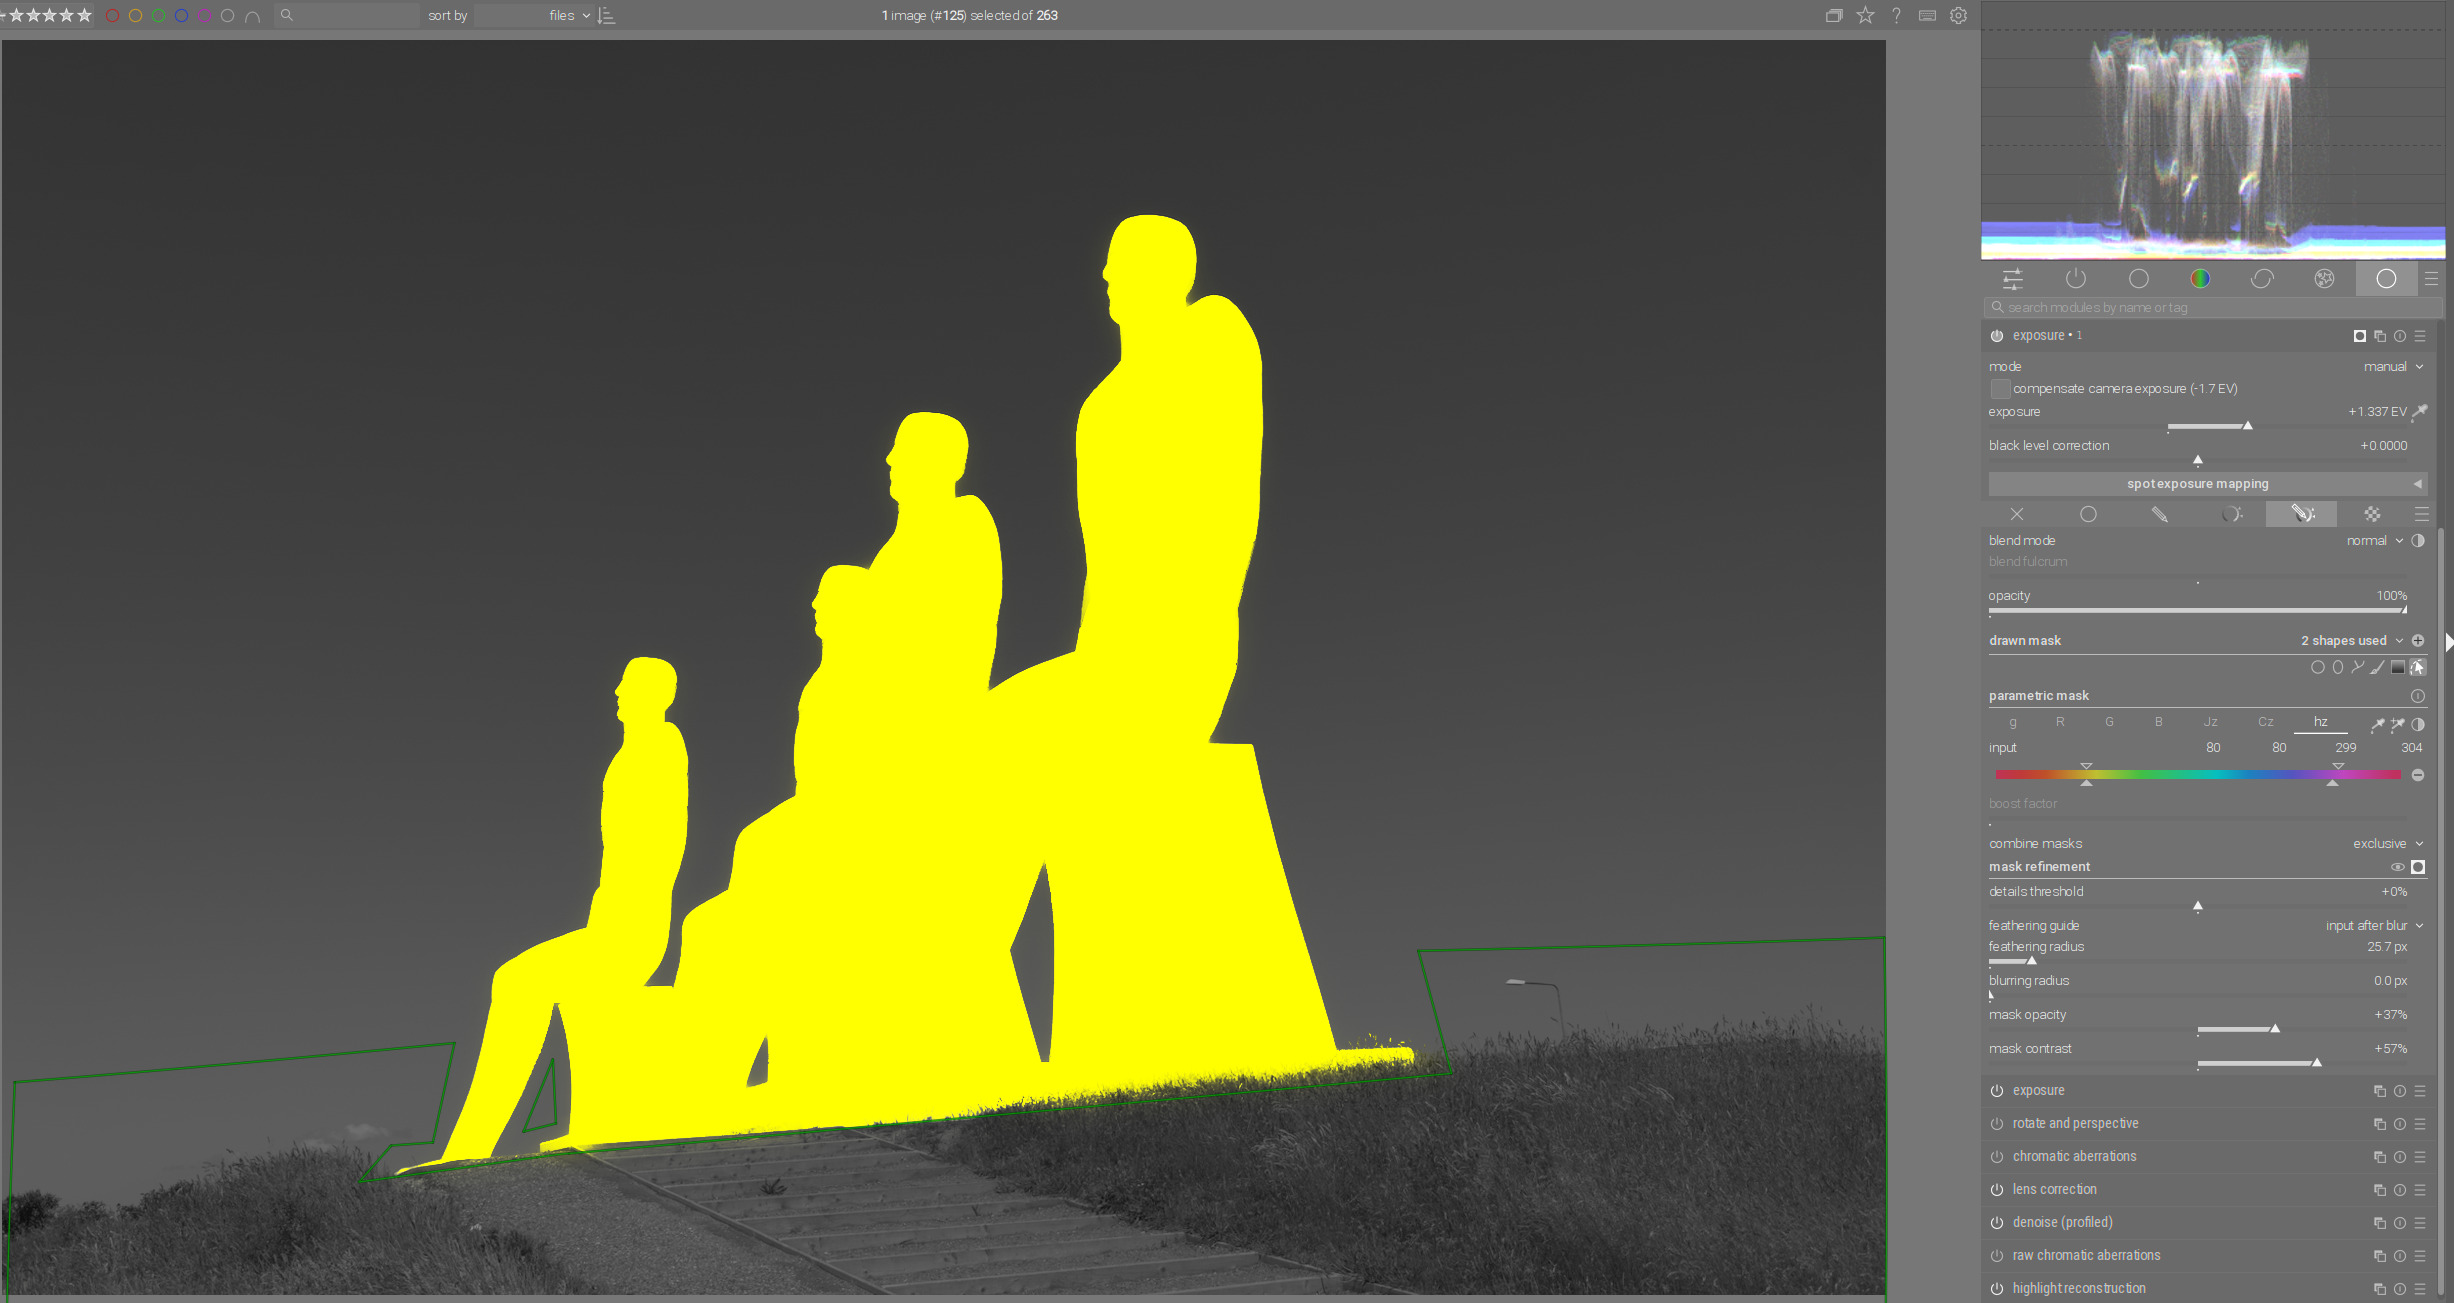
Don’t forget to use the mask refinement function!
With it you can significantly improve the masking, because the mask takes into account the texture of the environment.
Here I have increased the feathering radius, opacity and contrast.
4 Likes
Yep I see what you mean now. I would think that slider from how it is described would be just the same as doing a ctrl scroll on a selected shape but it changes the default for subsequent shapes… I think this might actually be a bug unless I just dont’ get the workflow or the intention of this slider vs using the ctrl scroll…
Thank you for an elegant solution masking the image in question.
Following your advice in one of the earlier videos to inspect the channel data I thought that using the grey channel would be the best option. I see now that the hue channel offers a more complete mask of the statues by masking the blue color and invert the mask……![]()
![]()
1 Like
I just found this thread. What a tremendous resource! Thank you, Boris the all other contributors.
I started watching episode 1 before I noticed that it was 4 years old and based on version 2.6.1. As a relative newbie, is it best to start at the beginning, or should I concentrate on videos using more current versions?
Any suggestions on how best to absorb all this great information is appreciated.
I should add that I am trying to create a workflow and use techniques that suit my needs. I shoot landscapes and nature, similar to many of the photos I’ve seen in the videos, so there is a lot of relevant information here.
In fact I will recommend to watch the later episodes where I explain things more. The first episodes - despite the fact that they are outdated - are rather demonstrations of darktable’s capabilities and are not suitable as tutorials.
Also the later episodes address the individual aspects of processing and do not follow any particular logic that would be useful as a guide for beginners.
I would rather suggest to stick to the documentation:
https://docs.darktable.org/usermanual/4.2/en/
and consider the episodes more as a supplement when it comes to practical applicability to certain topics.
Also highly recommended and more suitable for beginners are the video tutorials by Bruce Williams:
https://www.youtube.com/@audio2u
And also if you have questions, don’t be afraid to ask them here in the forum. The community here is very supportive.
3 Likes