Boris will of course give you a better answer but quite simply DT is a raw developer with some enhancements and not a raster editor like PS or Gimp. DT does in a way have layers in that each module can be positioned in the pipeline and also blended using blend modes and further refined with masking and multiple instances…so there is not a dedicated layering function but there is the ability to do some of what you could do with layers
2 Likes
Hello,
I am aware that the fundamental difference between an image editing program like Gimp or Photoshop and Darktable is that DT is a RAW developer.
The question was rather aimed at Boris’ statement that he works with Darktable almost every day and I would be interested to know whether he doesn’t need anything else for his work.
In his great videos he shows his way of working, which in my opinion leaves nothing to be desired. But when I watch videos of photographers using Adobe software, their main work is always in Photoshop, as if it’s the only way to create scenes.
Thank you for your answer.
The best tool is the one that you can use. For a lot of long time digital photographers, that’s Photoshop (or similar). For a bunch of us here, that’s darktable. I find msyelf needing to use gimp less and less. Its mostly relagated to large heal/clone jobs presently.
5 Likes
All good…my comments were directed at this portion of your question…
1 Like
Okay, I understand that. Then I also understand why these photographers and photo trainers only recommend Photoshop - especially for beginners - and because they also offer Photoshop courses at the same time ![]()
2 Likes
Yup. We want to share our knowledge here ![]()
1 Like
each module instance can be seen as a layer if you make use of blend modes or masks. There are plenty of examples how to use more than just one instance of a module in his videos.
Different tools, different ways to achieve an expected result…
3 Likes
I’m joining the darktable-by-default club too these days. I’m still using GIMP for quick edits of a jpeg. Stuff I can tweak in, literally, a minute or two.
I’ll probably achieve the same possibility in dt sometime soon. But, best I can manage now, if it isn’t a copy/paste settings from a similar pic, is multiples of a minute or two.
When it comes to photo enhancement, the use of different modules and the ability to have multiple instances and custom order combined with sophisticated masking functionality, blend modes, etc. replace the need for layers.
And I also use GIMP a lot. Especially when I don’t need to edit raw files or do photomontage, posters and the like.
I also hold regular photo courses about GIMP at the adult education center. Here is a small montage from the advanced course for children:
Or a graphic element for a poster:
In my experience, almost everything you can do with Photoshop can also be done with GIMP if you have the appropriate knowledge.
The only thing I miss about GIMP is the CMYK support which will come soon.
No, as far as I’m concerned, there is no limitation. Darktable has all the functionality I need for processing raw files.
Yes, as an event photographer I work with darktable almost every day.
But for other jobs I also use other tools.
I have already mentioned GIMP for processing non-raw formats and collages.
Other jobs I also do are the designing of various print products (posters, flyers, brochures) and graphics for these products.
I use Scribus and Inkscape for this.
7 Likes
Thank you for this answer @s7habo , that helps me a lot. it’s a pity that there are no such courses offered at our adult education center, i would definitely take part ![]() i think i’ve figured out where my mistake in thinking about darktable or photoshop was. i was just thinking completely in the wrong direction and will rather concentrate on darktable and the possibilities with it using your great videos. thank you again.
i think i’ve figured out where my mistake in thinking about darktable or photoshop was. i was just thinking completely in the wrong direction and will rather concentrate on darktable and the possibilities with it using your great videos. thank you again.
2 Likes
New episode: split-toning and other requests part 2:

30 Likes
This is fabulous. I’m more than half way through. Just about to watch the rest. Thanks Boris
2 Likes
Many thanks again! I have improved very much my skills and my understanding since I watch your series, even if I still have quite a lot to learn. For instance It is difficult to me understanding the way in which the masks tab in Colour Balance RGB is to be used, or the blending modes employed in this video. I would appreciate even a little comment in your videos.
Thank you, wonderful explanations
5 Likes
I feel like Boris might have covered using the mask tab in a previous video…I will see if I can find the correct one before he comes back to you :)…Basically they really support the 4 way tab adjustments to define the tonal range impacted…
This one was very good for blend mode demonstration but any program that uses them and has a good demonstration is helpful…

and here

about half way through this one for the masking demonstration…
10 Likes
@priort , just wanted to say a big thank you. Your willingness and commitment to helping others and responding to requests immediately impresses me deeply. We are very lucky to have you here on the forum.
19 Likes
Well thank you for those kind words, but I am afraid it pales in comparison to what you contribute…You may not be aware but hopefully there is enough discussion to let you know how valuable your video’s are to the point where I feel they are vital to show people new to DT what it can do. The interface and modules can be a challenge but you open them up to people and show what can be done and that provides the target and stimulus for people to perservere and hang on until they can see their way to unlock the potential of DT… So thank you for your kind words but my friend I am really in debt to you as I have learned so much. I recall one of your early video’s that you did without any commentary and you did an edit on an industrial shot with some elaborate pipes. You made them actually look metallic which is not always easy in digital media and I thought wow okay so it is possible and I am just the road block here…So you were my inspiration to get better…Then @Bruce_Williams unlocked the interface for me which I found a challenge at first but with the help of his video’s that hurdle was removed. When you started to make so many great video’s with such excellent explanations I found myself just waiting for each and every new one to arrive…So again thanks for your kind words but really the thanks goes to you and Bruce and the many people here on the forum that have interacted with me and given me so much great information. I am so much further ahead because of the group here… looking forward to your next video…
EDIT : Ha I scrolled back up…Episode 7… amazing…
22 Likes
Thanks a lot Boris! Again a very good episode.
2 Likes
Very helpful, many thanks!
Great video. Watched it all now. Thanks again. Re: comments on YouTube about Ogawa-san’s work. I was looking for details online of what he shot with or how he edited his work and eventually found this nice short interview where he speaks in English about his career, inspiration and a bit of his process. He uses a combination of 35mm and medium format film, and Fuji apsc and medium format digital, by the looks. Obviously, the images are generally intentionally soft, often shot through dirty or wet windows and in low or chiaroscuro light.

Two pics I particularly find interesting are:
One on this page:
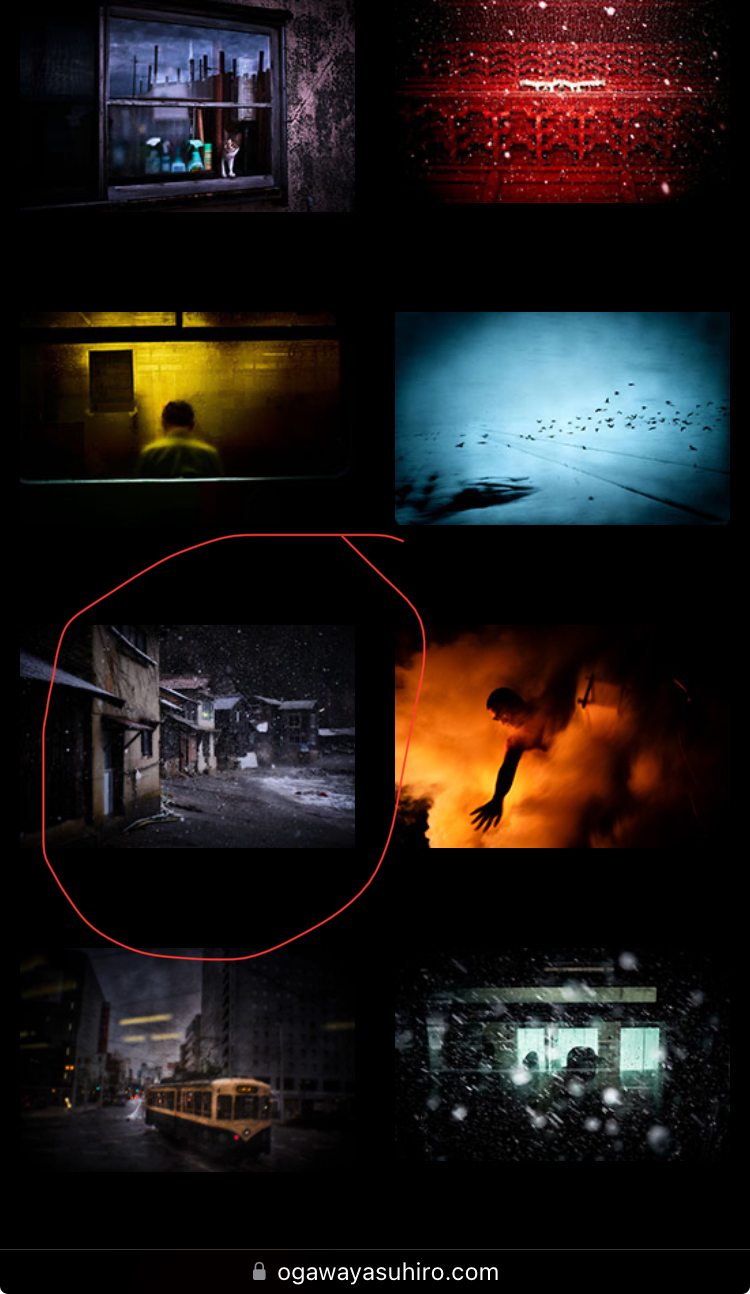
And one from the same series in his book:
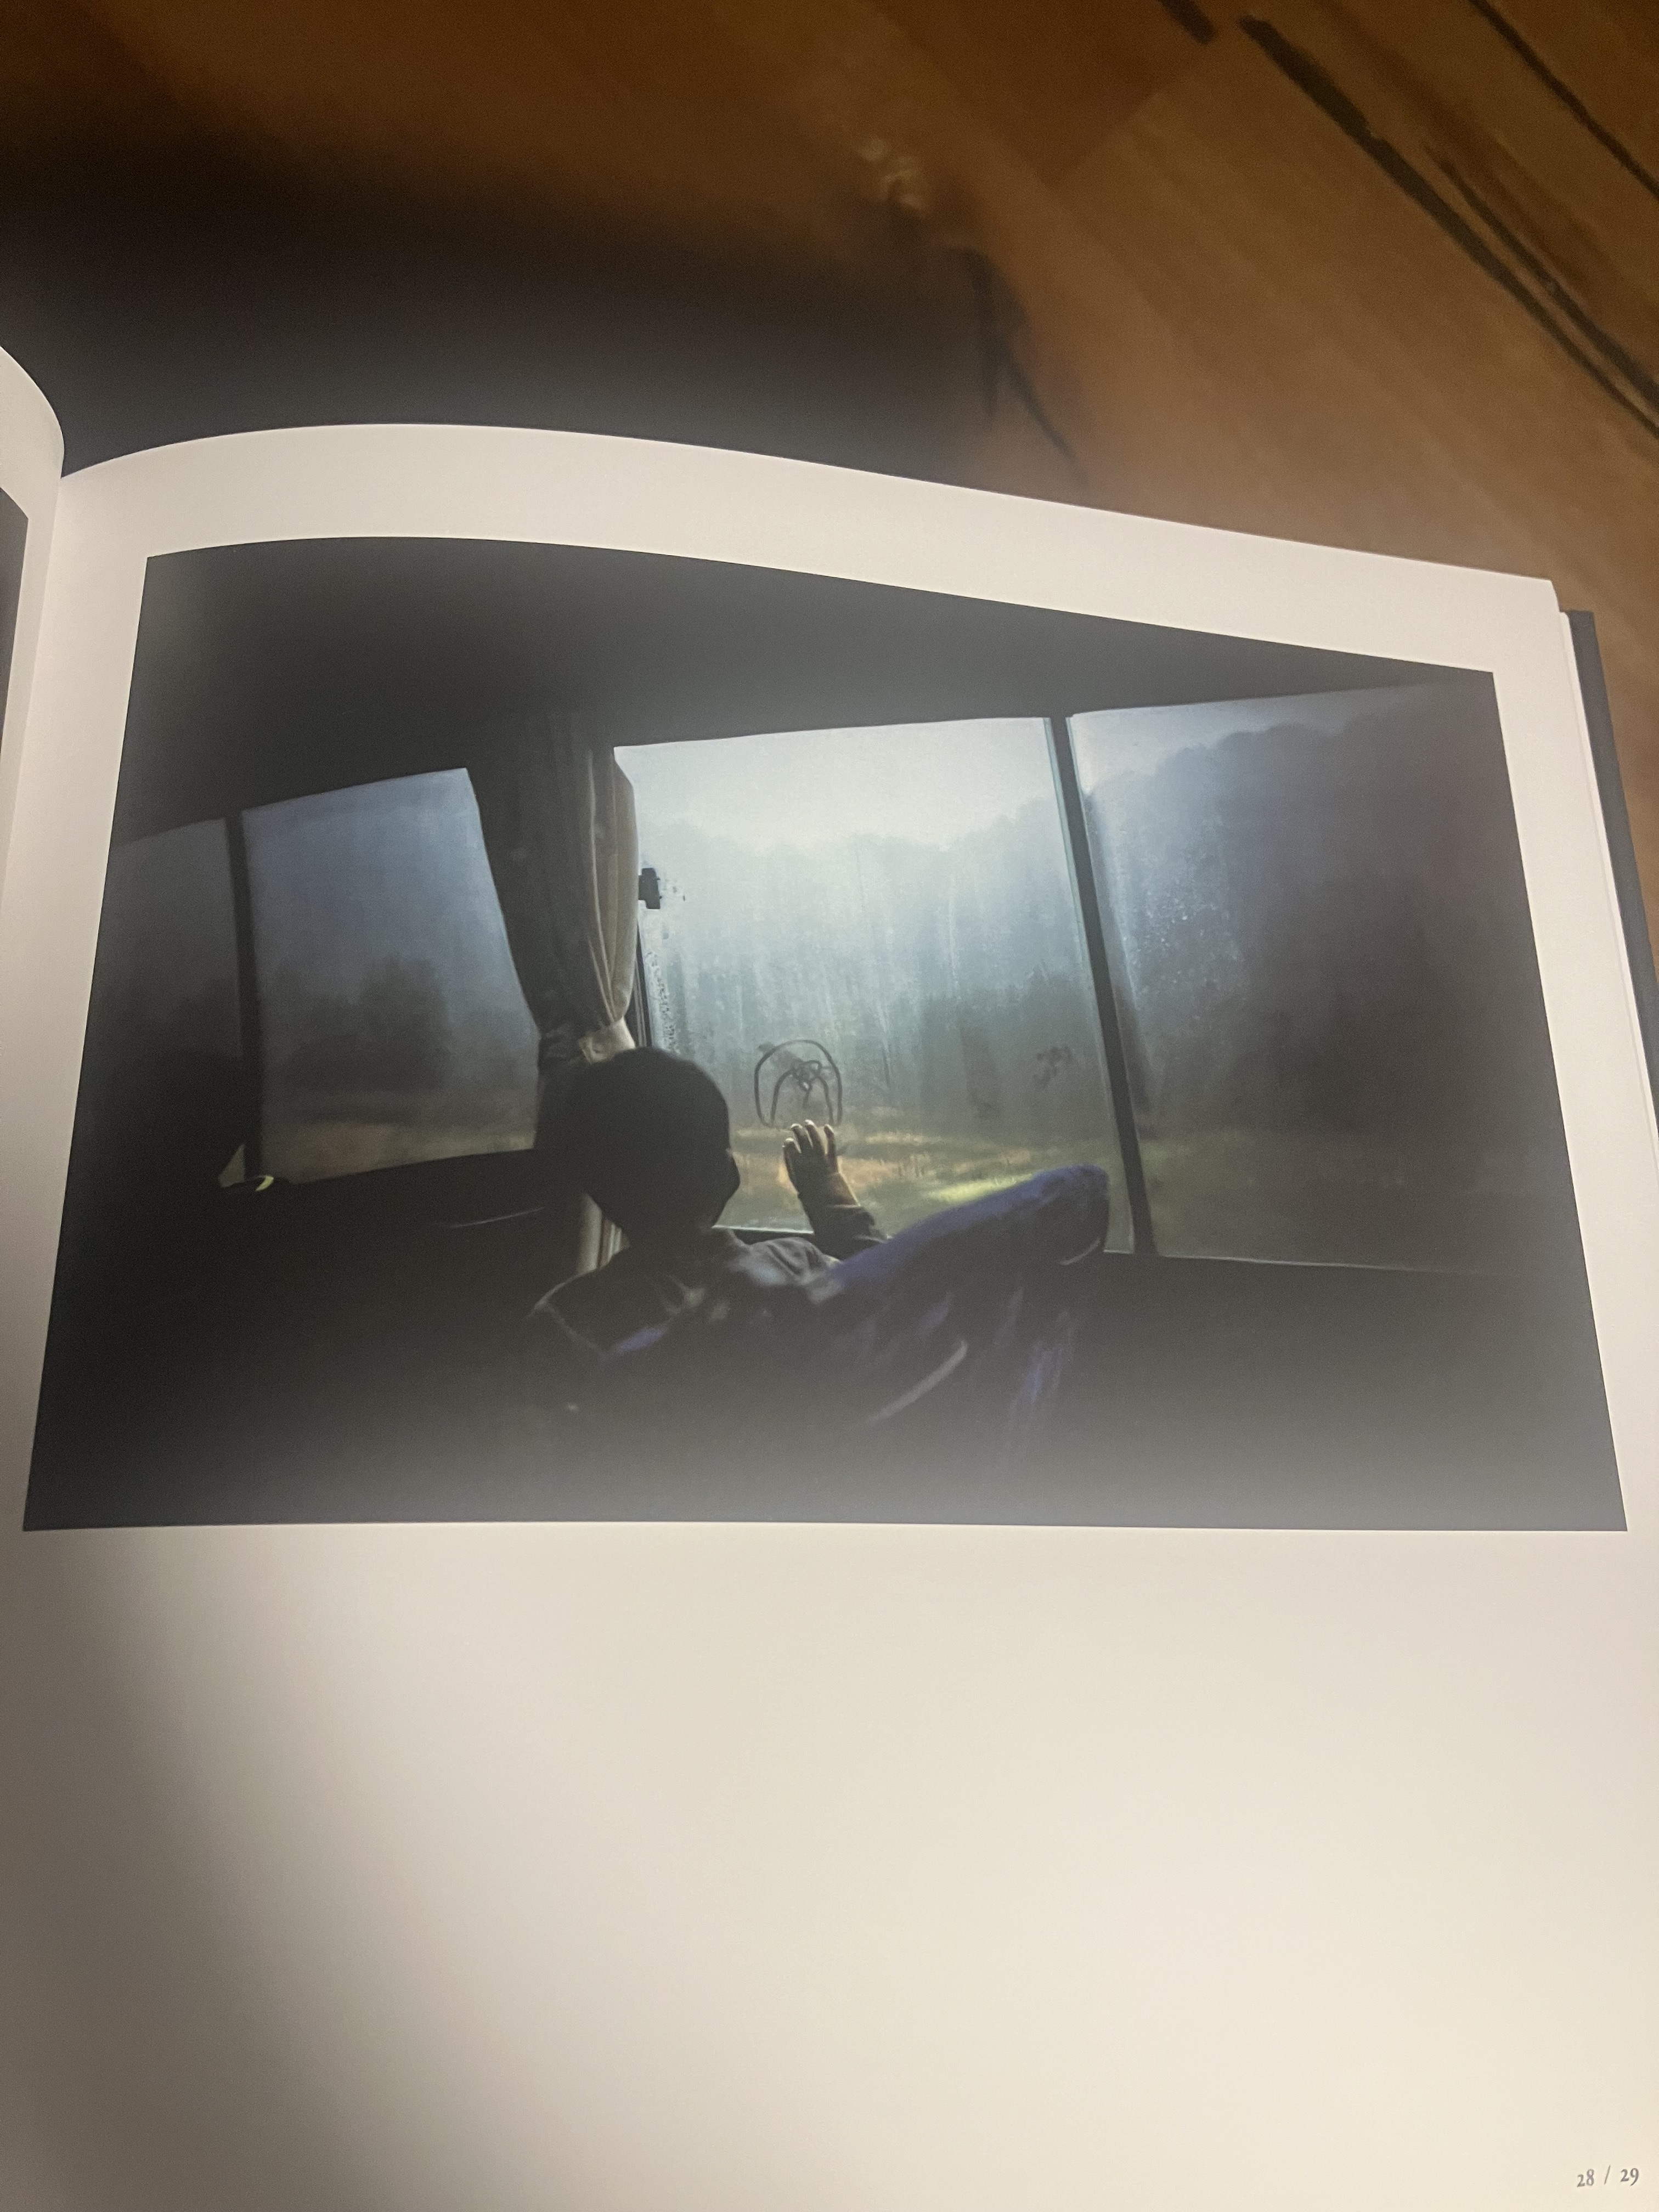
Hopefully the quality is low enough to post here for “educational purposes” as it’s hard otherwise to let you know what I’m referring to.
Thanks
I guess seeing the detail in the sharpness and dynamic range of modern digital sensors and lenses is quite addictive and is what a lot of YouTube discourse is about but soft, dark and a little ambiguous images can leave more work for the viewer and create interest and a tale to be told
5 Likes
@s7habo Your videos are wonderful. Thank you so much for all the hard work!
I have two requests, one subject and one style.
The subject is culling. In itself, I find rejection/choice very very hard, so I end up having to do too much processing on too many pictures! I try to remember advice from a photographer on another forum: “connect to your inner axe killer.” ![]()
But how can I use darktable to male the process easier? Up to now I have just been using a simple image viewer to knock out obvious fails and worst-of-pairs. How can I do side-by-side comparison?
This week, I started with something that I thought of a while back. There are usually 3 to 5 musicians in my pics. So I used colour-coding and filtering, so I can at least see the thumbnails of each individual together on the light table. Whoa! This makes editing easier to do too, because I can concentrate on the same subject all at once and more simply apply similar settings.
I think I’m on a good track. But is there a better track?
The style thing is this. With before/after snapshots, could you please go a little slower? and or dwell a little longer? My brain is not fast enough!