Good evening, Boris. Thanks again for your work and for offering us your videos.
I created the style as you showed us by adapting filmic to my photos, added contrast equalizer. When I apply the style, the image becomes very dark, I have to mount the exposure a lot. By doing this, it becomes very difficult to adjust rvb curve because the information, (pixels) are overwritten. I enclose a screenshot of the module, look at the pixels are packed down… This happens as soon as I bring up the exposure. Do you have any idea what the problem is?
Hi @AlainC,
This is hard to say without more information. Can you please show more. For example your tab with active modules and your History list?:


Bonjour Boris,
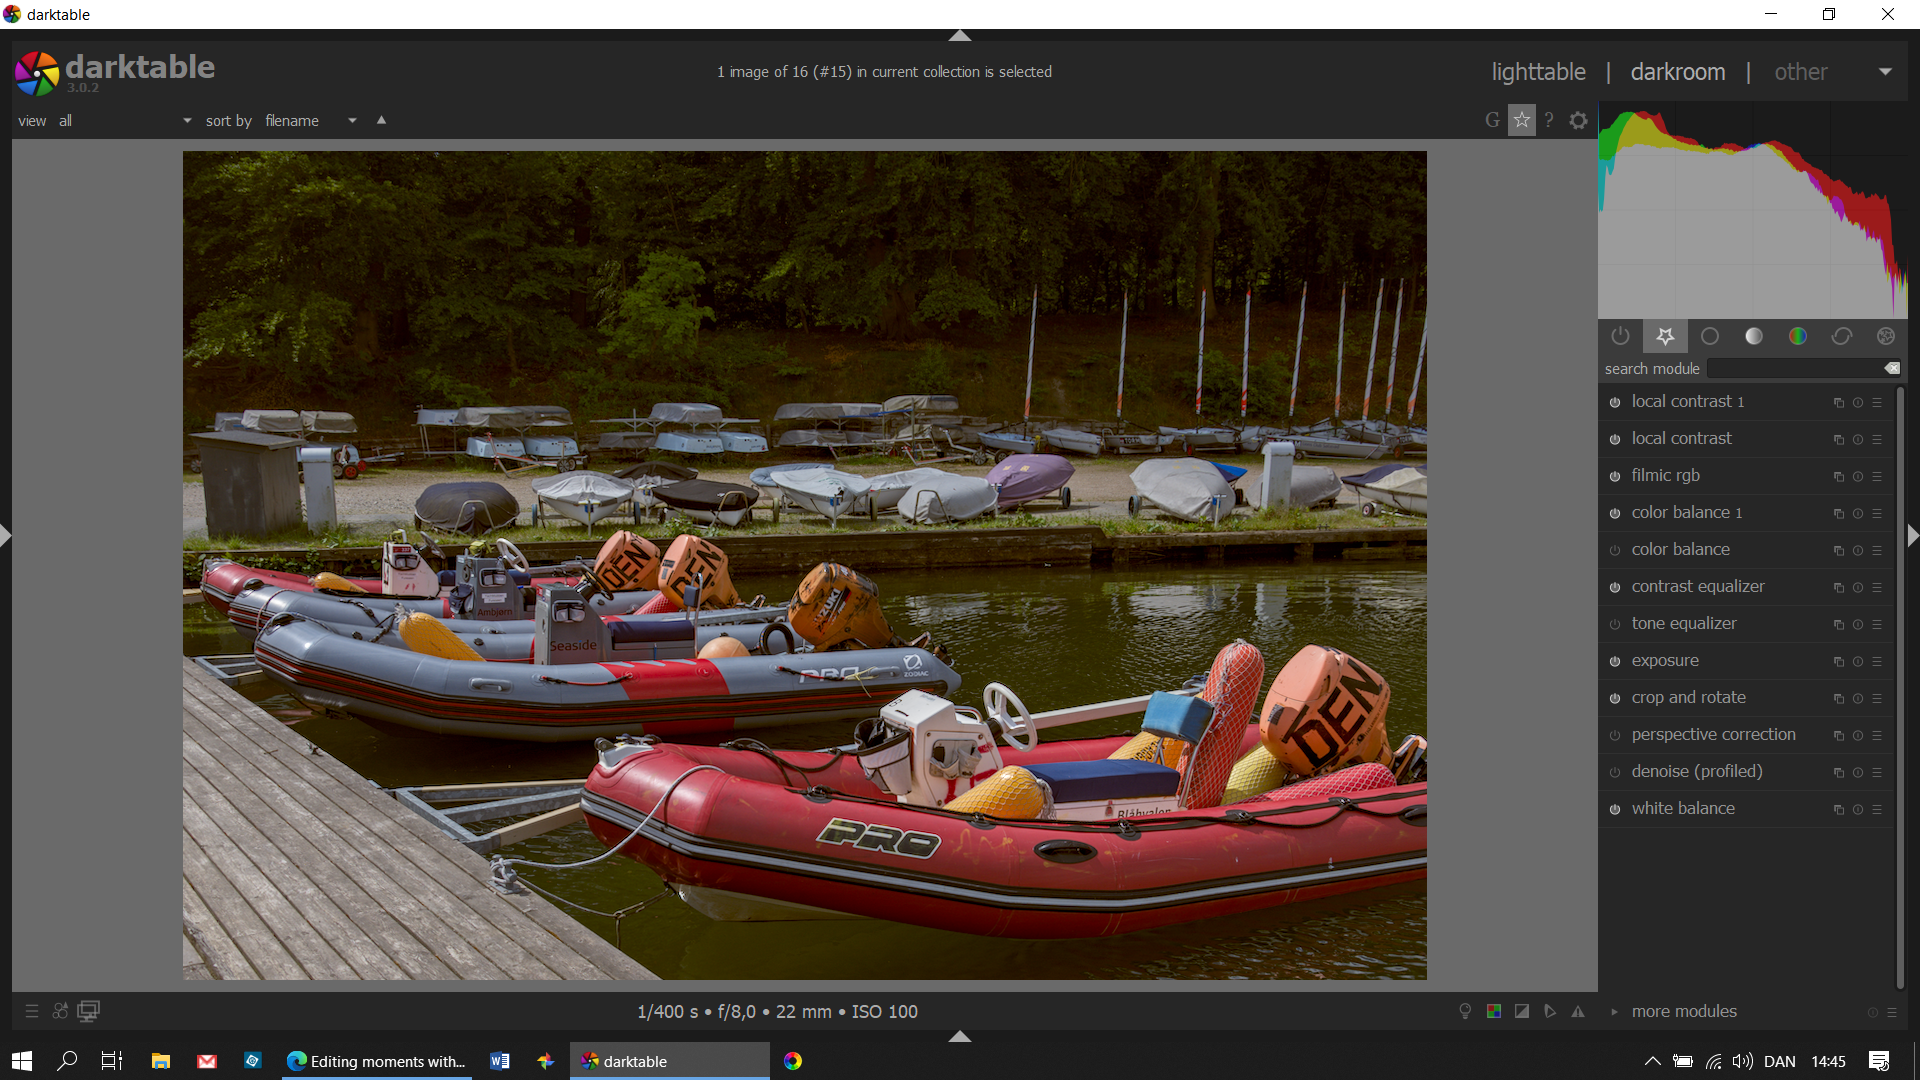
Voici les modules activés et l’historique.
Le problème survient dès que j’augmente l’exposition. environ +1EV sur chaque photo. Le problème impacte aussi table de correspondance couleur, les couleurs sélectionnées avec la pipette sont plus claires que sur mon écran. Par exemple le bleu du ciel apparait couleur cyan quand je l’integre à une pastille. Si je ne touche pas à l’exposition, tout va bien. J’ai essayé exposition avec le mode de fusion “moyenne” et “couleur TSL”, c’est mieux mais à l’écran c’est pas completement satisfaisant.
Merci


Hello, Boris,
Here are the activated modules and the history.
The problem occurs as soon as I increase the exposure. About +1EV on each picture. The problem also affects the color matching table, the colors selected with the eyedropper are lighter than on my screen. For example the blue of the sky appears cyan when I integrate it into a tablet. If I don’t touch the exposure, everything is fine. I tried exposure with the “medium” and “color TSL” fusion mode, it’s better but on the screen it’s not completely satisfactory.
Thanks
Episode 34. One question: In the last local contrast instance you use the local contrast module with a mask and an average blend mode. What’s the difference between this and applying the mask, a normal blend mode and an opacity of 50%?
I don’t know what’s wrong with it, can you send me a raw file and xcf file so I can try it on myself?
Maybe this is the same, but this is the first thing I tried 
I think it’s because three instances of local contrast darken the image very much. If you want to do something afterwards, move the modules over local contrast. Put the rgb curve over local contrast (ctrl+shift +drag with right mouse button)

The same with color lookup table
Hello Boris, thanks for your answers.
I’ve tried your solutions, it actually works better. I’m on fuji with an x-trans sensor. Maybe this concept reacts differently…
By doing several tests, I realized that it’s “exposure” that crushes the pixels at the bottom of the histogram when I increase the brightness.
I’m attaching the link to download the file.
https://we.tl/t-FC0AP7nVMf
I’m on windows with verion 3.0.2
Thank you very much for your time. I am all the more grateful because your videos are fabulous and bring me a lot.
Exactly!
The style in my video demonstration is fitted to my camera. It should only serve as an orientation to make your own style.
As I recognize it, your sensor has a different dynamic range (i.e. you have to adjust filmic accordingly) and offers a strong contrast from the beginning, which means it doesn’t need so much local contrast.
If I may, will I gladly demonstrate this to you with the photo you sent me?
But with great pleasure, if you don’t mind.
I’m honored. 
For information, I have a fuji XT-2 which encodes in 14 bits… so 14 EV dynamic range if I understood correctly.
Ok.
Your raw file already has very high contrast and it will not be necessary to increase it:

And because a bright strip of the bridge is overexposed…

…the autoexposure tries to compensate for that and instead of brightening it up, it darkens it a bit:

Since we will use filmic later, we can lighten it up manually until, for example, the details in the shadows of the trees are clearly visible:

Now, we adjust filmic so that there are no overexposed or underexposed areas and also adjust the latitude and contrast. There are no exact specifications for this, you just have to try it out and see what looks best for you. This is how I set it up:

Since with filmic some local contrast is lost, I just use an instance of local contrast to get it back. In this case only one instance is really enough:

Now you could save the fimic and local contrast settings as presets and test them on other photos, and if the results are good, you can make a style out of them.
I don’t know, maybe someone else could clarify this. ![]()
3 Likes
Thank you very much Boris for your explanations.
I’m going to look at these settings in other photos. I understand that only one instance of local contrast may be necessary. I didn’t think that’s where the problem would come from. I understand that I need to adjust this module + filmic. I get the idea.
Thank you. Thank you again for taking the time for me, I’m very grateful for that and for your tutos. 
Concerning your tutos, I showed one of your videos to my wife, who doesn’t care about the picture, saying: “Look how beautiful these videos are”. 
You give me a lot of satisfaction. Thank you.
1 Like
Hi’ @s7habo
While recovering from a minor surgery I have had the opportunity to study some of your excellent videos. The combination og exposure, filmic rgb, color balance, local contrast (also utilizing multiply blend mode with low opacity) and contrast equalizer for sharpening really does a big difference.
Color balance was earlier somewhat of a mystery to me. I just discovered that color balance has some excellent Kodak presets. It’s amazing what a little tweaking of the sliders in this module can do.
Thank you for all your work. Have a look:
Out of the camera:

Result after editing:
3 Likes
New episode: contrast with exposure ![]()

13 Likes
Inspiring as usual, thanks for the time and effort.
I notice you move the second exposure and tone equalizer above filmic, any reason?
Although the filmic ensures that the highlights are not overexposed, the colors become much paler in this extreme range. I don’t know why, but they see better if you apply the second instance with multiply reverse after the filmic.
1 Like
Great edit Boris what is that blend mode??
No idea. I discovered it and tried it out. 
Maybe one of the developers can say something about it.