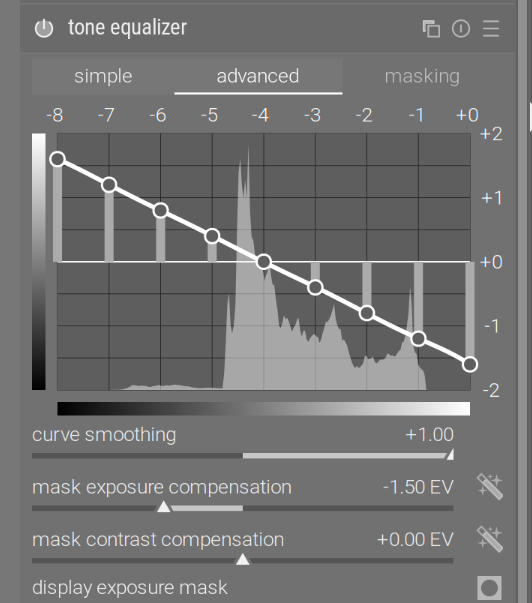
Using a Canon R7 in bright light, some images have vastly too much contrast, so all the detail is lost in the shadows. Using the built in tone equalizer compression of highlights/shadows sometimes results in color shifts in the sky, for example. Due to this, I created four linear highlight/shadow compression presets for for levels from +0.6 to -0.6 up to +2.0 to -2.0. Sometimes the larger two compressions (+1.6 to -1.6 and +2.0 to -2.0) appear to be ignored in light table. Dark room will show the image correctly, and it will update the roll at the bottom with the correctly toned image. Going back to light table, it appears to remove the tone equalizer change in both the thumb nail and 100% single image view. The exported image appears to lack the change too. Doing some research, most solutions denote issues with thumbnails not being updated. This is not minor color or tone variations; it is 1 to 3 stops different in brightness.
Things that have been investigated:
Zooming to 100% in lighttable shows the same image as the thumbnail.
Disabling the tone equalizer module causes the lighttable and darkroom image to normalize to the same. It is the same, but it is not the desired image.
Turning on OpenCL had no apparent impact.
Stacking two tone equalizer modules that sum to the same change and messing with the compensation can produce a substantially similar image that is substantially the same between lighttable and darkroom.
Details:
Darkroom 5.6.0 on Windows 11 home 10.0.26200 Build 26200 running an AMD Ryzen 9 5900HX with Radeon Graphics.
Images:
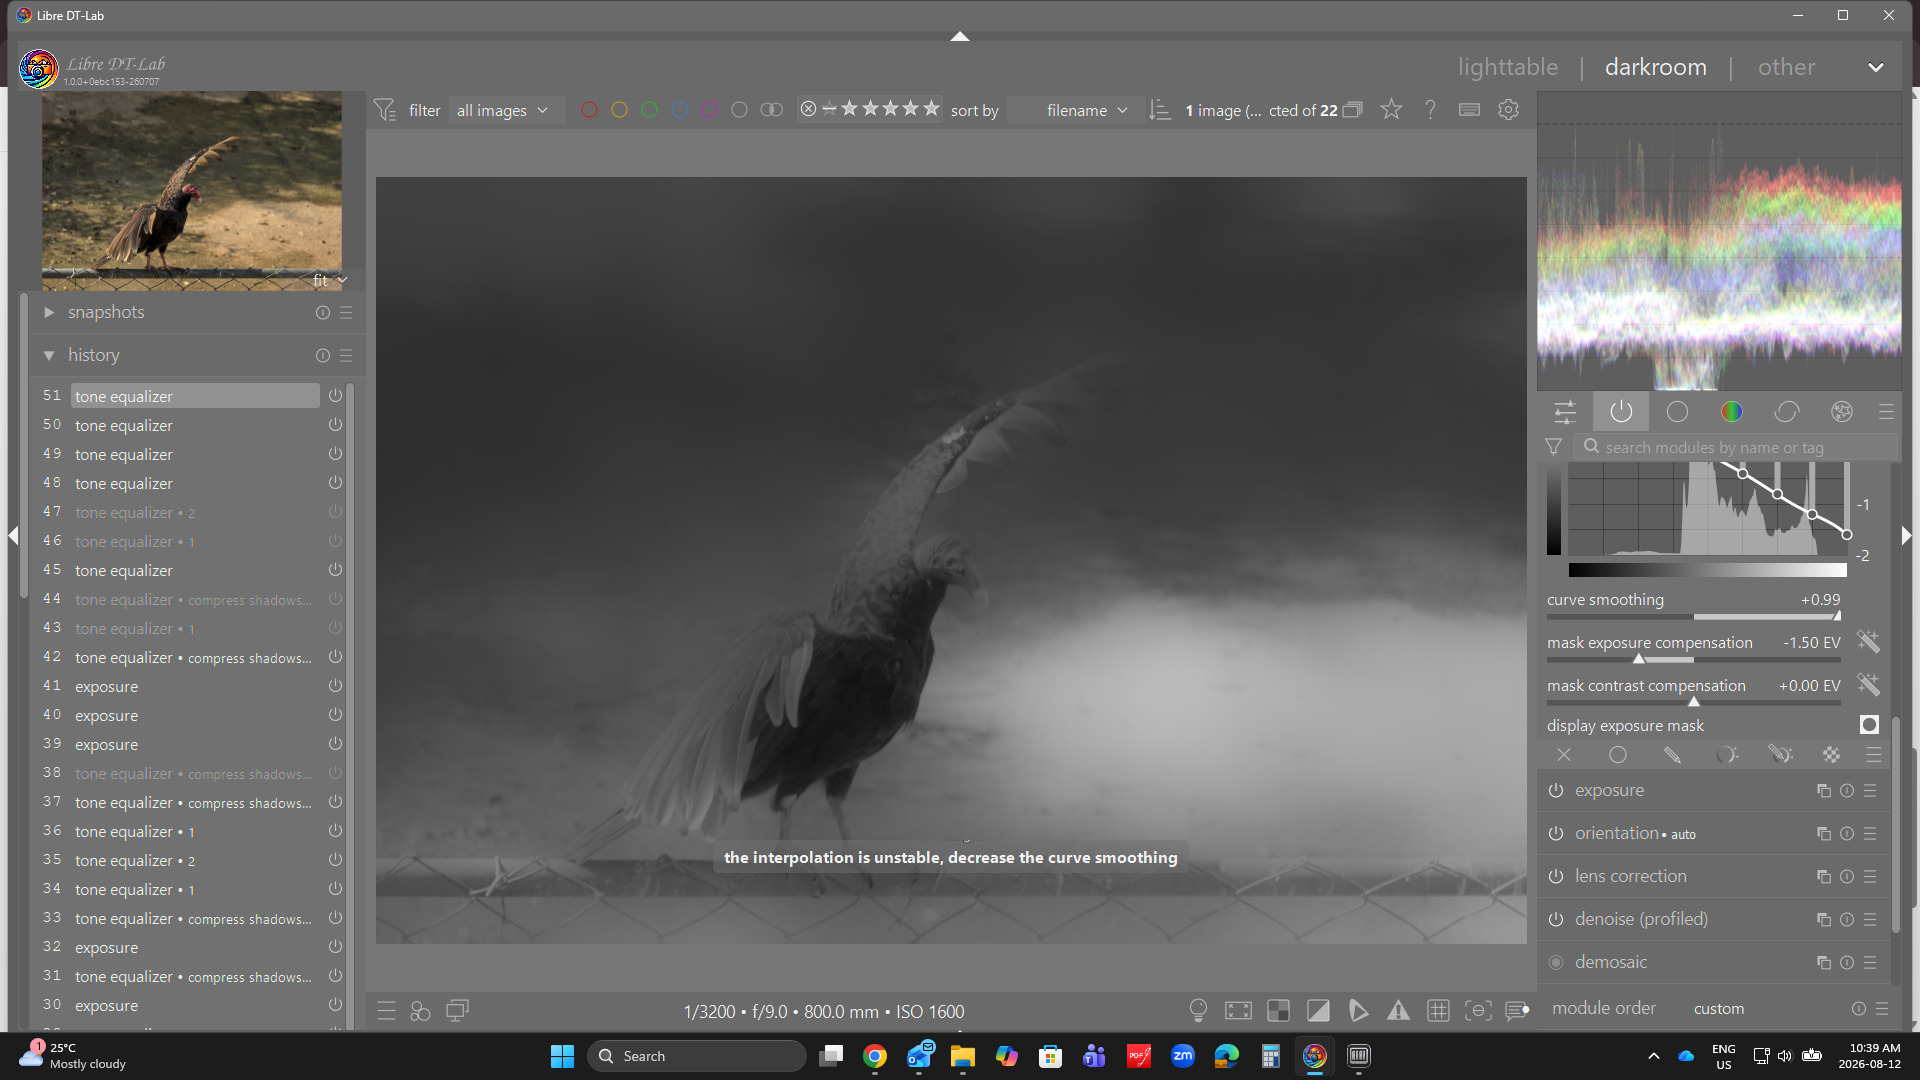
The darker image with less contrast is the intended output that appears in darkroom. It was constructed using two tone equalizer modules with smaller change presets, but it looks substantially the same as the version in darkroom with a single stronger tone equalizer preset. The very bright one is how the same image looked and exported from lighttable.
Hmmm. Do not see an edit. In case it was not apparent, the question is any idea what is going on? If two modules can produce the effect, it should not be a functional limitation of the software. Is it applied different in lighttable and darkroom? Different constraints?
our vision shifts colours with brightness (e.g. reds and greens seem more yellowish), blues shifting towards cyan
the tone mapper may or may not reproduce such a shift
either of which may be perceived as an unexpected colour shift.
tone equalizer itself does not shift colours.
Scaling (either for the display or for export) can have an effect. Turn on HQ processing in the darkroom to judge this (even if only temporarily, as it entails a performance penalty), and export at full size (or with high-quality resampling enabled).
Could you please also share the raw and the sidecar?
This is not the same image, but it is one from the same set with the same issue I am providing this one because it still has the problematic tone equalizer settings and the work around tone equalizer settings. It should make verifying whether it is application generic or specific to my setup easier.
The the raw + sidecar are in the zip. Let me know if zipping is an issue. I did not compress the history of the sidecar, so the history has roughly a dozen or so tone equalizer changes back and forth testing the differences and trying to get a rough match with two equalizers.
There should be three tone equalizers present in the processing stack, but all should not be active.
The top two enabled (1,2) and bottom one disabled (0) look roughly the same between darkroom and export,
The top two disabled (1,2) and bottom one enabled (0) look vastly different between darkroom and export
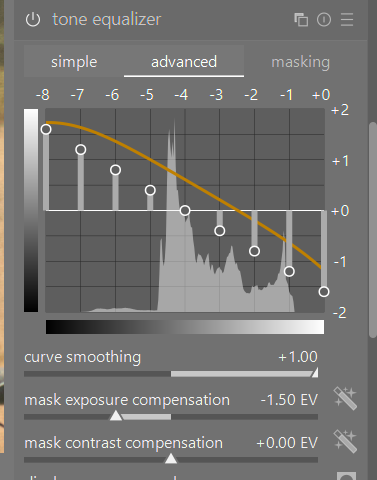
You have an extreme setting for curve smoothness that generates an orange warning curve…in any case removing that will sync the two so something about how the LT view processes that or perhaps doesn’t …seems to create the mismatch…
If I change it to 0.89, it seems to sync, as you said.
If I right-click and set to 1.0, it does not give a warning. If I right-click again and change it to a stable value, it warns that the setting is unstable. Seems like the warning might be getting queued?
If I move the slider to 1.0, it does give a warning. The orange line also stays synced with the dots.
As I did that a few more times, the warning seemed less synced with the actions, but I am not sure whether I was not letting it time out.
I was looking at the mask…the TE uses an 8 EV mask…you can use the mask settings to give a nicely blurred mask which will manage tonal transmissions…so what you saw was me looking at the mask…
I would leave the smoothing alone and focus on the mask. It and the luminance estimator that you choose will really impact the results…
If you have not seen it check out this video and also many of his other videos are premium DT content…Boris was quite prolific, as of late he has taken a step back but many of his videos are solid gold content for DT users…
These work pretty well…
download and import…they are organized into menu items automatically…
On first read, I missed some of the nuance of this reply as it applies to the reason for the linear mapping. I ran into the issue very early on using darktable, so with the steep learning curve, I may have just been doing something wrong.
After the tone equalizer, the sky changed from being a blue to more indigo. What I believed was happening was that the blue channel was being compressed differently than the red channel due to the skew in their peak locations and the differences in tone equalization at different intensities. (It appeared that the blue and red curve were impacted slightly differently.)
It was a different version of darktable and the images it impacted are archived.
If I get a chance to reproduce it, I will put something up about it to get feedback.
I had some questions a while back about the choice tone eq luminance estimators and the mask and how it would potentially impact color/saturation and any other elements and how they were targeted differently between the various options…
I ran it through a couple of AI queries…I didn’t have time to parse it and see if it made sense but I will pm it to you…it could possibly explain what you saw… if what it came up with is accurate…