export settings: jpg 95% quality, uspcaling+resampling allowed (however I tried a lot of different combinations and none of them helped). I have also tried different viewers (ubuntu native, firefox, gimp, but it’s all the same)
It’s the first time I encounter this problem, at least the first time I noticed it. I recently started using the filmic RGB module, and (after having tried to figure out what was going on) I suspect that it has something to do with the issue. The base curve is turned off.
I have now two filmic RBGs applied after oneanother, but I had the exact same issue with only one.
Could anyone point me somewhere how to figure this out? Many many thanks, it’s driving me crazy
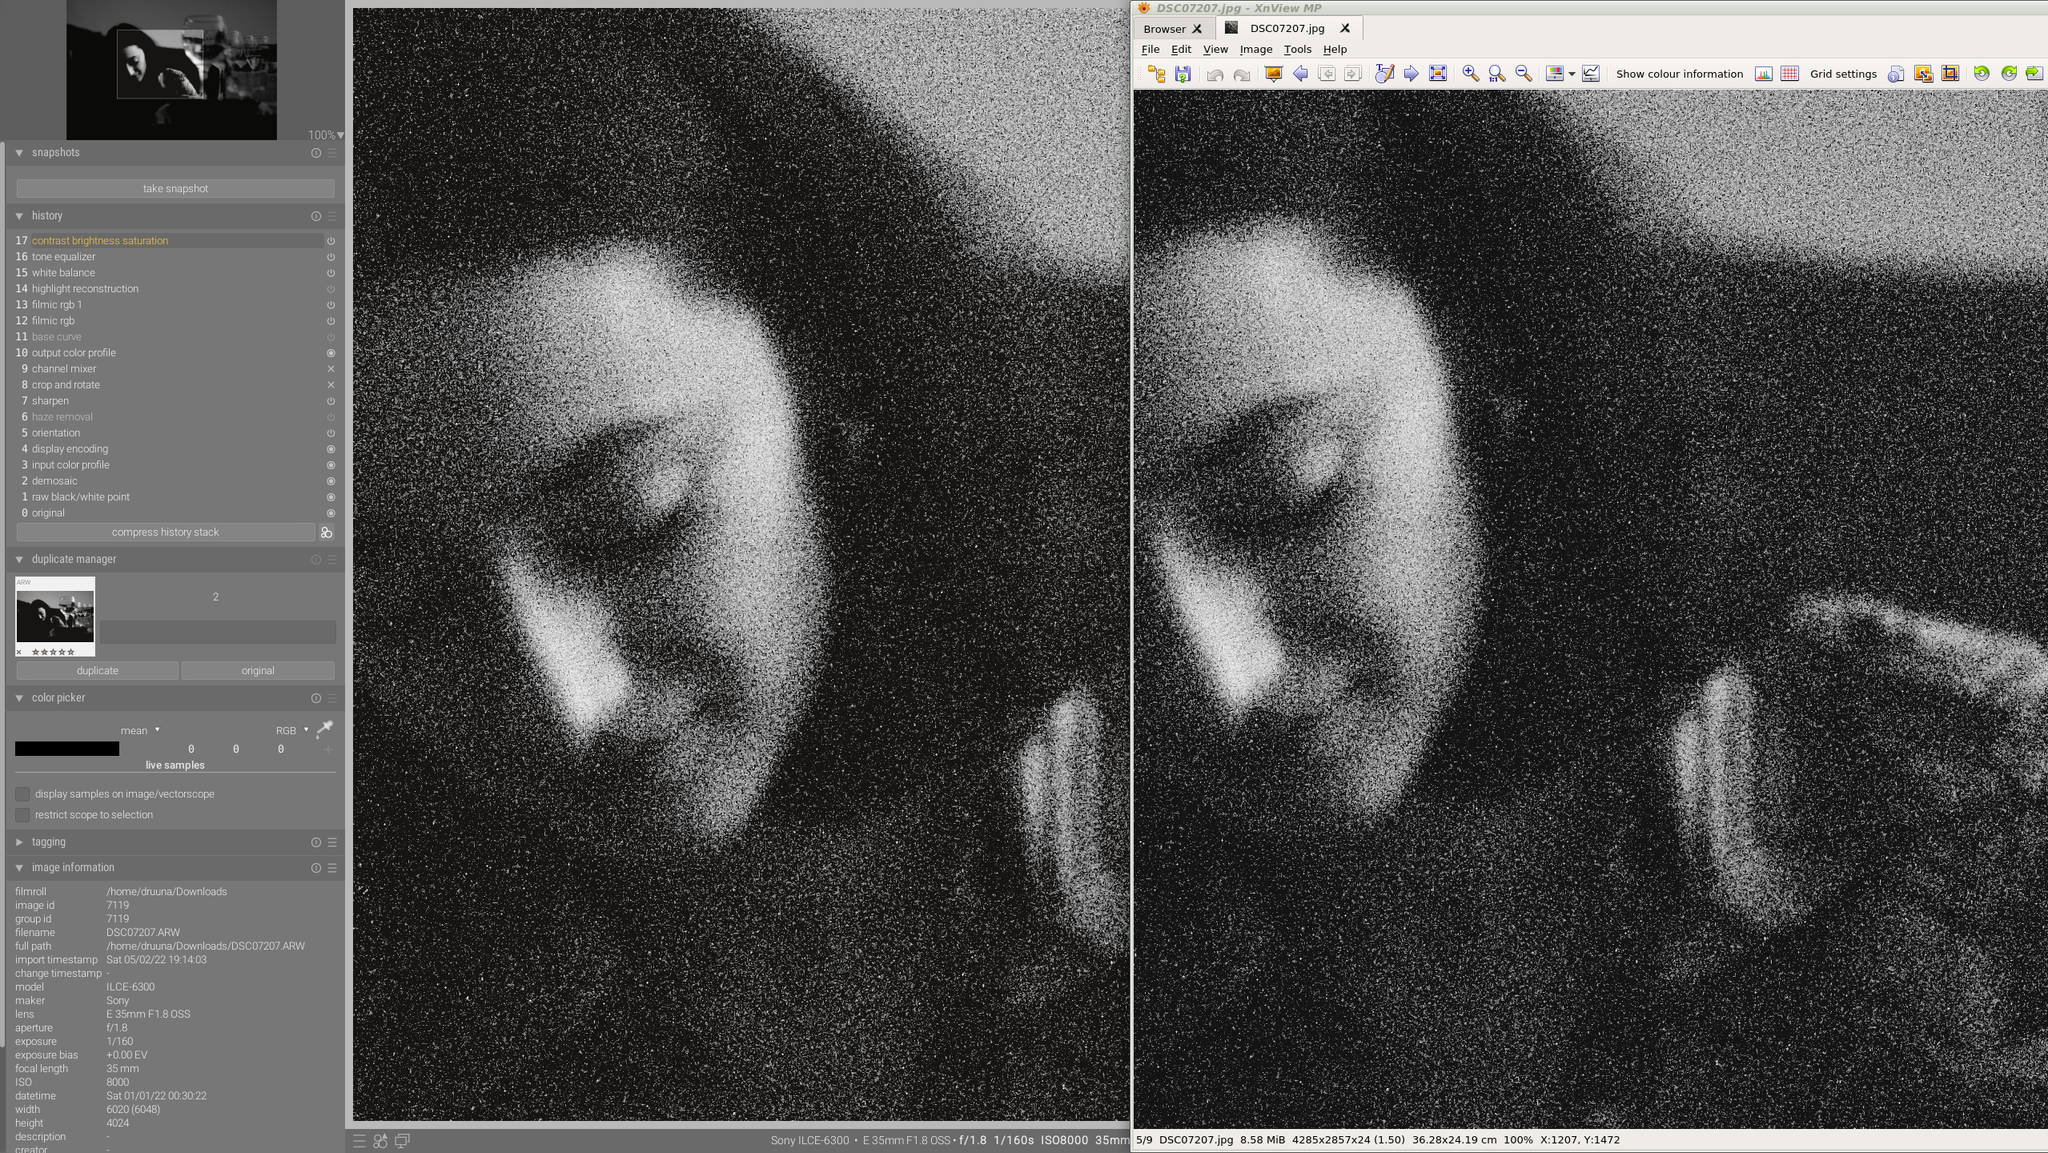
Thank you for all your replies, really appreciate it! It’s a good point, that once zoomed in the difference is not soooo obvious anymore, but it’s definitely still very much visible:
There is a bit of a difference, as the screenshot is in my monitor’s colour space (even though untagged by the screen capture tool), and the other is the exported image in sRGB.
Unfortunately, getting exact processing in the preview would mean performing the equivalent of an export all the time, which is much slower than the so-called preview pipeline. The preview is the equivalent of a reduced-size export with the high quality resampling option turned off.
Is there any way to mitigate it to some extent? I understand the reason why it cannot provide and exact preview, but the size of the difference is just huge…
Maybe a button could be added to the UI: run full processing? But you can already export from the darkroom and view the output, fit to the screen, in an external viewer.
Its the whole scaling thing…export the image using the settings in export to scale…set to 0.25 …export and you will see the image will look like the dt preview at full scale…this came up with that thread in sourdough bread and the noise and the poster saw more noise in his export…again the noise in the export matched the 100 percent view but not the full preview…it seems to me that if you want a perfect match in DT then you also need to manually scale the export…
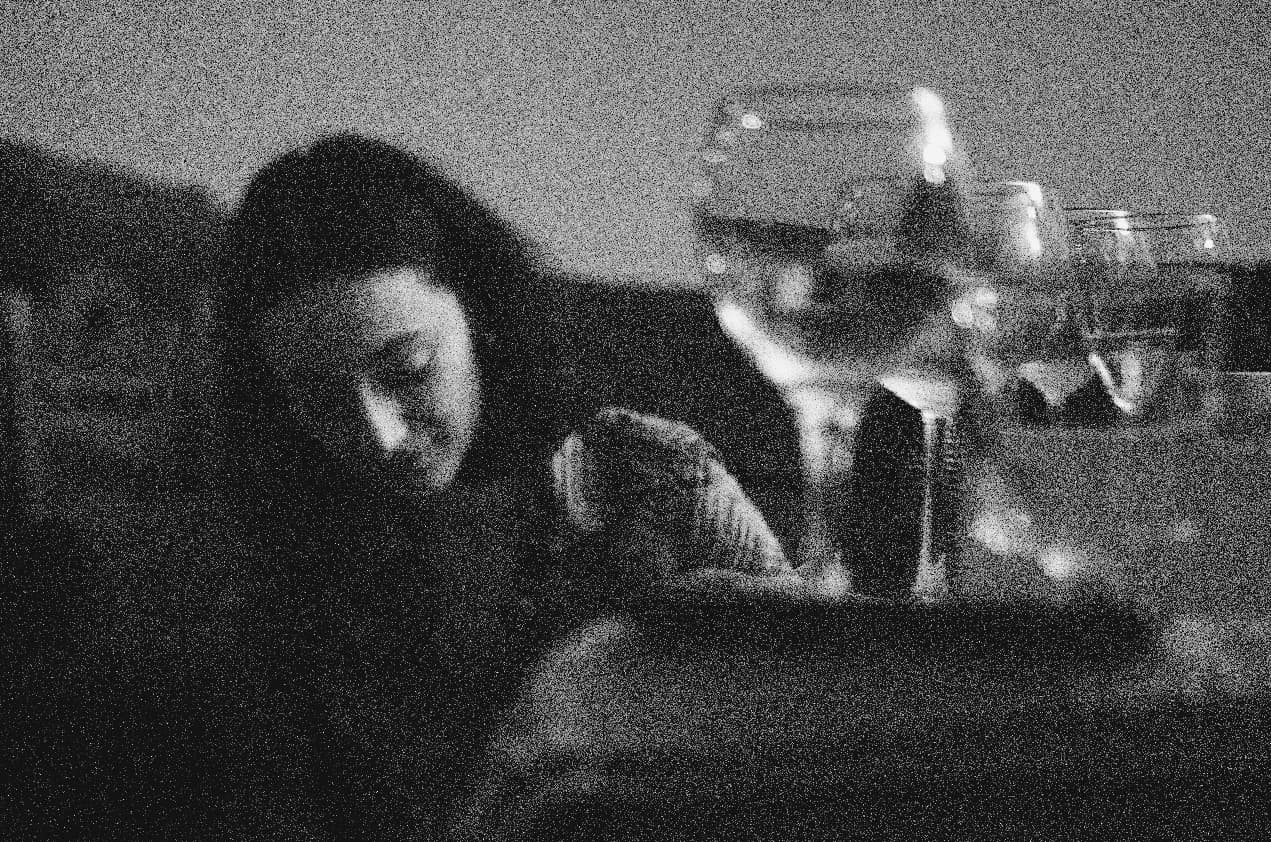
Interesting capture, most of the image is in the lower 3% of the sensor resolvability, but there’s still clipping, two specular reflections in the upper left…
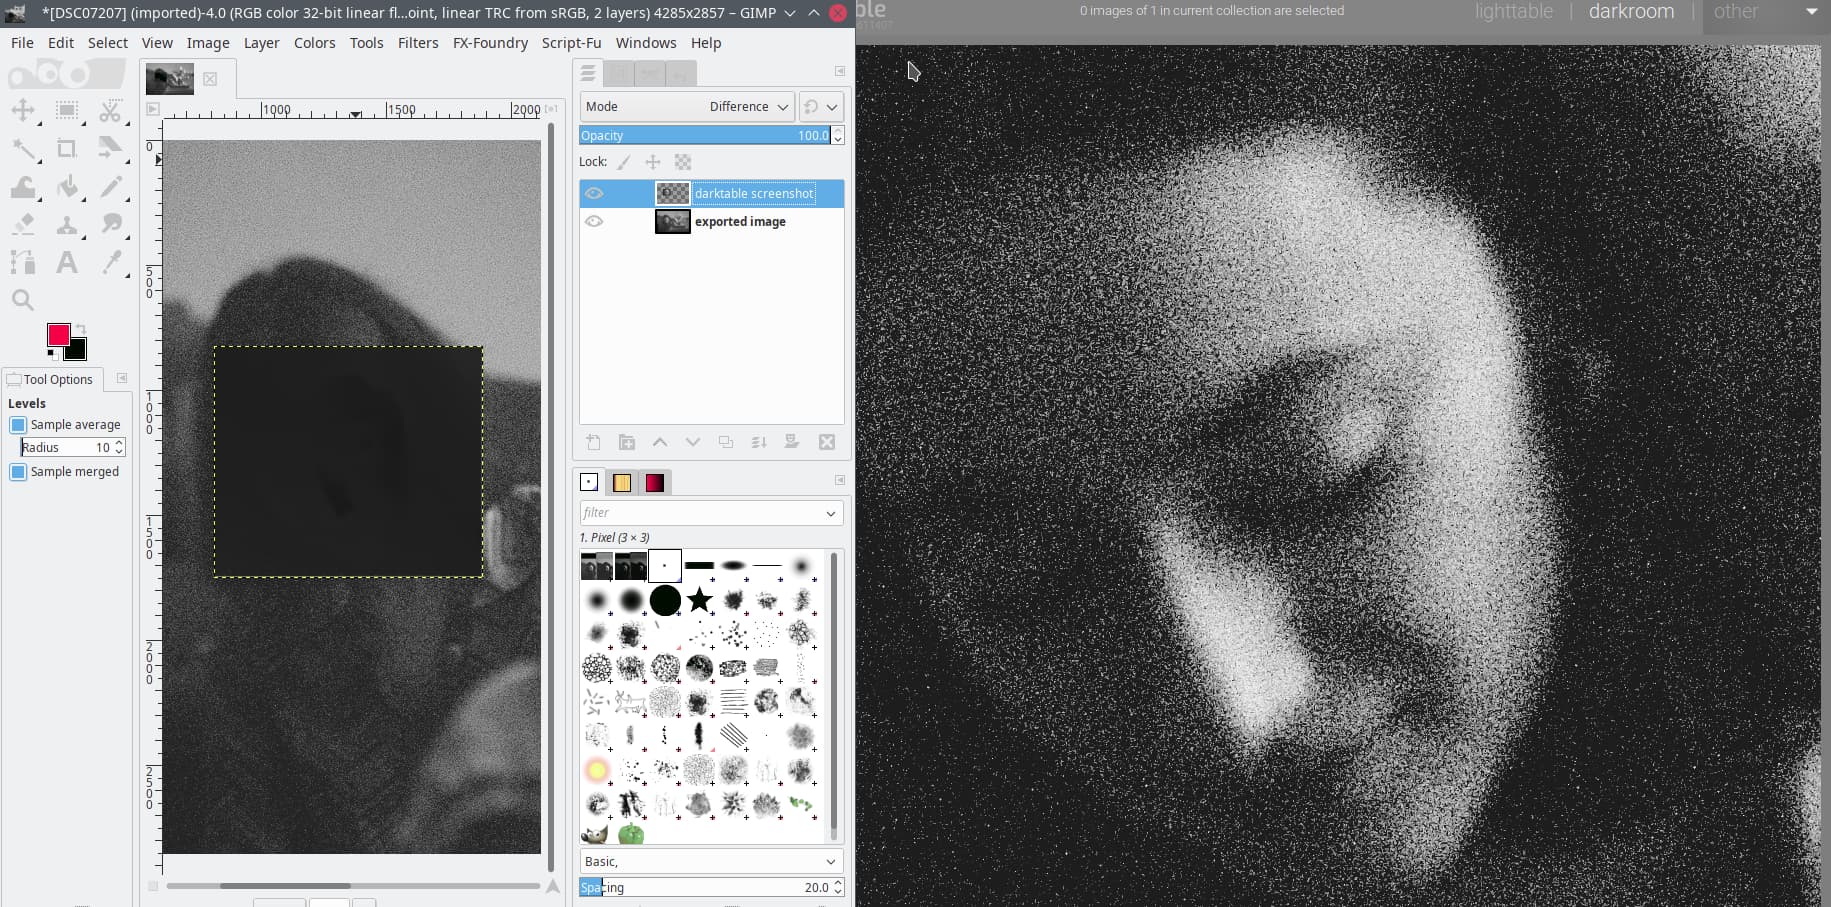
Pulling the lower part of the image up with a tone curve revealed the shot noise in all its glory. I messed with denoise a bit, then decided to defer that until I saw what an export resize would look like:
I think what’s going on is that you’re trying to add contrast, and all that does is to make the noise more contrasty. Resize for export mitigated it, but you probably need to put denoise before the tone curves…
I may have mislead you by the link I included…the issue that the OP sees is that DT exports true to 100 % The full screen preview on a monitor scaling shows or can show quite a different version of the image. that can be matched if you scale the output the same way before export…noise is just a good way to visualize that in action…it was just the starting point in that thread for that discussion
What is weird (and I think we have a bug here) is the following:
I reset the module, I get high quality resampling = no:
I switch to set size = by scale; 0.25 and do an export, I get the darker version. This is as expected (the darkroom view also uses the equivalent of high quality resampling = no for the preview).
I switch to high quality resampling = yes and run another export with by scale; 0.25, I get the same output as before. bug
I switch to set size: in pixels; x = 1072 (as the previously exported image is 1072 pixels wide):
I get a properly scaled-down version that matches the contrast and tonality of the 100% view.
I switch to set size = by scale; 0.25 and do an export again (without touching high quality resampling = yes, as it is already set), I also get the expected outcome. This matches #4.
If I now stay in by scale mode, set high quality resampling = no and export, I, again, get the preview-like output (dark and contrasty); this is expected (these are the same settings as #2).
Switching back to high quality resampling = yes, the image will match the 1:1 view (like #4).
Toggling high quality resampling between yes and no behaves as expected from that point on; resetting the module leads us back to #1.