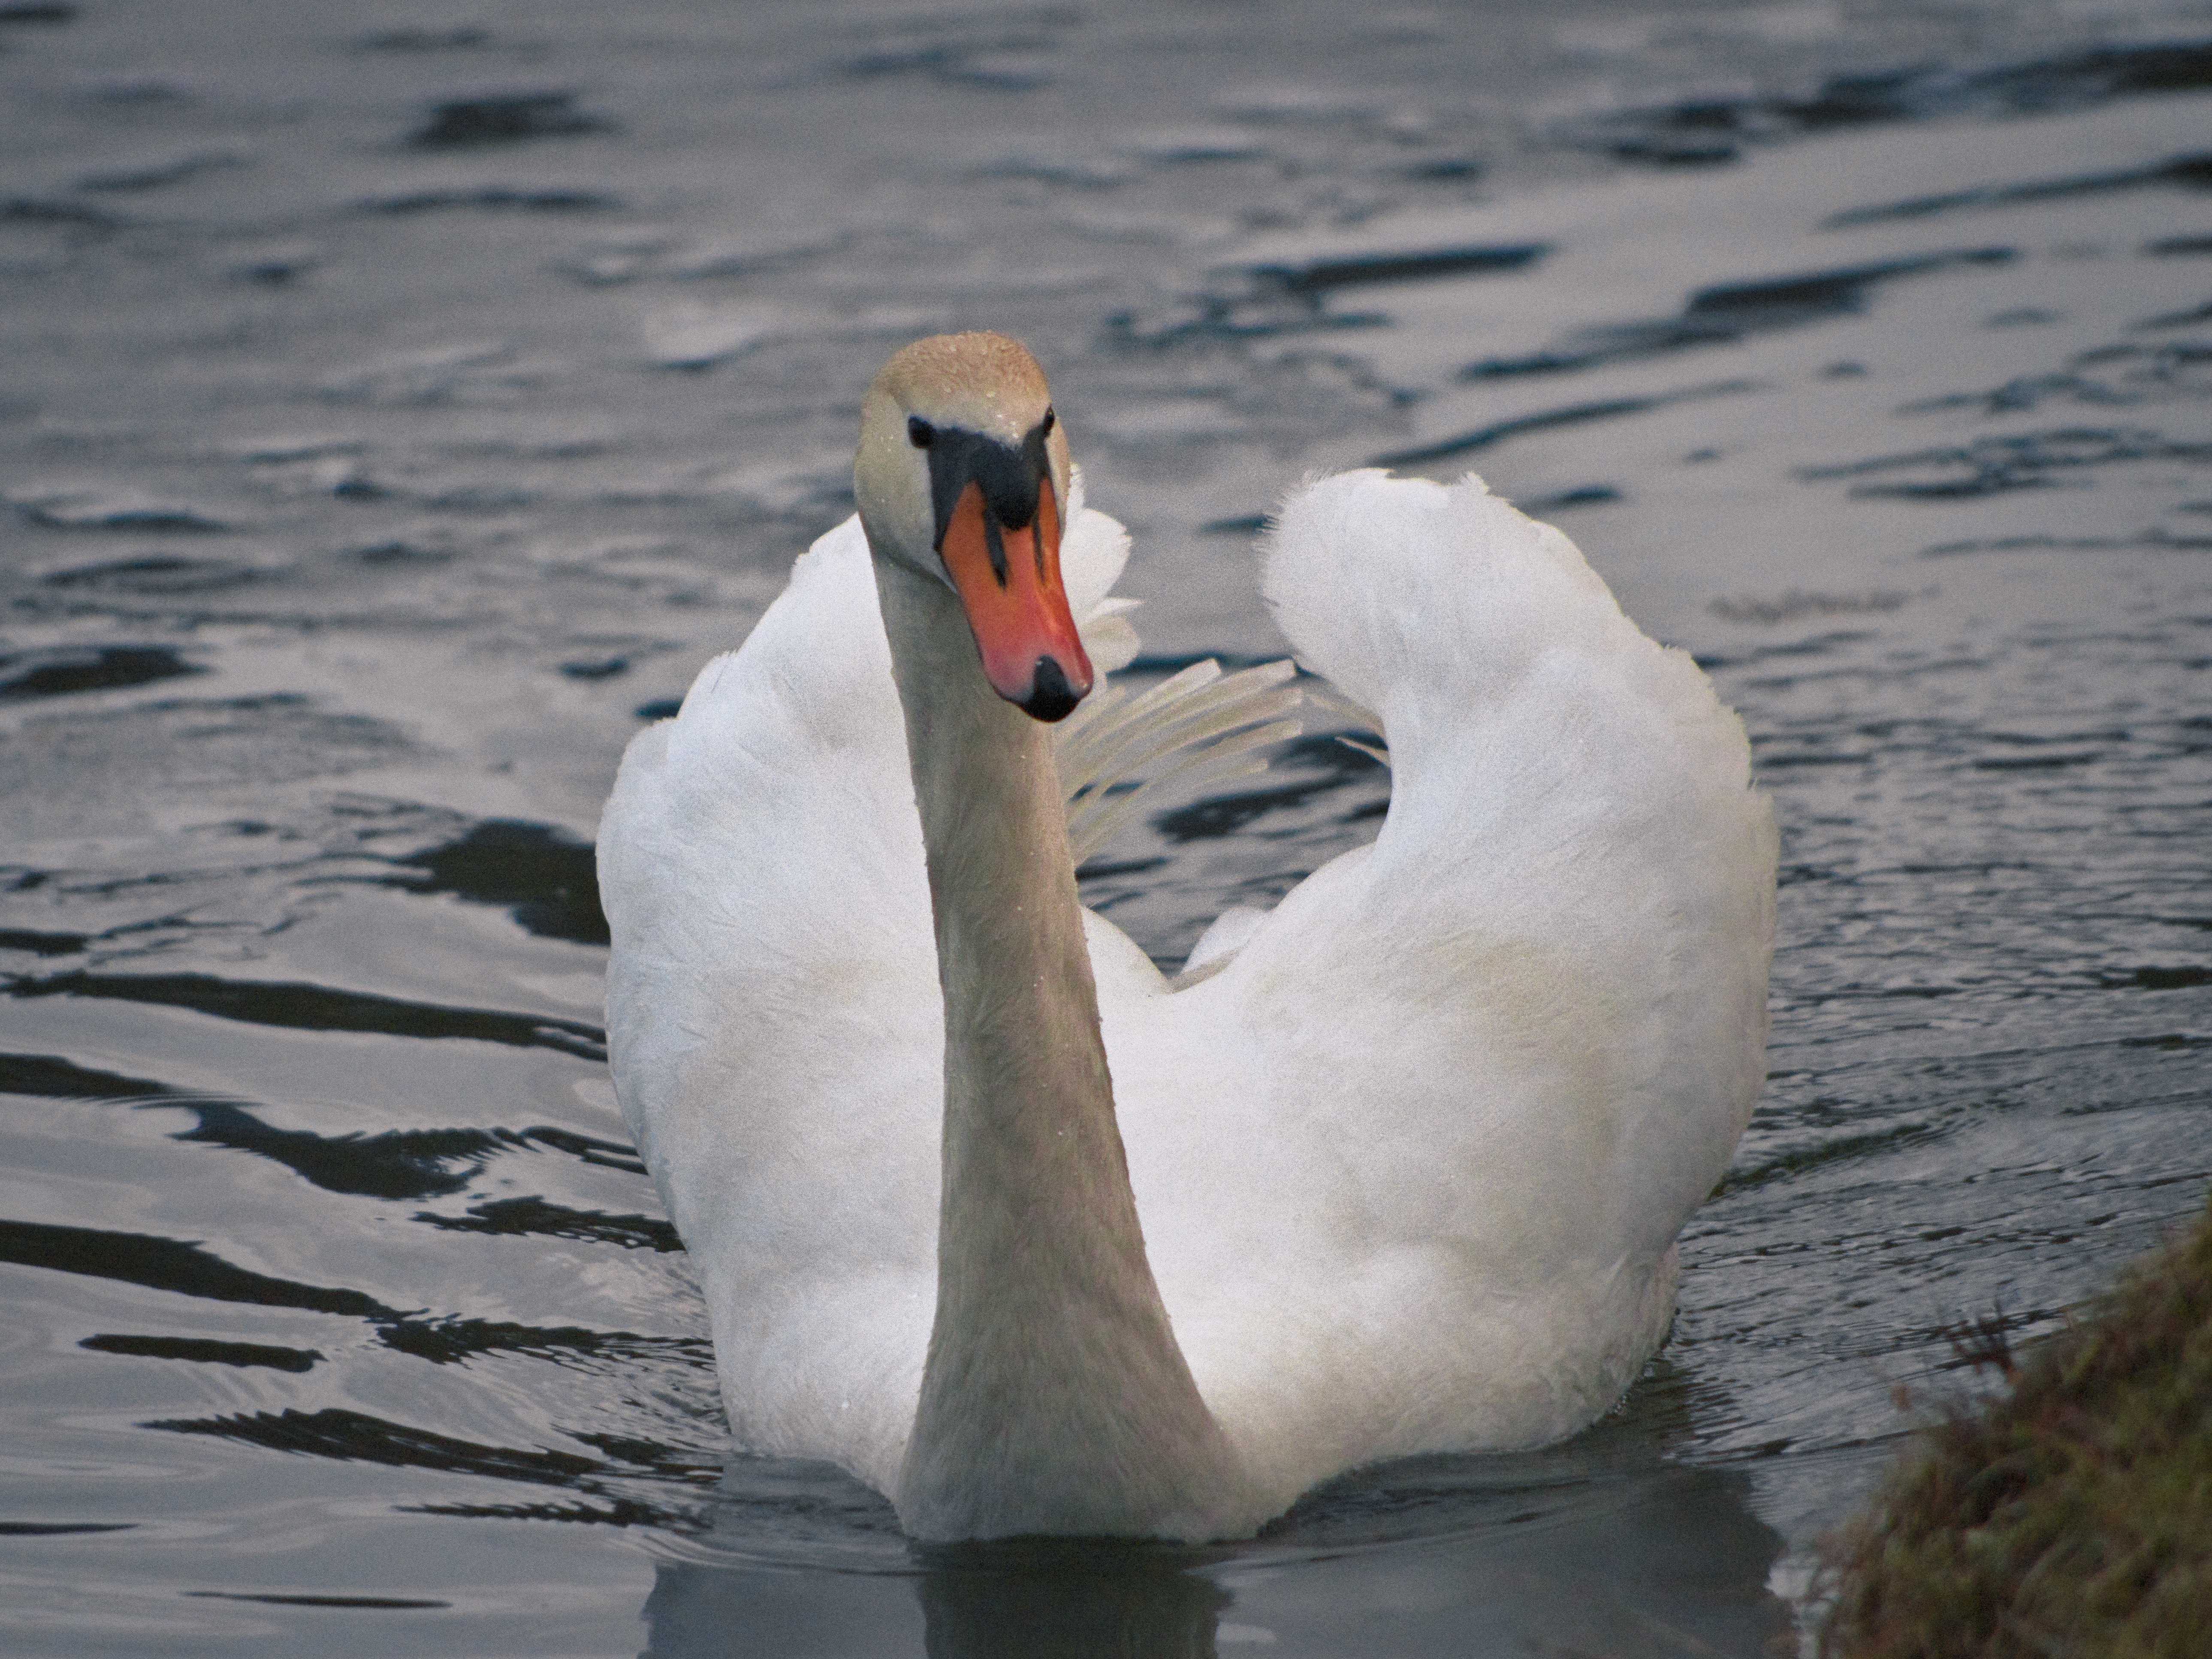
So I was taking a walk rather late and the light was getting bad. Still kinda good enough to shoot a swan though. (Photographically, that is)
This bird has very white feathers. There is some structure in them, but when I crank up the exposure only a little bit, they are so white that you can’t see anything. I find myself going for rather strong contrast enhancement to bring out some of this structure, but I wonder if that is the right path? What would you do?
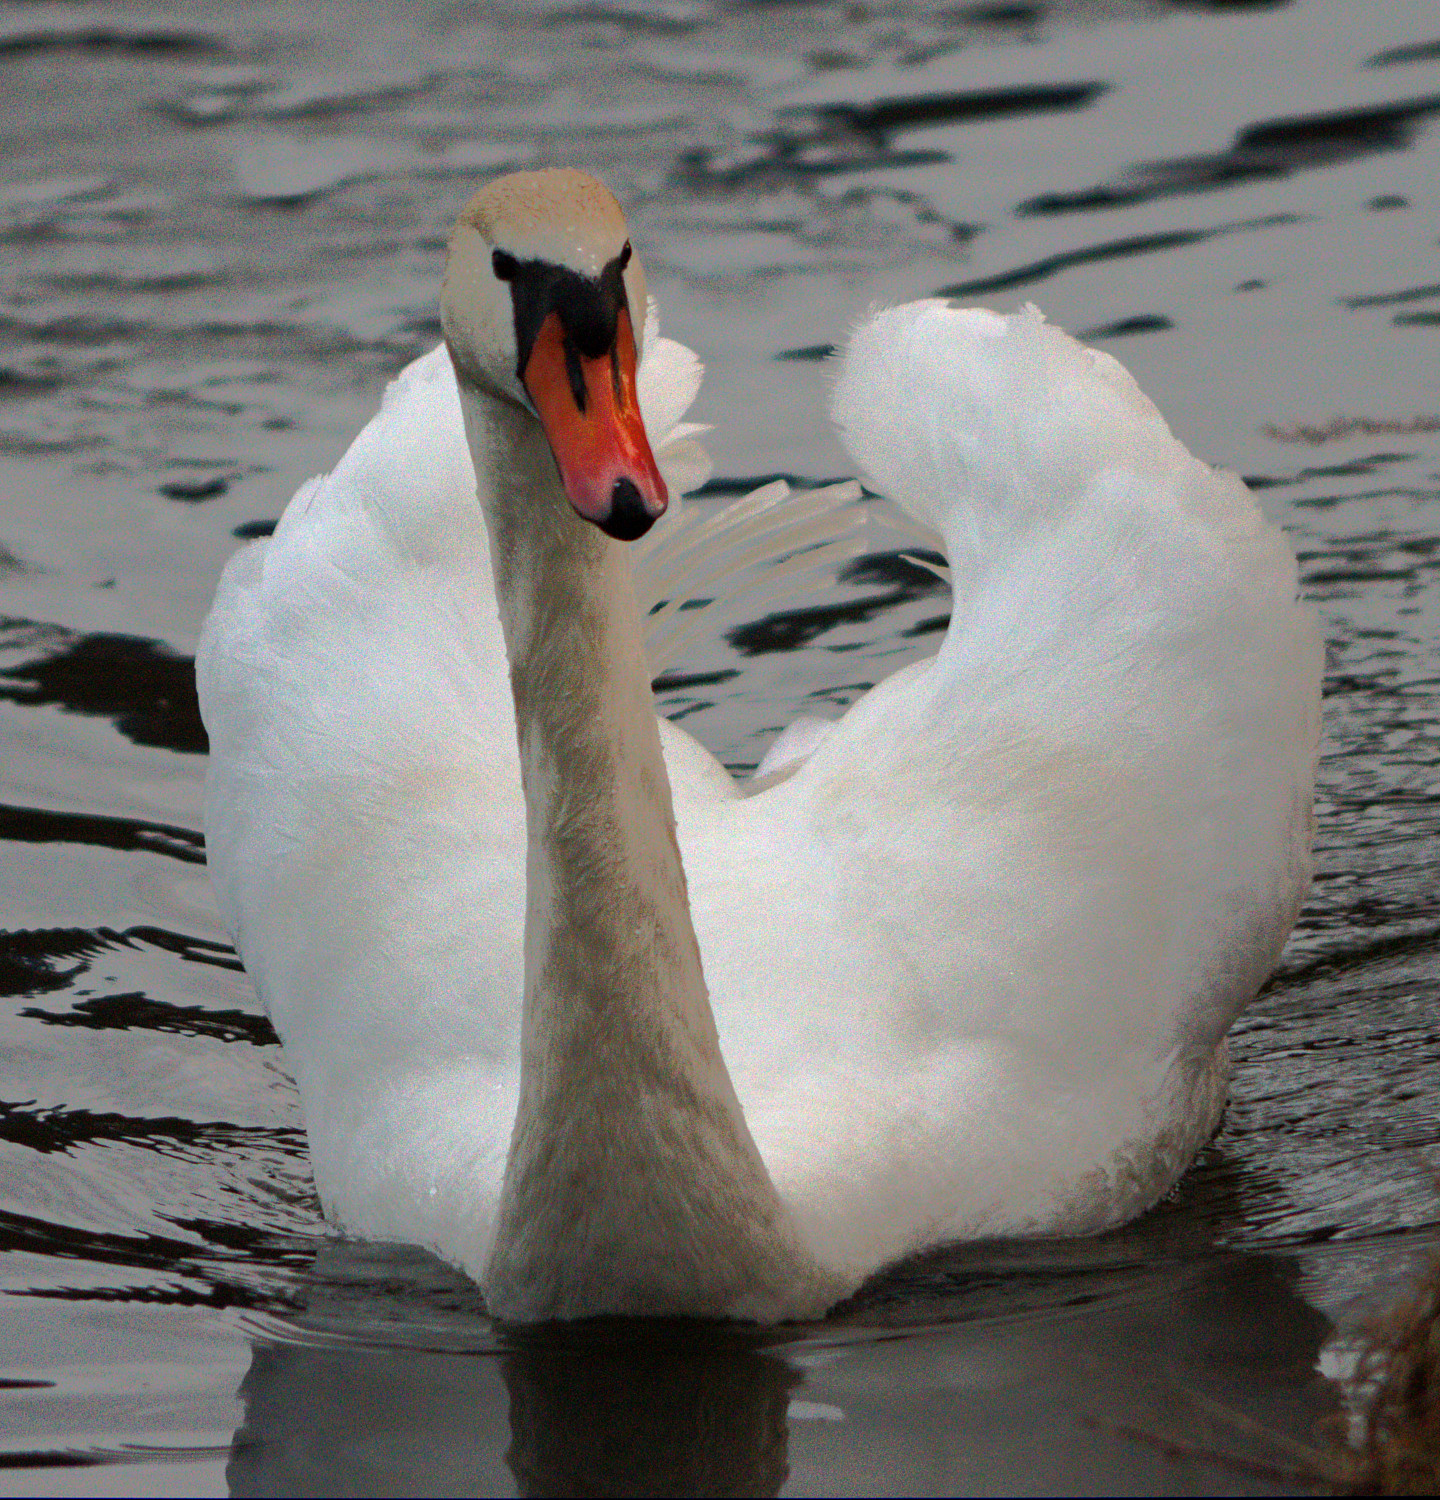
First of all, I have to admit that I am still learning
RawTherapee. This is presently my best attempt
to tame the feathers of that swan — at least I managed
to get them a bit fluffy
I used sigmoid, with relatively high contrast and the skew slider hard over to the positive side to increase highlight contrast, then used tone eq (starting with the compress gf medium preset)to pull the (blown) highlights back in again. Quite happy with this result.
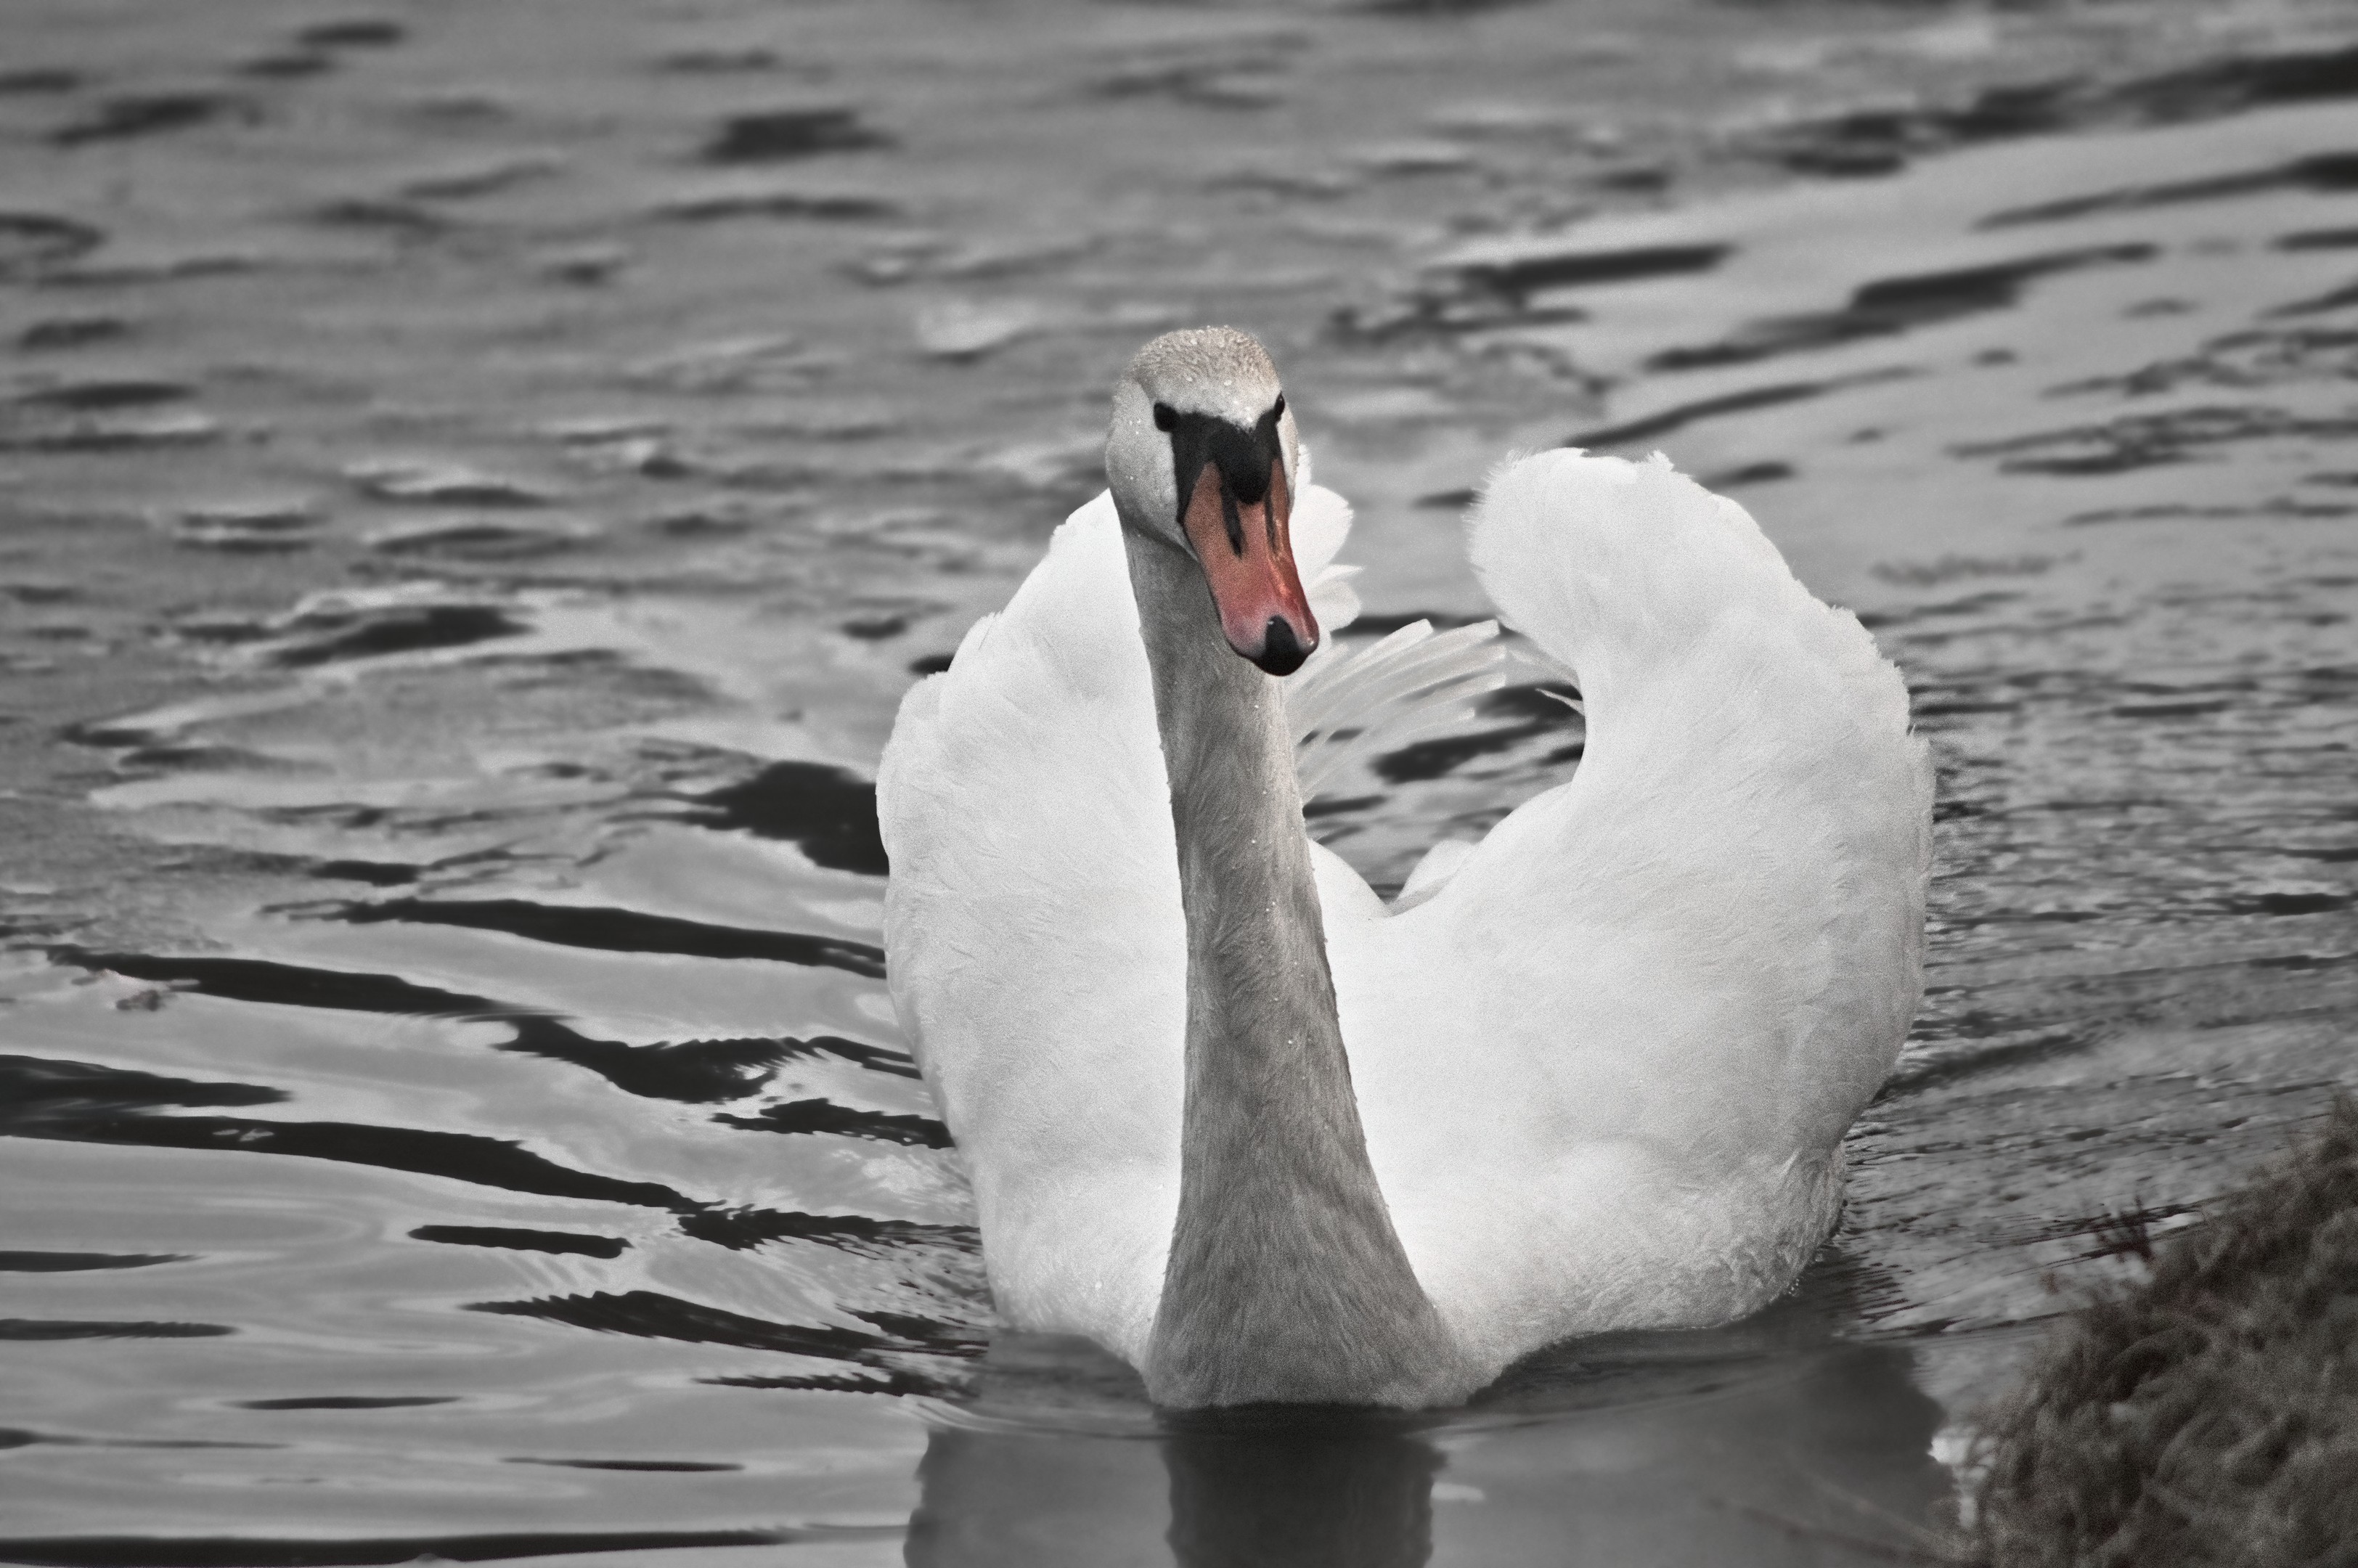
Cooler colouring which I think works well but may not be accurate.
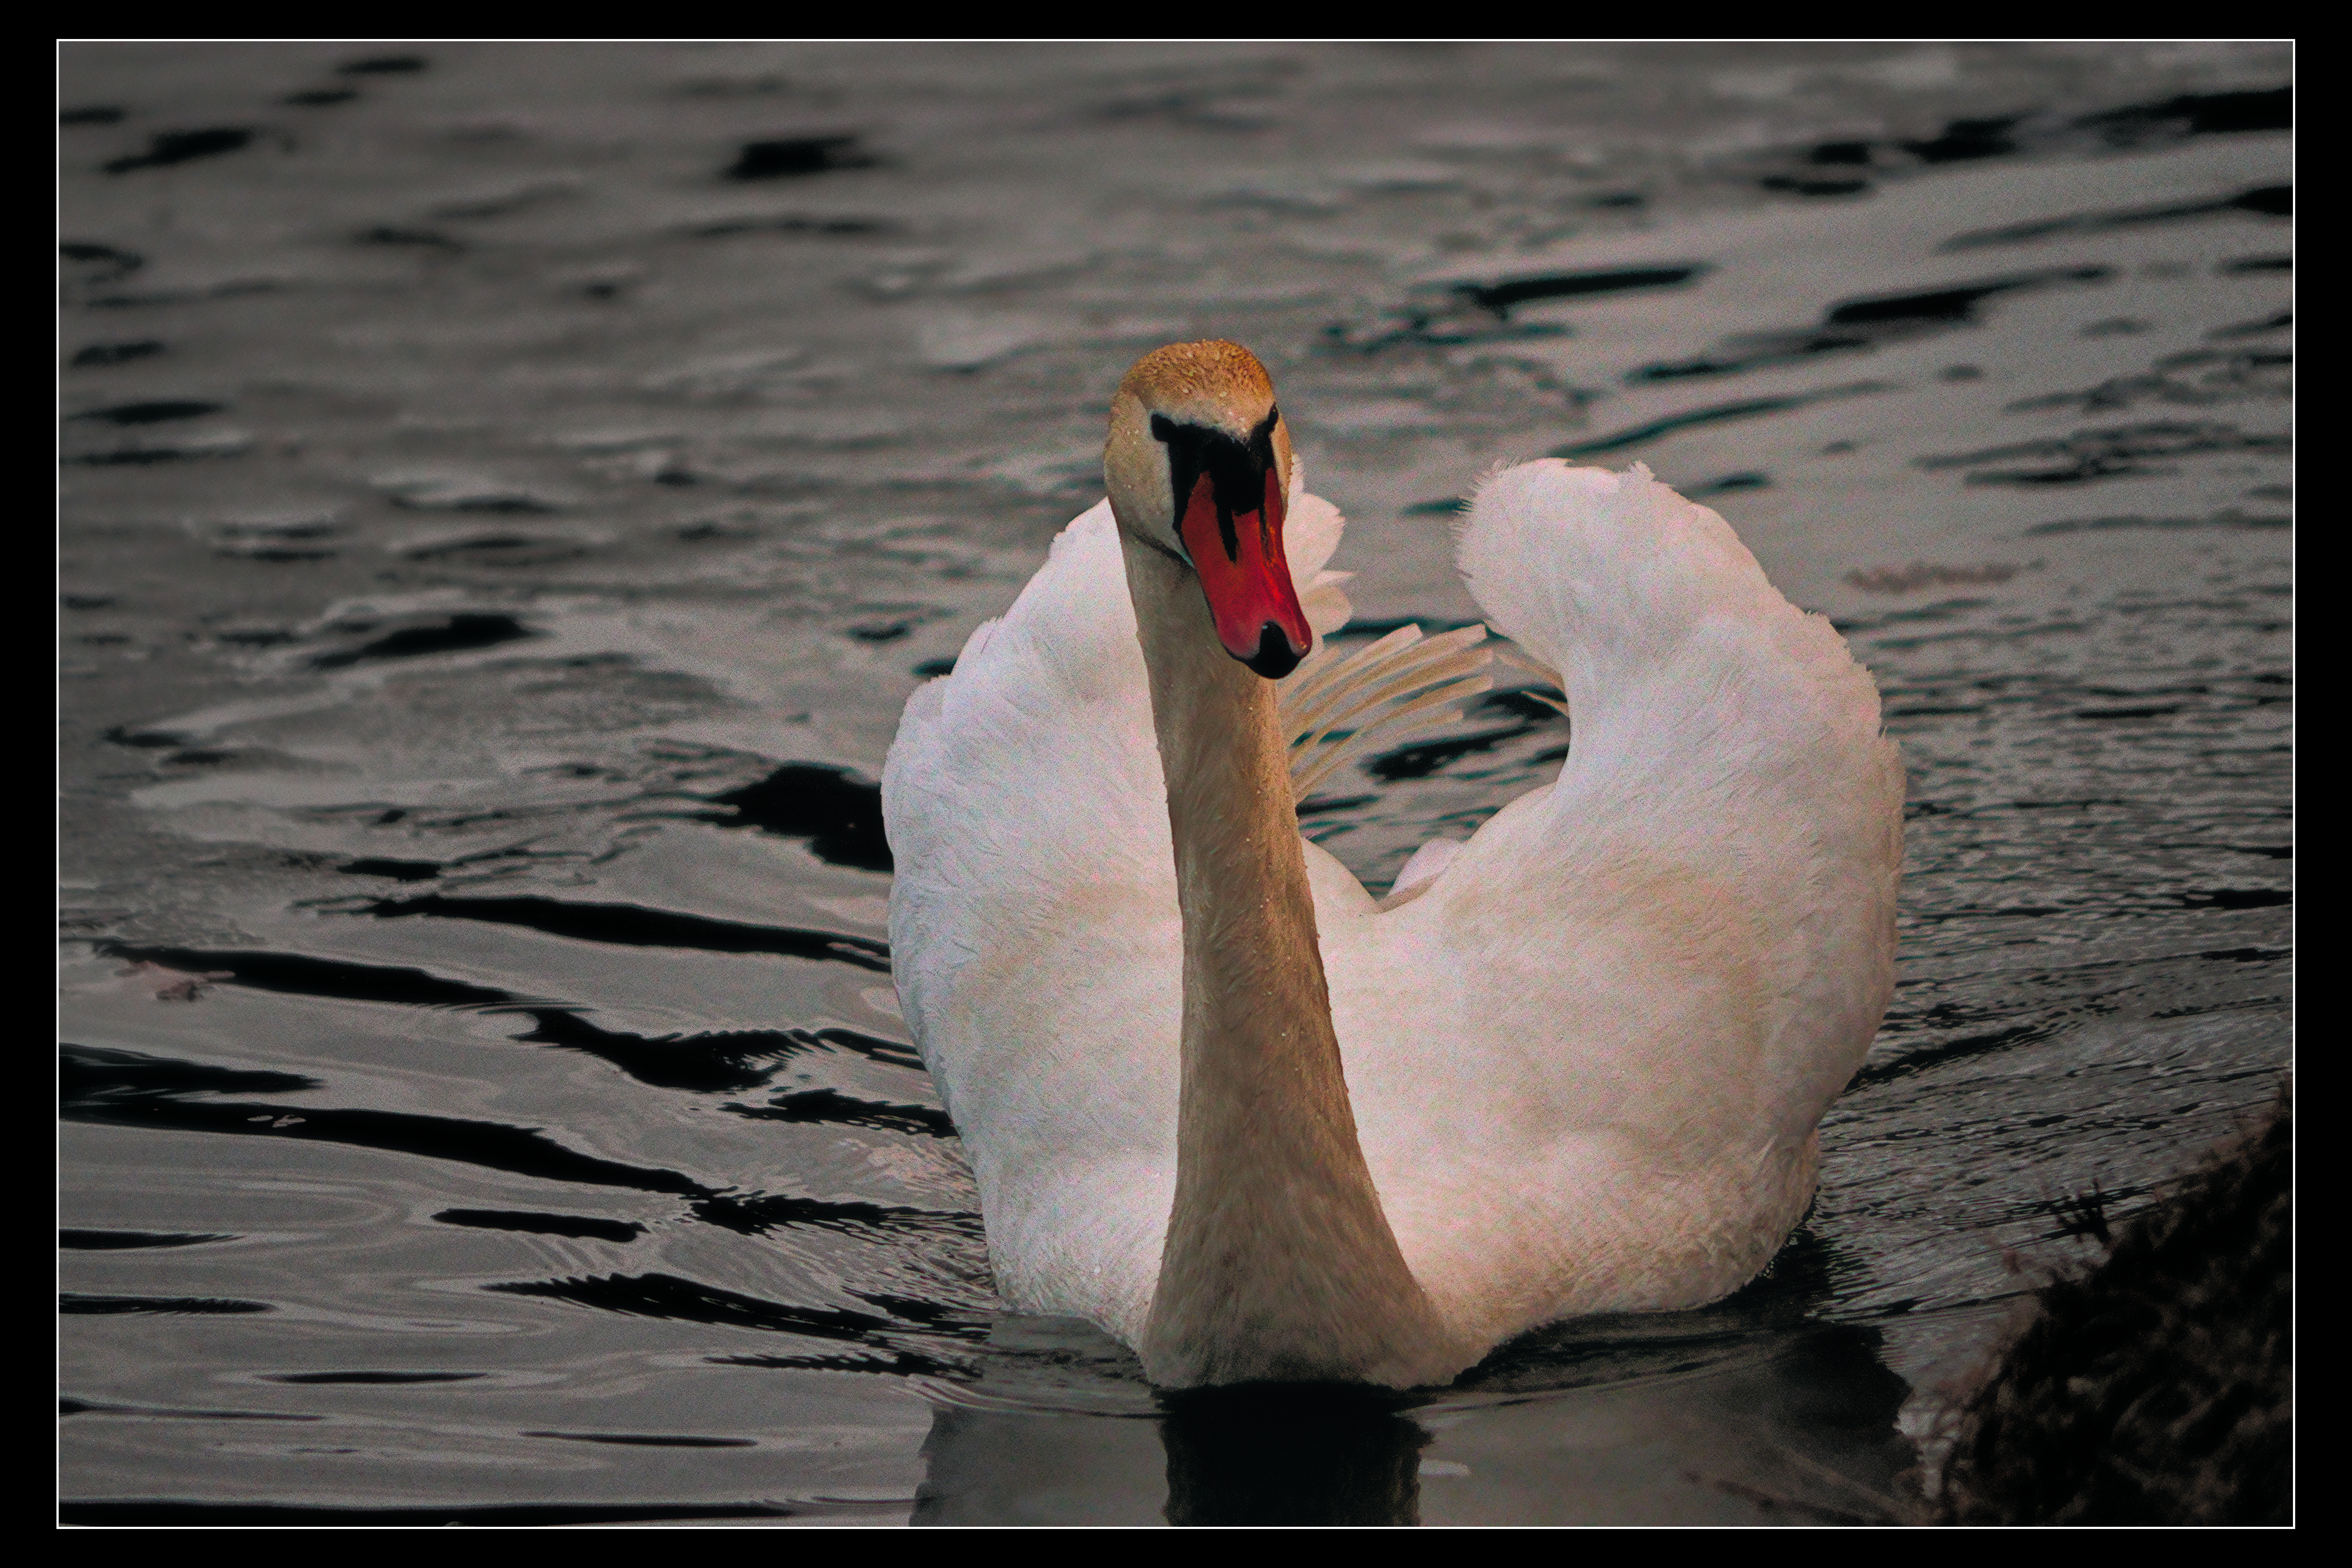
Quite challenging!
I tried to emphasize the structures by strong abuse of haze removal and CBDL. The resulting excessive noise was gracefully reduced by downsizing the image
I found this image challenging to process. Filmic auto tune levels freaked out on this image because of the white feathers and the dark water. So I had to resort to manually adjusting the sliders which was no big deal. Then trying to get the feather details maximised I used both tone equalizer and shadow and highlights modules. I then wanted to deal with the slight out of focus head using the lens deblur: Hard preset found in the diffuse or sharpen (DS) module. I used a drawn mask to limit this correction to just the head and was pleased with the improvement. I also used the DS module to do initial sharpening using the sharpen demosaicing (AA filter) preset. I tackled the noise using denoise (profile) but also the denoise preset in the DS module. This preset has 32 iterations which was hard work on the laptop I was using as it doesn’t have a dedicated graphics card. I masked the image so denoising wasn’t applied to the swan. The denoise option in the DS module is impressive, but bloody resource hungry. I will save that for special cases and not day to day use. Thanks to AP, the developer of the DS module, for giving us such a great tool. 20230219_0021.DNG.xmp (27.3 KB)
Thanks everyone for the great attempts and inspiration! Some are definitely better than mine.
I’ll have to experiment more with the DS module for sharpening. It really improves the quality, but it’s such a pain to wait for it to complete, even though I have a graphics card.
What you want is local contrast , maybe masked to just the bright parts.
I described this elsewhere as my clarity trick :
Add the local contrast module , set it to bilateral.
Set the contrast to 3 (real low ), then crank te details . I easily go to 300% or more. Overdo it a bit.
Then enable parametic mask, set it to L mode (we are display referred here , it’s after filmic or sigmoid ). Then use the sliders (maybe with the yellow preview enabled ) to select a low and high point to select on which brightness to work on
I often add a bit of feathering and/or blurring .
Then, after the mask is set and you like the result (toggle on/off)… You can finally adjust the opacity of the mask to fine tune how strong the effect is .
There are many other ways to try something like this. D&S is the better scene referred option (but not the easiest ) , but dehaze or sharpening or contrast equalizer (and even the tone equalizer) can enhance local contrast.
My quick attempt. I just raised exposure, auto-tuned filmic, then applied local contrast in a way similar to what @jorismak described (I’m attaching two presets I sometimes use; you may tweak the input L range, as well as the other params). Finally, I raised filmic white relative offset a bit. bilat_highlight details.dtpreset (1.0 KB) bilat_highlight details (subtle).dtpreset (1.1 KB) 20230219_0021.DNG.xmp (8.8 KB)