I’ve done some big panoramas with hugin before, and it’s been great so far for correcting distortion. I just got my hands on a view camera though, and now I’m looking to do some stitching by physically shifting a digital back around on the film plane, which should mean that the images will stitch together perfectly without any correction needed.
So with that in mind, is there any simpler (and faster) software I can use to do this kind of less complicated stitching? Bonus points if it can somehow combine multiple RAW files into a single, stitched DNG, although I know that’s probably not super feasible.
Interesting, I’ll have to give it a try. I haven’t actually gotten anything together to test with yet, I just got the whole thing finally up and running today. Hopefully I’ll have some examples soon, but what I’m going to be doing is literally shifting the sensor up and down, left and right along the plane of the image. It should be effectively flat (at least to the extent that the lens’ projection is flat), because the lens is staying put and I’m just sampling different sections of the image circle
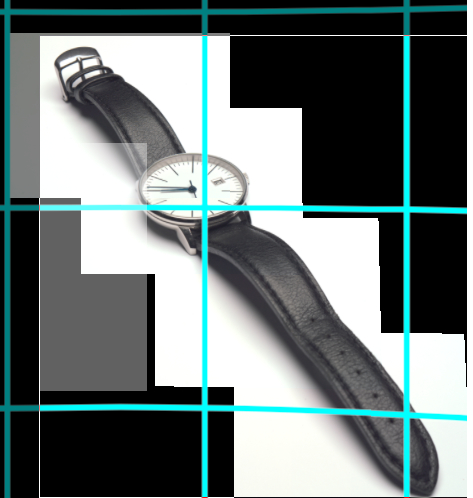
That’s a Google drive folder that should have both a final stitched file and a ZIP file with all the constituent JPEGs in it soon (I’m leaving it uploading while I go to sleep). I cheated a little on this one with a diagonal object across a white background, so I didn’t have to shoot the entire rectangular area. Don’t mind my questionable use of camera movements, I’m still trying to get the hang of this whole view camera thing
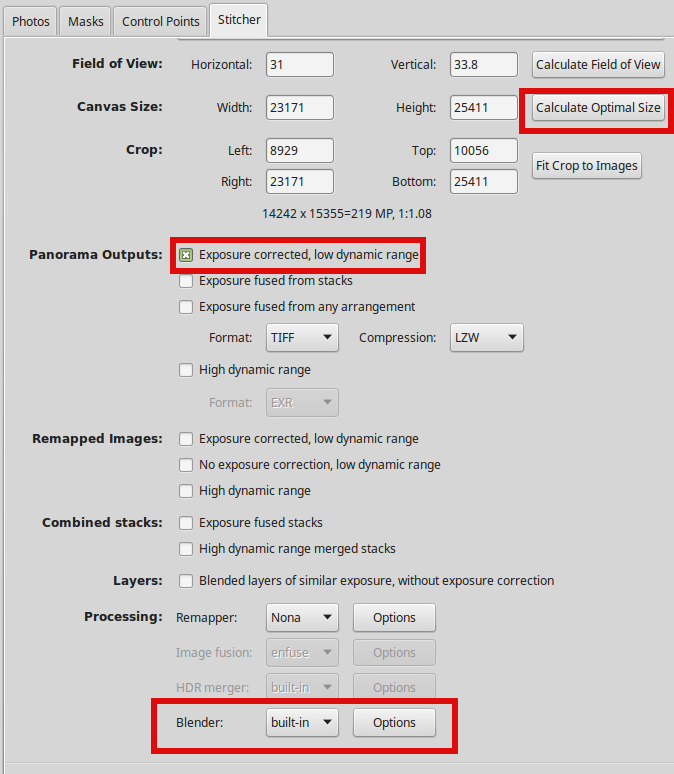
As far as stitching goes, though, hugin seemed like huge overkill, to the point that I had to correct the things it was trying to “correct” in Gimp after the fact (and it turns out a 120MP stitched image It introduced a noticeable color cast towards the bottom right of the image, and the process took forever. Is there any way I can tell it to just not even try to correct exposure and simply align and overlay the images? It seems like I have to select exposure either fused from stacks or fused from all images, right? Maybe fusing just from stacks would be less destructive, I’ll try running a version like that overnight.
first, run Hugin’s cpfind with --ransacmode hom -o %o %s, then optimize for R (roll), X (horizontal translation) and Y (vertical translation). adjust the preview to your liking and stitch with exposure corrected, low dynamic range ticked. to hasten the stitch, untick superfluous images from the preview. your example file set can be stitched with 4 images.
I use Hugin for flat (mosaic) stitching to increase resolution on large-format film negatives using a digital camera. I made a video tutorial for this using a recent version of Hugin, as some of the tutorials on the web are for out-of-date versions and no longer work well.
This type of stitching is for stitching photos where the camera position shifts laterally, keeping the sensor in the same plane as the subject, or in my case shifting the film laterally while the camera is stationary. This differs from the more normal panorama where the camera (or rather the nodal point of the lens) rotates.
My tutorial is a screen capture video that’s about 15 mb. Can I upload it here?
missing exif data shouldn’t matter, since hugin asks for the focal length when you load the images onto hugin. just set the field of view to something reasonable, i.e. less than 45 degrees or so - for flat stitching it’s not important.