first, run Hugin’s cpfind with --ransacmode hom -o %o %s, then optimize for R (roll), X (horizontal translation) and Y (vertical translation). adjust the preview to your liking and stitch with exposure corrected, low dynamic range ticked. to hasten the stitch, untick superfluous images from the preview. your example file set can be stitched with 4 images.
1 Like
I did following:
-
I chose pictures 2, 5, 9, 12
-
In Camera and Lens data, write to HFOV (v) number 10

-
Controlpoints: Hugins CPFind
Options: Postions (incremental …)

-
Click Fast Preview panorama

-
Select Projection, click Fit, change to Rectilinear

-
Crop
-
Go to Sticher:
Click Calculate Optimal Size
Choos Exposure correkted low dynamic range
Change blender to buil-in
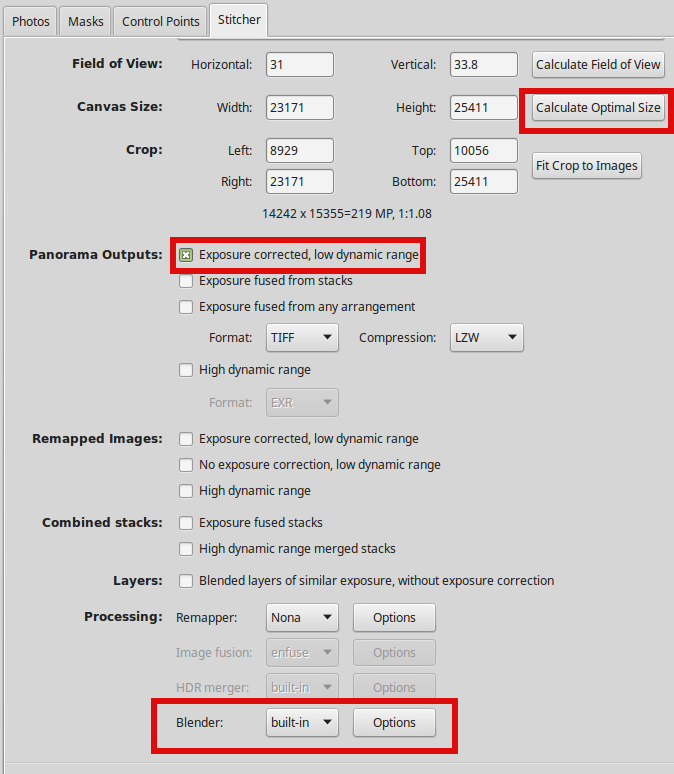


8 . Stitch!
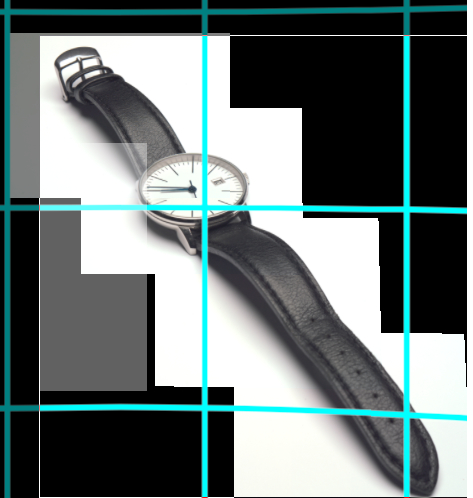
9. Picture img_002-img_0012.tif is over 200 MB. Here is smaller .jpg

5 Likes
Y’all are great, thanks for all the advice. I don’t know why it never occurred to me to look for a minimal set of images, but that should help a lot
I use Hugin for flat (mosaic) stitching to increase resolution on large-format film negatives using a digital camera. I made a video tutorial for this using a recent version of Hugin, as some of the tutorials on the web are for out-of-date versions and no longer work well.
This type of stitching is for stitching photos where the camera position shifts laterally, keeping the sensor in the same plane as the subject, or in my case shifting the film laterally while the camera is stationary. This differs from the more normal panorama where the camera (or rather the nodal point of the lens) rotates.
My tutorial is a screen capture video that’s about 15 mb. Can I upload it here?
I think you can drag and drop it in the editor window here.
If not, I’d recommend a PeerTube instance such as https://peertube.xyz/videos/trending or you can embed a YouTube link in the post.
Drag and drop didn’t work as it won’t accept .mp4 files. I’ll try some your other suggestions.
I’ve put it on peertube but it’s not loading well, at least on my computer. Maybe try it? https://peertube.xyz/videos/watch/fa20dd76-da08-4b02-92a4-a87e7f7174b7
2 Likes
Loads well for me!
That was perfect, thanks!
1 Like
@troodon I tried your guide to @Bieber’s pictures, but I did not get a good result. Can the problem be missing exifdata of @bieber’s pictures?
missing exif data shouldn’t matter, since hugin asks for the focal length when you load the images onto hugin. just set the field of view to something reasonable, i.e. less than 45 degrees or so - for flat stitching it’s not important.
This takes a lot or is my computer?
I stich these 4 pictures with blender enblend and built-in.
With enblend stitching takes much longer time.
With enblend blended picture was 176 MB and with built-in it was 222 MB.
Enblend did long time polishing built-in not .
Edit: Writing mistakes corrected
1 Like
You mean enblend. 
I did it and work very well
In some days share my 360 DIY
I think @Morgan_Hardwood is right. @yteaot can we expand this into a post on the main site as a tutorial? Do you want to flesh it out just a little bit with me?
Alright. How to proceed?
I had a go at @troodon’s method, and it worked swimmingly: View Camera Still-Life Panorama | This is my first serious-i… | Flickr
Just ignore the horrific posterization in the web-viewer image Flickr generated, all of the download sizes look better  In this one I used 15 exposures to get an effective sensor size of about 3.2x3.5 inches, although I cropped in quite a bit for the final edit (cropped from ~200MP to ~100, which still makes GIMP choke). I could have covered the whole space with just nine, but using the digital back on a view camera seems to generate some pretty pronounced centerfold artifacts in the shadows, and with some duplicate pixels in the in-between spaces enblend seems to do a pretty good job of smoothing them out. I just have to accept that it’s gonna take some time to process one of these monsters
1 Like