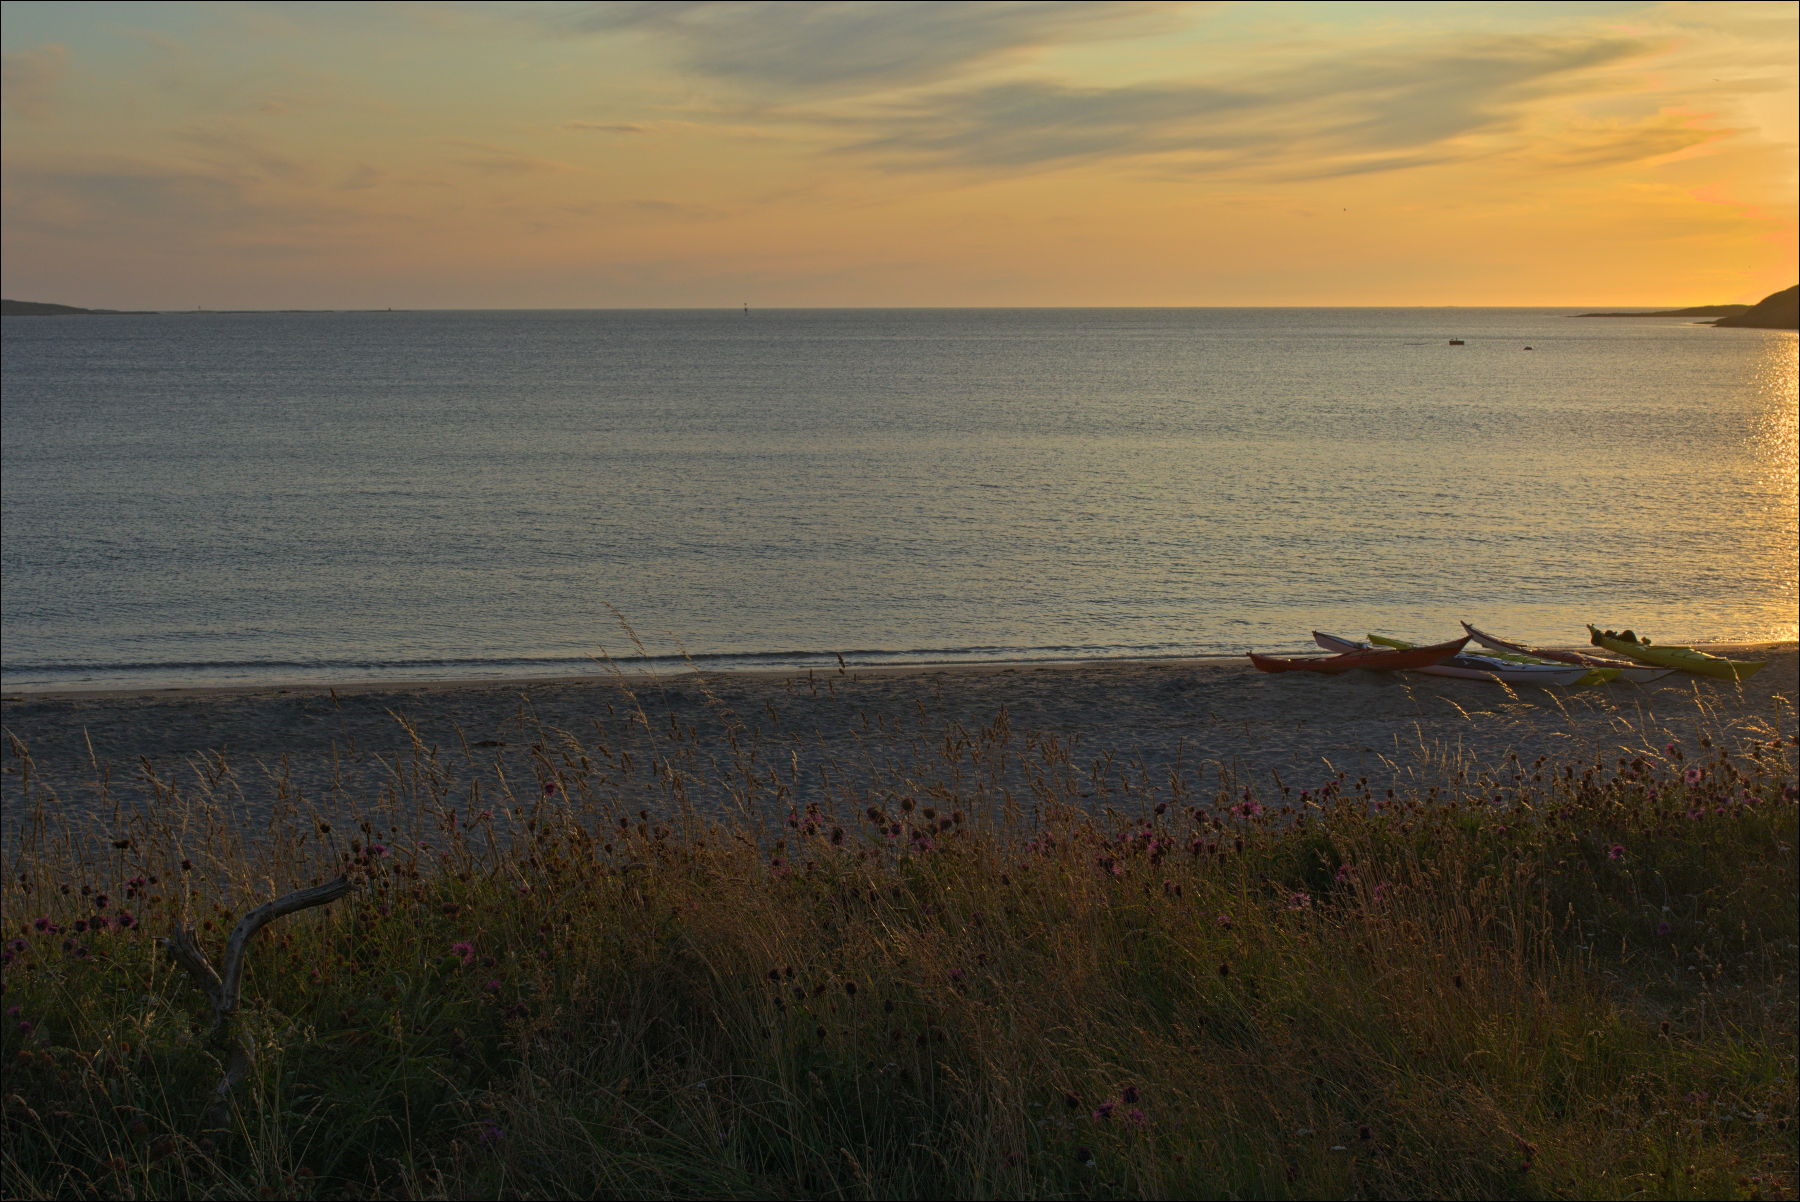
I was wondering if it is OK to ask for help regarding an overexposed sky in a photo I took. It is not the best best capture, but I still would like to improve it as much as possible. I am quite satisfied with the way the picture looks except for the unnatural look of the sky at the right top corner.
I am not quite sure that I have fully understood how highlight reconstruction works, but what I have done, is that I have used the highlight compression until the overexposed part does not appear clipped by the clipped highlight indication, and then a bit more. I then activate the highlight reconstruction function and select the method which produces the best looking result (in this case “blend”). It usually turns out quite well, but this time it looks a bit unnatural.
Any tips on how I could improve the photo (except to expose better the next time), or my understanding on how this works, would be greatly appreciated! I enclosed the jpg, the raw file and the pp3.
A quick adjustment:
1 Put Exposure-> Method: Color propagation
2 Darken zone with graduated filter
3 Activate Clipped highlight indication (Shortcut >)
4 Low Exposure-> Exposure copensation until there are no highlights
5 Disable Clipped highlight indication (Shortcut >)
6 Upload in Exposure-> Lightness
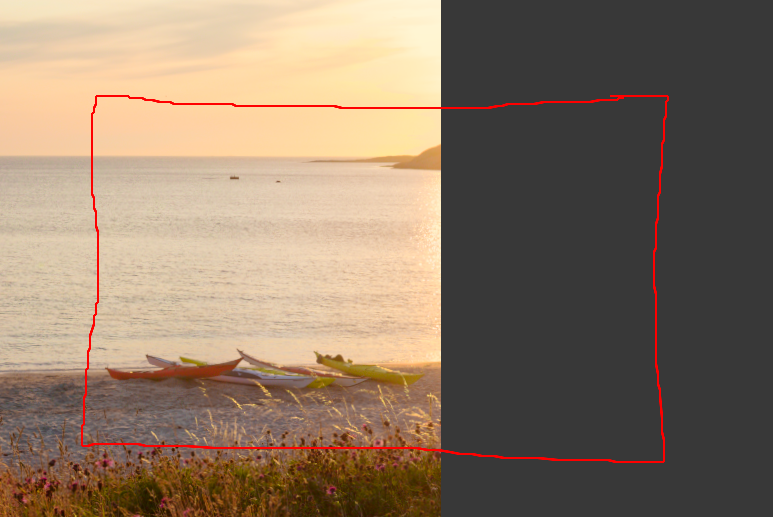
Try to work with nature and don’t count on fixing things in post-proc, which often leads to unnatural results. In your composition the sun looks like it’s in the way. Maybe there was a better composition waiting here:
Colour propagation for highlight reconstruction works better here, with exposure compensation. I found I had better results doing the exposure compensation on the raw tab rather than on the exposure tab. I then used black point correction on the exposure tab to bring back the shadows.
Adjusting the colour balance to a true white might help, although when I tried it using the canoes I couldn’t get anything decent.
Hi, Thanks for your reply. Seems at least like the green and blue channels are clipped. Might be that @Morgan_Hardwood´s suggestion of cropping away the problem area is the best one.
I think @Morgan_Hardwood was suggesting that you rotate to the right in your composition and include some stuff that wasn’t included in the original shot, as opposed to just doing some cropping. Of course, none of us knows whether the area outside the right side of the shot was attractive.
Aha, that makes sense! Thanks for clearing that up The capture was not great. The scene looked really nice when I was there, but I did not have the time to do things properly I believe that also a tripod and bracketing would have been a great idea.
Try to work with nature and don’t count on fixing things in post-proc, which often leads to unnatural results. In your composition the sun looks like it’s in the way. Maybe there was a better composition waiting here:
Very good point. Can’t remember the scene but I@m sure there must have been a better way
I didn’t buy the camera (Z6) for this, but I’m finding it to be quite useful: highlight- weighted matrix metering. It works on the JPEG exposure, but +1EV seems to put the data pretty close to saturation in most cases. Then, filmic helps pull the low data out of the shadows.
Still messing with the variations, but results to date are encouraging. Now, don’t think I’d buy a camera without this metering mode…
I’d like to hear more the more you find out. I have this mode on the D850, but when I tried it, it just severely underexposed the image. I’m sure it was operator error
I’m also interested. However, I’m committed to the Pentax K mount, and I don’t think any Pentax SLRs have that exposure mode. (There’s a similar thing called “zebra”, where the brightest portion that’s to retain detail is overlaid with moving stripes in the electronic viewfinder, I believe?)
No, that’s what it does. Bet the highlights were preserved…
Most metering is about exposing for middle gray somewhere in the scene. In high dynamic range scenes, this’ll put the upper end past the sensor’s saturation point, to various extents. Highlight-weighted schemes insure that the upper end is below saturation, at the expense of pushing the lower data lower. With my particular camera, I’m finding that the highlight preservation is based on the JPEG rendition, which leaves headroom on the table, so to speak, in the raw. So, dialing in some +EV helps recover that headroom. I’m messing with a +1 EV right now, finding in some cases there’s still unused headroom, in others it goes just a little too far.
I’m finding the filmic curve to be useful in pulling up the low parts of the highlight-weighted exposed image. It’s next to impossible to use curve tools to construct a curve that will lift to the extremes somestimes needed, but still leave a little toe at the bottom to keep blacks crisp. The original filmic equation does this nicely. My current batch processing for proofs uses the filmic curve with the Duiker default coefficients, then I go in and adjust the numbers for the particular dynamic range situation. I just finished committing a batch tool for rawproc that lets me take the modified toolchain for one image and apply them to part or all of the rest of the session’s images; used it to good effect for the first time tonight, processing the shots from our family Christmas tree decorating party.
There seems to be no “one curve to rule them all” for highlight-weighted exposing, so this approach probably isn’t for those who despise post-processing…
The Z6 can depict “zebras” in the EVF where parts are over-exposed, but I haven’t played with it. I think, however you determine exposure to preserve highlights, you’re going to have to deal with some kind of “lift” curve to yank the low parts of the image into visibility.
I think the important thing to do is to test the behavior, make multiple exposures of high and low dynamic range scenes, and inspect the raw histograms to see where the data goes. It’s really just ETTR, with different tools.
Hi Glenn. Sorry to go off-topic, but where is the setting for over-exposed zebras in EVF of Z6? I love this camera, but still not familiar with all the feathers.
Does it come with a manual? There could be a digital one online. I like to read manuals of old gear and many of them are available online albeit scanned.


 The capture was not great. The scene looked really nice when I was there, but I did not have the time to do things properly
  I believe that also a tripod and bracketing would have been a great idea.
 Thanks!