On friday we had the lantern festival in the local kindergarten and I took some photographs. And as it happens, I failed big time:
They asked me on site if I could take some photographs because the kindergarten’s camera’s battery was low and I did not say “NO”.
I failed to take some pictures without children for testing purposes (e.g. for a play raw).
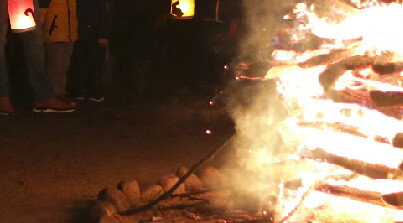
Now I’m working through the images and I have a particular issue. While I am able to improve the pictures a lot over the sooc jpeg (using basically filmic, basic adjustments and standards such as exposure, white balance and denoise (profiled), darktable 3.2.1), there’s one characteristic that I would like to take over from the camera processing: The rendering of the bonfire highlights. I tried all highlight reconstruction settings in the module and in filmic, but I cannot get a similar rendering.
Here’s a screenshot:
(sooc)
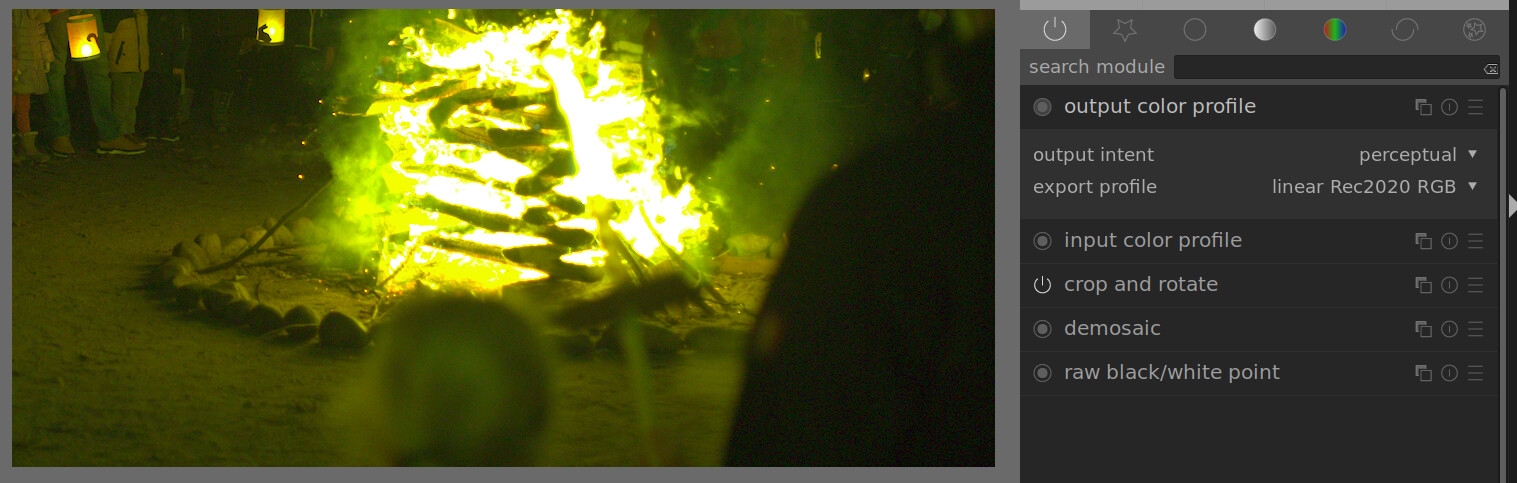
(darktable)
While the floor is much more reddish in the sooc result, the bonfire shows a lot of red/purple artifacts in the darktable result.
Any idea how I could get rid of these? Maybe this was also discussed earlier and you have a pointer? I was not able to find something.
And maybe, somebody wasn’t as stupid as me and also has an example image to work on …
Edit: I tried with the “preserve chrominance” setting, and setting it to “no” solves the issue, but introduces weird color shifts on the people. Unfortunately, I still do not see the correct way out … I added the tag “filmic” for this reason.
Thanks for the pointer. I’m not even sure if these are color shifts or not. It’s more the transition into white is somehow odd. And I don’t think DCP profiles will work out-of-the-box in darktable.
In particular, the transition into white is going through green and yellow. The other issue I see is that after filmic the white areas inside the fire become gray.
I found a way to work around this issue: If I go into filmic with +2 EV and in filmic tune it down by manually dialling in the middle gray luminance, I can find a suitable setting:
However, IIRC, that’s not the way it’s supposed to work.
Have you tried to change the settings on the highlights reconstruction module?. I regularly find that the default value (clip) creates that kind of artifacts when not all channels clip at the same time.
This. Set it to ‘reconstruct LCH’ or disable the reconstruction module altogether. In most scenarios smoothing out clipped highlights will be handled more gracefully by using the filmic highlight reconstruction (lower the threshold)
Yes, this was the first thing I tried, but with no success.
Yes, this is as well something I tried, but with no success.
Hm, I guess I did not try disabling highlight reconstruction at all together with filmic highlight reconstruction, because I thought, if HR clips at 100 %, this makes no difference for the input of filmic. Maybe my understanding of what HR clips exactly is not sufficient, especially its interaction with white balance. Hm, the more I think about the more I understand my misunderstanding . At least, I can now work without changing the middle gray assumption.
So filmic HR seems to work, but I still have some issues:
It’s not possible to reach a pure white in filmic without pulling the sliders too far such that the rest of the image looks weird.
The basic problem is that the fire in the image is overexposed. That means that information is missing and can not be recovered. So, the problem can’t be solved but only mitigated.
How this is done best depends on the image context and the grade of overexposure. Without seeing the raw file it is difficult to help.
And probably the best thing to do in this particular case is to transition in a reasonable way to pure white. It’s what one would expect from an overexposed area, see e.g. the white “core” of the light sabers in star wars – they don’t look natural with an oversaturated core.
After thinking more about it, my question probably has to be rephrased: Why is the overexposed area in filmic not pure white (with respect to the output color space), and what should I do to make it white?
You cannot imagine how angry I am about myself and the fail that I did not do some test shots without children visible. Unfortunately it’s nothing you can easily build up for a second time to do some test shots. It would be convenient to have a tool that can crop a raw file losslessly, such that I could send a picture without children recognizable. But I am not aware of such a tool.
Basically, highlights like this are parts that you want to clip, let it blow out. That gives the white most people want from an SooC jpeg example.
Don’t use / touch filmic highlight recovery tab, let it do nothing. Set the white a bit higher to let it clip. If you get weird color shifts, play with the highlight-reconstruction module. Try other modes, and try with it off.
Don’t use filmic’s ‘middle gray’ slider. Just use the exposure module to boost the exposure a bit. Set the filmic white-slider to get the flames how you want it, then use tone-equalizer to make other parts brighter or darker to get where you want to be…
If you don’t want to share the image - I understand why - you can maybe arrange a screensharing, where you first set the crop options so parts are removed from the image you don’t want to share.
Or - and maybe others chime in here on how this would work - arrange a method to open the raw, crop, and then do absolutely no processing (or as little as possible) and save it as a tif file in linear-space. We can then open that tiff and have a play with it.
I’ll try if I can dig up some new-years-eve pictures of kids with sparkles on the screen, to see if I can recreate your problem.
You’ll get a linear DNG (at least, I only know of DxO Photolab and Lightroom / ACR who can export anything to DNG, and those will end up with a linear DNG in this case).
Which means it’s already demosaiced, and probably whitebalanced a bit. Yes, filmic and exposure and the rest can be done, but what you’ll lose is the highlight-reconstruction module… it’s already ‘baked in’ with however Lightroom or DxO approach a situaton like this.
And I think that’s one of the more important parts of processing this image, for the OP.
If the OP is possible to do something, trying to export to some tif of linear-dng might work, if he/she is able to reproduce the problem first on that file.
Just thinking out loud: create a copy, discard the history on that copy (so you start with your defaults again): disable filmic. Crop it so no parts are visible you don’t want to share. Set the output space to ‘linear rec2020’, and export a 32bit-tif with no scaling. And make sure the export uses the image-settings for output space.
And while you’re at it: Create another 3 exports, with the ‘highlight reconstruction’ module set to ‘reconstruct lch’, ‘reconstruct color’ and one with it disabled.
Now you have something that can be imported into darktable and do a lot of things to it you normally would do to the raw. The highlight-reconstruction mode is baked in, and the (default) white-balance is baked in. But I guess the WB isn’t that important in helping you along with the problem, and for the highlight-reconstruction you can have multiple copies to share. True, we can’t change the slider anymore, but let’s see if that is even an issue.
There will be a default exposure adjustment on it, but exposure can still be freely moved around on the TIFF, in both directions. And since no filmic is baked in the data should still be linear and have all the > 1.0 data still there.
A bit late to the discussion here, but on the flame overexposed highlights that turned grey, I frequently see this kind of thing occur with filmic when display-referred modules used in the pipeline prior to filmic. I run into this almost every time I use the highpass or lowpass module if there are very bright areas in the image. The work-around is easy though- turn off modules one at a time until you see the grey go away, and if that particular module is display referred, then try moving moving its position in the pipeline to just after filmic. So this won’t “fix” an overexposure problem, but it will make it so don’t have goof up your filmic settings to make the gray go away.
Lower the white exposure in filmic, because here whites are grey, and desaturate highlights more. Also, fix chromatic aberrations.
You all need to start understanding that whatever “color science” (hint : it’s no science) the OOC JPEG uses boils down to the same thing : RGB curves on separate channels. Which desaturate highlights and resaturate shadows, and conveniently hide a lot of bad things close to white. Also, in the case of fires, hue get shifted to green, meaning it produces yellow instead of red.
Unfortunately, since the scene-referred pipeline is designed to preserve input chromaticity as much as possible, you get served at the output the same shit you input it, including the chromatic aberrations and single channel clippings. Which people then call “artifacts” as if they were created by the pipeline. They are exactly the original RAW, with all its flaws preserved because the instruction was to preserve colors.
Yes, I can reimport, but all the controls (white balance, filmic) behave much different than with the original raw file. With this intermediate tiff file it is much easier to get good results in filmic (e.g., white highlights don’t require extreme settings). As this is behaving so much differently, I think it is not possible to easily reproduce the issues. If you have any further idea for a general workflow with messed up photographs that show people that should not be on the internet, please tell me … the original images had to be delivered last weekend such that for them it comes too late, but for the next time …
No display referred modules in my case … For testing I removed anything unnecessary, trying to create a minimal (non)working example – something I took over from my good old LaTeX days .
Hm, if I lower it more, it also affects the rest of the image which becomes too dark then, therefore I would have to do it with a mask … I was hoping for a workflow that works without masking.
I tried with a fresh duplicate of the image, and only used white balance, exposure and filmic. With a reasonable exposure, I have to take white rel. exp. down to +3.7 EV to get white fire. But, I then would need to bring black rel. exposure well below -16 EV to not get too dark or too contrasty people.
I understand that the issue is the extreme dynamic range of the image. I am shooting canon, but the DR of the scene would probably be too much for a sony sensor as well. For the next time, I take any advice for better camera settings, but I thought I was already at the border of what is possible. Shutter at 1/250 s, because children are moving, and open aperture f/2. With ISO values in the 5000 range, I get well blown out fire and people that have just enough information in the noise to get something reasonable out. I don’t see any opportunity to expose more to the left, as people would vanish in the noise (it’s still a canon). What can I do better?
The wording “artifact” is for me only a description of something in an image that should not be there (no matter if it’s due to input data or the processing), not assuming any reason. Maybe this is wrong, but I am not a native speaker. However, eventually I am searching for a technical solution to fix the flaws in my input data. Everybody can take (technically) good photographs with the right light, but I often have scenes where this is not given. I hope, next time I think of shooting some additional frames without people.