How do I get RawTherapee to do absolutely nothing?

Title over states my aim a bit. I am trying to convert film negatives to jpegs. I am finding that on loading each image, even though the exposure, aperture, light source, even roll of film are the same, I get wildly different initial images. The software is doing some exposure compensation and curve tweaking before I can do anything. I would like to have minimal processing done so that under exposed images look under exposed, the unexposed film around the edge of the image is always exactly the same brightness and color, etc. The way it is, I can’t just tweak the first image and copy the processing to all of the frames from the same roll without the color balance, brightness etc being wildly different for every frame.
I have not even been able to find out how to set the default processing when loading a new image.

I loaded two raw images, then closed them without making any changes, and did a “diff” on the two pp3 files. This is the result:

26c26
< Curve=4;0;0;0.050000000000000003;0.031135154953798292;0.12;0.08097305825747092;0.21799999999999997;0.1785966425016916;0.35519999999999996;0.37422603506772162;0.54727999999999999;0.63905930066194638;0.81619199999999992;0.88321909520079211;1;1;
---
> Curve=4;0;0;0.050000000000000003;0.062481735366759182;0.12;0.15122351644086013;0.21799999999999997;0.28113139532597831;0.35519999999999996;0.47700803303702421;0.54727999999999999;0.71015763841724788;0.81619199999999992;0.90828923108833337;1;1;

As it is, I am having to hand tweak every single image, and some are so out of wack it is difficult to get them to look right.

I would really like to be able to get repeatable results. Ideally I would want demosaicing done with digital values of zero as black, and maximum possible digital values scaled to white with no autoscaling, just a fixed transfer function from the raw image to the loaded image. I don’t want the software doing anything I did not tell it to do. Right now there are just too many variables, and I do not know which ones the software is tweaking behind my back. It is really hard to learn how to control a system if things are being randomly changed without your knowledge.

I am uploading an image that RawTherapee handles very badly. This is a negative from film labeled “Kodak RA 100 Royal 100” The image is of an off white Corian counter top with pencil lines on it. It was captured with a Sony a7RII camera with a 90 mm lens. (this is probably in the meta-data) The light source is an RGB light panel which has been color adjusted so that unexposed film gets all three color peaks in the histogram near the same value, and near full scale. (The original negative was captured with an Olympus OM1 with a 50 mm kit lens 26 years ago.)
DSC04424.ARW (81.6 MB)

You want to set the “Neutral” profile.

1 Like

How do I set that to be default? I don’t believe that neutral is good enough because it still includes white balance which is not good for a negative before the negative to positive conversion is done.

You can read about the neutral profile here: Sidecar Files - Processing Profiles - RawPedia

You’ll need white balance in order to demoasic your raw file, so turning it off isn’t a great idea.

There is also a film negative tool, for working with film negatives scanned with a DSLR: Any interest in a "film negative" feature in RT ?

I have read the sidecar files before, and read it again just now. I have not found it helpful.
I am already using the “film negative” tool, and have created two profiles based on neutral, one with white balance, and one without for those times when the software for white balance goes haywire. But I still get widely varying results. Some pictures where the raw histogram shows it covering the whole range of brightness get converted to an image that has a narrow histogram squeezed into the lower half of the plot whereas others with similar raw histograms are result in histograms that are clipped off on the right, other times the red green and blue curves on the histogram end up wildly different. The software is just not consistent.
I keep looking for a way to change the default profile. I am going through scanning nearly 200 rolls of film, and it gets tedious having to change the profile for every roll of film I load.
If “neutral” is supposed to not change anything for non raw files, why is white balance enabled and set to “camera”?
I don’t understand why demosaic requires white balance. If it does, I would think that “film negative” should be applied before the demosaic and white balance, but that does not appear to be an option.

My software, rawproc, will do absolutely nothing:

However, this is probably not what you want. :laughing: 
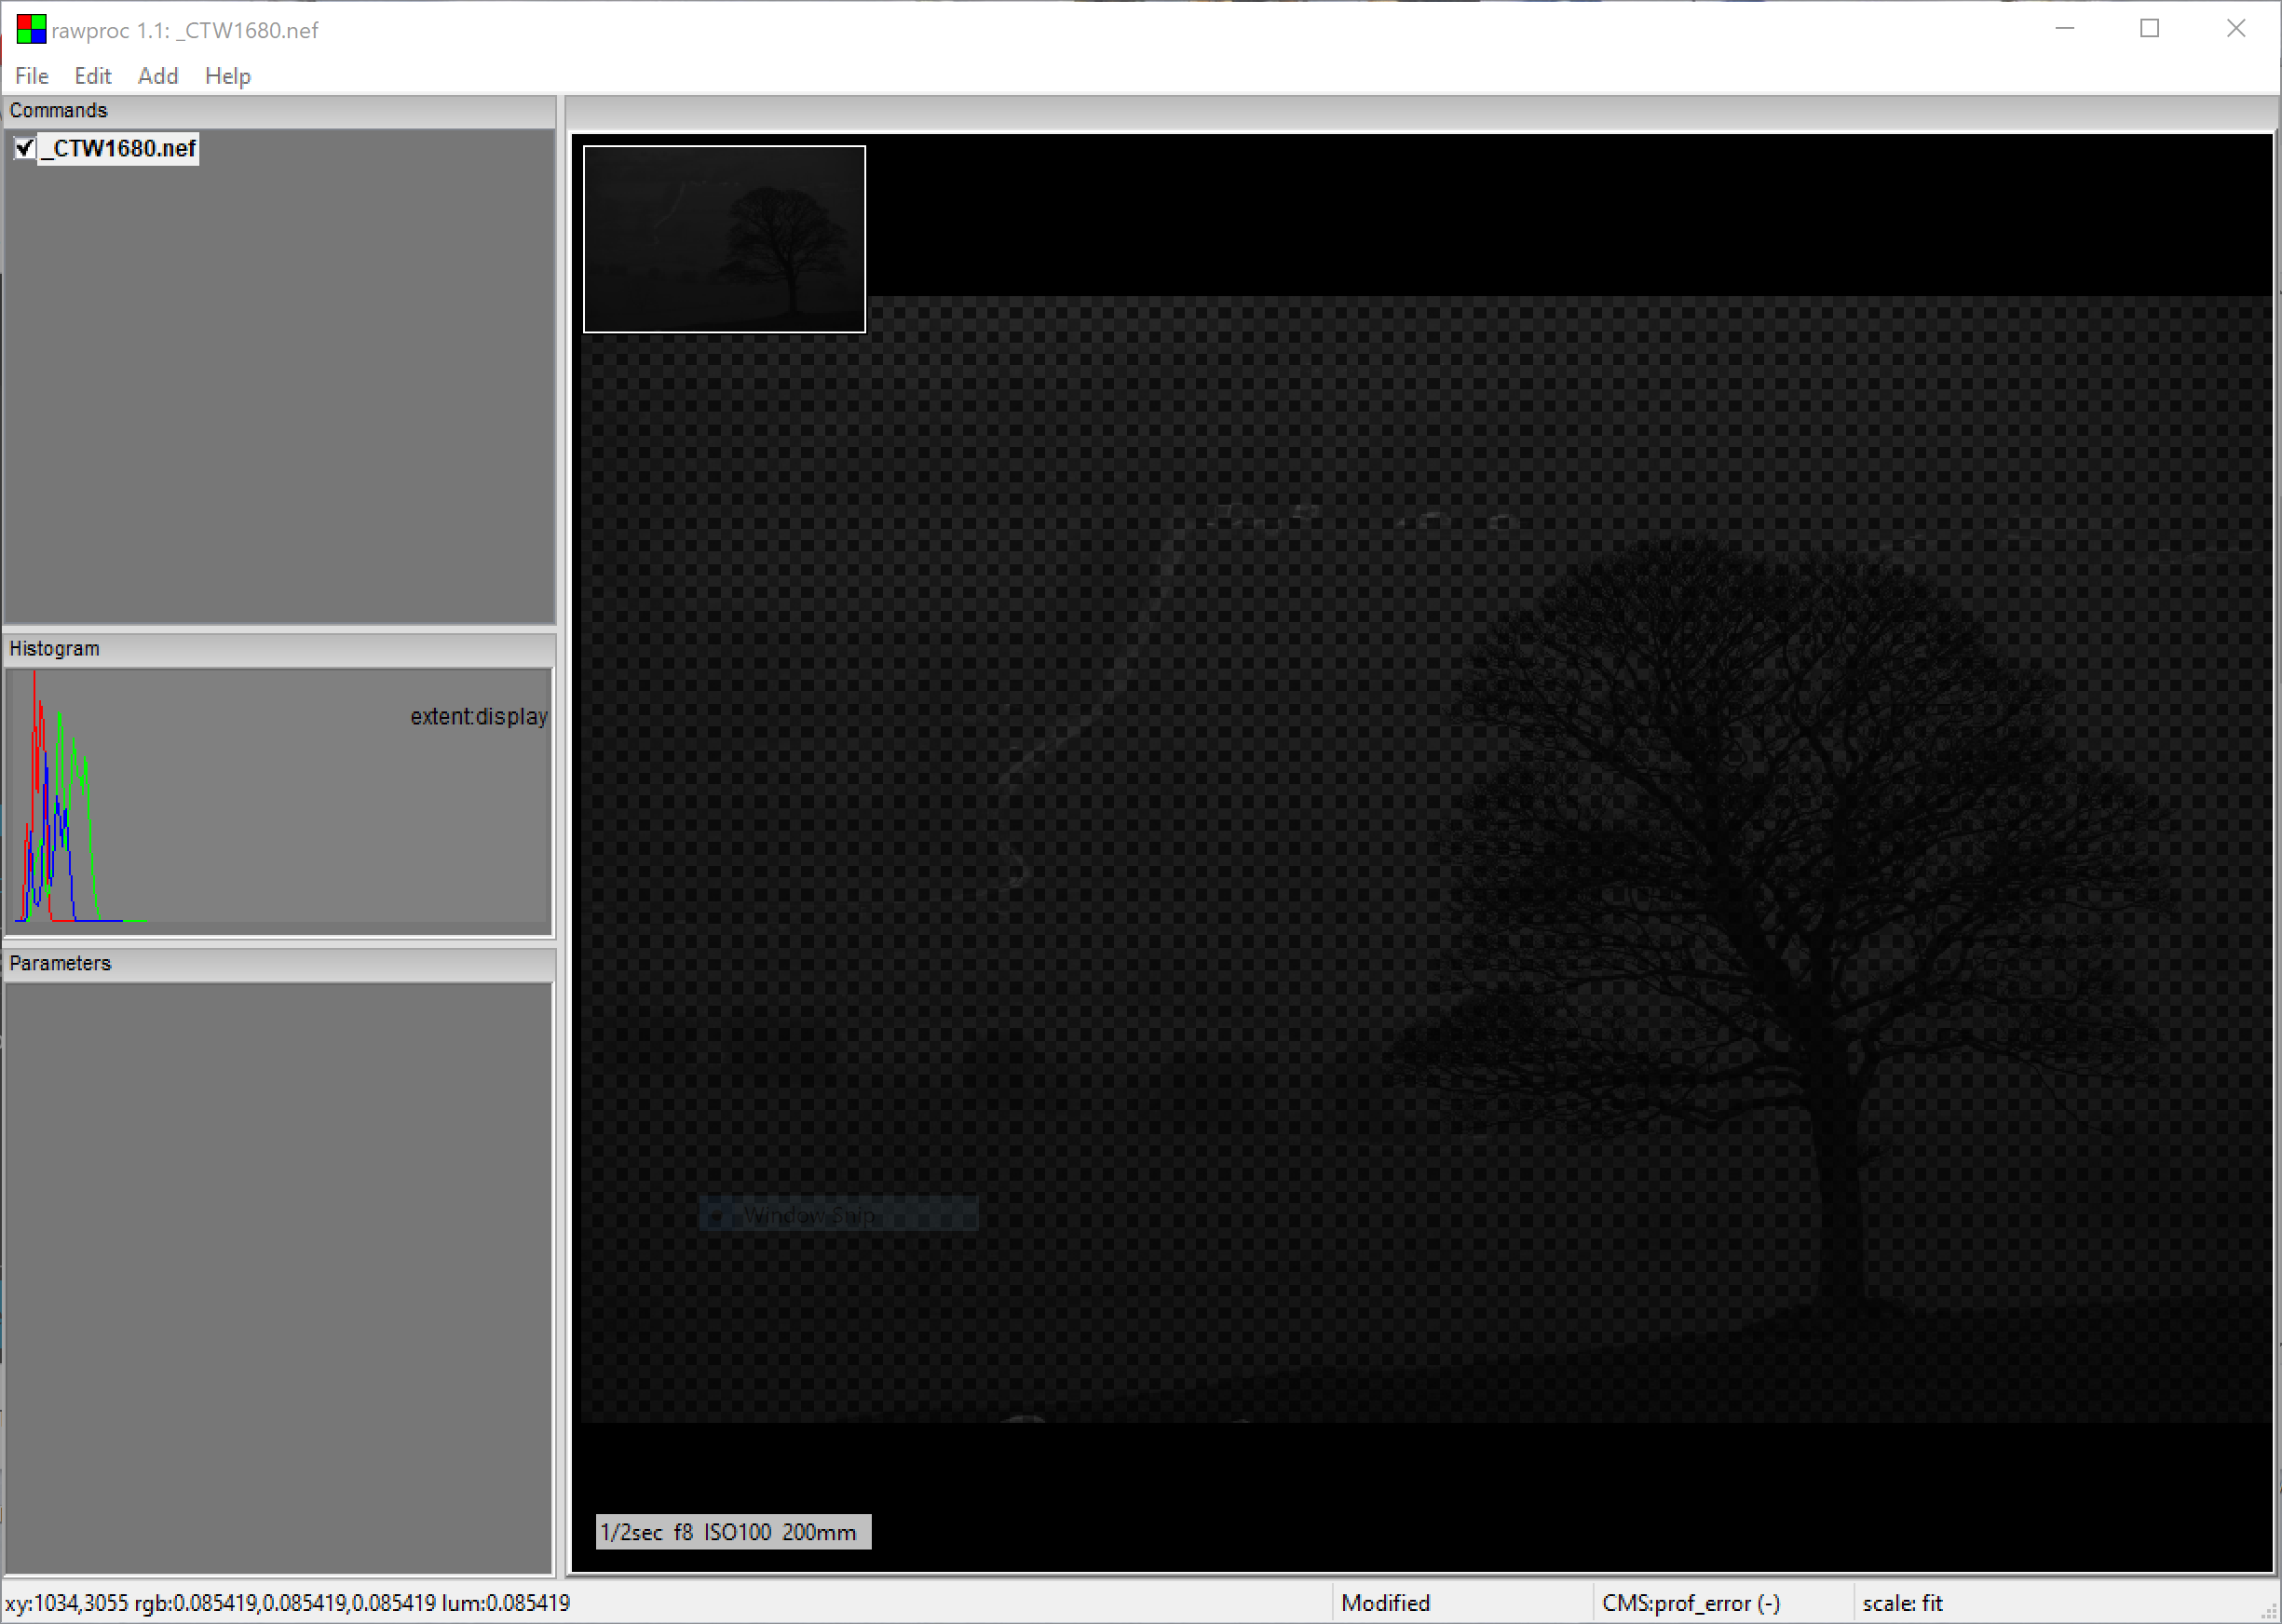
Thing is, from here you can add only the tools you need, maybe just demosaic and a scale of the data to the black/white point limits:

Really though, you’ll probably need white balance, which in digital is about wrenching the particular camera’s spectral response into a pleasing white reference. And, colorspace conversion from the camera space to an output space:

This would be the “linear RGB”, rawproc’s equivalent of RT Neutral.

https://github.com/butcherg/rawproc/releases/tag/1.1

1 Like

Perhaps some of the experts could chime in here, @rom9, @troodon or @Thanatomanic ?

A few comments and questions:

  1. What version of RT are you using? The development version has an excellent bundled profile for negatives, but there is a specific workflow to make it function properly.
  2. I downloaded the raw file you posted, but it’s not a good choice of subject matter to use for a test, as I have no idea what it’s supposed to look like. Find another negative in good, predictable light such as sunlight or cloudy bright. It should have skin tones and ideally some neutral gray tones.
  3. What is your RGB light panel? You should set a camera custom white balance to your panel. If you’re using the film negative profile in the development version of RT, don’t use the spot white balance in the toolbar, but instead you can use the “Pick white balance spot” in the “Film Negative” tool.
3 Likes

@DAP I hope I can clarify a few things for you.

  1. First of all regarding doing ‘nothing’. The White Balance tool happens after demosaicing, so it does not influence the demosaicing result. Just to be clear: internally an automatic white balancing procedure takes place before demosaicing, because it often helps reduce interpolation artifacts. Only in rare cases would you want to disable this auto-WB procedure. This can be done by setting Preprocess White Balance in the RAW tab to ‘Camera’. Don’t expect a world of difference.
    image

  2. When processing negatives, the White Balance tool should always be set to the values of the backlight. Simply make a shot without a negative, set the Neutral profile, use the color picker, readout the Temperature and Tint and apply that to your negative image. Only then use the ‘Pick neutral spots’ and ‘Pick white balance spot’ in the Film Negative tool. I must admit that the documentation could be a little more helpful. @rom9 Might want to take a look. @paperdigits already mentioned the Film Negative thread on the forum where you can ask for help.

  3. If you experience you have too many variables and wildly differing results when opening similar files, Mica’s advice is the right one: use the Neutral profile. It does only the bare minimum and should give very reproducible results across similar shots. You can set it as the default profile in the Preferences in the Image Processing section (where else…):

  4. I now see @troodon has ninja’s me and summarized the most important take-away messages :smiley: Your raw file in particular is very unhelpful, and you will have a hard time getting good results with the Film Negative color pickers because it does not seem to have two distinct neutral spots. However, if you have another shot that does and was shot on the same film and digitized in the same conditions, you can always copy/paste the obtained Film Negative values to your other images.
    image

  1. I am confused about this sentence. Then again, it shouldn’t matter too much as long as you follow the advice in my second point.

Version: 5.8
Branch: releases
Commit: 9a9e0ac
Commit date:
Compiler: cc 7.3.1
Processor: x86_64
System: Linux
Bit depth: 64 bits
Gtkmm: V3.22.2
Lensfun: V0.3.2.0
Build type: release
Build flags: -std=c++11 -Werror=unused-label -Werror=delete-incomplete -Wall -Wuninitialized -Wcast-qual -Wno-deprecated-declarations -Wno-unused-result -fopenmp -Werror=unknown-pragmas -O2 -DNDEBUG -ftree-vectorize
Link flags:
OpenMP support: ON
MMAP support: ON

The pictures in bright sunlight with images of people usually don’t have a problem. It is the pictures like the one I posted, or pictures of flowers with no sky and just leaves around them, or in one case a picture of a Christmas tree in a room illuminated only by the colored lights on the tree that have a problem. It is pointless to give you an example where the program works, I gave you an example of where the program doesn’t work. I can’t even adjust everything on a picture that works and copy the processing to the picture that doesn’t because white balance will be off and the white balance tool will make it worse if I try to do a point white balance.

I am specifically trying not to use the white balance in the camera as I am trying to capture as much brightness resolution as possible with the camera. To that end I am trying to compensate for the color filter built into the film, and the color sensitivity of the camera by adjusting the color of the light source such that unexposed but developed film has a peak for all three colors near full scale of the sensor. Without doing this, I loose two or three bits of brightness resolution.

This is an example of the kind of image that is very good for colour negative conversions. It’s well exposed, has good skin tones, plenty of gray tones and several other useful colours. This shot, taken by my dad near Tofino, British Columbia about 1967, is from a 6x6 cm Kodak negative. See if you can find a shot something like that to use to establish a baseline. Digitized with a Nikon D800 and a Nikkor 60mm f2.8G micro. Processed with the development version of Rawtherapee using the bundled film negative profile.

The appimage for the development version of RawTherapee is here. Release Automated Builds ¡ Beep6581/RawTherapee ¡ GitHub

When processing negatives, the White Balance tool should always be set to the values of the backlight. Simply make a shot without a negative, set the Neutral profile, use the color picker, readout the Temperature and Tint and apply that to your negative image

I don’t understand why you would want to do this. I would think you would be better off to set it through unexposed developed film if you are lucky enough to have an unexposed frame of film.
I also don’t understand how this would work since if I do the sequence set profile to neutral, turn off white balance, film negative, pick neutral spots, turn on white balance and use the pick option to select the unexposed border of the picture (which usually gives me a reasonable starting point) then copy that processing to the rest of the frames of the roll of film, I end up having to do the white balance pick of the unexposed boarder to every single frame to correct the color. So the white balance is not stable frame to frame.

As to point 5, I am using the RGB light source to normalize the ADC values of the R, G, and B sensors in the camera through unexposed film to near full scale in an attempt to maximize the color resolution captured.
My goal is not just to get nice jpeg copies of the film images, but to capture as much information as possible from the original negative in the raw file for archiving.

I am uploading another picture that includes people. Since it is a more normal picture with people in it, I did not have as much trouble with the software fighting me. So far I have only converted this to a positive and done the white balance. I have not adjusted exposure, black level lightness, saturation or contrast. I’m not sure what good this one will do because it is not causing me problems.
DSC04530.ARW (82.1 MB)
DSC04530.ARW.pp3 (11.2 KB)

Which of the two appimages should I be using?

Here’s a short tutorial on the using the development version of RT for colour negatives. I would certainly welcome corrections or suggestions from @rom9 and @paperdigits.

Before shooting the negatives, set the camera white balance to the light source, in my case this is an LED light panel.

Important note: Do not use the white balance eyedropper tool in the top left of the screen. It’s not meant for negatives and will revert the image to a negative. Instead, you can use “Pick white balance spot” in the “Film Negative” tool under the color tab in the right panel.

This image was processed without using the adjustments available in the “Film Negative” tool, although there are times when the sliders and “Pick white balance spot” are useful. I rarely use the “Pick neutral spots” because it’s hard to find two neutral spots (one lighter than the other) on these historical negatives. If you’re shooting film, however, you could shoot a gray scale or Macbeth chart with each roll to get these neutral spots.

Slide 1.

At the top right of the screen the White Balance is set to “Camera”, which shows the color temperature and tint of the light panel. Don’t adjust this.

Above that, where the screen shot says “Neutral”, press that and navigate to “Bundled profiles”, then “Film Negative”.

Slide 2.

“Film Negative” is selected. The image is now a positive, but needs to be cropped and is too dark.

Slide 3.

Adjust the “Exposure compensation” slider so that the histogram in the top left of the screen is approximately centered.

In “Film curve 1”, try “Auto-Matched Tone Curve” first. This can also be set manually if it works better for a particular image.

In “Film curve 2”, move the bottom left and top right of the curve so that the histogram in the top left of the screen goes to the left and right edges, without clipping.

If needed at this point you can make further adjustments to “Lightness, contrast, saturation” and “Shadows/highlights” if desired.

Slide 4.

The photo was taken late in the day with warm light. I wanted to preserve that, but I used “Color Toning” to cool it slightly.

Final version. I brightened it a bit more in curves and increased blue in the highlights, then in Gimp cleaned up a few specs of dirt and added a bit of sharpening.


1 Like

Use the latest appimage with “dev” in the name. At this time it’s from 20210614.

@DAP @troodon Please consider whether your comments about using Film Negative would be better suited in the appropriate thread: Any interest in a "film negative" feature in RT ?

@rom9 Can probably explain better, but this is the recommended procedure. I believe this is because your negatives on film have been shot with a different illuminant than you use when digitizing them. You want to compensate for the latter by taking a shot of your illuminant only and setting that as the white balance of your image and then use the Film Negative tool to pick/set the white balance of your negative.

I understand now. Can you share a file where you only shot through unexposed film?
I assume the second image you shared contains a completely uncovered area on the right? These are completely clipped to the limit of your sensor and therefore cannot be used for white balancing (neither in the White Balance tool or the Film Negative tool). As per the described procedure where you need to know the white balance of your light source, this makes it much harder to get good results easily.

Edit: I forgot to mention, but your images so far look extremely pink. This makes me wonder what is going on, because other negatives shared on this forum that I’ve seen were never that off-colour.

1 Like

That particular roll did not have any unexposed frames. On most rolls, there is often a bit of unexposed film before the first frame, or after the last frame. I use those to adjust the color of the light source, but I do not keep those images once I have the color correct for that film. This needs to be done for every film type and for Kodak, for every roll. (Kodaks quality control was terrible.) All images have unexposed areas on at least three sides of the image, the fourth side is sometimes cut off exposing the light source (the developers cut the strips into four frame segments, and did not always do a good job of getting the cut between frames). I usually try to use that unexposed area to set my black point, but some frames are badly under exposed, and to get anything useful at all the black point needs to be significantly lower.

Those images were captured before I got any advice from this forum. I have not done anything with the cameras white balance, I had not been using that. I figured the cameras white balance would be useless since negatives have such a huge color bias built into them to deal with color films color sensitivity.

The camera settings don’t matter, because they don’t affect the raw files. But since you have been tinkering with your light source, I wondered what the effect of that is.

Ah too bad, that might have helped finding a better workflow for you. Do you maybe have an image just exposing your light source, but not overexposed in the camera? Doesn’t matter if it’s a few stops down.

1 Like

I might be able to get an image of the light source tomorrow night. In the mean time, I’ll include the settings I’m using for various film types I have run into, as well as a light source characterization I did.
Sheet one of the light source characterization was proving to myself that the brightness adjustment was linear for each LED color. Sheet two was measuring the linearity of the camera sensor. The spectrum of the color LEDs is not extremely narrow, so the blue LED is picked up by the green sensor, and the green LED is picked up by the blue sensor. I figure this will not be a problem since i’m just trying to bias the spectrum to counter the color of the film and the sensitivity bias in the camera.
LightSourceCharactarization.ods (37.8 KB)
Light Source Settings.ods (20.0 KB)
these are both libre office spreadsheets. Excel will probably open them without problems but will spew FUD about them being dangerous (they are not).

1 Like