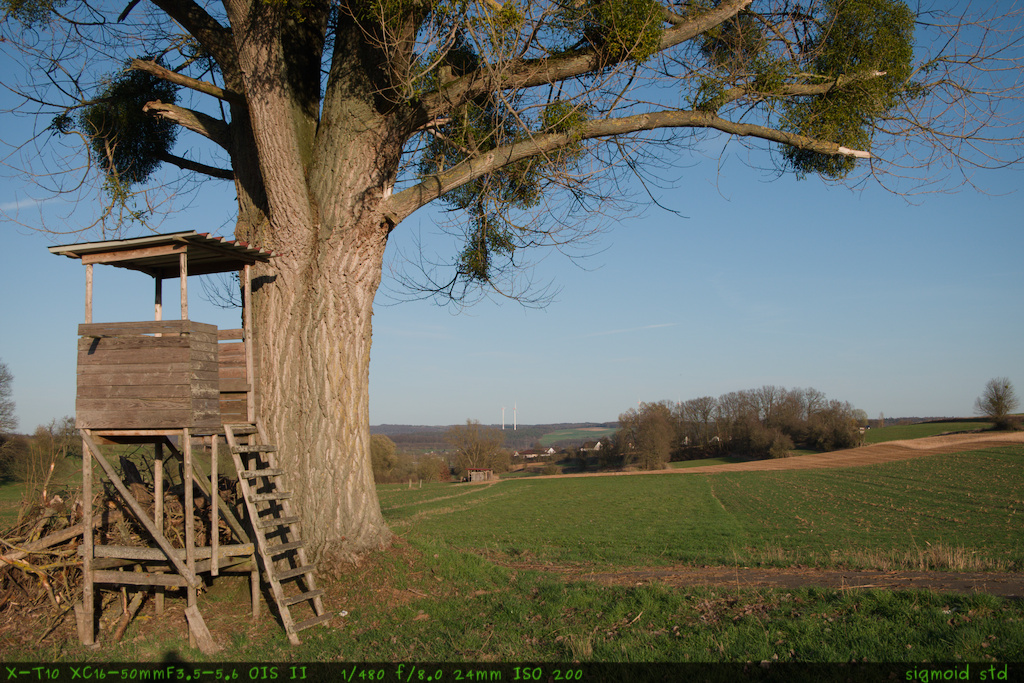
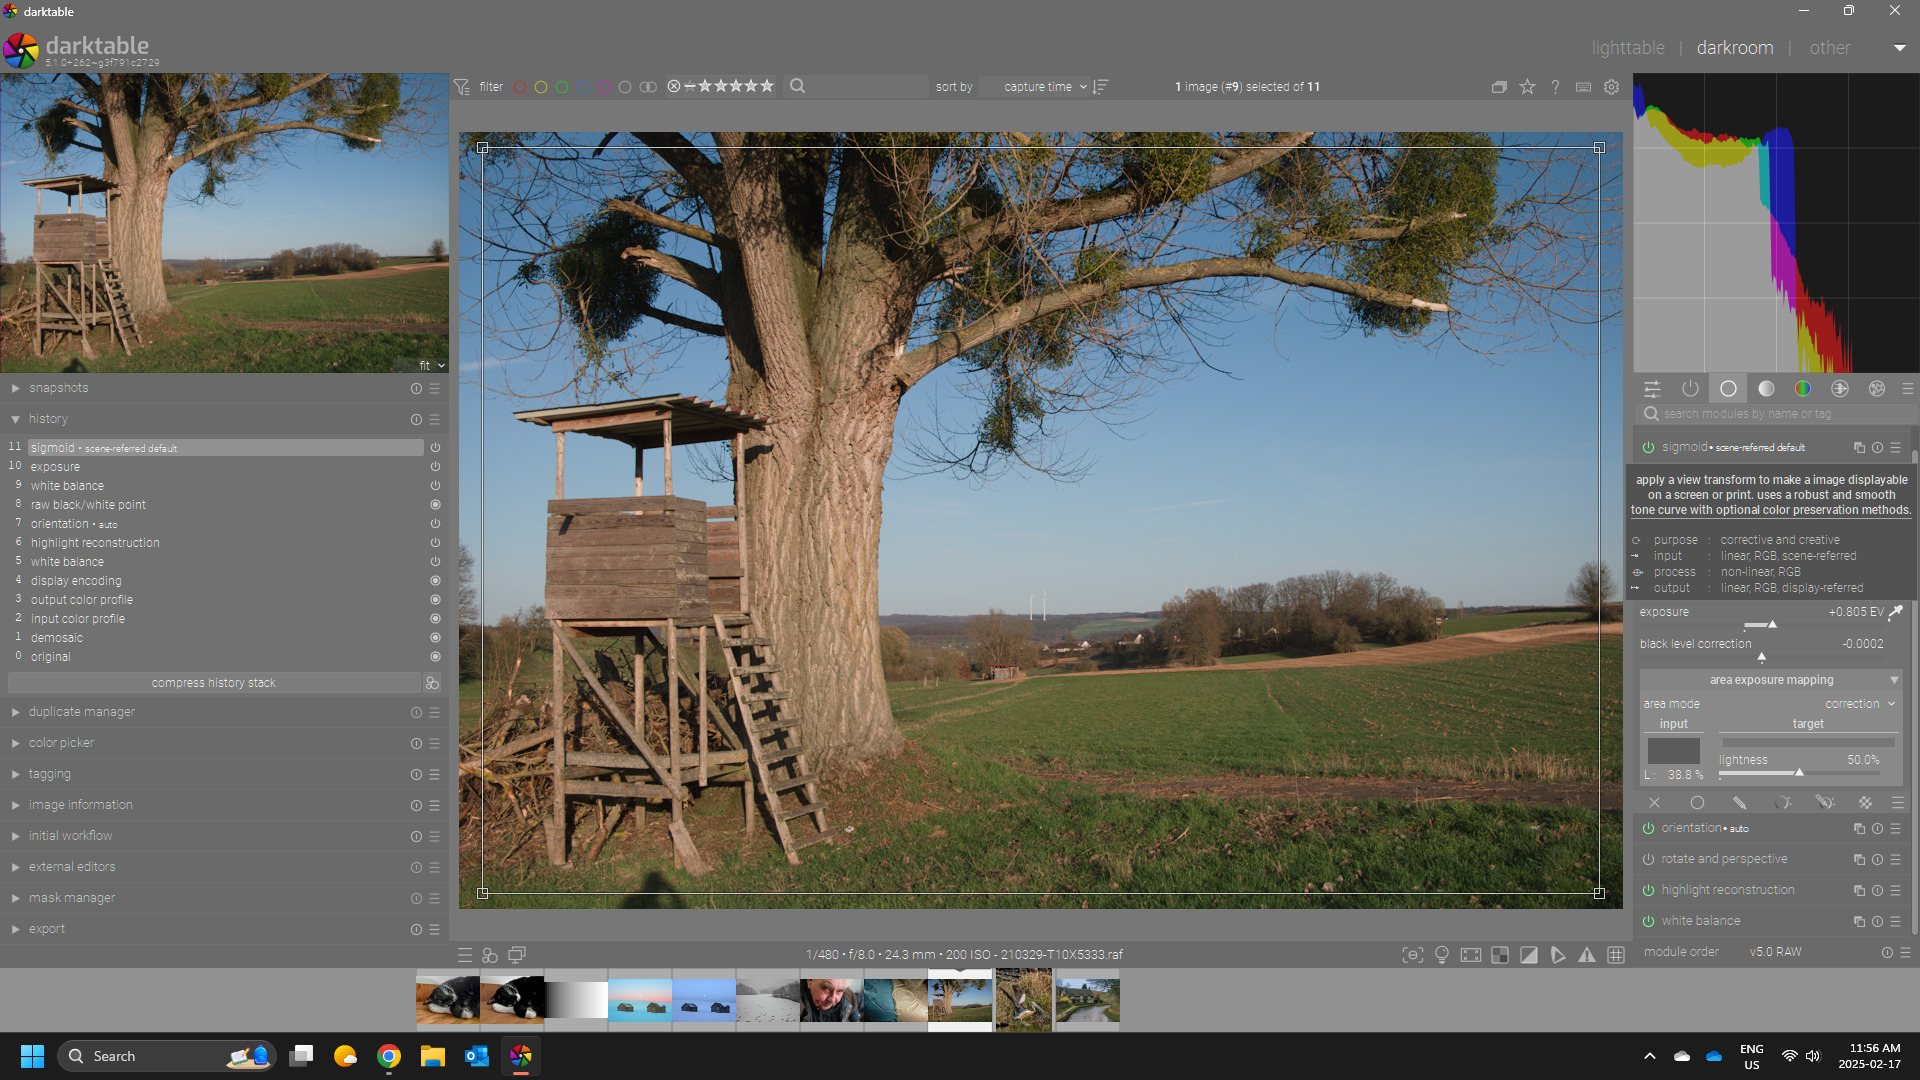
Since version 5 I have decided to use the sigmoid workflow as the default.
The big advantage is that the colors and tonal values are closer to the JPG ooc.
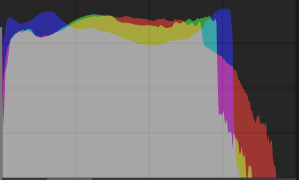
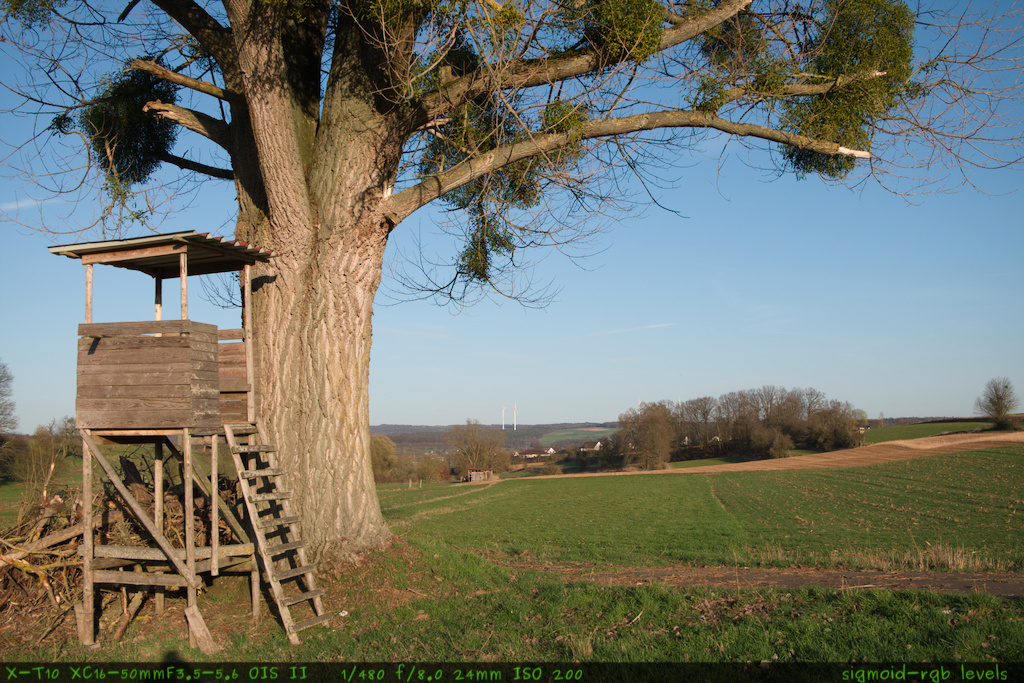
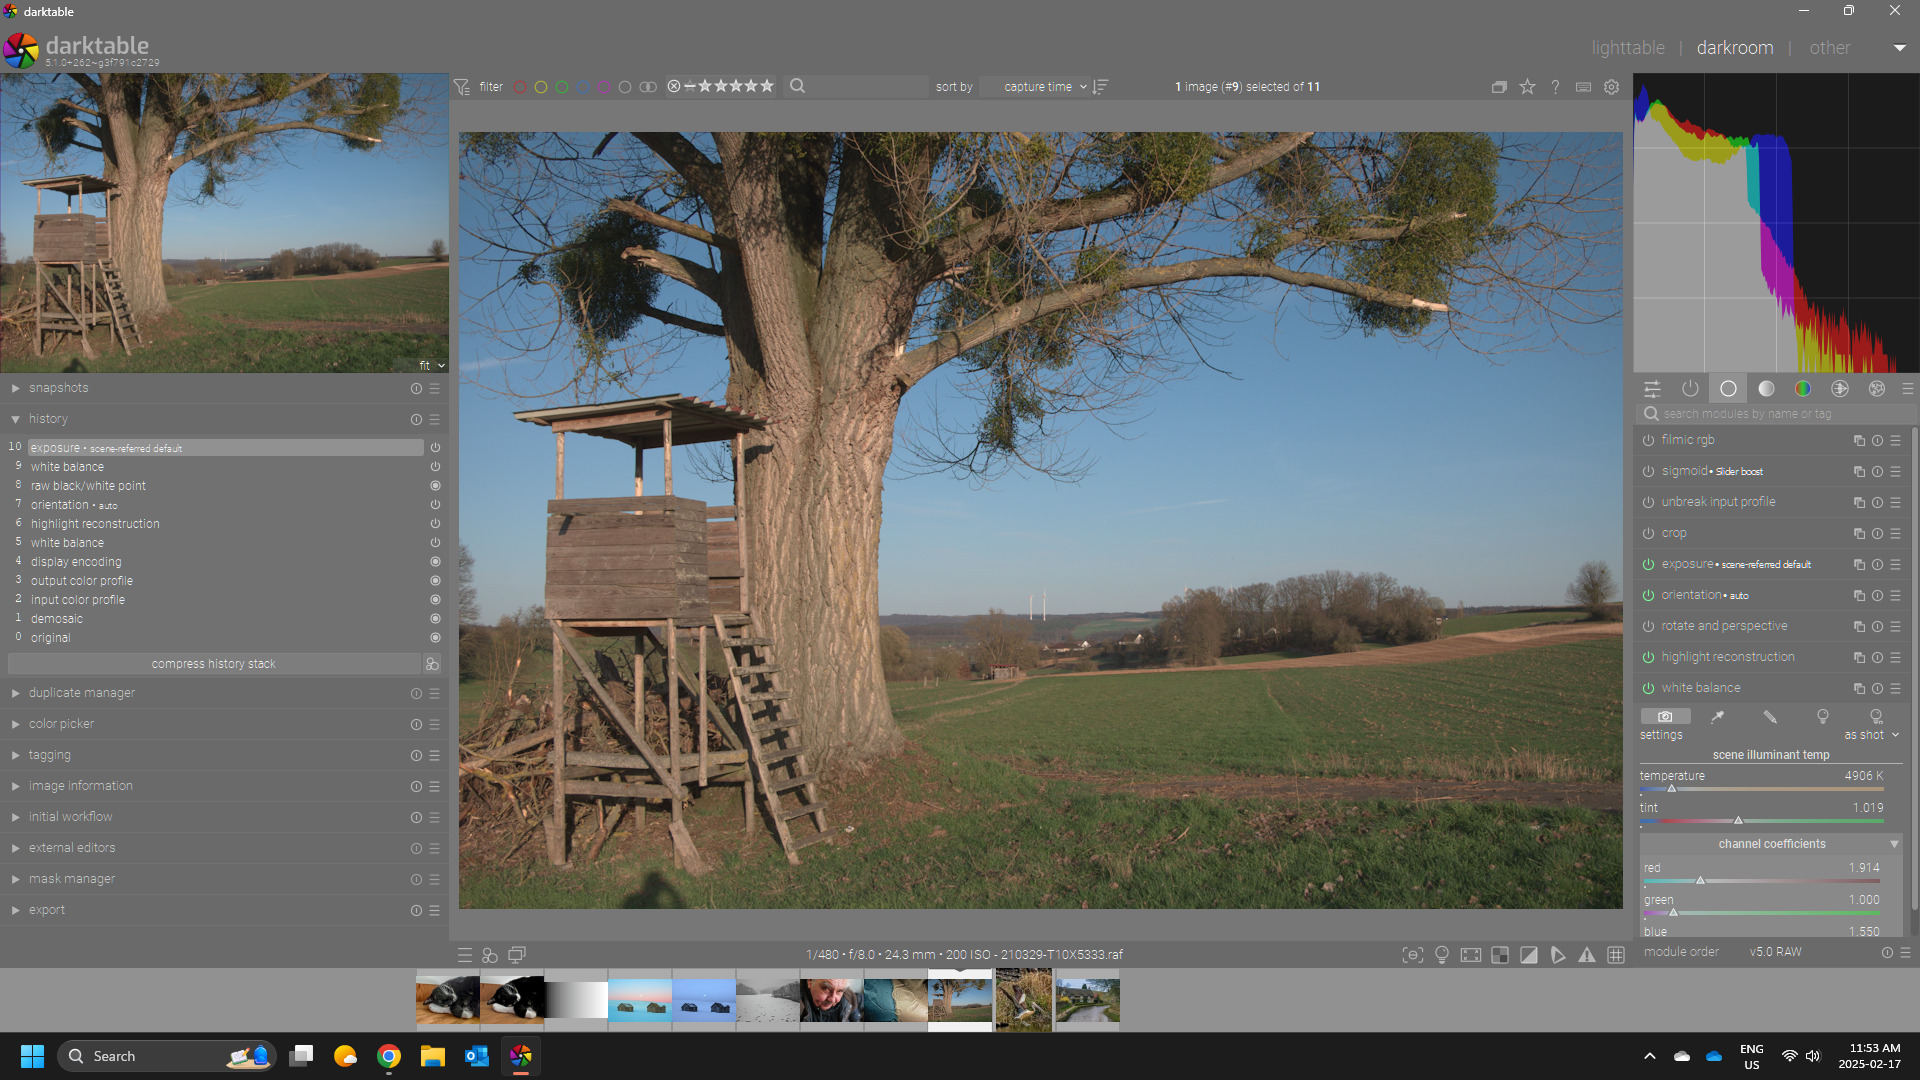
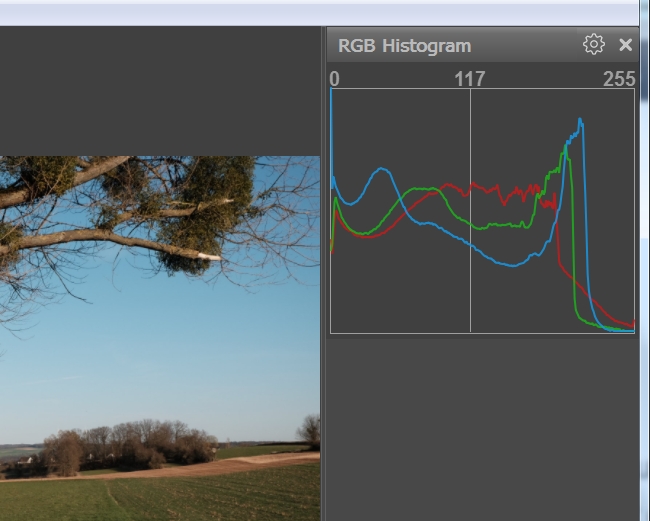
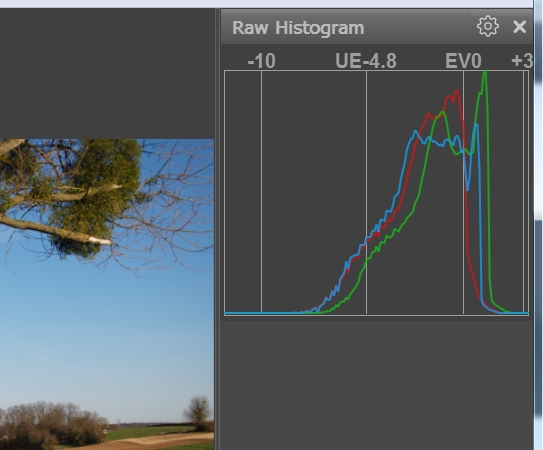
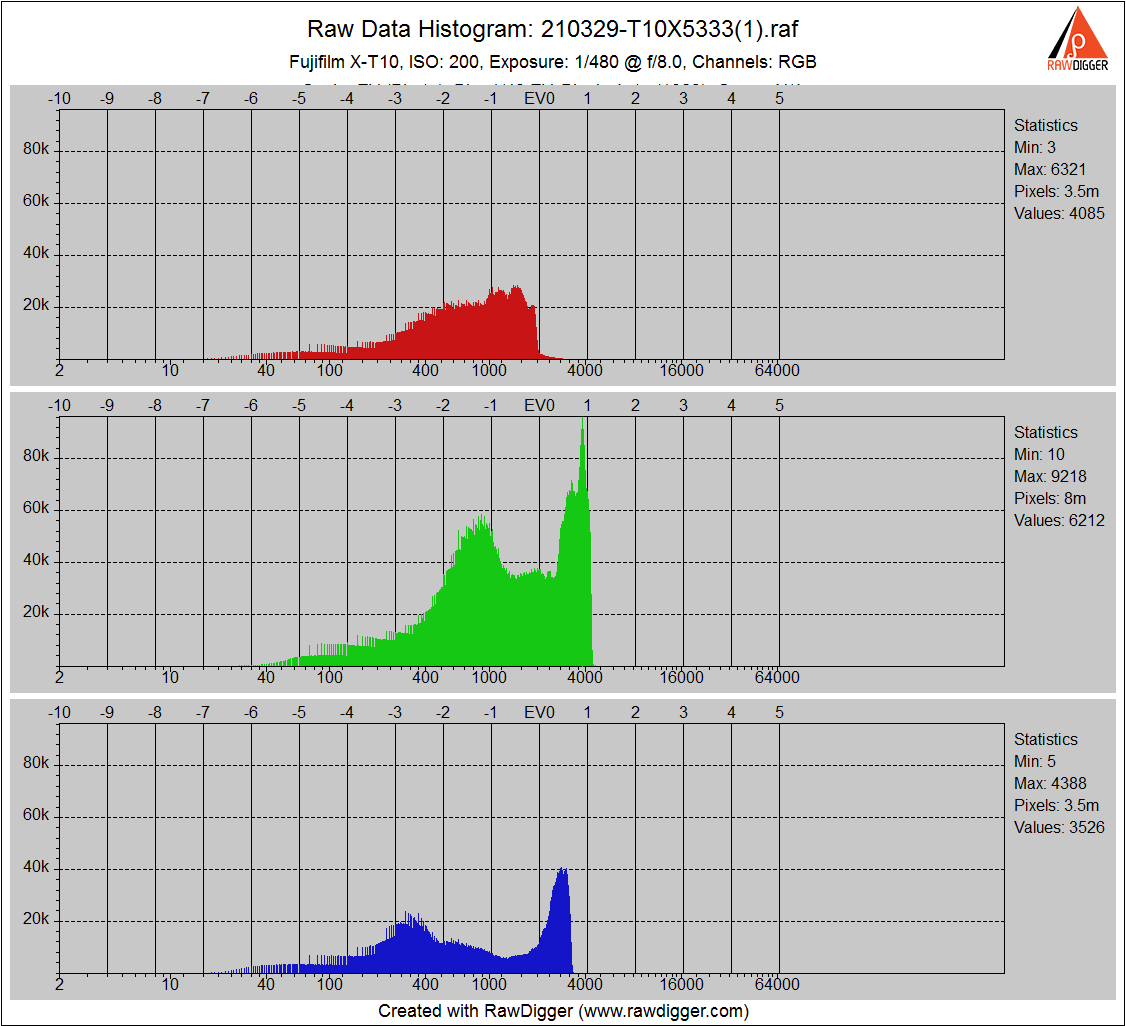
Lately I’ve noticed that there are a lot of images that show underexposure according to the histogram. These cases occur with all my cameras (Fuji, Sony A7, Nikon DSLR).
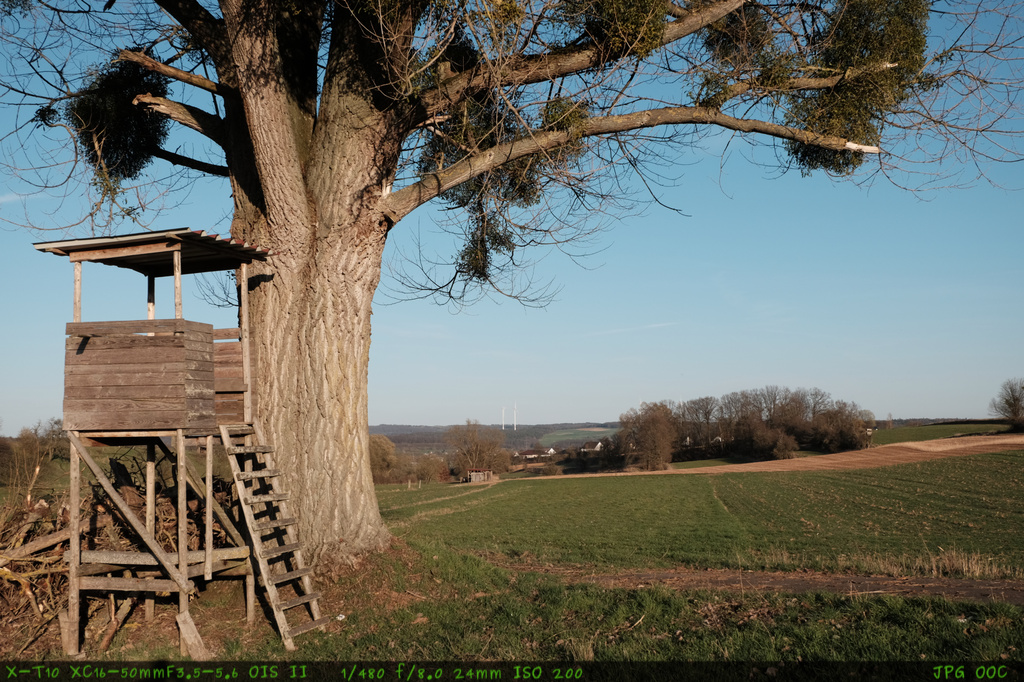
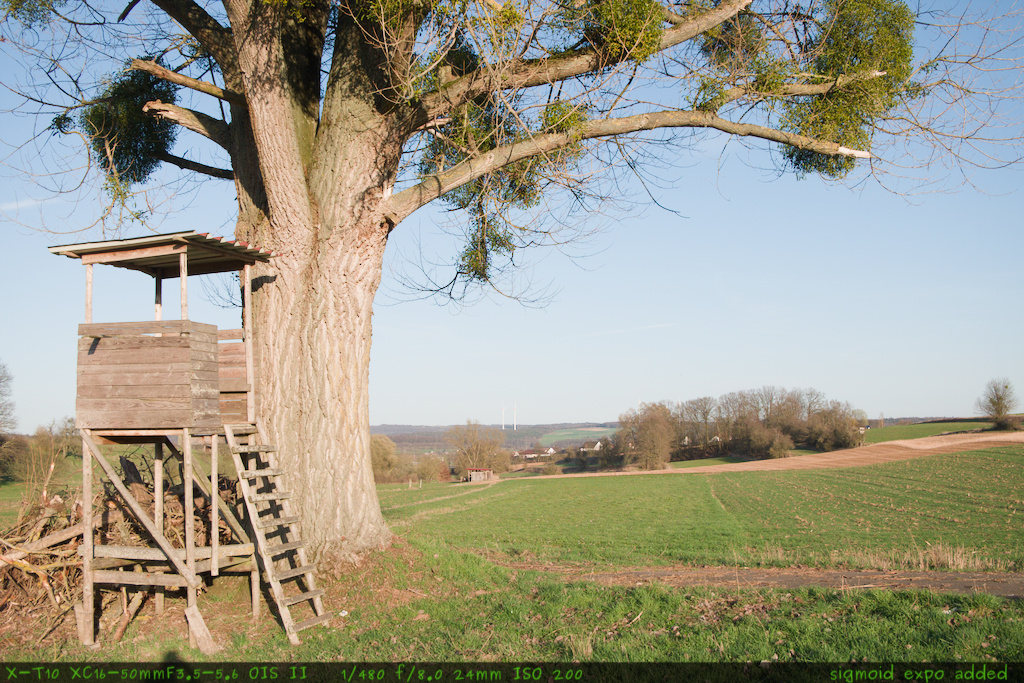
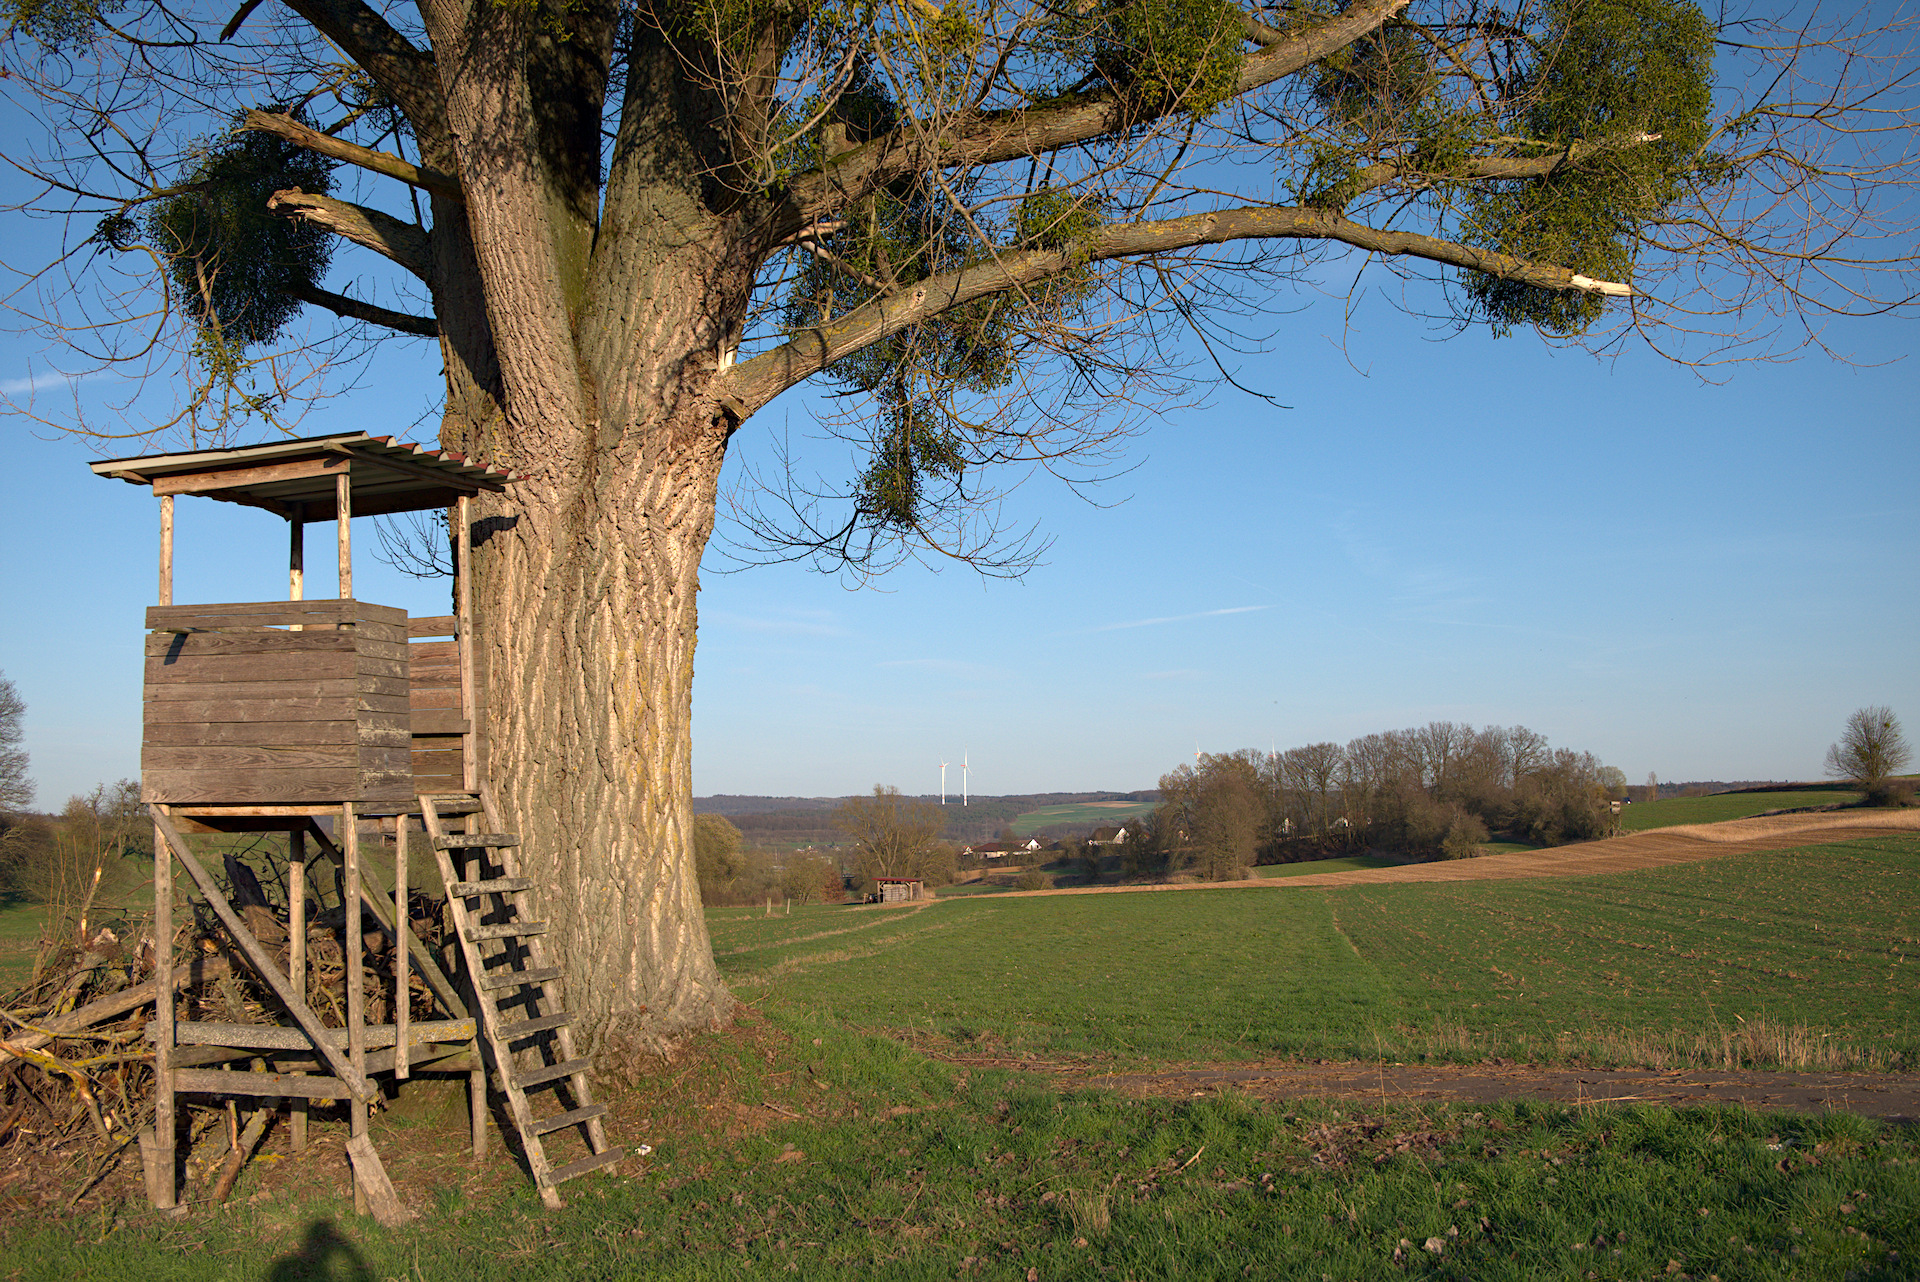
Here is an example.
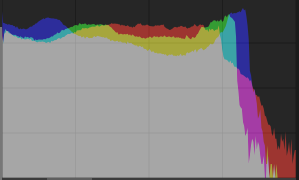
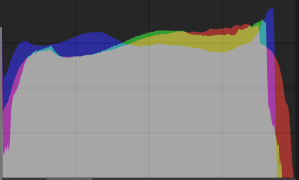
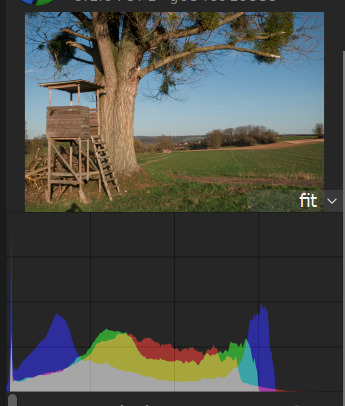
First the JPG ooc. It was exposed correctly, as you can see in the histogram.
That works for me, but it’s ‘display-referred’ and the order of the pixel pipe has to be changed.
The question arises as to why this is not the standard, as it says in the tooltip for rgb levels that this module is display-related. But that’s not what this is about.
My question is: does anyone know of another useful way in the referred-related workflow to correct this underexposure?
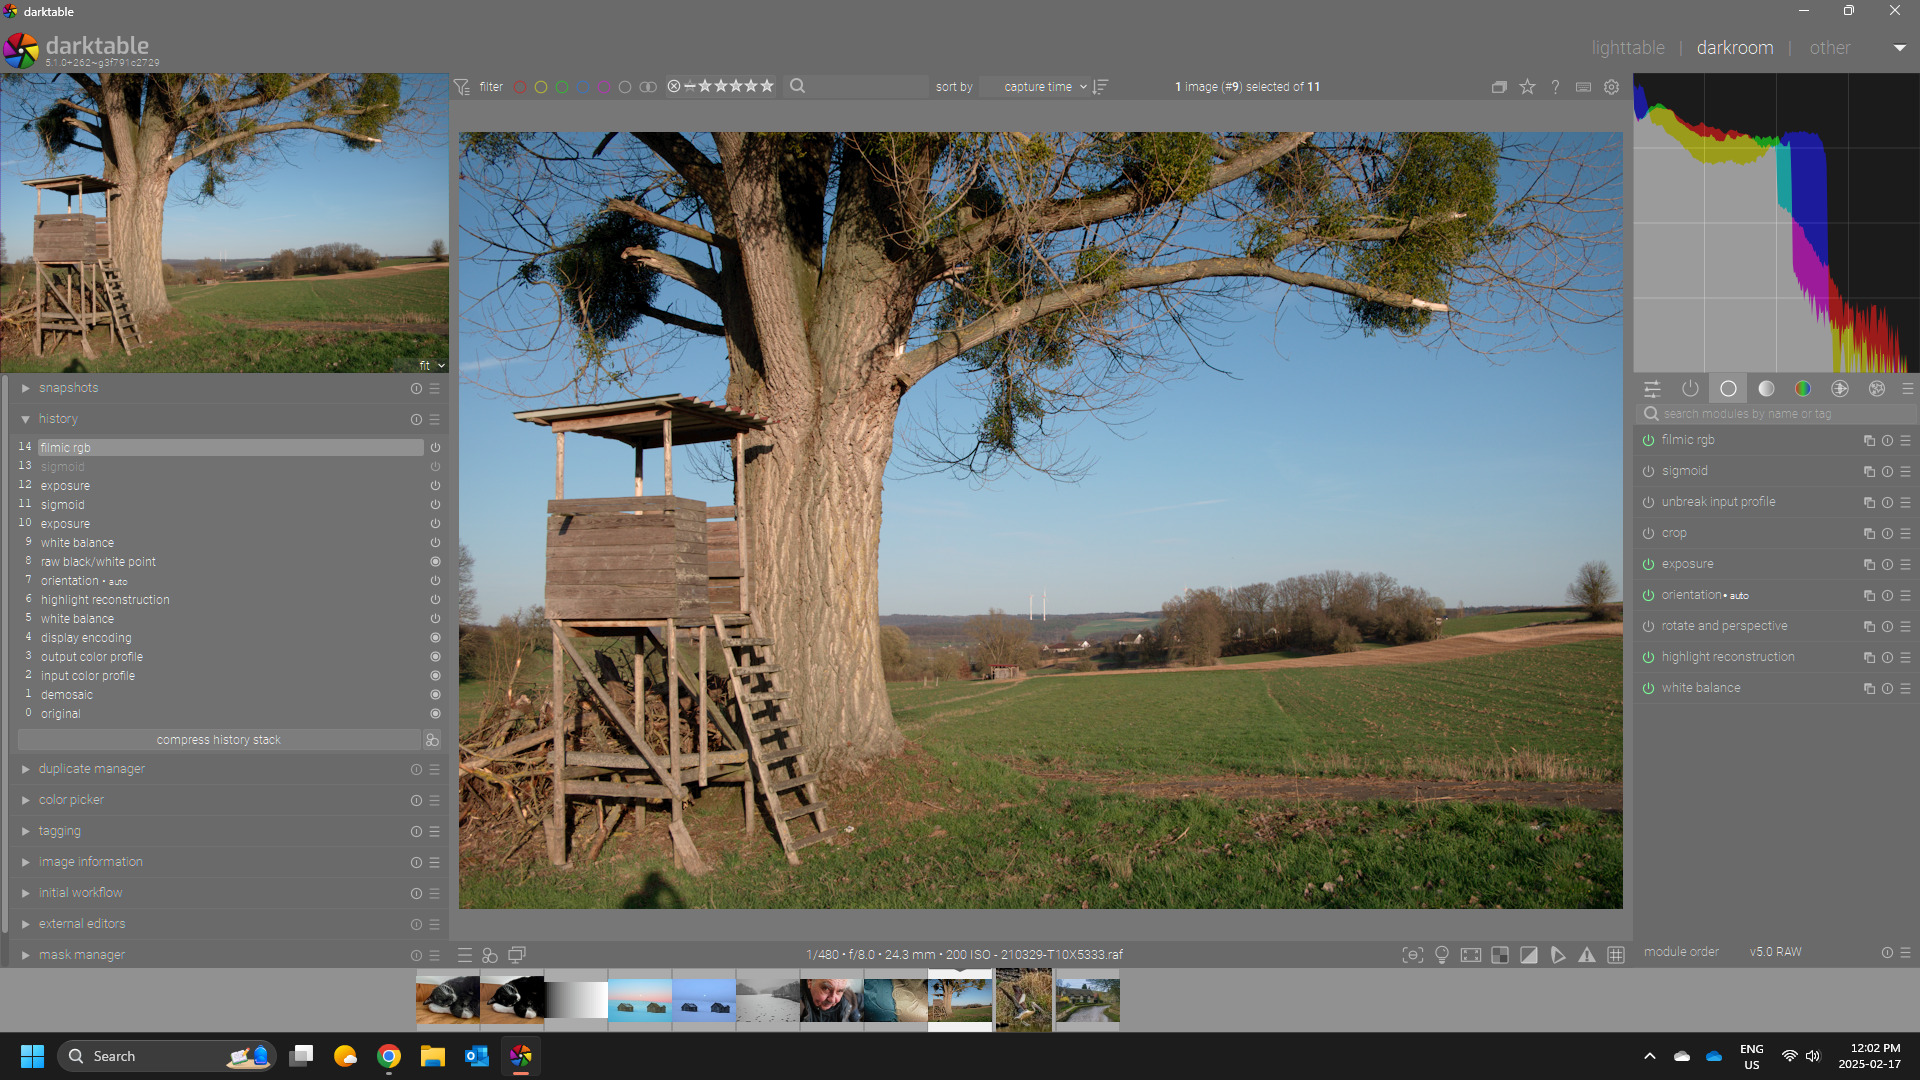
filmic RGB is not a solution for me. It works there with exposure, but I want to use sigmoid.
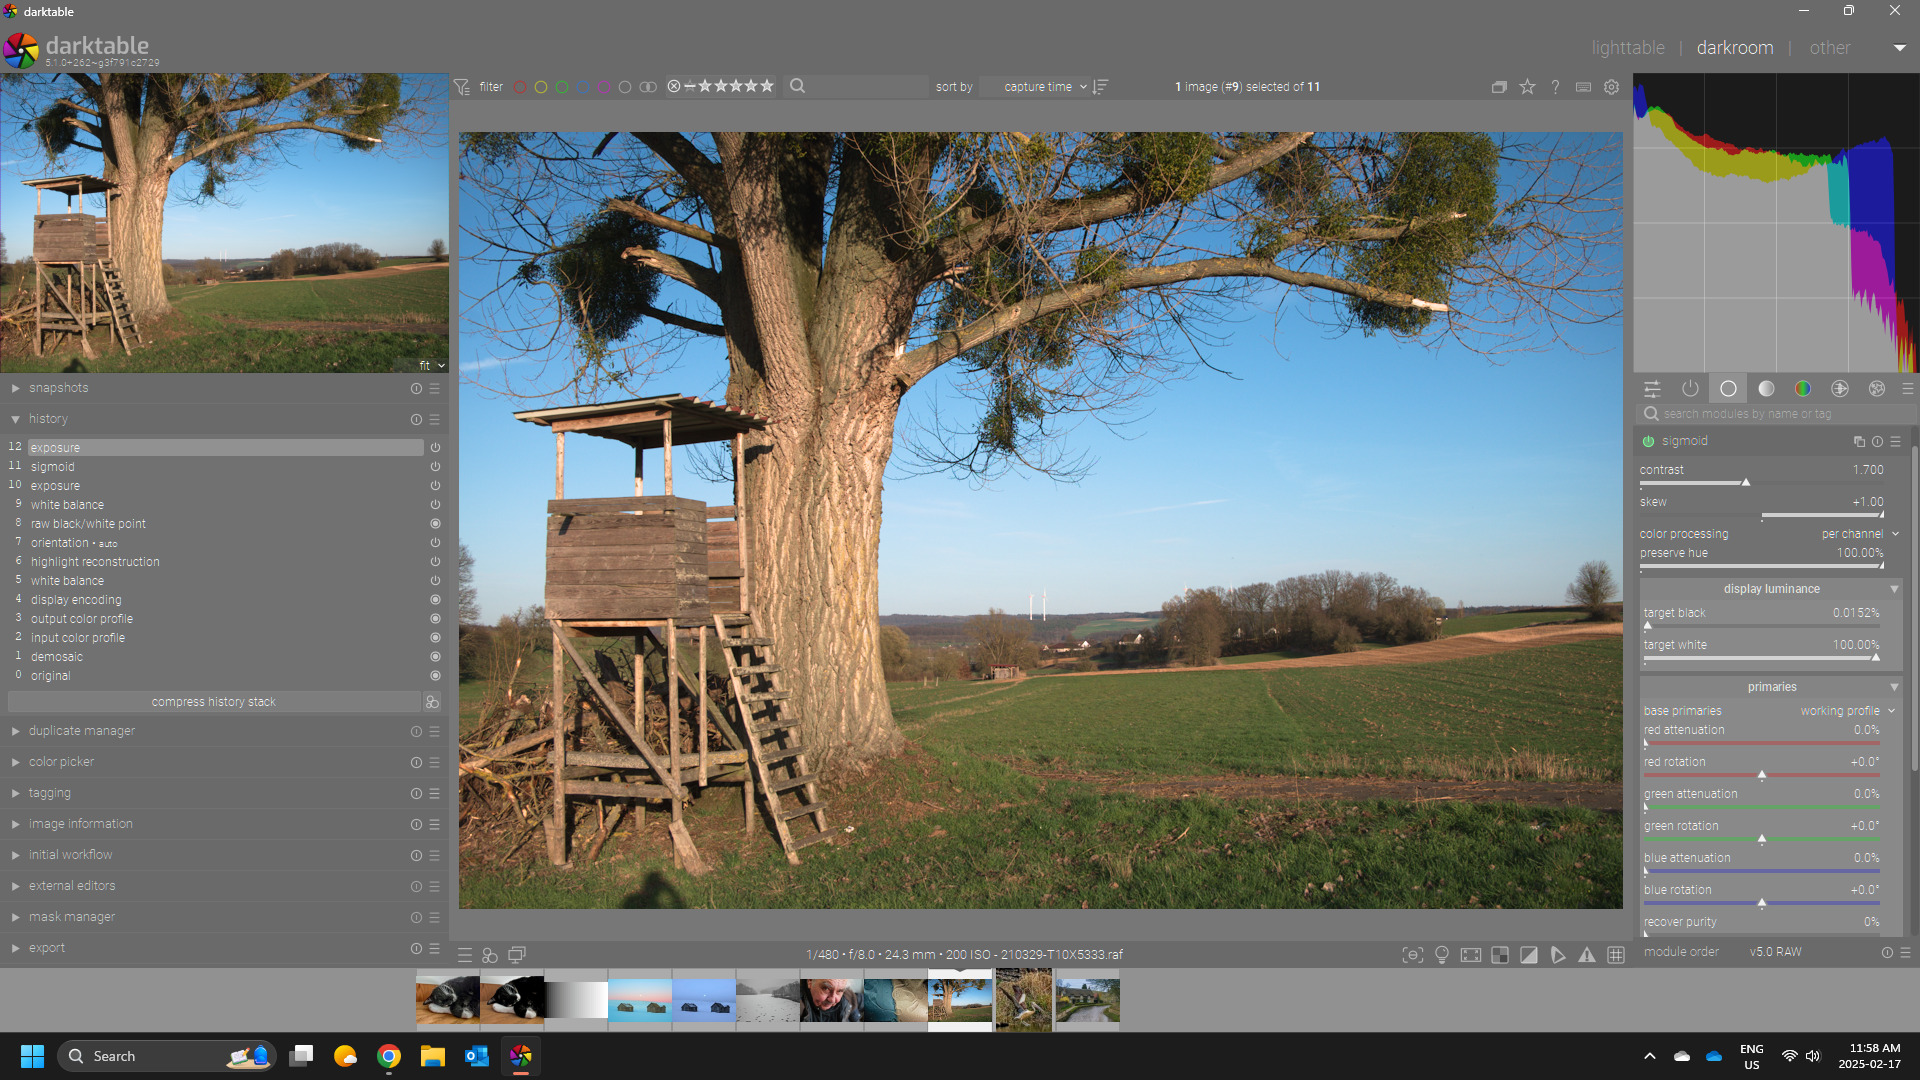
Sigmoid has the drawback that it never reaches 1 (it converges to 1 asymptotically).
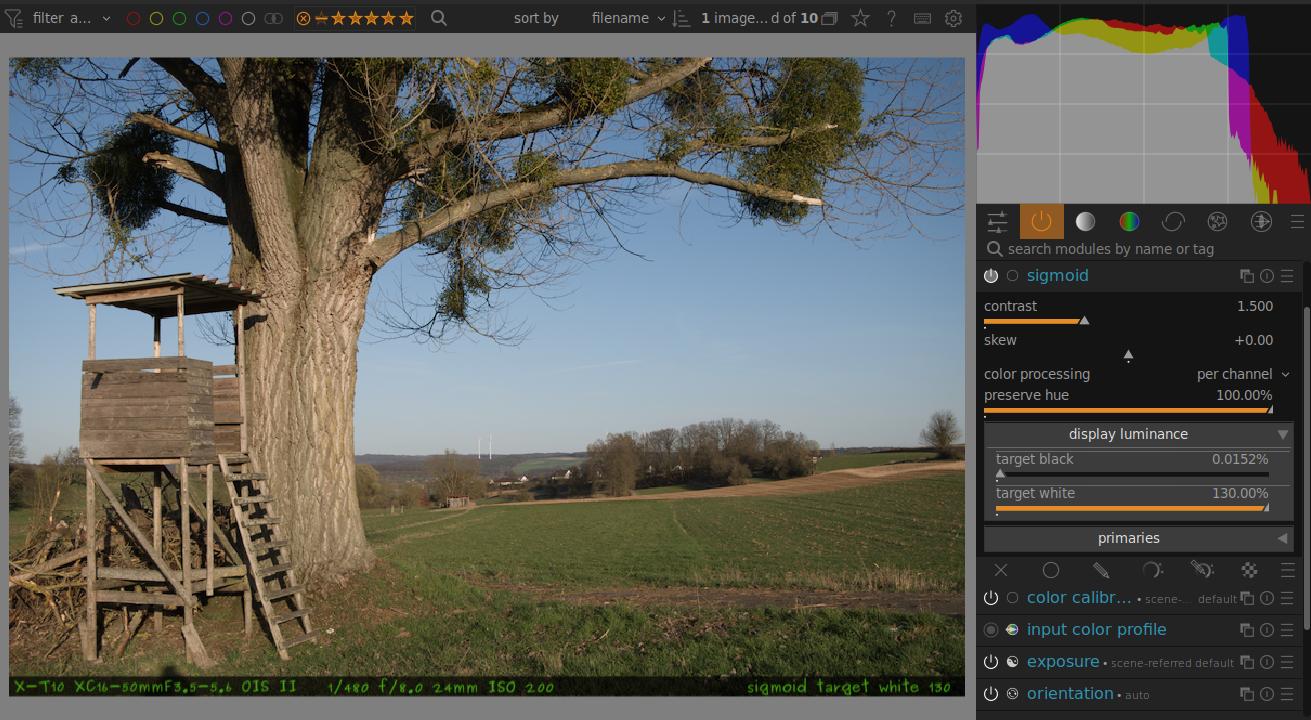
The trick from @s7habo is to open the parameters and increase display white above 100%, while keeping an eye on the histogram.
You are not supposed to use the exposure module to “fill out the histogram”, exposure is used to set the midtones, as one of the first steps in the editing process (with white balancing). If you want to brighten the highlights, use contrast, skew, and the trick @kofa referred to (or use filmic… ).
From a quick test, the midtones (tree bark) looked reasonable “out of the box” with sigmoid.
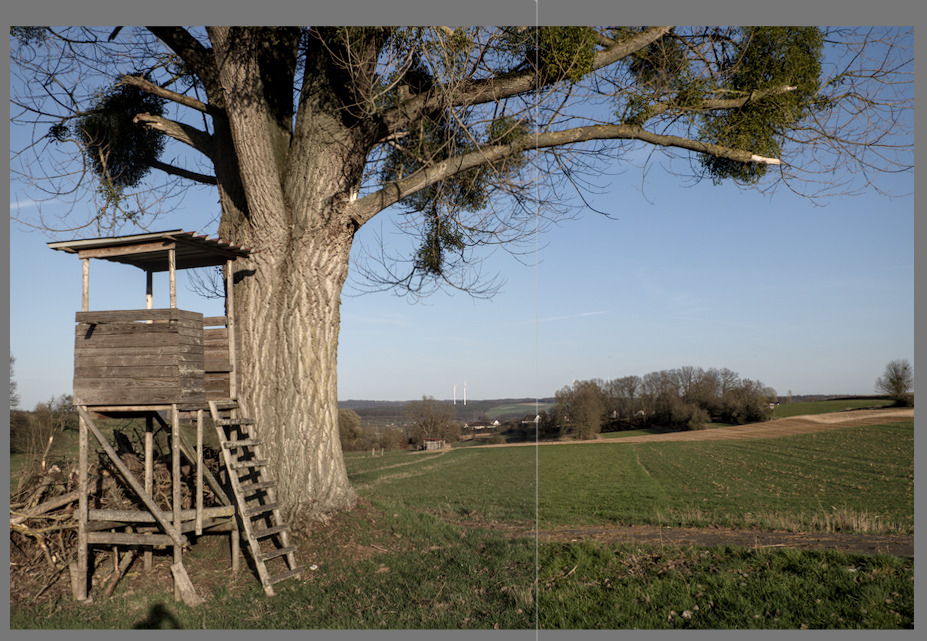
Left: sigmoid (with settings from a video from @s7habo) with the display white raised.
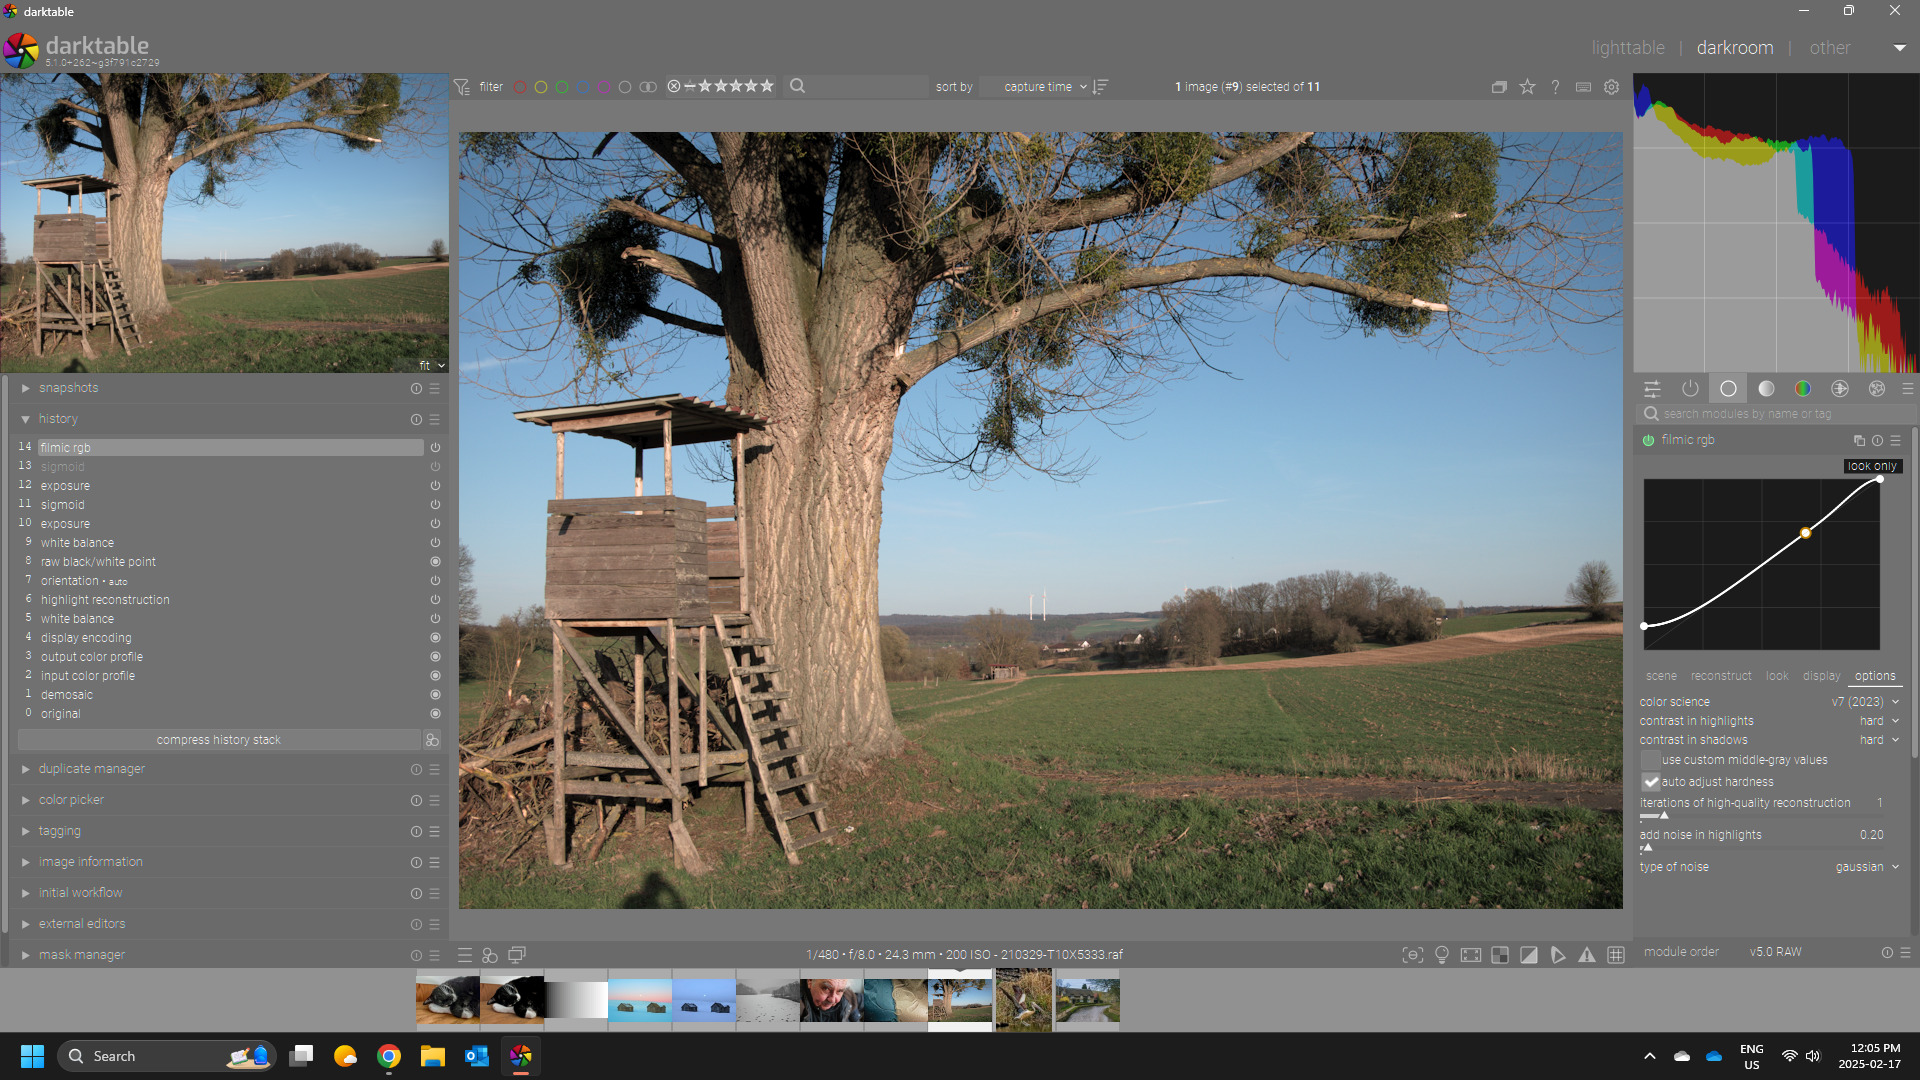
Right: filmic + color balance rgb (preset: vibrant colors) + filmic contrast raised a bit.
BTW, for quicker work with filmic (in case you find it fiddly), I’ve assigned a hotkey to its auto-picker, another to its contrast (so I press “t” to pick, then press Alt+F and scroll the mouse wheel to adjust contrast). I’ve also assigned a hotkey to its white and black level, and to the ‘contrast in shadows’ and ‘highlights’ settings, so it’s quite quick to use. But to each his own; sigmoid is a very nice module, and sometimes works better even for me than filmic.
Try some skew with contrast in sigmoid…but as noted expose to the middle grey and then use some of the options others have shared if skew and contrast don’t bump things enough…
EDIT:
I didn’t see too much of an issue with the image you shared and using sigmoid??
I would be happy with these…they are a bit warmer but the sun does seem to be coming from behind you in this shot and the jpg was quite cold…but v7 filmic does give a colder look likely more desaturated highlights…
I was not happy when applying either Sigmoid or FilmicRGB to this image, no matter how I fiddled with their settings. Both modules gave too much contrast, reducing some features in the image to almost black. I was particularly looking at the lowest left group of leaves above the little playhouse.
I was very satisfied to process it using only WB (as shot), ColorBalanceRGB, and two instances of Diffuse or Sharpen, one for Sharpen Demosaicing (AA filter) and the other for Local Contrast.
I am always surprised that people try to use a tone mapper for effects for which there are better tools in darktable.
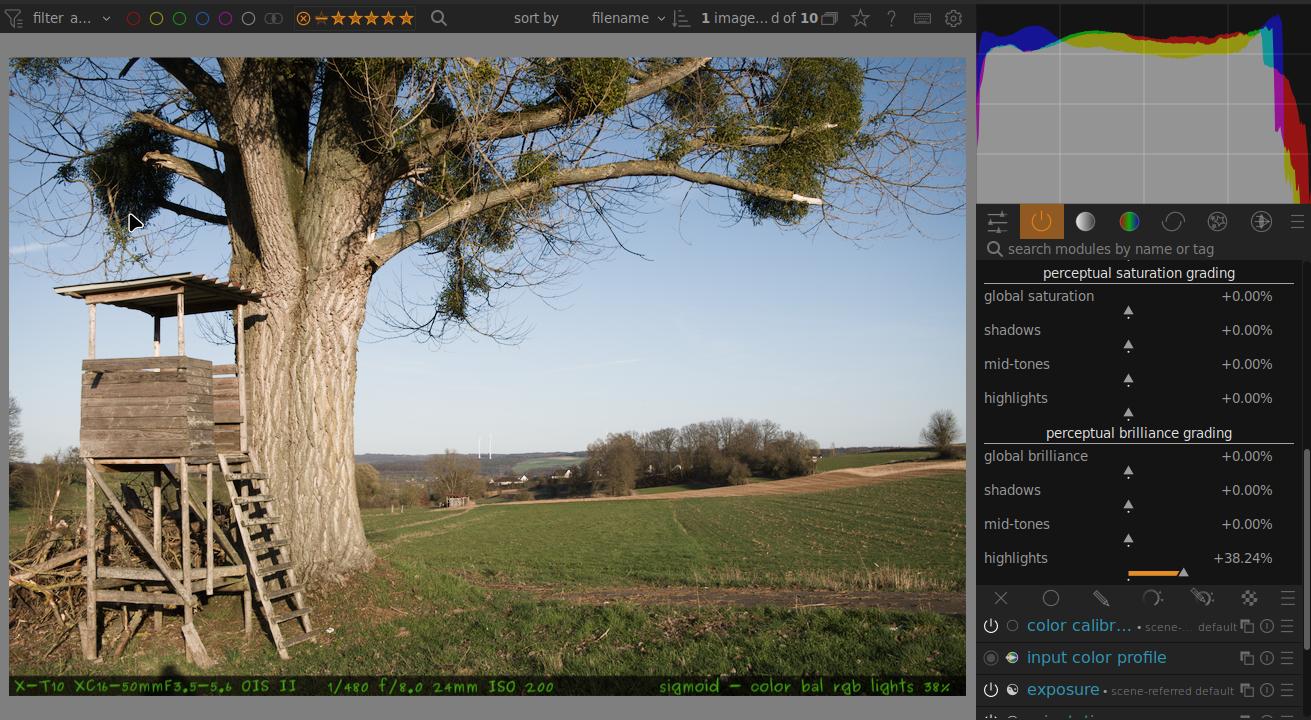
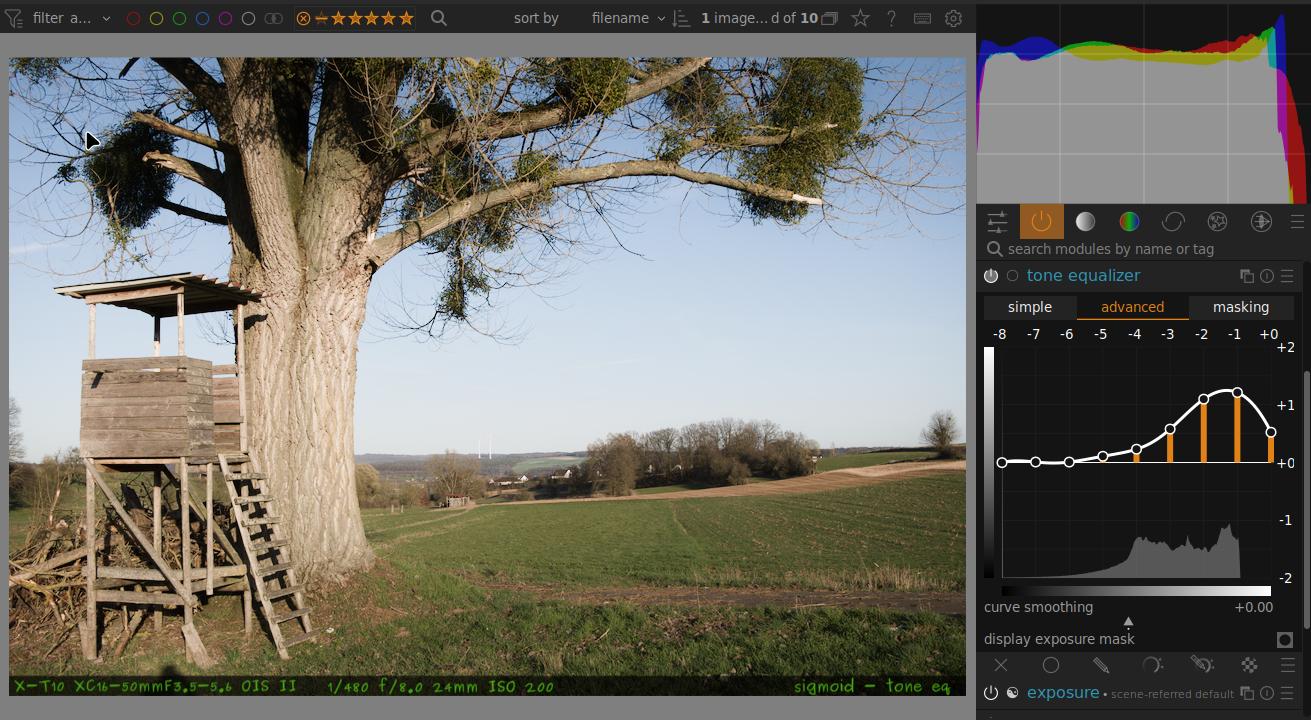
There’s exposure for correct mid tones, tone equalizer or colorbalancergb brilliance settings for shadows and lights.
Why not simply use those tools instead of fiddling around with tools designed for a different purpose …
Quick Q, if u don’t mind Martin. I set exposure, hit white/black pickers in filmic, maybe lower white if there’s not “100% white” in the pic, raise the blacks just before the curve shows orange, giving maximum detail in the shadows. Then use tone equalizer, contrast equalizer, d&s, color balance rgb to add back in contrast as required. Does that make sense as a method? Tnx
Can you please explain when you think it is best to use filmic and sigmoid?
One of them is activated by default in scene-referred, though deactivation is possible. I would imagine that most people just leave one of them activated all the time. Might this in itself be the reason why there is a tendency to “fiddle”, when other tools would be easier and perhaps better used?
I would find a linear histogram more informative for this image. Also I tend to ignore the histogram when editing and concentrate on the look. I regard basing my edits on “correctly” setting the exposure based on the histogram as painting by numbers. However, I find it interesting that the histogram here suggests that there are some pure blacks in the image and I just don’t see that with my eyes. The shadows are dark but not devoid of detail.
I personally use Sigmoid for most of my edits as I like the colors I get straight out of the box compared to the dull colors given by filmic which then require tweaking in color balance rgb module. But both modules can produce excellent results.
In case anyone is interested, I submitted a feature request in Github to show values above 100% by default in Sigmoid (I know @kofa has already commented on this issue).
I feel like this will help users to discover the possibility by themselves. Like @s7habo , it’s something I’ve been doing for a while to add a little bit more contrast in the highlights when needed. If you ever want the same highlight contrast that Filmic gives, it’s a quick and easy way to get something that matches.
I have converted them both to autopresets but inactive, ie the tonemappers…I like to look at the image and do some basics before just applying it…and this way I can also leave the processing in preferences set to one of the scene workflows so that mask blending modes are scene otherwise or at least it used to be that choosing legacy or none would then set the blend modes to display in the masking options… One small note for filmic…AP recently tweaked the defaults to 1.18 for contrast and 33% for latitude… THey were 1 and 0.01 as he had set them for DT before leaving…
@all: Thank you for the information on this topic.
I know that filmic can solve the problem, but I’m not interested in filmic (for this case) but explicitly in sigmoid - as already described in the first post.
My point is to understand why sigmoid behaves this way and what can be done about it.
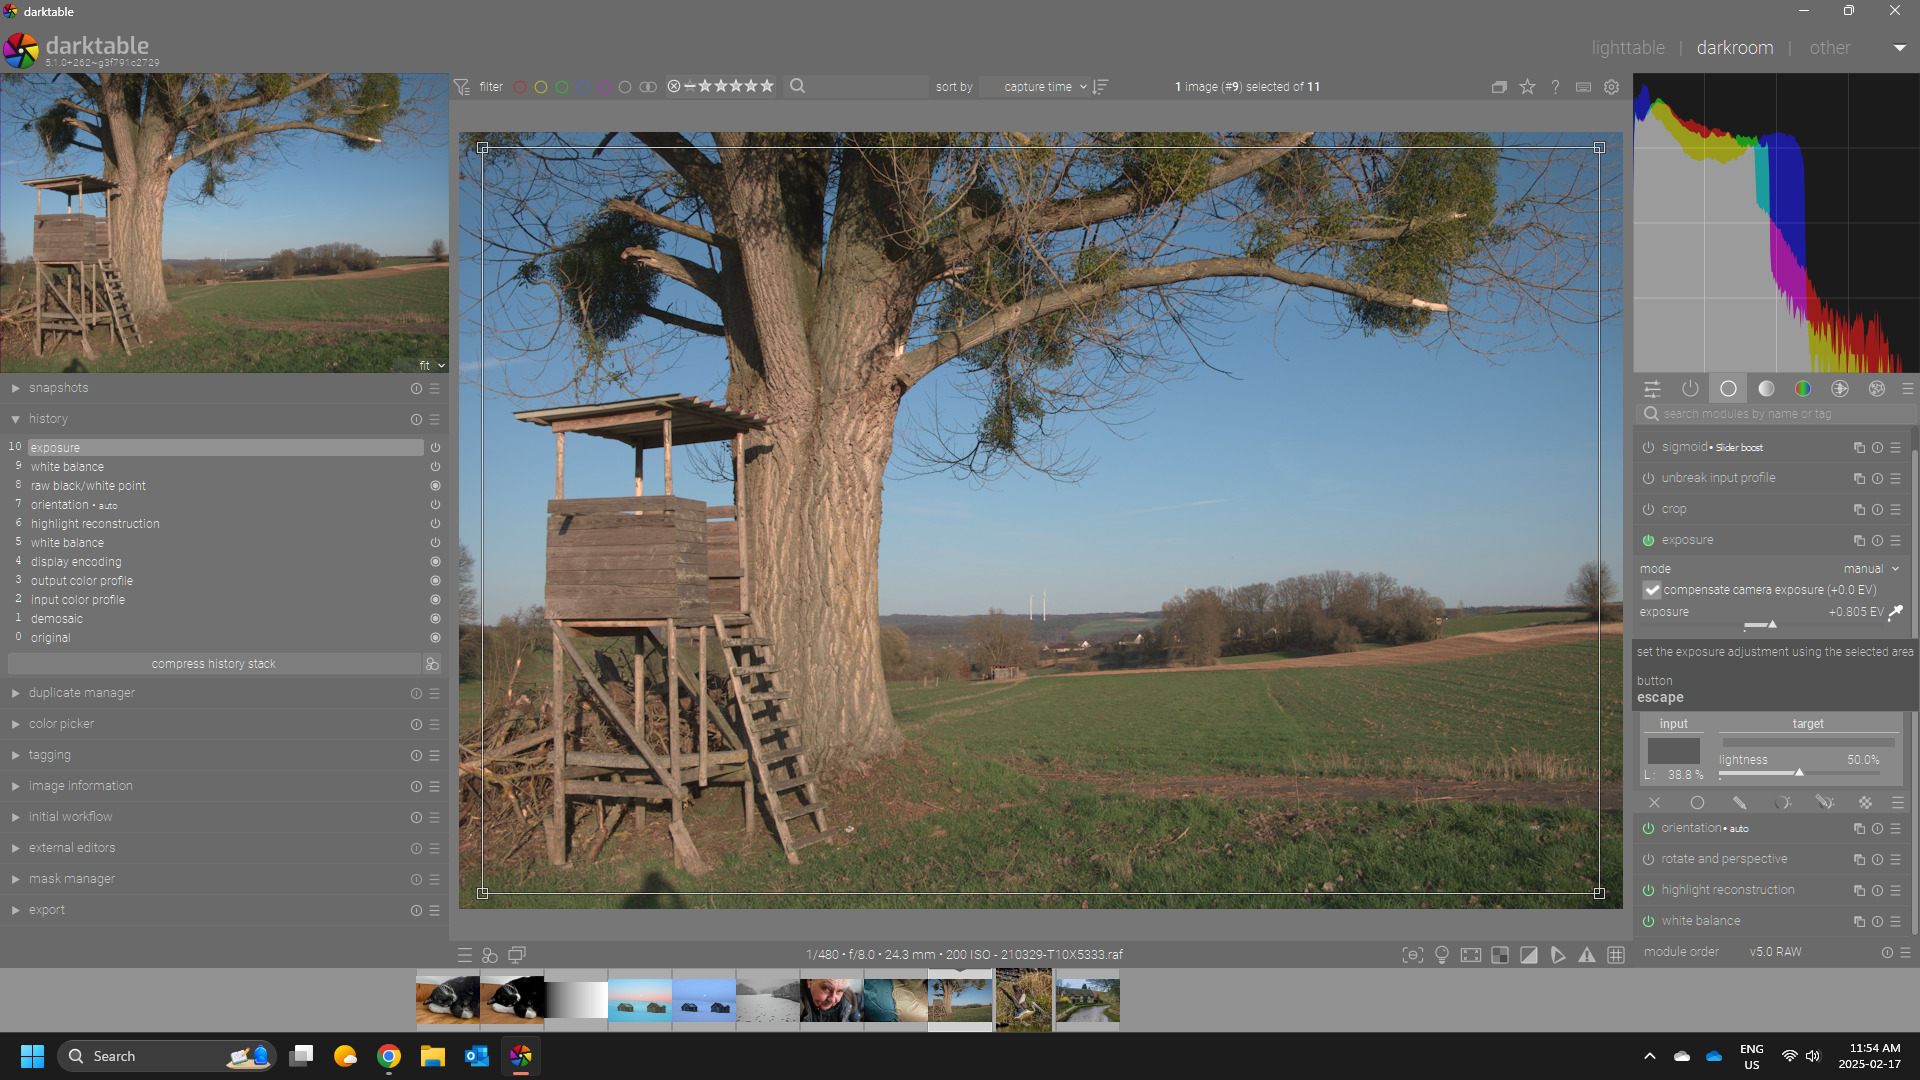
As the exposure is increased, it feels like there is a limit to the highlights that sigmoid doesn’t want to cross.
That’s why I would say increasing ‘target white’ in sigmoid is the solution.
But ultimately only the tonal values in the highlight area are increased.
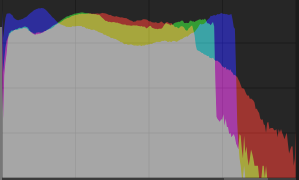
The histogram is filled with it, but the image is still a little bit too dark.
With ‘color balance rgb’ and ‘tone equalizer’ I have the same problems as with exposure: the edge of the histogram is not reached properly and I have to turn the values up significantly.
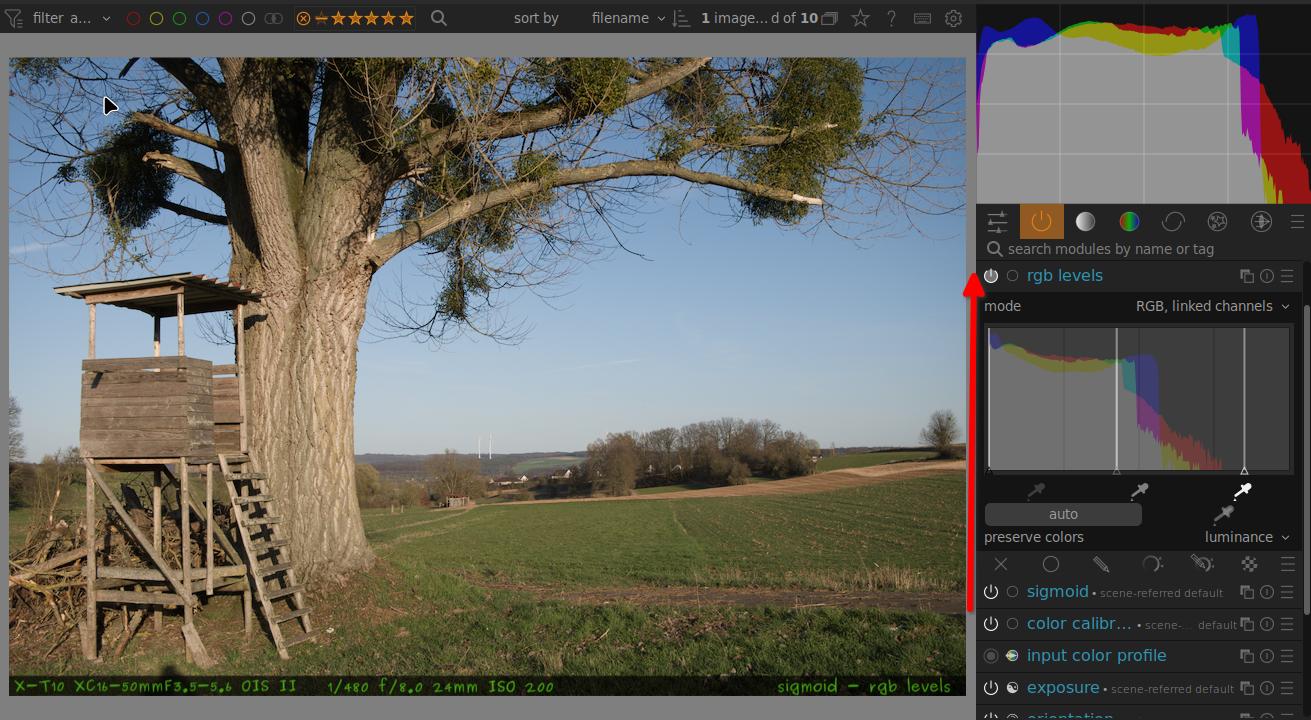
What leads to a good result for me is the use of ‘rgb levels’ and positioning it behind sigmoid in the pixelpipe (unfortunately module ‘levels’ is deprecated) - i.e. a tonal value spread.
But that brings me back to the display-referred part.
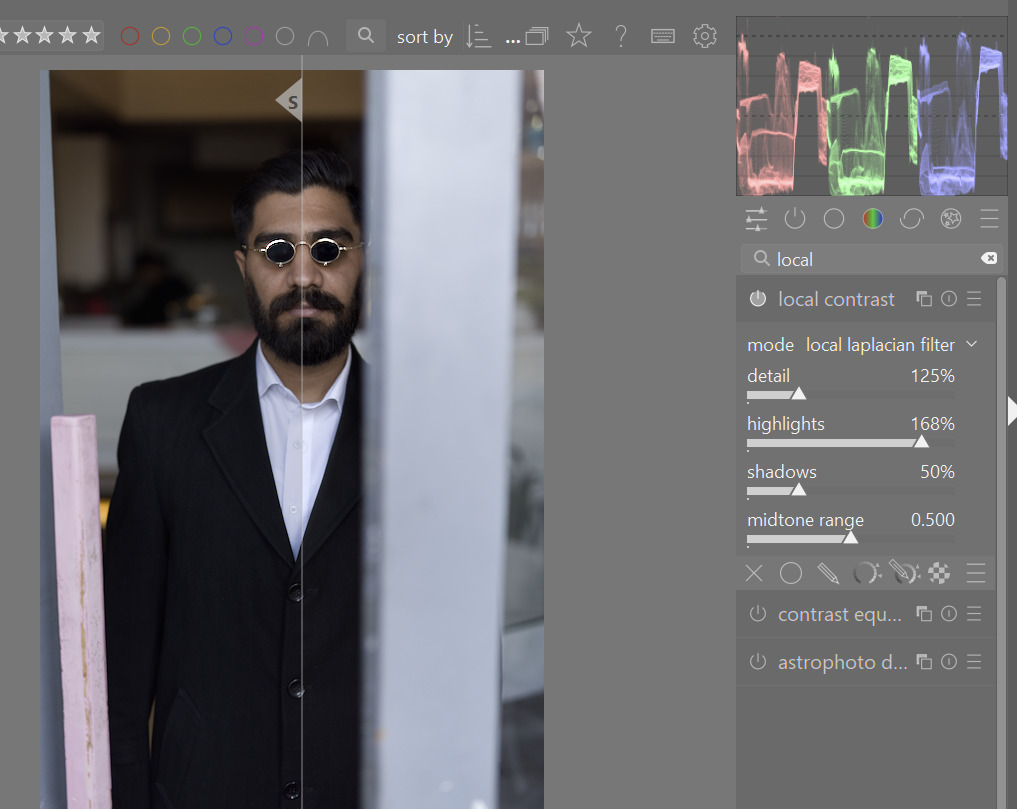
Increasing the local contrast also solves the problem. But it also increases the local contrast (if you want or not).
And it also takes place in the display referred part.
I just thought that there was a simple and good solution in the scene-referred part.
But from the many different options that experienced people have pointed out here, I get the impression that this is probably not the case.
I think I’ll continue to use ‘rgb levels’ for cases like this, like I did before.
The only thing that surprises me is that this module can be found in the scene-referred part in the standard version, even though the tooltip says that it is display-referred.
Significant adjustments are necessary here too so that the histogram moves in the highlights and the result does not look good.
That is exactly what happens: Sigmoid (like filmic) keeps one value ("middle gray) unchanged and compresses lighter and darker values to fit within the output range of 0…1. One of the characteristics of sogmoid is, that the output never reaches 1 (at default settings) whatever you do earlier in the pipeline
So if you increase the exposure, you will brighten your midtones and shadows, with very limited effect on your highlights.
And it also explains why the tone equaliser has only a limited effect on the highlights: sigmoid compresses the changes you apply with tone equaliser.
The issue with rgb levels is that it’s not well defined what happens if the input is outside the range between the black and “white” points (there is no “white point” in the scene-referred part of the pipeline, the “white reference” in filmic defines what you want as white point for the remainder of the pipeline)
As @rvietor says, this is how Sigmoid has been designed. As to why, I believe it’s to ensure there is always a smooth roll-off to white in the highlights, which gives a nice analogue or “filmic” look. It has been mentioned before that Sigmoid gives a more filmic look than the Filmic module. The developer @jandren can maybe give you more details.
But the point is that it’s “as designed”. And other than increasing the Target White value, there isn’t anything to be done about it.
I’m still a little unsure exactly what you want to achieve. When you mention that Sigmoid leaves your image 'underexposed", are you sure you’re not referring to more compressed highlights? From your sample images and histograms, it looks to be like the overall exposure is fine, but you don’t have the white point at 100. Have you tried just bumping up the Highlights slider in the Brilliance section of Color Balance RGB?