How to get brighter photos with filmic (without blowing out highlights)?

Ok my question is a little more specific than the title implies so bear with me. :slight_smile:

I’ve been struggling for a long time with, as far as I can tell, a drawback to using filmic rgb. I would like to use the full range of pixel amplitudes (i.e. fill the histogram) in order to maximize the brightness of a photo without changing the overall balance of it too much. However, I am often unable to do this when I use filmic because, even if I push the input to the module high enough to do so (and/or adjust the white point setting), the highlights end up getting crushed and/or blown out—even when nothing is clipping at any point in the processing chain. The de-saturation is helped somewhat by setting “highlights saturation mix” to 100%, but it definitely still happens.

Yes, there are other ways to make things look brighter, but I think it is a waste to not start by using the full range you have available. One work-around I will sometimes use is to place an exposure module after filmic to make up the difference, but I know this goes against the entire philosophy behind filmic so I’d love to know if there’s a better solution.

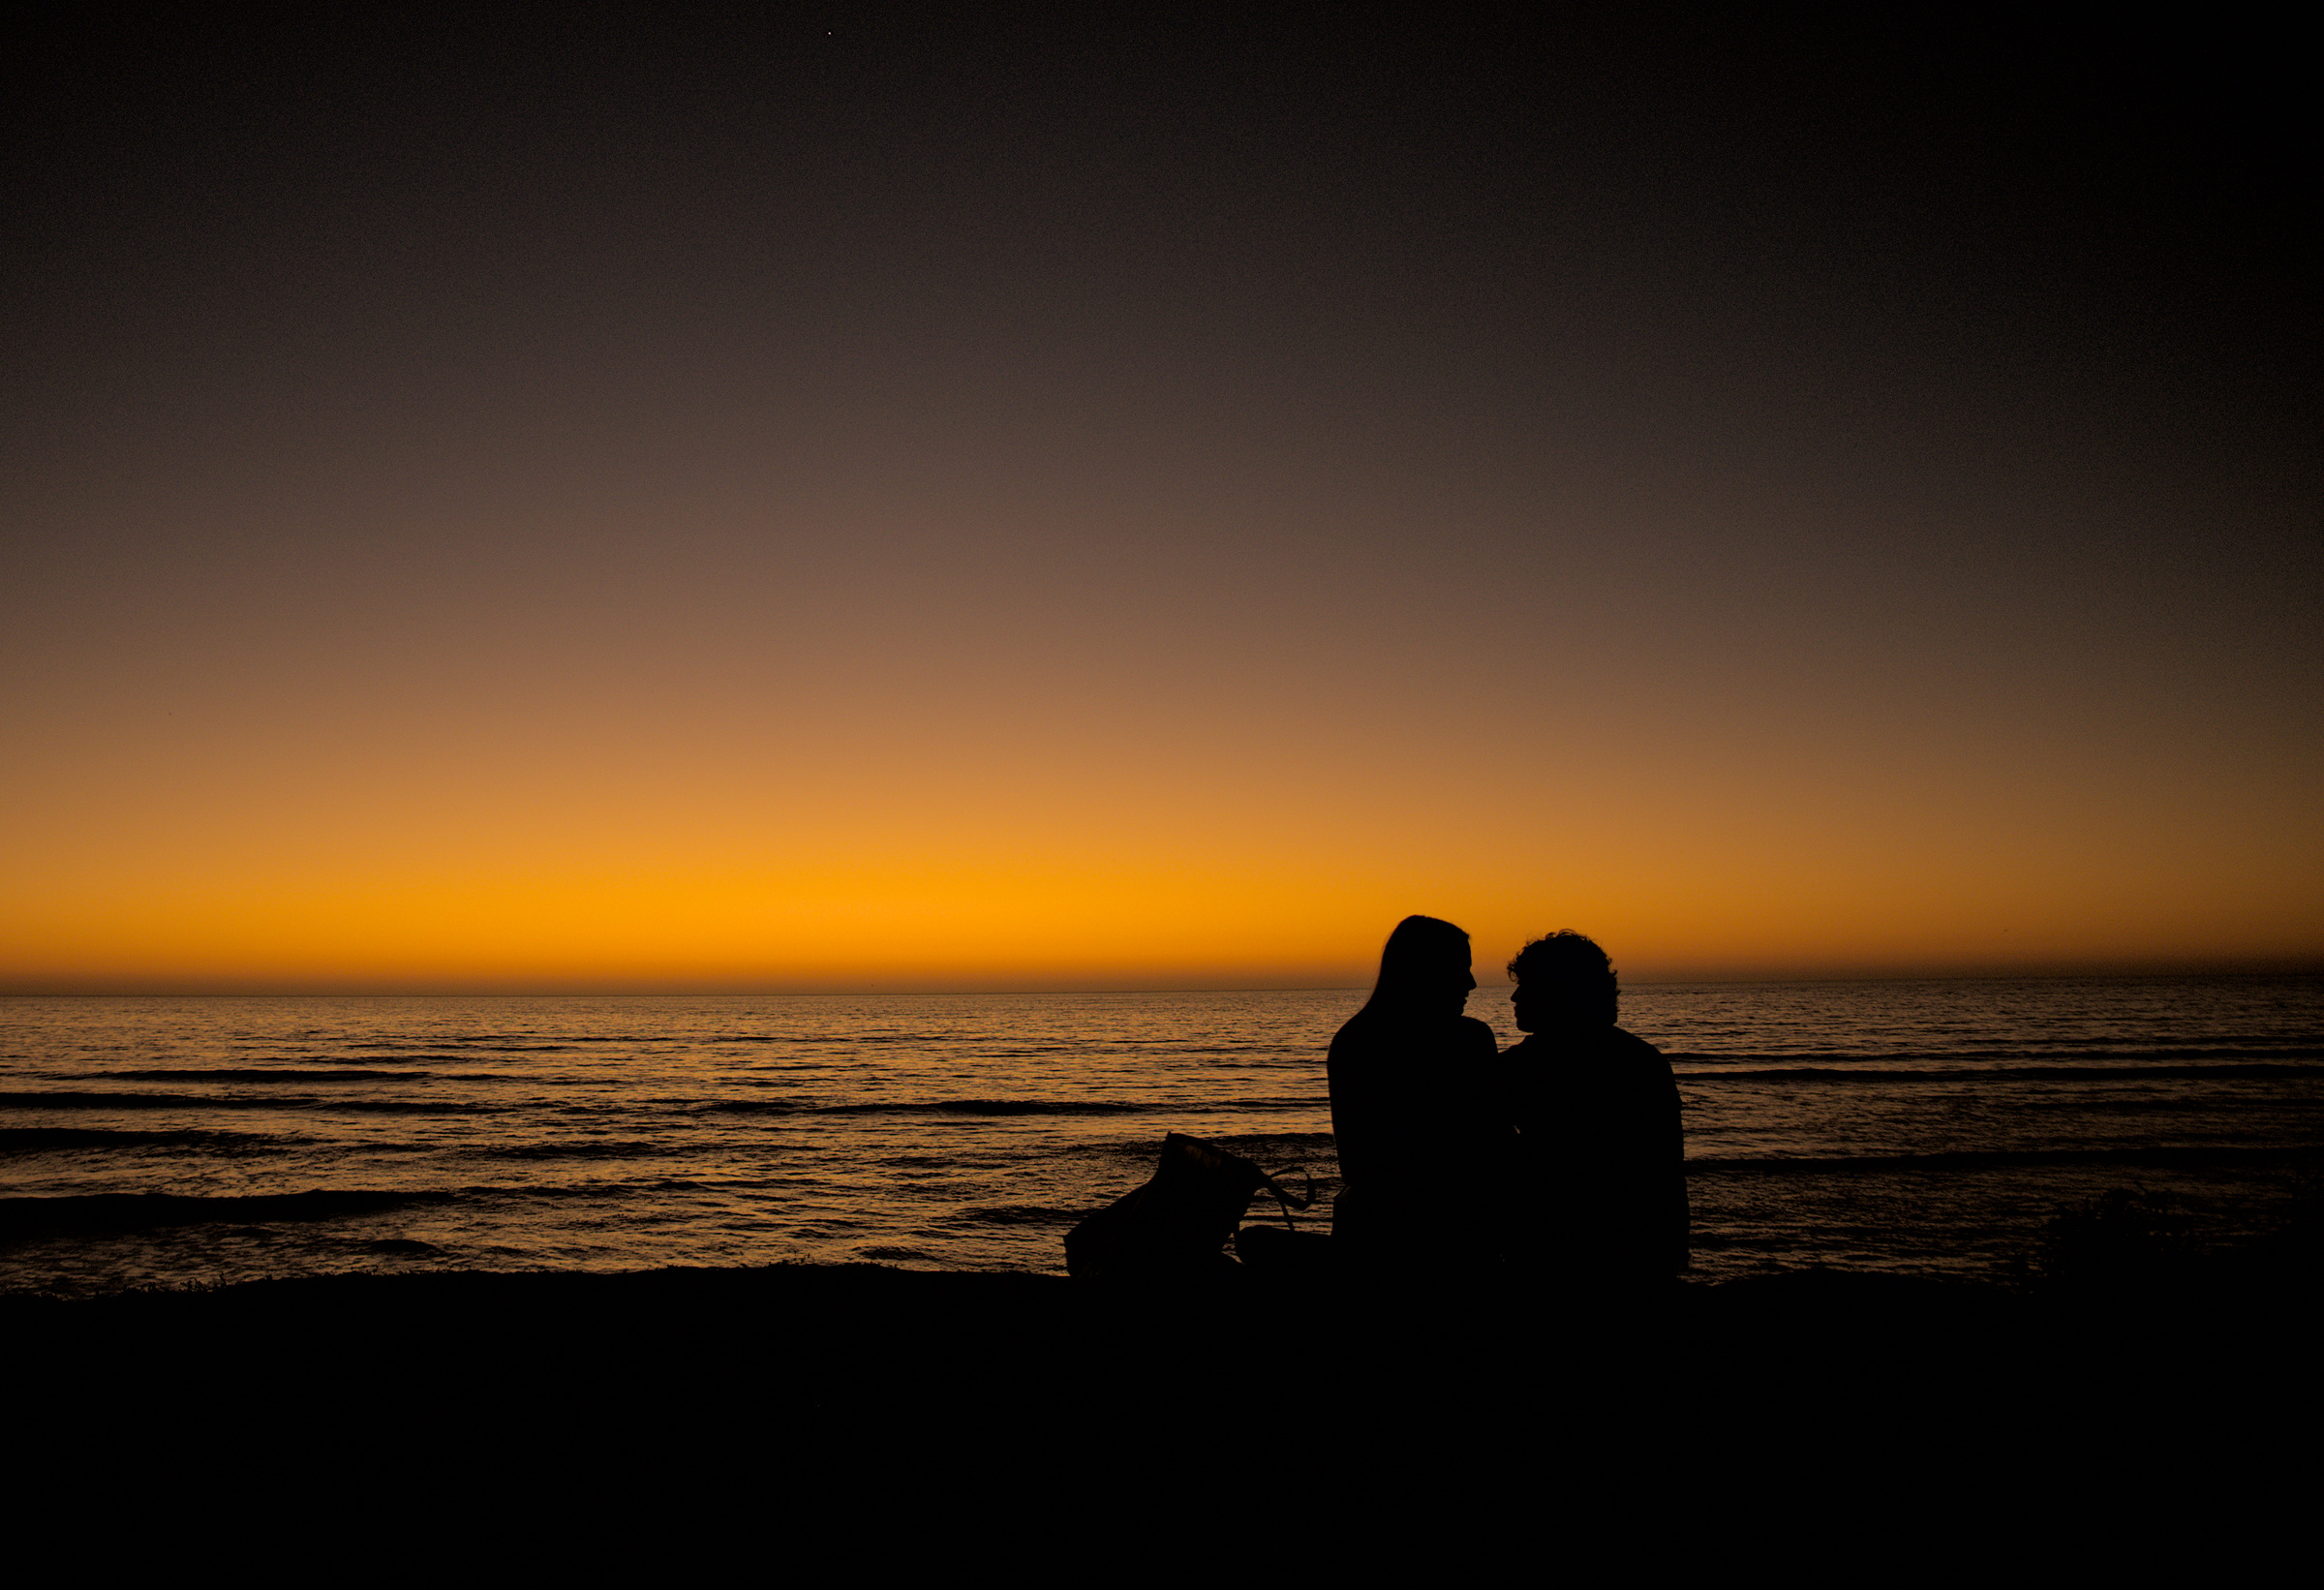
Here’s an example with filmic set just before the highlights start to blow out (right) vs the same settings with an exposure module added after filmic (left). Yes, it is a dark photo to begin with, but this is just what I happen to be working on currently; it is not limited to this case.

This is the same setup, but with filmic-only with exposure just before blow-out, as before (left), vs. same settings + more exposure added before filmic (right). Note the de-saturation in the middle of the sunset and that the histogram is still not filled.

Are you able to share the image with a licence so people can test out suggestions. BTW, I prefer to use Sigmoid for sunsets or if using filmic V5 with no chrominance preservation.

Here ya go! Thanks for having a look!

sunset_cliffs_with_august-02_23_2025-007-_DSC1912_02.NEF.xmp (15.2 KB)
sunset_cliffs_with_august-02_23_2025-007-_DSC1912.NEF (45.7 MB)

PS - yeah I do often go with sigmoid over filmic for similar reasons, but with sigmoid, the related problem I run into is having to crank up the contrast to fill the histogram (even with skew all the way up), and then ending up with something that is brighter but, at best, is more contrast-y than I’d like. And, same as before, an acceptable solution is to just increase the exposure after-the-fact, so it doesn’t seem to be as simple as using that full range requires more contrast.

I haven’t worked with the other versions of filmic very much though; I’ll have to play around with V5!

Did you see this recent discussion and tutorial from @s7habo ?

I am not sure that I am understanding your problem. Hopefully others will.

I loaded your image and your xmp file. The histogram on my windows computer DT5.1 shows a histogram stretched across most of the range. There are no specular highlights or even white areas in this image so I don’t see why the histogram should extend any further across the range.

When I edit, I rarely look at the histogram because this feels like painting by numbers to me. I prefer just to go for the look that appeals. In the real world there are no 100% whites except if you have the specular highlights of the sun off a chrome bumper bar or something similar. There are also not 0% blacks unless you have an unlit interior of a cave. So for me there are very dark shades in the deepest shadows and white fluffy clouds are not really white but a very light grey. Sorry if I am missing the point of your question. I hope someone can post a more helpful answer to your question.

1 Like

Out of curiosity, are you trying to stretch out the dynamic range to fill the histogram because it’s something you like, or because you believe you are supposed to? Some scenes just don’t have a huge dynamic range.

If I understand your problem, you want to brighten the sunset and take advantage of the full histogram range while retaining the intensity of the sunset? I have a similar problem with Filmic because the highlight saturation roll off removes the intensity of color.

I tried this with Sigmoid, which has some other options to get around this problem. Is this closer to what you’re looking for?


sunset_cliffs_with_august-02_23_2025-007-_DSC1912.NEF.xmp (16.4 KB)

This was just a minor exposure corrections with added saturation in Color Balance RGB and some tweaks to a Sigmoid preset provided by @Christian-B in another thread.

1 Like

Actually, I goofed and had Color Balance RGB off when I took the screen shot. Here it is, enabled:

I used the same Sigmoid settings, and the CB RGB values are shown on the screen shot.

2 Likes

IIRC it’s been explained previously that it’s basically a law of colour science and/or perception that the brighter the image, the less the saturation. Increasing brightness tends to white. That might be what you’re up against here. Here’s an edit with filmic contrast at minimum. It might be slightly better than your examples, dunno!


DSC1912-couple-sunset-DT-V2-sRGB.xmp (35.7 KB)

2 Likes

Thanks everyone for the quick responses!

@TonyBarrett – I have not! I will have a look thank you!

@Terry – No worries! I was on v4.9, but I just opened those files in v5.0.1 and I still see the same histogram I posted before… from your screenshot, it looks like either a) filmic is off or b) the final exposure module is on (have a look up above filmic in the order). When I opened the re-downloaded files in a fresh install, I don’t see either of those cases though.

Yeah, I get the idea of not touching the extremes; for these pictures, I’m breaking that rule on the black-end for artistic reasons :slight_smile:. I’m not wanting 100% whites though—that would be pixels with 100% in all R,G,B color channels. In this case, you can see that the right side of the histogram is all red pixels, so what I’m expecting is that there will be some pixels that will have 100% in the red channel, but everything else has the same relative value to those highest pixels (i.e. the chroma and dynamic range stays the same for everything, the brightness is just turned up… that may or may not be the right terminology though). This way, the photo’s brightest pixels will be comparable to the other things on the screen (e.g. a bright white browser window) and you can set the dynamic range of everything else accordingly. I don’t think it is painting by numbers so much as calibrating your perception.

Everyone – Maybe some context would help: I used to be a sound engineer and one important step of recording and mixing a song is mastering. One of the major goals at this stage (to vastly over simplify) is to make the recording sound the way people expect it to sound in the real world. That, of course, has to take into account the artistic intent behind the recording but, one way or another, it is always going to be perceived relative to everything else a person hears (i.e. other recordings played back on whatever system they’re using at the time). So, it is a pretty fundamental piece of the process to set the loudest samples in the track to 100%, then set your dynamic range relative to that. That’s basically the goal: set the dynamic range for your image relative to the brightest possible pixel (in any given screen-referred channel) so that we know it is comparable to other things that will be on the screen/printed/etc. Maybe, for artistic reasons, you actually want to set the brightest pixels to 50%. That’s fine, but you’re still making that choice relative to a fixed brightness.

@elGordo It’s not so much that I think I have to as much as my photos always come out too dark and fixing this tends to improve things. As I mentioned in my prev. paragraph, you should be able to set the dynamic range relative to the brightest value same as anything else.

@RawConvert Yeah I had considered that, but the fact that it is an acceptable solution to just turn up the exposure after the fact shows that it can’t be a perceptual problem.

@Dave22152 Thanks! I did play with sigmoid and I find that, when I set things to fill the histogram, I end up with way more contrast than I want (see I think it was my 3rd post). There’s just not the extra degree of freedom I’m looking for I think.

1 Like

None of my business as usual but I could not convince myself that ‘S’ curves are suitable for this image whereas in RT, +1 exposure and an ‘Auto Matched’ tone curve seemed OK to my eye:

Probably missed something subtle …

Hopefully the suggestions offered by everyone gives you some additional tools to work with. WRT to your concerns with contrast, I believe that expanding to the edges of the histogram increases contrast by definition. Filmic and Sigmoid also generate a tone curve that generates additional contrast in the mid tones, so that is what you might be trying to mitigate. There are ways to work around that and the tutorial from @s7habo episode #88 might give you some additional options.

For me its worth taking note that the default histogram profile is linear rec2020 so if you are outputing this for digital viewing you are no where near that and will be doing a conversion in the output profile. Rather than using the rec2020 histogram in this way ie to judge the dynamic range of the final edit you would be better to be sure that its set to something like srgb if you are trying to fill the histogram in your workflow, imo anyway…

2 Likes

If this what you want to do, then use exposure to push the histogram to the middle, then increase the filmic contrast to push the histogram from the middle out to the edges. Increase white relative exposure as needed to get the histogram all the way to the right.

As someone who has to run sound as part of my wifes business, I had to adjust too. With photography the fundamental piece is setting the midtones where you want and the dynamic range gets fit (or clips) relative to the medium of display…eg.a print.

For your specific desires though, you should take a look at the option in filmic. You get to control how hard the saturation falloff comes on with the “contrast in highlights/shadows”. You can also increase the lattitude in the Look tab. That sets the range where desaturation begins.

In my (limited) experience this is not always going to give you the result you think/expect, but for your example photo it works well.

A quick peek at your photo let me set exposure at +3ev, set hardness at “safe”, latitude at 95%, and then the white relative @ 4.33 and the black relative @ -3. This will expand your histogram almost to the exact edge. I would suggest you use the Waveform over the regular histogram as it is easier to see when you are about to clip.

I sometimes experiment with a preset of filmic from the manual that is described as setting filmic neutral…

Here it is with rgb CB vivid preset and +2EV and then just adjusted with white and black… black on the autopicker


Note the histogram is fairly covered…

If it was set at the default (linear rec2020) it would look more like this…

Maybe the silhouette area is not dark enough so switching the histogram back to srgb for this one and dropping the black relative for deeper black…

If my display profile is okay and not causing clipping then having the histogram at lin rec2020 is good for roughly showing that I have not broken the gamut of the working profile. Default working profile is also the same linear rec2020, but it shows a histogram that my monitor can’t natively show and the data have to use the display profile to match that device or through the output profile for exporting for myself and others. So using srgb for this sort of DNR guage at least in my case is closer to what my device can show and therefore will make more sense to me… Changing the histogram profile is not changing the image just the representation of it in the histogram so stretching only to compress it again.

There’s this other recent thread, where @Christian-B posted his standard style that helps with this:

The idea is to use local contrast to get details back. Since darktable uses a floating-point pipeline, even compressed details can be ‘expanded’ again.

And here I’m playing with different tone mappers and settings. Filmic v5 max look good in some cases, but check out its results on all colours…

1 Like

Latest ART built from sources:

sunset_cliffs_with_august-02_23_2025-007-_DSC1912.NEF.arp (11.5 KB)

I don’t see blown highlights on your screenshots, just shadows drowning in black.

Exposure +6 still nothing really blown…:

Maybe you are reading the histogramm from the wrong side?

1 Like