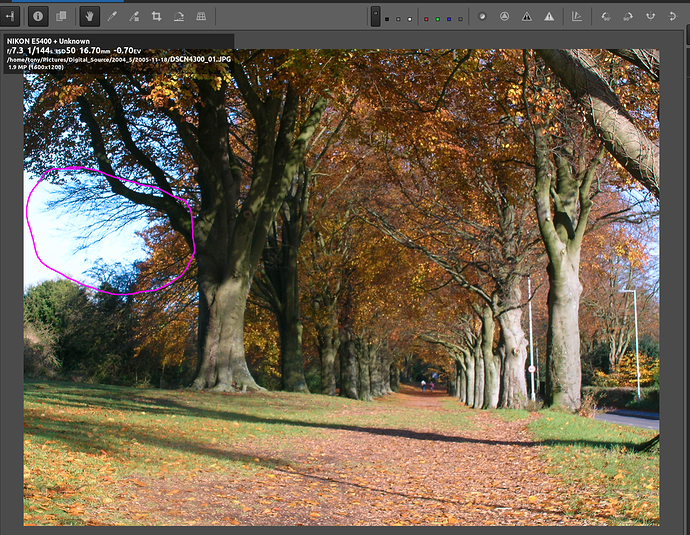
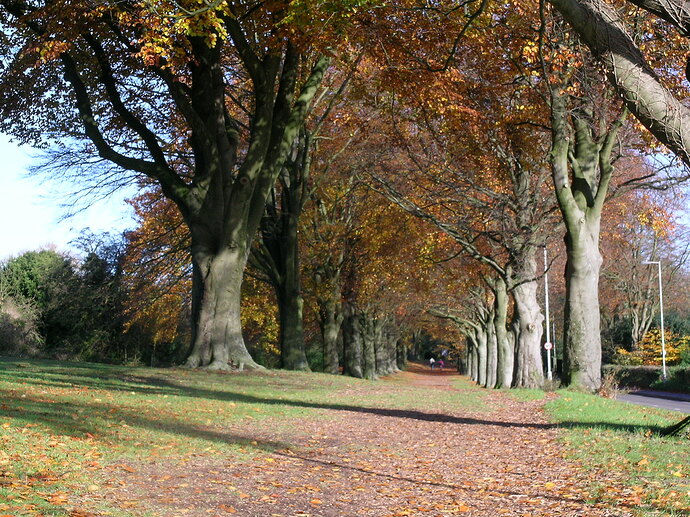
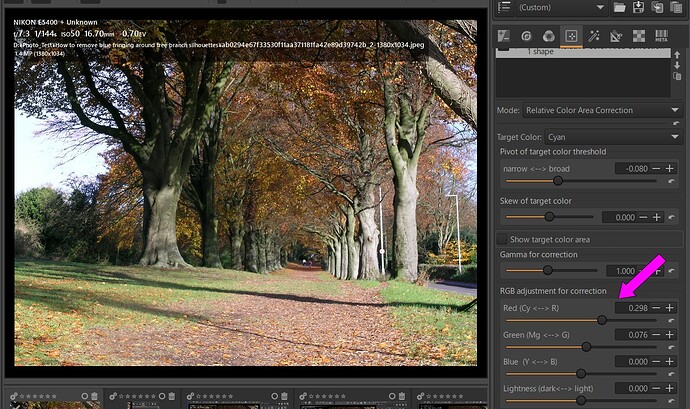
The attached screen shot of a rather old jpeg, taken with an entry level Nikon almost 20 years ago, illustrates the problem. So far I haven’t found an effective tool in rt to correct this. Any advice?
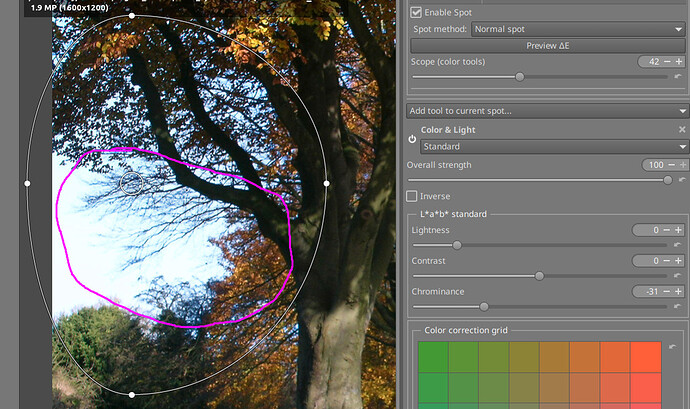
Have you tried Color & Light under local adjustments? Selecting a branch and sliding the chrominance to to zero could would make it black. With a second spot, you could try to lighted the fringing to blend in with the sky. The big challenge would be getting the DeltaE right.
Or if you want to take a sledgehammer to it, use the spot removal tool to clone sky and just ‘erase’ those branches.
Sometimes the Defringe tool can help with the right evil colours targeted.
I seem to recall one of @Andy_Astbury1 's videos mentioning that turning off “Avoid color shift” in the Raw > Sensor with Bayer Matrix > Chromatic Aberration Correction tab can sometimes help with problems like this.
I’ve spent quite a few hours on that tool - made almost zero difference.
It’s a jpeg image…
You are absolutely right! So far I haven’t achieved a valid result - the sky loses all chrominance too.
It’s why I shoot raw. Jpgs are just too difficult to fix once they have issues. That said, I’d try to desaturate (partially?) the blue/purple color selection using local adjustment if possible.
With ART, not RT, and CTL script in following link, which I made, you can easily correct this problem.
If you allow me to use this file, I can show the example.
I can’t tell if there is any actual fringing from the screenshot. Most or all of the blue is just the sky that hasn’t been blown out because the branches are blocking some of the light. If you could specify the exact parts you want to remove, I can give better advice. Here’s what I think you want based on what you wrote so far.
Scope: 42
Chrominance: -31
Spot center on the thickest part of the branches.
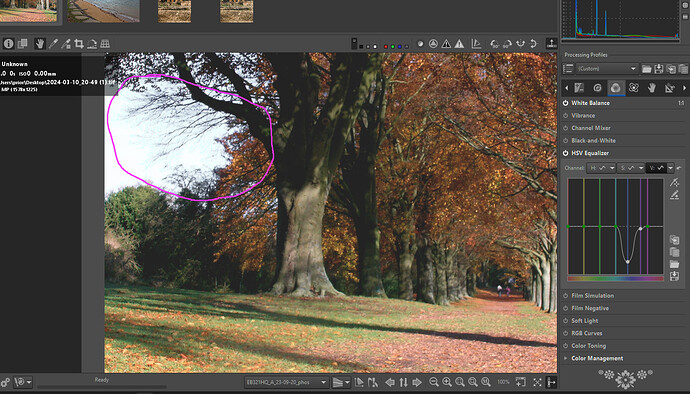
Desaturate and darken the blue…target the blue with the HSV tool… I am sure you could mask or use another tool but in 15 seconds it looks a lot better and its background anyway…
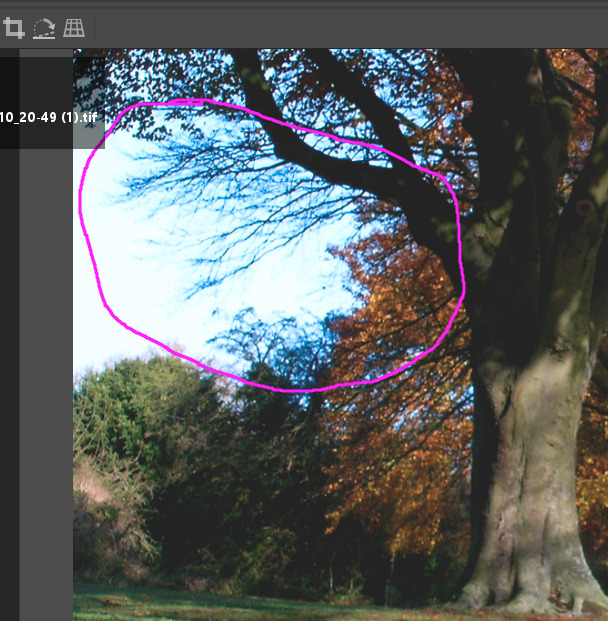
Very difficult to evaluate with the file provided. Unless I’m wrong there is only PNG.
Local Adjustments provides a notable improvement: reducing the blue on the branches without (too much) affecting the sky.
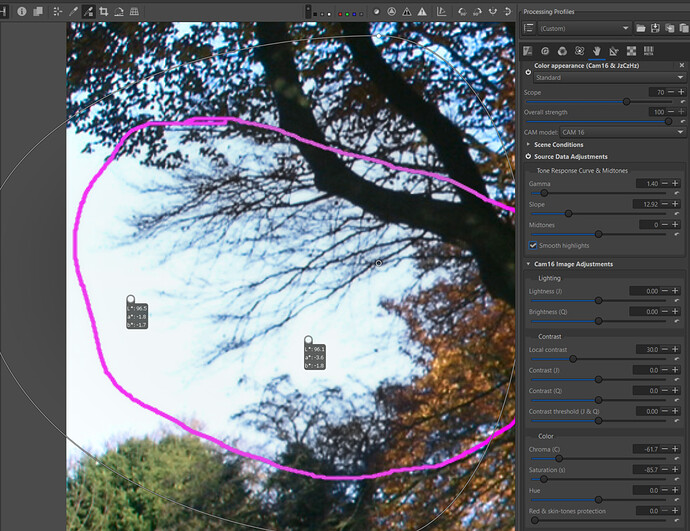
I will use the last tool proposed: Cam16 from the “lacam16n” branch
First go to “Settings” and reduce the “Spot size” to a minimum of 2. This will limit the action of deltaE to the part concerned (the system takes as reference the average of L, C, H of the center of the Spot.
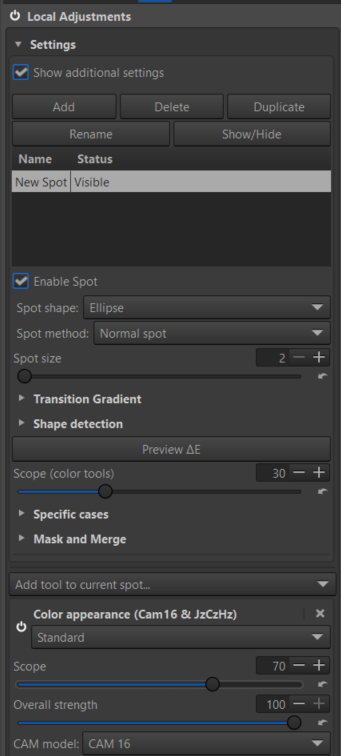
Then select Color Appearance(Cam16 & JzCzHz), in Standard or Advanced mode. This choice allows you to differentiate the action of chromaticity according to 3 different algorithms: Chroma, Saturation (which acts less in the shadows), and Colorfullnes.
Reduce these values as desired.
You can also increase the apparent contrast by adjusting “gamma” in “Tone Response Curve”.
Adjust Scope as necessary.
I’m not saying it’s perfect…
Jacques
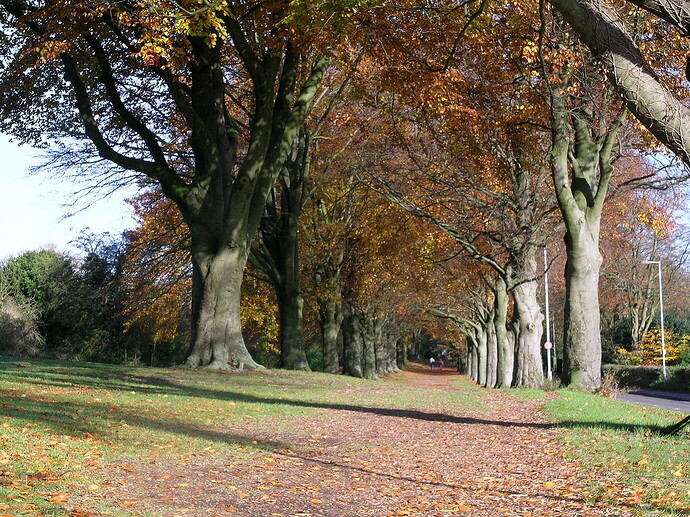
By all means use the file. Assuming I need to upload a ‘full sized’ image, without annotations, it is attached, along with the necessary legal permission.
This file is licensed Creative Commons, By-Attribution, NonCommercial, Share-Alike.
Apologies for appearing uninformed, but I don’t under stand the expression ‘lacam16n branch’.
btw I uploaded a sceenshot, PNG, low resolution only because I had no expectation that people would want to edit the file; I had set my expectations on receiving comments only. As you will see, I have now uploaded the ‘full’ jpeg.
Excuse my bad english.
I don’t know what your Github skills are and/or compiling and/or working with executables.
When you want to develop a new functionality, you create a “branch” separate from the main one.
This branch must have a name (to recognize it - here “lacam16n”) and depending on its degree of advancement it may or may not be associated with a “PR” - Pull-Request (development gibberish).
This PR may or may not produce executables (Windows and Appimage)
This PR is here:
https://github.com/Beep6581/RawTherapee/pull/6861
I’ve had several threads on Pixls.us about this - the latest one here
https://discuss.pixls.us/t/news-from-cam16-a-processing-challenge-is-coming-up/42518
The executable are here (with in the name ‘lacam16n’
https://github.com/Beep6581/RawTherapee/releases/tag/pre-dev-github-actions
Thanks for the link with the TIF… I don’t guarantee anything more (or less)
Jacques
Thanks for most informative explanation. This method has produced better results than anything I had previously been able to achieve. My ‘best so far’ result is shown, which should be compared with the image given earlier. I would like to get more of this blue/purple fringing removed, but perhaps I would need a raw file to achieve that?:
This file is licensed Creative Commons, By-Attribution, NonCommercial, Share-Alike.
Following file is the result of ART with Relative Color Area Correction CTL Script.
ab0294e67f33530f11aa371181fa42e89d39742b_2_1380x1034.jpeg.arp (13.7 KB)
Here is image captures of editing steps.
In Color/Tone correction of ART, Select this CTL Script.

Step 1.
This is dialog of Relatiive Color Area Correction.
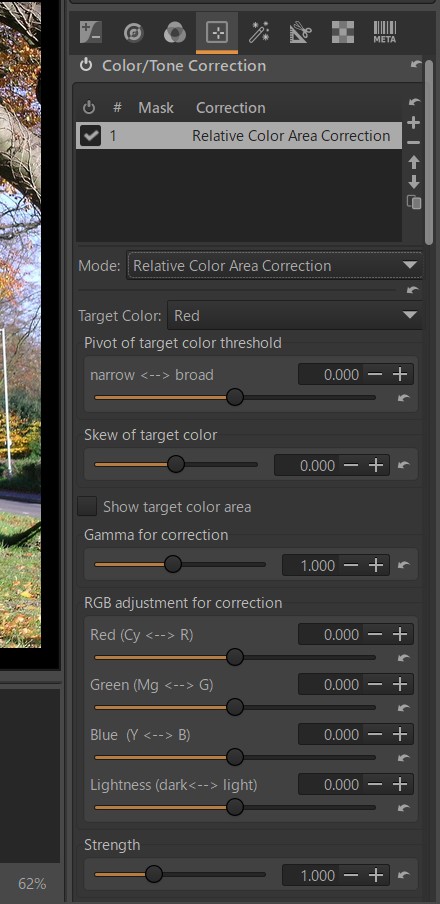
Step 2.
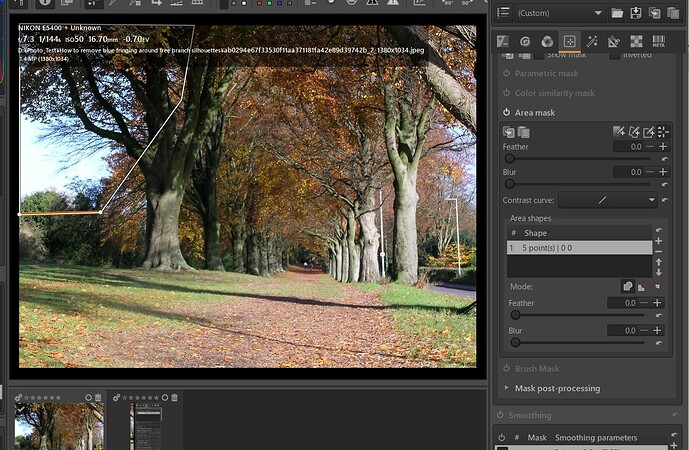
Set Area Mask.
Step 3.
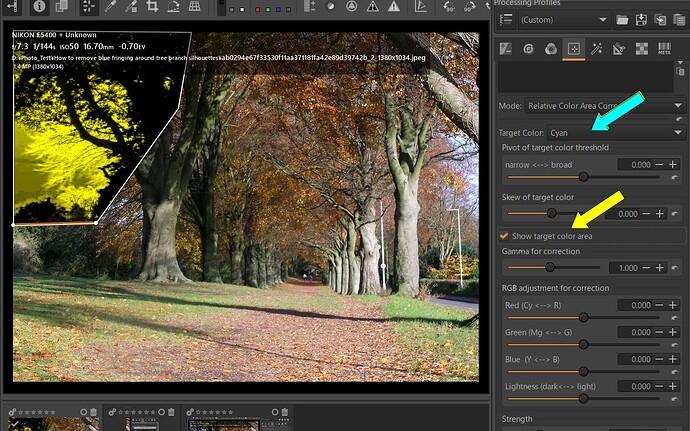
Set editing target color. In this case “Cyan”.
And check preview for editing area.
Step 4.
Adjust editing area with parameters.
Step 5.
Adjust color with RGB parameters.
Off the preview of editing area.
Step 6.
Add lightness mask.
I think that’s probably good enough for this photograph, bearing in mind it was taken with what was really little better than a ‘point & shoot’ camera that was only a couple of years after the Nikon D1 and didn’t exactly get a glowing endorsement from dpreview at the time - more than 20 years ago. It did not have raw output capability.
However I’m not yet an ART user and, sadly, don’t have time right now to understand what a Relative Color Area Correction CTL Script is or how to apply it. Maybe later.
Wow, that’s impressive, and extremely informative and helpful. Thank you.
