Hi Forum,
I have used RAW images a bit from Nikon cameras and recently I am taking “raw” with mobile phone Huawei P30 Pro (as DNG). I am learning that DNGs are a great many things and Huawei ones rather exotic. Before I settle on a workflow for my DNGs I am trying to understand the best way (for me) these files can be made into jpegs. I have noticed that a DNG at 100% in either RT or ART shows some funky looking swirls and twists. What are they and how do I get to a “normal” jpeg quality where these wonderful little creatures are never seen? I have uploaded a screenshot of a DNG at 100% showing black gravel stones.
Kind regards Mint
For us to be able to diagnose the problem, we need to directly download a DNG file to be sure of what is going on. But if I were to hazard a guess, I’d say that the P30 is doing some behind the scenes noise reduction, even though a DNG is supposed to be untouched raw.
So, I looked at one of your raws posted elsewhere from the same camera, and it does look like there is some noise reduction applied, even with a true neutral processing in Rawtherapee. So in otherwords, the P30 apparently isn’t giving you a truely neutral raw, and there is nothing you can do in software, short of doing something crazy, such as recreating the effect using G’MIC anisotropic diffusion and then training AI to undo the effect.
Edit: I stand corrected, it is the weirdness of the quad cell bayer pattern being messed with into traditional bayer that causes the artifacts.
1 Like
Hi Pat,
Thank you for having a look. So once again the Huawei P30 Pro is doing “unique” things in the photo area and I only got it for the camera (it really is a great phone but the camera was the draw). It all sounds rather complicated (how does G’MIC use AI? https://gmic.eu/tutorial/_smooth.shtml) and that I have little chance of using the Pro mode to actually make DNGs I can work with. Sigh.
Thanks for letting me know.
Kind regards Mint
It all sounds rather complicated (how does G’MIC use AI? https://gmic.eu/tutorial/_smooth.shtml)
Just to clarify, G’MIC does not do AI, my comment was more that it would be theoretically possible to undo but require AI wizardry. The steps would be as follows, try to simulate the bad rebayer swap using fake raws sampled at traditional and quad bayer patterns and train an AI to undo the bad swap.
Either that, or find someone who knows the math and programming necessary to create a deconvolution algorithm that undoes anisotropic diffusion. the bad rebayer swap.
TLDR version: It is theoretically possible to undo the artifacts using advanced post -processing, but it would involve lots of work, and it would be better to get a different camera-phone at that point.
Another option would be to just simply be to shoot in 10 megapixel merge mode, as it looks perfectly fine when downrezzed to 10 megapixels, or shot in merge modem which is more befitting of the optical resolution of the lens.
Oftentimes, these higher resolution sensors in phone cameras are meant to be downrezzed anyway, and at superresolution, the noise reduction actually improves results at the downrezzed version.

Thank you for that clarification (I have no chance in training or building an AI so…) and suggestion on downsizing. It would be fine to do that as an alternative to the jpegs from the phone it self as they sometimes look very much over the top in noise and sharpening. So for me to get a workflow going…I would import the DNG into RT, run FF correction and then downsize the image. Last step would be to export it to GIMP to make the jpeg. Is this correctly understood?
1 Like
Oh… And thank you so much for the image. I didn’t see it first time for some reason. Yes it looks fine!
You don’t really need to go into GIMP unless you want to do local adjustments and brushes and such.
OK. Thanks I will dive into G’mic then and learn. Now just for me as a starry-eyed beginner. What I am seeing in the huawei p30 pro DNGs is that the so called “worms” reported from fujifilm raws Fuji RAW Worms - Has Adobe Finally Nailed It? — hendriximages?
Kind regards Mint
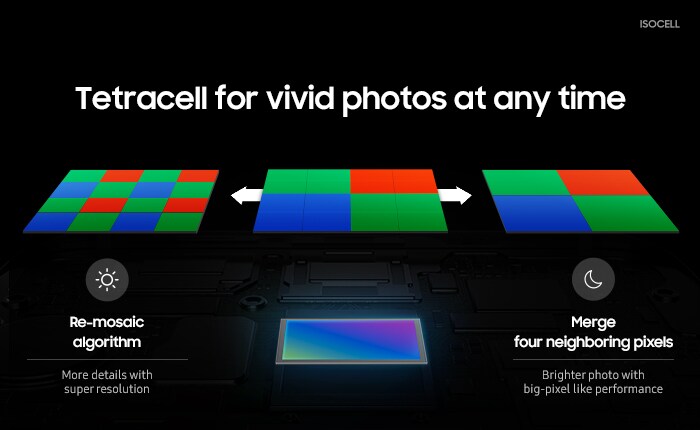
This is a Quad Bayer/Tetracell/4-cell sensor. Which means it operates in one of two possible modes, and AFAIK it is not possible to get the pristine 40MP raw data from these sensors just yet. @Waveluke is correct to assume there is some processing going on, but it is more probably the “remosaic” done by the sensor itself, rather than denoising. And this is not Huawei specific, it’s really down to the Sony/Samsung/OmniVision sensor.
The reason for this is that no 3rd party SW supports demosaicing this 4x4 pattern directly today, so the sensor converts to regular Bayer before saving to DNG instead. Think how long it took to support the Fuji X-Trans 6x6 pattern well and fight its worm problems as you pointed out.
So, if 40MP resolution is not of the utmost importance to you, as suggested, you’re better off operating the sensor in the 10MP “merge” mode and get 10MP DNGs that don’t have these artifacts, but you get a much better dynamic range instead (even better than downscaling the 40MP in software).
3 Likes
Hi - I am learning a lot, just a pity it is not good news  - So I should forget about the 40 MP and go 10 MP DNG instead as I understand your advice. I did 2 test shots in 10 MP Pro with both Huaweis own camera app (main rear) as well as Adobe LR Mobile (only camera LR finds is the wide rear) camera. I have attached screenshots from RT in 100% from both. In the IMG DNG (a 80 MB file) I see the same strange “mosaic”, perhaps less but still very funky but in LRM DNG (a 40 MB file) I dont see this just poorly defined pixels. So why is that? Is Adobe already pulling of some magic in the DNG? If I want to use raw should I stop using Hu


Kind regards Mint
It looks like you haven’t got the 10MP ‘merged’ output mode in either case (19.6MP & 39.8MP by your screenshots). A 10MP DNG should be ~20MB.
Not sure why the 10MP+RAW setting in the Pro mode hasn’t done it… You can also try the OpenCamera app…
Hi - I do not know what you mean by 10 MP “merge” but I was wondering why the DNGs kept the same size irrespective of resolution choice. However there are no other choices in the Huawei camera app. I can try the app you suggest however its see how that pans out. Thank you for the suggestion!
Hmmm. I didnt get very far, Even with Camera2api Open Camera does not use the Huawei raw mode. No idea why as Adobe LR is capable.
OK - I don’t think there is much to do about the intricate peculiarities with the Huawei (rewriting the rules of photography ) camera when in DNG mode. It seems that while i still can not get the 10 MP merge to work, I can shoot in Wide. It then drops the main cameras 40 MP to 20 MP and those DNGs looks OK at 100% (less so at 200%) where the 40 MP ones looks downright bizarre at 100%. On size yes I can see how a 10 MP should be 20 MB as the main DNGs are 80 MB and the Wide DNGs are 40 MB.
Thank you again for helping and making me understand better the workings of the world. of pixels.
Kind regards Mint
Oops, looks like I was incorrect about the noise reduction., and it is a bad rebayer swap as kmilos mentioned. I stand corrected, and I fixed my posts.
Those worms make sense if it is remosaicing. I imagine getting a full resolution image is done by finding the orientation of each 4x4 block and interpolating and smoothing in that direction which would create worms, especially with noisy data.
Just fyi, I think it is not possible to get 10 MP DNGs with the P30 Pro. The DNGs are always saved at maximum sensor resolution, so 40 MP, 20 MP and 8 MP depending on what camera you use. The P40 Pro differs from that because it only ever gives you 10 MP from the 40 MP ultra wide angle camera. And that makes it disappointing compared to the P30 Pro.
I would always prefer the remosaiced full resolution output over the reduced one (true Quad Bayer output with proper software demosaicing would be ideal, of course). I scale down my photos to 71% (20/25 MP) and tweak the detail/noise for the lowest level in the wavelet settings. The resulting output has no visible wormy artifacts and you get better detail retention over the 10/12.5 MP JPEGs taken by the phone
OK… So photo in Pro mode at full sensor = max size at 40 MP DNG, load into RT and resize to 20-25 MP (or 71%) and then look at noise and detail before exporting to Jpeg. Great. I must try that. Thank you for the great FYI!