Is it worth migrating to Dark Table from RawTherapee?

Try instead the global luminance and/or shadows in the 4 ways tab…it should work on the lower portion with less impact on the overall tonal range. I often treat the global brilliance as a white correction and the global luminance as a black correction…

You can also drag the middle gray fulcrum over well to the left and then the shadows slider will only work on the lower region…because DT is scene-referred the fulcrum sliders are very important in controlling how the modules apply changes…

1 Like

I had a quick look / test, this looks very promising! Capture One seems to retain a bit more contrast, but that is an easy fix. I will do some more extensive testing, but looking good so far! Thanks for this advice!

1 Like

The four HDR sliders in Capture One are spacial adjustment, that is, they affect bright or dark areas. You can get the same effect (with more control) with the Tone EQ in Darktable.

(Brilliance etc are tonal adjustments, which do something slightly different)

1 Like

If you couple that with setting the fulcrum where you need it I think you will get to where you want…I think ART has a pivot slider which is the same and by setting the pivot you control the target and to an extent the range of the impact of say the shadows slider….

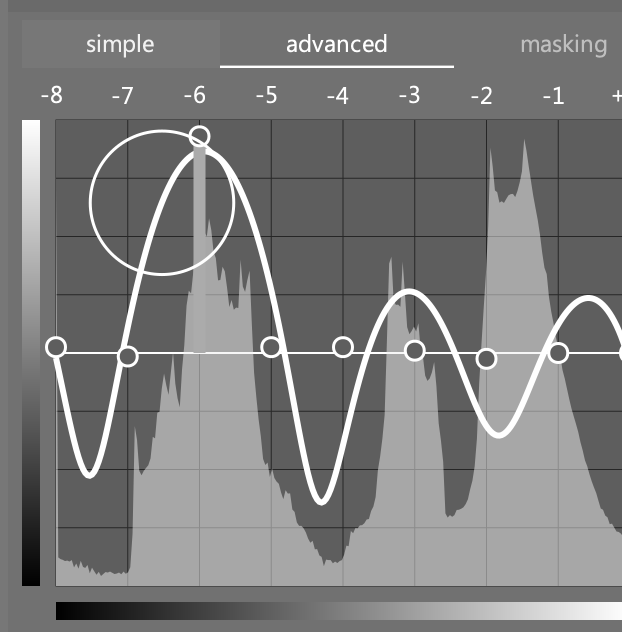
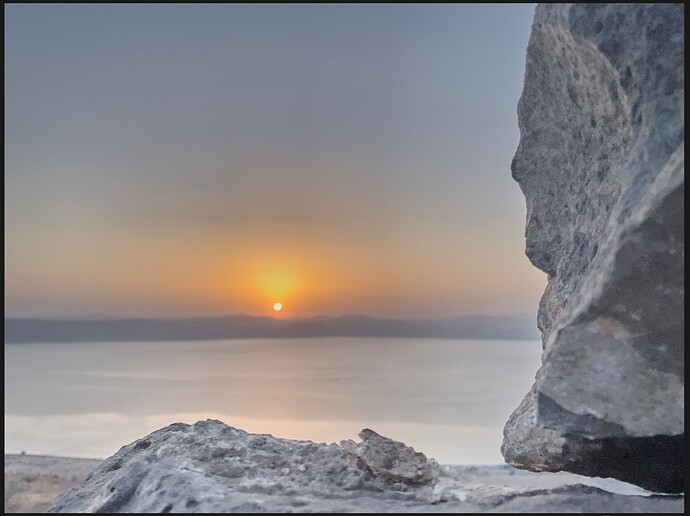
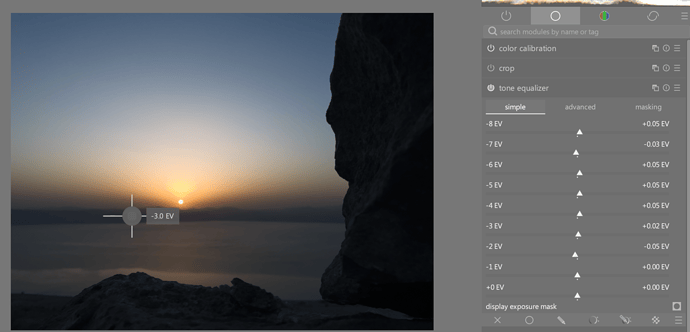
Yes, I am the tone equalizer do so, but in Capture One this works better for me so far… with Tone EQ, I sometimes get strange artefacts or colours when I push it. And also, and that is what I don’t understand of Tone EQ. If I measure at a place for example -2.5 EV, and I push the -8 EV slider why is that part effected as well?

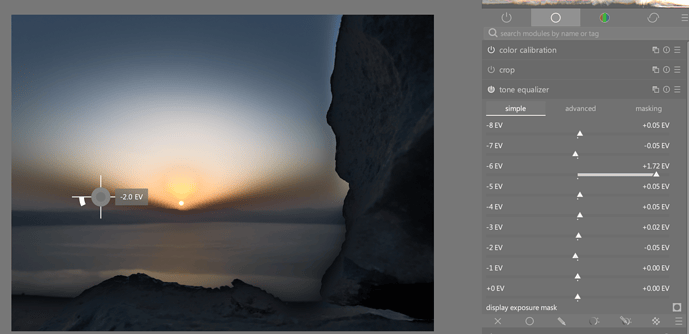
Very extreme example… But I don’t understand why the sunset part is effected… And this is not happening in C1


(btw the dark rock in the foreground is -6.5 EV)

Yes, conceptually they’re similar to Lightroom’s shadows and highlights sliders, and Tone EQ with local contrast preservation.

For those that don’t know, here’s how it works in Lightroom:

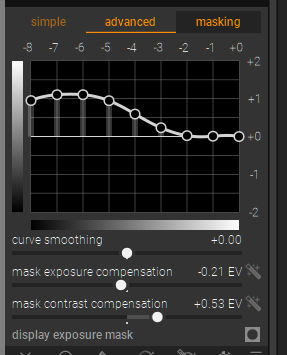
How does the advanced tab look? And did you adjust the mask exposure compensation?

No I did nothing with the mask… And this is just adjusting the -6 EV slider in the simple tab.


This is the effect in C1 if I push the shadow / dark sliders…

That could help to isolate the areas affected.

Well, there’s your answer. That curve is what actually happens, not what you see in the simple tab. Basically you pushed it too far and the math broke. Curve smoothing may help, but really you need to be more careful - and don’t use the simple tab.

No, that is the explanation of what happened.

It doesn’t answer the question of how to reach the same effect as in C1 efficiently.

To reach more or less the same effect, I use a combination of Tone EQ, exposure with masking and also Color balance RGB. My initial comment what that I am missing the ‘HDR sliders’ from C1 and I explained why.

But again, I enjoy use darktable and am really grateful for all the tools build into darktable!

I replied specifically to your question about why it affected the sunset, without concerning myself with how C1 does it.

As for C1, my guess is they do something like a parametric mask internally, to limit the affected tonal range. Certainly that appears to be what LR does.

Here are some test images you can use to evaluate the results of different adjustments:
grey-ramp-linear_linRGB-16bit-int.tif (197.3 KB)
grey-ramp-perceptual_linRGB-16bit-int.tif (451.6 KB)
grey-ramp-smooth-linear_linRGB-16bit-int.tif (293.2 KB)
grey-ramp-smooth-perceptual_linRGB-16bit-int.tif (798.2 KB)
grey-ramp-steps-linear_linRGB-16bit-int.tif (99.2 KB)
grey-ramp-steps-perceptual_linRGB-16bit-int.tif (101.9 KB)

When comparing to C1, you obviously want to use the histogram and not the waveform.

If you want a similar effect as C1, smoothly raise the entire bottom half of the tone EQ, then gradually level off towards zero. I have saved this as a preset.

1 Like

Thanks, I will play around with those. Thanks for the help.

I am not completely sure what you mean with the ‘entire bottom half’. Is it possible to share such a preset?

With the tone eq you need to set the mask in general for the best results …at least the compensation and contrast but the other settings can come in to play…

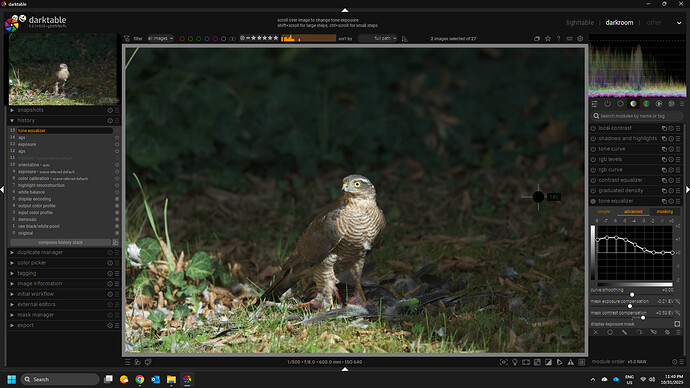
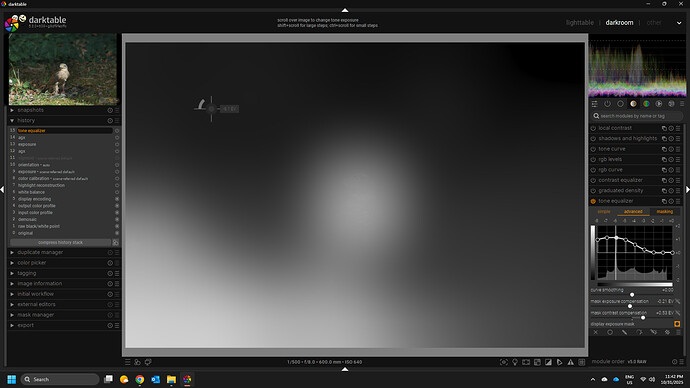
Take this edit… I’m not sure I would lift the dark area like this but for effect…

Starting here

Tweaking the tone eq something like this

I tweaked the tone eq mask…not the module mask but in the third tab ie edited the tone eq mask for the curve. Nice and blurry for smooth application…

Watche the waveform and the image , compare the bird and foreground which don’t change and the background…

After experimenting you can make a few presets as starting points and in general it works very well… I don’t think I have ever used the simple tab…

2 Likes

I’m wondering if you have tried AgX (currently it’s in Master Branch) yet, and if it can change your opinion on this. Not so sure about shadows, as as I have more problems with highlights (eg white clothes in an otherwise darkish scene) and I’m finding that AgX is doing a better job than Sigmoid at taming them.

I cannot compare with the commercial softwares: I was Linux-based before I started raw processing, started with RT and moved to dt.

The reason for my move from RT to dt, personally, was I found it generally a little easier, the documentation easier to understand, and the initial starting point (especially after sigmoid arrived) closer to my preference, which equals less work :).

I don’t know how it is now, but I found local corrections incomprehensible in RT, whereas masking in dt, both drawn and parametric, is much more approachable for the “non-technical” photographer.

The only thing I miss from RT is the LAB tools, which I preferred to Colour Zones/Equaliser. It just happened to work better for me.

In the end, I think it is all “what works for you” and only the individual can try and decide. I doubt if one package gives inherently better/worse results than another, and I am certainly not qualified to even speculate on that one. Maybe it could be nice, but I doubt that the work that I do would benefit that much from AI masking. I’m not changing skies, backgrounds, etc: just maybe applying different instances of (eg) Colour-Balance-RGB to a figure and to their backgound. drawn mask and feathering works wonders. But… maybe not enough wonders for a model with wispy hair against a backdrop for people that do that stuff.

It’s like, given the camera I use (Sony a7m4), any problems with the pictures have to be mine, not the camera’s. For post-processing, same but times a hundred!
No I have not, looking very much forward though, but I will wait till it is released.

As many birds (my main photography subject) have often white feathers, I am very careful with highlights. Often I shoot slightly under exposed. Only with overcast days I don’t care (that much) of blowing out the highlight in the sky. So that why I often have to push shadows in post.

I’m a Mac user, and can’t make the transition to Linux (yet) as I am bound to some commercial software that is not available on Linux and doesn’t run on Wine. (And I am not going to install a virtual machine to run Windows). That’s also why I hold a bit back on running the master branch.

I agree. For me the UI of RT doesn’t work, there are so many drop shadows, 3D styled buttons etc, that the whole interface seems to ‘float’. I really really love the minimalistic style of darktable. Also what I really like about darktable is that it is Library focused.

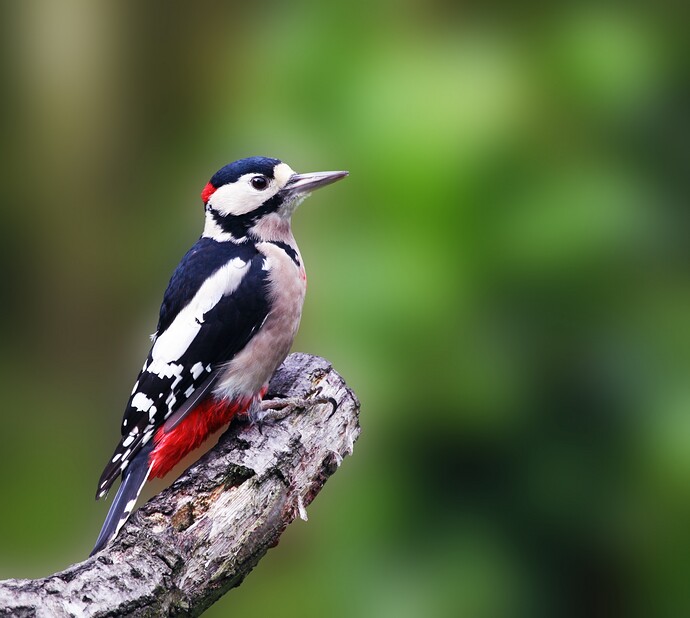
In bird photography, you often want a much as separation between the background and the bird and foreground:


In most other types of photography you have often both more control over the distance between your subject and background, and faster lenses. But when working with long focal length (I shoot 600 mm) backgrounds are just more visible (not everybody can effort a $13.000 f4 lens - and even then), because of the physics lenses have less ‘bokeh’ then a dreamy f1.4 lens. and of course you can’t control the light as much (e.q. using flash is out of the question).

So to deal with background there are tricks that you can use in the field (that is where shooting techniques comes in) and there is the post processing techniques. The ‘low pass’ module in darktable is really awesome (thank you developers!), but you want to mask that so that only the background is affected. Currently I am often using a combination of parametric masks and a drawn mask. But the AI masking in commercial software is almost always easier and faster. And that’s why I’m missing the AI masking from C1.

3 Likes

Nice image btw. (it is an Eurasian sparrowhawk isn’t it? ) Can you try something? can you try to push the image so that the dark background and foreground (but not the bird) have about the same brightness? (that’s what those sliders in C1 provide…)

It is from a playraw here on the forum if you want to have a go and experiement…just on my phone but I will edit with the link in a little bit…

Maybe you can share your expected result from C1… Are you tweaking both to meet in the middle or bringing up the darks mostly …either way it might break the image with that much compression but I might not quite be sure what your expectatoin is…

Also it might warrant a new topic as talking about DT and Capture 1 isn’t really in the spirit of the topic at least anything at length…maybe take an image and edit and then ask about DT or RT edits to mimic or do a similar result…

1 Like