Sometimes I use the lowpass module to have bit of additional background blur, often in combination with a mask for only the area I want to blur
(I know that the manual recommends to use the contrast equalizer instead, but they simply don’t give the same effect. I also have used DorS but that get’s slow very very quickly )
However I noticed that if you have a very stark (colour) contrast between the area you want to blur and the rest of the image the area not under the mask is going to affect the masked area.
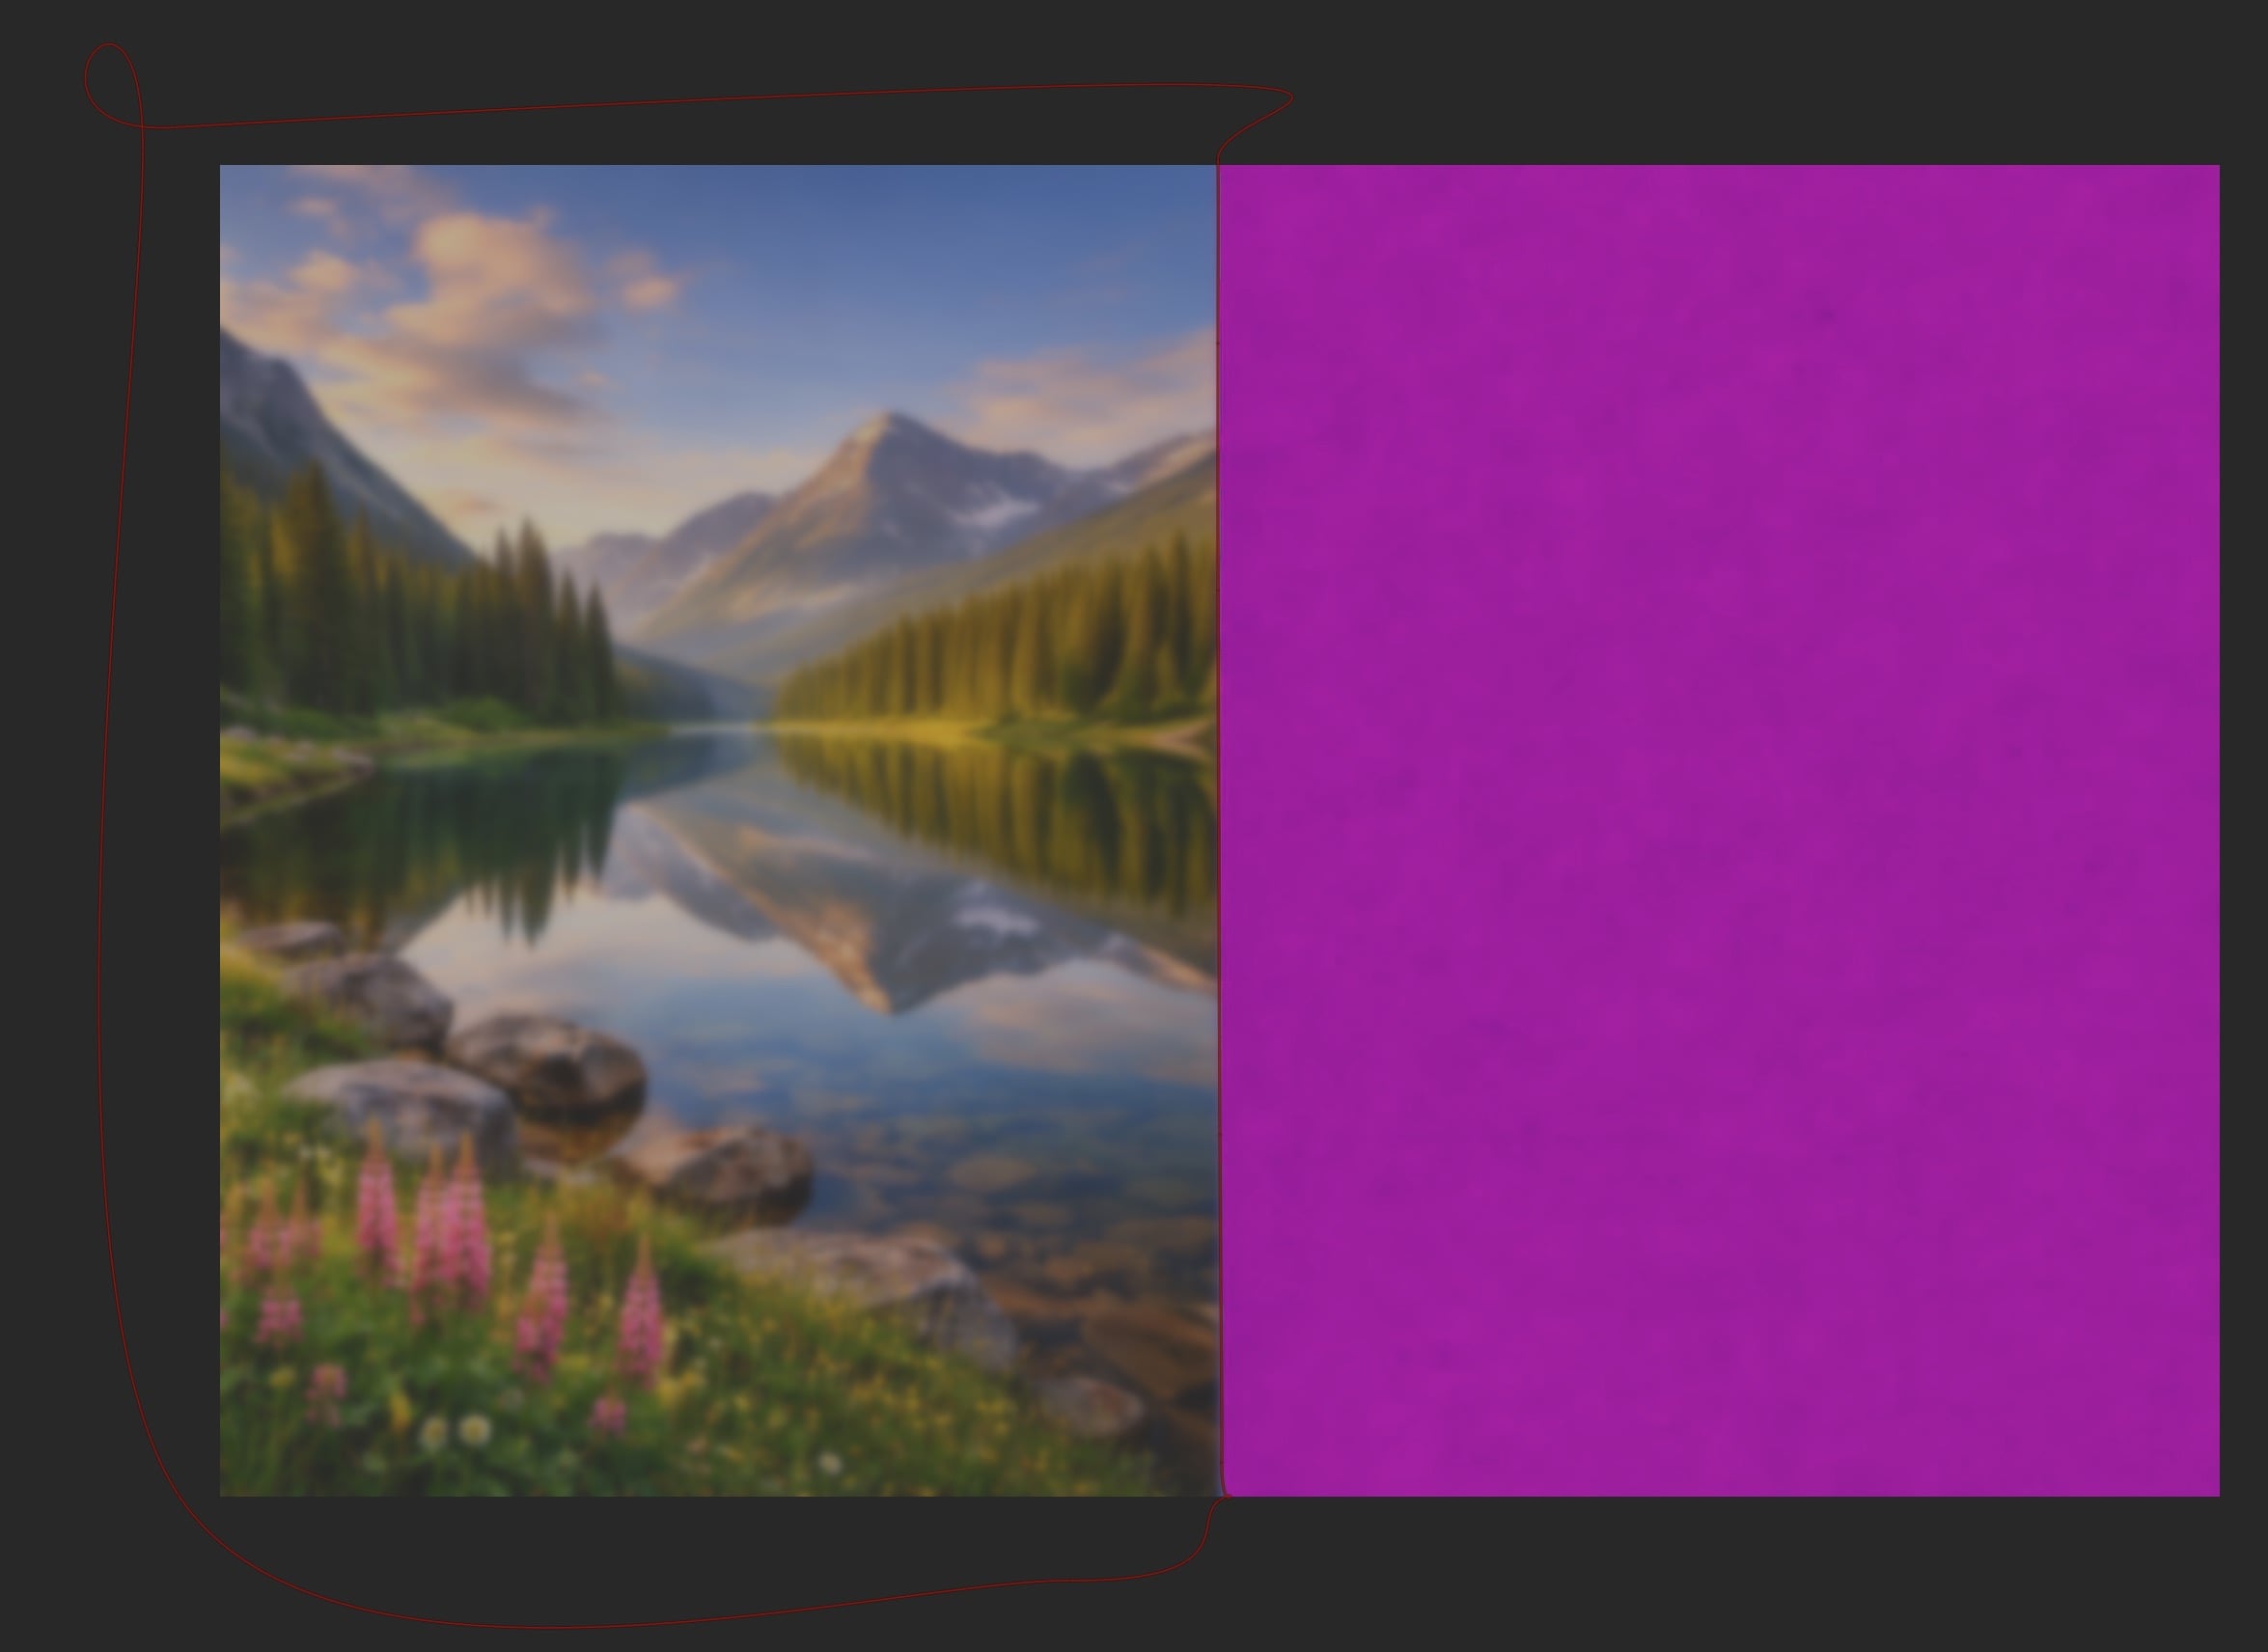
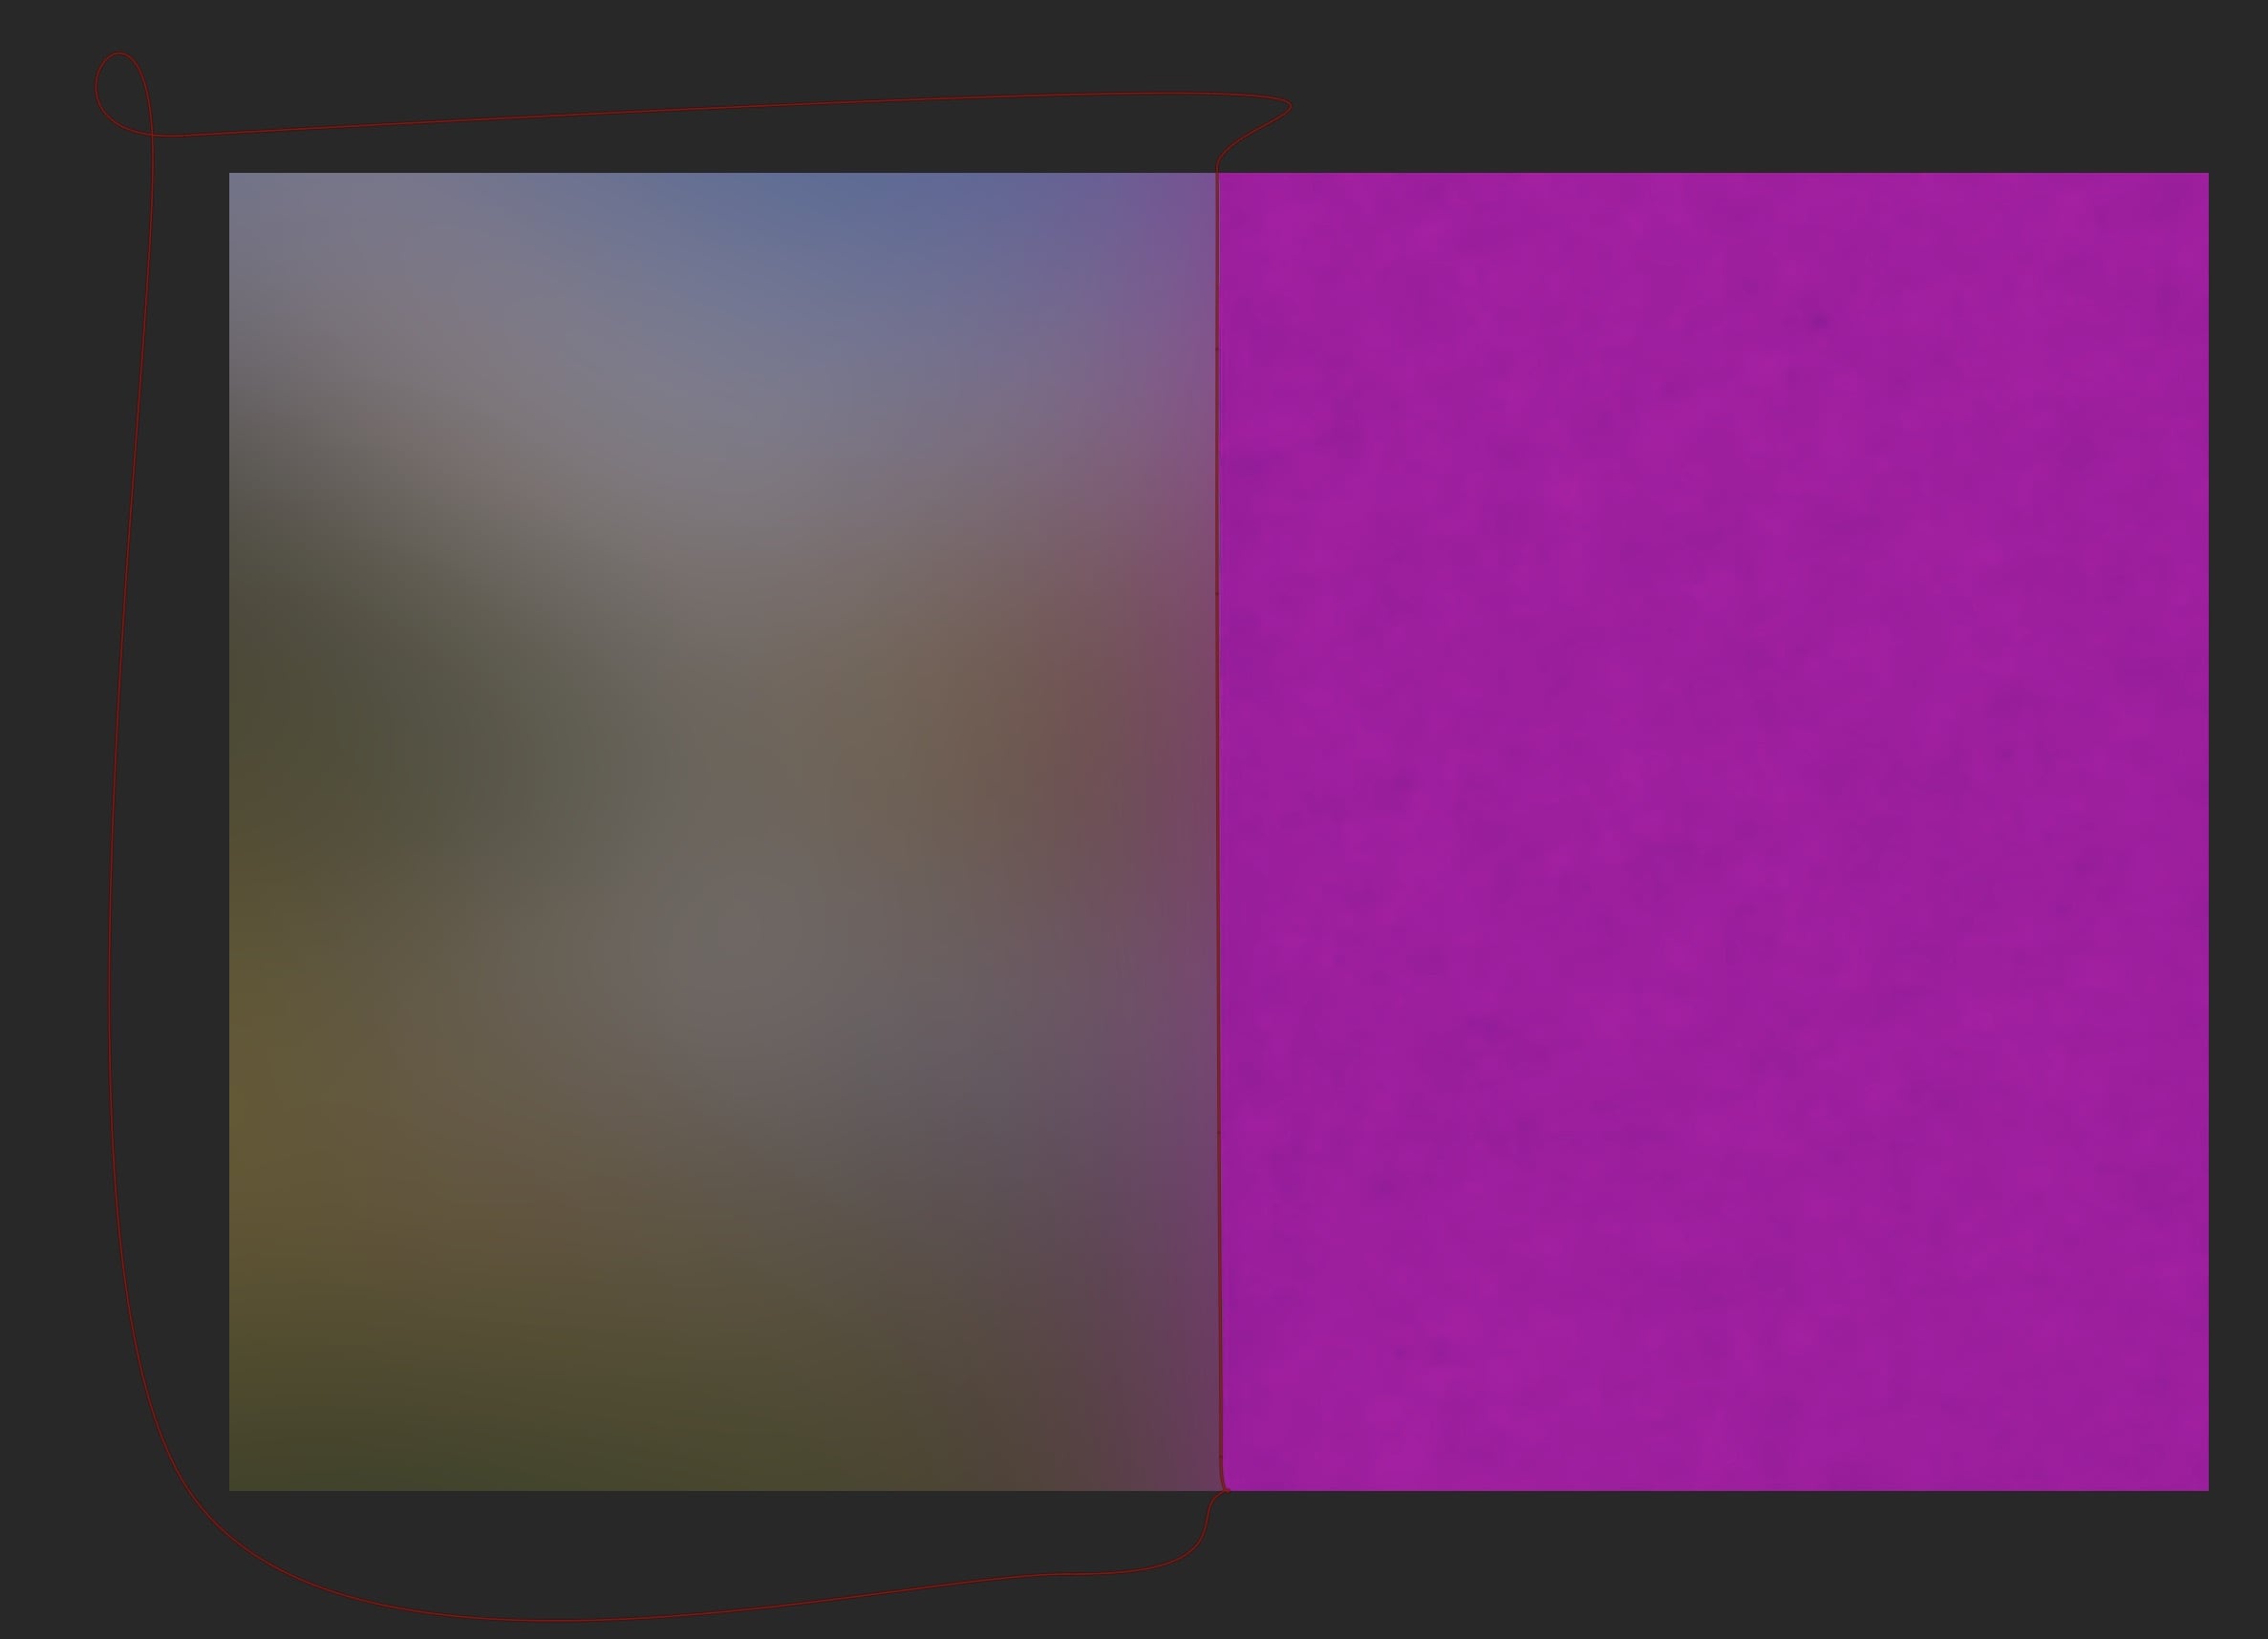
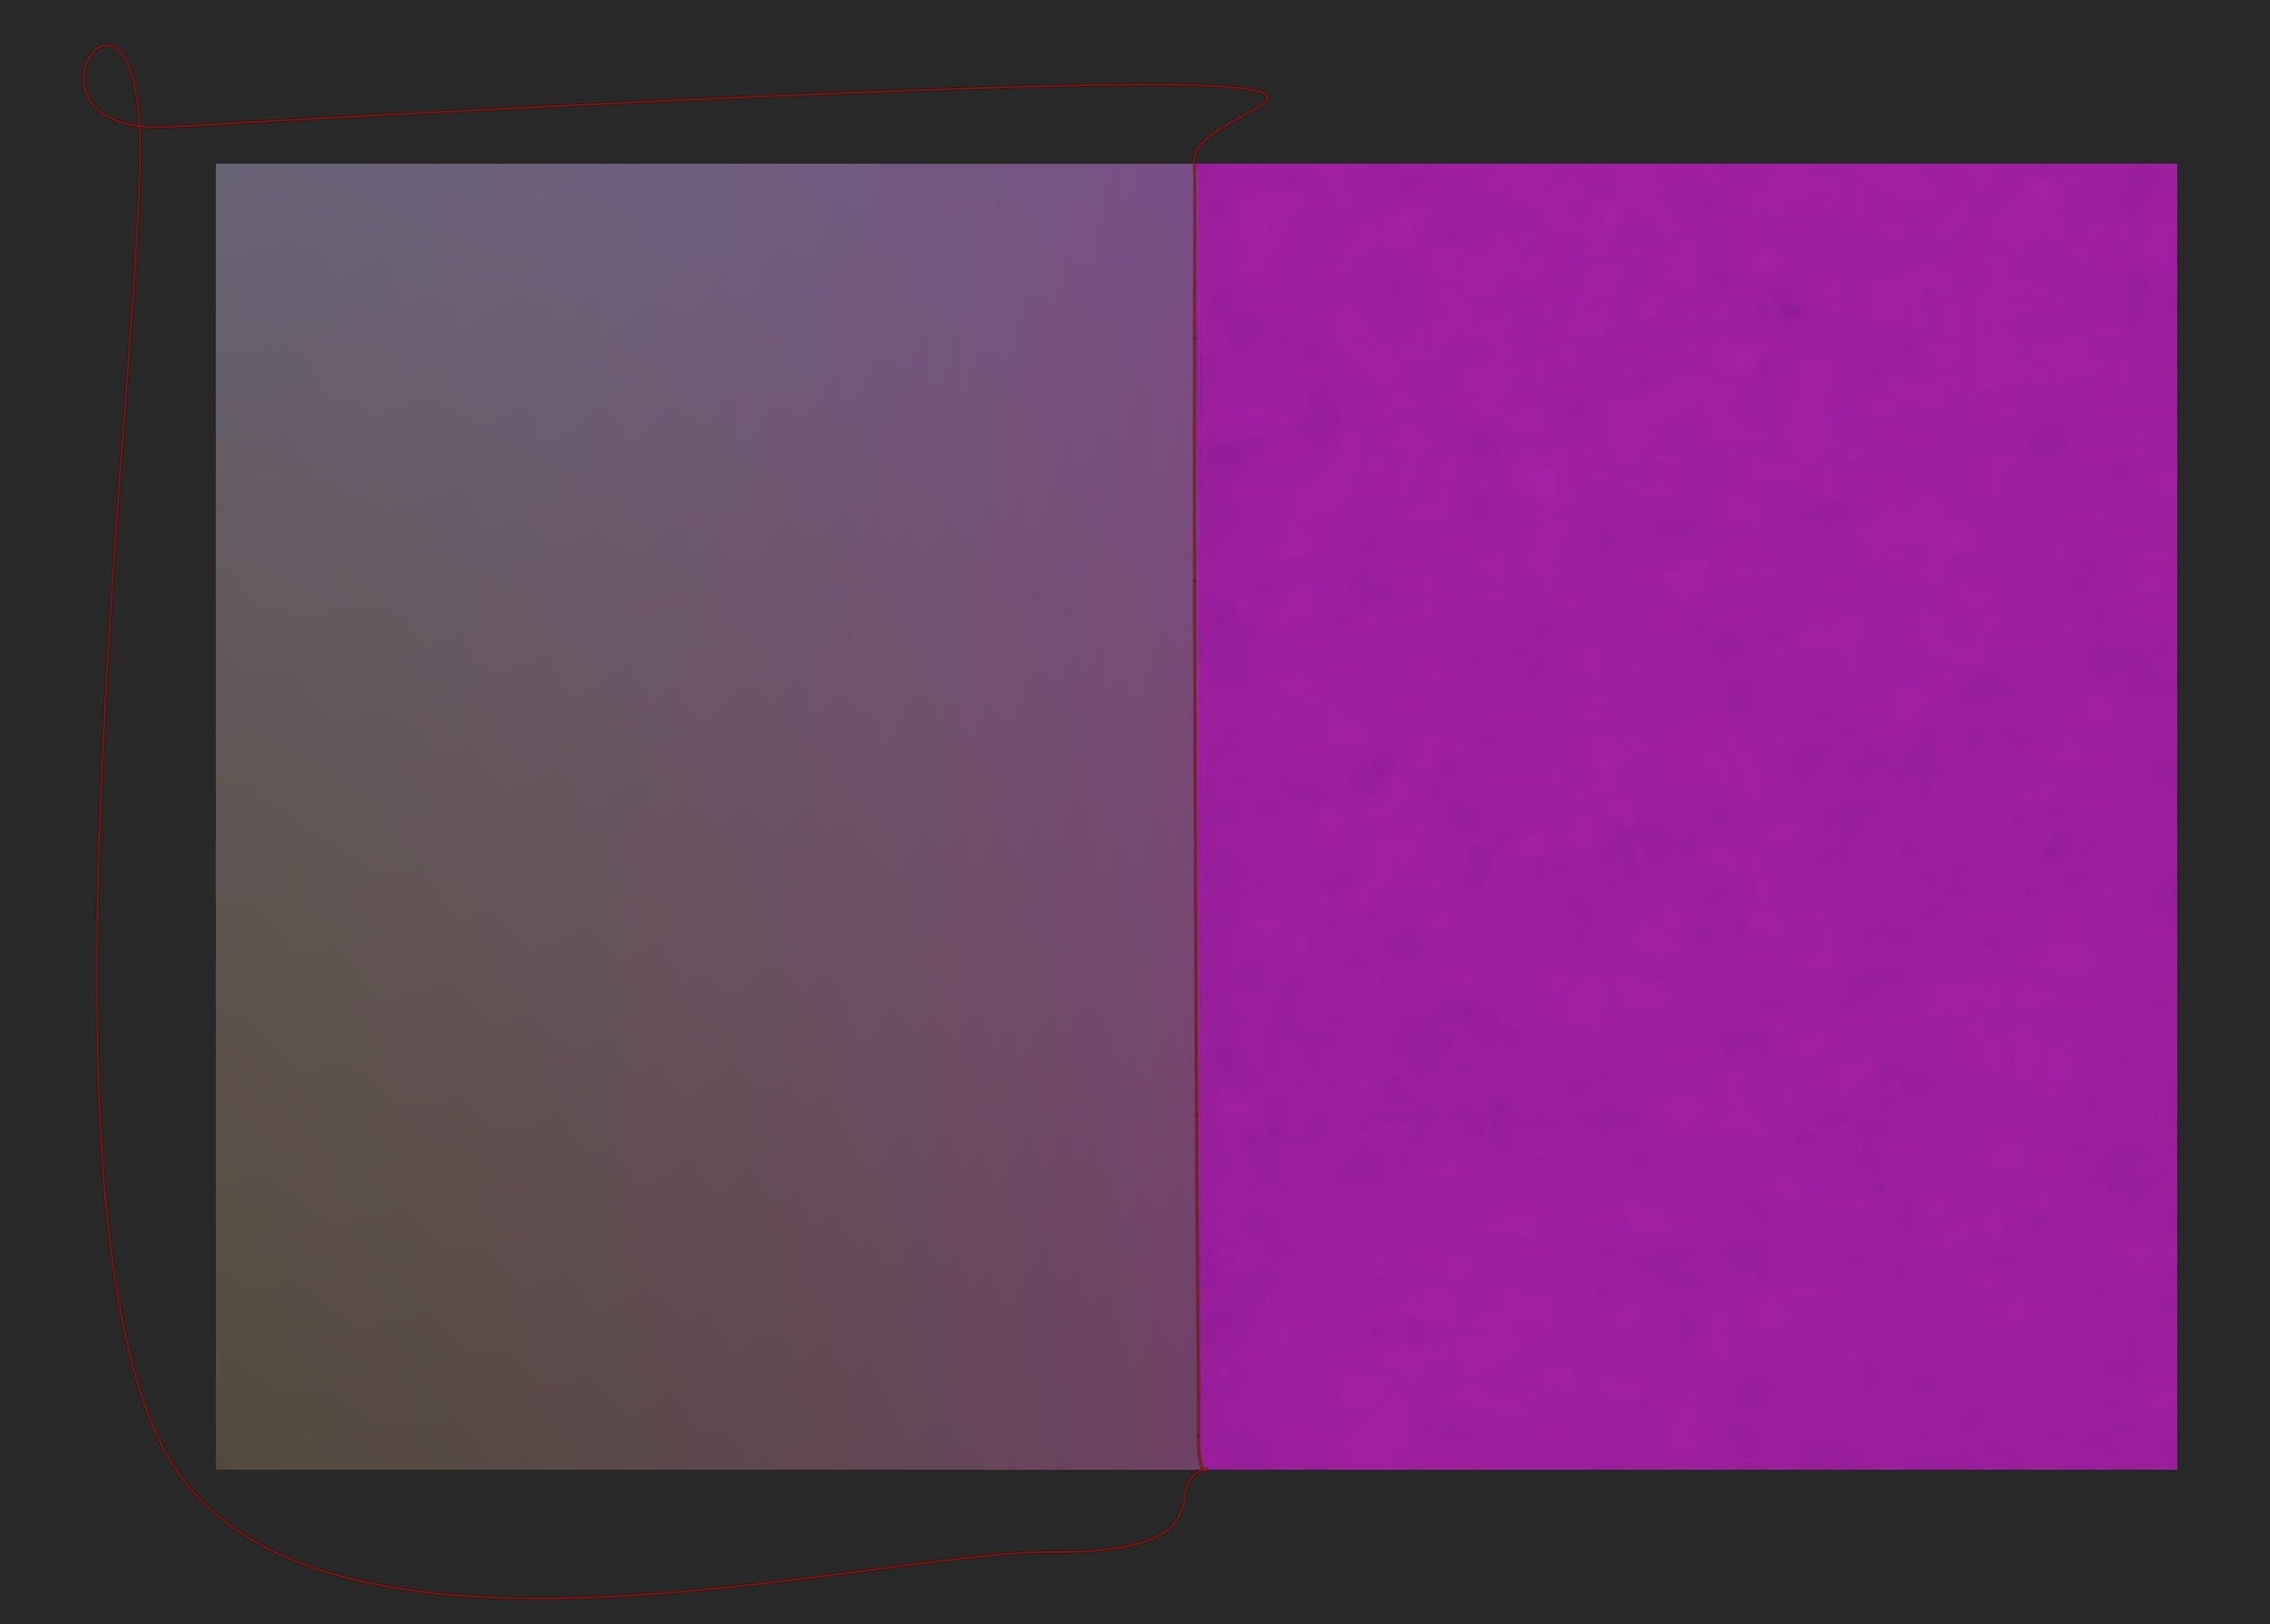
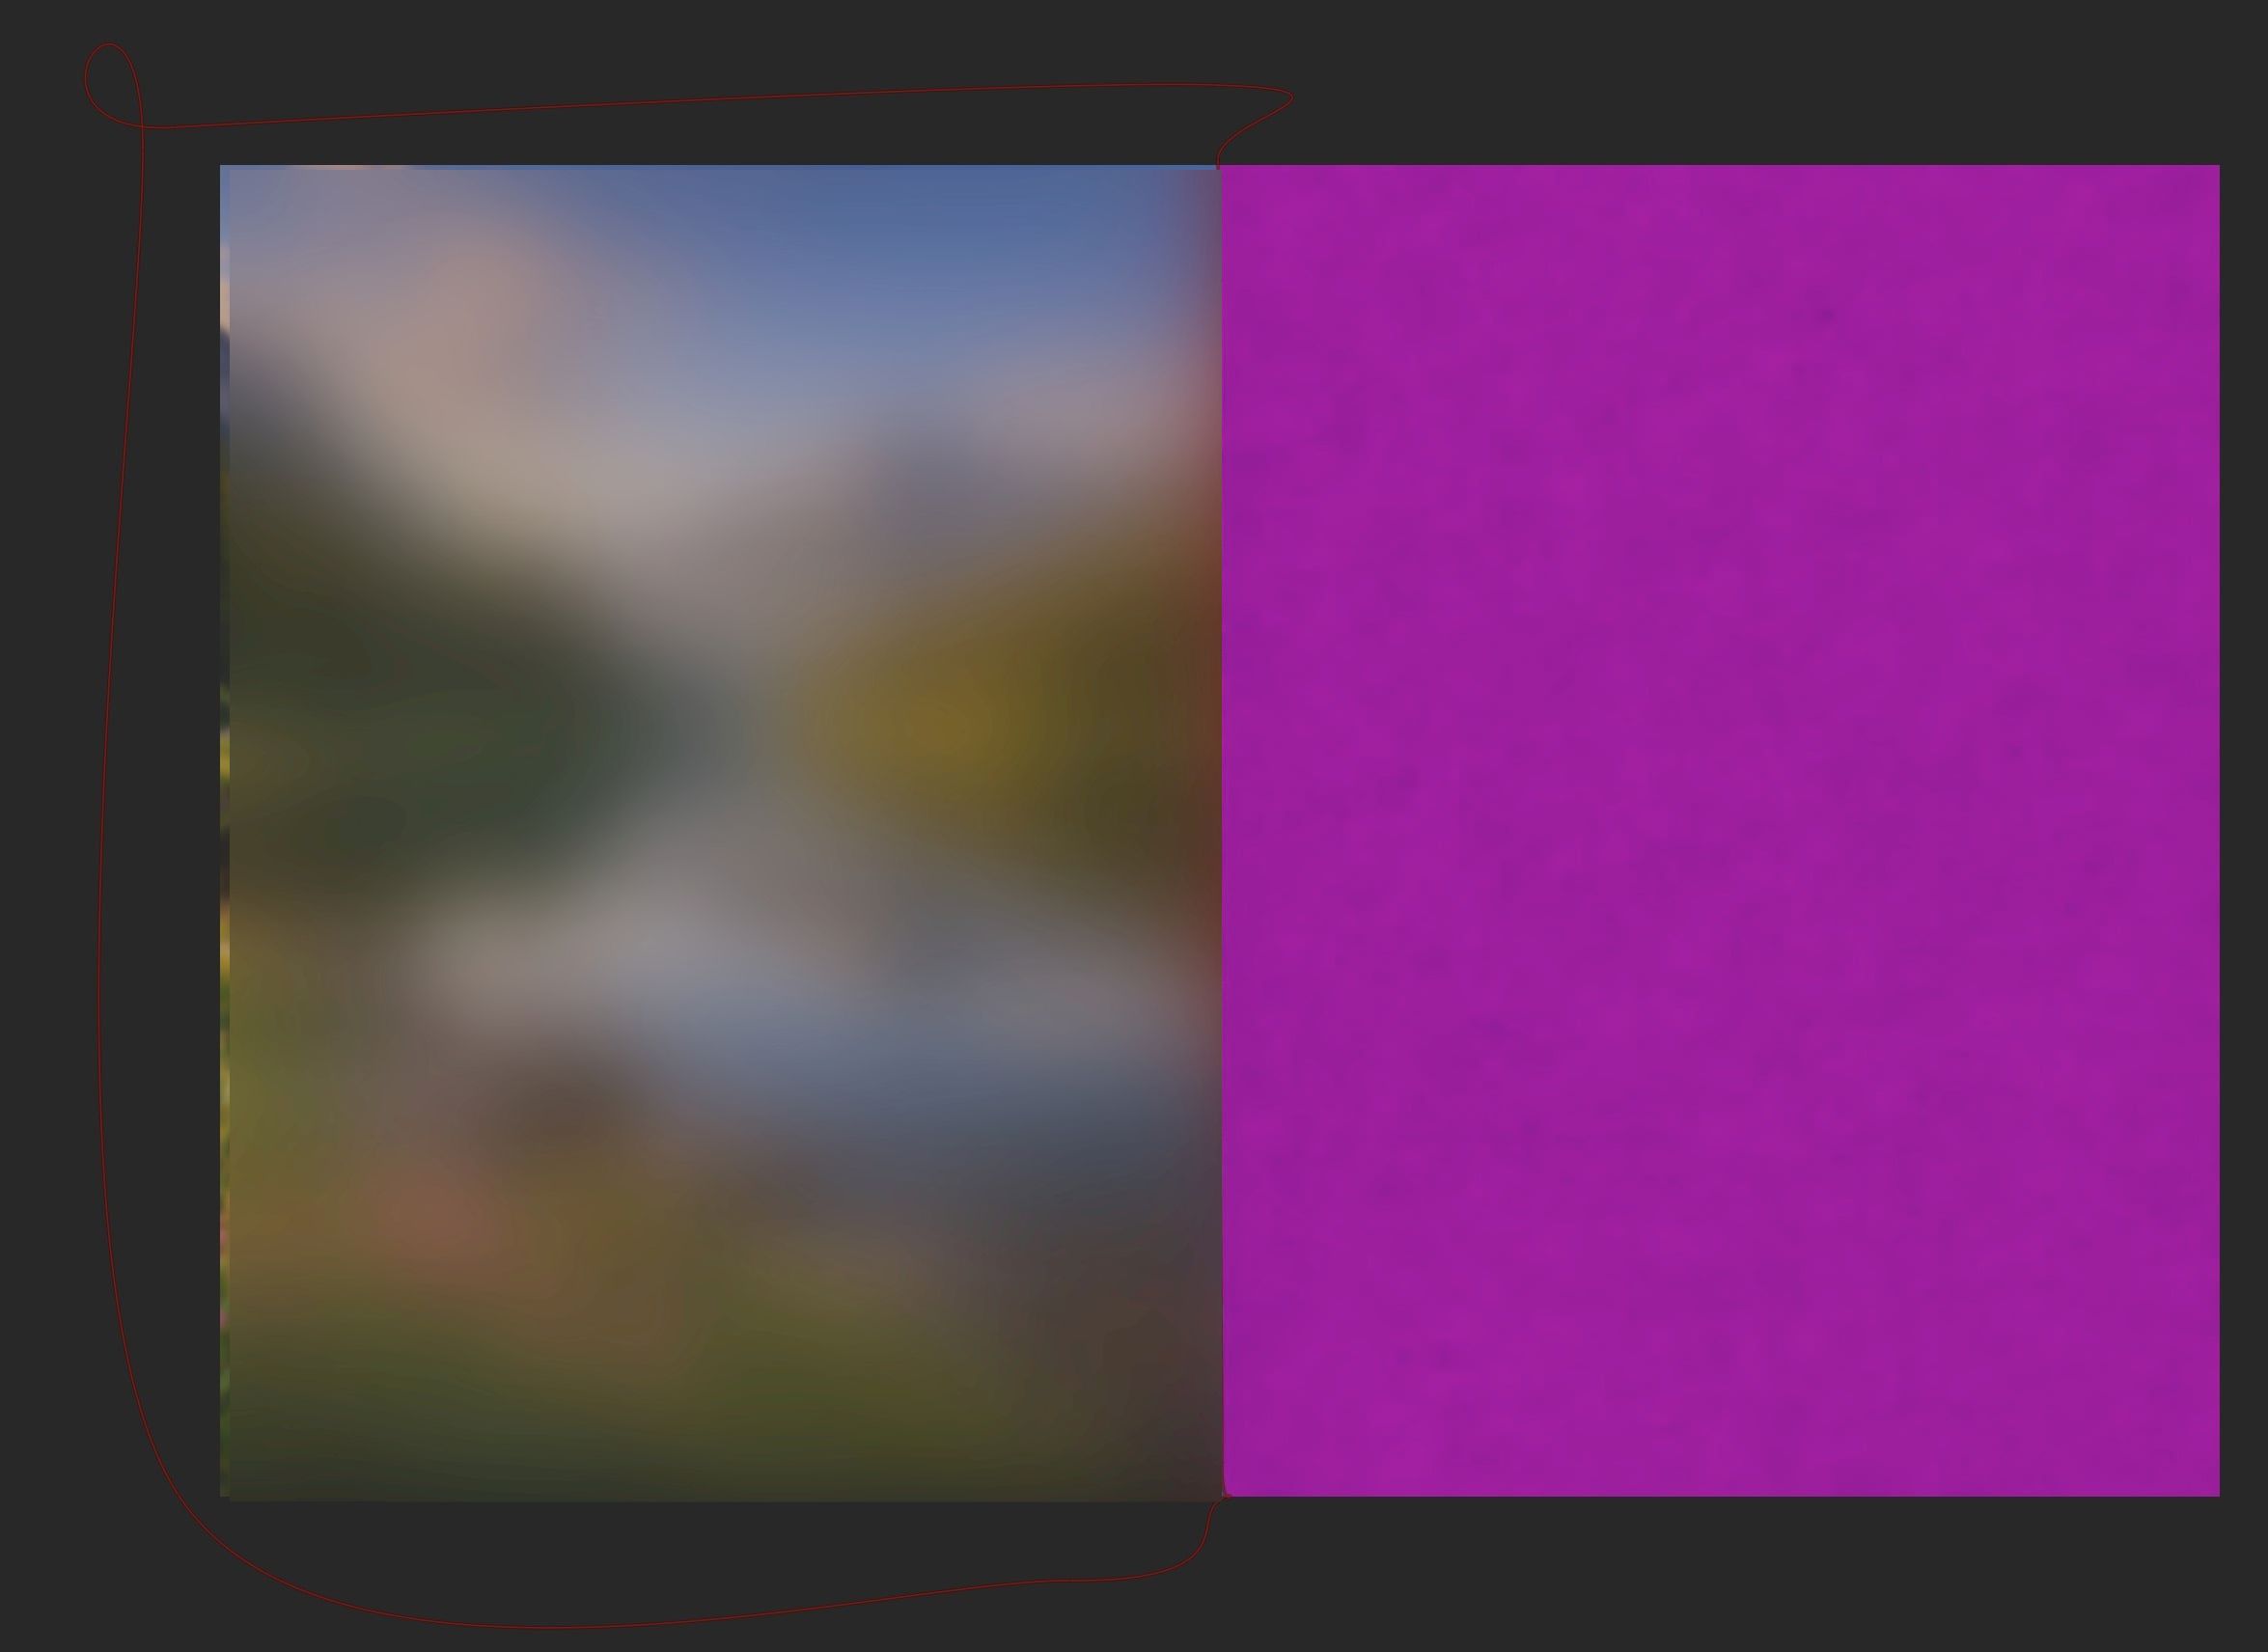
Please consider the next image (obvious for demo purposes). I have a mask with only landscape image. The big purple blob is not part of the mask
Of course, is this expected as the radius is larger. But I am wondering is there a way the lowpass filter only takes the area under mask into account for blurring so that the purple does not creep into the blurred area.
You might also want to look at this page in the manual, which explains how and when the mask is applied.
In short, the module’s operation is first performed on the whole input image, and the result is then combined with the input using the mask. So masked out areas can still have an effect on visible areas (as in your case, the purple bleeds over the whole image).
TL;DR: what you want is not possible in darktable (and perhaps not at all, as you will always have to deal with a border)
In gimp, get the part of the image you want blurred onto its own layer. Fastidious masking may be needed to get it clean. Then blur that layer and blend back in with your non-blurred section.
For super simple images like your example, you may be able to get something close enough by using composite (plus cropping, plus…). I did this for an “architectural” image I did once.
I spent some time experimenting in Darktable yesterday, using all the mask refinement options, using the composite module, layer ordering, blending ordering, duplicate instancing, lots of “hacks” to protect the masked area…
And I failed to stop the “leaking” from the non-masked area. It just doesn’t seem to be possible in Darktable alone because of the way the blur works. It struck me that there should be an option a bit similar to “reverse feathering” where you can shrink/feather the mask from the outside in, rather than outwards across the edge as is currently the case. Or at least, there could be an option to protect a mask edge so that nothing crosses it.
I had the same thinking, but I thought it was me not fully aware of all the masking options in darktable.
That would be awesome. But I think that would require a completely different approach that what masking is currently is happening in darktable. The calculation of a module applied on the whole image and then the mask is use to determine what is on the output of that module. However, that protection option would mean that the calculation of a module should become ‘mask aware’, that would be a huge (and perhaps rather complicated) change of how things are working now…
Maybe the method I described in the other thread could be added to the mask as an option (via a checkbox named something like apply mask before processing, which is not quite accurate, but descriptive; we could also come up with a better name).
Does anyone want to take it up as a feature request? I don’t have time to implement it now, but could take it up later, if in theory it’s accepted by the team (or someone else could take it up).
Note: I have not checked the feasibility, maybe the mask is not made available to the processing module.
I don’t think it is, but in principle the data could be cropped before being passed into the module. The big question is going to be how to deal with irregular/non-rectangular masks.
For the regular borders of the picture, darktable must already have an or several (dependent on the module) ways to deal with it, as the problem for e.g. the blurring also exists at the regular borders of the image. I don’t think irregular borders are much different than rectangular ones besides that the normal direction of the border is not obvious but must be computed and that normal directions may overlap.
Some options for an irregular/non-rectangular mask are:
Leave the surrounding white/black/transparent/user-input color (maybe as user option).
Extend the pixels in normal direction with the color of the border pixel and interpolate missing and duplicate regions.
Mirror the existing image in normal direction of each border segment (this requires a strategy for areas where the image is not wide enough to fill the surrounding space) and at mask corners, repeat with normals between the left and the right ones in increasing density until each pixel got at least one color (pixels with several colors get a mean value).
Use in-painting techniques to find the values of missing outside pixels.
I am pretty sure there are more elaborate algorithms (these are some that i remember from earlier discussions of the topic, and i may have forgotten or mixed up details). Maybe it may be beneficial to implement several and give the user a choice.
Suppose that modules would have access to the modules and only calculate the pixels that could be affected. Then there is a rather big potentially performance gain depending on the mask isn’t there?
And for modules that only operate on the pixel levels this shouldn’t be very hard, or am I missing something?
It depends. If you read the process I described, it’s quite a bit more work.
Also, adding an if(pixel_affected(x, y, mask)) { doChange(); } very often does NOT reduce execution time, but increases it, because of the way modern CPUs work. Conditional execution ruins the CPU pipeline.
Thanks @kofa, Yes I am aware of these kind of optimization techniques. But there are of course more ways than if(pixel_affected(x, y, mask)) { doChange(); } . And how effective that if statement is, also depends on how the branche predation works.
And the slowness of that if statement is not necessarily in the if but in the context switch of doChange();. Do this in a for loop and you may see massive differences in performance…
Another question, I have been playing with DorS to see if that module also ‘suffers’ from influences outside of the mask, and this is indeed seems to be the case.
Would DorS benefit if the feature more-or-less proposed above is added?
@kofa since your recent encounters with DorS, what is your take on this?
I did not look into the code of DoS, the LLMs did. I’m trying to supervise the process of generating suggestions, making sure the code gets tested etc., but the actual coding is up to the bots.
But, as @Donatzsky said, all modules that perform ‘contextual’ processing (as opposed to per-pixel) have this issue.