In the Blender OCIO config, I think AgX does that, but I didn’t port that code. filmic rgb does take the export profile into account.
Still wouldn’t solve the input to the module question, though.
In the Blender OCIO config, I think AgX does that, but I didn’t port that code. filmic rgb does take the export profile into account.
Still wouldn’t solve the input to the module question, though.
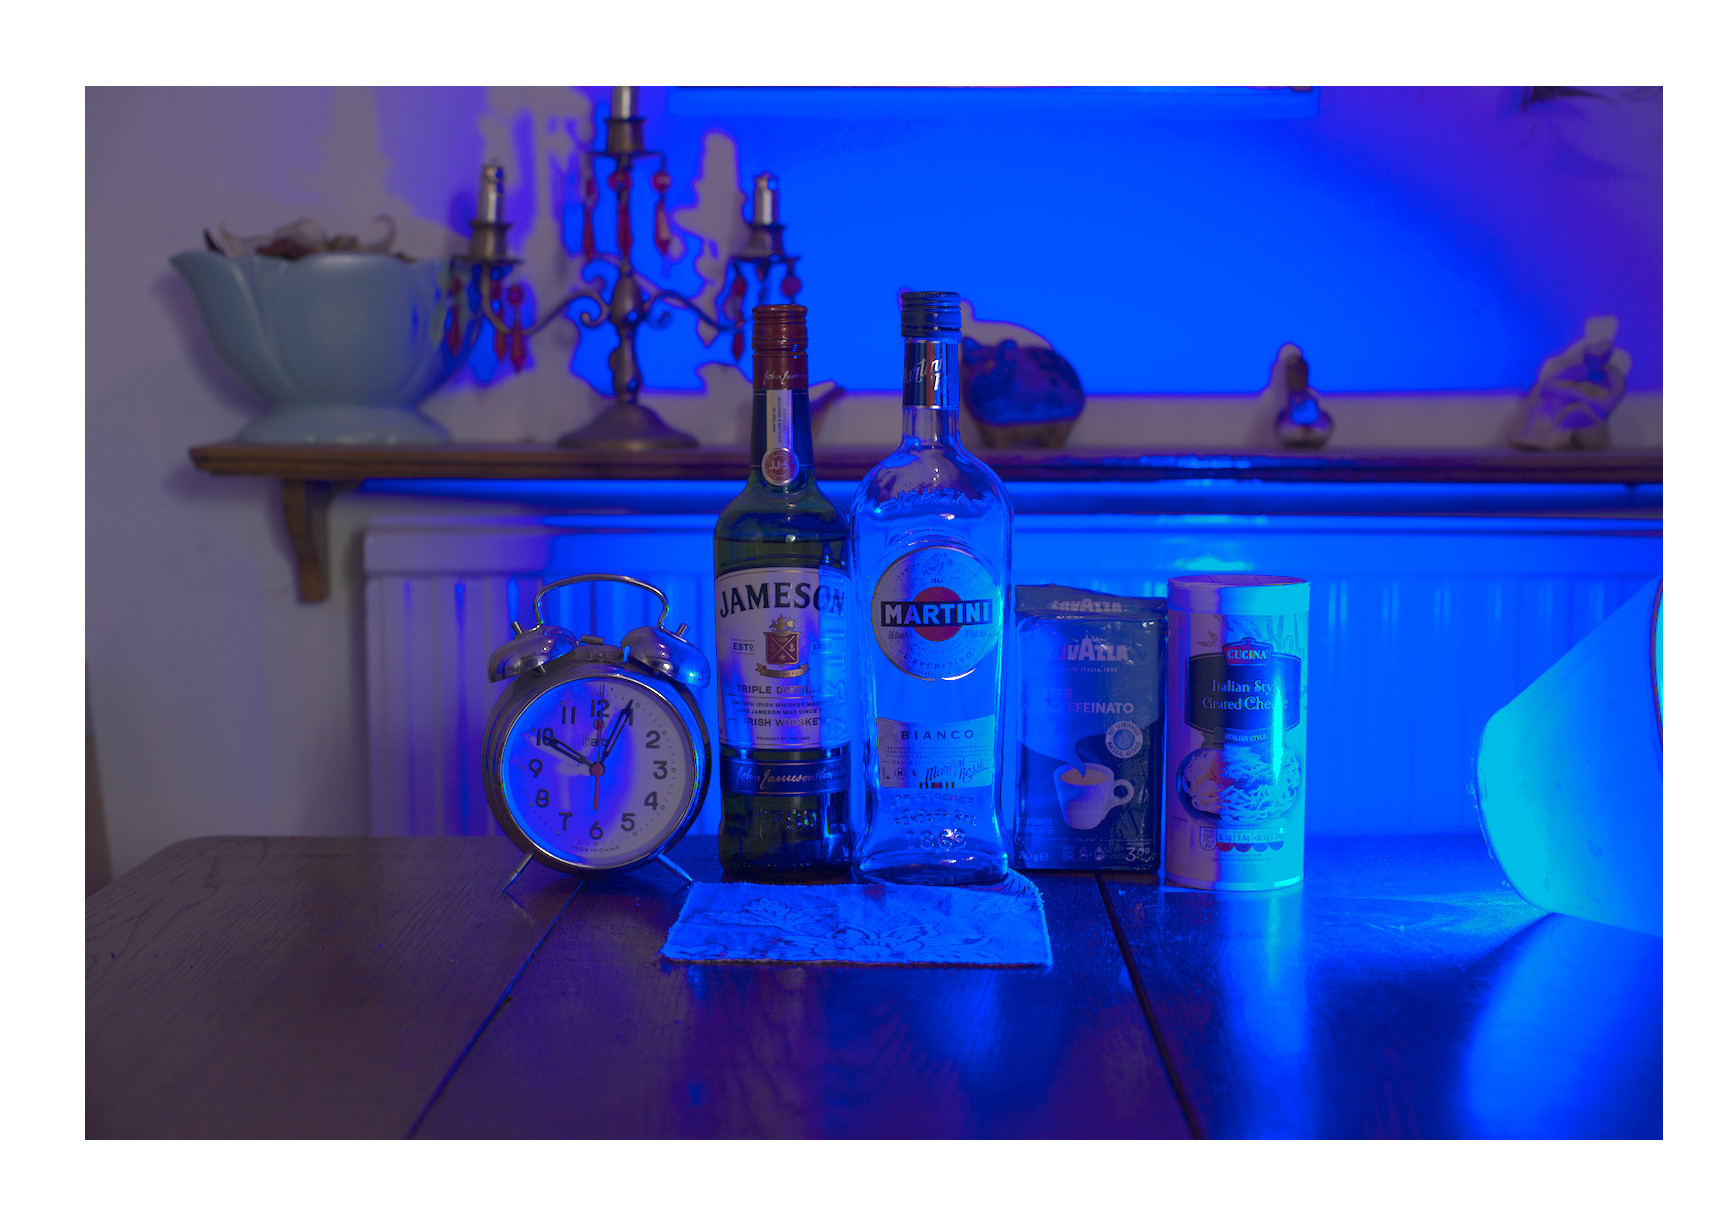
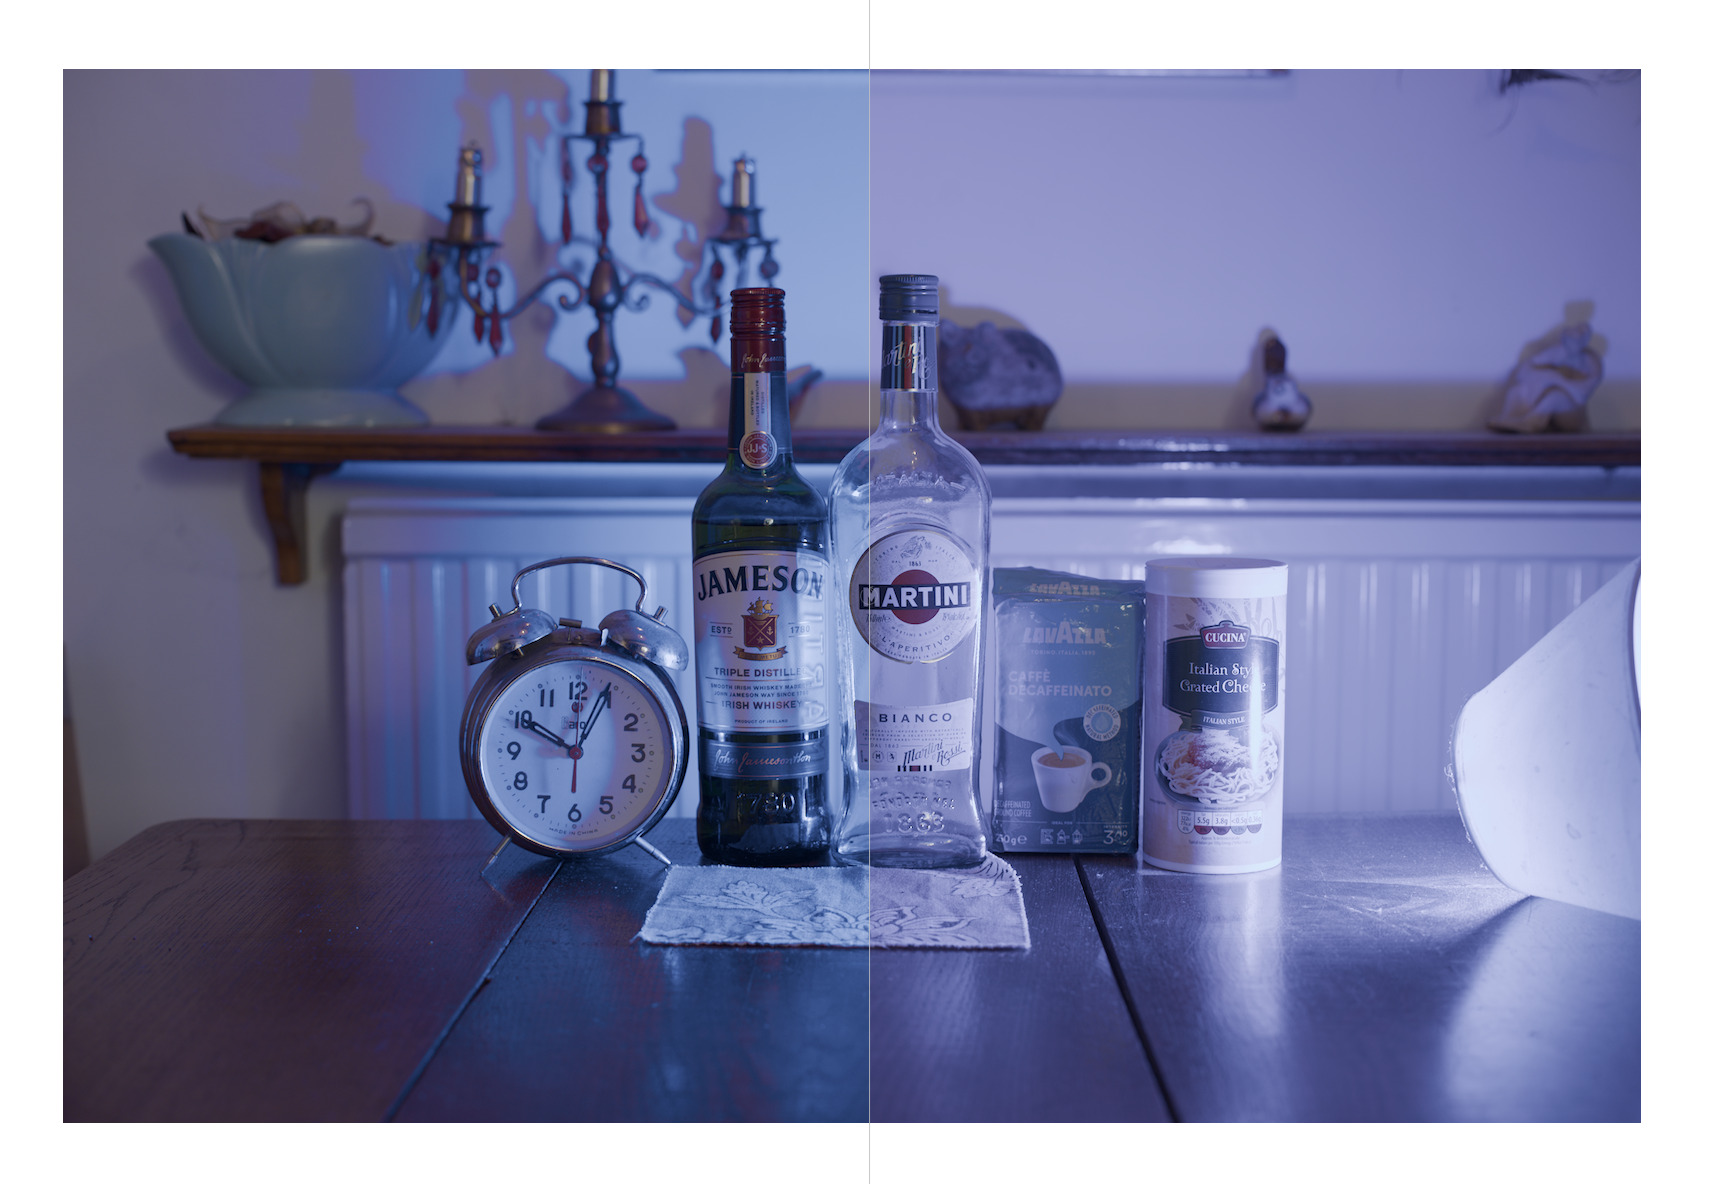
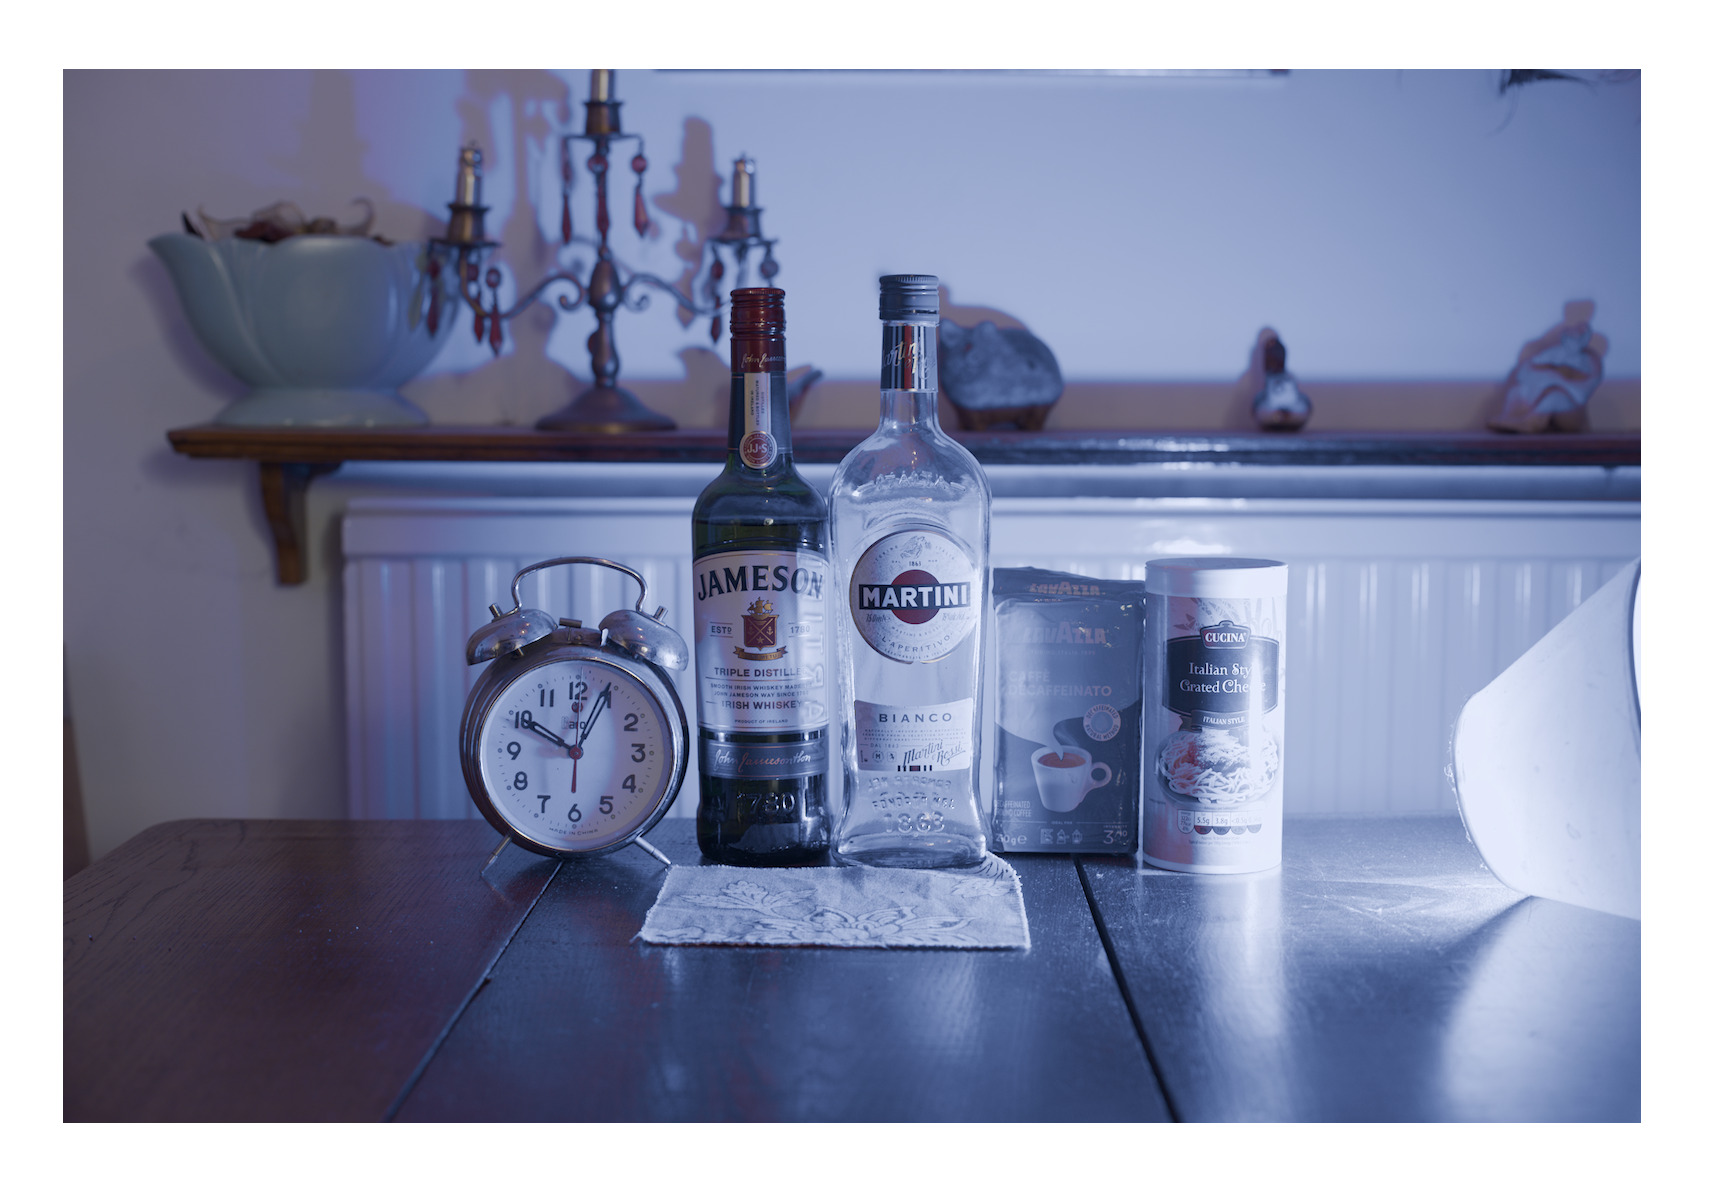
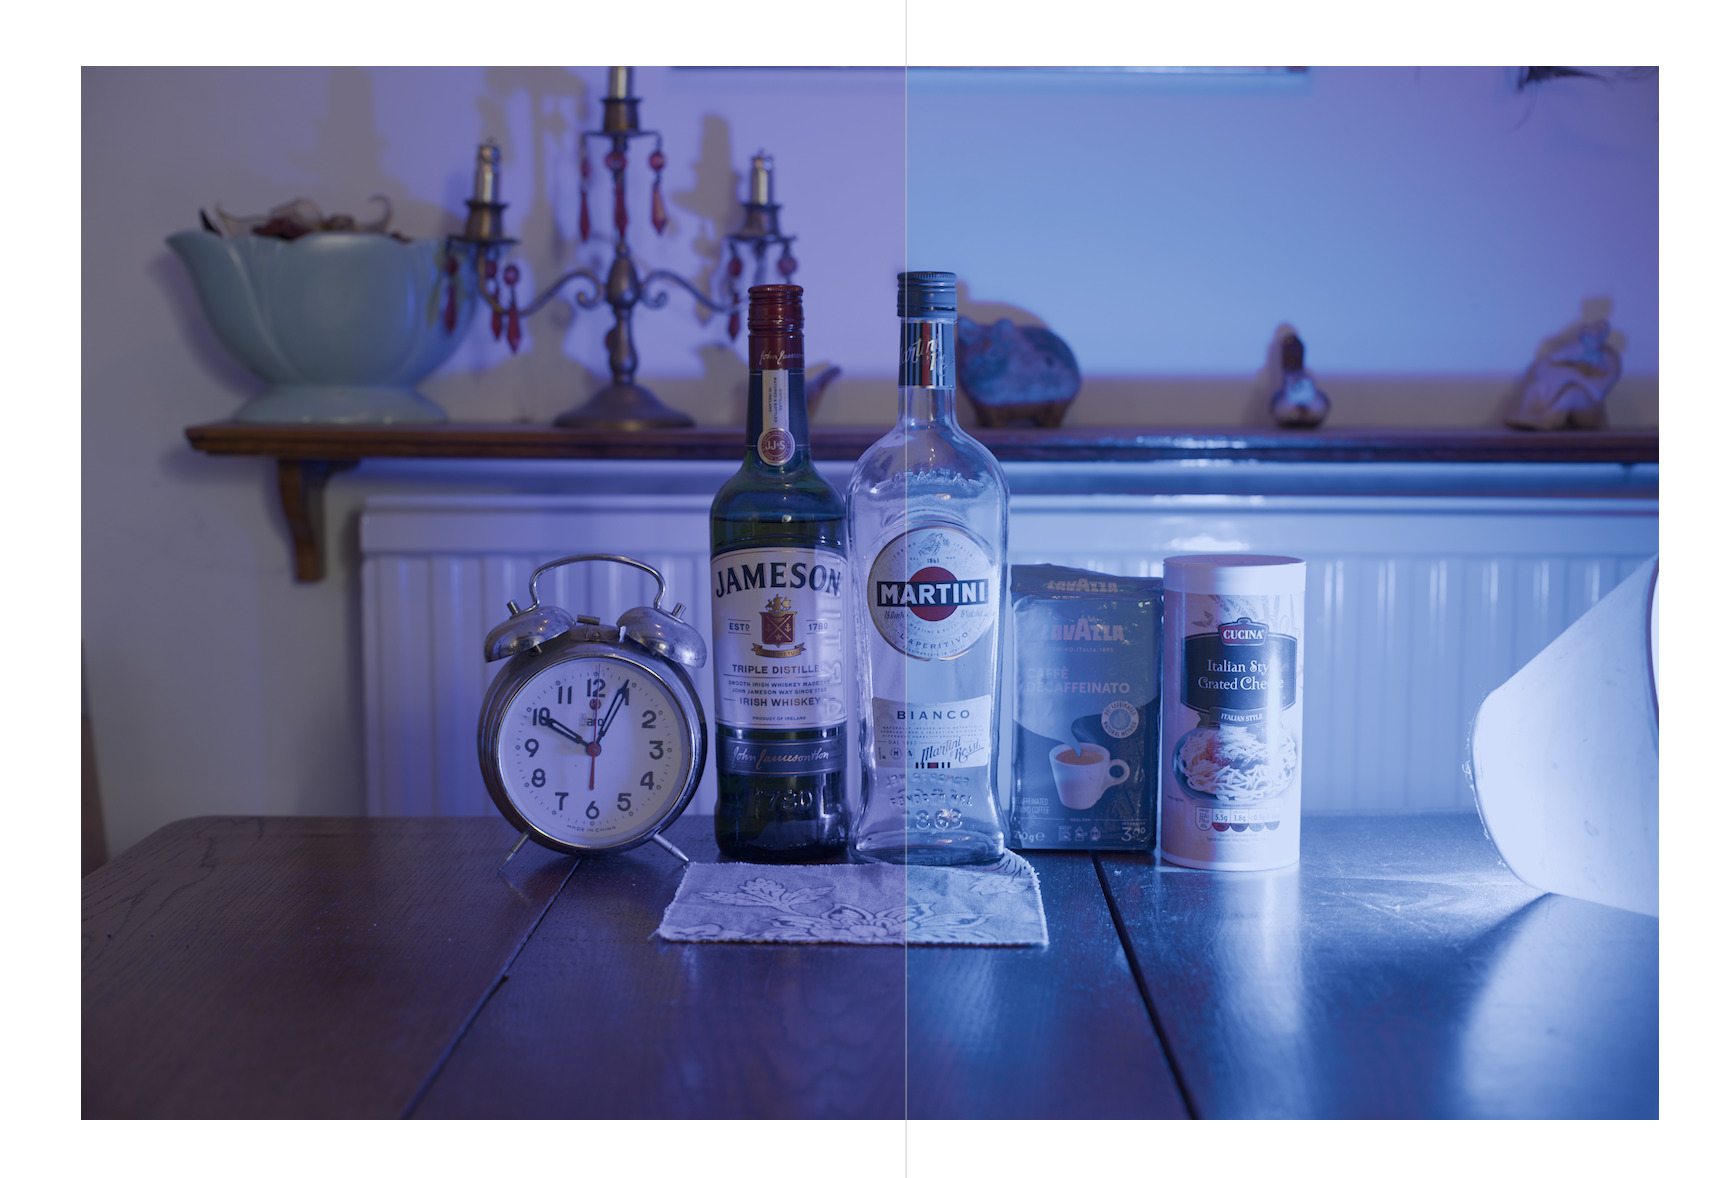
Here is an example. Try processing it with the current tools of darktable:
I’ve added +2 EV in exposure. HQ mode in the darkroom, otherwise darktable clips out-of-gamut colours.
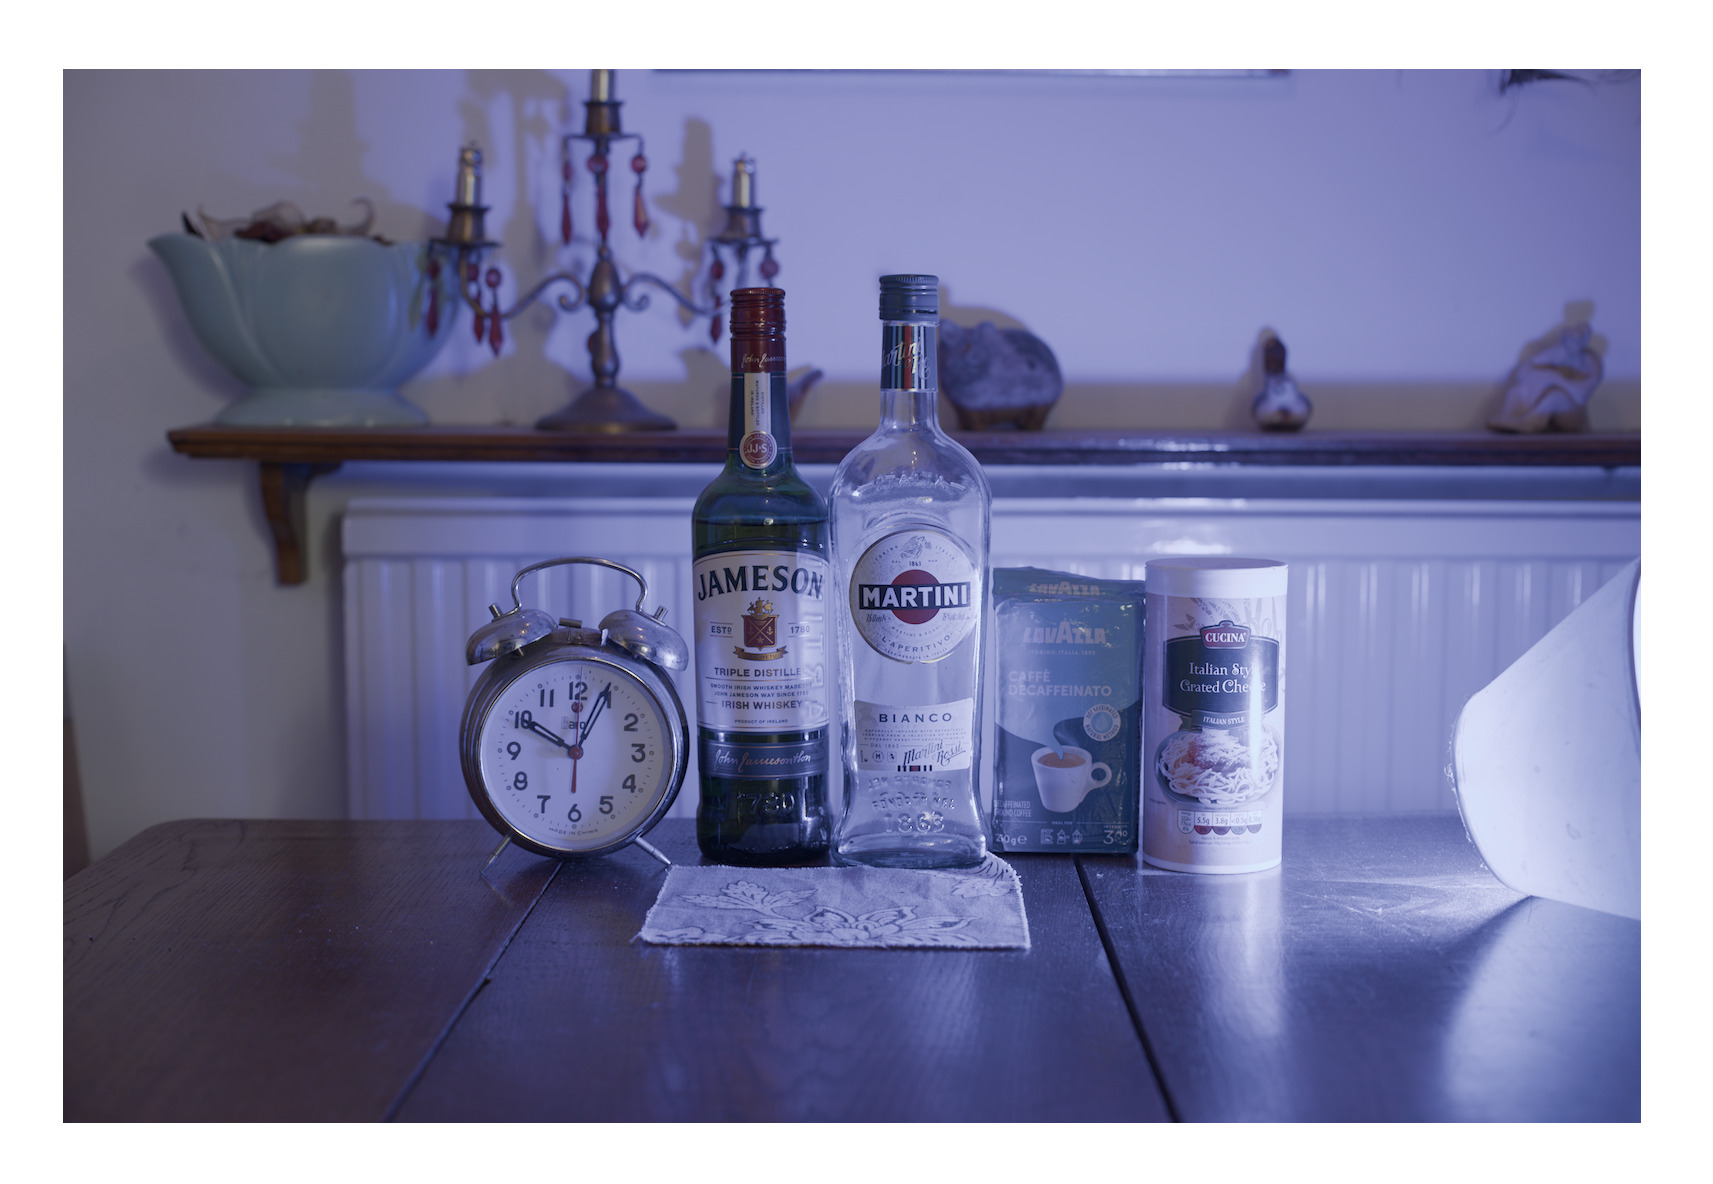
No tone mapper:
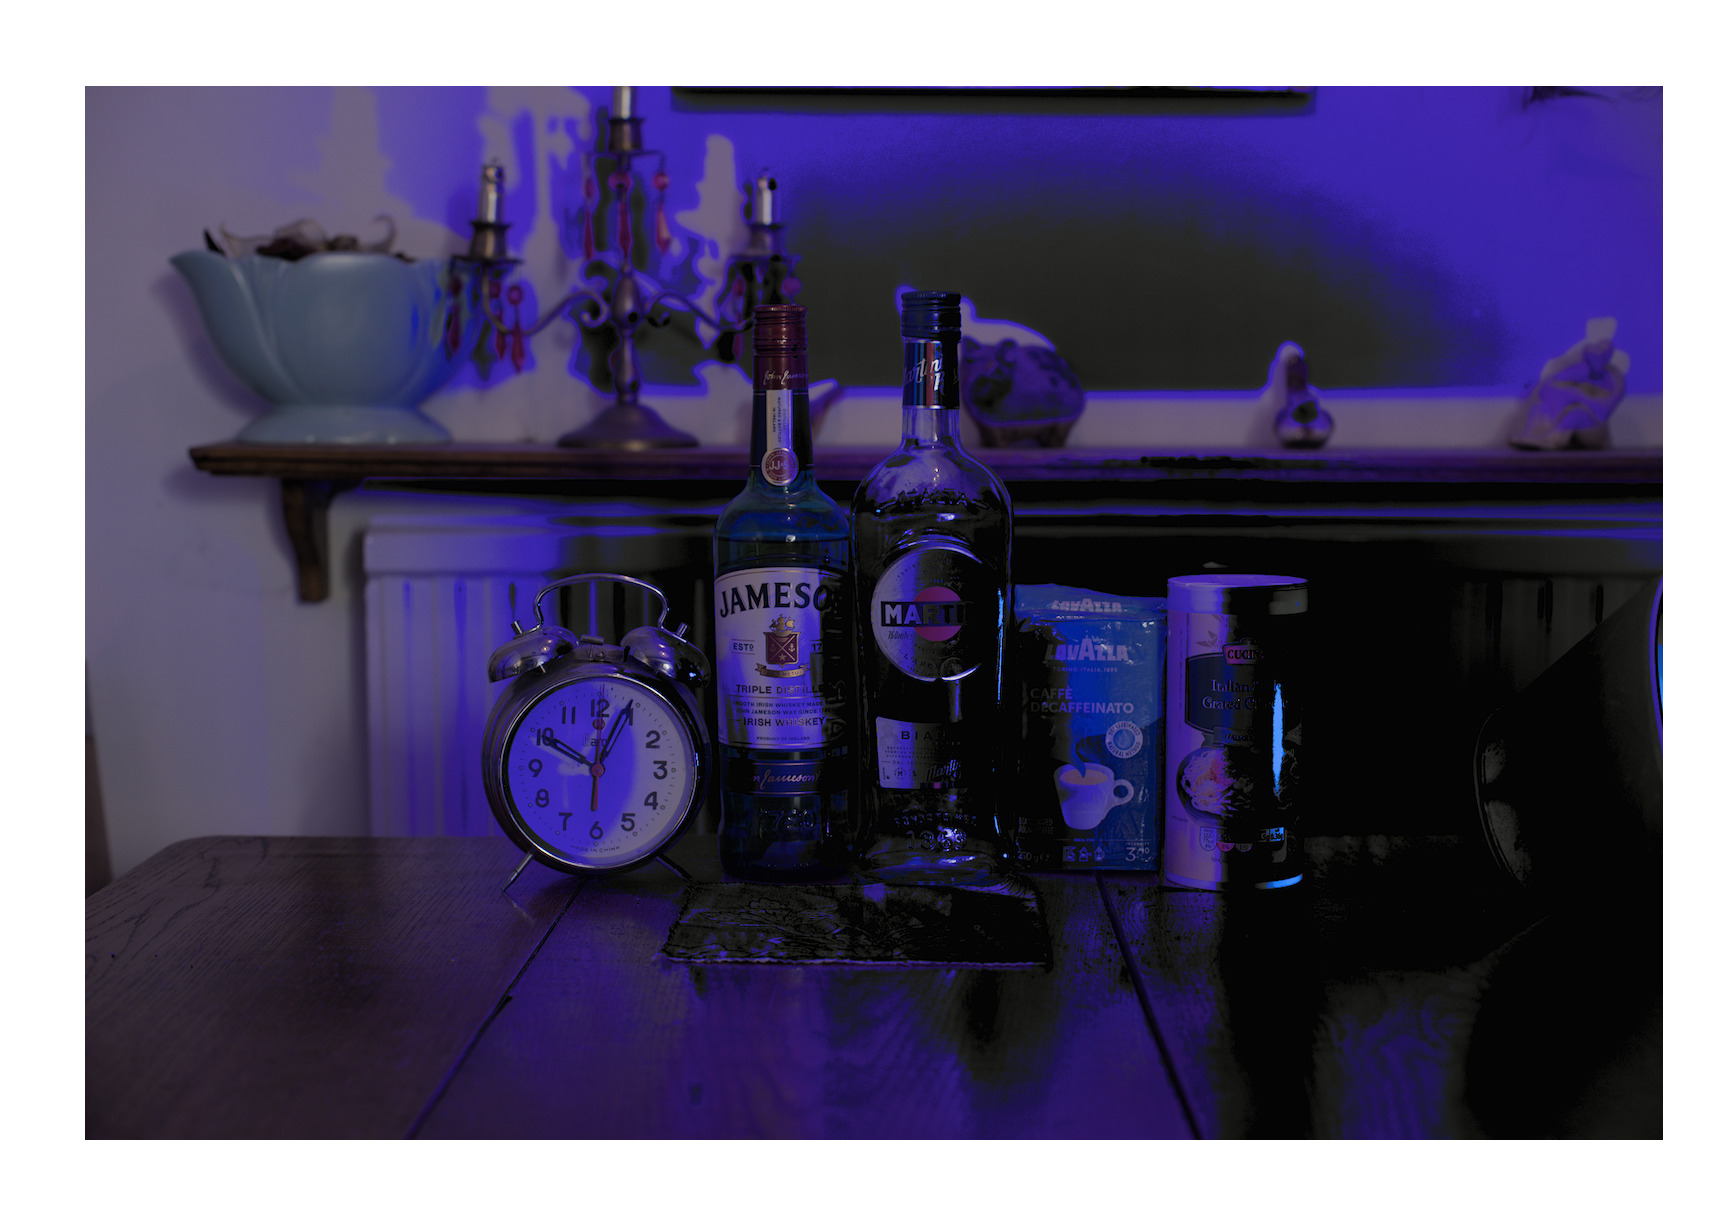
Filmic (v7 + auto tune exposure):
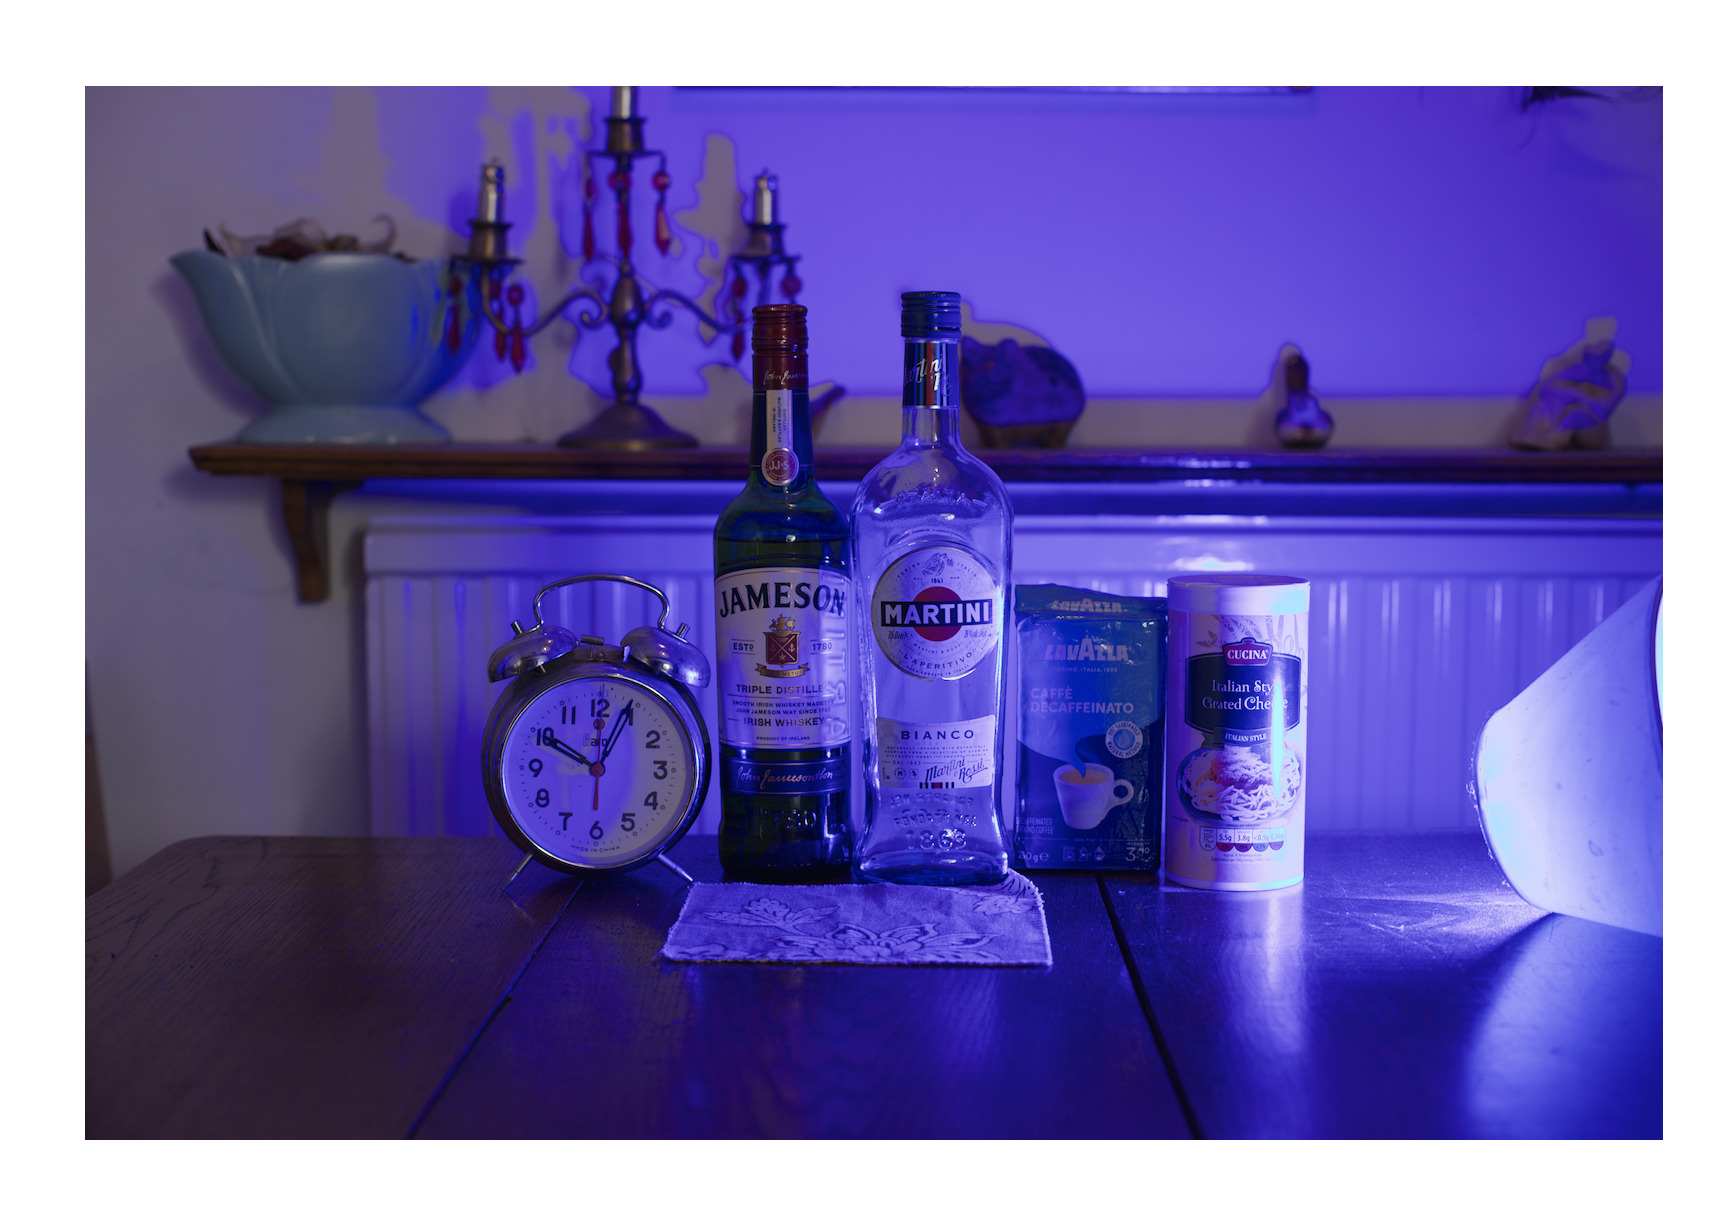
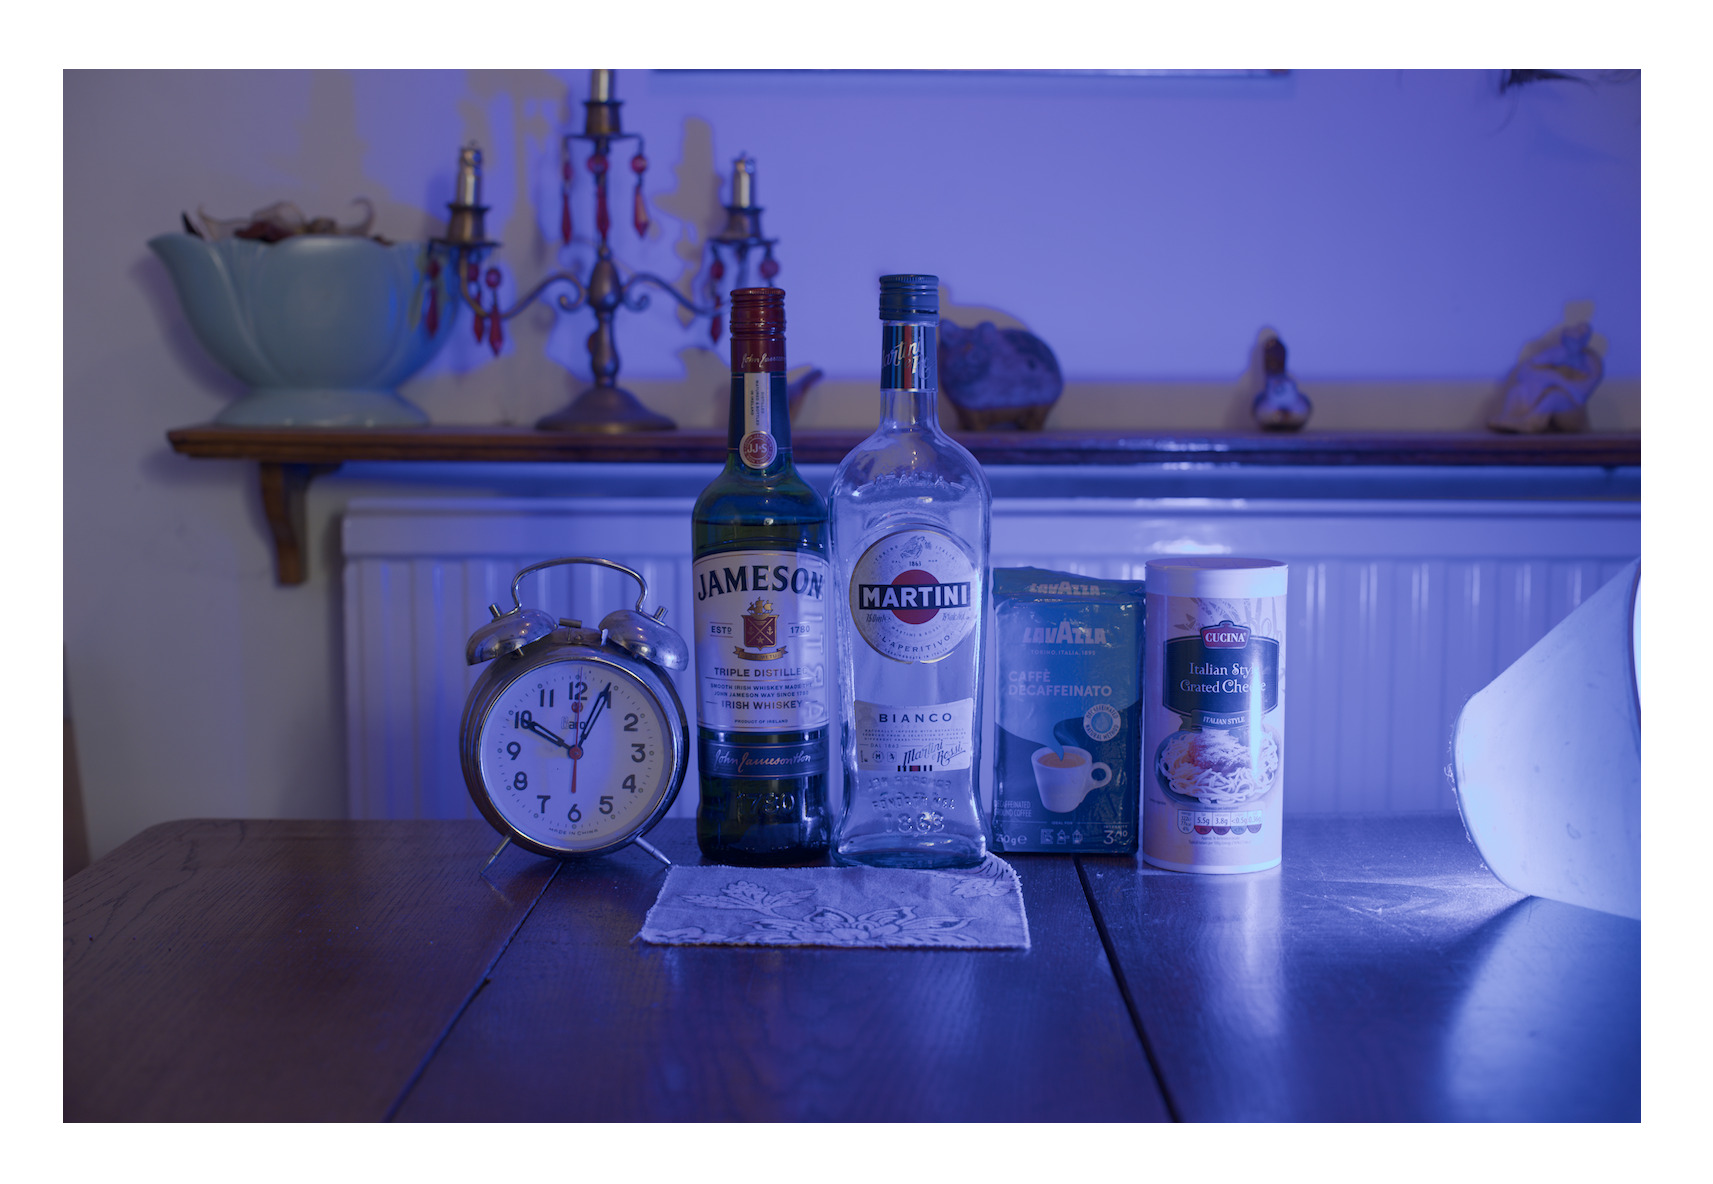
Sigmoid, smooth:
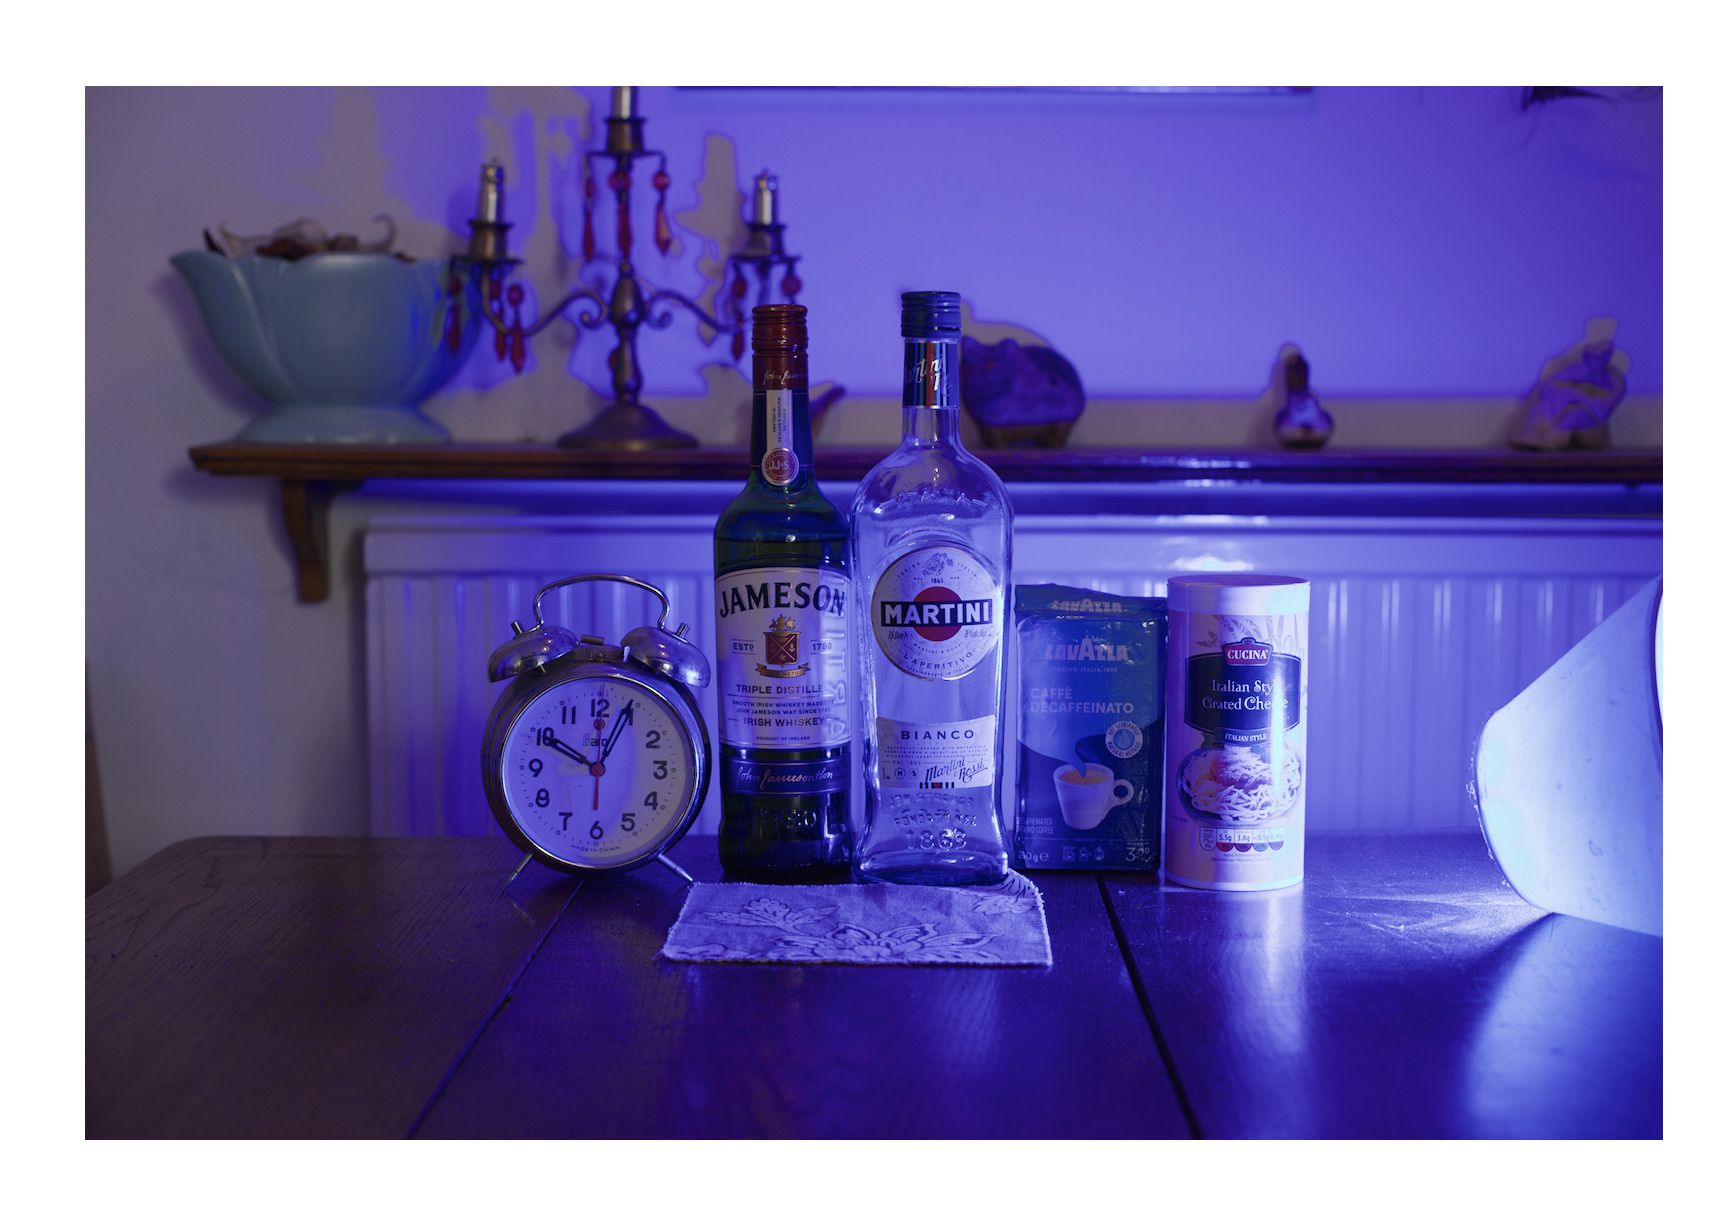
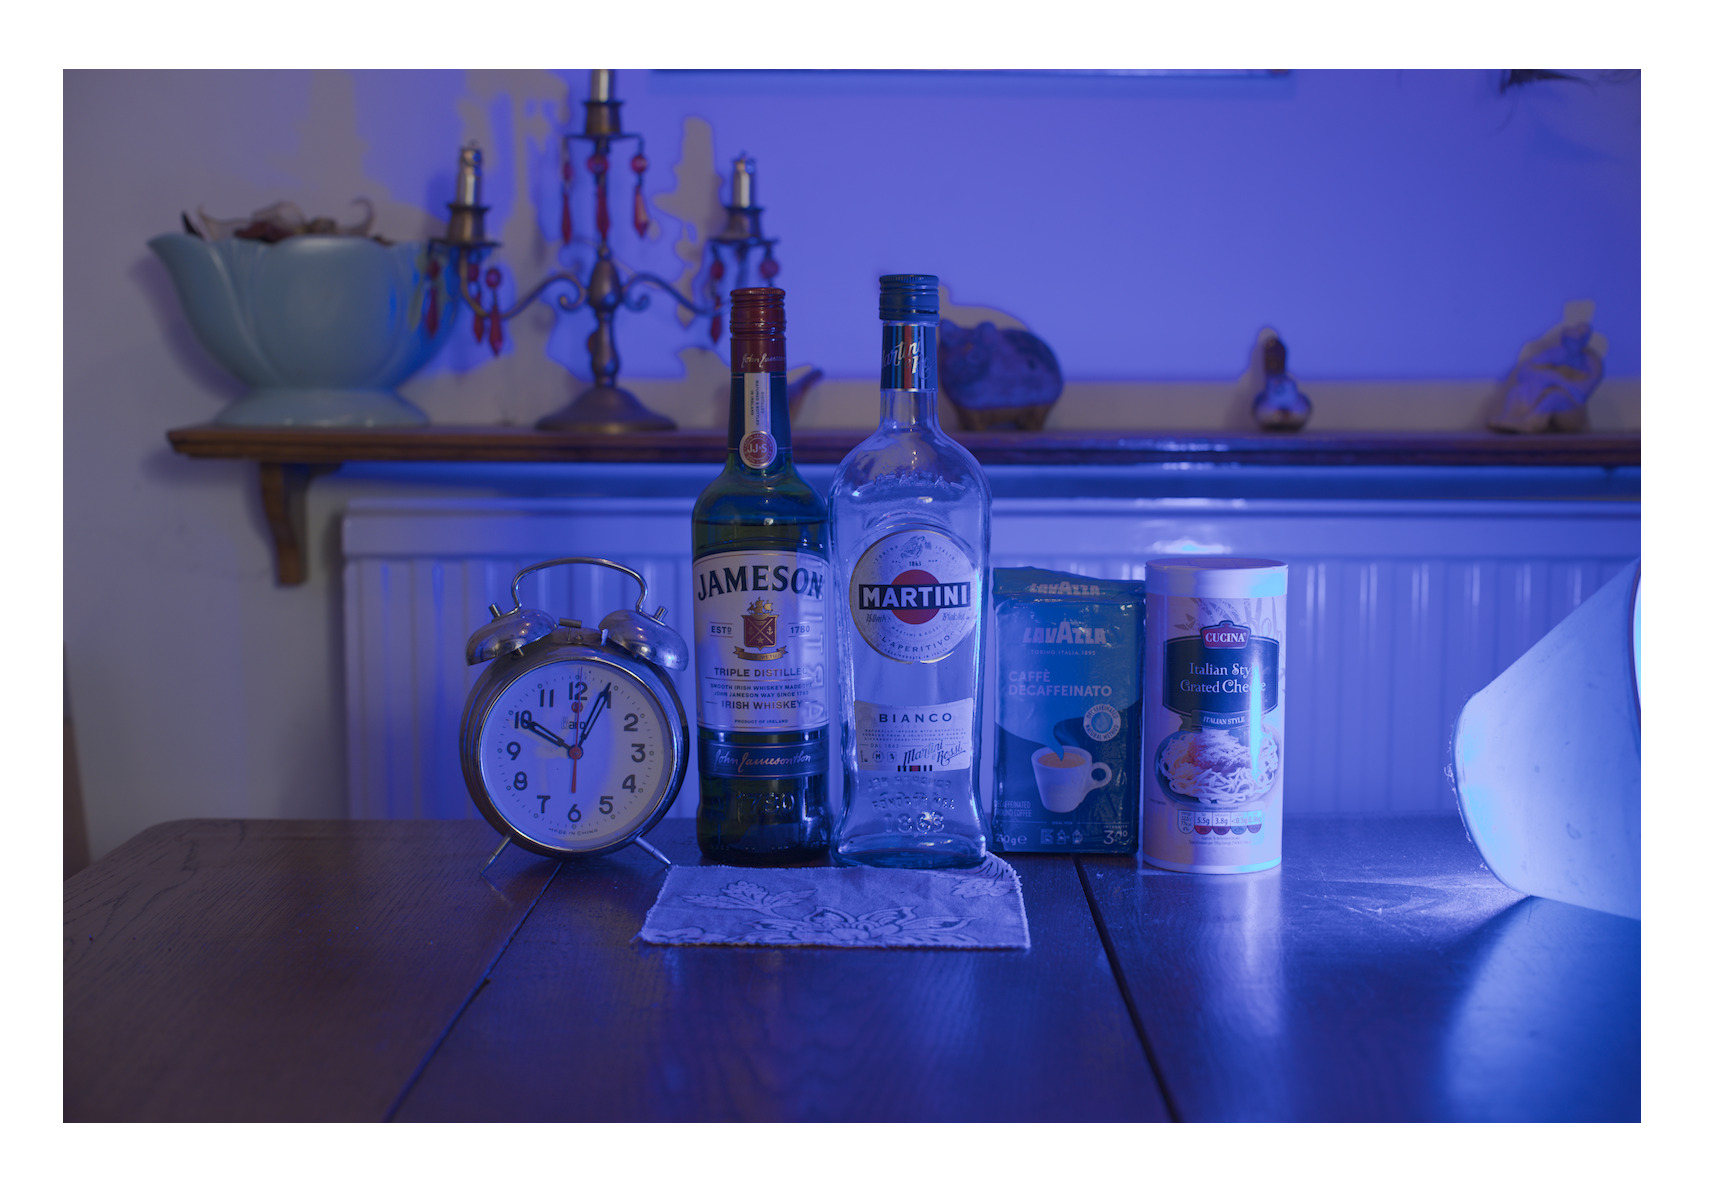
Sigmoid, sRGB:
AgX (blender-like|base + auto tune exposure):
Gamut-compress + AgX (blender-like|base + auto tune exposure):
Same, but with increased blue attenuation in AgX:
Same, but the gamut compression turned off:
Gamut compression still off, further increasing blue attenuation:
The shadows are the best in this one, but it looks very flat now, and the walls look magenta-ish. A comparison with the less blue attenuation but gamut compression on:
So let’s try gamut compression and some blue attenuation (this has less blue attenuation dialled in than the ‘Gamut compression still off, further increasing blue attenuation’ version):
A quick comparison between max-out blue attenuation with gamut compression off, and somewhat lower blue attenuation with gamut compression on:
And, for comparison, gamut compression using color calibration (+ agx):
AgX (no color calibration) vs AgX with color calibration:
If you try compressing further, the shadows become brighter than the blue-illuminated surfaces:
just a side remark: even interpreting the colours in this exr as srgb primaries (because that’s the least expressive power), i get:
As I understand it, cameras may provide data outside the spectral locus. For example, the ‘Blue Bar’ image:

If you simply clip (in this case, to ACEScg), you get something really ugly:
i would disagree with this notion. broken processing provides numbers outside the real world, not cameras. a camera is just measuring energy filtered by some cfa absorption spectrum. if you apply a matrix to that to go to something metameric to human vision you’ll likely mess it up, with this i agree.
OK, I see what you mean. However, given the limitations of available input profiles, which may create impossible ‘colours’, what is the preferred way to mitigate them? Clipping looks ugly.
Then, there is the 2nd use case: taking processed image data, with real-world colours, from the wide working space to sRGB.
oh absolutely, don’t get me wrong. i think this is a useful tool. i just want to avoid overfitting solutions to certain test files which contain questionable data. also the comparisons to prior methods you give will probably not look so dramatically broken if the input is sane.
If you need raw files, here are two of my own examples that you can use without restriction:
_DSC6600.NEF (91,5 MB)
_DSC7410.NEF (90,2 MB)
Yes, that’s correct. It’s usually those darn LEDs that stir up trouble. ![]()
Thanks.
agx with defaults + auto-picked exposure (no other changes), vs gamut-compress to working space using gamut compression, in color calibration gamut compression and clipping disabled, agx defaults + auto-picked exposure, gamut compression for export space:
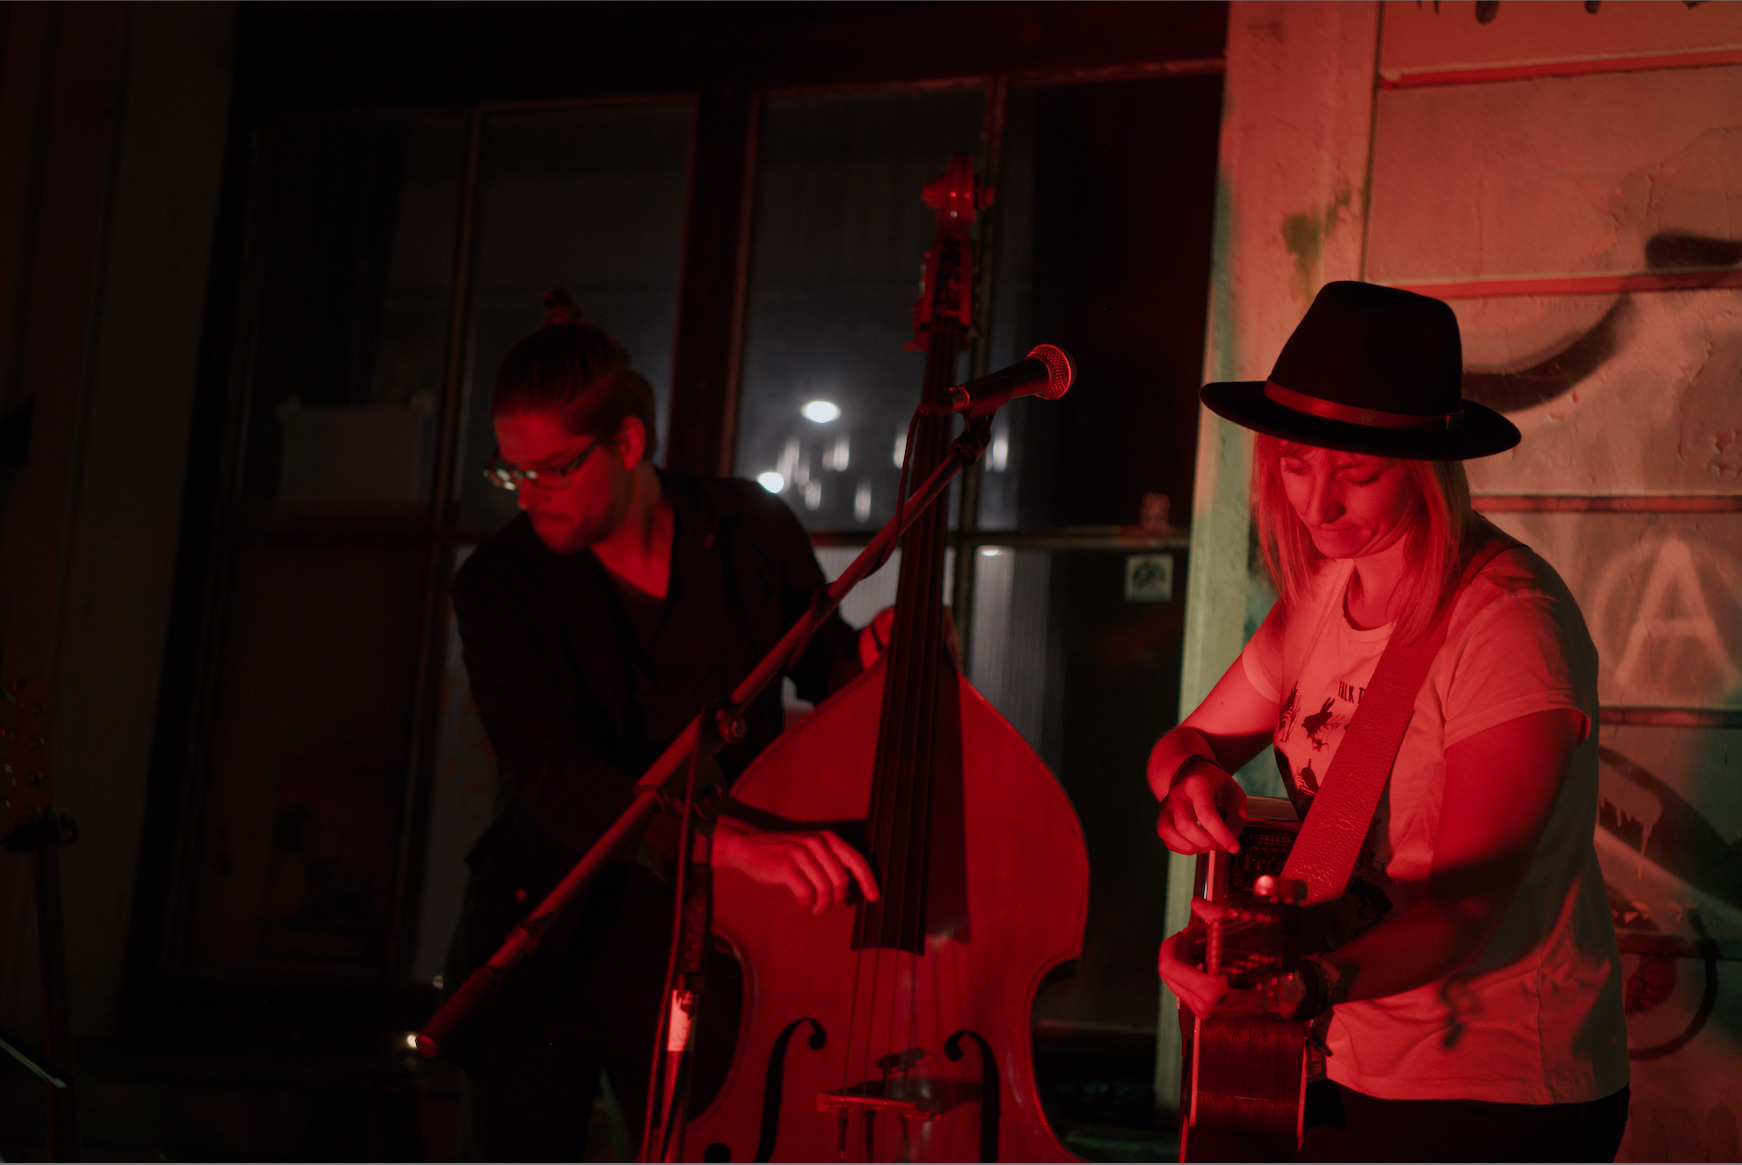
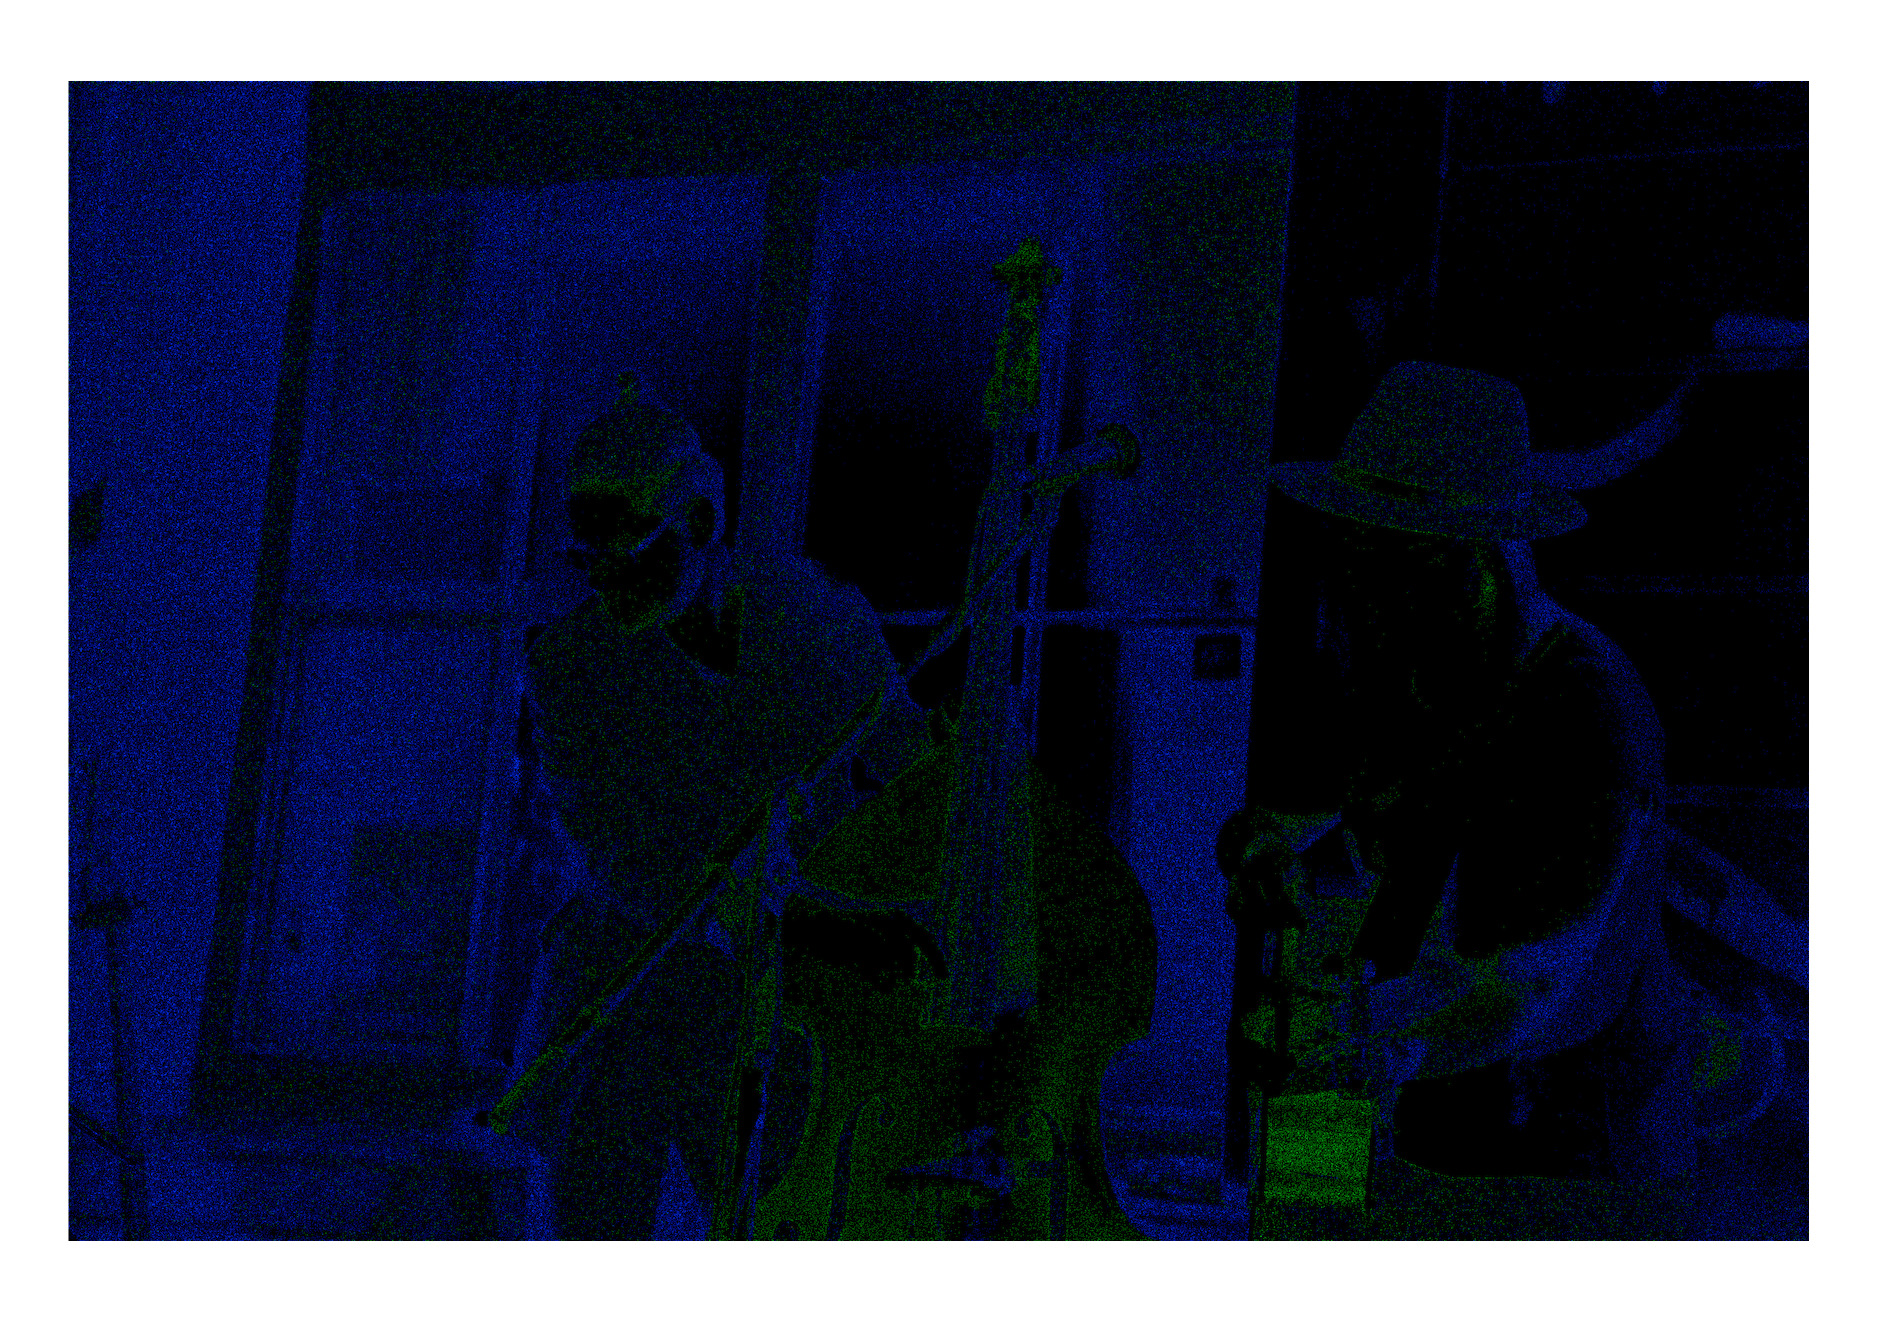
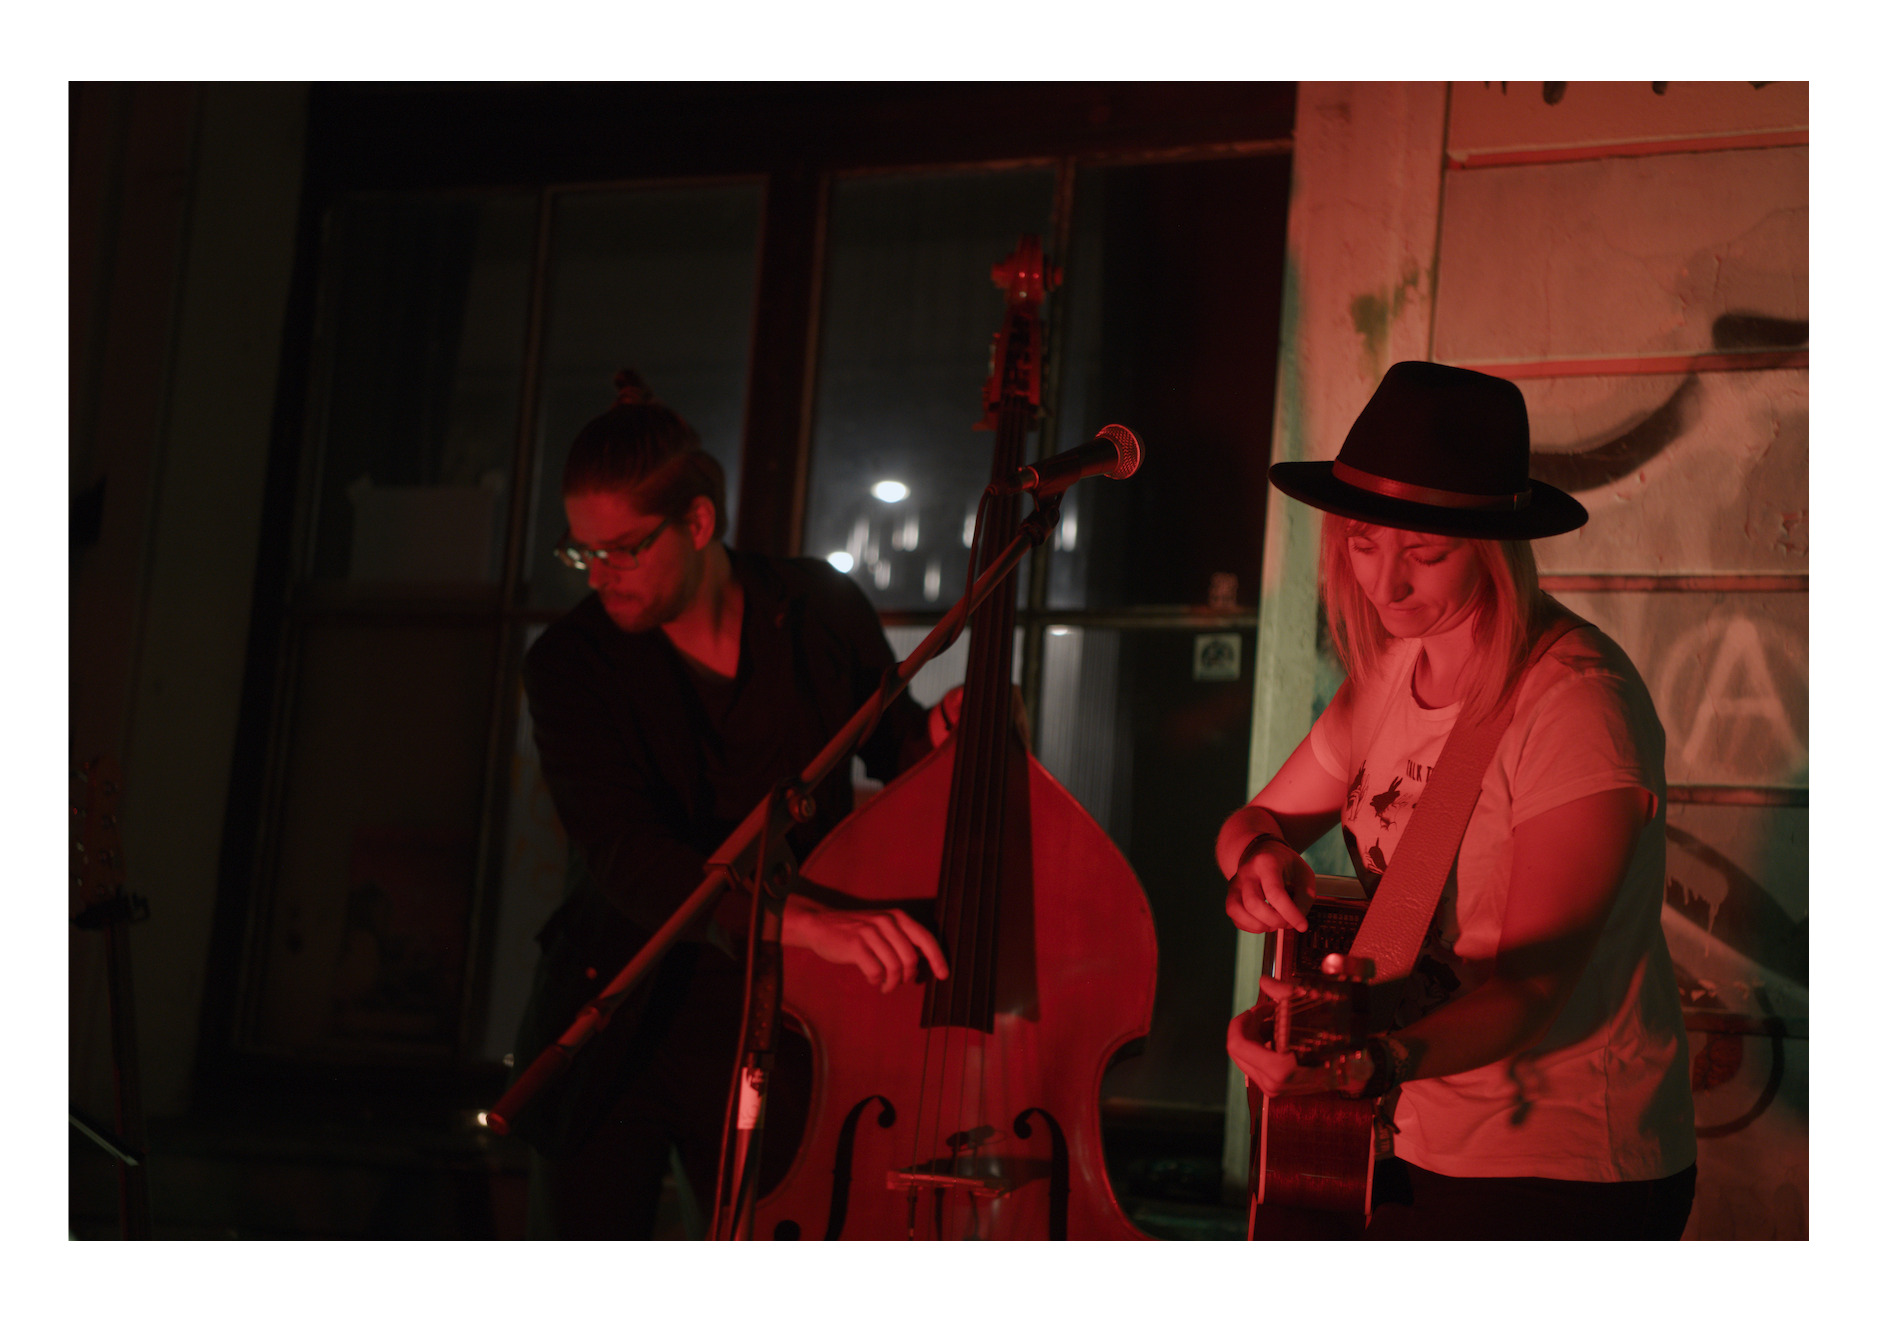
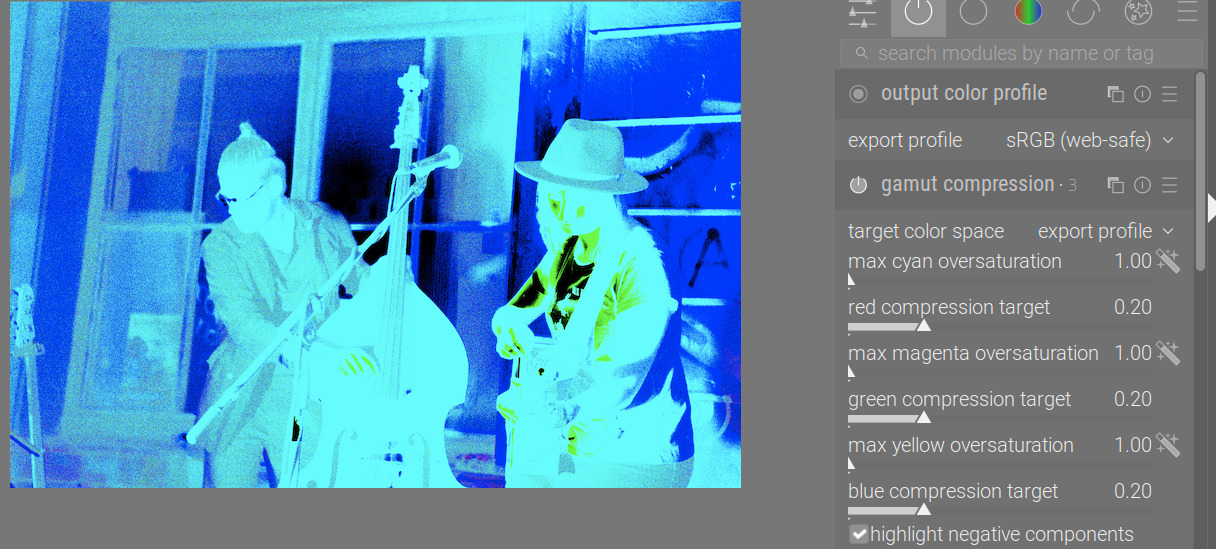
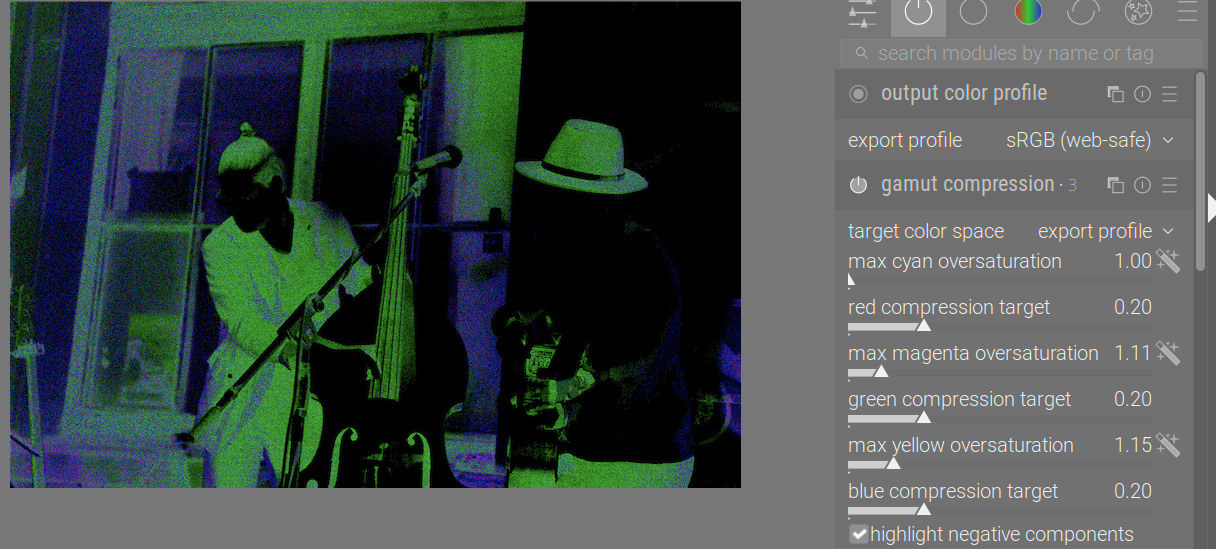
The musicians image is ‘nothing special’, gamut-wise. There’s a lot of red, but the only out-of-gamut areas are not so bright, so you won’t see much of a difference (only negative components are shown):
No gamut compression vs compression before (to working space) and after (to export space) agx. Edit: The differences mostly come from the 2nd, post-agx compression to sRGB. the first, pre-agx compression, but that’s actually triggered by some individual hot pixels.
It doesn’t. It takes data in the pipe’s working space and emits data also in the pipe’s working space, ensuring that whatever ‘target’ space (typically: the working space or the export space) will no longer have pixels with negative components. Input and output colour profile take data in one space and output in another. Gamut compression cannot be moved before input color profile or after output color profile.
You are right in that it may make sense to enhance the existing modules with this functionality. However, with the modern workflow, we also have color calibration that does its own gamut compression and chromatic adaptation, which may mean that pixels that were out of gamut right after input color profile are no longer out of gamut after chromatic adaptation. At least I think it may happen.
Unfortunately, the gamut compression in color calibration seems to be acting weird, see
If you try compressing further, the shadows become brighter than the blue-illuminated surfaces
(in module proposal: gamut compression - #23 by kofa)
I think, in its current state, the module is good as a tool for exploration and experimentation. I also think it helps with difficult lighting. I’ll provide an AppImage, and the code is on GitHub.
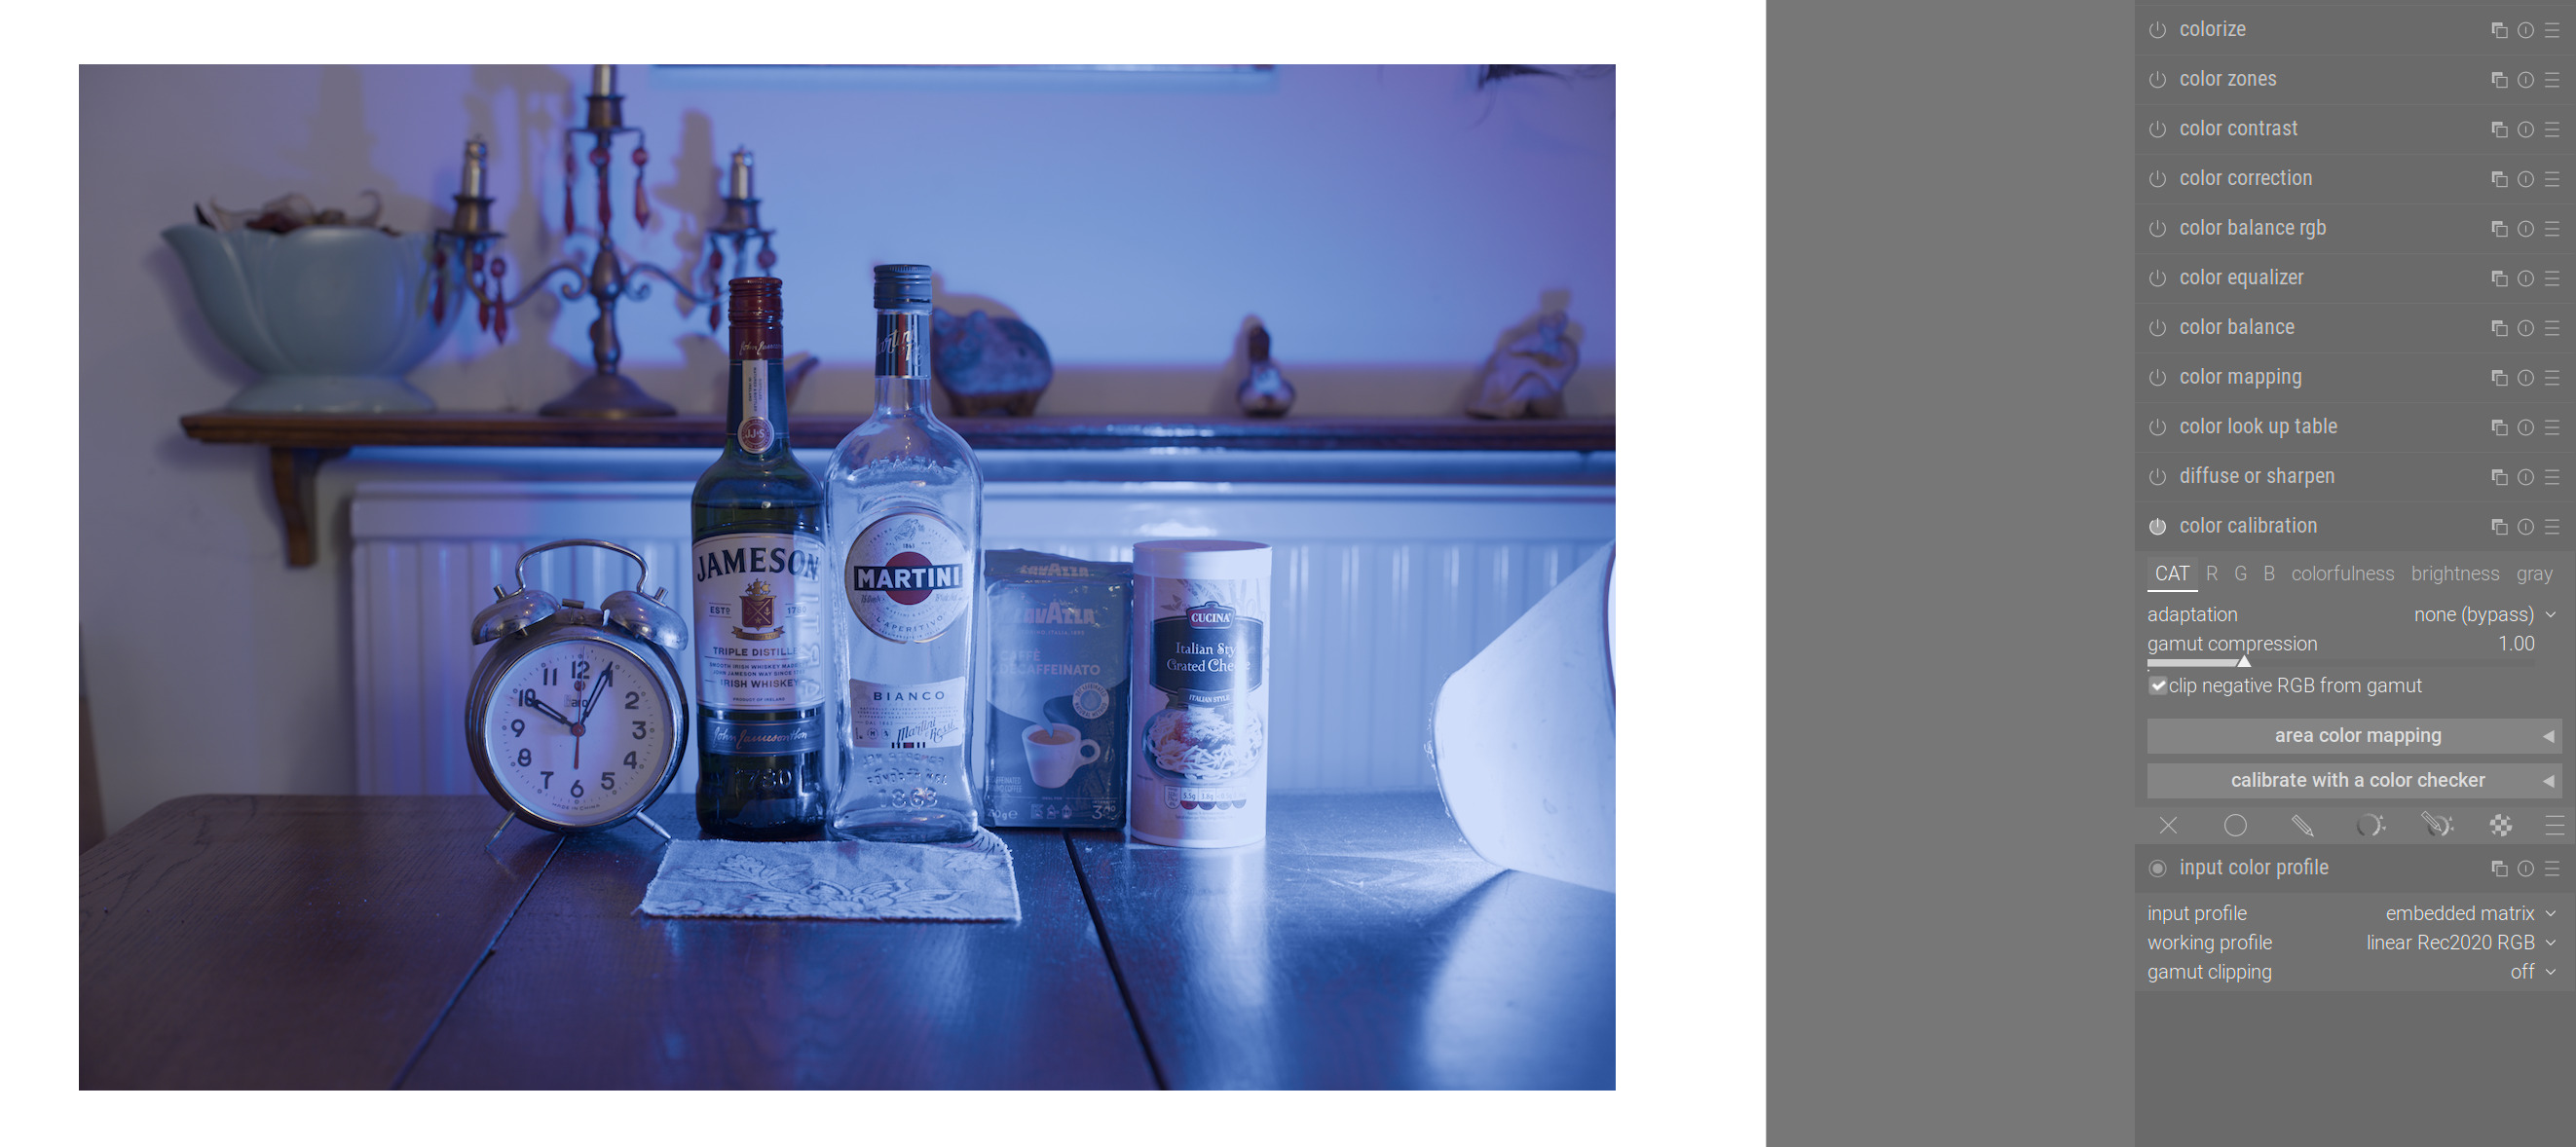
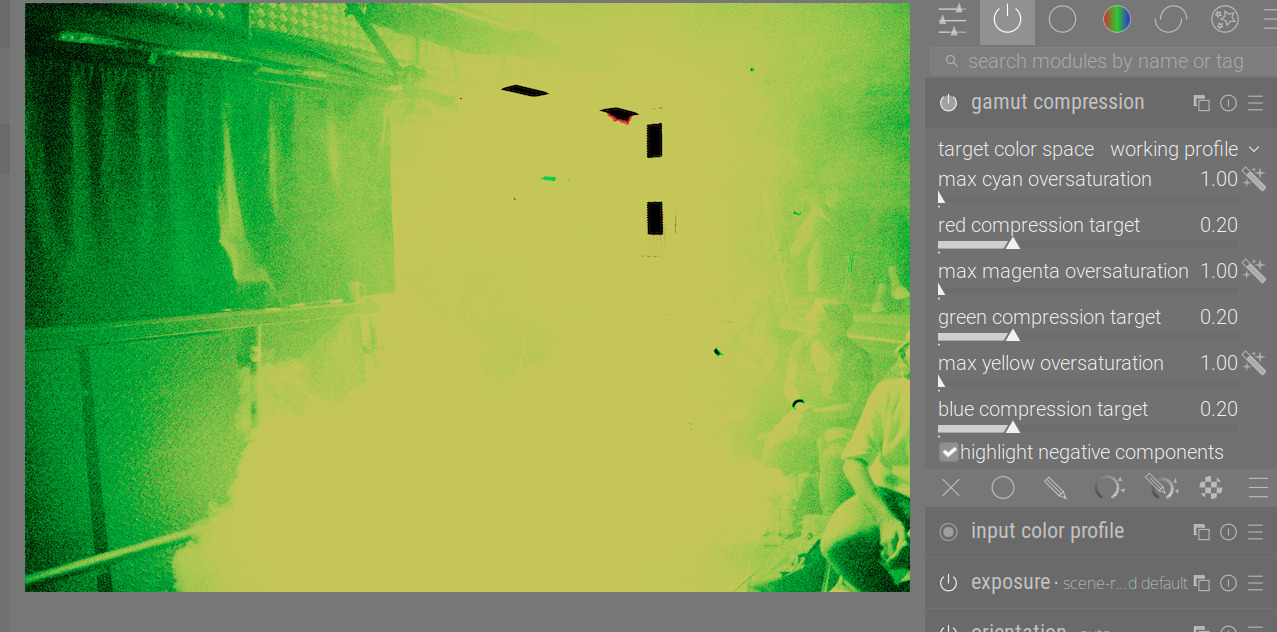
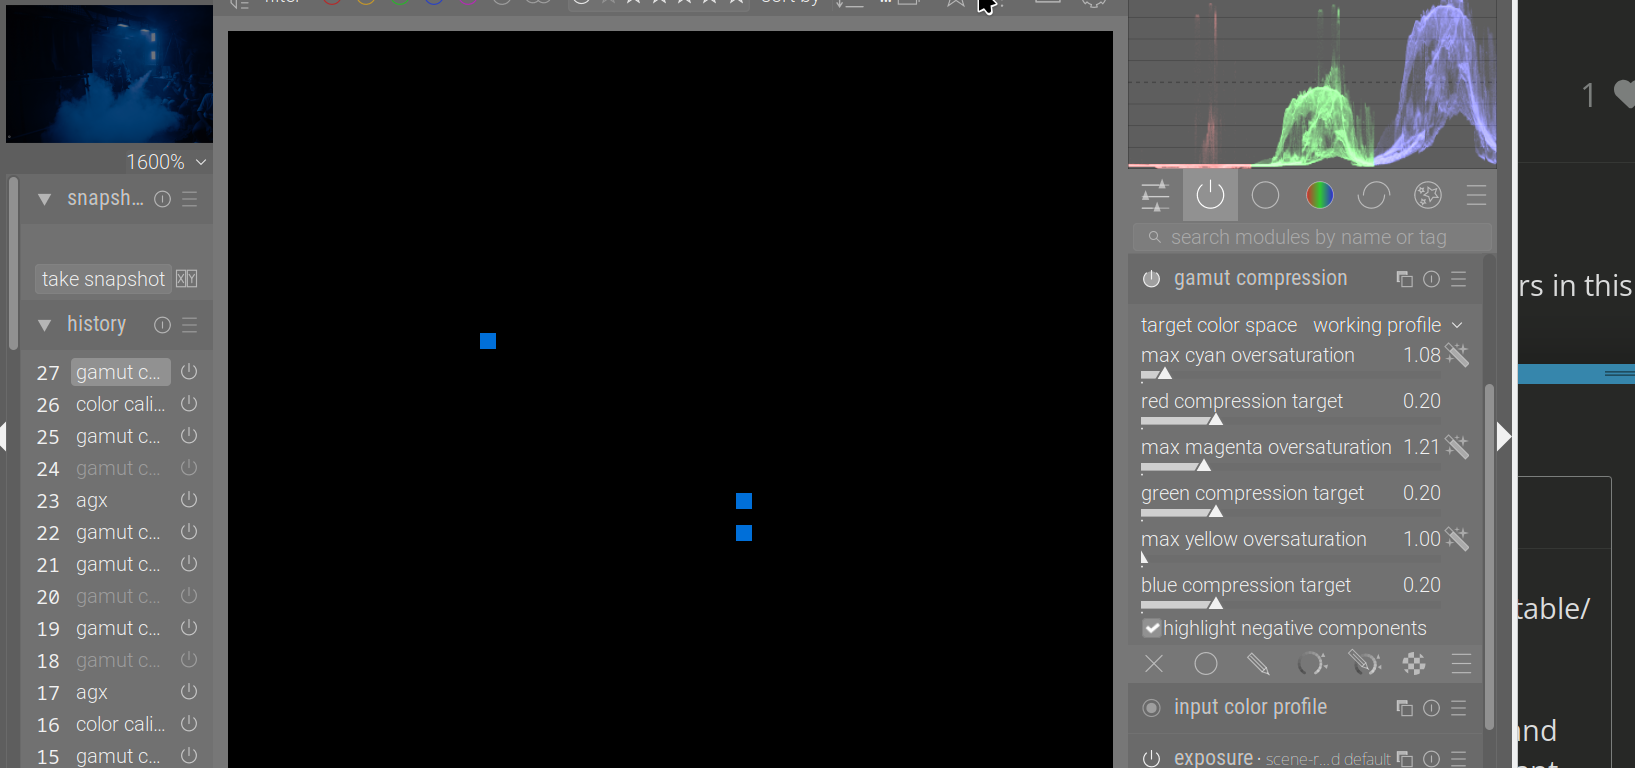
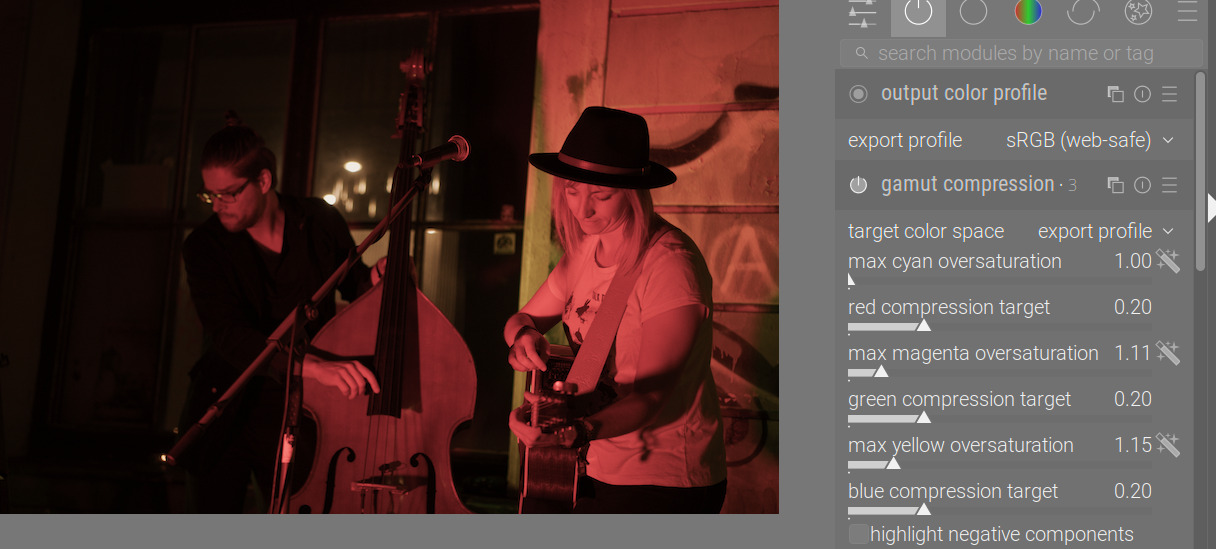
You add an instance; by default, it comes before output color profile and works against the export profile, but you can move it wherever you want, and switch it to e.g. working profile:
Then, you can check what’s out of gamut. For all pixels, positive components are set to 0, negative ones set to 1, so in-gamut pixels turn black, those where only red is negative turn red, where red and green are negative, turn yellow etc.
You can skip this step, but it’ll be useful a bit later.
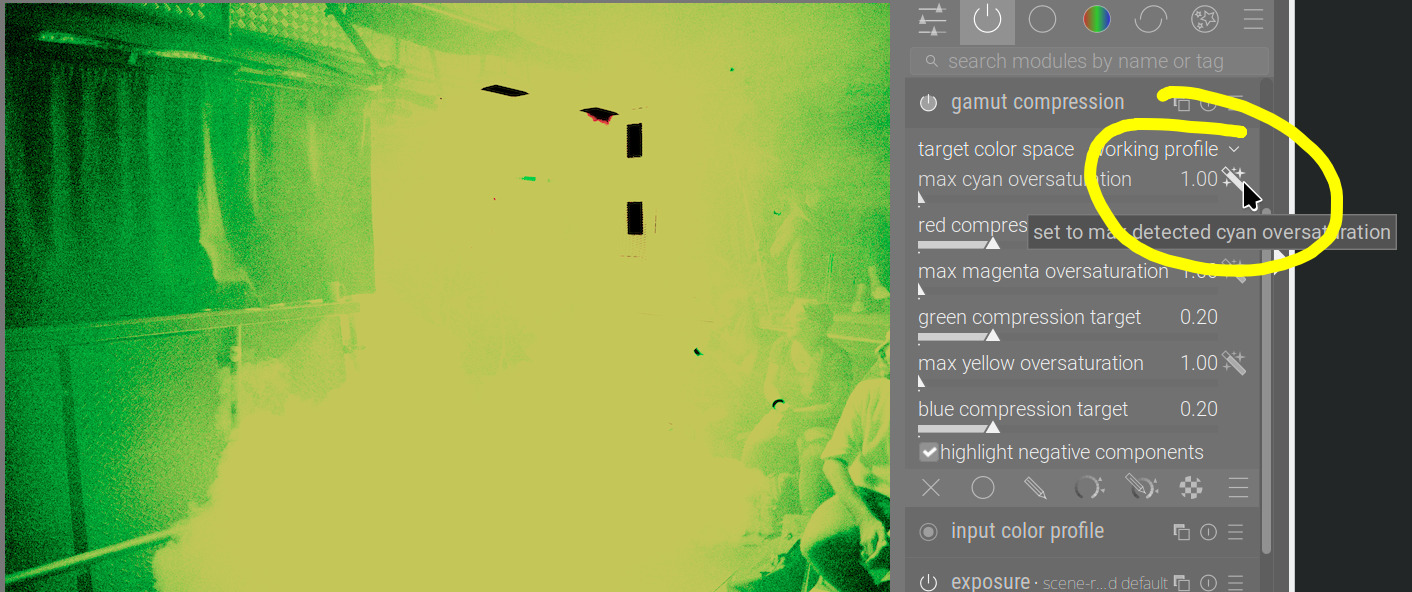
You can then click the pickers (I can later provide a ‘pick all’ as well):
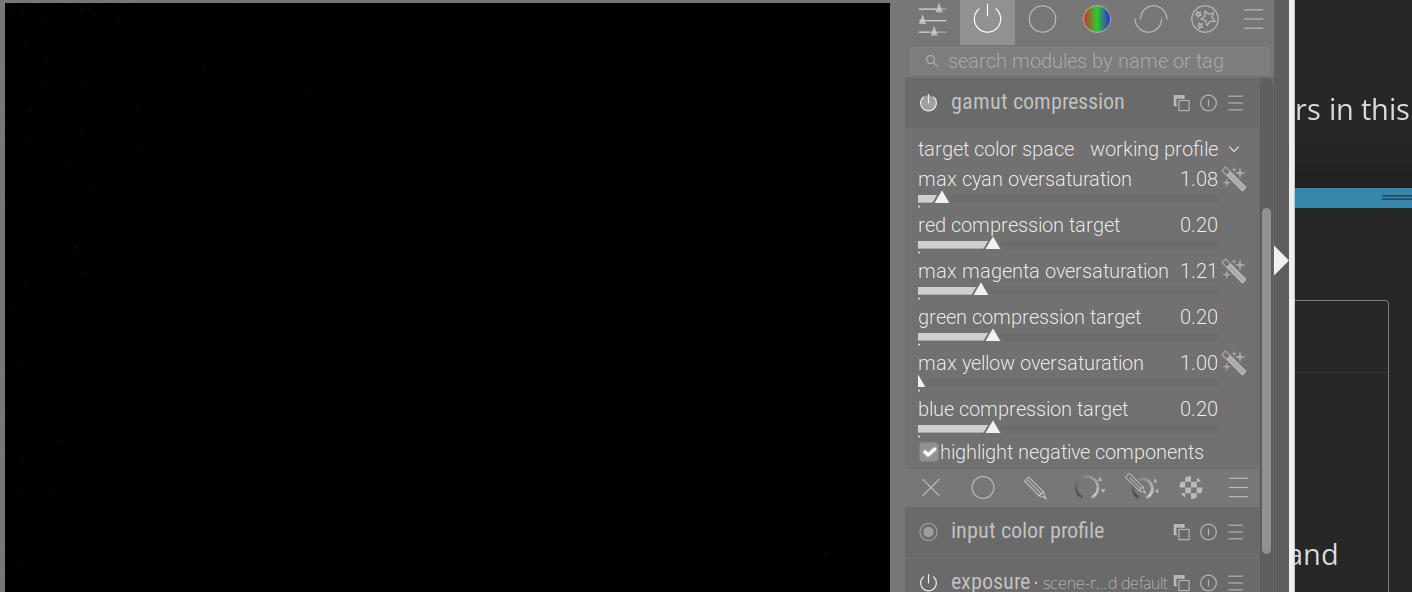
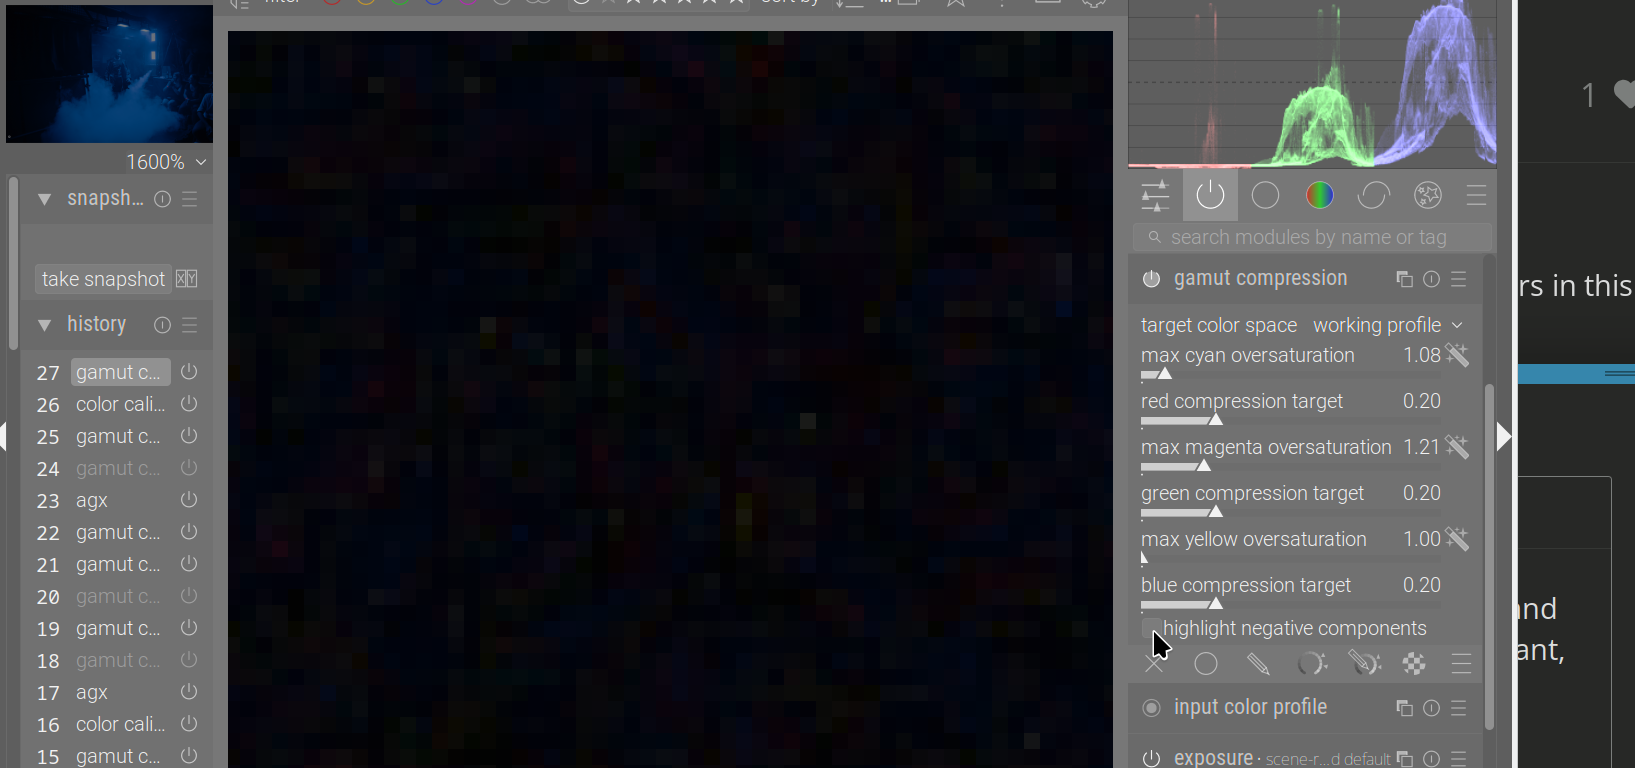
After picking them all, you’ll get a black image, or one with very dark ‘noise’. That’s because I exclude the darkest pixels from analysis, as they are so close to black that their ratios between components can be high (overestimating the required compression), while having no visible effect:
Some left-over dark pixels, with highlight negative components on and off (just to confirm they really are dark):
That’s all.
On the musicians image, compressing to the export space (sRGB):
After the pickers:
All of the left-over pixels are on dark areas:
I’m considering adding a final clip to ensure those dark pixels don’t carry on any negative values.
So, if you want to try it:
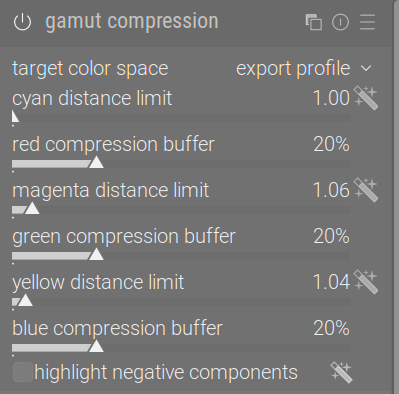
target color space: what you want to compress into. The output of the module remains in pipeline working space, even if you set sRGB, but the colours themselves will fit into sRGB (no negative components, but values > 1 are possible – this is not a tone mapper)
cyan/magenta/yellow distance limit: a distance of 1 means a fully saturated pixel, at least one of the components is 0. A distance > 1 means one or more components have been pushed below 0. If red is below 0, that’s because of its complementary colour, cyan, and same for the others. Use the pickers next to the sliders to get a reading from the image. Note that you’ll need to use HQ rendering in the darkroom for the pickers to work properly.
red/green/blue compression buffer: how much of the valid gamut is to be used as buffer. If set to 20% (default), 80% of the colour range will be left alone, and the 80% - 100% range will be used to move all oversaturated pixels inside the gamut.
highlight negative components: provides a false-coloured view (only for the darkroom view, not applied for export etc.) Ideally, it would be black. However, even after using the pickers, some pixels (in dark areas) may remain, as I’ve found that those dark regions can have high distances, and raising compression to manage those leads to desaturation, while the dark regions are not easily seen, anyway. If the highlight negative components checkbox is disabled (or the module is used during export runs), those remaining negatives will be clipped to 0, to ensure the output contains no negatives.
Placement/usage:
Just before output color profile: use it with the default target export profile. Before tone mappers: use it with the target working profile. Try experimenting, and please provide feedback.
Linux AppImage (now hopefully fixed):
https://tech.kovacs-telekes.org/dt-gamut-compress/Darktable-5.3.0%2B355~g0b6aedcb38-x86_64.AppImage
The code has been synced with master, and contains all changes up to and including:
commit 737e214bc37c7ad783505334a8bea3d04869689c (origin/master, origin/HEAD)
Author: Jeronimo Pellegrini <j_p@aleph0.info>
Date:   Sat Sep 13 09:07:00 2025 -0300

    Udates to pt_BR
So, it is equivalent to g737e214b (+ the gamut compression module).
You are strongly advised to isolate this branch from your normal XMPs and database.
Warning: the previous version of the AppImage uploaded here used to crash/hang; the updated one, Darktable-5.3.0+355~g0b6aedcb38-x86_64.AppImage, hopefully works. The old AppImage has been removed.
The new AppImage hopefully fixes the hang (also updated the post above):
https://tech.kovacs-telekes.org/dt-gamut-compress/Darktable-5.3.0%2B355~g0b6aedcb38-x86_64.AppImage
Thanks for another cool module!
Here’s my observations after playing for half an hour:
Is definitely an improvement on simply using rendering intent.
Defaults of placing it before output profile (using export profile as target space) and 20% compression work very well. On some occasions - such as on some highly saturated flowers - I can make a case for placing it before the tone curve (still using export profile as target space), to retain a bit more detail in the petals, but not all. Probably not enough to justify changing the default settings. Try it on this: Red flower monster
The highlight negative components checkbox is great to show just how well the auto pickers work. Now I just trust the auto pickers, and don’t need the checkbox.
Thank you. The ‘red flower monster’ has been one of my test images for long. ![]()
The above was in response to
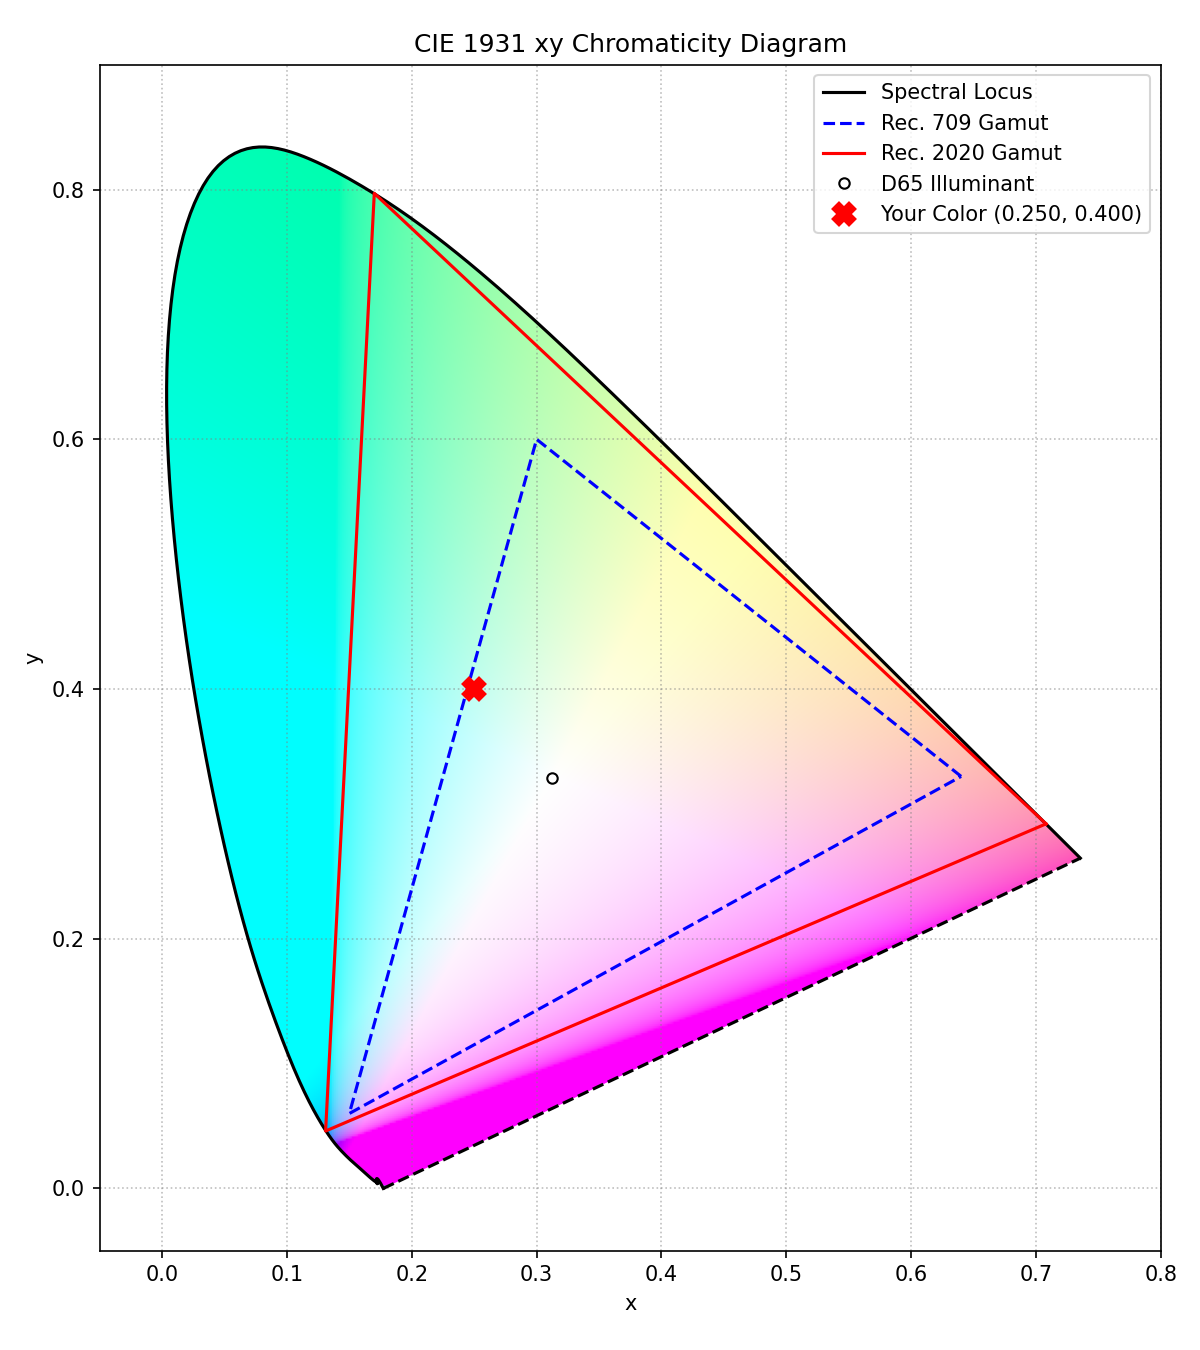
Looking at those numbers I posted from the office, they are probably wrong. However:
xyY (0.2, 0.4, 0.3) is linear Rec 2020 (0.0748, 0.3897, 0.2724) (so perfectly valid), but its linear Rec 709 encoding is (-0.1246, 0.4299, 0.2643). You can see it’s outside the smaller triangle (Rec 709), but well inside the bigger one (Rec 2020).
Moving a bit to the right on the diagram:
xyY (0.25, 0.4, 0.3) is linear Rec 2020 (0.1487, 0.3641, 0.2378) and linear Rec 709 (0.0156, 0.3920, 0.2267). We are now inside the Rec 709 gamut (just barely), and there are no negative coordinates.
BTW, it’s also possible to get 2 coordinates negative (‘behind’ the vertices):
I’m attaching the script I had Gemini generate. Remove the .txt. It works on Linux, no idea about Windows. You may need to install some Python libraries.
Usage:
$ csc.py
Color Space Converter. Formats: '<2020 or 709> R G B' or 'xyY x y Y'
Requires scipy: 'pip install scipy matplotlib'
Press Ctrl+D (or Ctrl+Z on Windows) to exit.

> 2020 1 1 0
  - Diagram saved to: rec2020_1_1_0.png
  - Converted to Rec.709: [R=1.0727, G=1.0084, B=-0.1188]
  - Intermediate XYZ:         [X=0.7816, Y=0.9407, Z=0.0281]
  - Chromaticity xy:          [x=0.4465, y=0.5374]

> 709 0.2 0.5 -0.2
  - Diagram saved to: rec709_0-2_0-5_-0-2.png
  - Converted to Rec.2020: [R=0.2815, G=0.4713, B=-0.1318]
  - Intermediate XYZ:         [X=0.2252, Y=0.3857, Z=-0.1266]
  - Chromaticity xy:          [x=0.4650, y=0.7964]

> xyY 0.4 0.8 0.3
  - Diagram saved to: xyy_0-4_0-8_0-3.png
  - Converted to Rec.709:  [R=0.0623, G=0.4143, B=-0.1322]
  - Converted to Rec.2020: [R=0.1698, G=0.3838, B=-0.0808]
If it formats your disk, steals your data or provides wrong results, I take no responsibility. ![]() It looks safe to me.
It looks safe to me.
csc.py.txt (9.0 KB)
(CSC for ‘colour space converter’, but it only knows Rec 709, 2020 and xyY.)
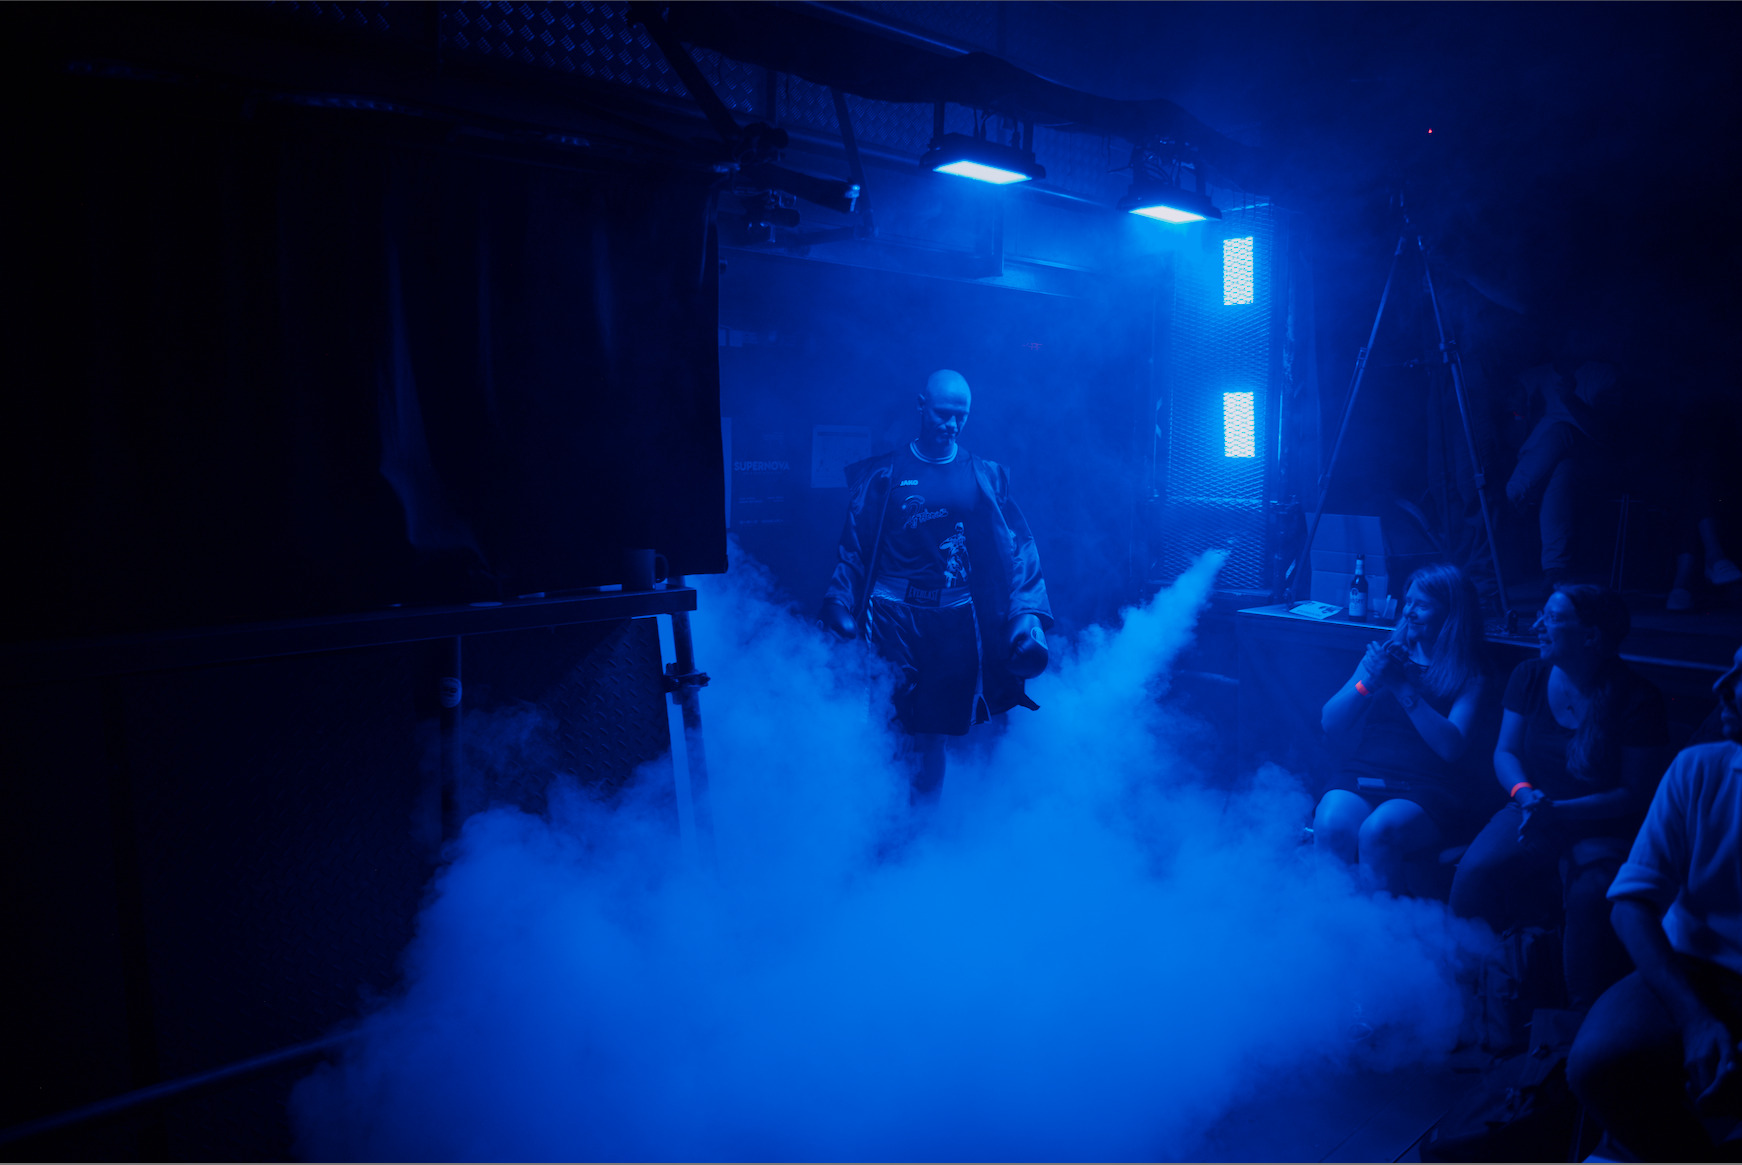
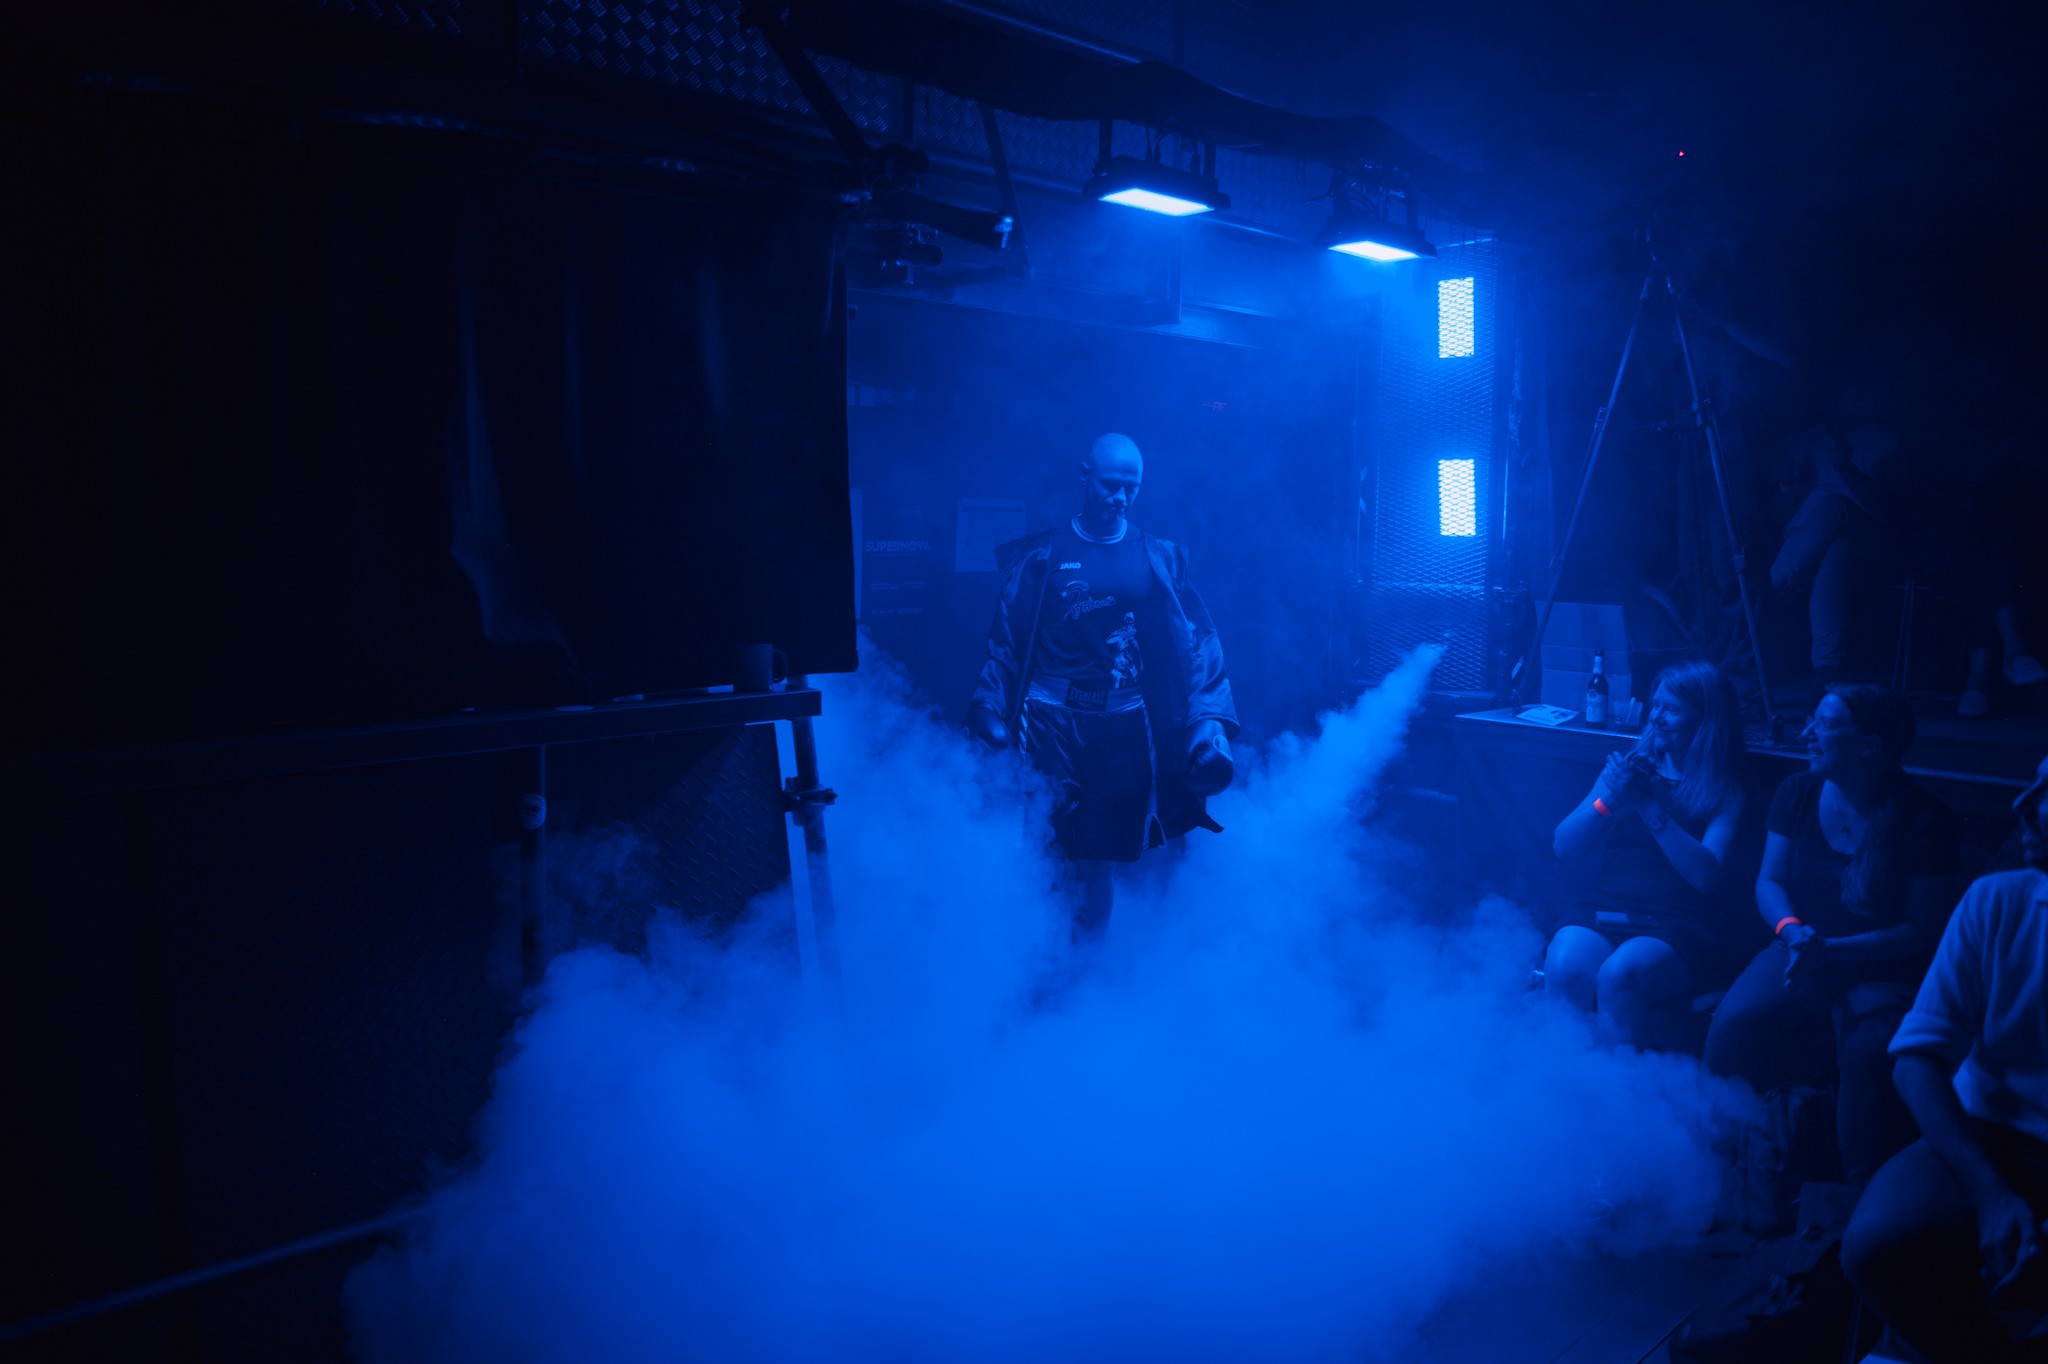
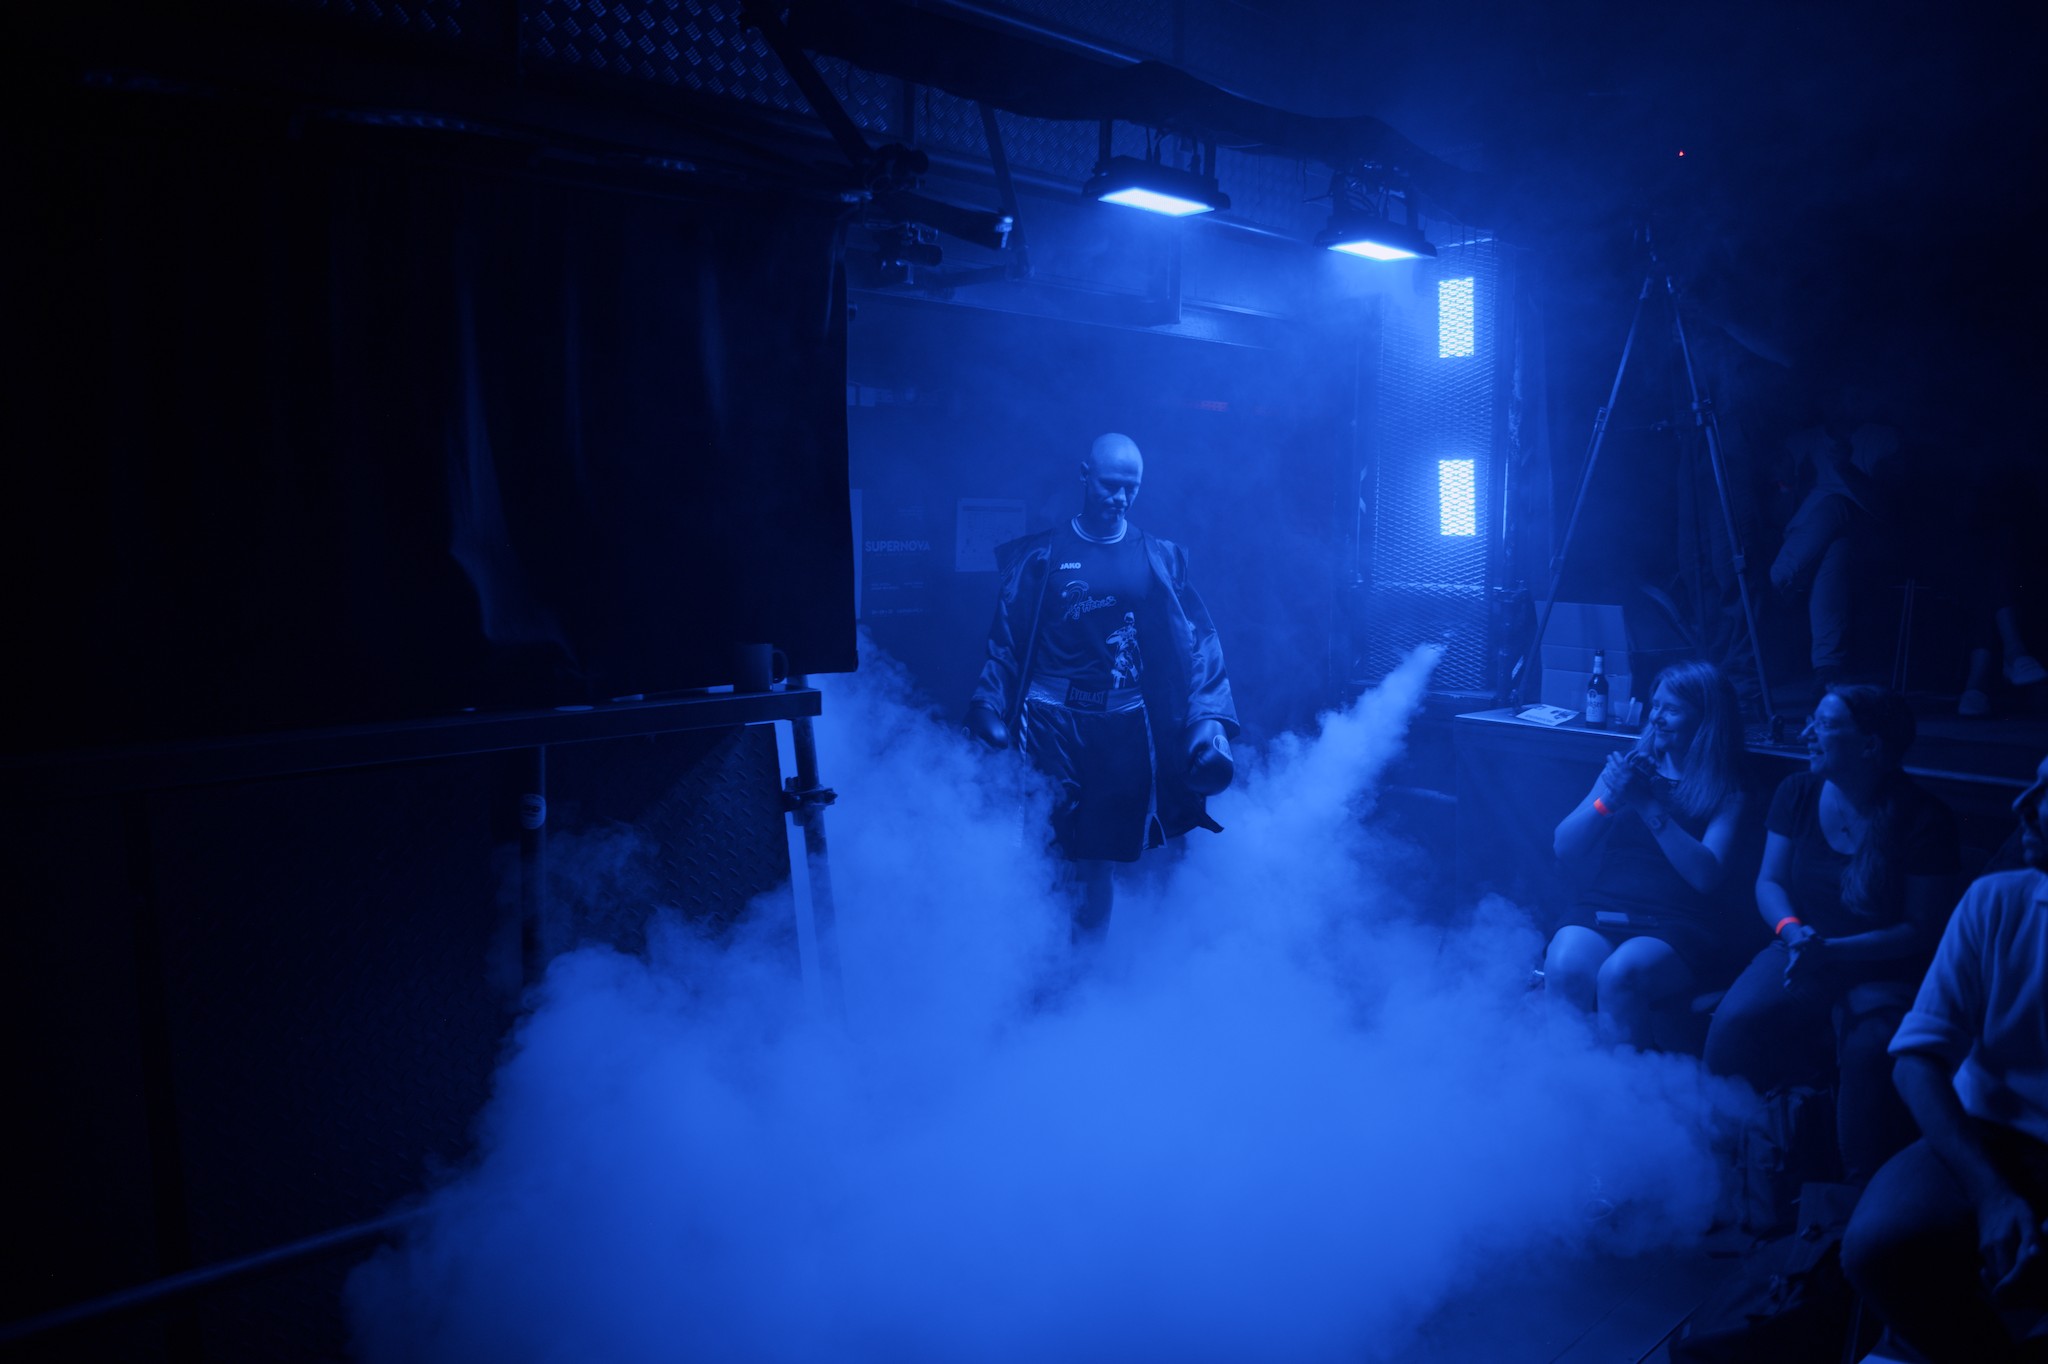
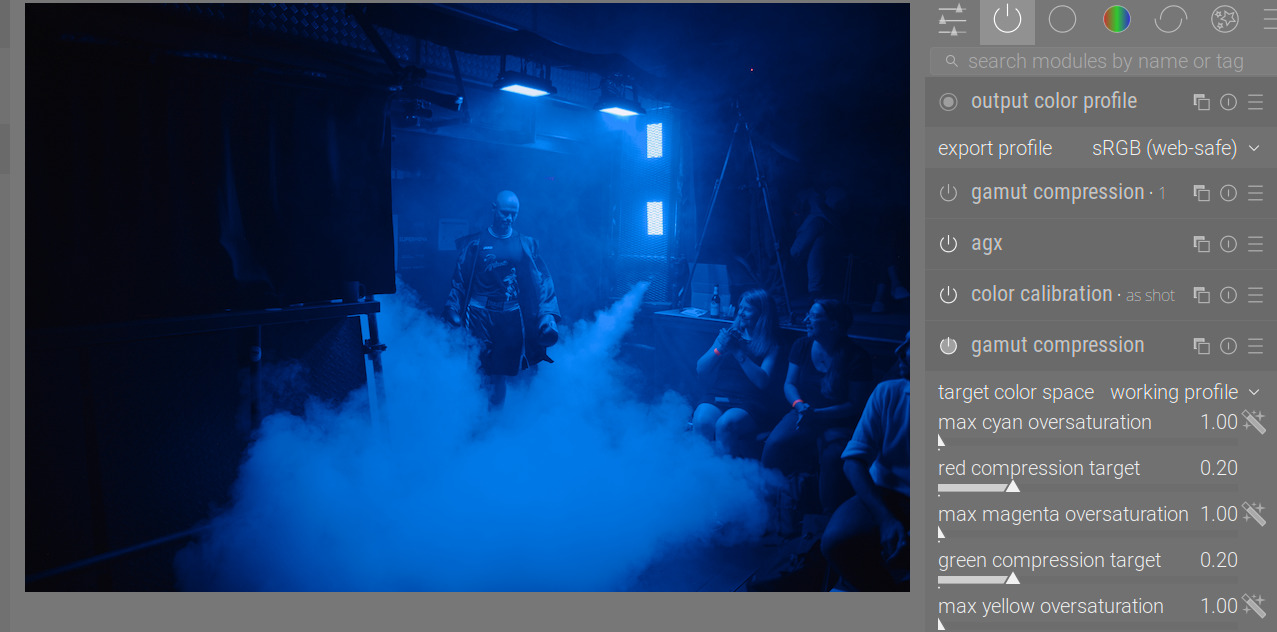
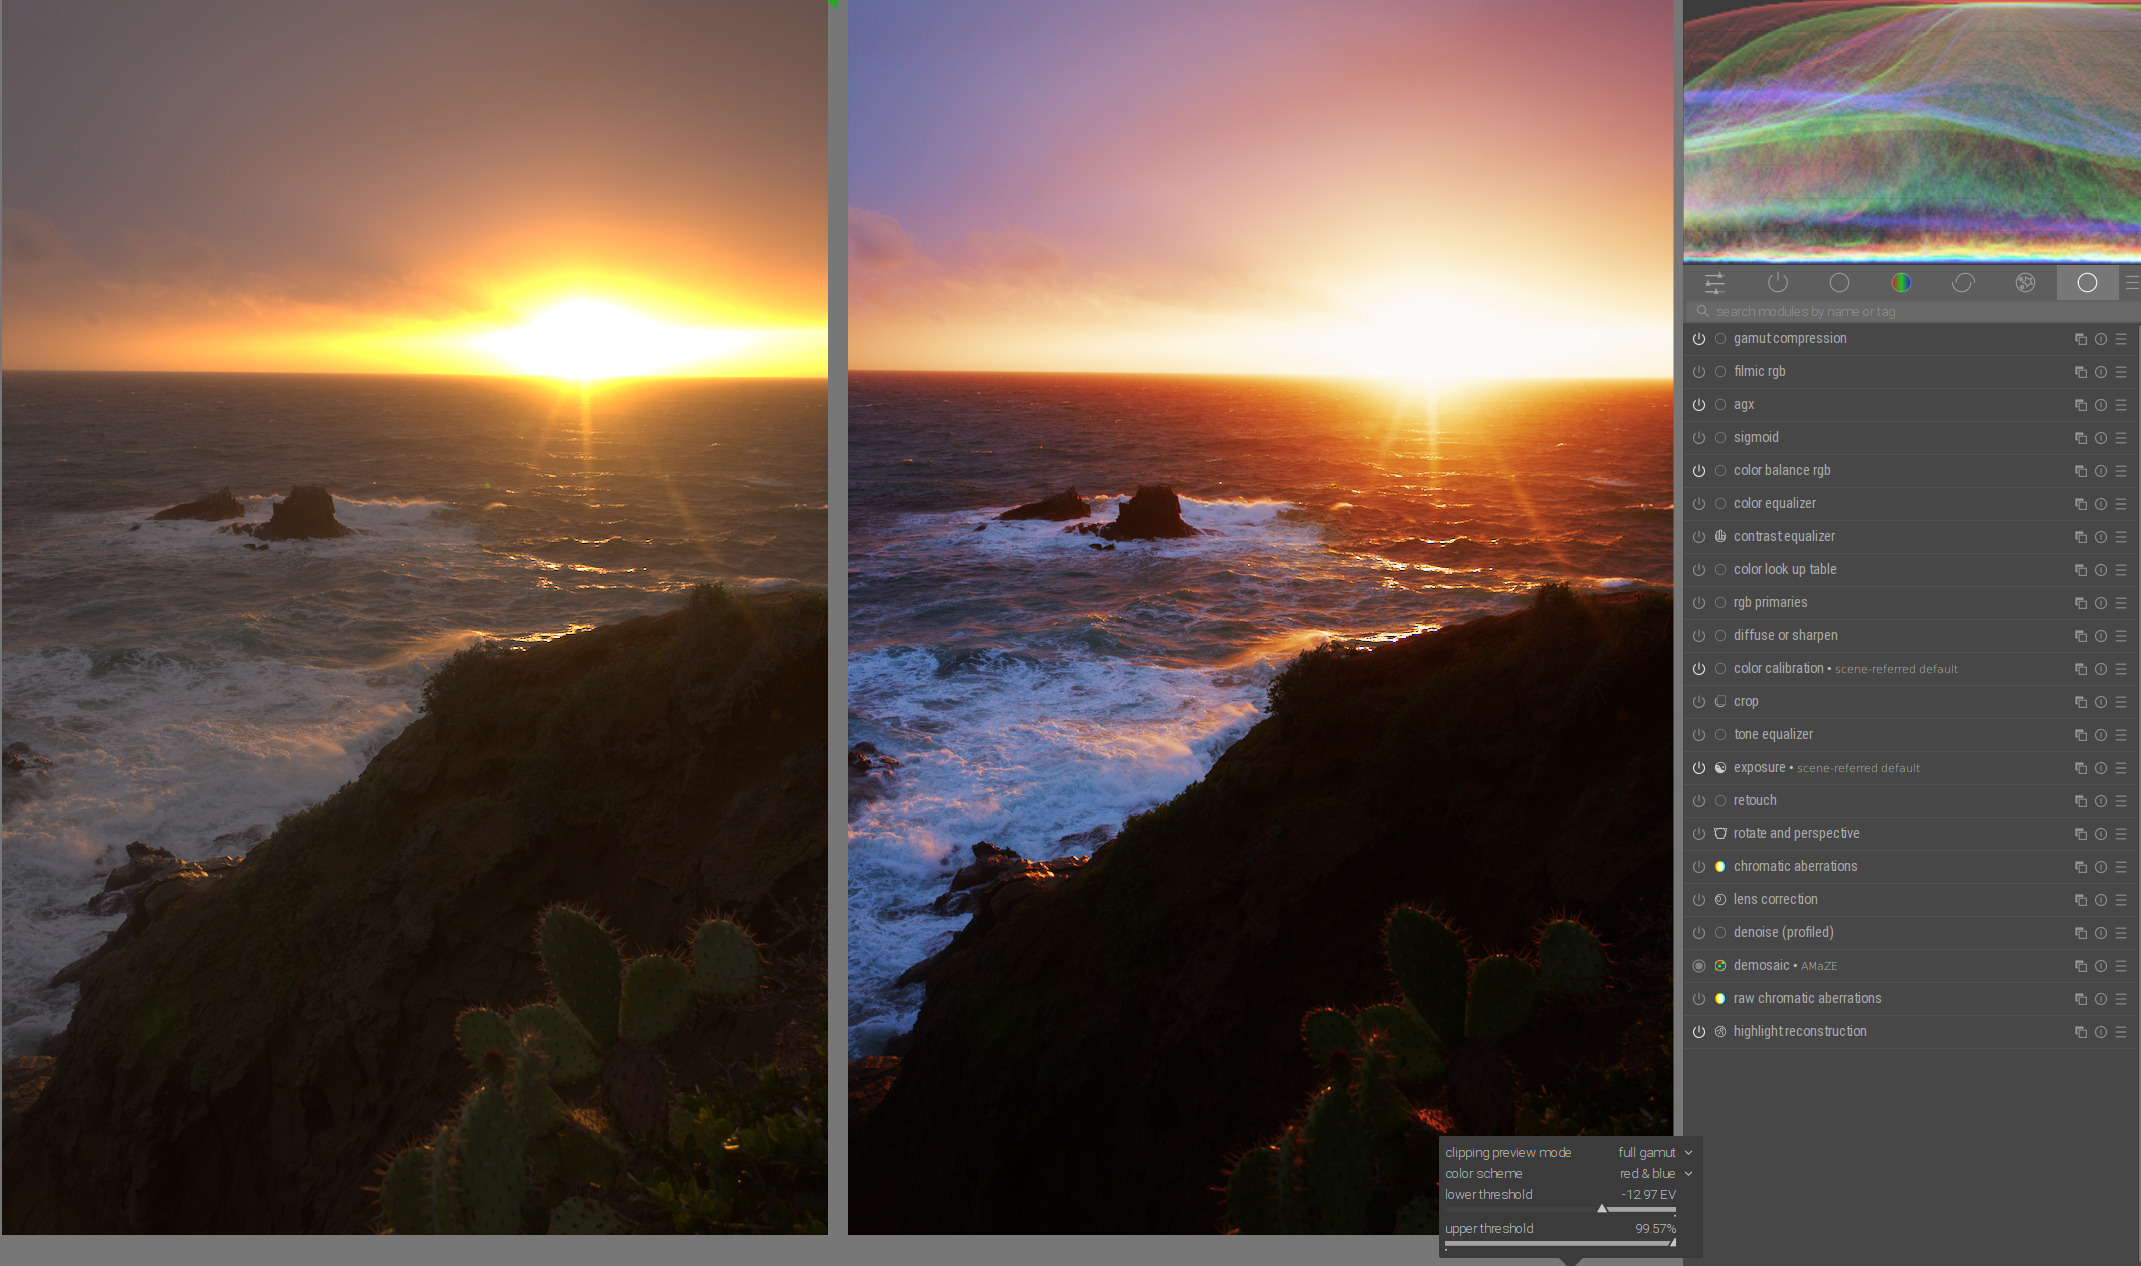
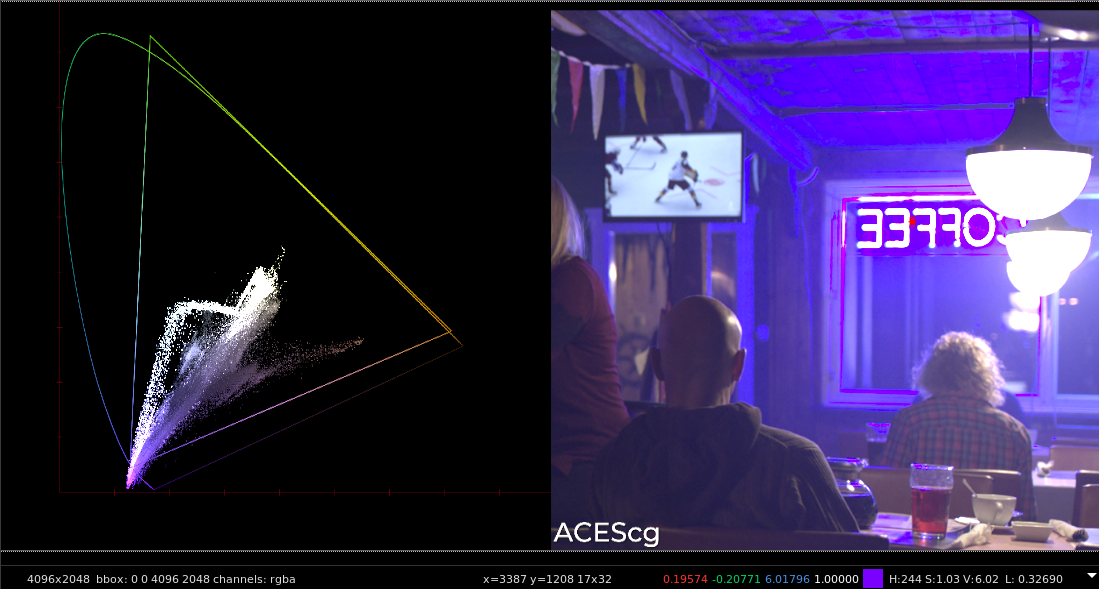
My current testing shows that we can now handle very high saturation values without any clipping.
When paired with AgX, scenes like these gain a whole new dimension:
Here, the clipping indicator is set to sRGB.
Nice work @kofa ! ![]()
Is this the correct branch…should we provide a Windows build??