Path into the Light — Exploring Editors' Limits for an HDR-ish Image

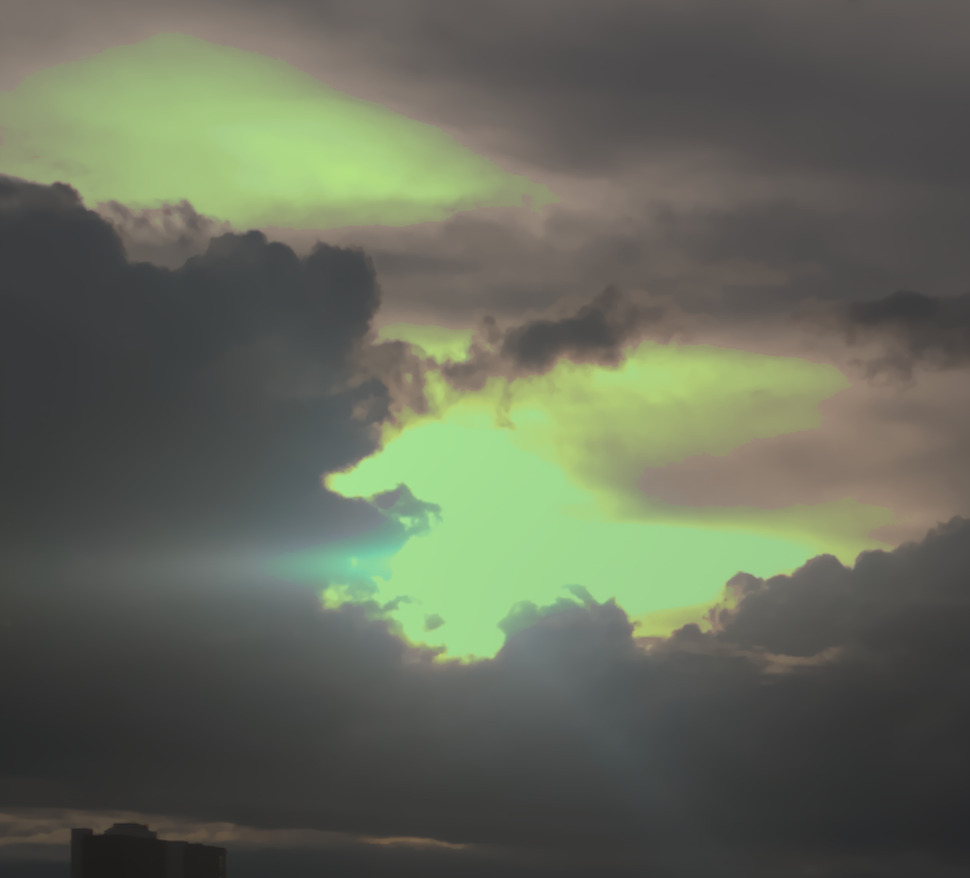
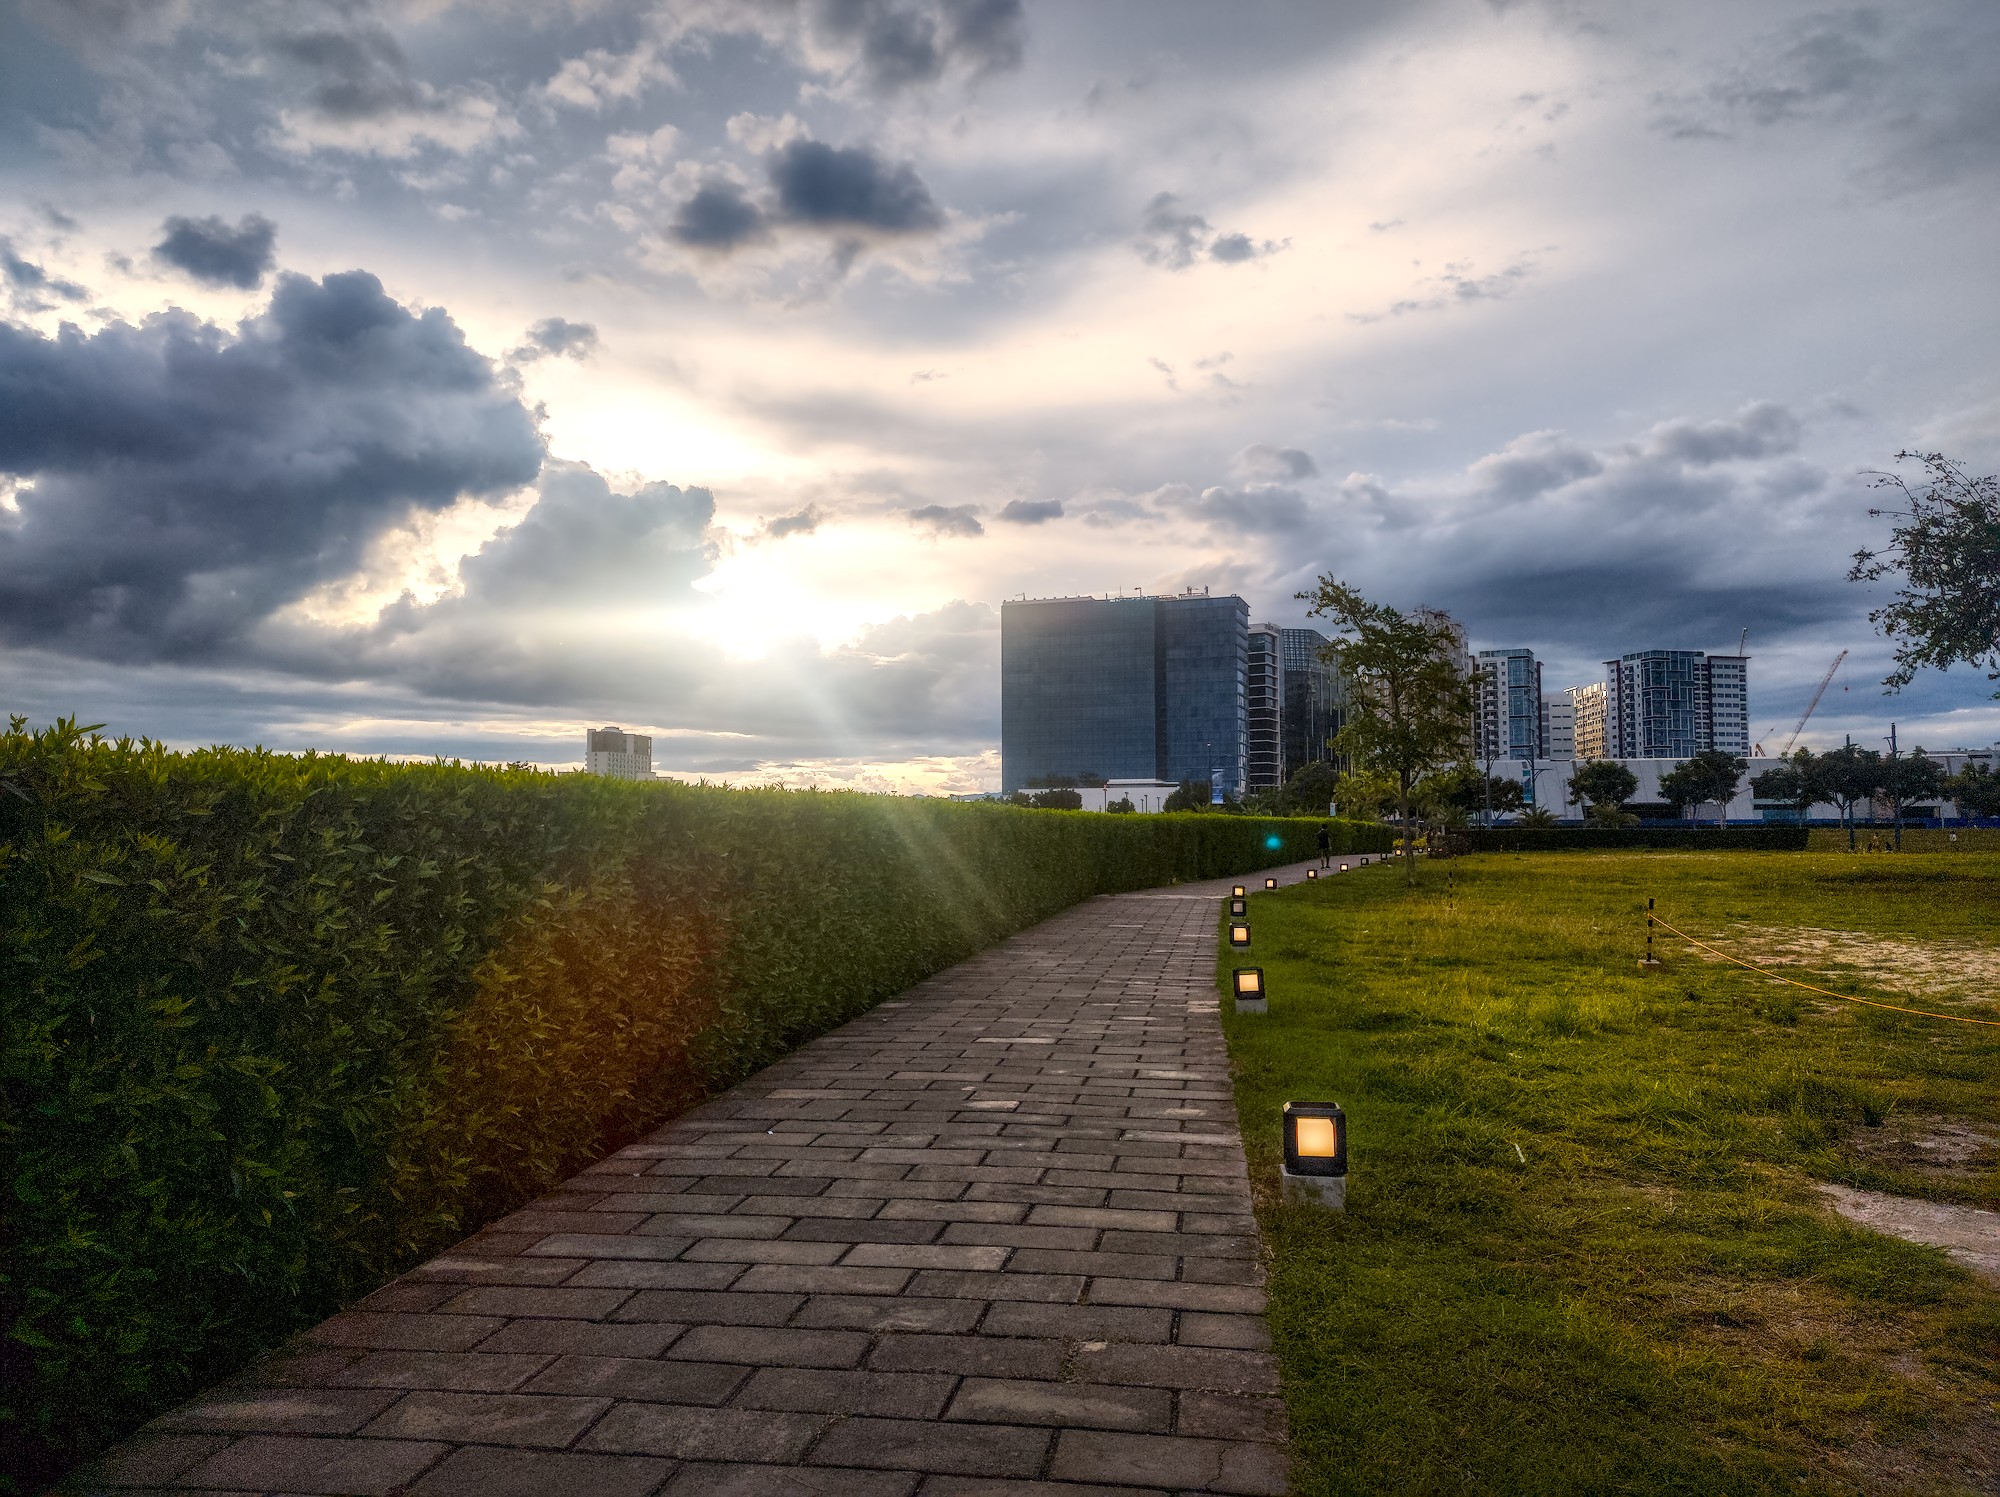
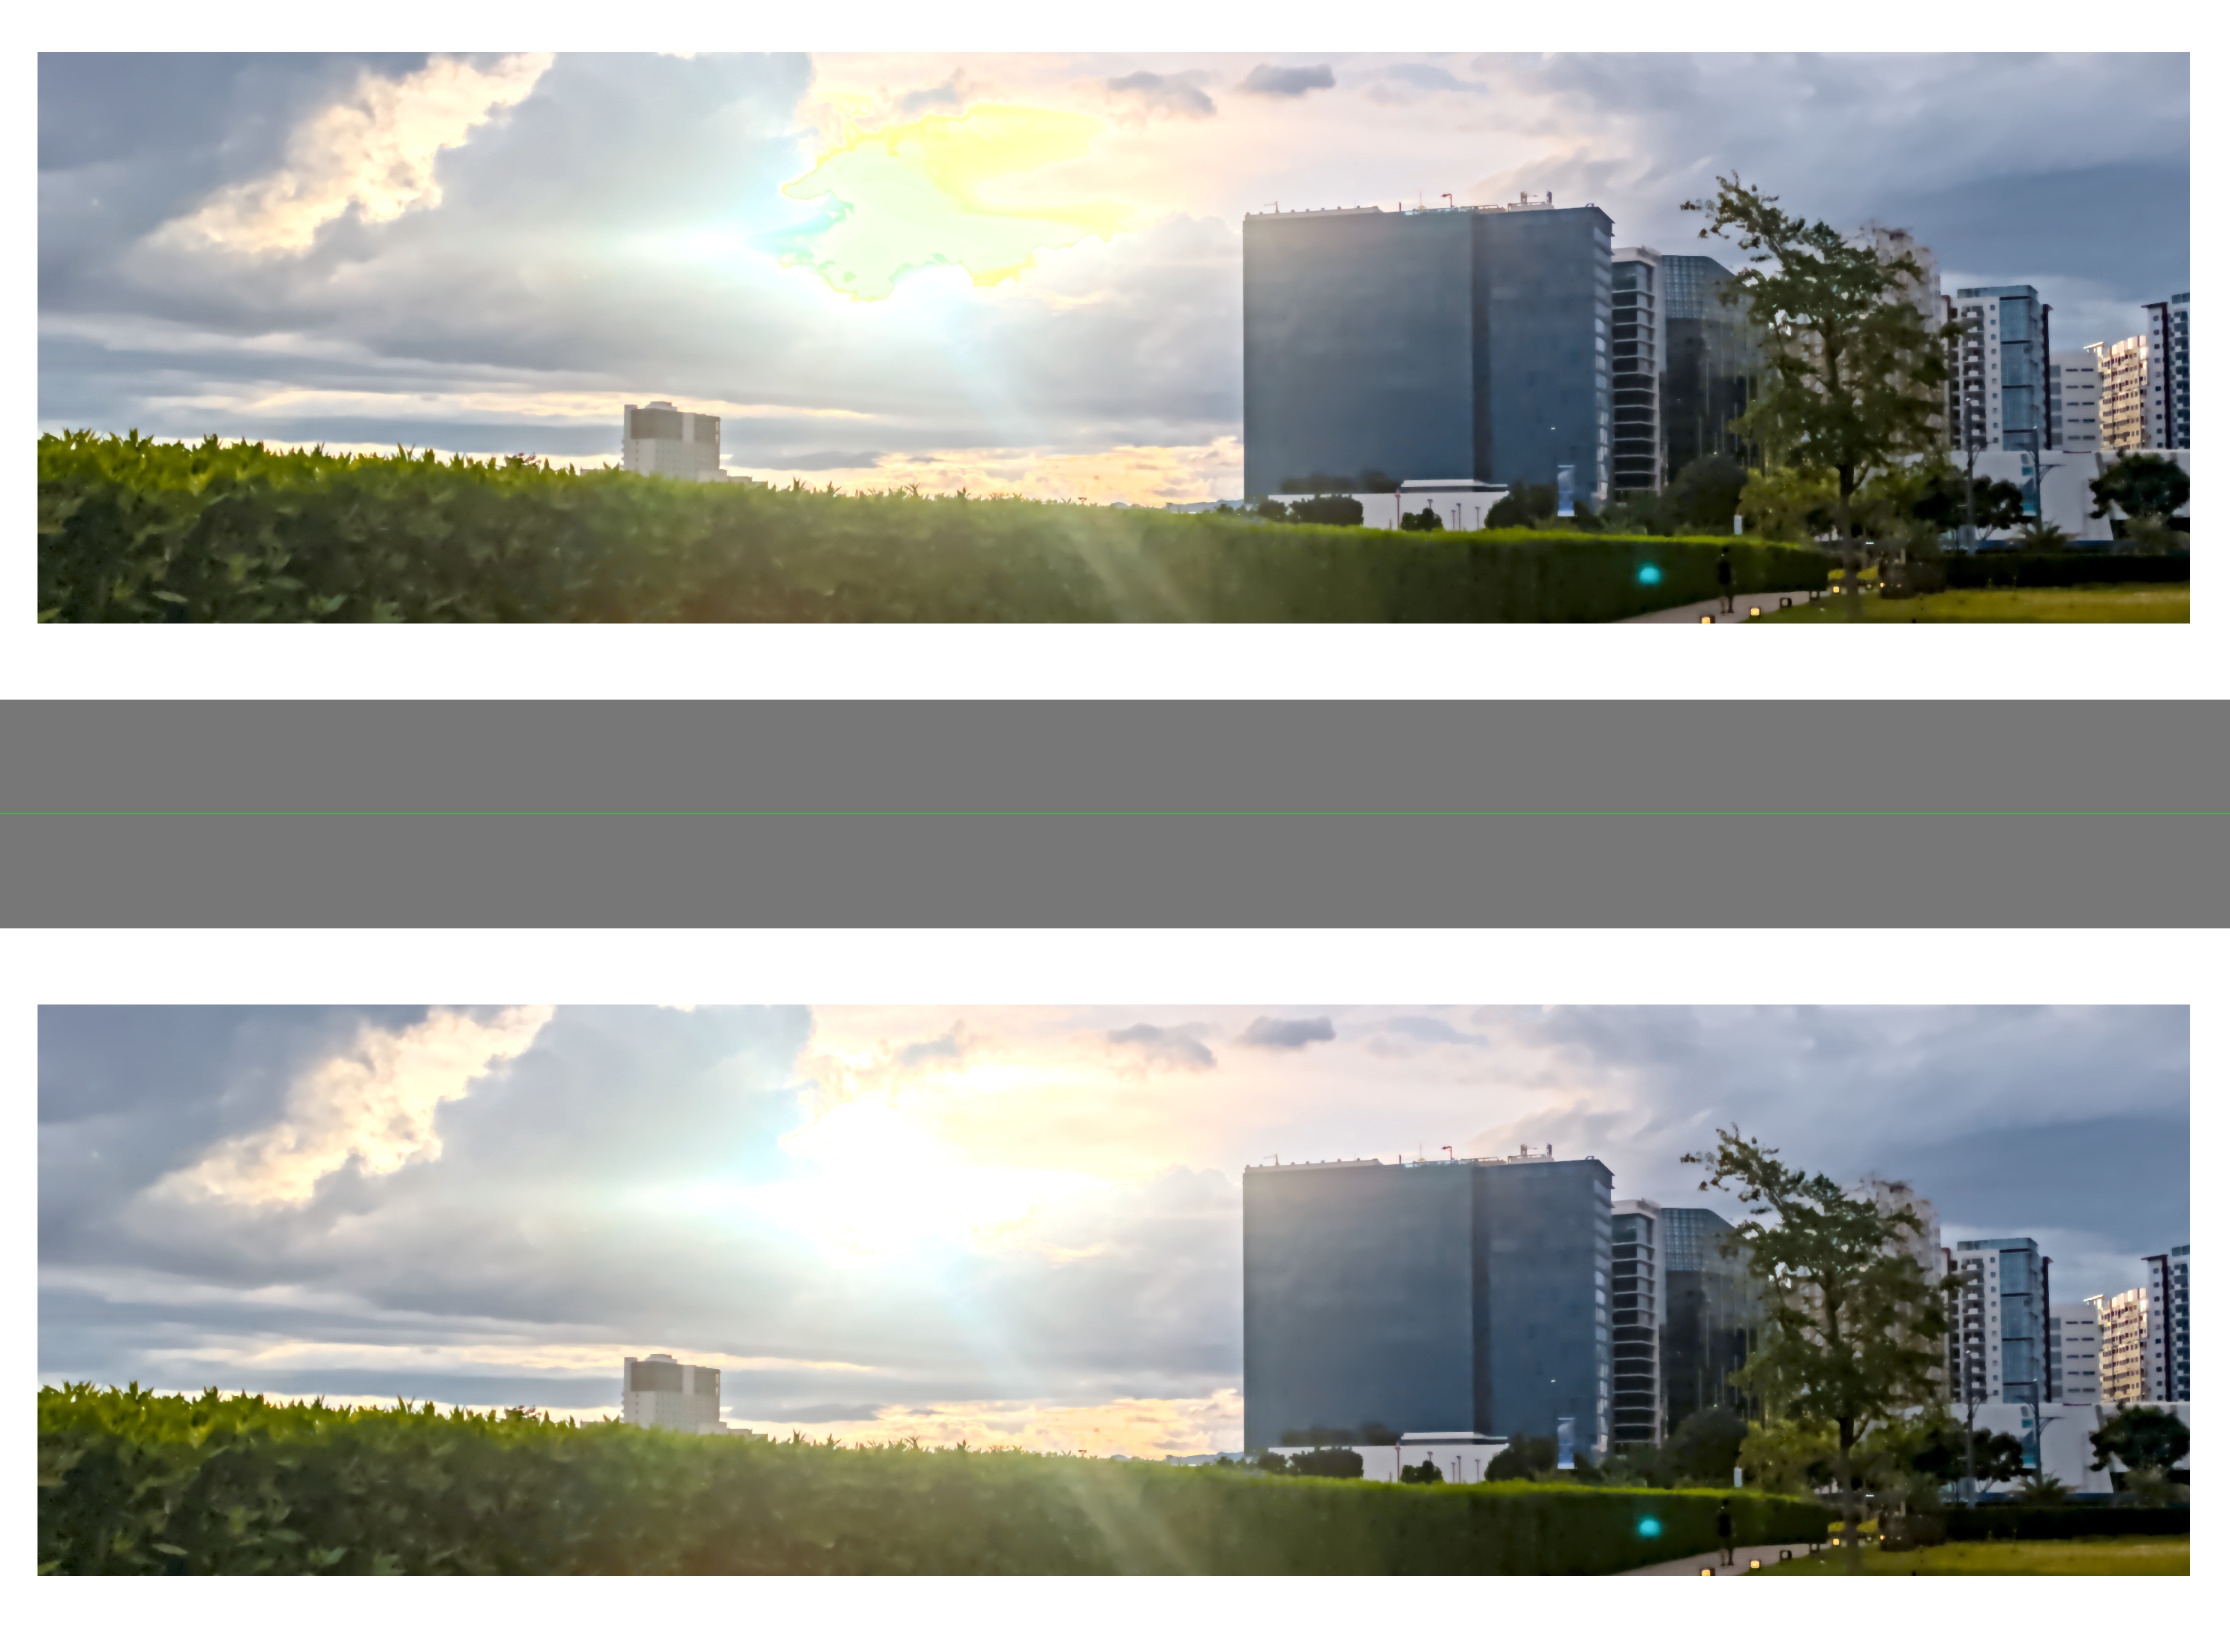
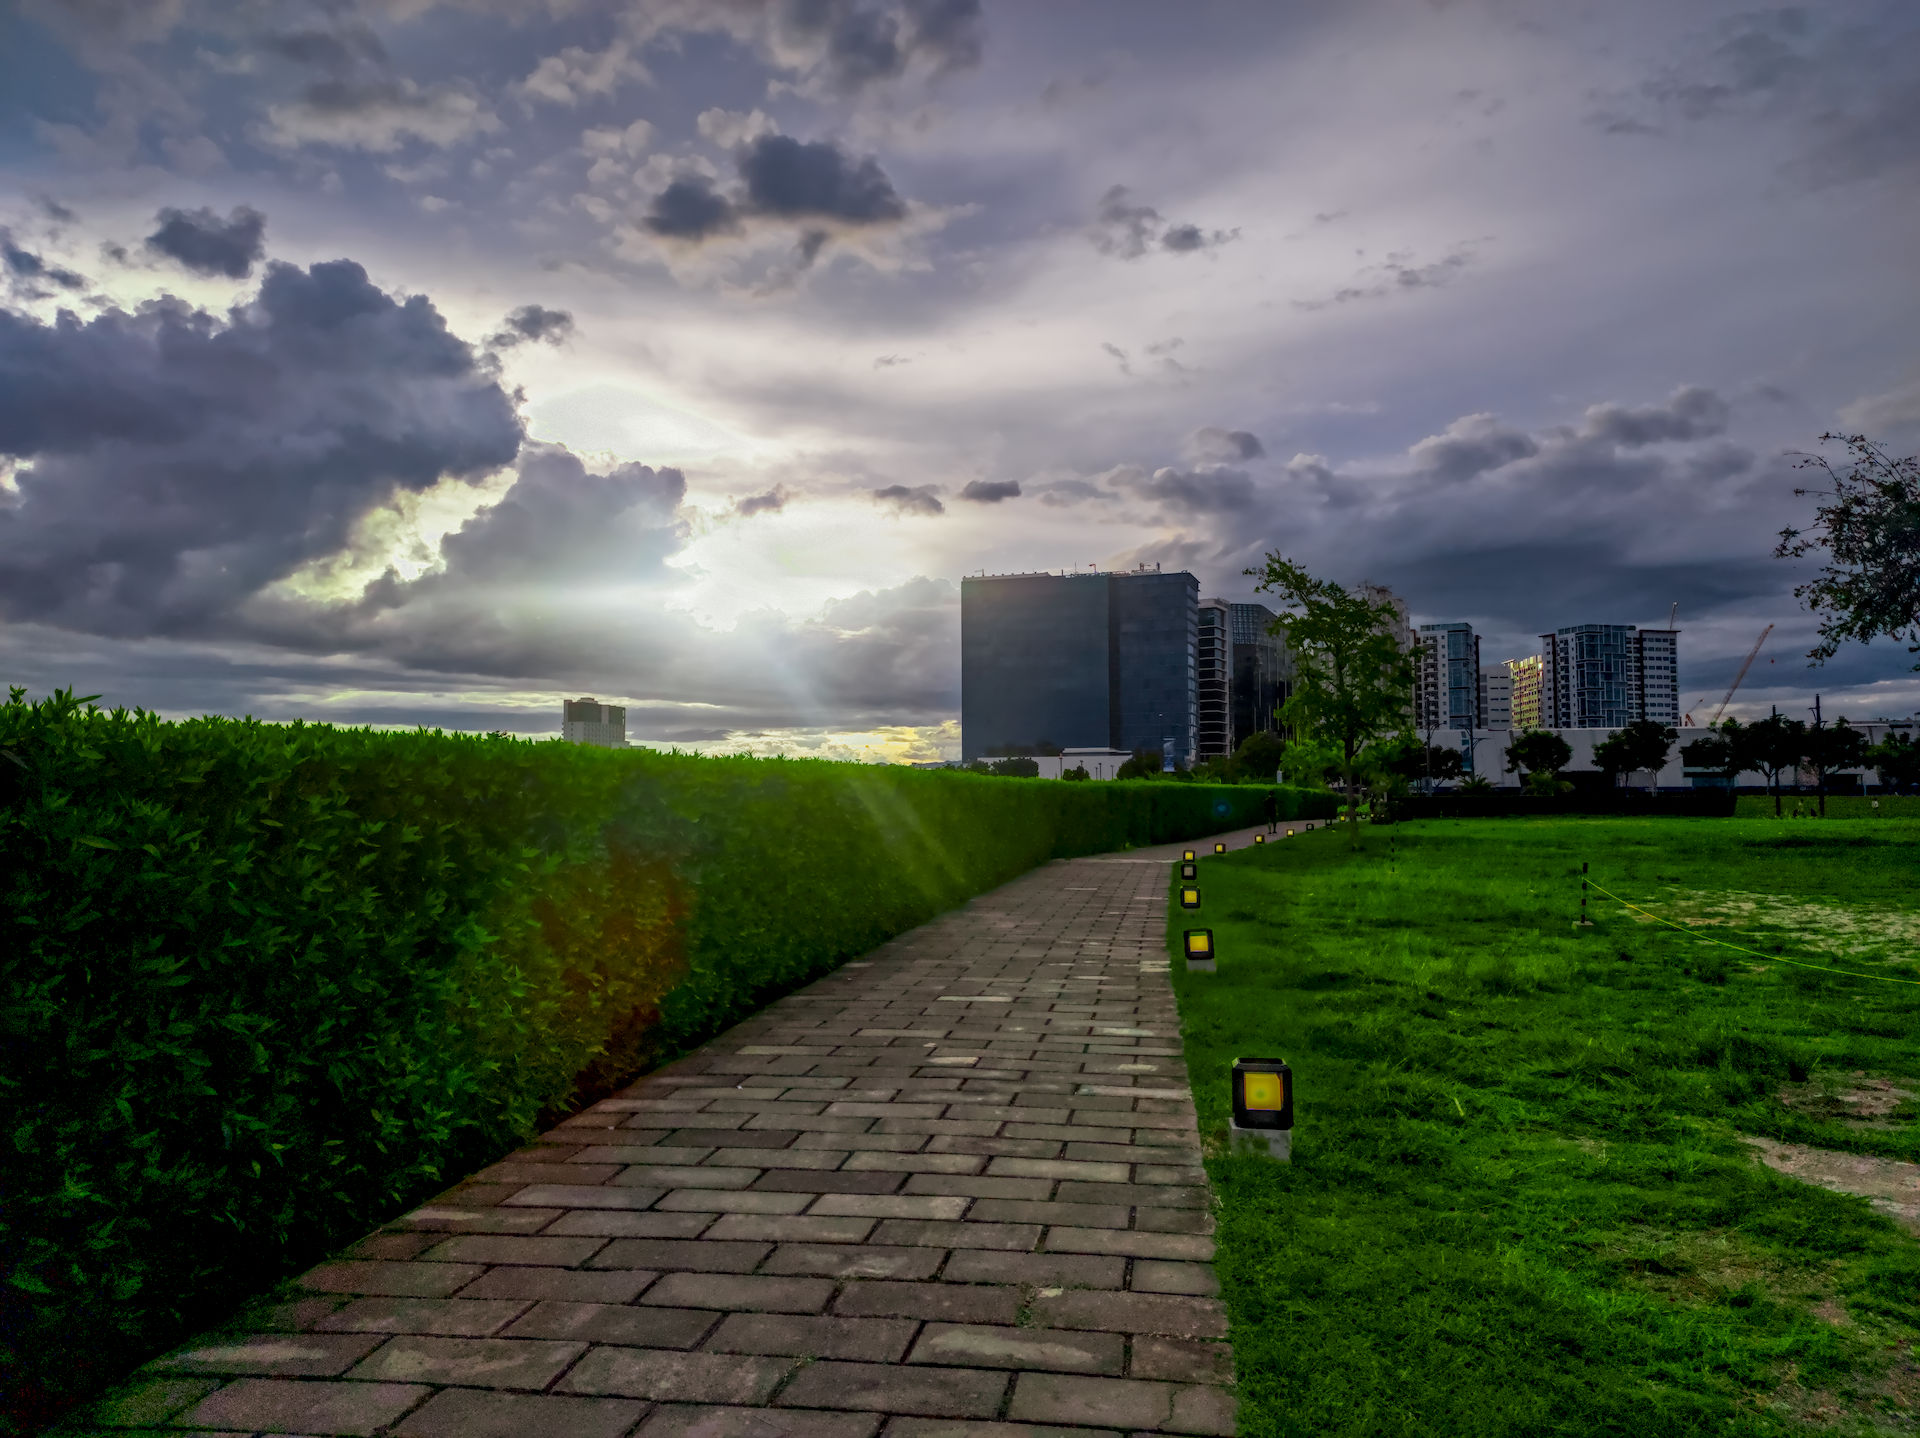
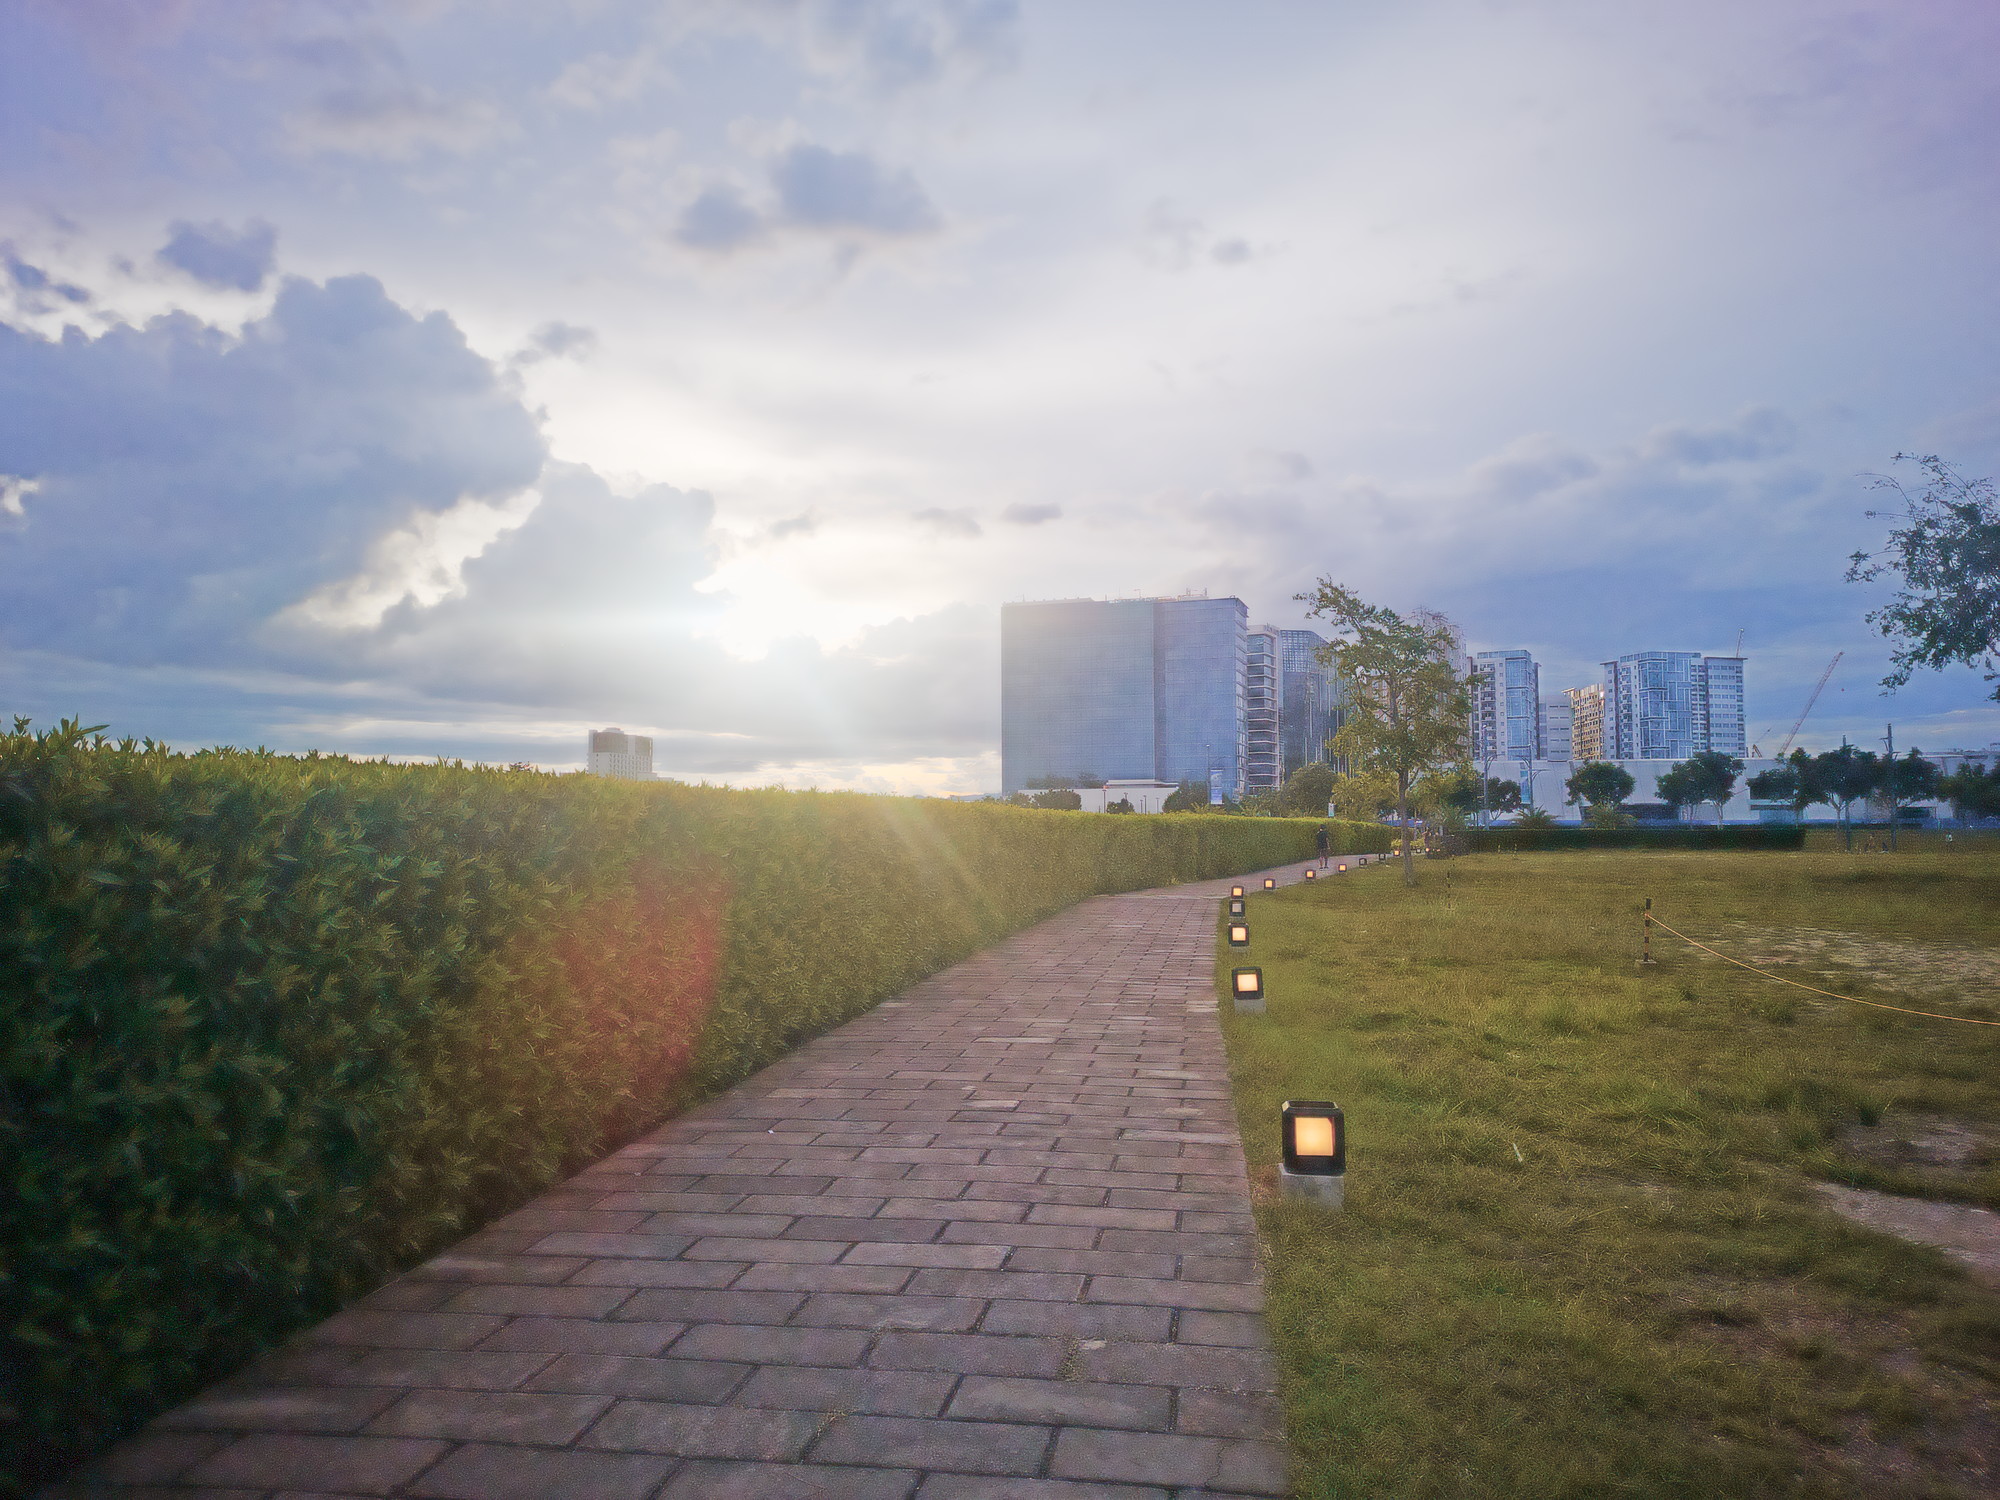
Here is what OpenCamera, running on Poco X4 Pro 5G phone, can do:

Let’s call it a reference rendering of the scene, because that’s what I shared with others before, and because I like it.

As you can see, this is a high-contrast (HDR) scene; the out-of-camera JPEG was shot in the DRO (Dynamic Range Optimization) mode and is not a result of merging multiple exposures - but it does push the sensor limits.

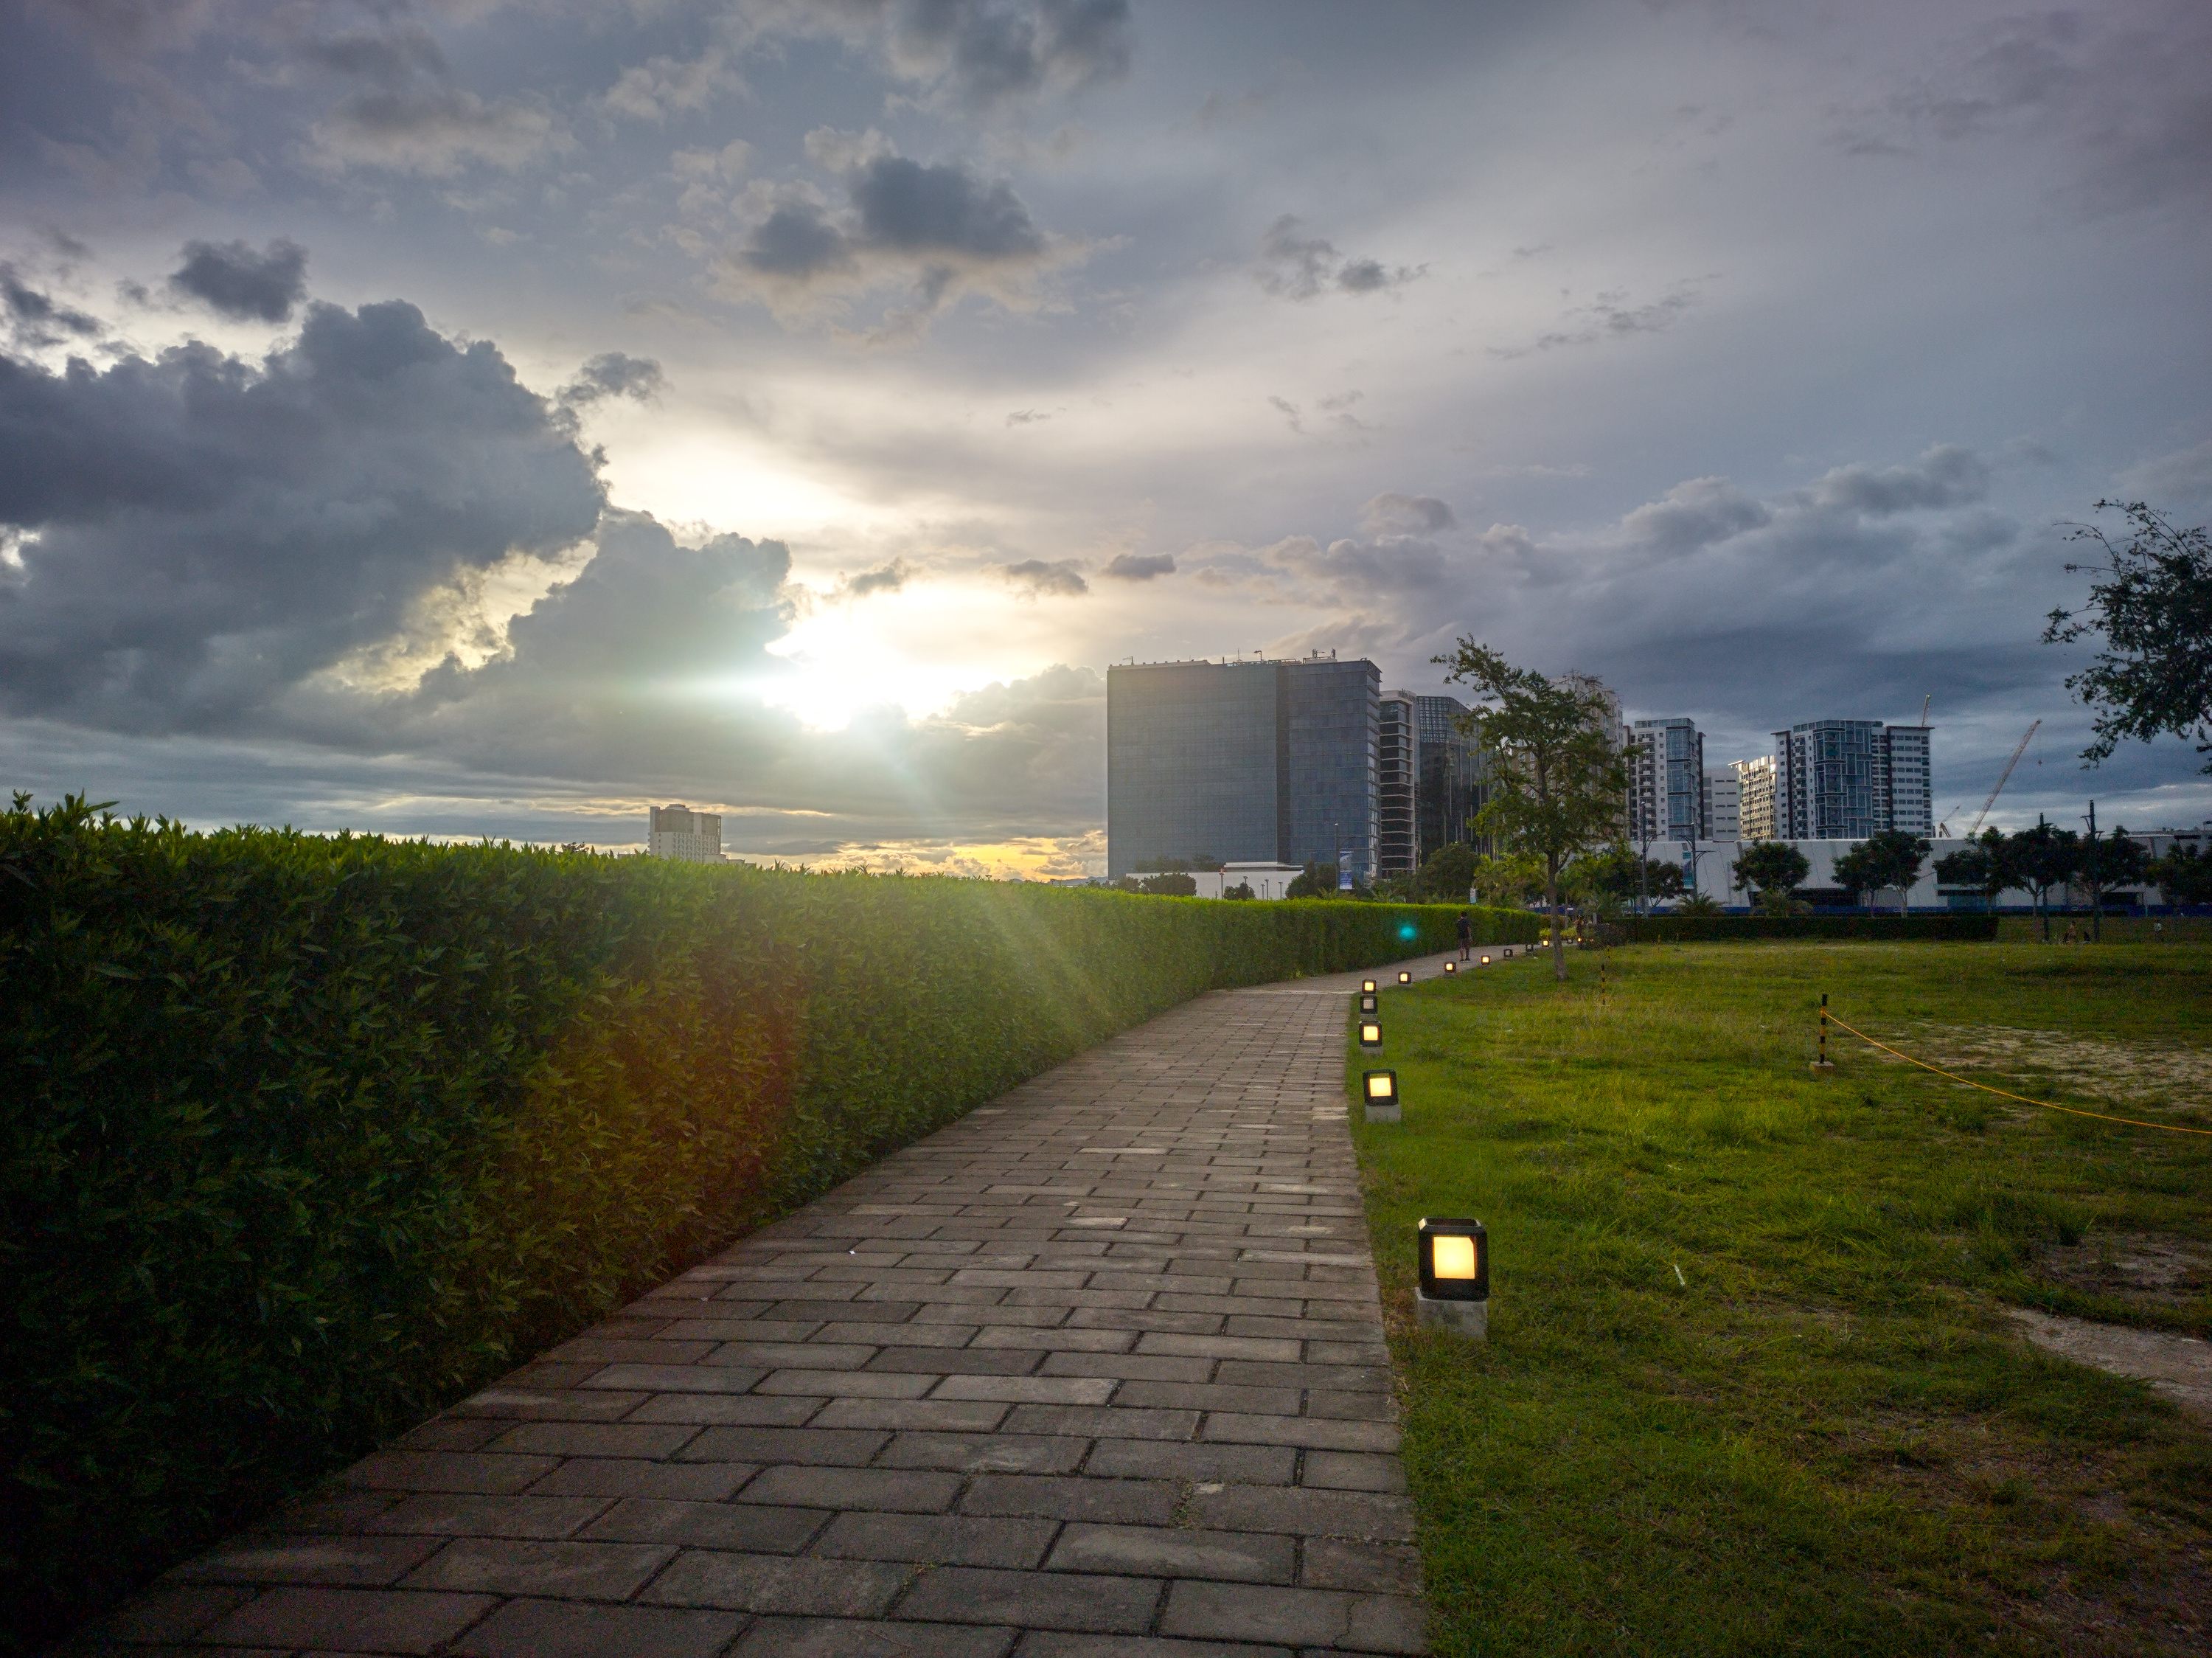
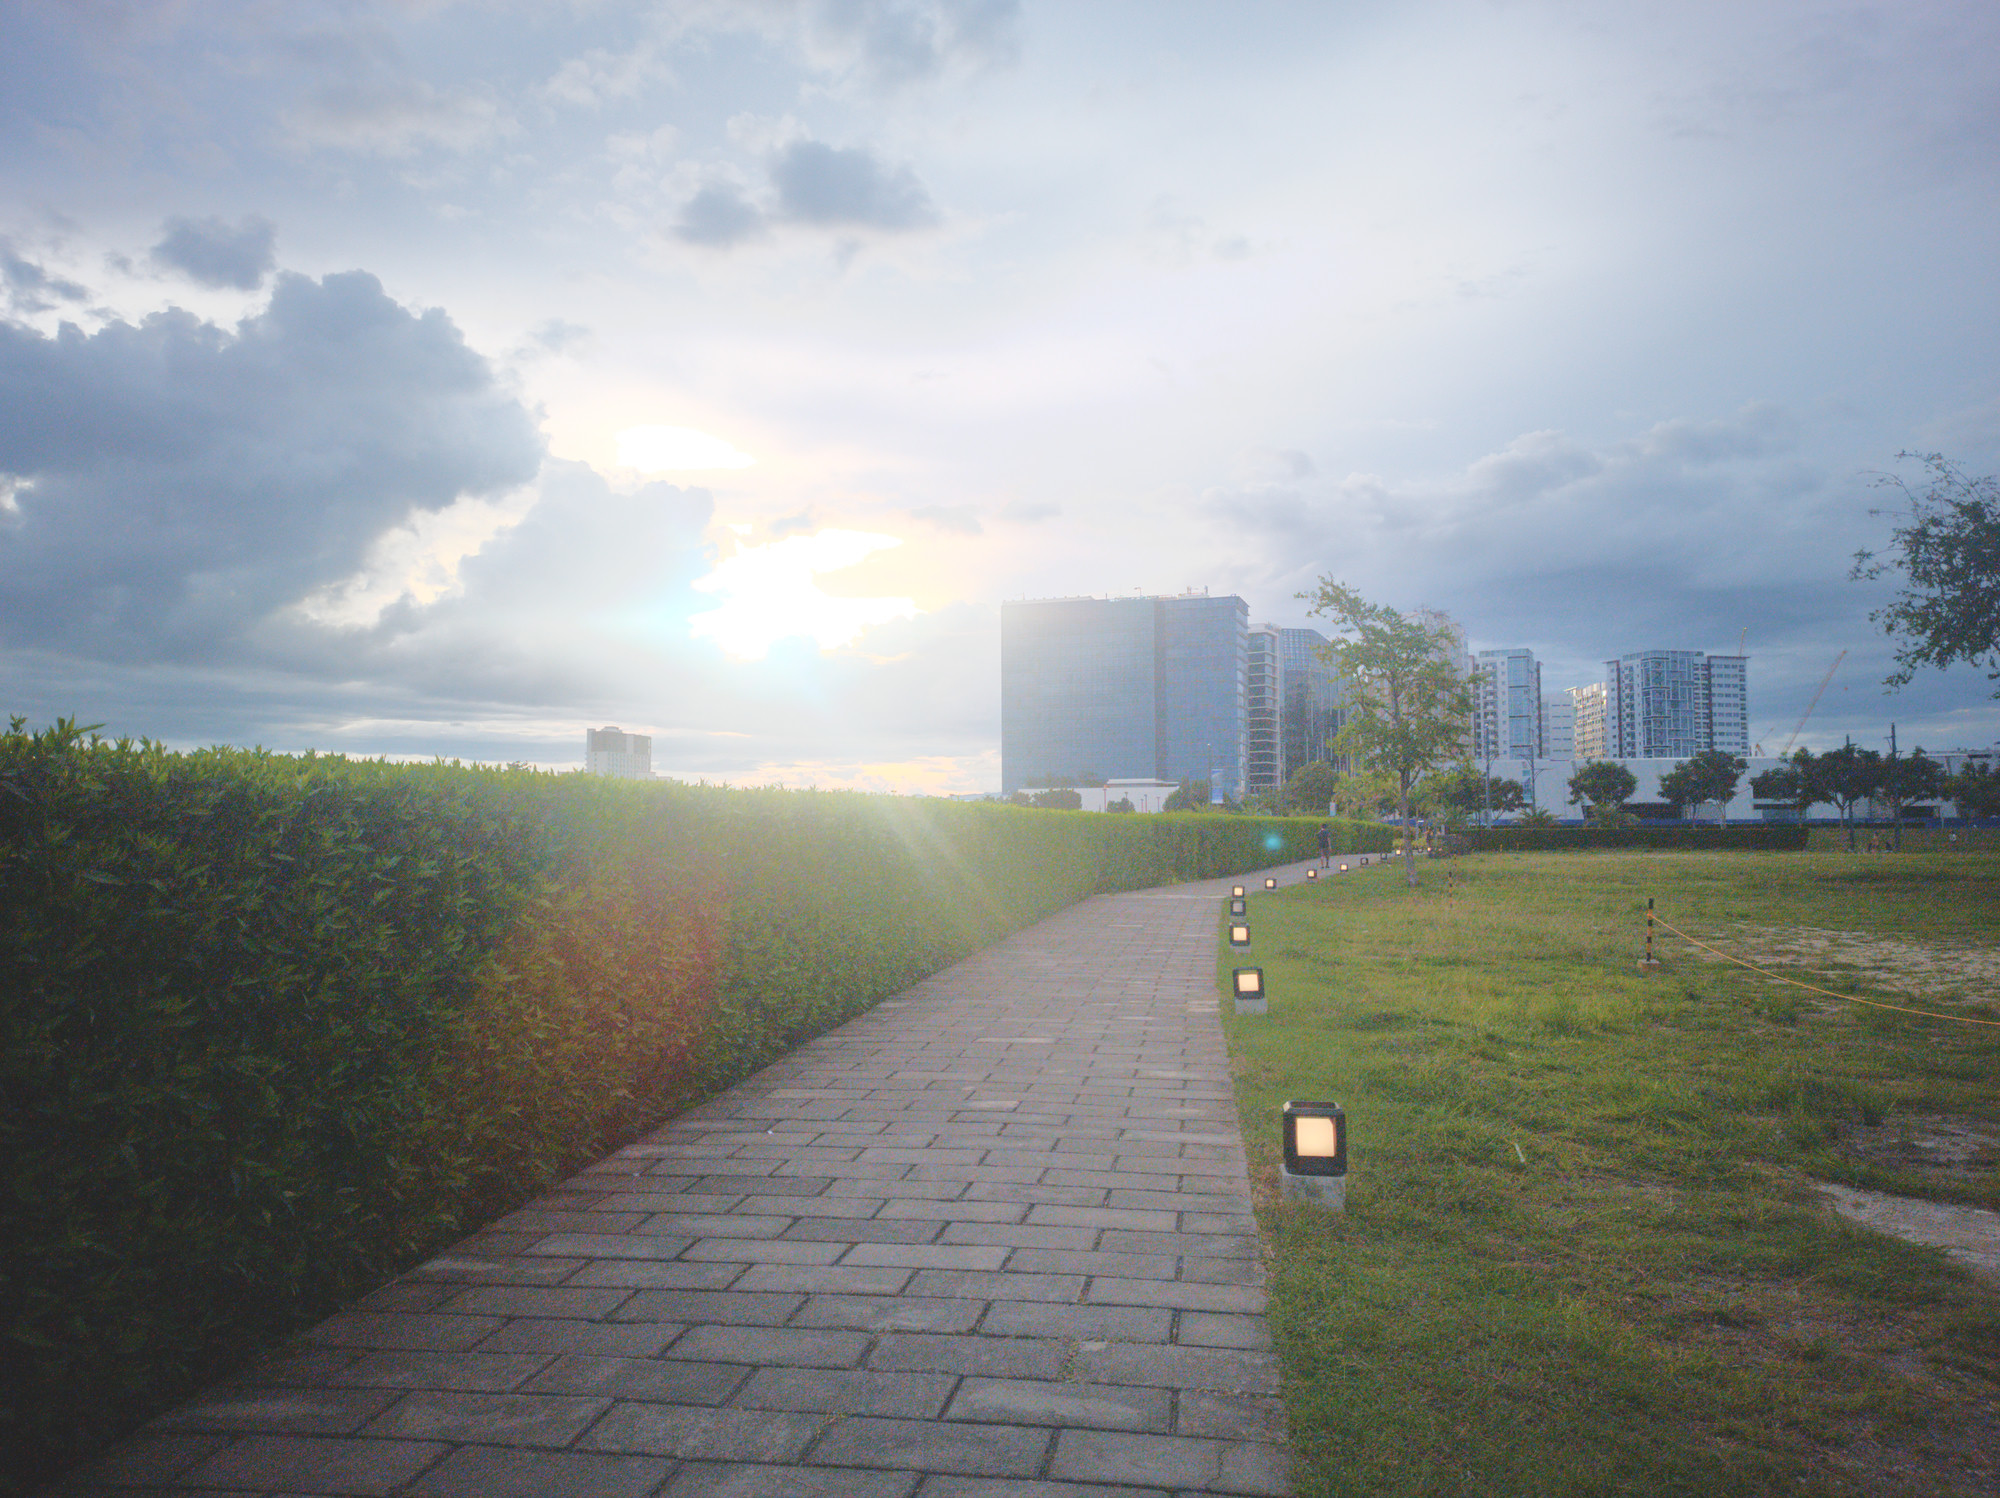
I also saved a DNG file:

IMG_20250907_171053.dng (22.9 MB)

Today, as an exercise, I tried to reproduce the same look by editing the DNG in different programs.

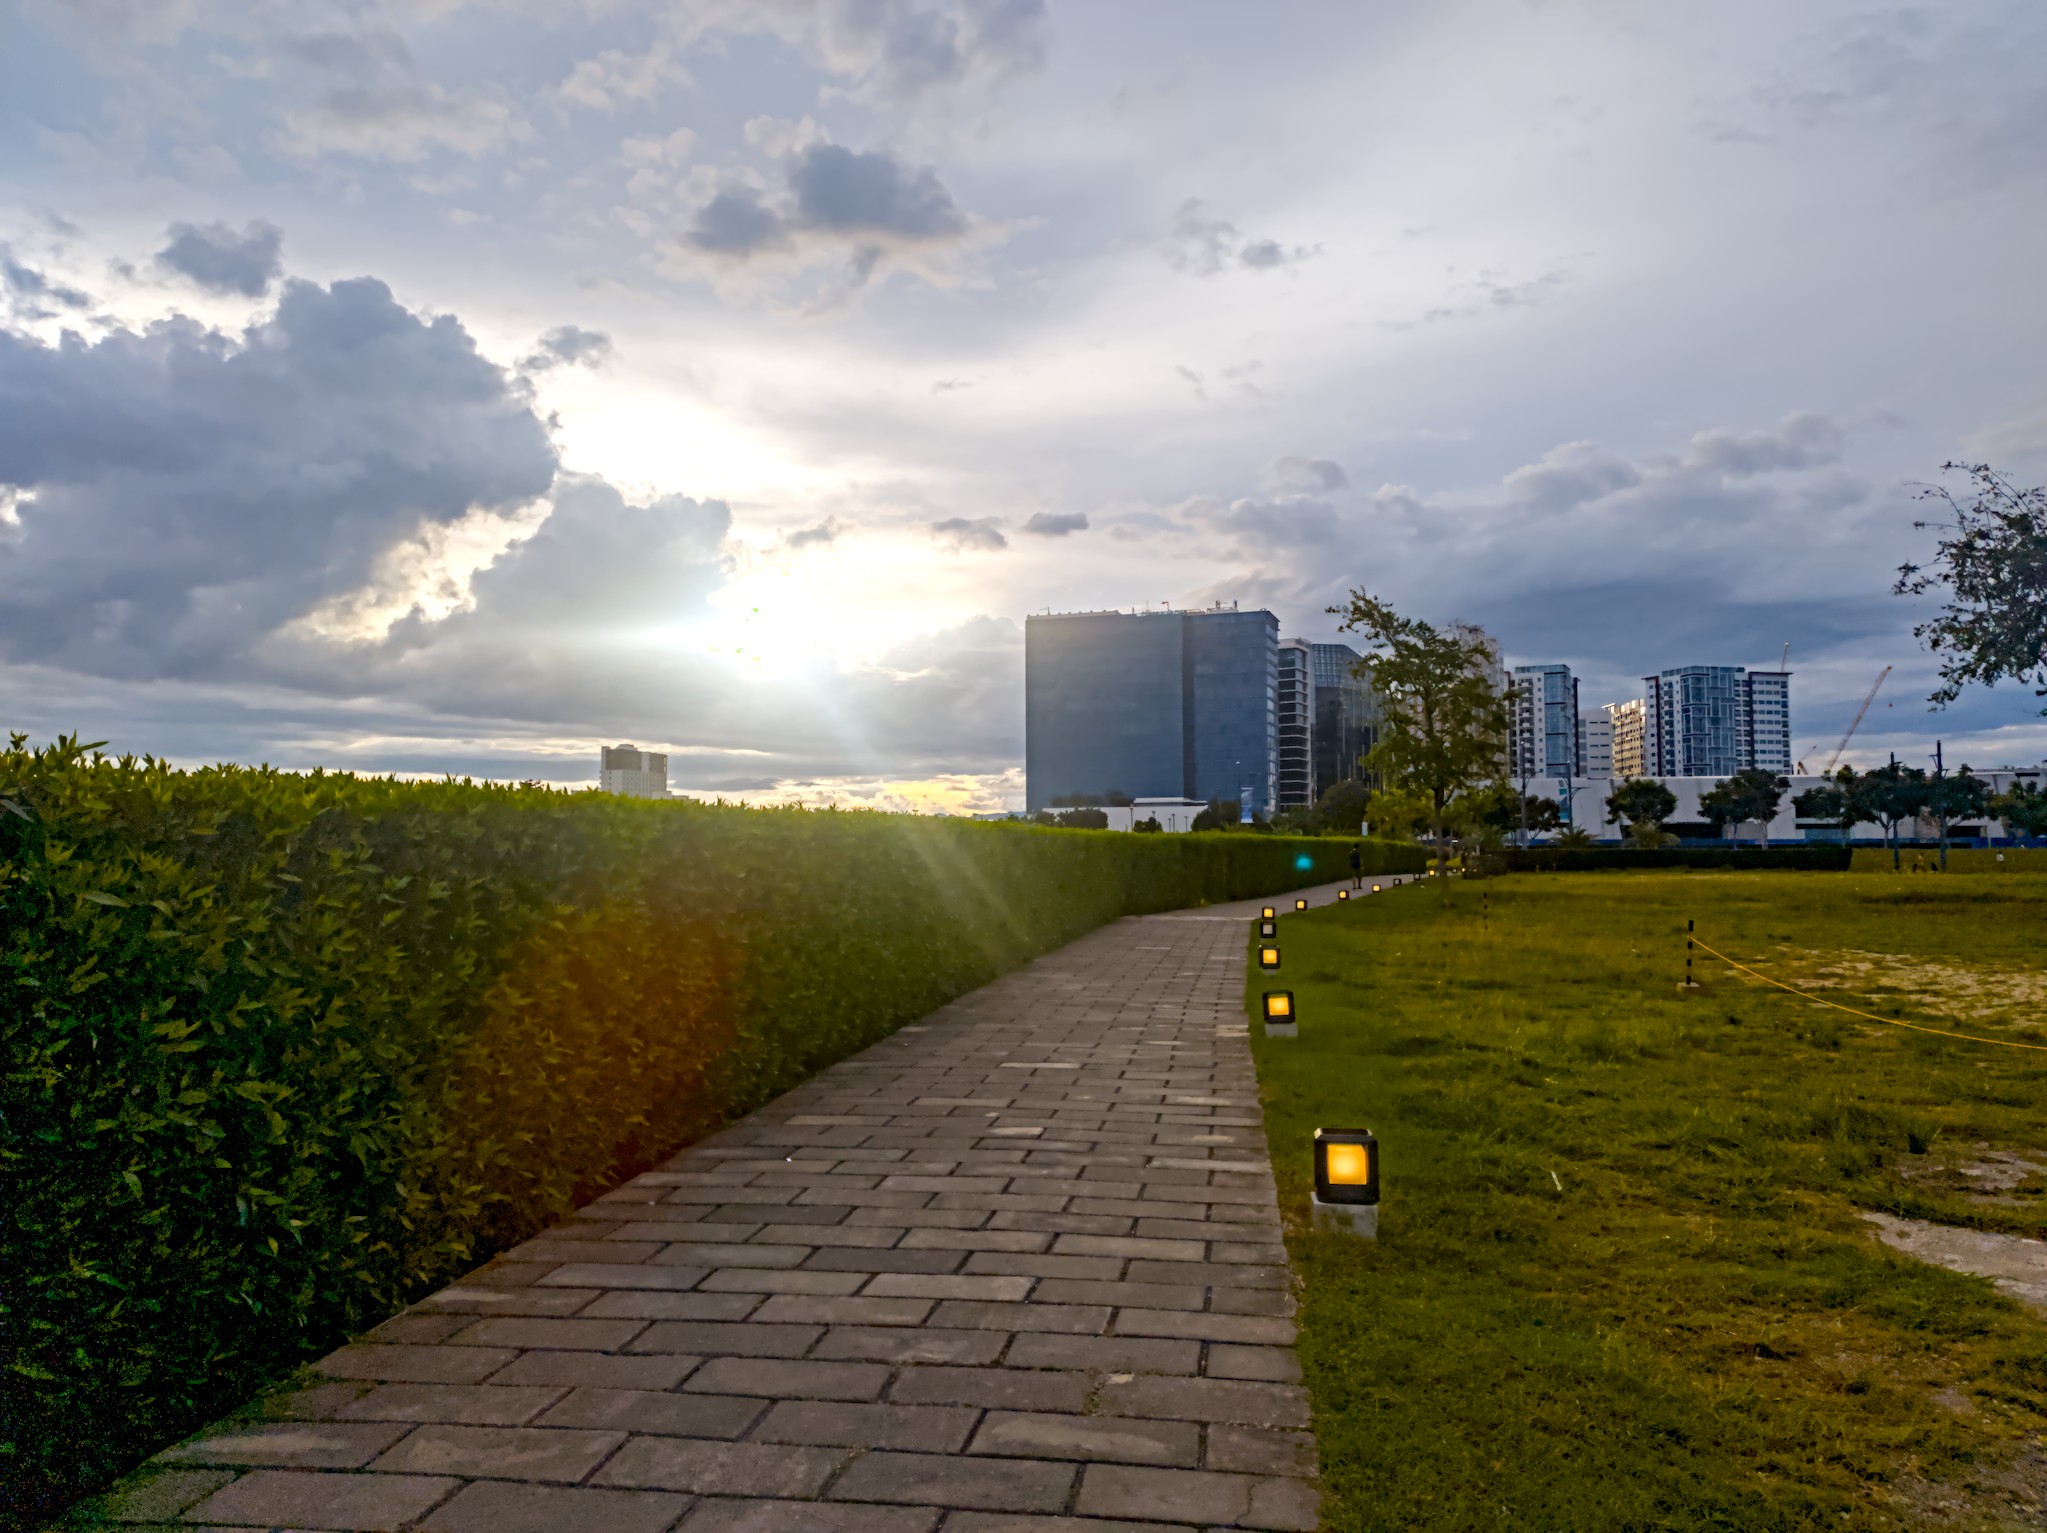
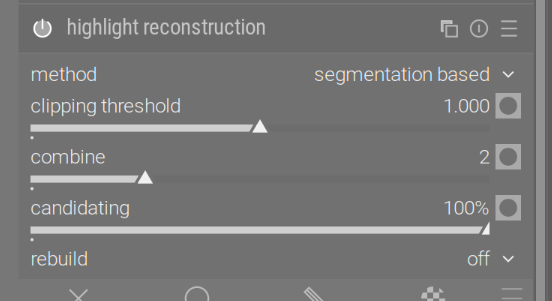
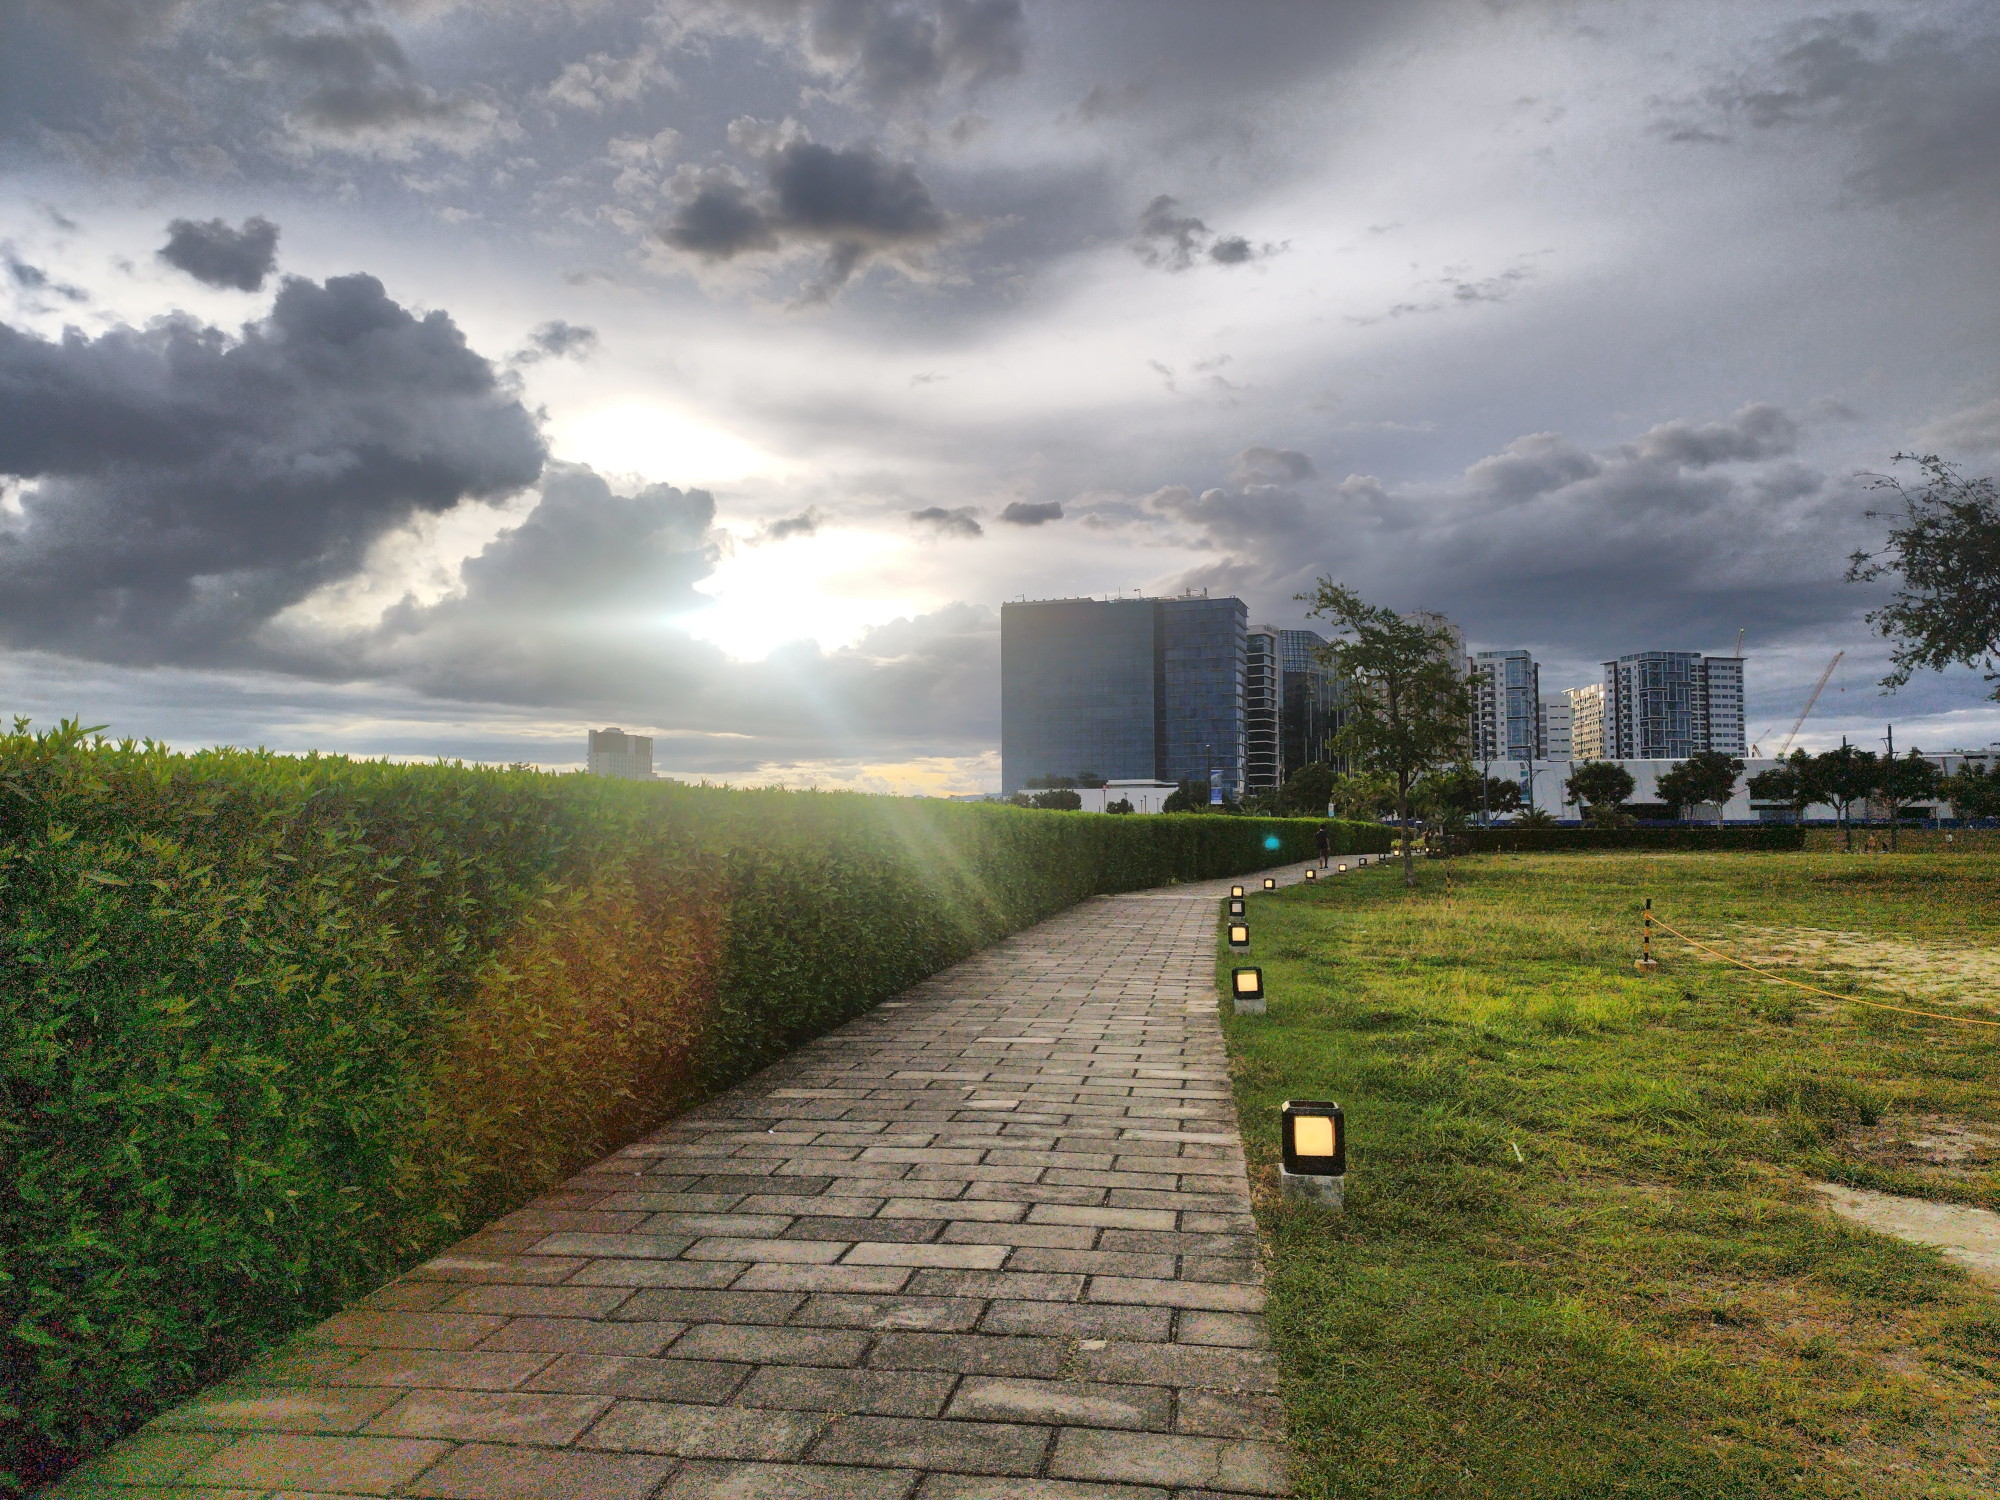
So far, thanks to the “Log Tone Mapping” module, ART could do an almost-close-enough (or, in some aspects, even better) approximation, even without any use of masks other than one whole-image mask for the “Local Contrast” effect:

IMG_20250907_171053.edited-with-art.jpg.out.arp (12.3 KB)

I think, with a bit more tinkering, it can do even better - for example, more dramatic clouds, better color preservation of the lights along the path, more structure of the pavement.

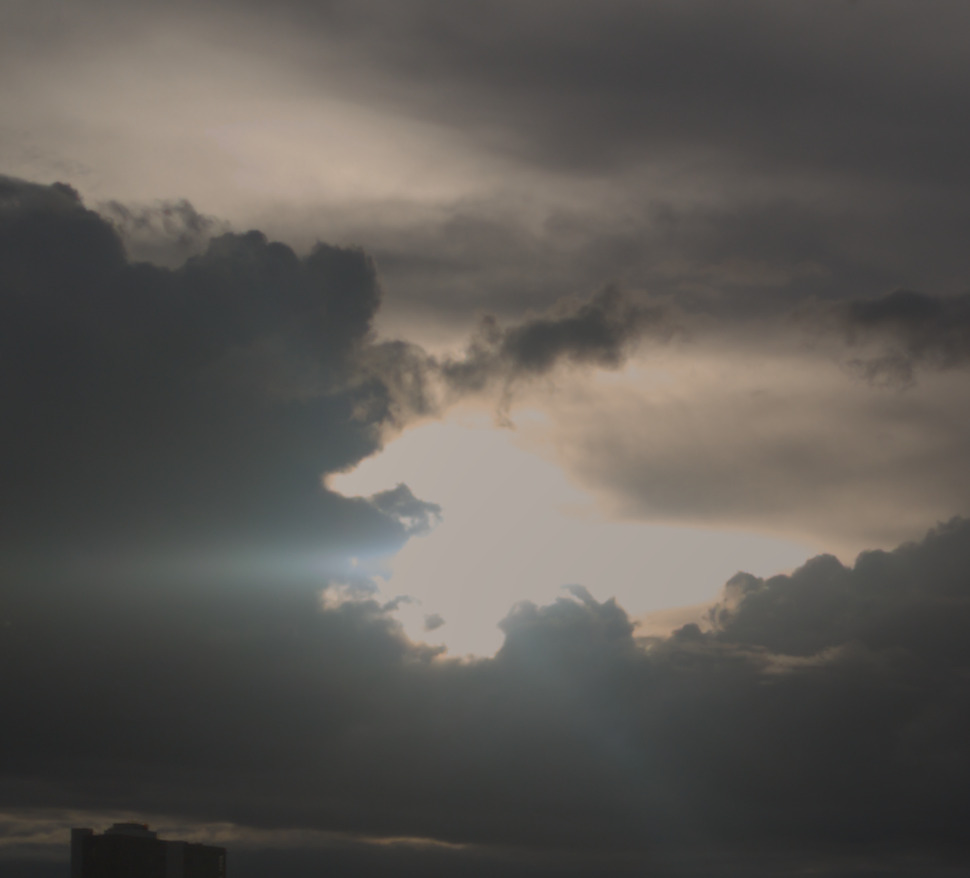
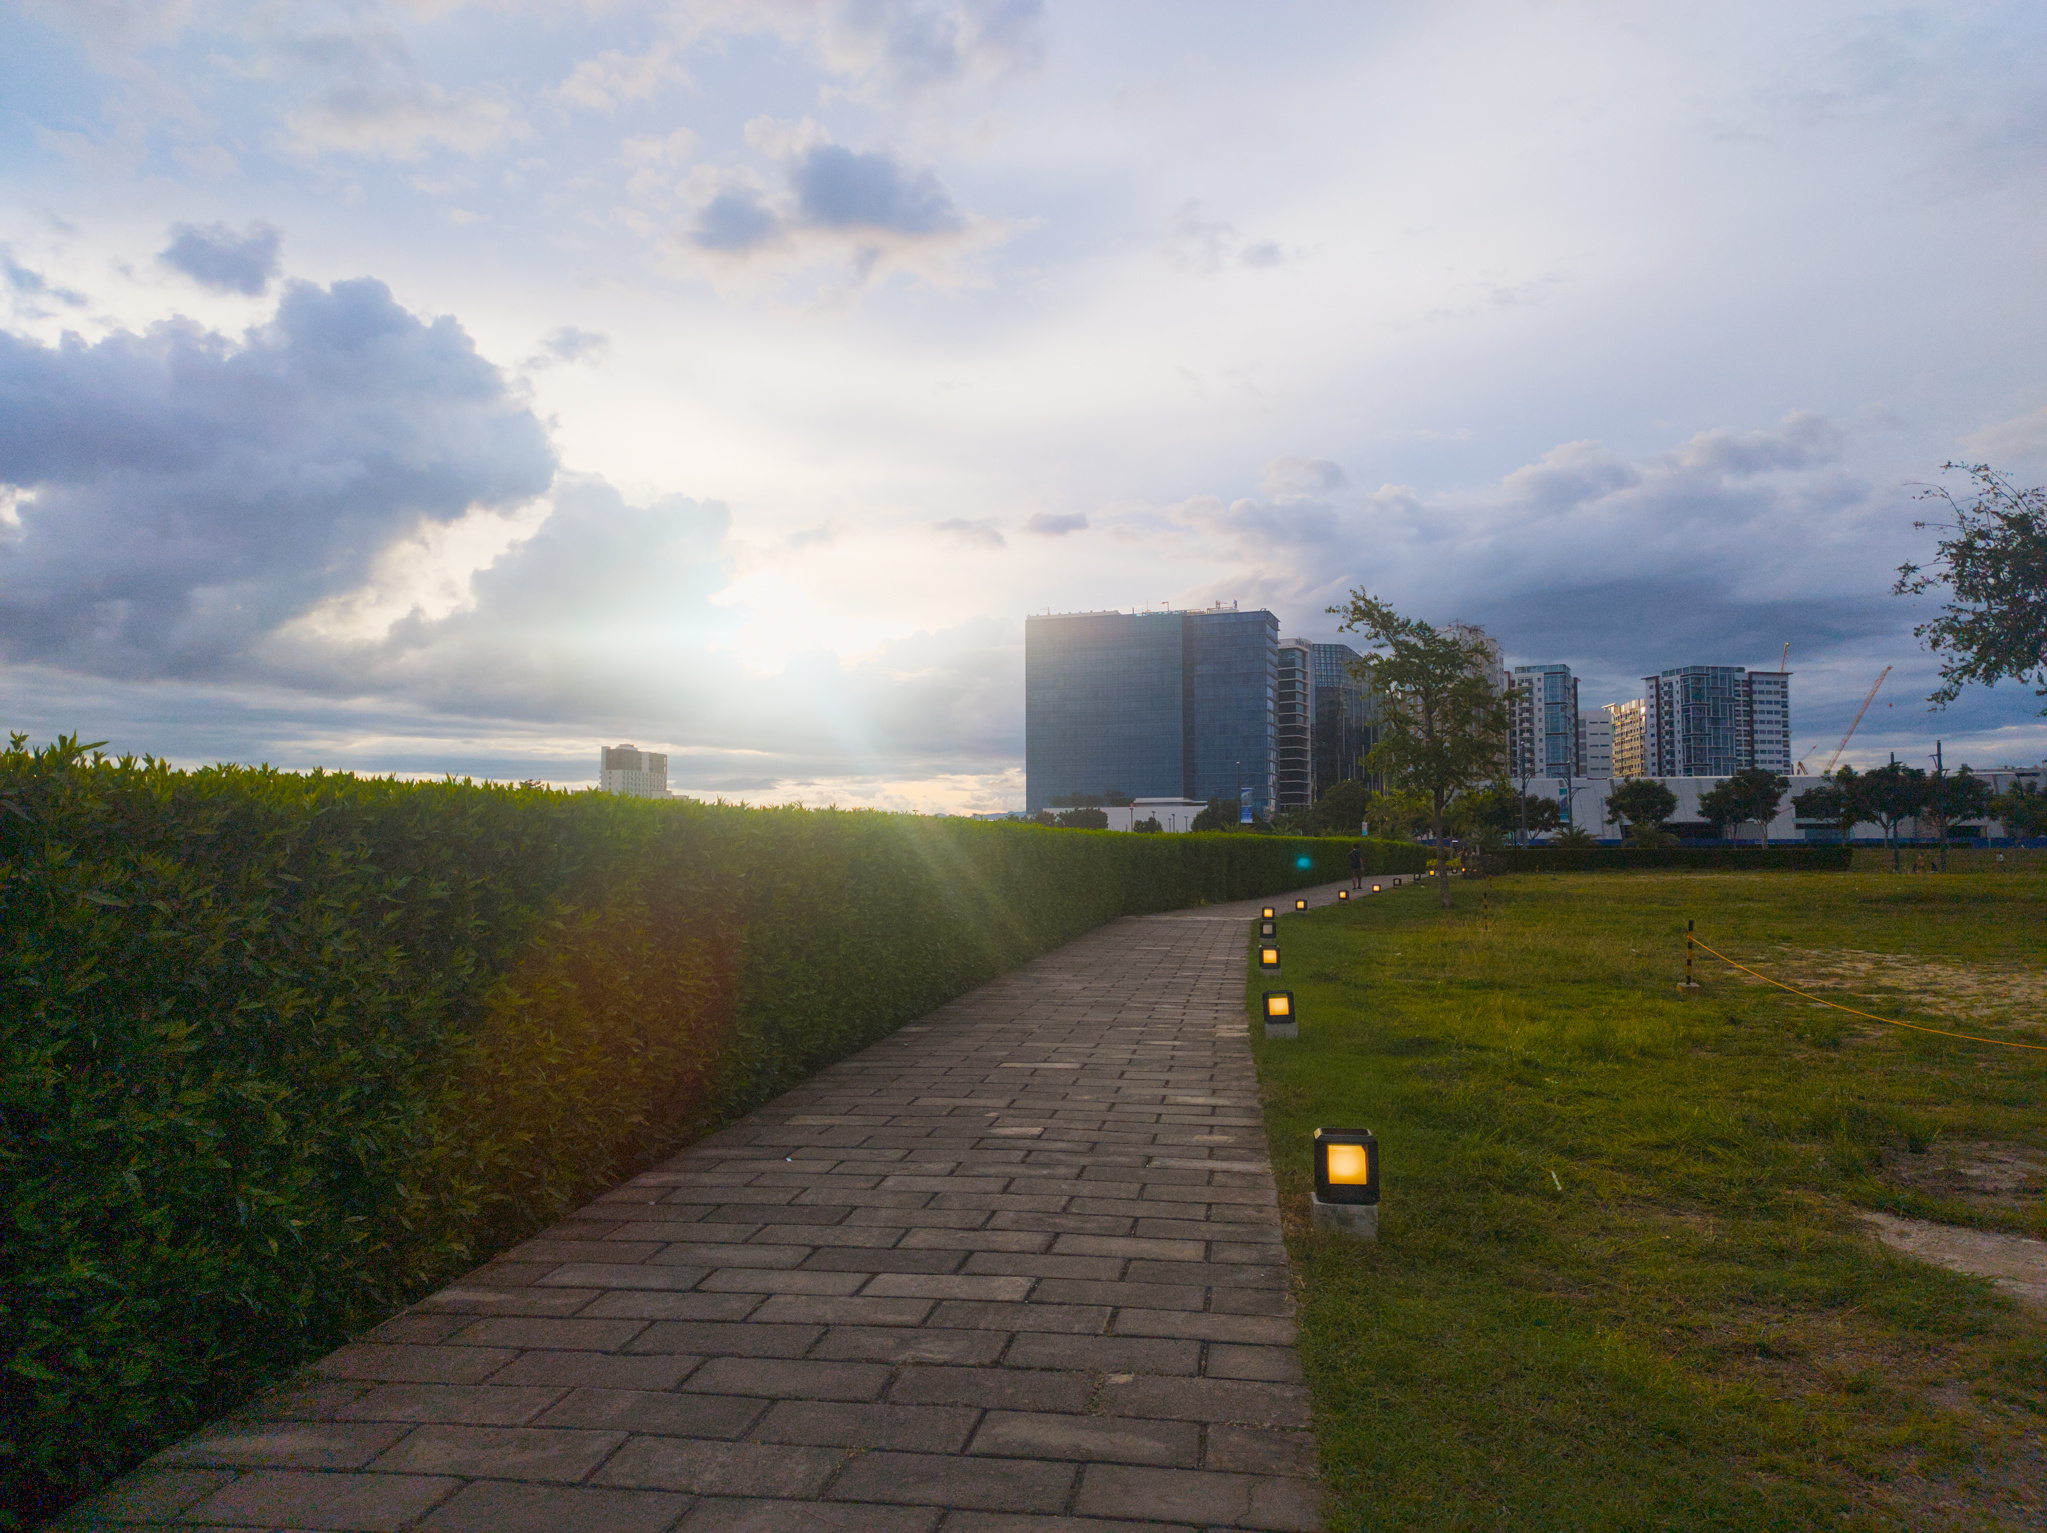
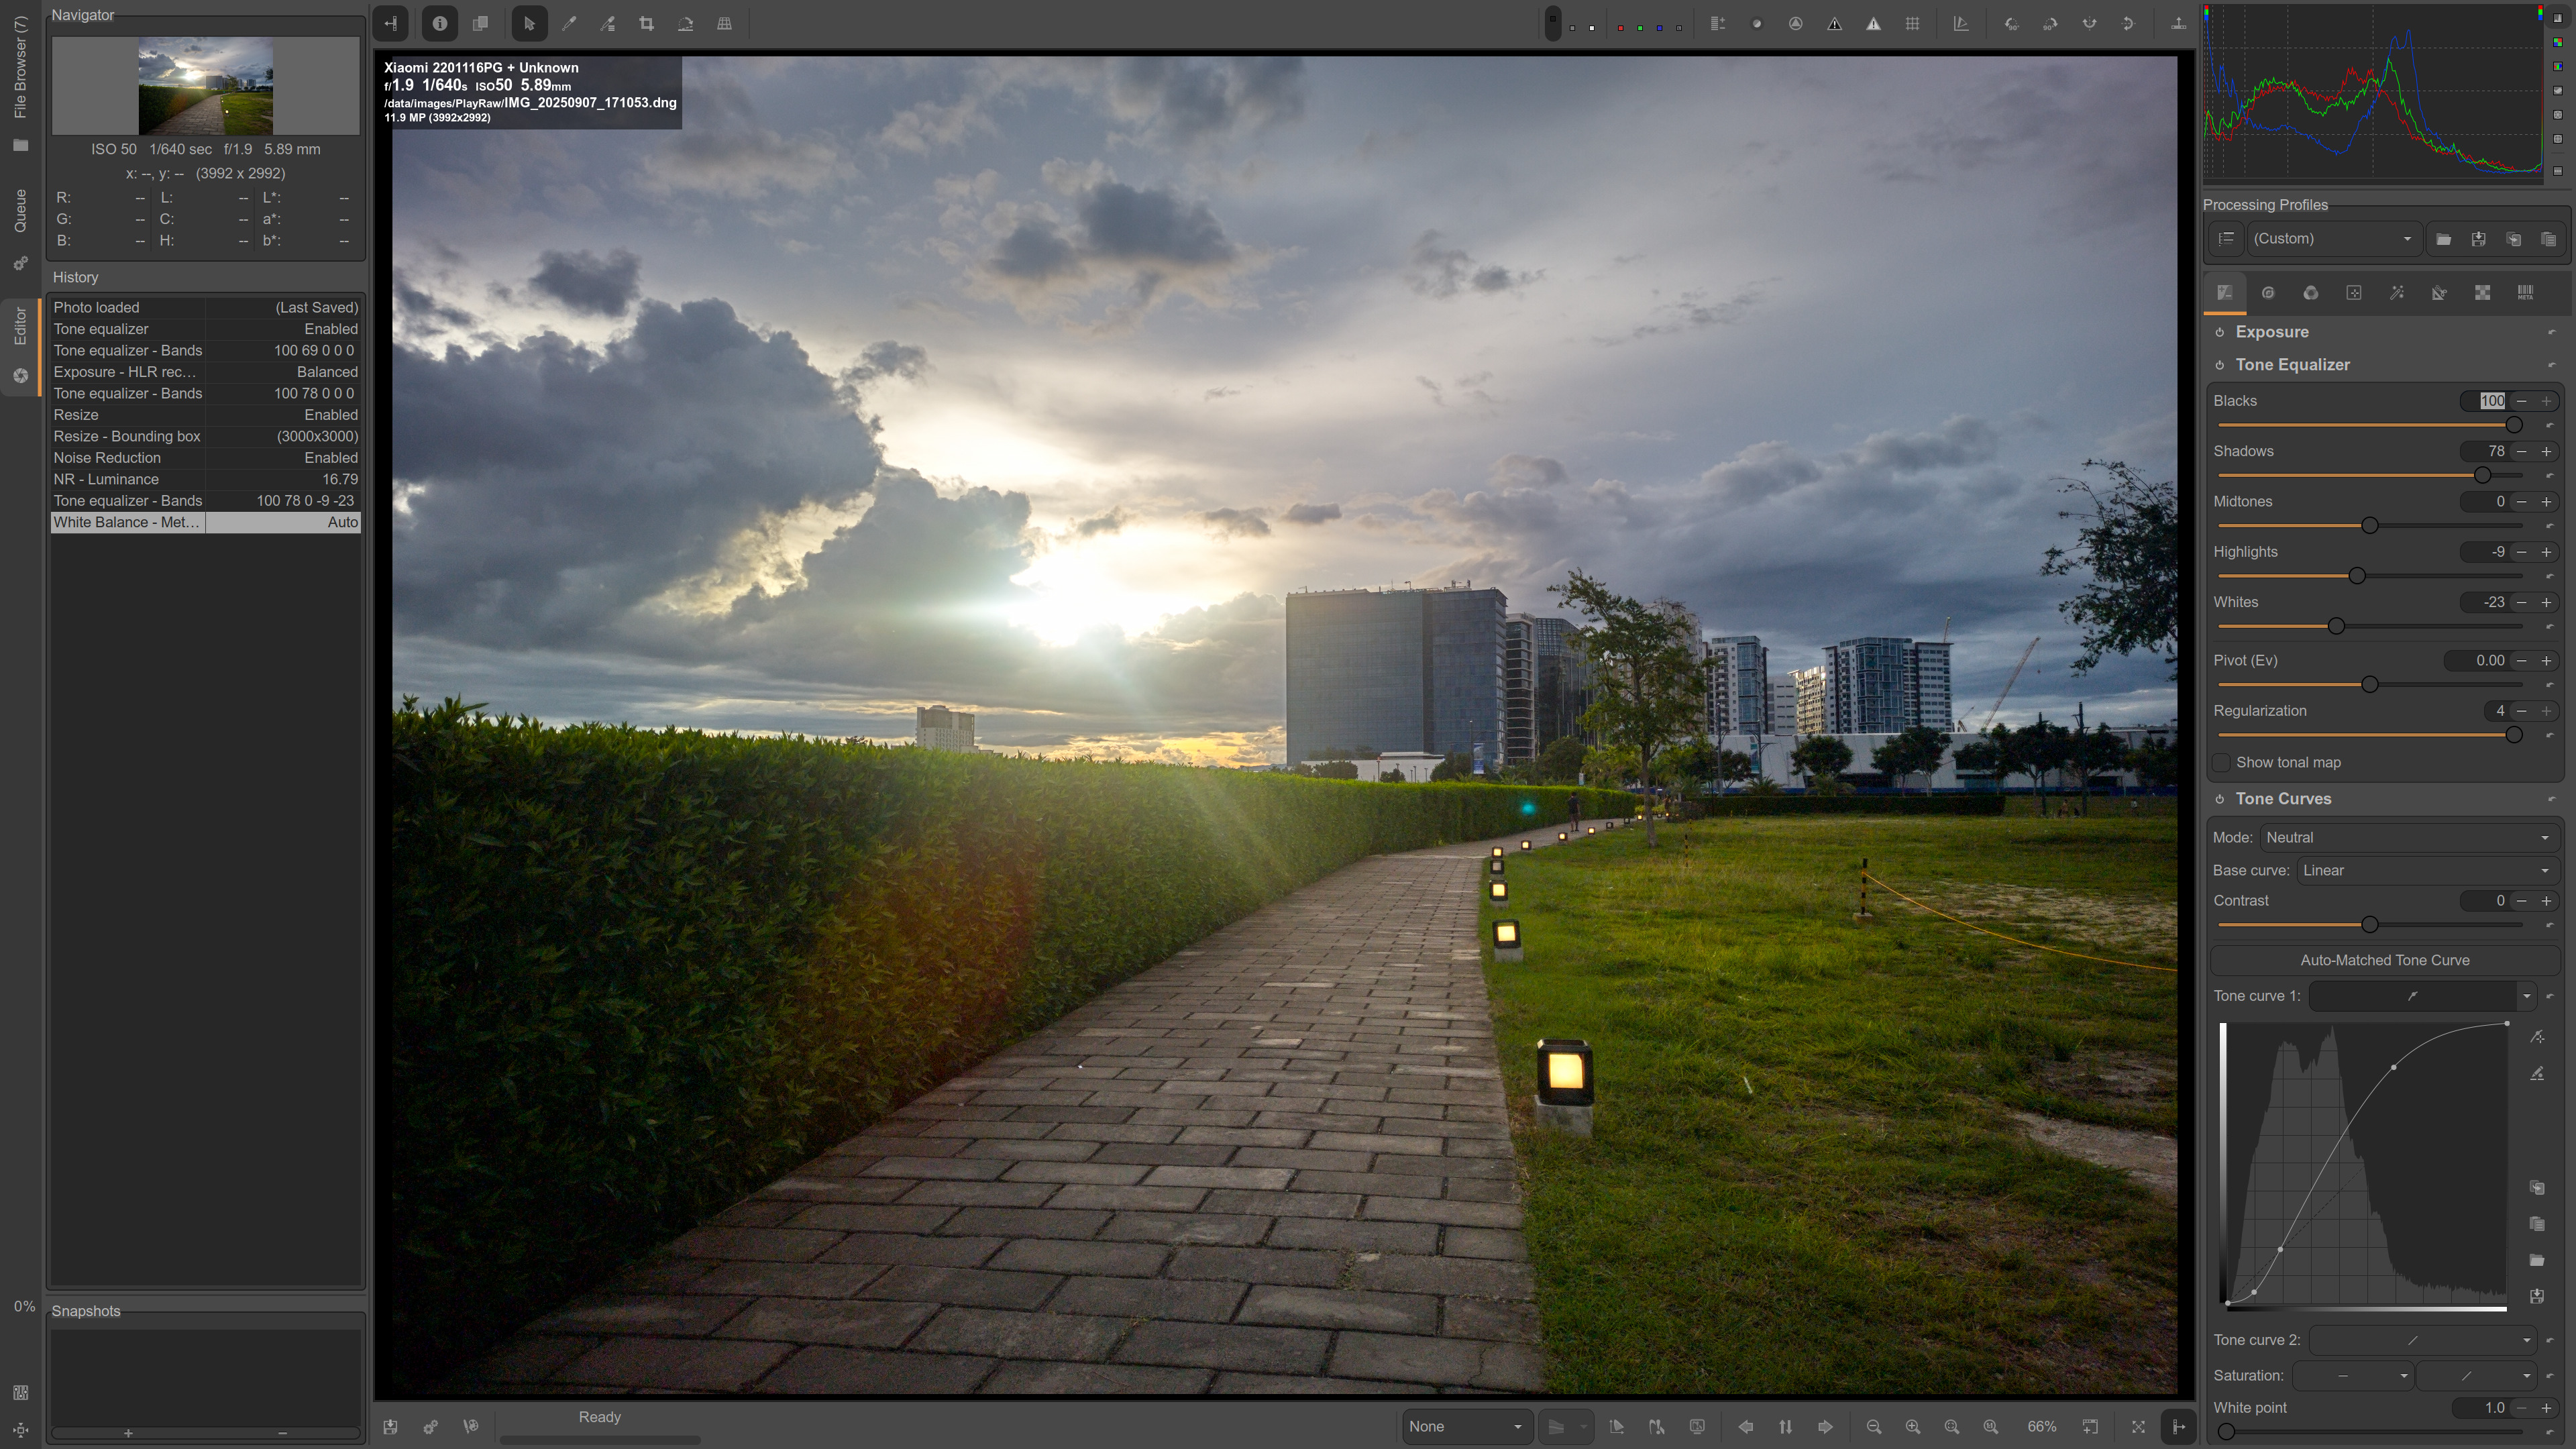
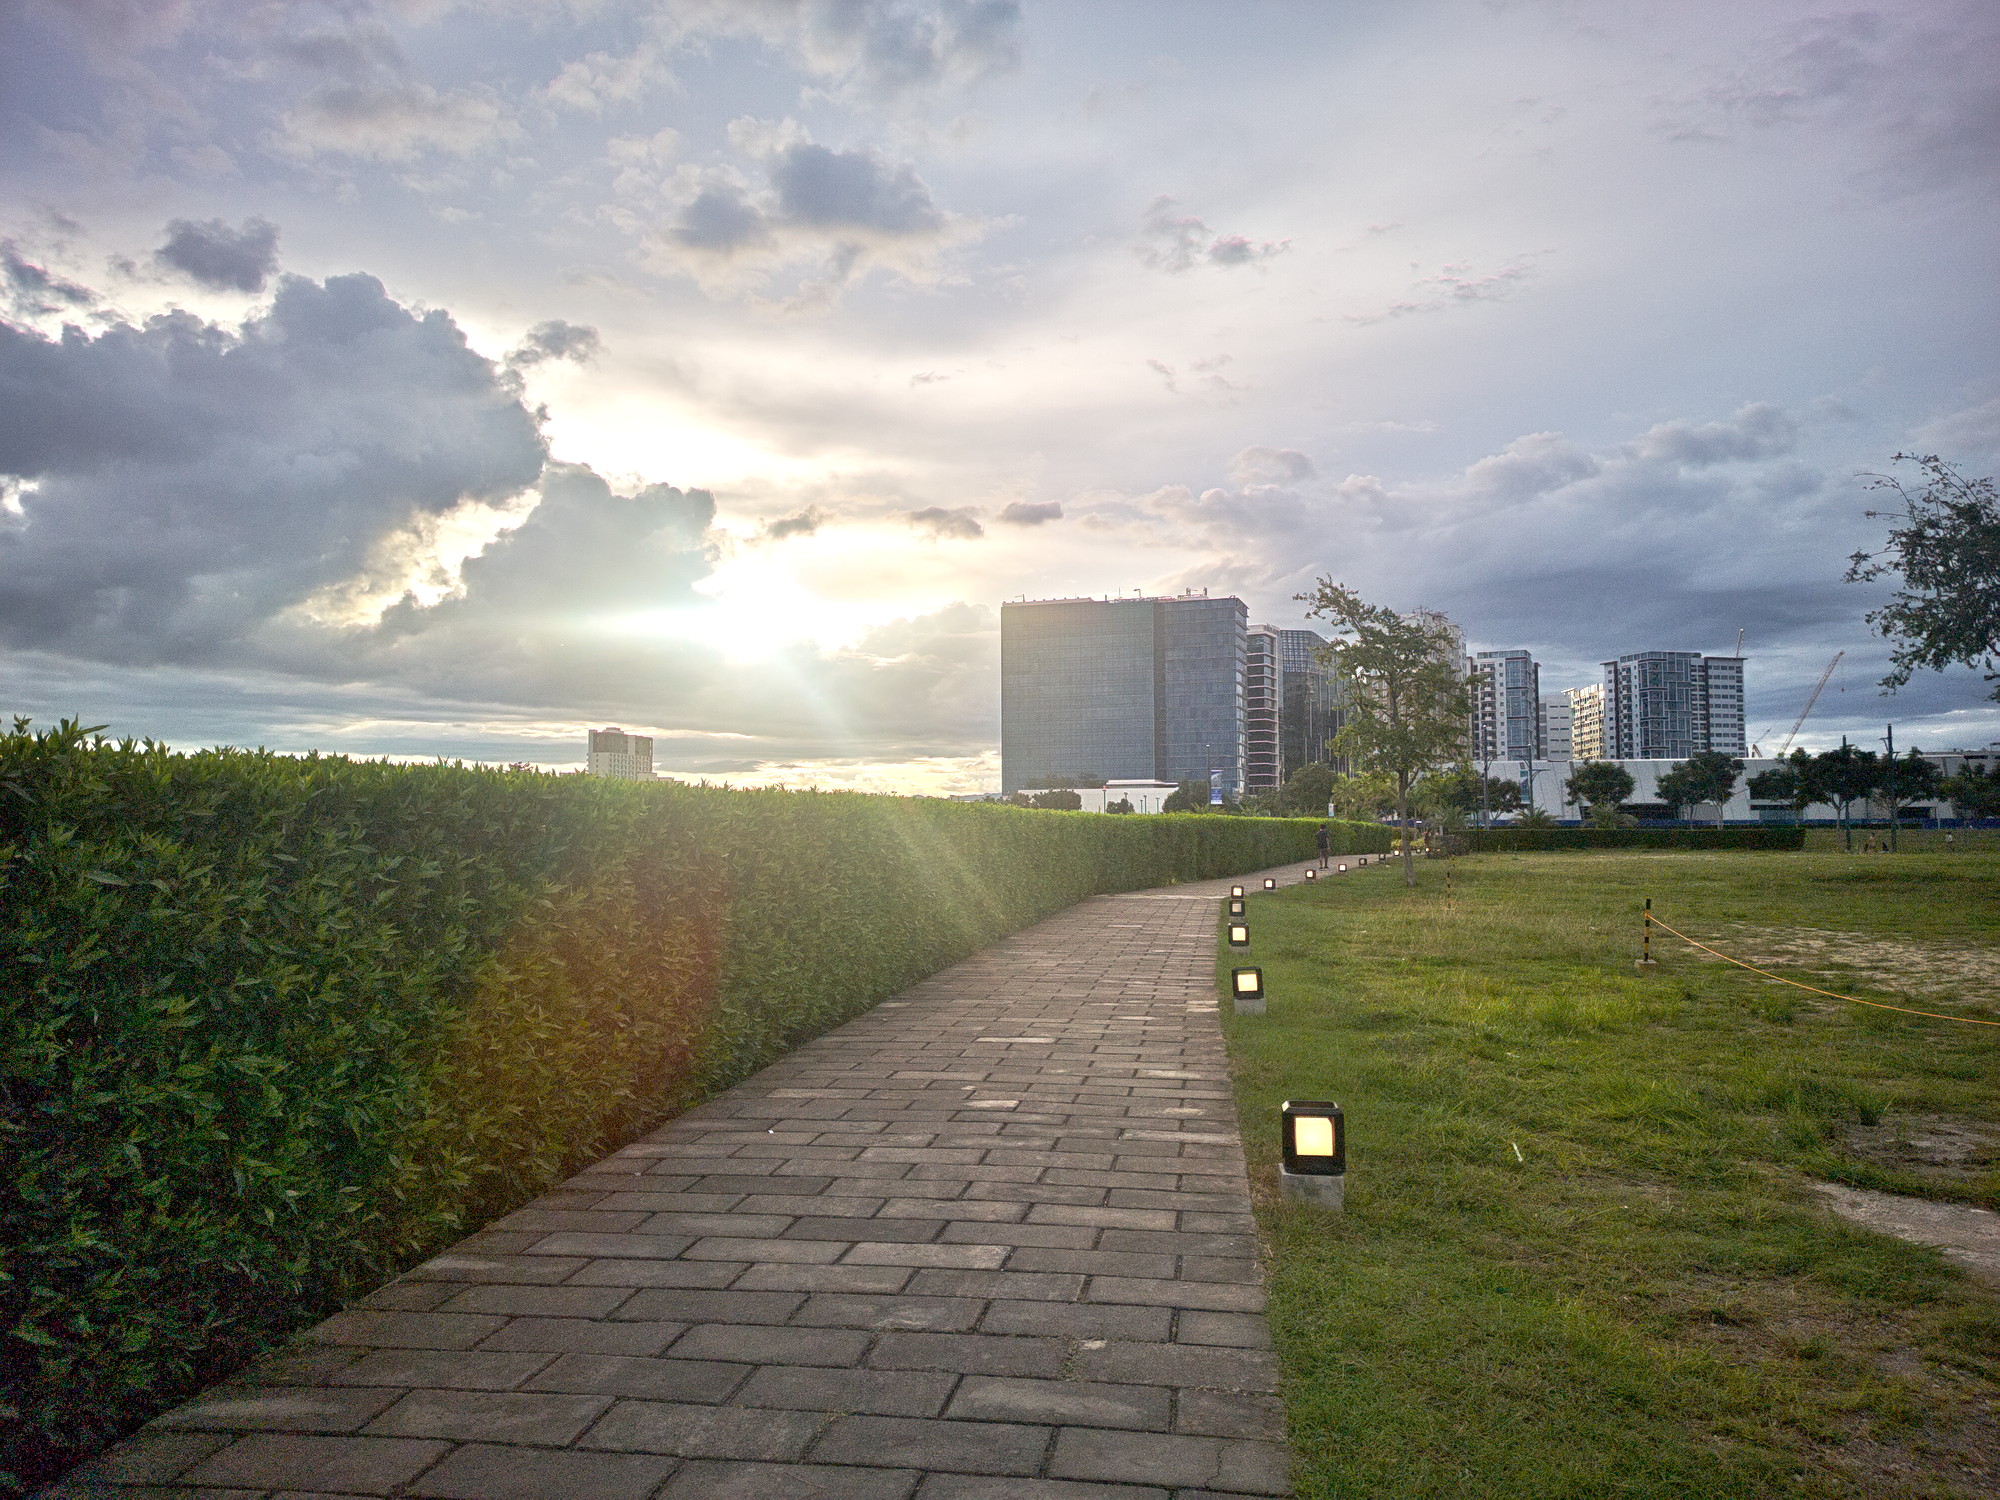
Darktable v5.2.1 (so without AgX) also handled this image very well in all places except the sun beaming through the clouds - even though I am not an experienced user. I would even say, it’s the best result so far, except for the color shift bug where the sensor (unavoidably) clipped, which ruined the whole effort. I have checked that this Filmic bug is not fixed in 5.3. Also, frustratingly, it only manifests itself on export, not during the edit.

IMG_20250907_171053.dng.xmp (14.3 KB)

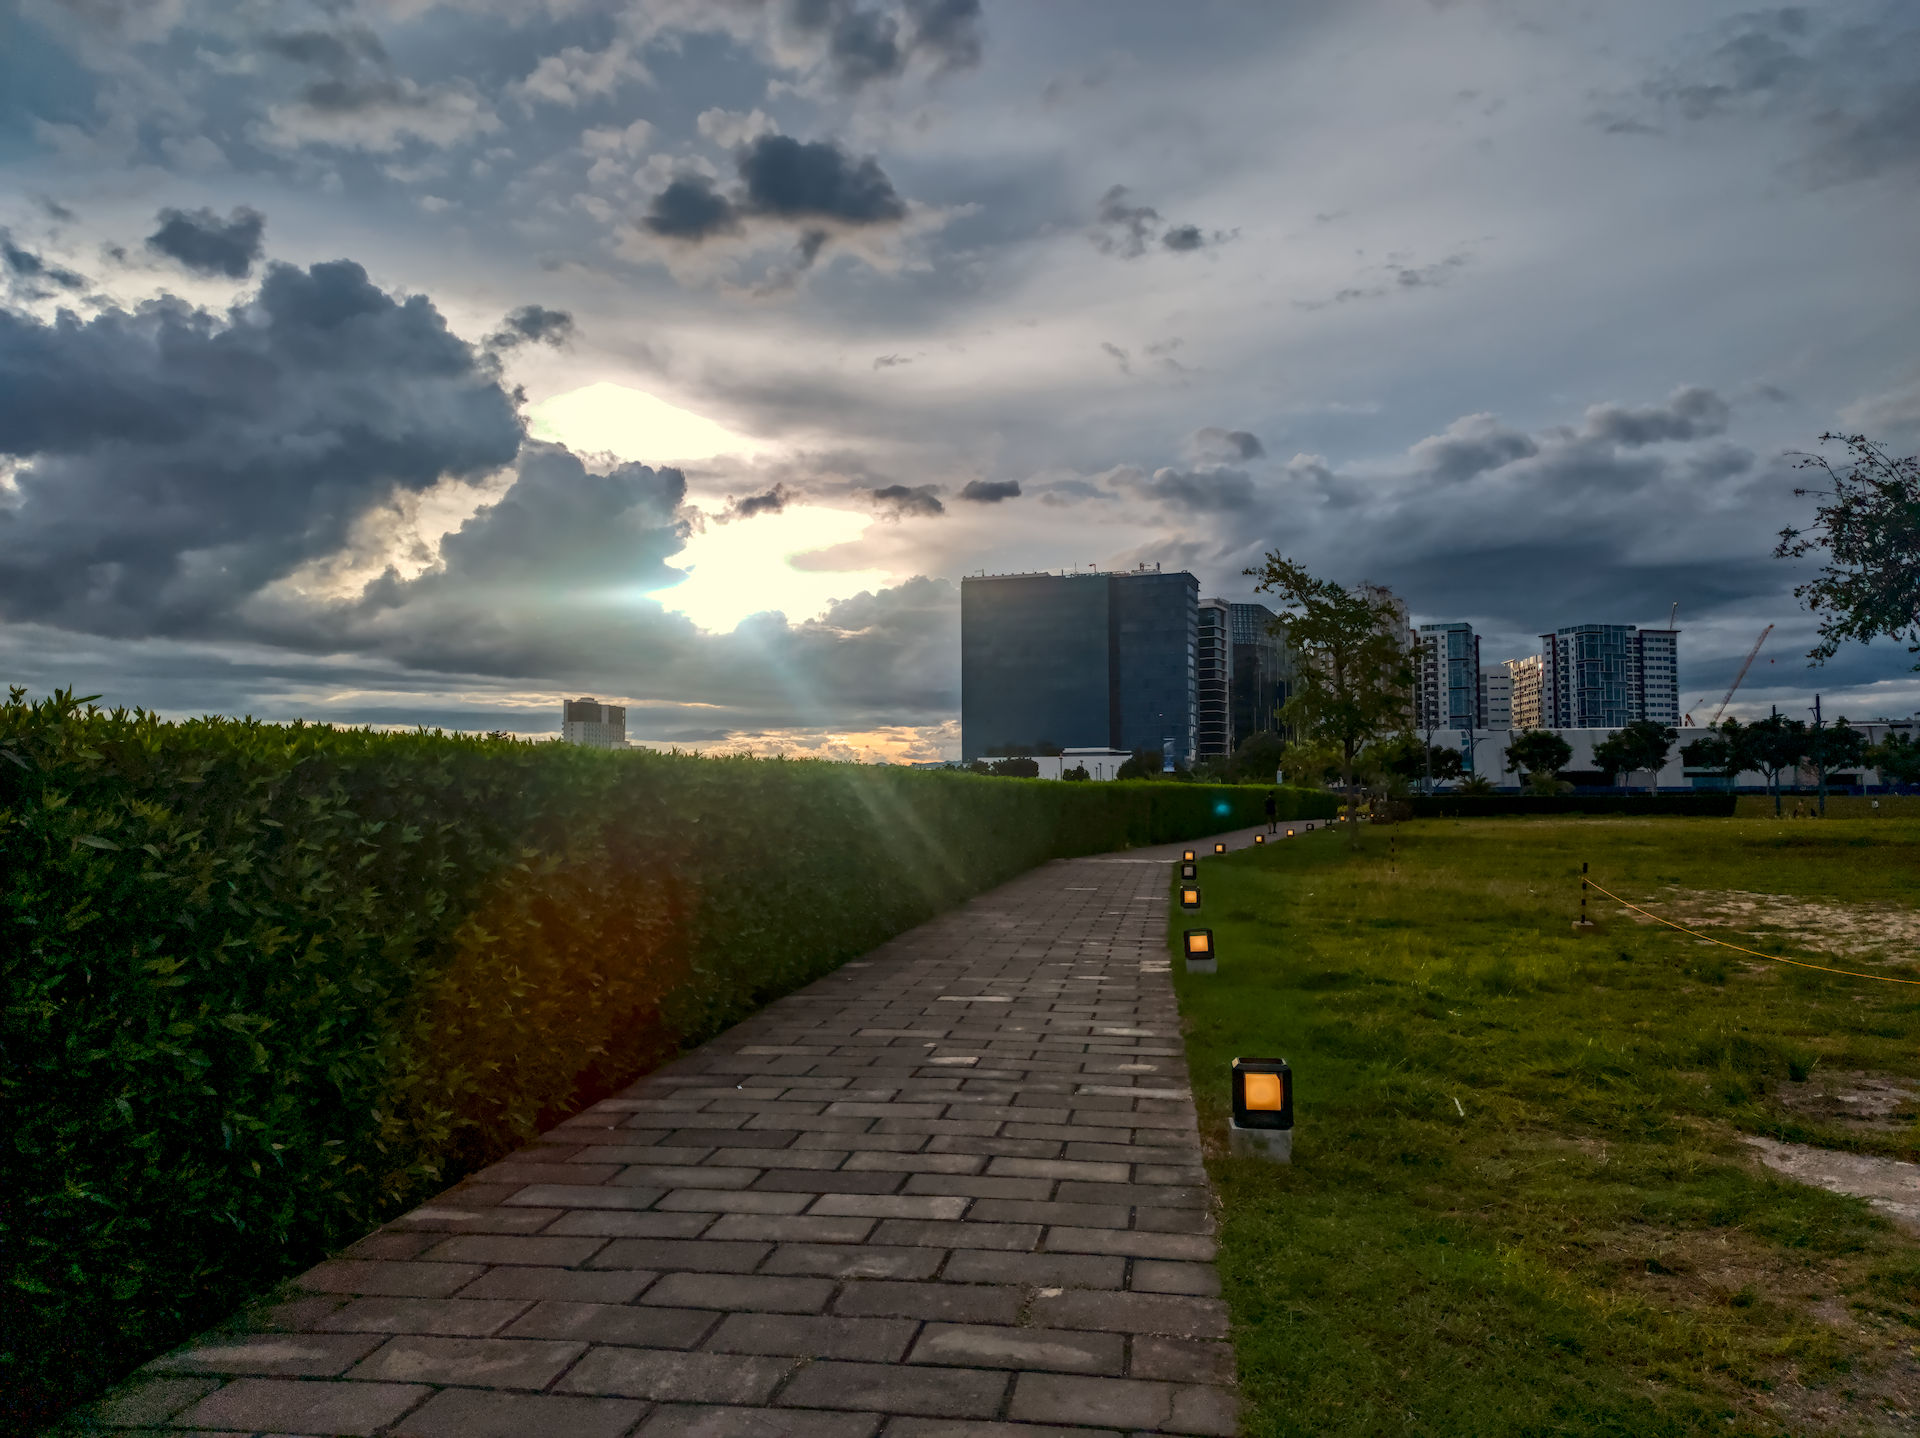
AgX in DarkTable 5.3 fixes it:


IMG_20250907_171053.dng.xmp (16.7 KB)

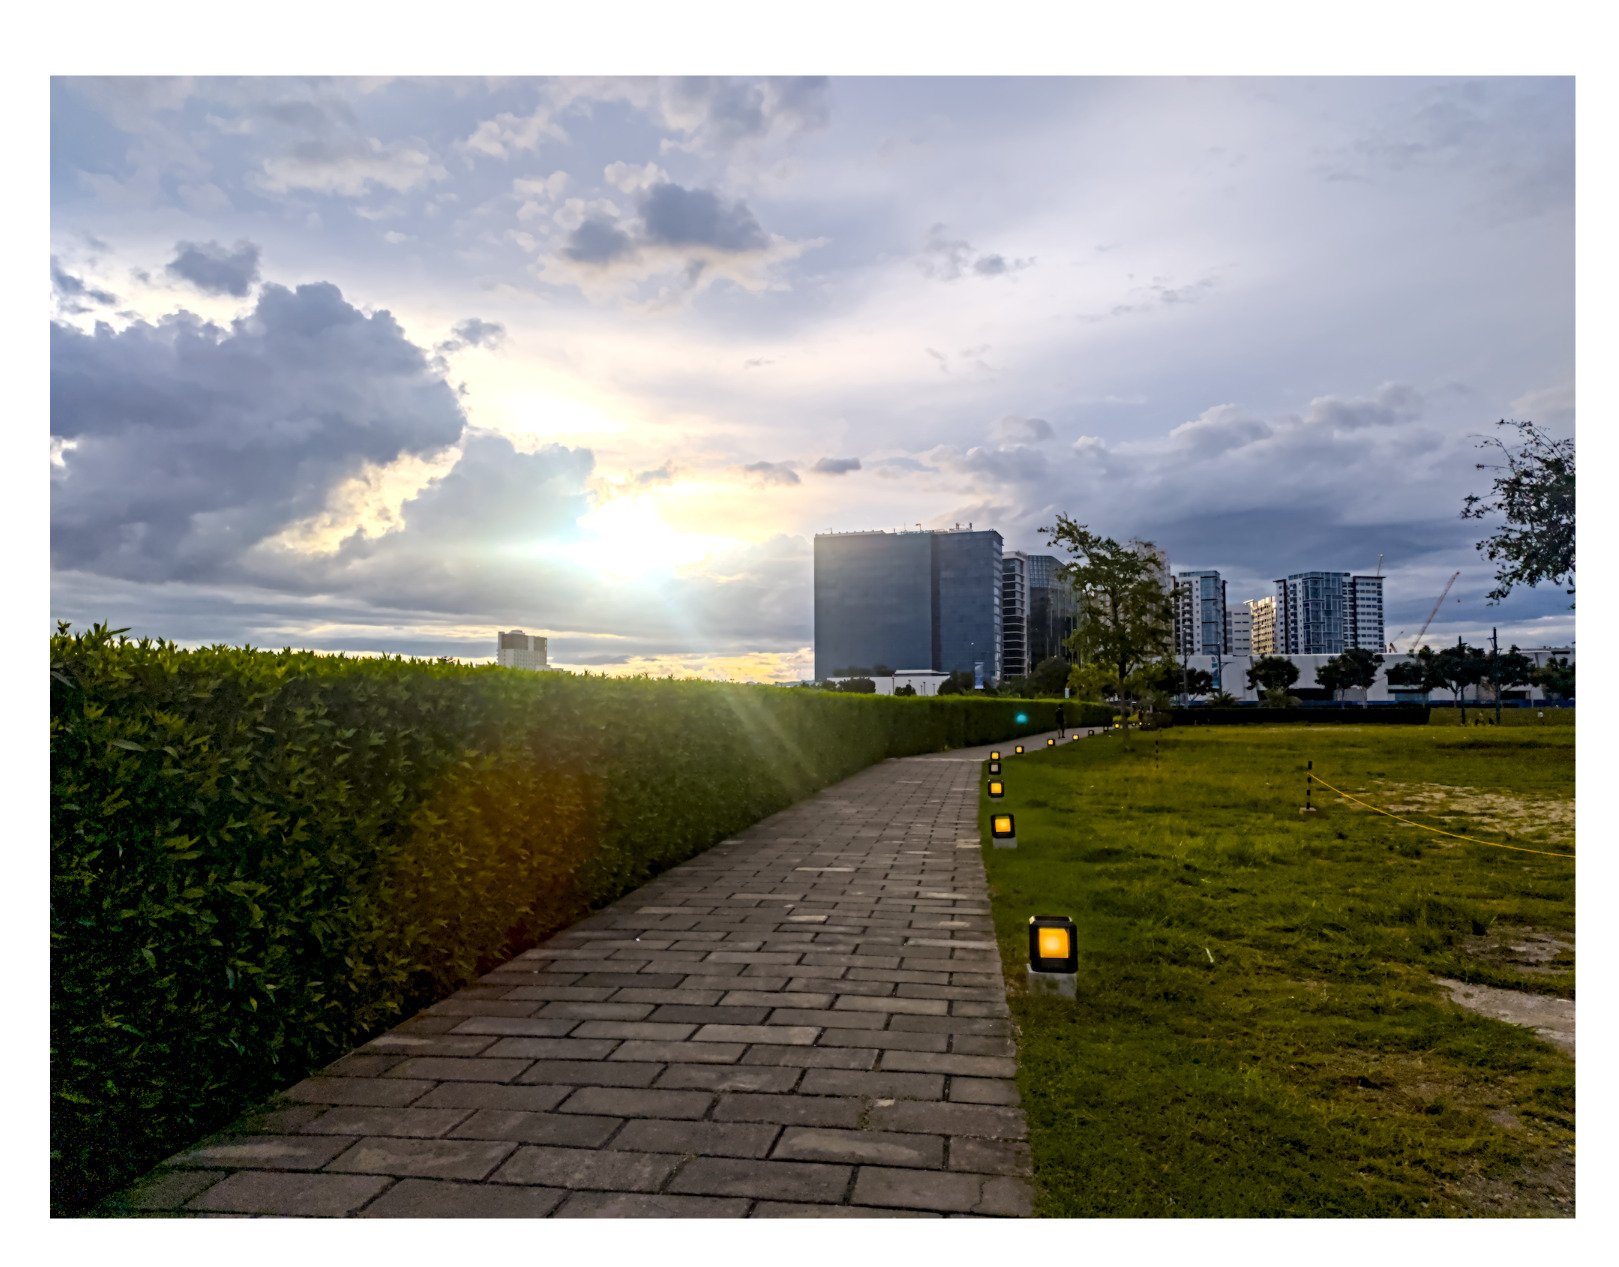
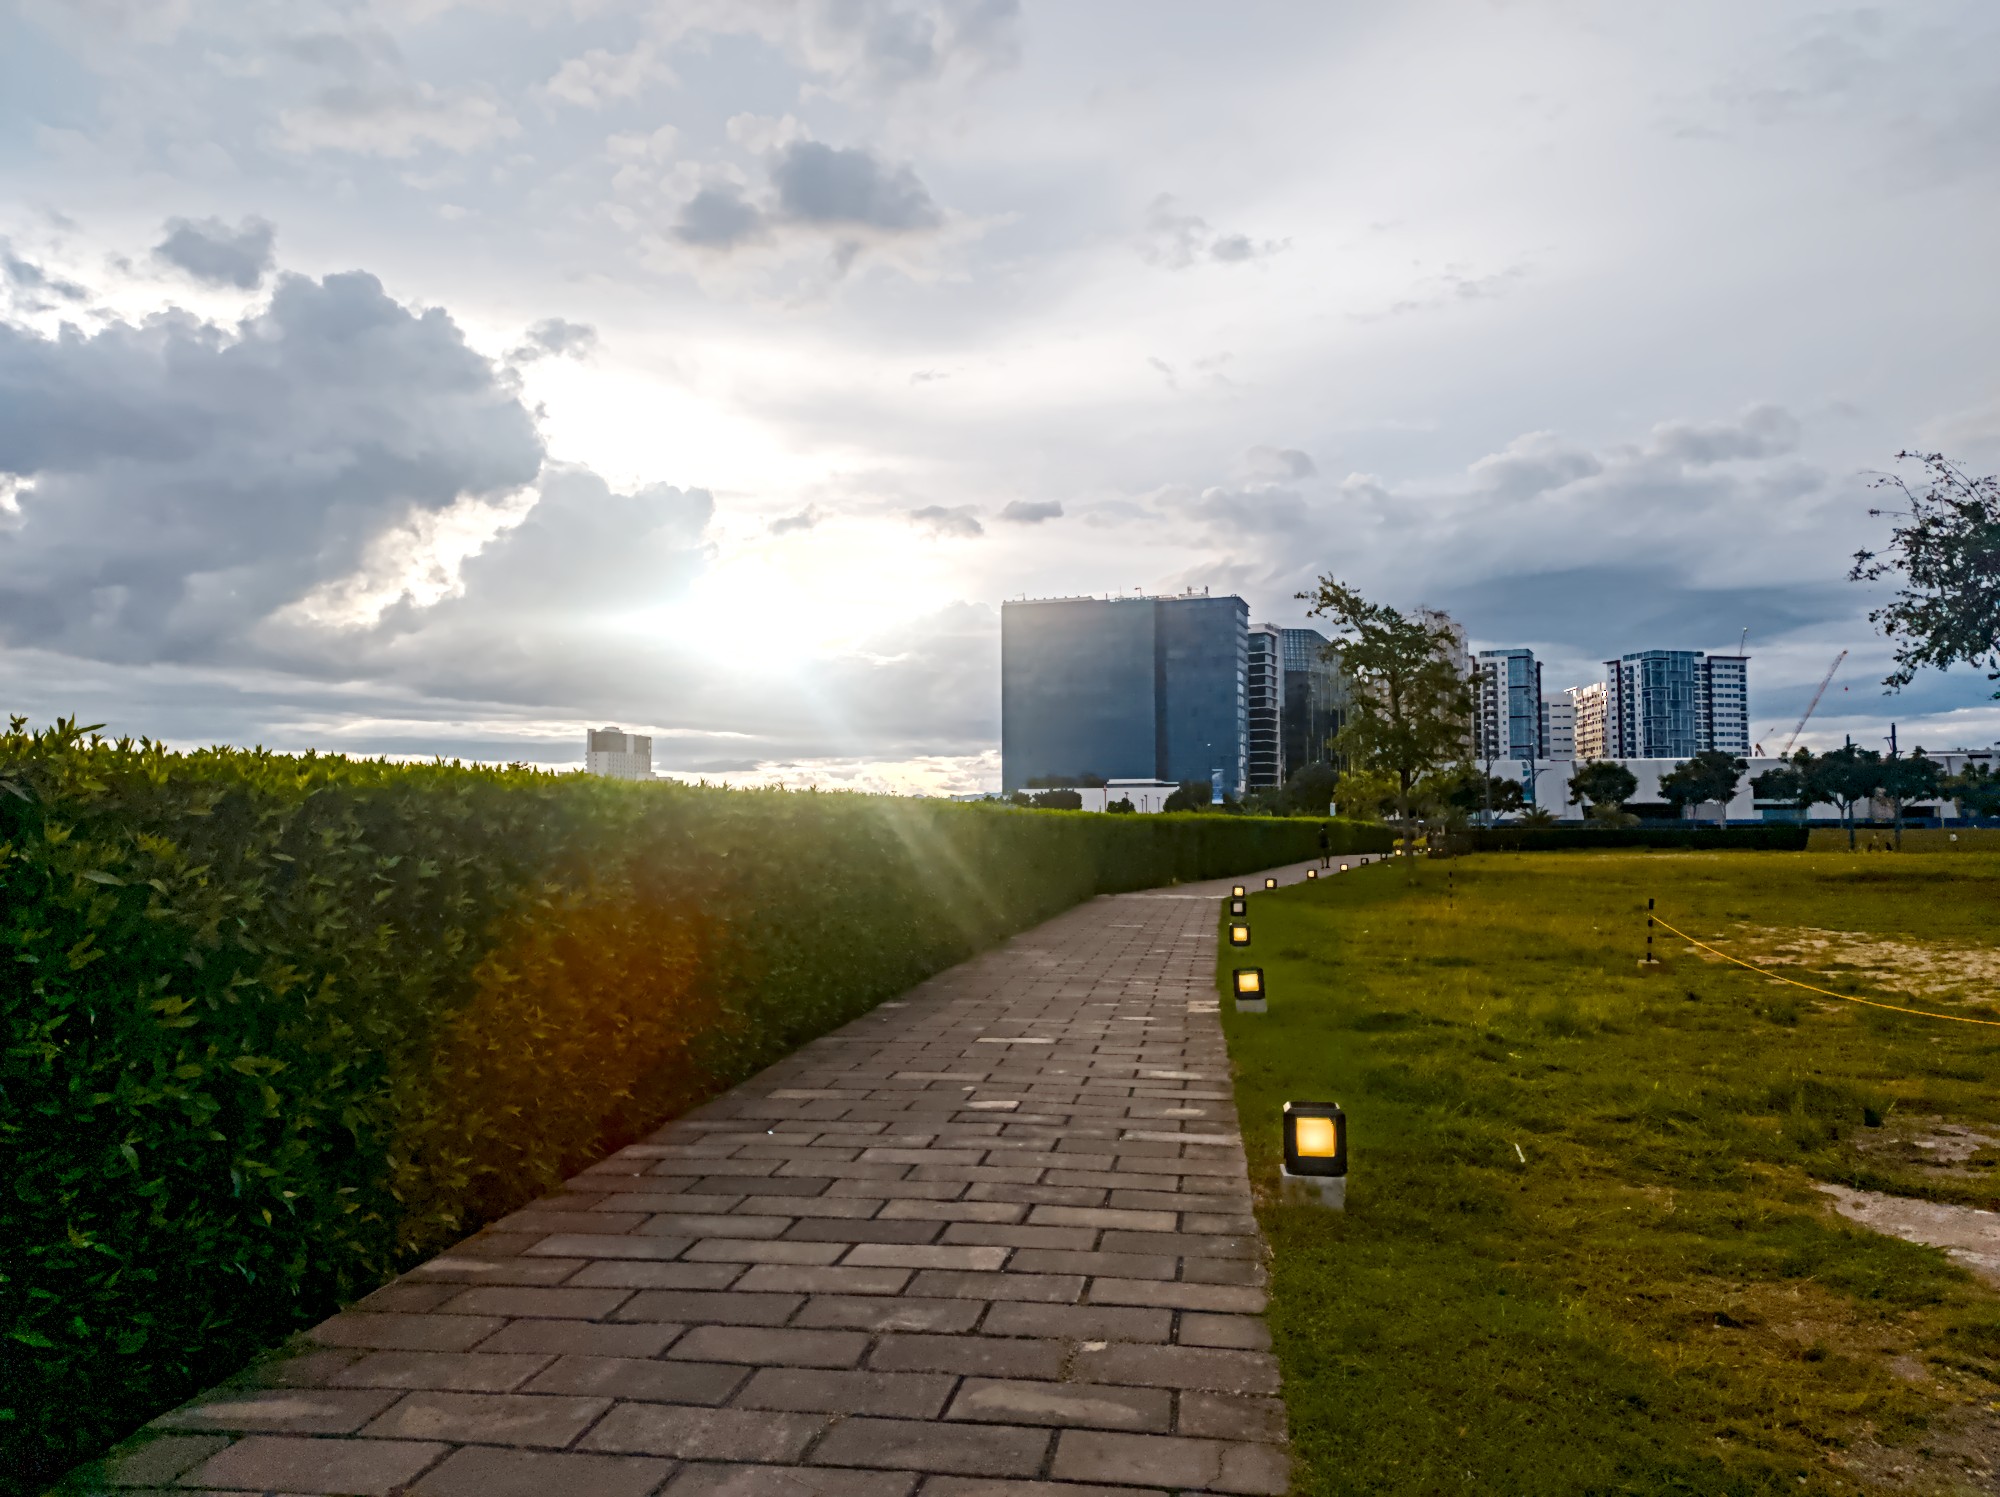
Adobe Lightroom (the online version) also works well, with only a few settings - quite surprising for an ad-hoc, display-oriented workflow:

  • Exposure +1.83
  • Shadows +54
  • Whites -100
  • Temperature 4050
  • Tint -60
  • Saturation +24
  • Clarity +60

(Oops, I forgot to heal the blue dot resulting from the sun’s reflection in the lens!)

The two editors that had trouble are RawTherapee and RapidRAW.

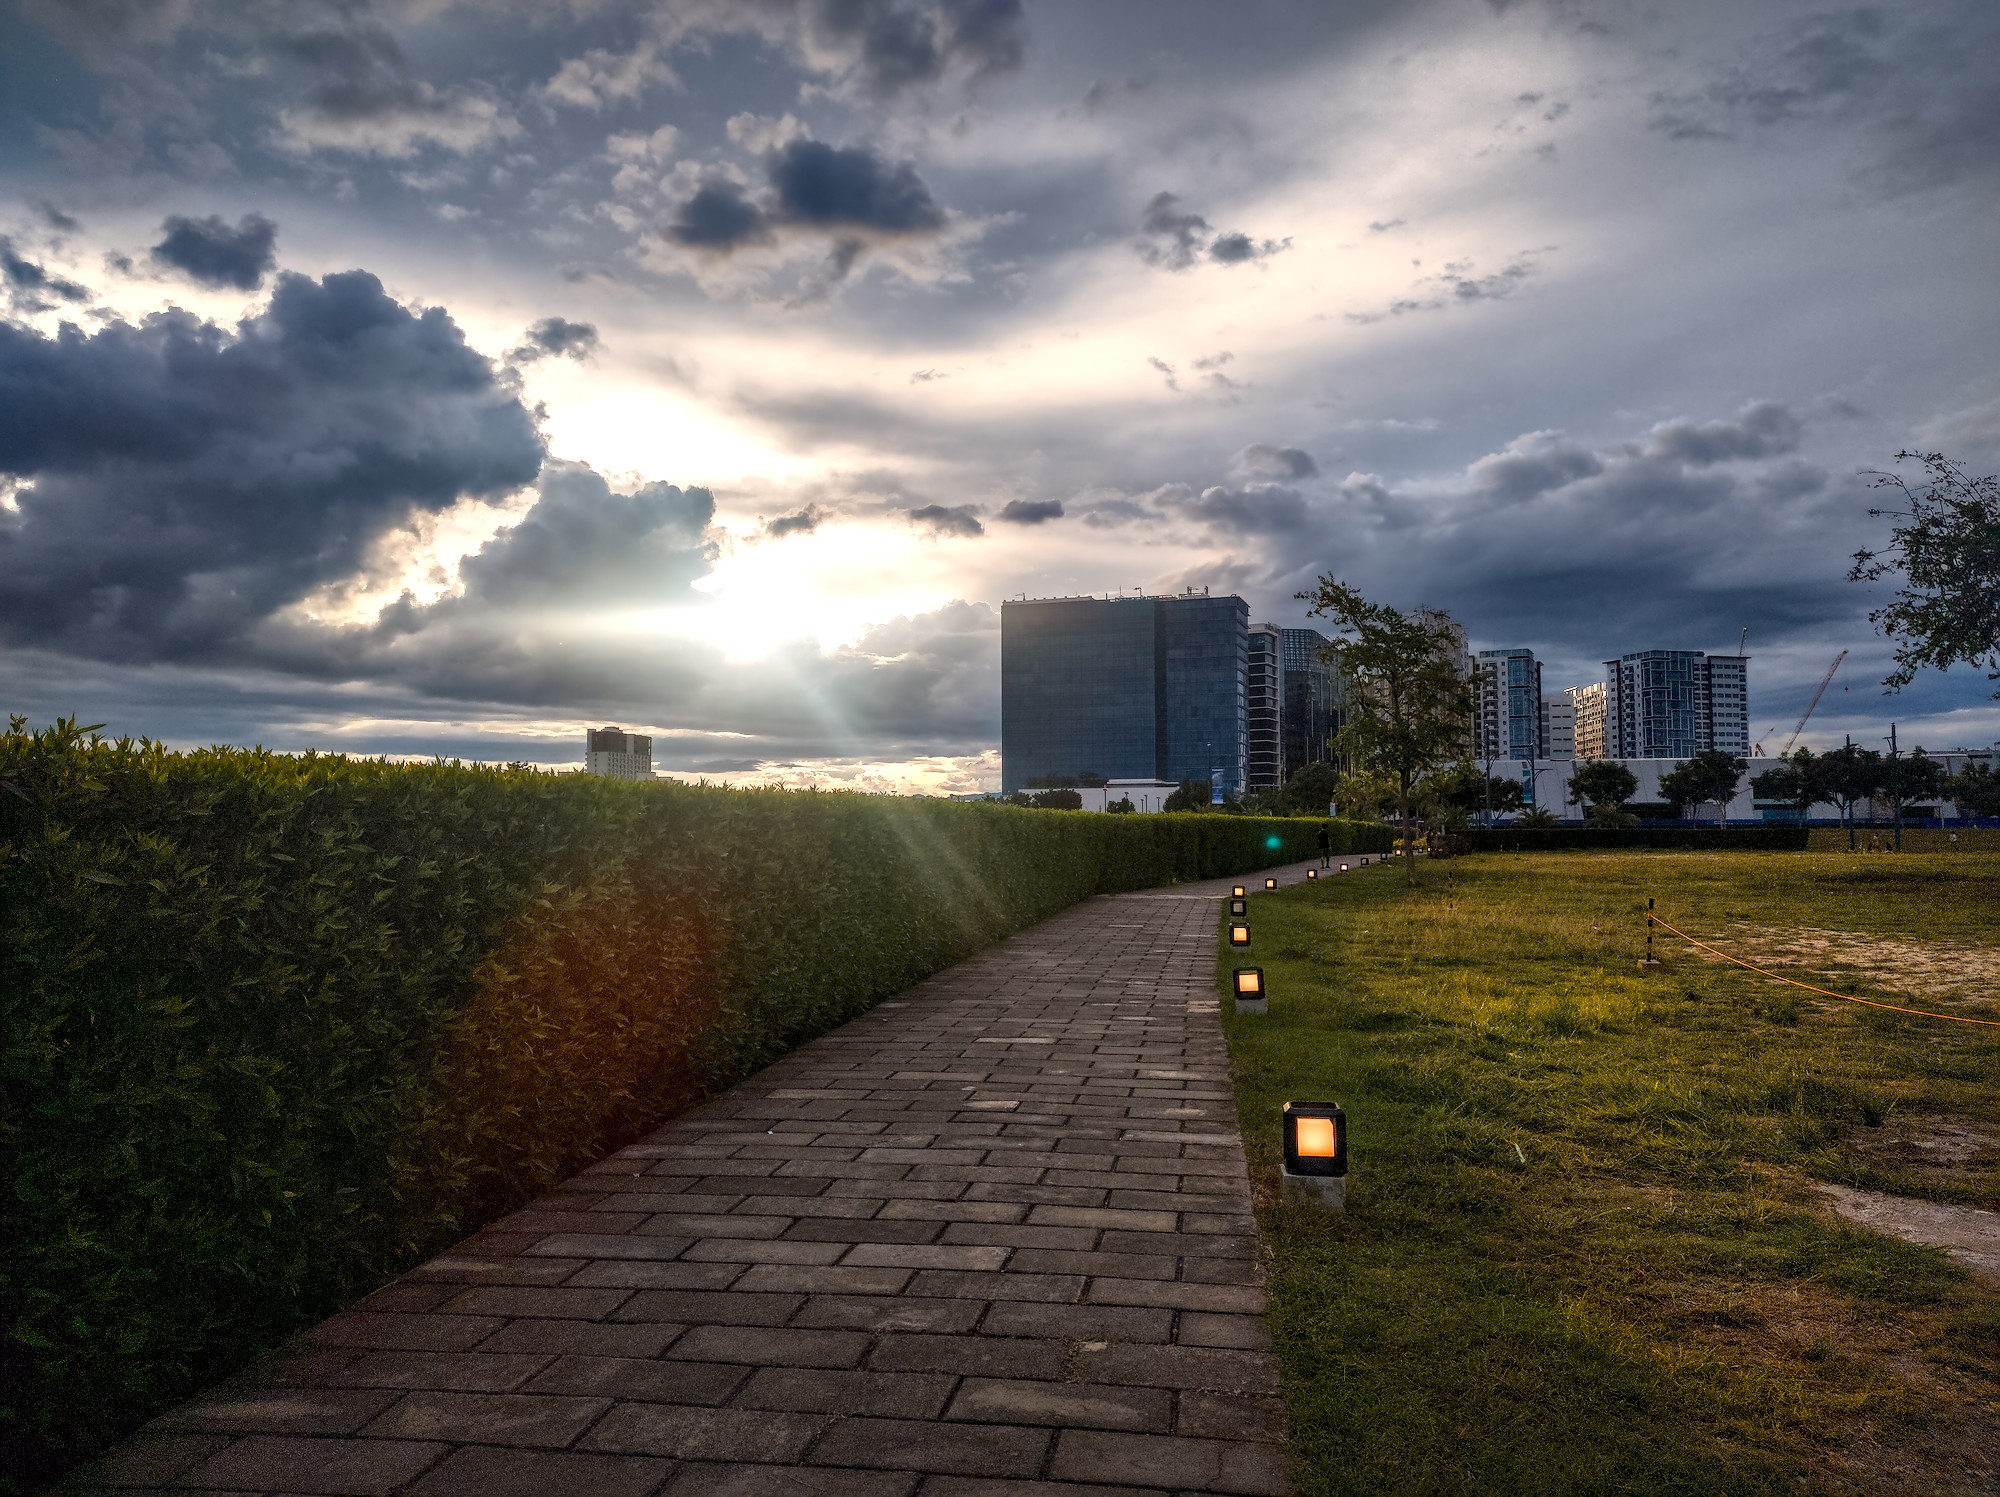
RawTherapee produced this not-quite-failed result with a disproportionate amount of effort:


IMG_20250907_171053.edited-with-rawtherapee.jpg.out.pp3 (15.6 KB)

And this is RapidRAW. @CyberTimon could you please look? Maybe you can better formulate bugs that prevent the use of RapidRAW on this type of images? Here is my best attempt - and it deserves no grade other than a straight “F”:

IMG_20250907_171053.dng.rrdata.txt (7.1 KB)

Did I use it wrong?

Problems found so far:

  • With a such severe brightness/contrast adjustment, AI cannot select the sky, and denoise sliders do not work at all.
  • I could not increase the contrast in the sky without using a mask, and, strangely, what worked is negative clarity/structure - very counter-intuitive.
  • Applying negative clarity on the whole image (inspired by the previous finding) has no effect.
  • When editing curves, there is no way to cross-reference a particular point in the image with the point on the curve that affects it.

You are welcome to suggest improved/alternative edits.

All files in this message, as well as its text, are licensed Creative Commons, By-Attribution, Share-Alike.

3 Likes

That’s not a bug. Filmic relies on correct input colours. Sigmoid and AgX will strongly desaturate highlights, and thus hide the problem.

Disabling non-essential modules (leaving only white balance + color calibration + highlight reconstruction) and strongly dropping exposure give this result:

Disabling color calibration and using just in-camera white-balance multipliers improves this quite a bit:

Turning everything back on:

3 Likes

I would then call it a bug that the problem did not surface until export time.

I also confirm that changing the “white balance” setting from “camera reference” to “as shot in camera” fixes the export. Then, this becomes a bug report against Standard Workflow – darktable.info – The Unofficial Darktable Guide & Resources which recommends “camera reference”.

1 Like

Two edits with darktable. A darker and a brighter one. I prefer the darker one, but I leave it to you. Both are far away from what OpenCamera delivered, because I don’t like the output that much. For me shadows are too bright and (chroma) noise handling is not really good…


IMG_20250907_171053.dng.xmp (19,7 KB)
IMG_20250907_171053_01.dng.xmp (20,7 KB)

3 Likes

Maybe you should read more about darktable before pointing out random bugs.

White balance + color calibration is the recommended way, but it depends on the camera’s matrix, and can produce bad results if that’s not correct.

Anyway, a possible, quite neutral, AgX rendering, based on your sidecar.

IMG_20250907_171053_01.dng.xmp (13.2 KB)

2 Likes

IMG_20250907_171053.dng.xmp (18.1 KB)

An interesting touch on the sky - thanks!

1 Like

You could try setting highlight reconstruction like this:

That already brings a substantial improvement with filmic:

Or guided laplacians:

1 Like

A display-referred edit using base curve + exposure fusion, just for kicks.


IMG_20250907_171053.dng.xmp (14.2 KB)

Something is definitely wonky with the image, the white balance module (‘temperature.c’) screams about invalid parameters if set to camera reference (which is what the sidecar from @patrakov uses):

   457.7242 [iop_validate_params] `temperature' failed for type "float", field: various (23336660.00000000 - [0.000000..8.000000] : default 0.000000)
   457.7242 [iop_validate_params] `temperature' failed for type "dt_iop_temperature_params_t"
1 Like

For comparison here is ART with Tone Equalizer instead of Log Tone Mapping:


IMG_20250907_171053.dng.arp (12.1 KB)

How did you arrive at the tone curve that you used? Is it some standard or widely-available preset?

This is the standard Auto-Matched Tone Curve:

There are a few other variations of this in Mode and Base curve drop-down boxes.

1 Like

For me, ART fails to auto-match anything, because there is no embedded JPEG file in this DNG.

Well, I can embed the out-of-camera JPEG into the DNG, and then ART (and RT!) will pick it up, but that’s borderline on cheating, so let me say “no” to this approach:

ln -s IMG_20250907_171053_DRO.jpg IMG_20250907_171053-thumb.jpg
exiv2 -i t -l . IMG_20250907_171053.dng

(and then fix the orientation)

After that, no log tone mapper and almost no tone equalizer are necessary to give the result the same look.

1 Like

Interesting. When I clicked the Auto-Matched Tone Curve button the curve did disappear for me too. I guess what I had was some remnants from the previous edit. BTW the curve can be saved and then loaded later for another photo.

Personally I always shoot with both RAW and JPEG enabled. I consider OOC JPEG as a good starting point to edit RAW. Sometimes JPEGs are so good I can’t match them in RAW.

I won’t call this “borderline cheating”, I consider this approach as quite helpful. Why not use the camera maker expertise to get good photos quicker? I guess some people like to start from clean slate and then tinker with myriad of controls, I prefer a more efficient experience.

Open Camera DNG are weird. I tried to use that app some time ago… JPGs were generally fine but the wb often has weird coefficients and going just from memory it used a weird d55 wb on one phone…There is a thread or two even going back a couple of years on these images. I’ll dig that up but I think in the case of images coming from this app there are some let’s say not anticipated data… This image used the matching BP data for the raw file but it comes in weirdly magenta.

Also just a note when editing DNG from phones…most support gainmaps and DT will apply it if its found automatically but in ART and RT you need to go to the flat field module and check get from metadata option to apply it…it will nicely balance out the tone of the image before you start editing as the phones have that wicked strong vignette…

Here is filmic with some tweaks I have been experimenting with, the blown area could be made more white if that looks better … and it could be brighter in the shadows but I think dark works with the path lights…if they are on and its light around then it looks a bit off to me…but thats the nice thing with raw lots of ways to go… :slight_smile:


IMG_20250907_171053.dng.xmp (29.3 KB)

Another version…


IMG_20250907_171053_01.dng.xmp (18.8 KB)

1 Like

Just doing a self-check here…on both my laptop and my desktop, I am seeing some strange turquoise areas on the edges of the cloud to the left of the sun in about 9 images posted by multiple people. Is it just me or are other people seeing this too? Maybe I have to re-calibrate!

…are indeed present in both the RAW file and the out-of-camera JPEG (e.g., RGB(236,244,246) at one point). Feel free to edit them out, even if this is done by expanding the burned-out area.

EDIT: Somehow, Lightroom and my initial attempt with RT were able to avoid the artifacts.

Thanks for confirming that it’s not just me. I’m just puzzled as to why they are there in the first place. I’ve never seen that color as an artifact before. And it’s not just in your dt 5.2.1 and RapidRAW examples, it’s also in some images added by other people.

It can indeed look that weird way, but there is a simple explanation. In tropics, the sunset is really quick. At the moment in the photo, the sunlight was indeed full-on, and the side lights served only a decorative purpose. But in 15 minutes, the sun would hide completely below the horizon, giving the utility to these small yellow lights.