[Play Raw] Call for Darktable filmic workflows

That’s not true. You can have several drawn masks on the same instance, with different opacities, as well as masks boolean operations in the same instance.

The only time I have used control points (sort of) was in Photoshop fake depth-of-field tool. I hated everything about it.

But the thing is, I have no idea what sort of maths they use to extract the region around the control point. It looks like some sort of feathering on several channels, maybe guided filters like the ones Heiko added in dt 2.6, maybe graphcut segmentation like what OpenCV has, maybe a combination of both (or similar methods), I don’t know… Until I see an equation, I’m useless on that matter.

1 Like

Wow, thanks to all, very nice!

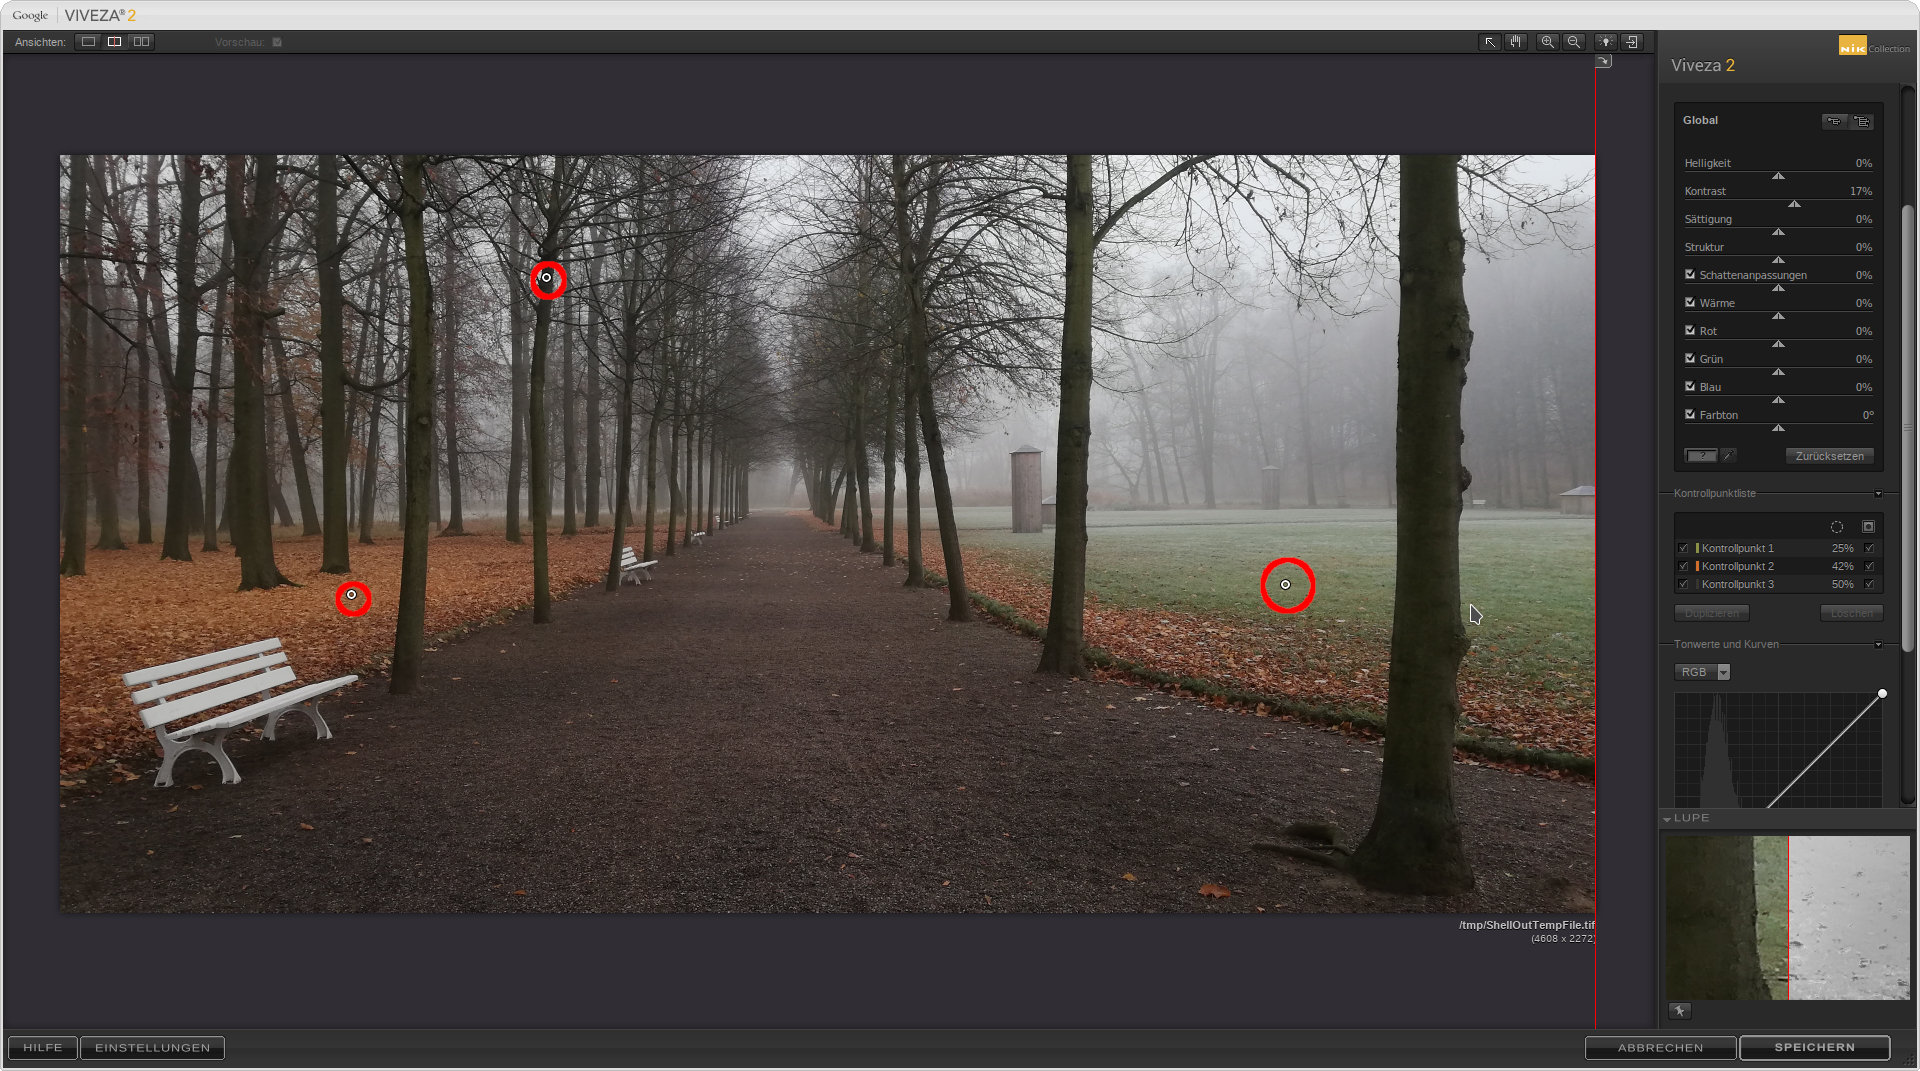
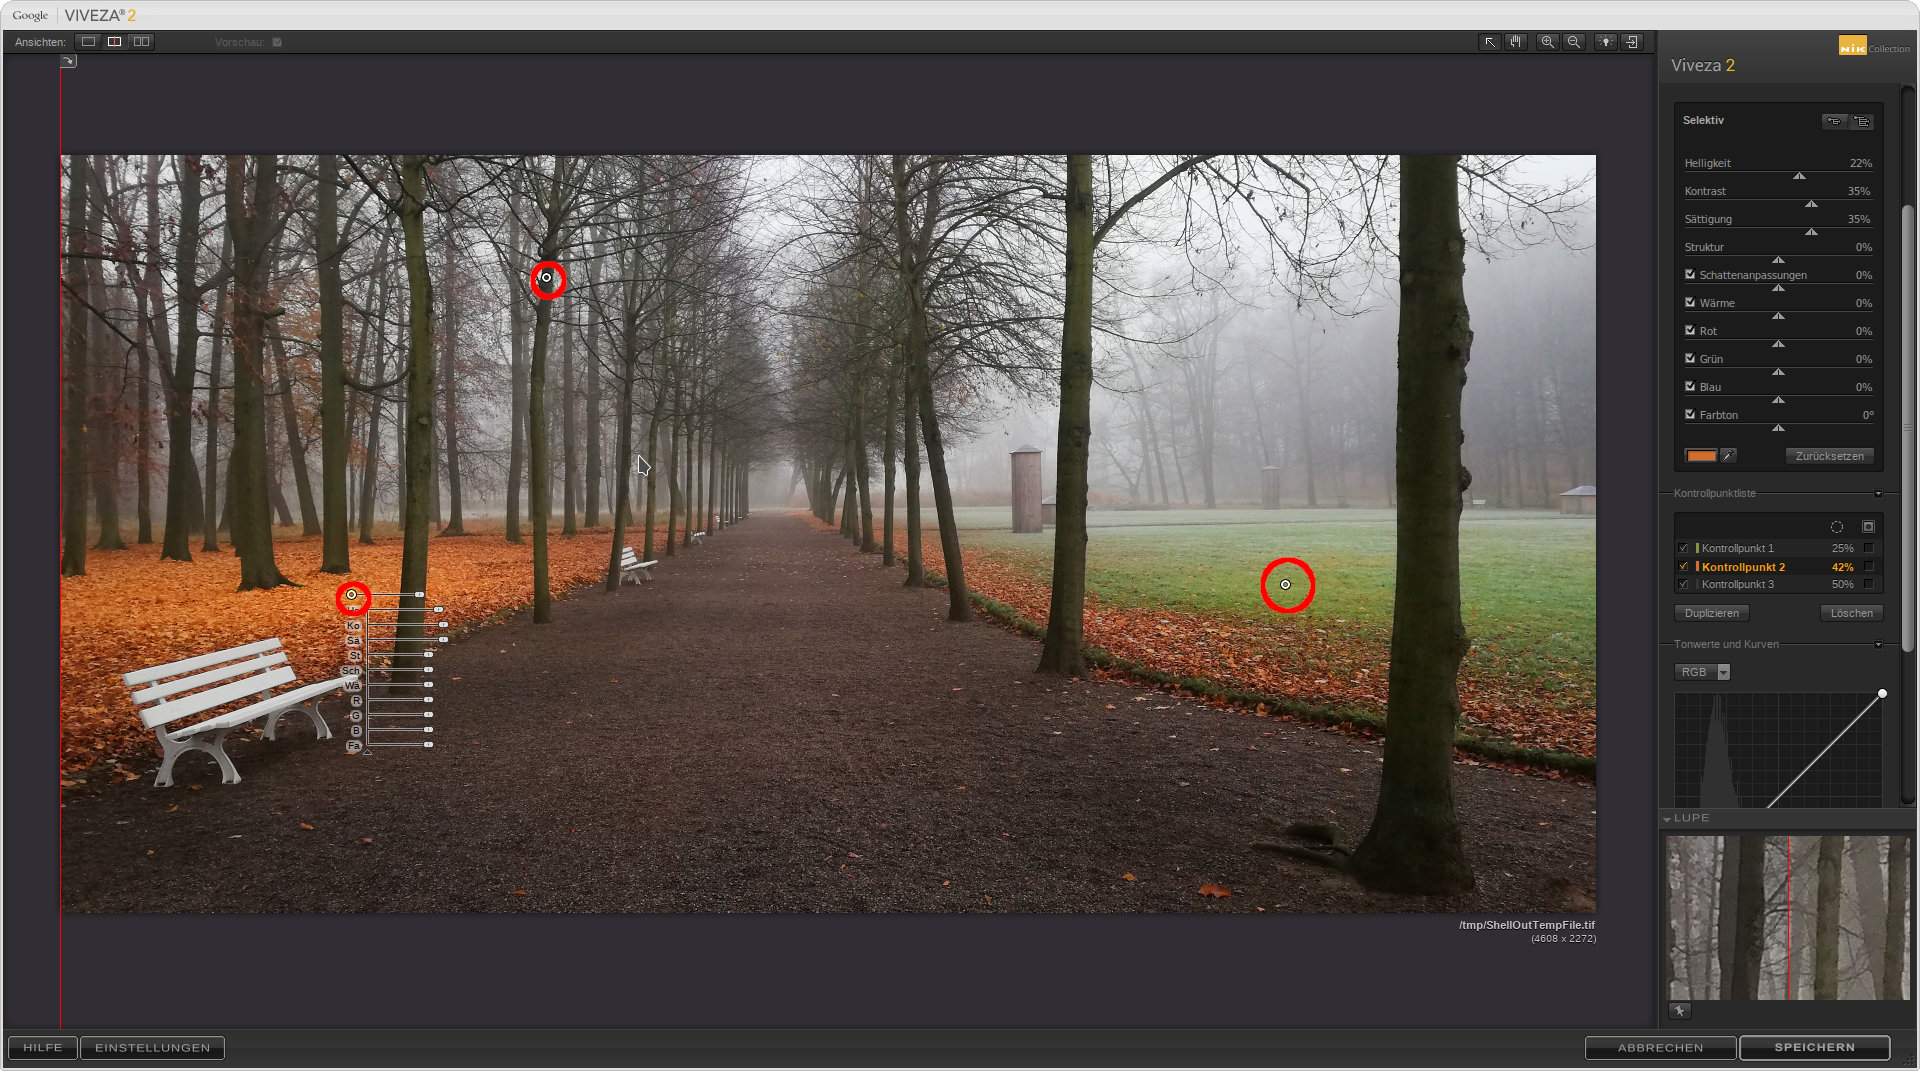
How couldn’t I have thought about it? I’m so filmic-oriented these days that I tend to favor global adjustments to local ones and forget about the latest. Thanks for the tip anyway.

Wow, it seems a huge task in front of you. Am I wrong to think that we have a new developer on the block?

@s7habo Boris, thank you very much for you thorough analysis and edit of the photo! Lots of things to learn from, much more than I’ve asked for!

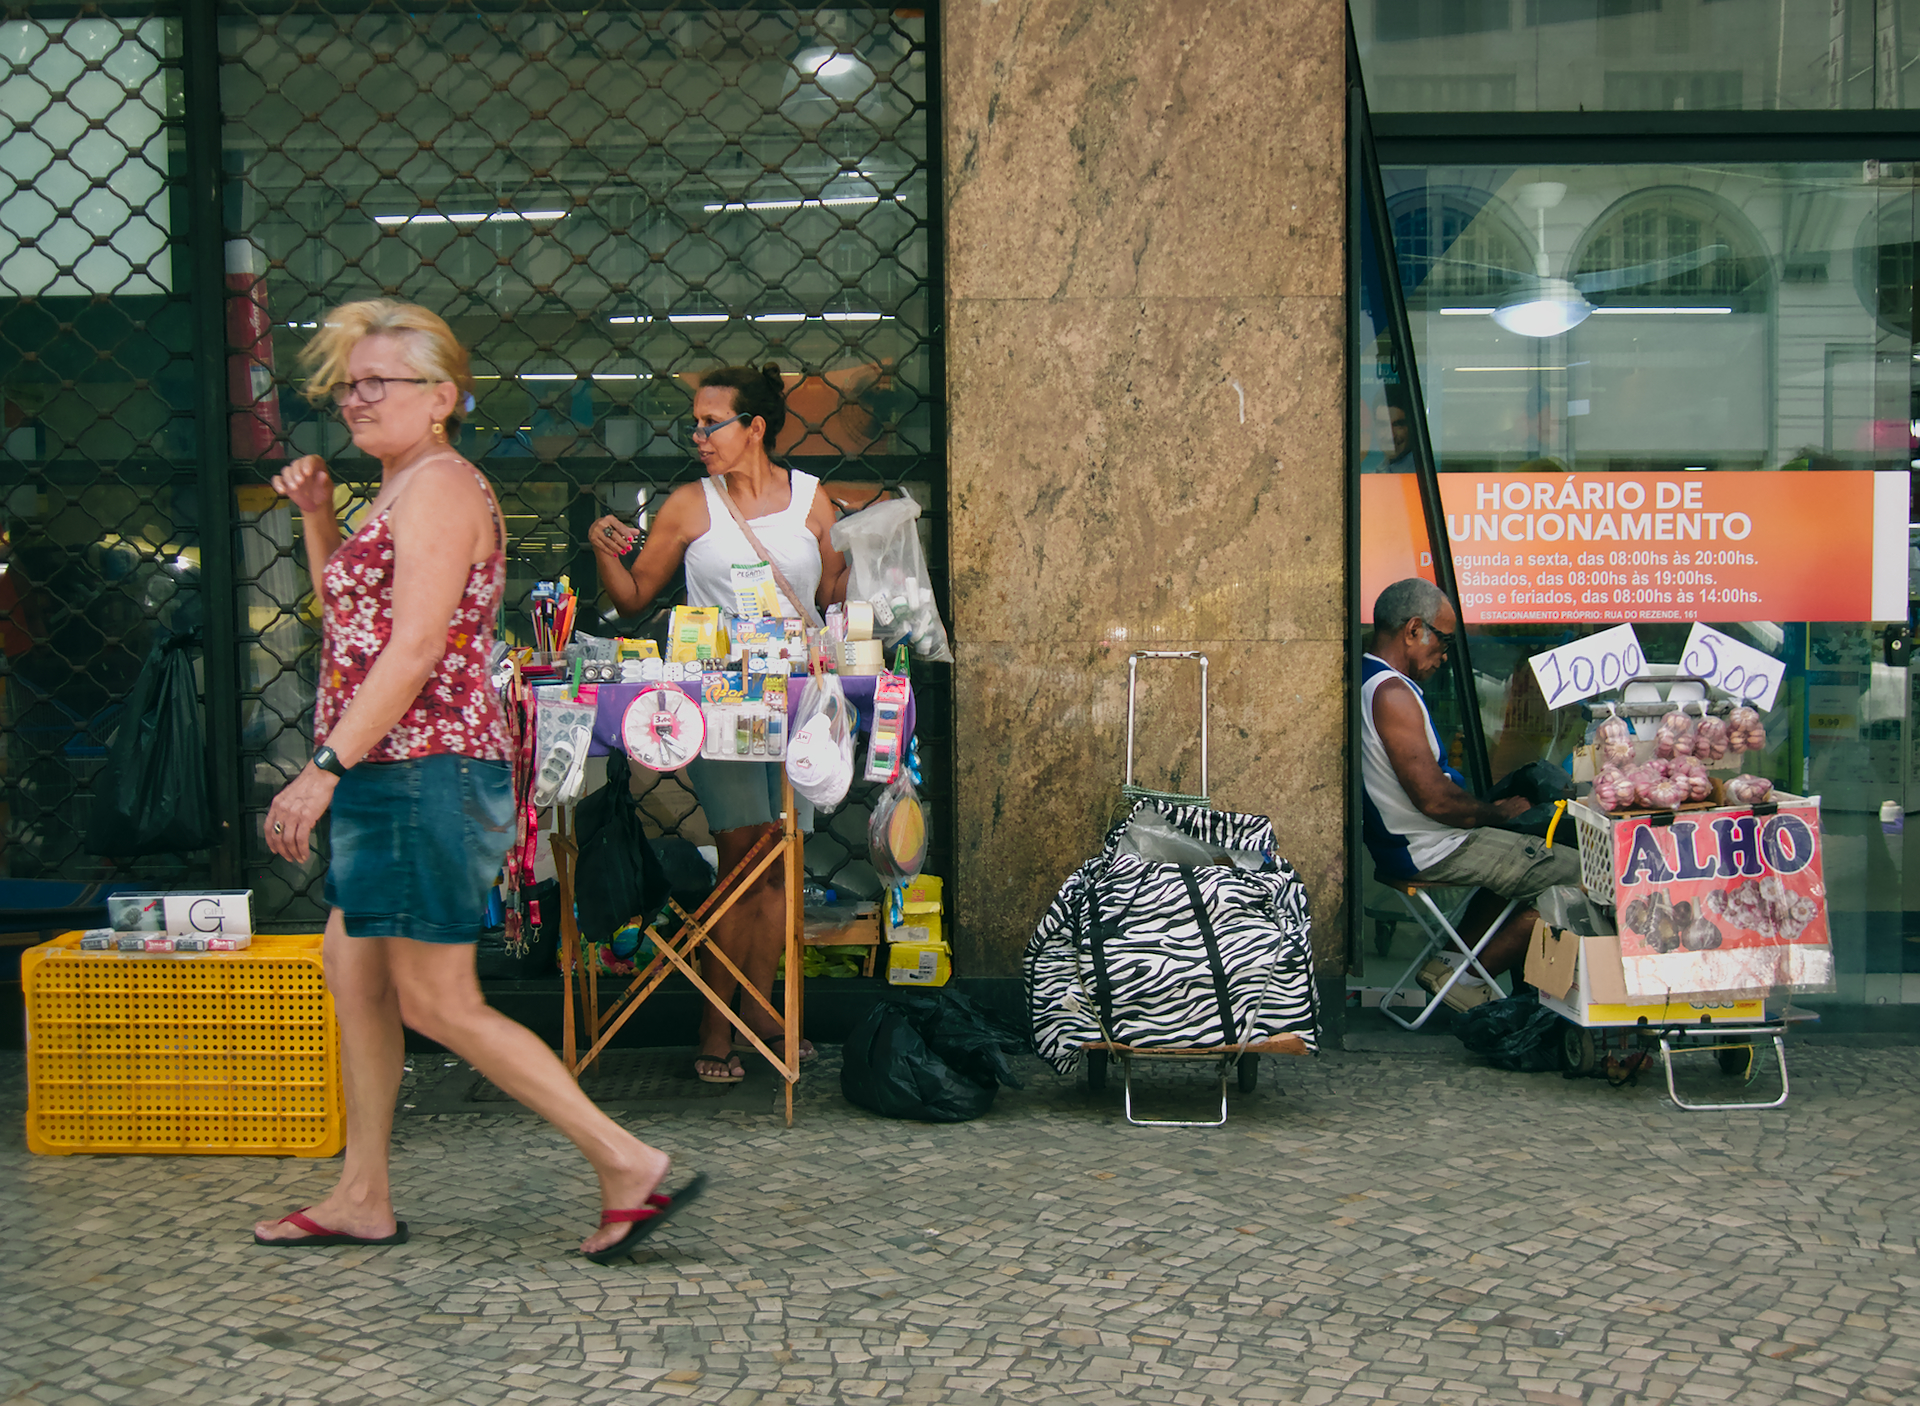
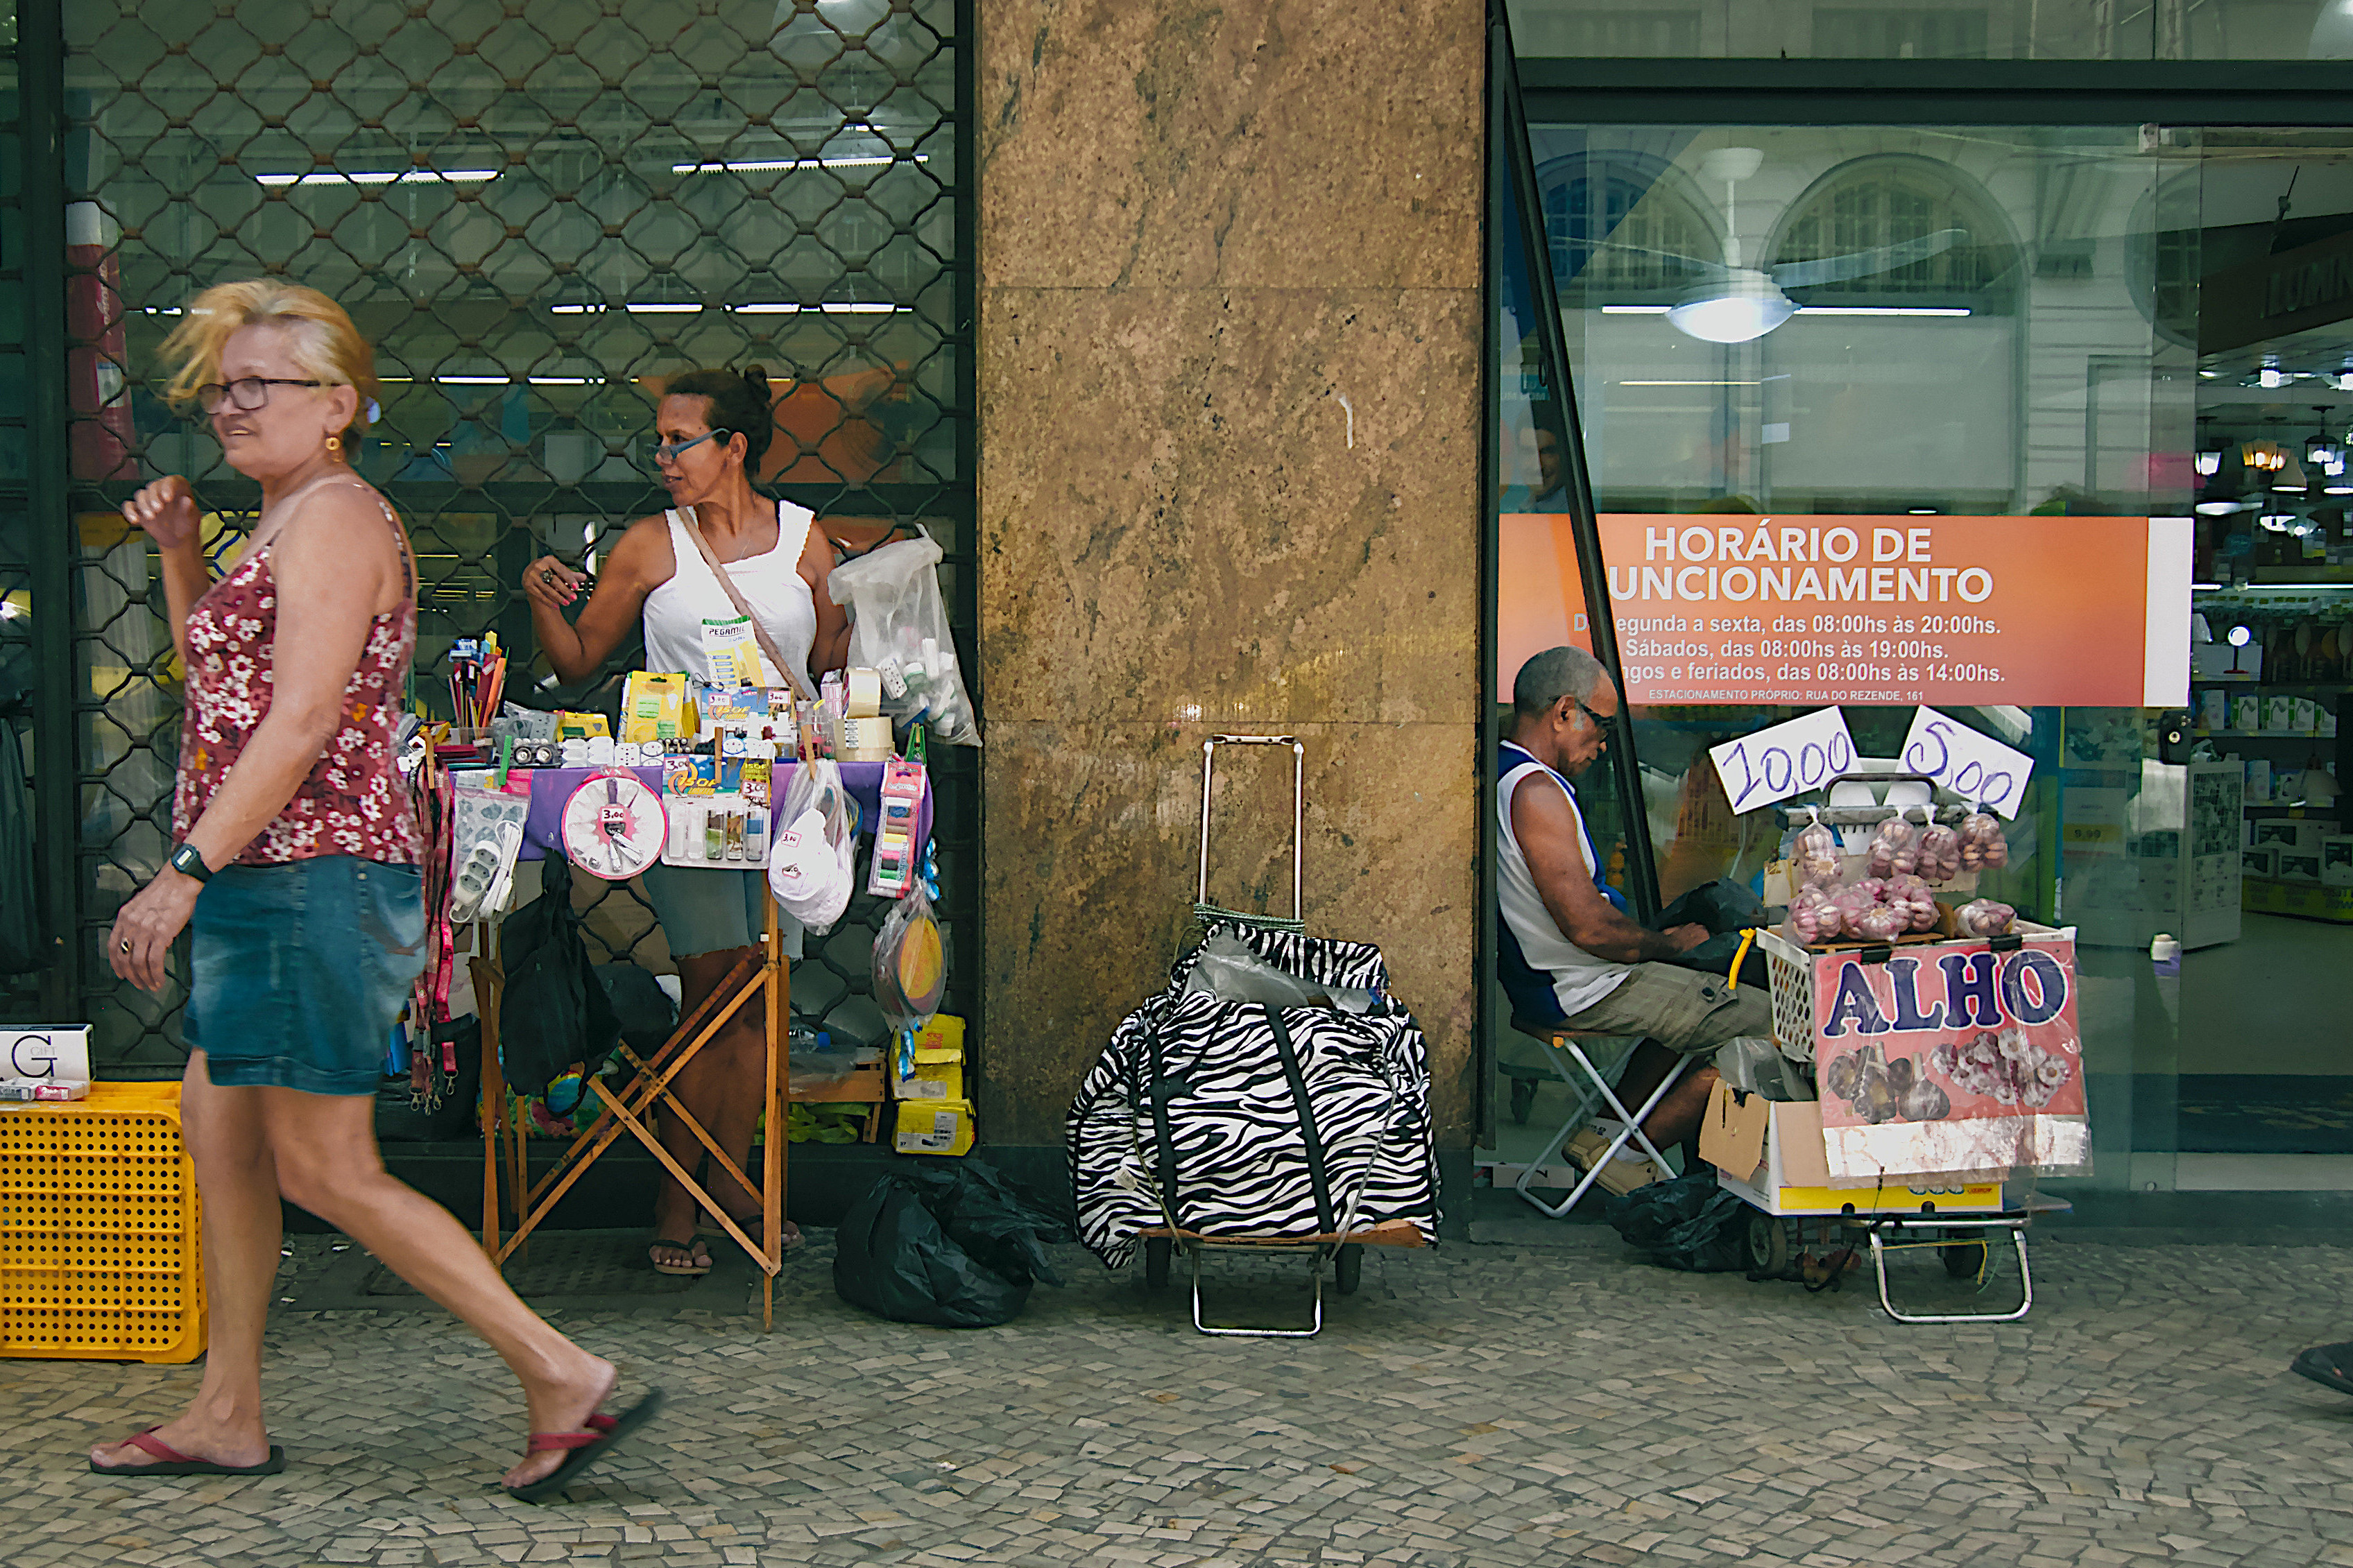
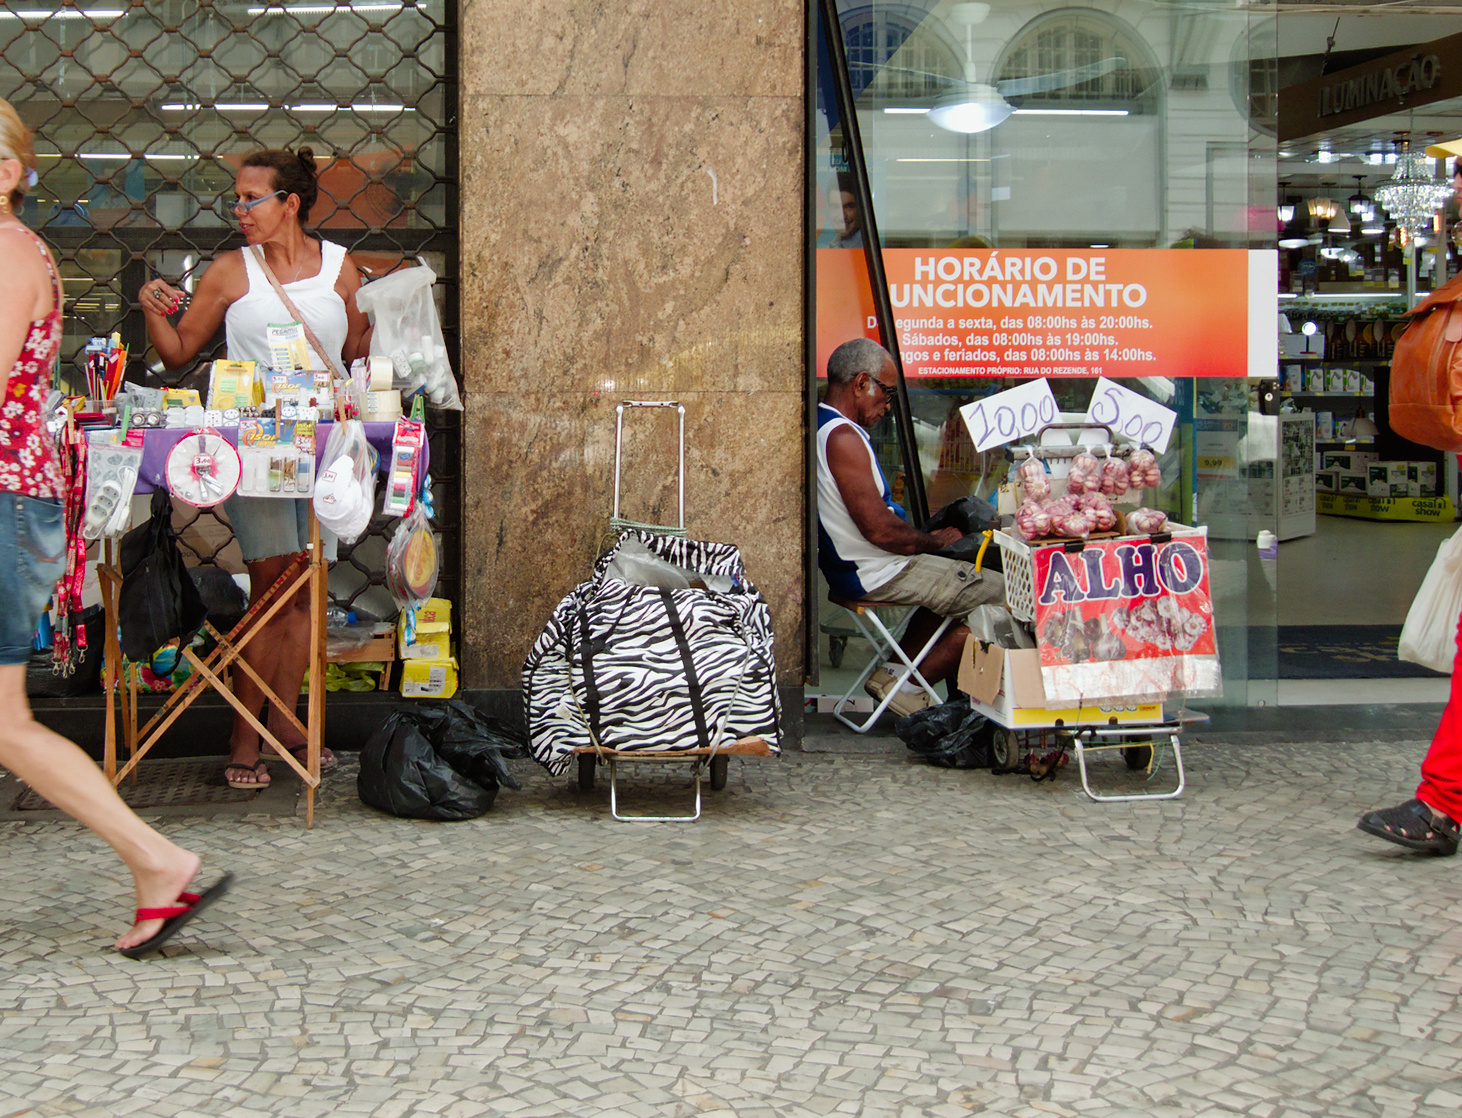
Interesting that you’ve mentioned about this separation. I tend to give a more political stance to it and say that the column separates people that come from the same world, origin, class, whatever… now it’s just a matter of giving a name to the column :slightly_smiling_face:

As for accentuating the salespeople, very nice approach!
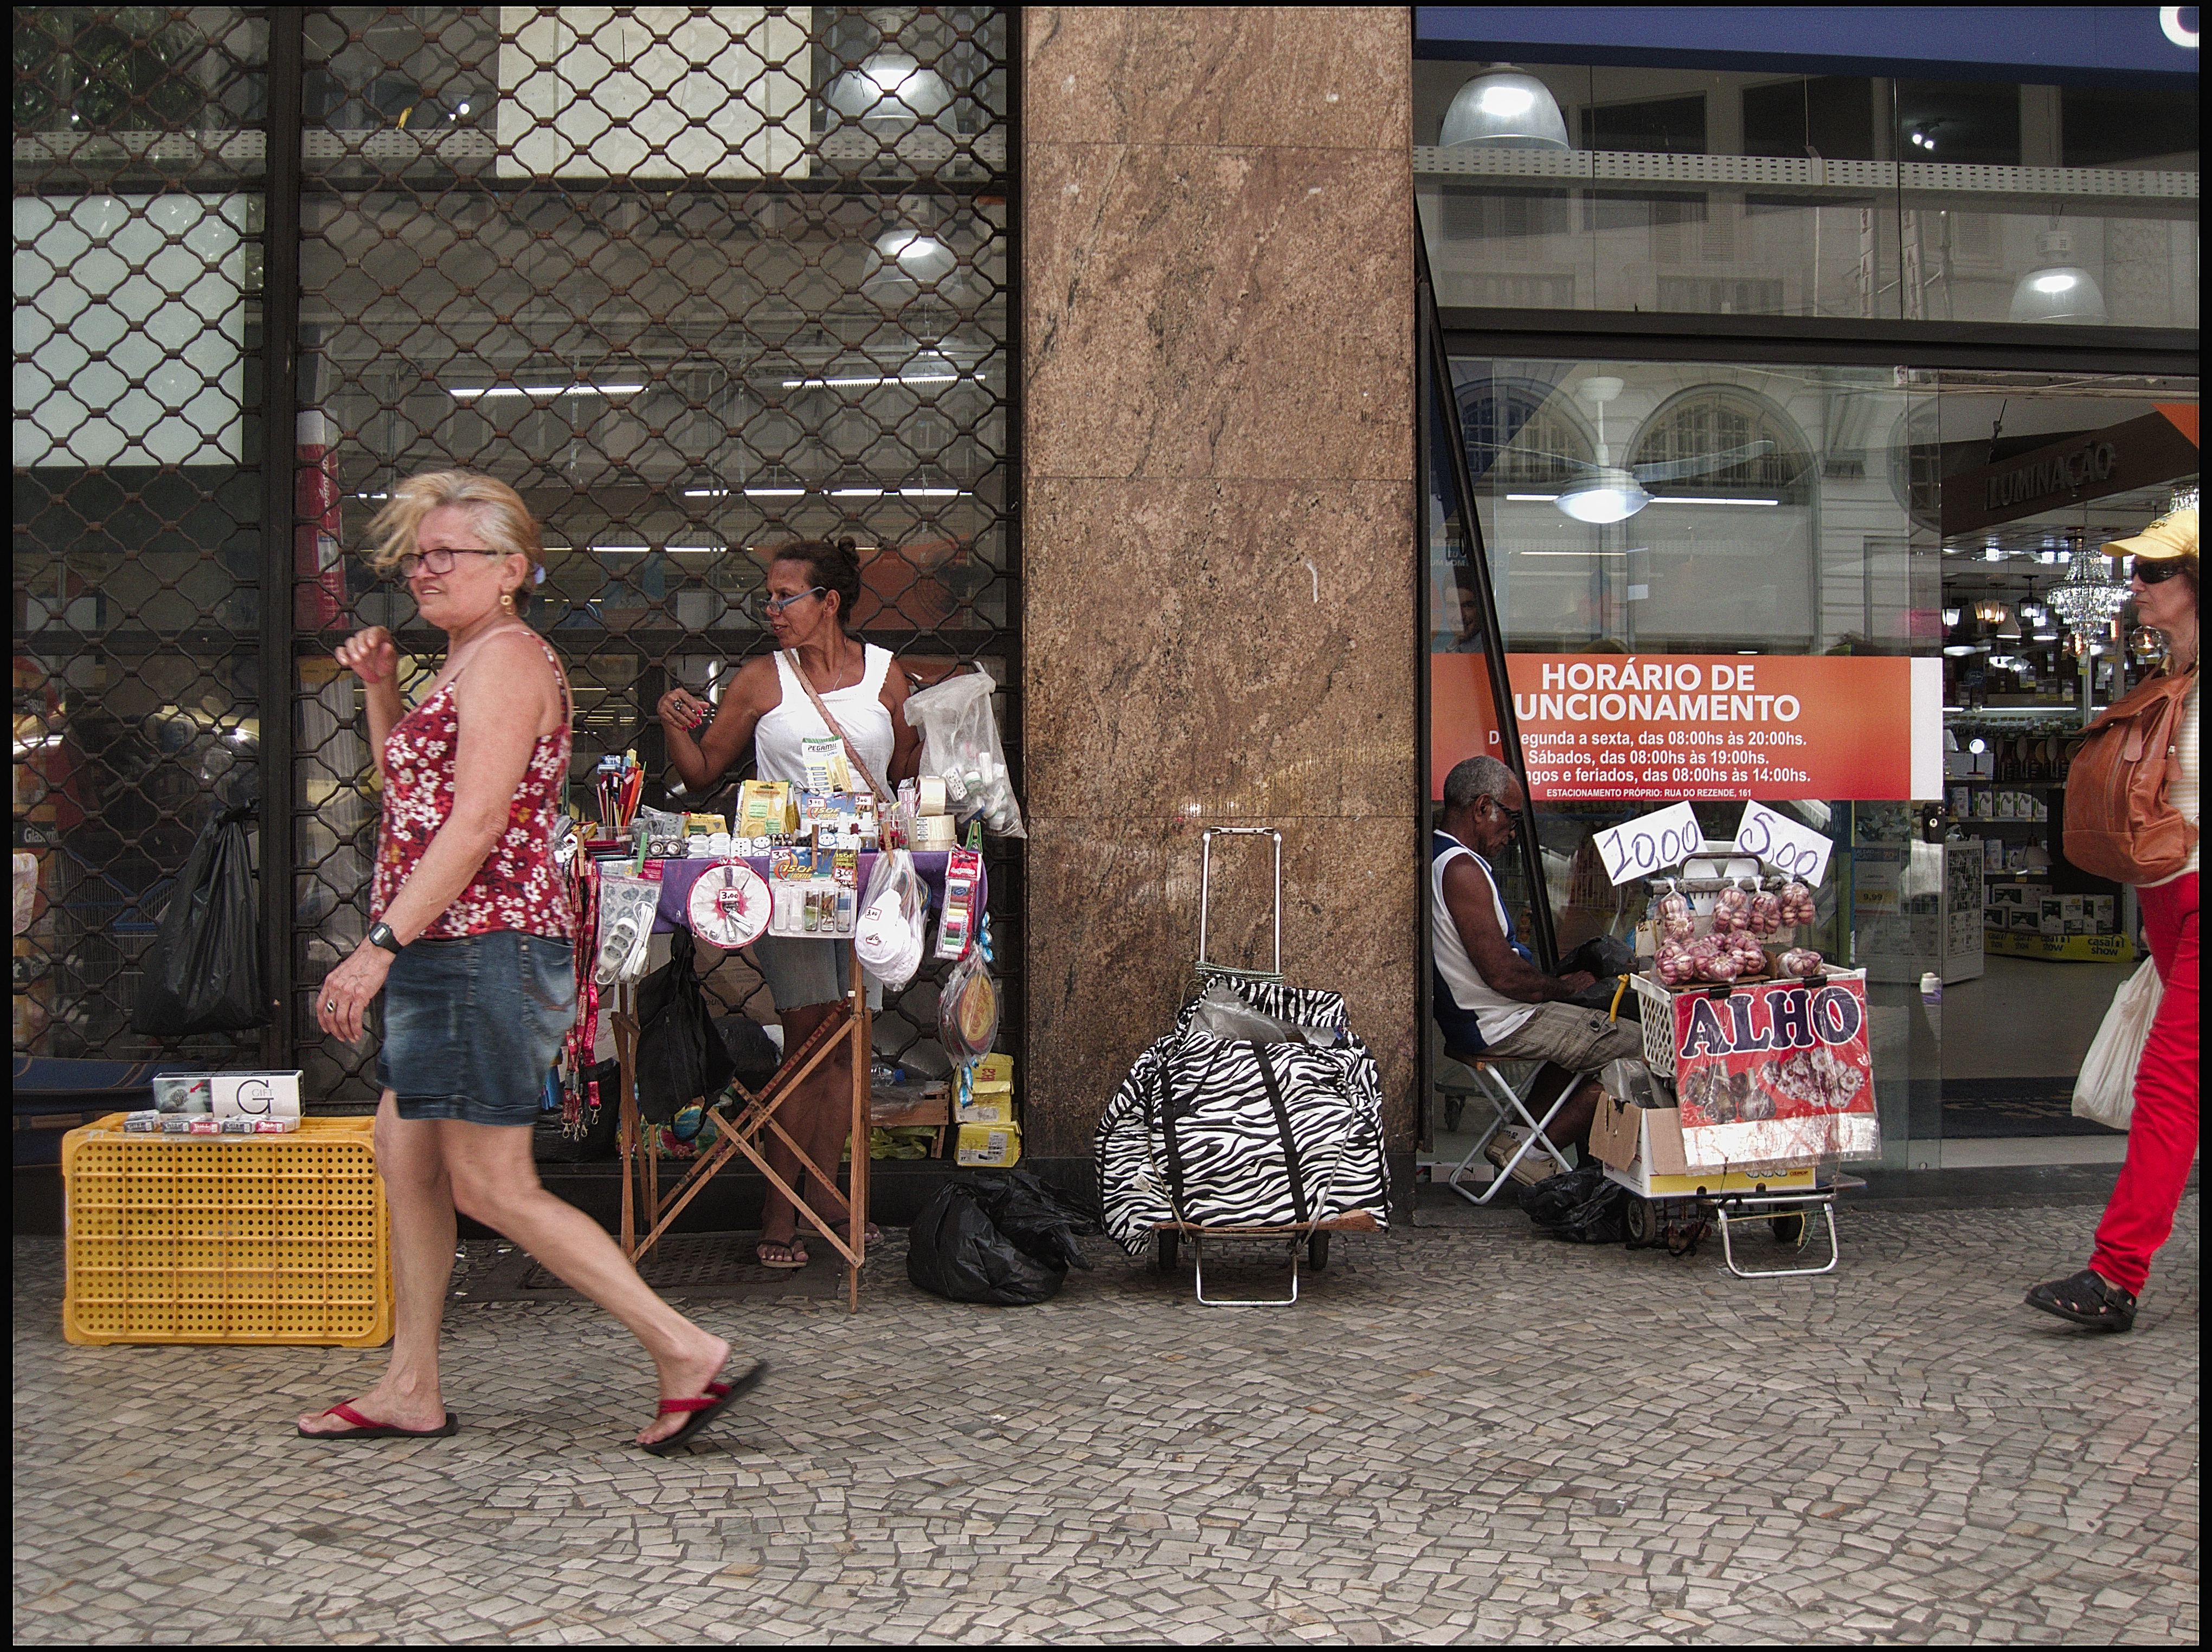
Before adding this pic to Play Raw, I ended cropping like this (your version):

This way I think the viewer’s attention is also drawn to the salespeople, but maybe we loose some perspective, a feeling of how small they are, which is present in the full framing version. The only thing I don’t like is the lady entering the scene at right. What do you think?

Finally, as for the color grading, it certainly adds to the message that the image conveys, with its cooler and somehow “industrial” mood.

Really, I have lots of material to think about.

Aurélien, I couldn’t find any of those settings in your xmp. I’m very interested in looking at it, since you seem to be the only one to have addressed the reddish problem without local adjustments.

Thanks again to all!

1 Like

If you want to influence similar parts of the image on different areas, yes, but f.e. not in this case:

On this picture I want to increase the saturation and brightness of orange leaves and green grass individually and only lighten the trees a little bit. Therefore I set control points for the corresponding areas:

This is the mask for each control point:

After I have changed the areas individually, the result looks like this:

in darktable, although I can have several drawn masks in one instance, I don’t know how to process the leaves and grass separately if I have to use separate color channels for the parametric mask to mark both, which is not possible.

:smile::+1:

Yes, it’s very good if the color differentiation is very clear but, you can’t choose the two different areas with similar colors, you have to repeat the selection each time. I don’t know, maybe this module could be improved a bit :slightly_smiling_face:

No. Me, too! :slight_smile:
I used Lab… [Pardon, @anon41087856! ]

lol… since you haven’t uploaded a jpg, I ended up forgetting about you… my bad

Yes, it looks better, but I would have crop it so as not to lose the symmetry (the separating column in the middle):

However, each viewer sees the picture differently. Very important is that you don’t let yourself be influenced too much by the opinions of others. :wink:

1 Like

GUI isn’t G’MIC’s strong suit, although it has been improving. I think your question is less of a problem in a raster editor than a raw processor. I have seen your work and know that you are proficient in GIMP. :nerd_face:

1 Like

Ok, I have watched that :

https://www.youtube.com/watch?v=4cLAudm5yXg

It seems very likely that they use a guided filter around the coordinates of the point, then sample the color of said point to define at once all the parameters you need to manually input in dt. That is something that could be done in dt too. But, for the correction itself, they use masks the same way Capture One does : define a zone first, then load corrections. dt’s logic is the inverse : define a correction first, then escape areas outside of the masks. That part will not be possible anytime soon in dt.

So, in dt, control point would translate in a vector storing coordinates, radius, hue, saturation, … and feeding this values as settings for a regular parametric mask with feathering. I could try it but… man this becomes a full-time job for real.

3 Likes

I do not know how color look up table module in dt works, but I have used it in a way that resembles the use of conrol points in Viveza video.
Do you have any experience with the color look up table module as control point selector?

1 Like

An alternative crop that puts the focus more on the sellers and relegates the passers-by to background. I’ve been lazy and used someone elses JPEG attempt…

2 Likes

Great idea!

Especially it can be interesting if you can choose an area in the color picker instead of a point as a reference for parametric mask.

This would be even more superior than Viveza’s control points since you can combine parametric mask with different drawn masks in darktable, which could make selection of a certain area even more precise.

Me too. That is great module. Also the color zones module can be used in a similar way.

1 Like

My try:

  • Modify exposure a bit
  • Filmic
  • Another instance of sharpen
  • Equalizer
  • Local contrast (default value)
  • Color balance (output saturation 95%)

Uncropped version:

Cropped version:

Thanks!

3 Likes

It looks like you have not been using “negative control point”/“protect area at all”. So the adjustment is actually affecting the whole image …

In this case there is no need for it. it was just a quick and dirty demonstration.

Ok that’s fine.
I was asking because not everyone is aware of this.

Hi @anon41087856 and @s7habo,
some time ago I read that the control point part of the software is under US and/or CAN patent. So this could be a source for finding out, how it works. But it also requires to find a way around this patent, when similar should be implemented in darktable.

Unfortunately I cannot find the page anymore, where I read about it…

I wouldn’t be surprised if it was patented. Although Europe doesn’t recognize software patents (the source code is protected, not the feature).

DxO bought Nik Collection ( Viveza - Color effecs pro + more ) from Google.
Control point is now a part of DxO Photo Line ( that’s one of the reason I like it so much)

I think they have licenced it to Nikon Capture

It’s a bit ironic that this awesome tech comes from a so limited and camera-centric software…


Filmic Test by gadolf CC BY-NC-SA.DNG.xmp (5.6 KB)

Here’s my version, as edited on my live stream! (Although I used more than just the filmic module for this) You can still see the process for the next two weeks at twitch.tv/chicagocameraslinger

Thank you for sharing!!

3 Likes