An RT 5.5 attempt.
_DSC0134.jpg.out.pp3 (12.3 KB)
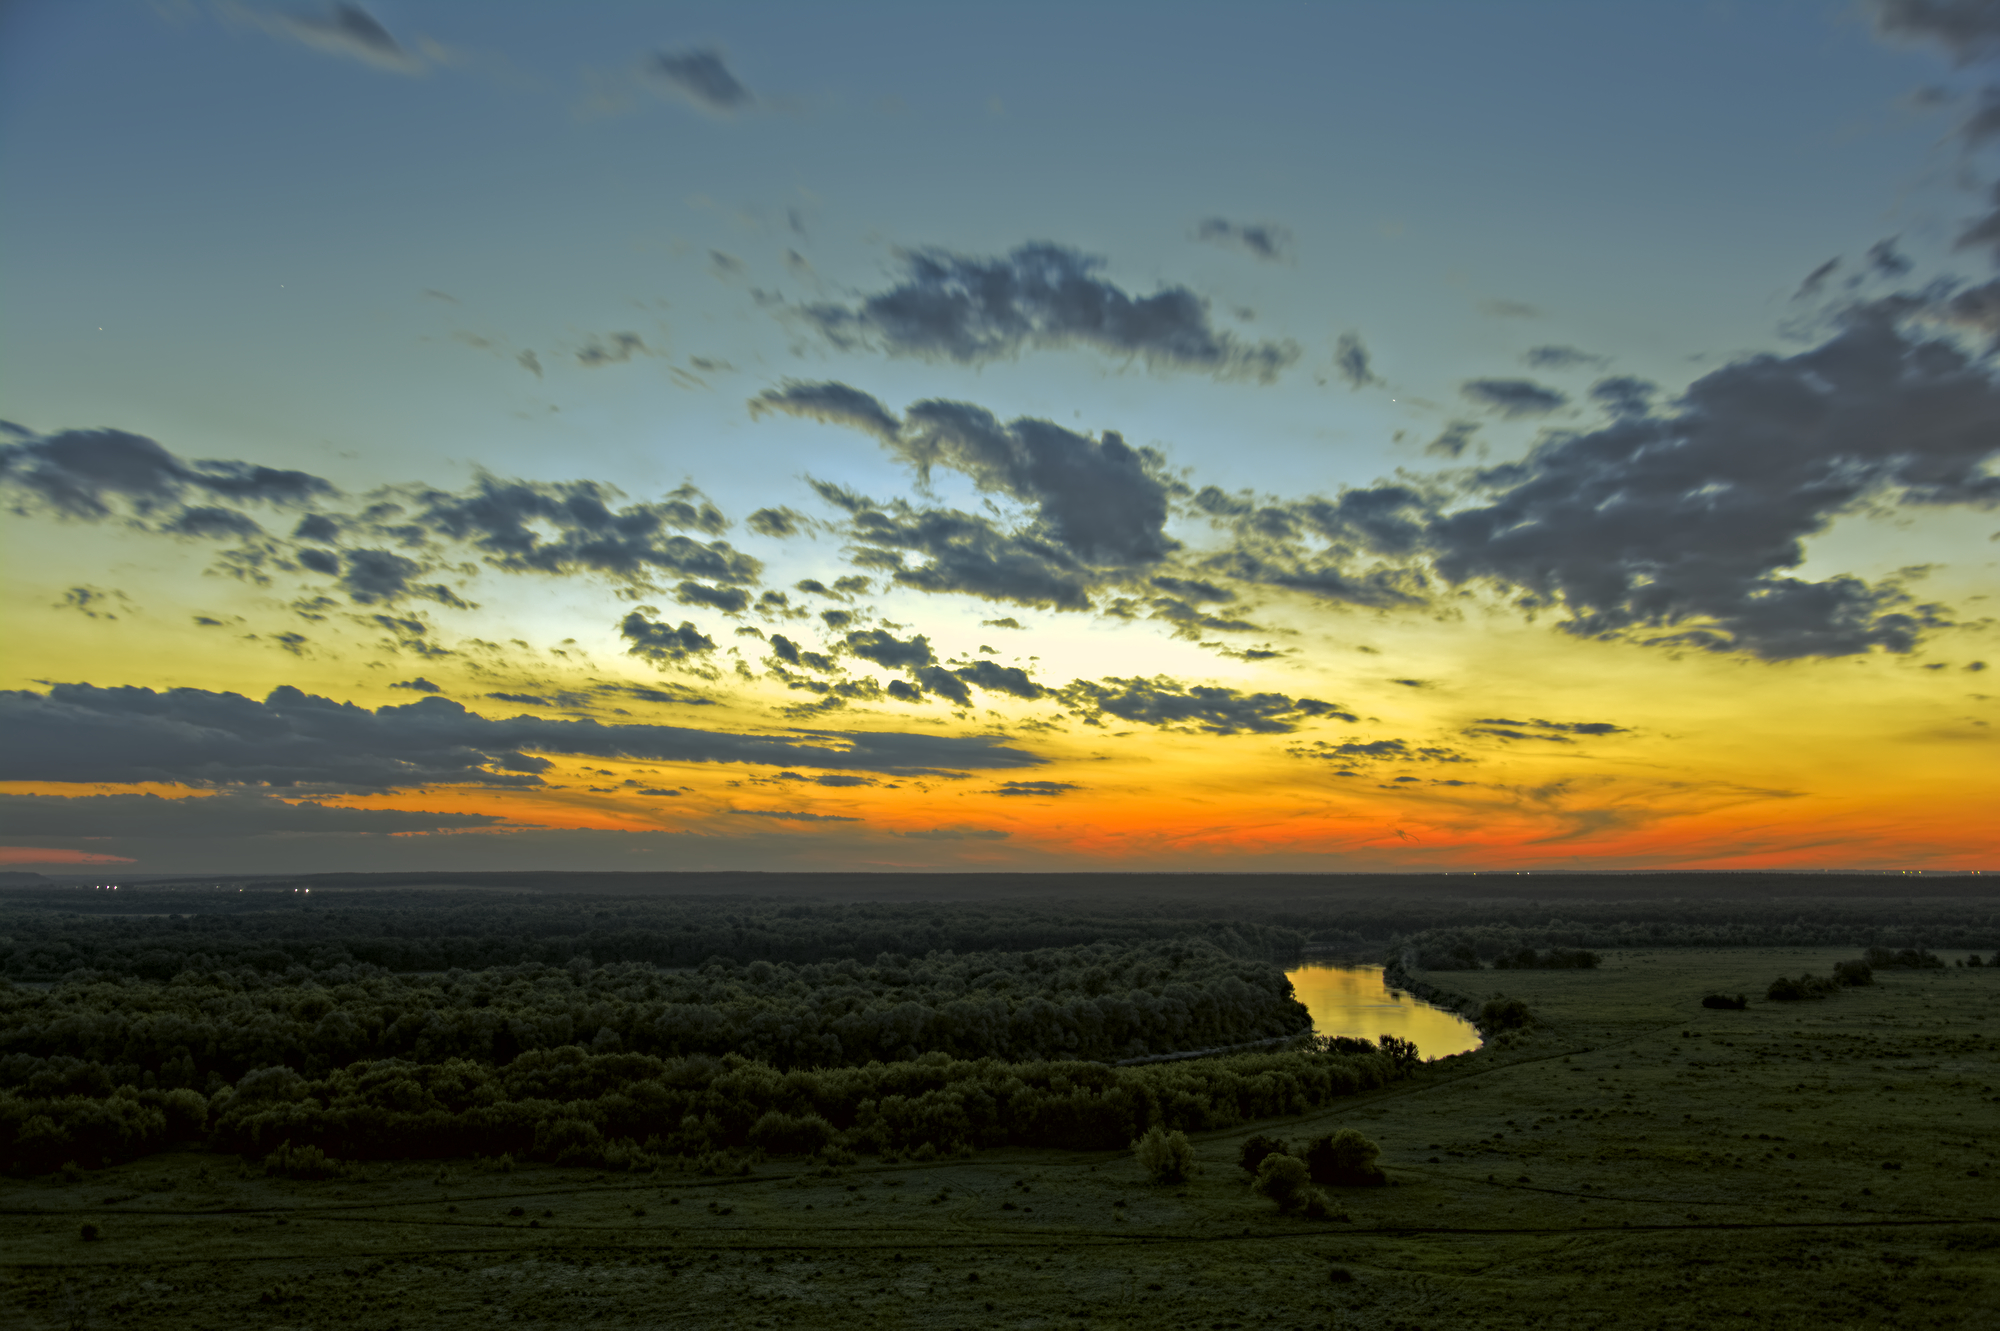
EDIT Noticed the blown highlights above the horizon in the above submission. So used highlight compression and highlight recovery to get this:
_DSC0134-1.jpg.out.pp3 (12.3 KB)
An RT 5.5 attempt.
_DSC0134.jpg.out.pp3 (12.3 KB)
EDIT Noticed the blown highlights above the horizon in the above submission. So used highlight compression and highlight recovery to get this:
_DSC0134-1.jpg.out.pp3 (12.3 KB)
First time in Play Raw and really started learning RT (5.5) just yesterday. As a color corrector (Davinci Resolve) and noob programmer amazed buy the code behind RT here is my attempt:

Exp_DSC0134.jpg.out.pp3 (12.2 KB)
Let me know your thoughts 
Maybe a bit oversaturated (just a bit), but I like it. It was quite chilling the moment I made this shot, so I tend to like edits with cooler colors )))
I feel that all the entries have kind of an odd color, so I tried to get something which to me looks more natural, though I wasn’t there so I might be totally off.
I also tried to add some contrast to the ground by separating the colors more.
Done in RT.
No dehaze tool was harmed for this processing

_DSC0134_R.jpg.out.pp3 (12.6 KB)
@McCap
Probably the best edited version of the picture so far in this thread 
I guess You have used RT for some while ?
Saturation and colour shifts are a common problem after dehazing.
Be sure to check out his tutorials. ![]() Very easy to follow.
Very easy to follow.
Do You have a link to his tutorials ?
RawTherapee neutral
GIMP 2.8
G’MIC:
Normalize Brightness
Pyramid Processing
Customize CLUT
Mixer [PCA]
Details Equalizer (smoothing)
Tone Enhance
GIMP Wavelet denoise CbCr
Can you share Gimp file with that? I want to dig into details. It looks good — highlighted region in the center was restored very well.
My GIMP-file is 651 MB…, with 33 layers…how to share that?
In the beginning I scaled down the RawTherapee neutral image, because my PC is antique.
I first used two times “Normalize Brightness” with sRGB and CMY (CMY is not in the original filter). Then mixed the results.
I forgot I used (on this mixed result) also “Pyramid Processing” thereafter, in the 6th layer . This two filters restored the highlighted region in the center.
The Mixer [PCA] (used after Pyramid Processing) also helped to restore the region in the center (A higher value with the Primary Factor slider).
With “Normalize Brightness” and “Pyramid Processing” the whole image looses overall contrast. Therefore I used G’MIC “Tone Enhance” (in last layers) to have more global contrast.
Thanks for the nice words @afre.
@DxO-user I think you already found my youtube channel. Other than that, you can search for [tutorial] here in the forum. There are some nice ones by some talented members. Also check the PIXLS.US - Articles !!
Has to be
Michail Alvanos
@iarga OMG…
No, I am Sushi & Fries.
But Michail also does interesting things.
I’ve seen one of those videos. High quality.
There is just way to few RT tutorials on YouTube , at least compared to Lightroom …
That is definitely true…
My attempt (I went a bit heavy-handed on saturation…):

True. I’m new here, can someone point me out where should I post a suggestion in this regard for RT?
Because I was thinking that there are some tools (like the dehaze and channel mixer) that would really benefit if there was an option where you could choose their output only affecting the luminosity channel.
Thanks @Timur for sharing the paw. Comrades {very silly monty pythonesque, old fashioned and cumbersome greeting}
How do I gaze, where does my pupils go? The golden stream, scattered thoughts around those clouds, the pastures maybe of green… It remind me of bill calhaham’s riverguard taxi drive. After the first read, me eyes got caught in an “Y” shaped track on the fields… and that’s all I need to get started, no need to be beautiful, just enough teeth to smile.
Anyway  RT 5.5
Image magick:
convert "$f" -unique-colors -scale 0.01% "${f%.*}_qsmall.png" && convert "${f%.*}_qsmall.png" -resize 800x "${f%.*}_squant.png"
Cheers
Edited IM’s script


