thanks for the comments, @Morgan_Hardwood Unfortunately I’ve recycled the bits that went into making the image, rats. I utilize this type of layering a lot, so perhaps in a future post I’ll show more details.
here’s my pass at it using rawtherapee and gimp. not totally happy with it, but that’s what I get for experimenting haha! if I had to vote for one so far it would be arctic’s version.

1 Like

To my taste it’s a bit too uniformly pastel (luminance too low) and a bit too saturated leading to a lack of depth - I used to process portraits like that myself some years ago, but now I ebb towards a less saturated and less bright look.
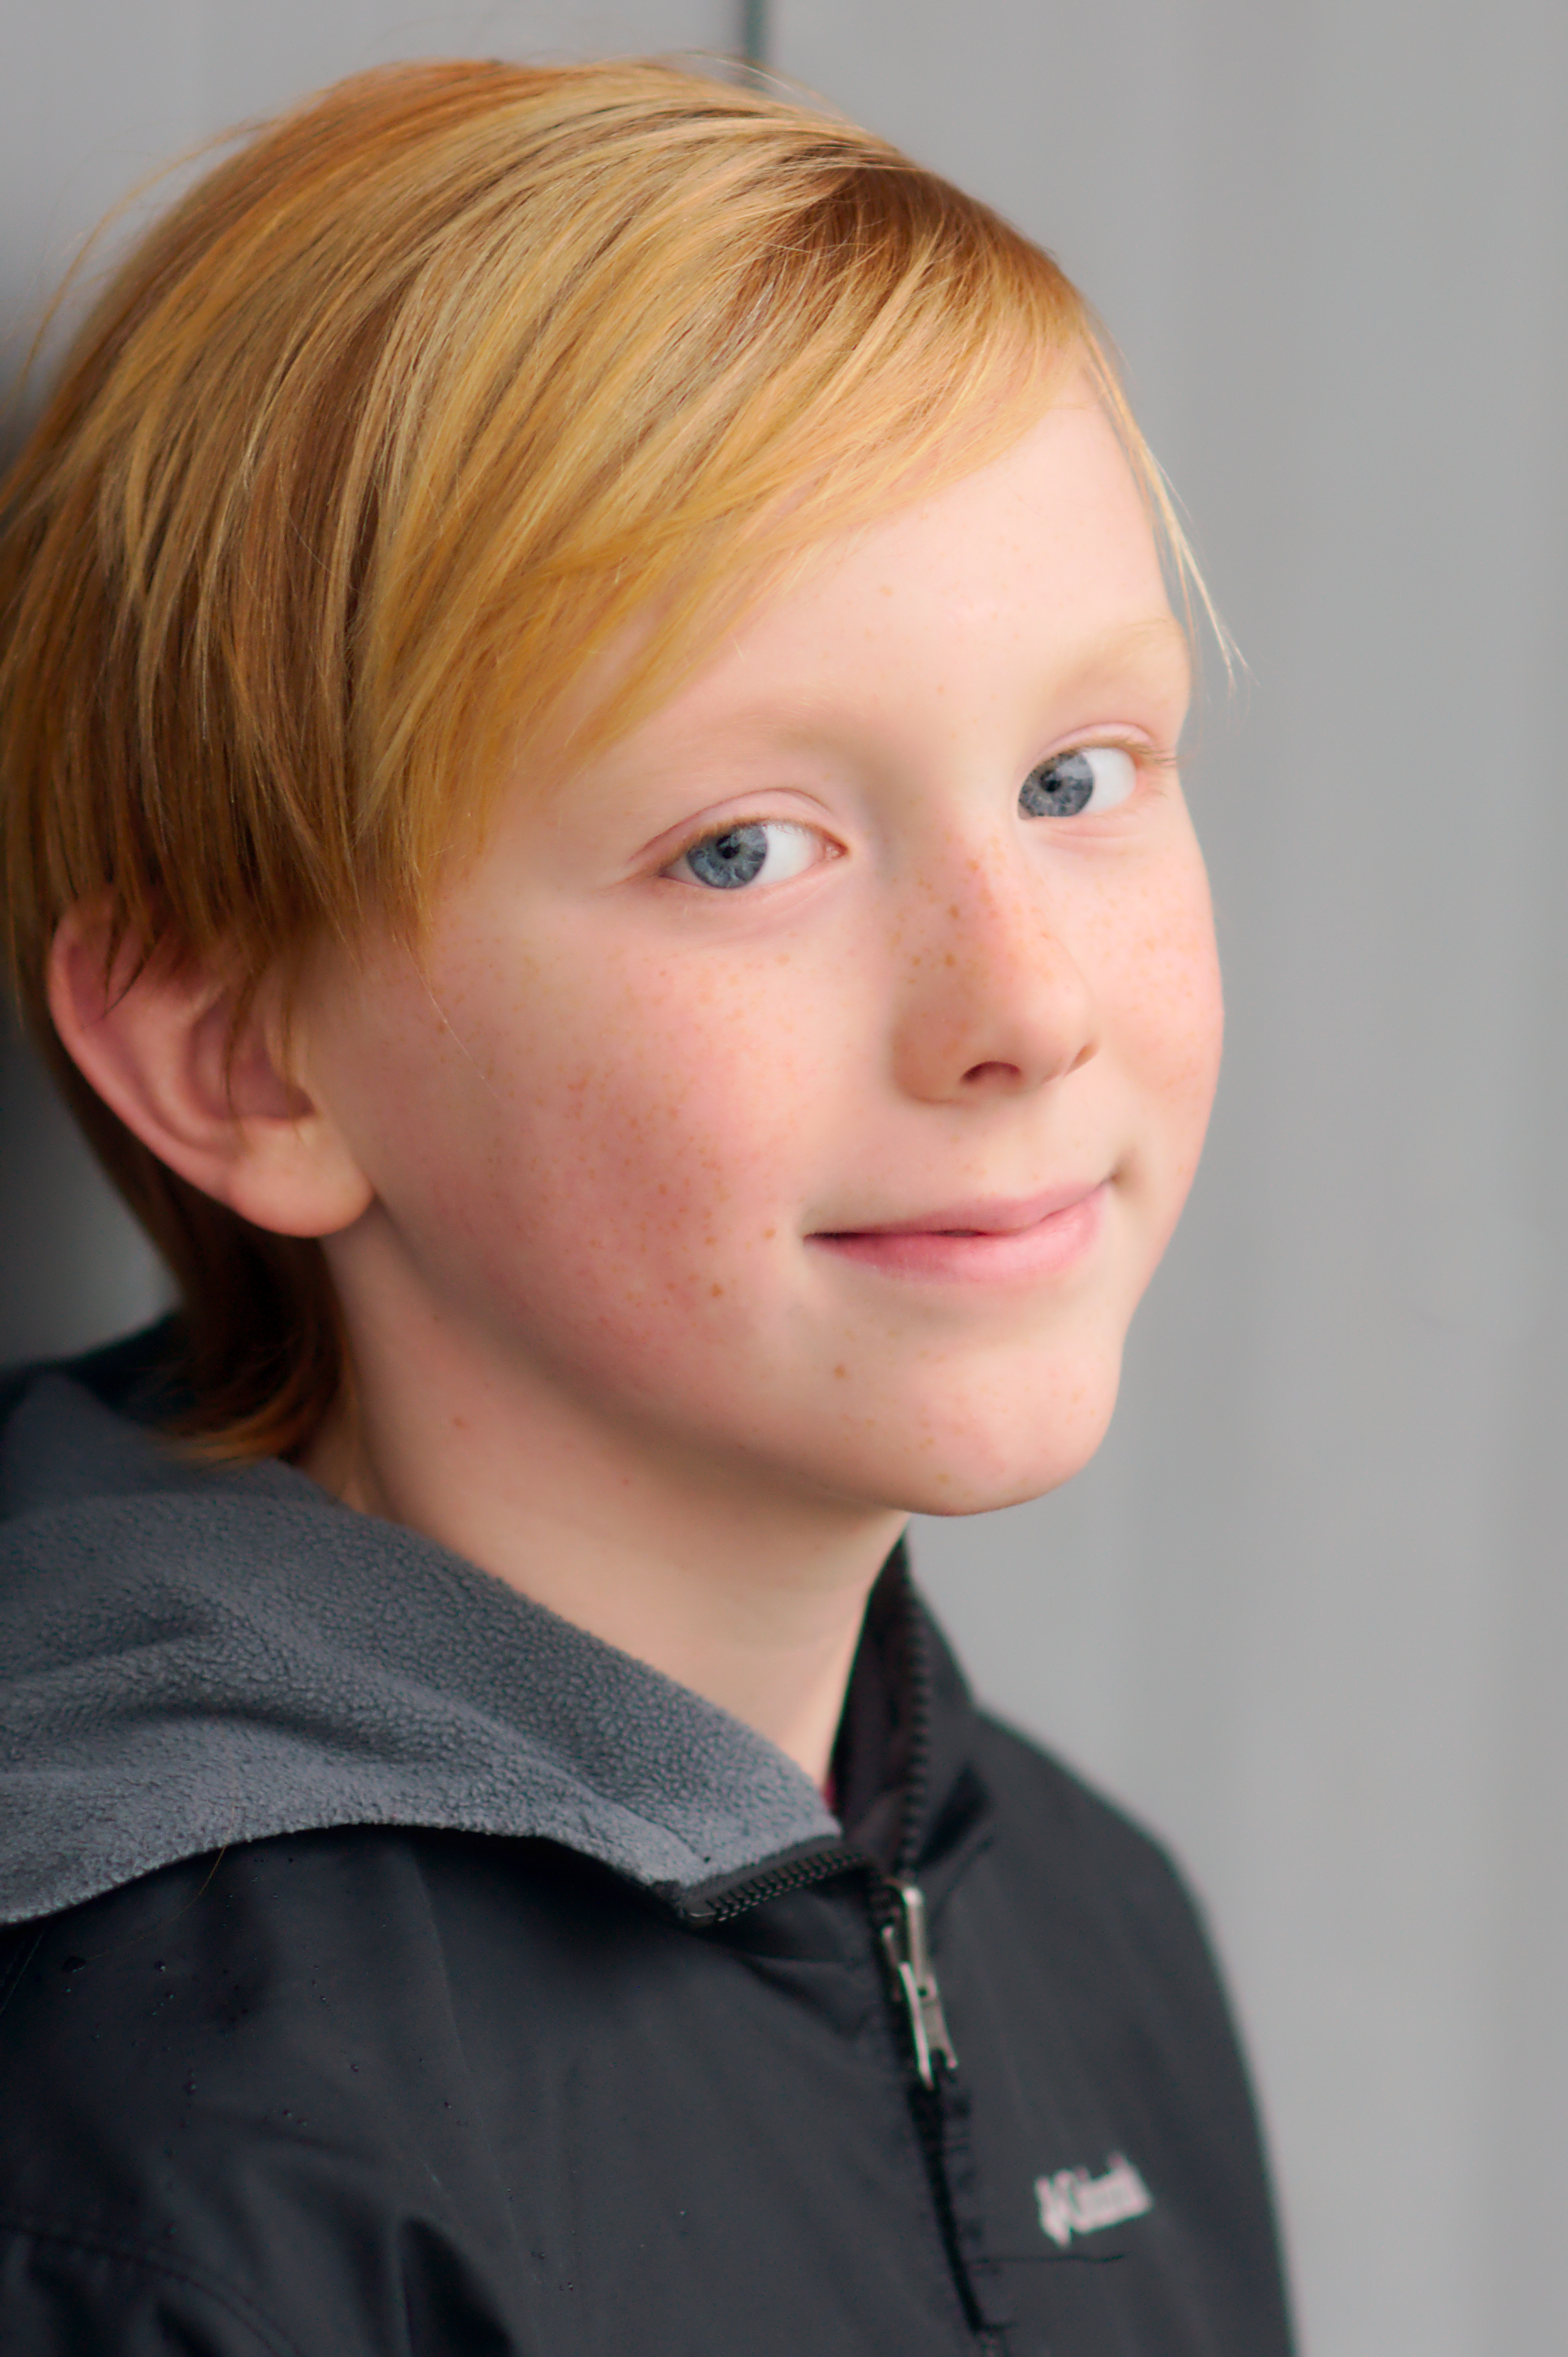
Just having fun with this lovely portrait:

Morgin_Carpenter_DSC_1922.NEF.pp3 (9.6 KB)
Rawtherapee + Gimp_G’MIC filters for the illustrative/painting look (several layers, some masking to preserve some detail in freckles ans the sweater hood, and slight touch of dodging of the eye irises).
3 Likes
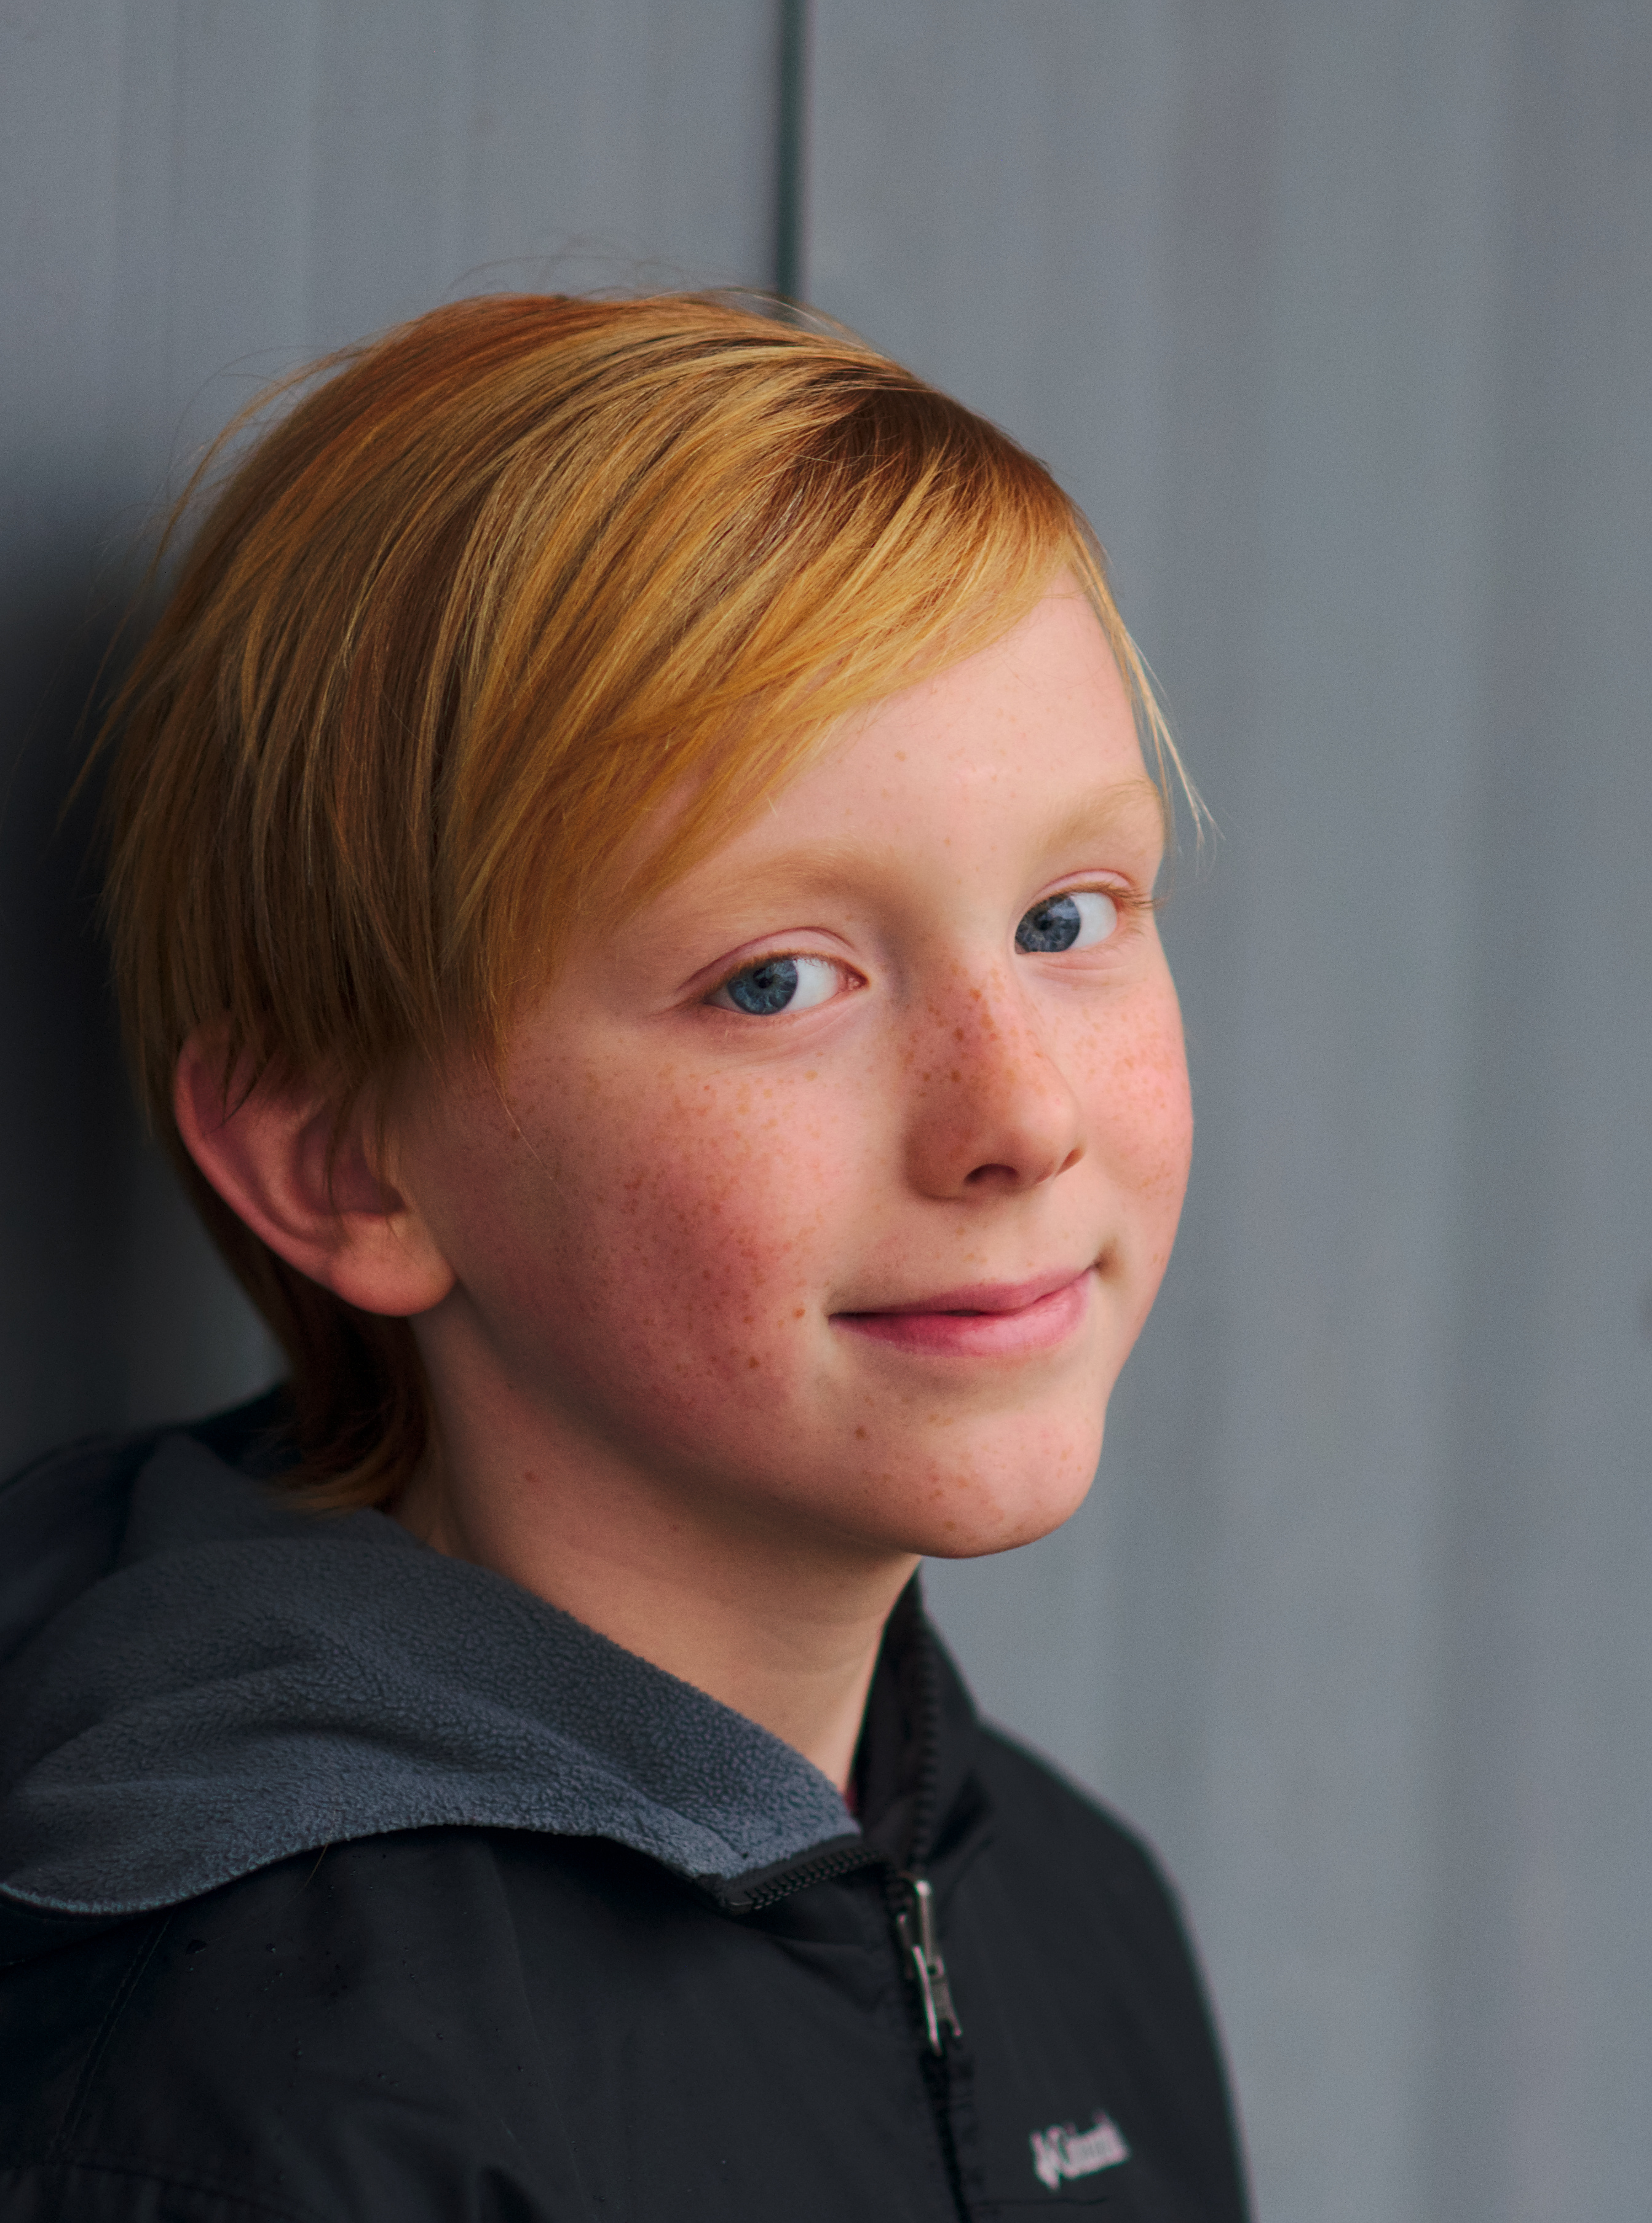
Here is my contribution
Rawtherapee with an Ilford Pan F Plus 50 film emulation and tone mapping to bring our the hair detail
A crop to remove redundant space and the logo from the coat, then sent the file to GIMP to ‘heal select’ the knotts in the wood which were catching my eye and distracting from Morgin

3 Likes


20th entry, couldn’t resist those innocent frecks. Mostly gmic and curves within gimp, love the 32 flotating WF but everything’s just too damn slow.Thanks MILC for the milk and everybody else participating 
4 Likes
I thought I’d take a stab at this. I don’t get to do any portraits, so…

Morgin_Carpenter_DSC_1922.NEF.xmp (14.8 KB)
Morgin_Carpenter_DSC_1922_01.NEF.xmp (8.7 KB)

3 Likes
Nice portrait. Didn’t know what to do with it. Decided to give it another go today. Came up with something I didn’t expect. It isn’t even Halloween yet.
1. PhotoFlow → HL mode (blend) → lens correction → linear Rec2020 (no clipping) → 32f
2. gmic → fill unwanted pixels → adjust contrast, brightness (curves; face) → crop → resize (copy) → vignette → WAIT—WHAT? → ![]() → make less creepy
→ make less creepy
Zoom 100% to enjoy!
To quote @MLC

3 Likes

Just hidden behind a toggle with the [details] tag. I guess not everyone would know that even though I provided a hint:
Just another bad day for Finn. You know you want to click here and see.
Unfortunately, I am not Alfred Hitchcock who is “the master of suspense”.
1 Like
Okay, okay. It is a good day to smile today for Finn.
1. Same as above.
2. gmic → fill unwanted pixels → adjust contrast, brightness (curves; face) → crop → resize (copy) → vignette → WAIT—WHAT? → → resize → sharpen (LoG) → resize → make less creepy
Zoom 100% to enjoy!
Wholesome Finn: no need to hide this time! 

1 Like
good that you gave the soul back to the child, it’s a big reponsabilityto hold a soul… to hold more than one it is a… sssiiiiiinnnn!!! You managed quite nice a version monsieur {hat off, 2/5 of a smile, blade to its sheath}
Morgin_Carpenter_DSC_1922.NEF.xmp (9.3 KB)
A new photo of the young man would be interesting. On the other hand, he might not like the idea. I wouldn’t, in his place, I think.
2 Likes

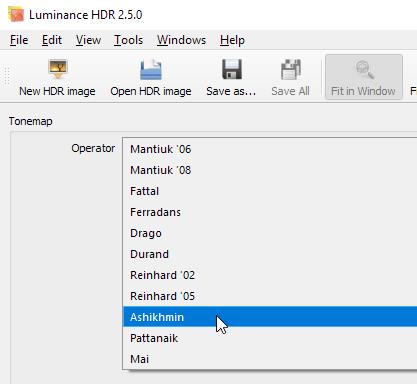
The only place Google finds Ashikim is this conversation. Exactly where does one find an Ashikim layer, exactly?
This is a nice image. Could publish a book on it alone. 
1 Like
The Ashikhmin tone mapping operator is an implementation of “A Tone Mapping Algorithm for High Contrast Images” scientific paper written by Michael Ashikhmin, Department of Computer Science, SUNY
I think I misspelled Ashikhmin or suffered an auto-correction. The algorithm is included in the Luminance HDR software.
1 Like