Thanks! For play raw I usually try and go a different direction than I’d normally go if it were my photo, partly just to experiment and partly because when I joined I enjoyed all the different takes you can get out of one photo.
I’m not certain I’m super happy with this one, I do like my crop, but I didn’t want to spend an hour on it either
Merci a @Andrius for the raw and all pips’ showing their versions =)
I wanted to go with and Edge look, unfortunatelly Igor must have had misplaced the screengrabs 'cause I can’t find them. You no dinner tonight Igor-san!!!
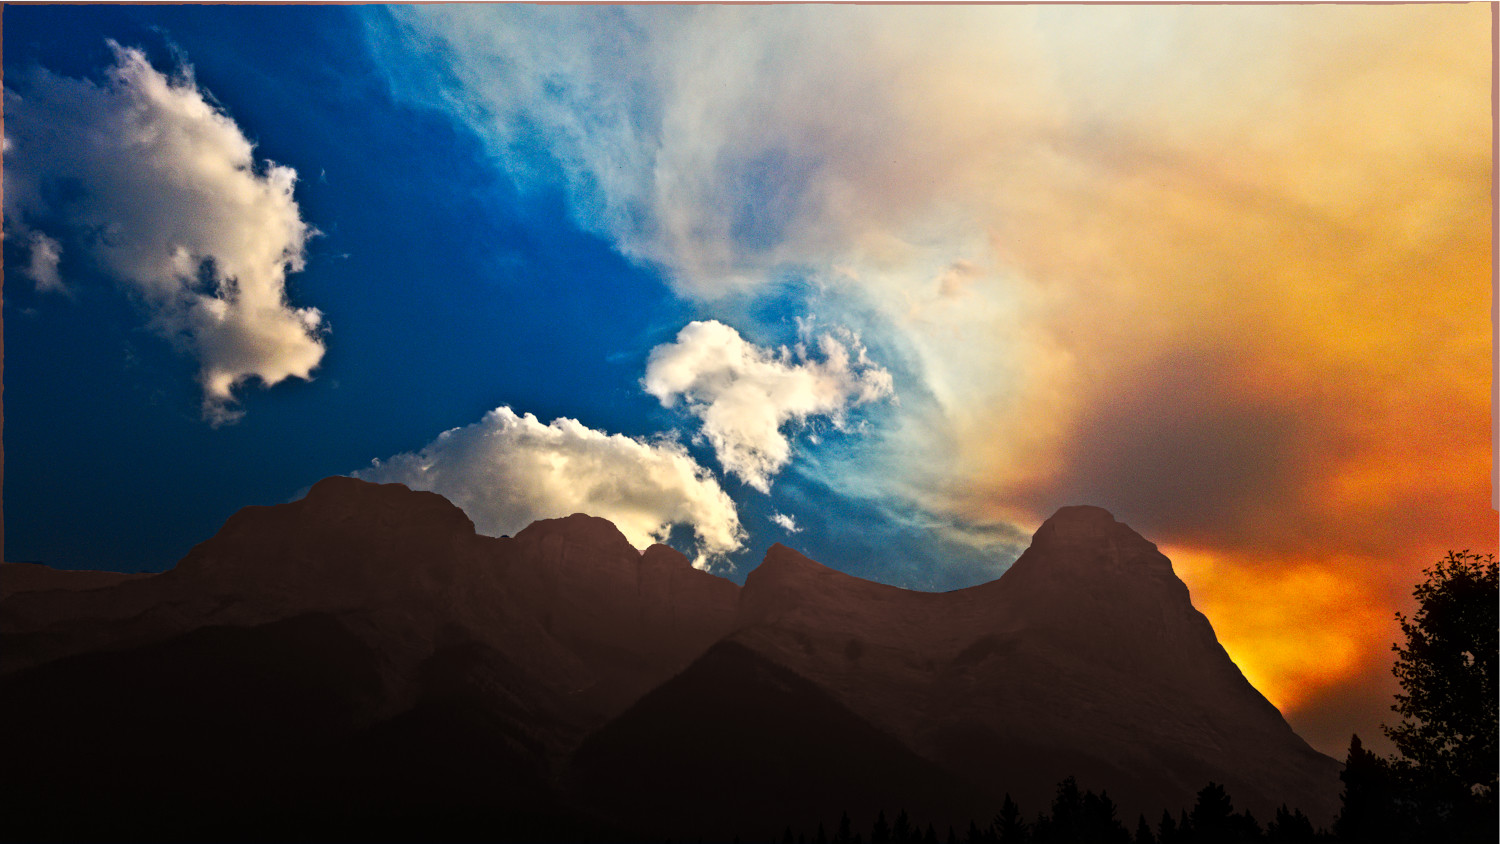
Two RawTherapee exposures, one in color for the sky, one in b/w film simulation for the mountains. Layered in GIMP with masking by the smart scissors selection tool and colorizing the mountains layer.
@Ajohn Sorry that the thread split made your post disappear from here. If you don’t mind editing your post to include the text that you had in the original (about how you arrived at the image), that would be great. Nice work on the photo BTW!
I used some non-local means denoising, mostly on the chroma channel, and then applied my “sky enhancement” preset to make the contrast between the clouds and the sky more dramatic.
Next I increased the saturation and applied a small gamma adjustment to lighten the mid-tones. Finally, I applied a couple of RGB curves to fine-tune the image contrast.
I intentionally kept the mountains dark, almost like silhouettes but with some residual texture.
@Carmelo_DrRaw That sky effect is definitely handy here. (I have yet to add color blending in the GIMP version.) Your take is basically what I would have done with the raw. Maybe brighter than yours for contrast, though upper body pains have prevented me from doing any PlayRaws.
@Carmelo_DrRaw I meant I would try to achieve better separation among the sky, mountains and trees. Sort of how @Andrius made the sky the brightest, the mountains less so and the trees completely dark, but consistent with the style of your first attempt.
Afraid I can’t remember all steps. I do have the pp3 for the first step IMG_20170729_185409.png.out.pp3 (10.0 KB)
What I have done is bought as much of the histogram in bearing in mind that I eventually want some detail to show in the mountains and leaving space at each end of the histogram for later contrast work.
Then by the look of it Fotoxx. It looked like I had a shot that needed some clarification due to mist. It’s style of tone mapping and curves and colour work. Still some what flat so GIMP and I think just a softlight layer. I then noticed some graininess had been bought out in the blue sky area so back to Fotoxx and a light wavelet denoise. I think this was detail enhancement rather than processing artefacts.